Planting a Tree
I fell in love this summer. With a tree, that is. The Northern catalpa (Catalpa speciosa) is a fast-growing tree that blooms beautifully in late June in my part of the world. The flowers, about 2 inches long and wide, are white with 2 lobes and purple or lavender stripes inside. They are deliciously fragrant. I got a 10-foot tall specimen at E.C. Brown Nursery in Thetford, Vermont.
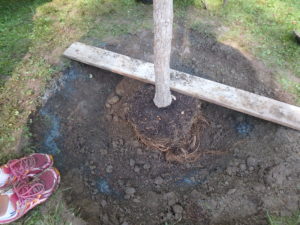
It is very important to find the “trunk flare” before planting a tree. That is the lower part of the trunk that flares out above ground in the trees planted by Mother Nature. The flare is waterproof, but if buried in soil or mulch it will rot and the important cambium layer can be damaged, injuring the tree. When young trees are put in pots the flare is often covered by 3 inches of soil or more.
If not corrected, trees with buried trunk flare often die in 6 to 10 years because their trunks are essentially girdled by the rot. If you have a tree with a trunk that doesn’t flare at ground level, pull back some soil until you can see the trunk flaring out. Cut away the little roots you will encounter.
It’s important to dig the hole for a tree the proper depth. You want to place the root ball on unexcavated earth so that it will not settle into a lower position that will fill in with soil or mulch, covering the trunk flare. The hole should be wide, not deep. I uncovered the trunk flare in my catalpa, which was just an inch or so below the soil line in the pot. There were plenty of small roots in that inch of soil I removed, and I just cut them away.
I also looked for roots encircling the root ball because it’s important to cut those back, and to tease out roots from the root ball before planting. I used my fingers to loosen roots at the edge of the root mass after removing the tree from its plastic pot.
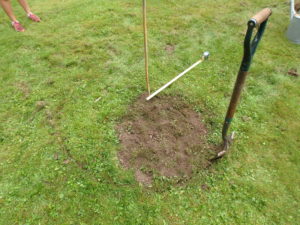
Next, I measured the root ball. It was 16 inches wide and 12 inches deep. I dug a hole 3 times the width, and just an inch or two deeper than the depth of the root ball. I dug the hole with sloping sides down to the bottom. I used a hoe to scrape the bottom of the hole to make it flat.
As I dug, I placed the soil from the hole in wheelbarrows. One wheelbarrow was for topsoil, another for the poor-quality subsoil I encountered at the bottom of the hole. I was fortunate to find just a thin layer of subsoil – heavy clay, then sand beneath that. The sand will ensure good drainage.
If you have only a shallow layer of decent topsoil, you may want to replace some of the subsoil you encounter with topsoil that you purchase in bags. But don’t replace all your soil, even if it’s not of good quality. Mix topsoil 50-50 with the crummy soil only if most of the soil is of poor quality.
A teacher at Vermont Technical College once told me to imagine a tree as a wine glass sitting on a dinner plate. The wine glass is the tree we see, the dinner plate is the root system. So the tree needs to spread its roots far and wide. Creating a planting hole full of compost and rich topsoil will encourage the roots to stay in the original hole instead of spreading out. That’s known as the “bathtub effect.”
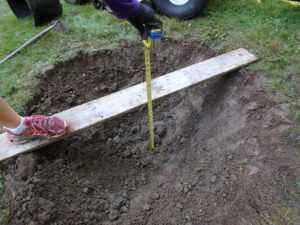
To dig the hole the proper depth, I use a board (or a rake handle) to span the hole, measuring from time to time as I approached the proper depth. I dug down 14 inches for my 12 inch rootball, and in the bottom of the hole I added some of the better topsoil I’d dug up. I packed that down so it wouldn’t settle later.
Mother Nature does not use fertilizer when she plants trees. I don’t either. Fertilizers contain nitrogen, which stimulates fast green growth. But I want my tree to get established, spread its roots, and grow at a moderate rate. But I did add 2 mineral products that I bought in bags.
First, I added trace minerals in a mix sold as Azomite. It is a mix of some 70 minerals from volcanic and sea sources, mined and packaged in Utah. I have found it to add vigor and resistance to stress in plantings. The other product is called green sand. It is mined from a formerly undersea deposit in New Jersey. It is a good source of potassium and trace minerals. Potassium helps build strong cell walls.
I also paid attention to the north-south orientation of the tree when planting. Trees develop thicker bark on their south sides because they get more sun there. If a tree is planted with the north side from the nursery facing south at your house, the bark can develop sun scald in winter, crack, and damage the tree. Trees generally have more branches on the south side, so I planted the bushier side facing south.
Watering trees is important the first year, and even in dry times during the second year. I made a ring of soil around the tree to keep water from running away. And an inch or two of ground bark mulch will help to keep the soil from drying out.
Planting trees is not rocket science. Take time, do it well, and your tree will please you for the rest of your life.
Read Henry’s blog posts at https://dailyuv.com/


