Vegetables: When Is It Time to Plant?
Posted on Tuesday, March 30, 2021 · Leave a Comment
I know some gardeners that plant their potatoes or tomatoes in the garden on the same day every year. Not me. I think planting time is best based not only on the last frost date in your garden, but also the soil temperature and up-to-date weather predictions. And of course, late frosts do occur unexpectedly and can wipe out your tomato or pepper seedlings. So don’t jump the gun.
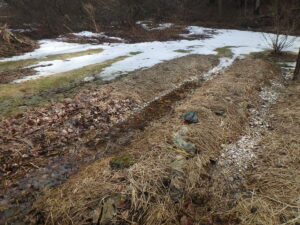
These raised beds are draining nicely but are still too cold and wet to plant
The internet has many guides and suggestions for when you should plant, but I think an experienced next door neighbor probably has a better sense of when to plant. So, for example, one internet source says the last frost for Cornish Flat, NH is May 15, while another internet sources says June 11 to 20. That’s over a month of difference! But perhaps an old timer in your town can advise you, depending on your exact location.
My vegetable garden is in a low spot, with hills on either side. Cold air slides downhill, so I am cautious about planting too early. Often there is a late frost in my garden, but not around my house which is 15 or 20 feet uphill. Rivers, lakes and the ocean can have a warming effect, too. The closer you are to the Connecticut River or the Atlantic Ocean, the sooner you can plant.
It is often thought that a full moon will cause late frosts. But a friend of mine used the frost data his mother had collected over decades and compared it to the phases of the moon. He observed that the moon does not seem to affect frost dates.
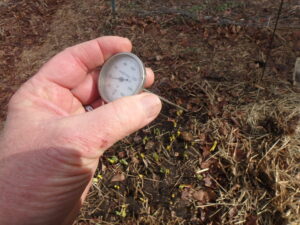
Soil thermometers are useful tools for deciding when to plant
Soil temperature is important, too. Seeds are genetically programmed not to germinate if the soil is too cold. That makes sense: seedlings are tender and many can be damaged by frost. So you can plant spinach or peas seeds “as early as you can work the soil”, according the package, but they may not germinate for weeks if the soil is cold – and they may rot.
Seeds can rot in cold, wet soil. Corn seeds are particularly susceptible to rot, and many are treated with fungicides to prevent rotting. But as organic gardeners, we should avoid treated seeds.
If you are in a hurry, can warm up the soil. First, rake off any fall leaves or other mulch from you garden beds. That will allow the sun to warm the soil, and air to evaporate some of the melted snow and spring rains that make the soil soggy.
Raised beds help with drainage. My vegetable garden is near a stream and the water table is high, especially in spring when it is occasionally flooded. Each fall I shape my beds for spring, raking soil into the beds before covering them with leaves. In the spring I rake the leaves into the walkways, but after the soil has warmed up in mid-June I will put down hay and newspapers around my plants.
I you want to warm the soil and kill any annual weeds that start growing early in the season, you can cover the soil with clear plastic. If you get what is called “4-mil” plastic, you can re-use it. Flimsy stuff sold to painters is not usually reusable. Be sure to pin down the edges, or better yet, put soil or boards over the edges to keep wind from lifting the plastic and cooling the soil.
On a sunny day the temperature under the plastic can exceed 100 degrees, “solarizing” weeds and killing them. Perennial weeds and grasses will have their tops browned, but it will not kill the roots unless you do this for a long time.
So what seeds can you plant early? Spinach, peas, lettuce can be planted 3 to 6 weeks before last frost. In the fall I let a few lettuce plants flower and go to seed. Those seeds fall on the soil and start up much earlier than I plant any lettuce. But I also start lettuce indoors to get nice sized plants in the ground in May for early eating. Carrots, beets, onion sets and radishes can go in the ground a week or two before last frost.
Tomato, pepper and squash family seedlings I plant in mid-June, well after last frost because I want the soil to reach at least 60 degrees before planting. Because I am bothered by a beetle that eats my cukes and squash I start those indoors instead of by seed outdoors. When the vines are about 6 inches long I plant them outdoors. By then they will survive any beetle munching.
Before planting any seedling outdoors, be sure to harden off the plants. That means to start putting the seedlings outdoors a few hours a day and increasing their exposure over the period of a week or so. You should do this for store-bought seedlings, too, as they have probably been protected from sunburn and windburn inside a greenhouse. But ask at the nursery if they are hardened off.
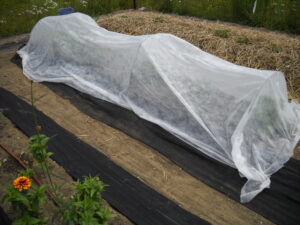
Row cover with hoops helps to keep insects off and keep plants warm
You can protect seedlings from light frost by covering them with something called row cover, Reemay, or Agribon. These are spun agricultural fabrics that come in 5 foot wide swaths that you can cut to fit your rows. Unlike plastic sheeting, this stuff breathes and allows moisture to pass through it. Buy the wires sold to support it and form hoops over your plants. It will also keep bugs off your plants, but you need to remove it when vine crops start to bloom – they are insect pollinated.
The more you garden, the more you know. But we never know exactly when a late killing frost will come. So I am always the last on the block to get my garden planted – but my plants catch up.
Henry is a gardening consultant and the author of 4 gardening books. Reach him at
henry.homeyer@comcast.net or PO Box 364, Cornish Flat, NH 03746. Please include a SASE if you wish a response by mail.
It’s Time to Prune Fruit Trees
Posted on Tuesday, March 16, 2021 · Leave a Comment
When I was a boy I loved to climb trees. I had no fear of heights, and loved the unique perspective I got looking down from the top of a tall pine or maple tree. Now that I’m all grown up, I no longer climb trees – unless I have the excuse of pruning, which I also love. On a recent warm, sunny day I got out my pruning tools and ladders to give my fruit trees “haircuts”.
A word about timing: conventional wisdom has it that you must prune apples and other fruit trees in March. Hogwash. You can prune then any time. I generally stop pruning when flower buds start to open, but prune again in August and in late fall after leaf drop.

Pruning saws come in various sizes; loppers are a quick way to cut branches too big for your pruners
Good tools are important for doing a good job. You need sharp by-pass pruners (not the anvil pruners that crush the stems), a pair of good loppers and a small handsaw – folding saws with sharp teeth are good. I have bigger saws for large branches and even a small electric chain saw, but rarely use them.
Start by walking around the tree a few times and really looking at the structure of the tree. I want my trees to have enough open space that sunlight can get to every leaf. Sunshine feeds the tree and dries out leaves, helping to minimize fungal diseases. A robin should be able to fly right through a mature apple tree without getting hurt.
My first cuts are usually the biggest branches that need to be removed. It’s easier to remove one 3-inch thick branch than snip away 50 small branches on it. If you prune every year, you may not have a big branch to remove, but it’s surprising how quickly water sprouts turn into big branches going straight up through the middle of the tree. You can often reduce the height of a tree by shortening big branches.
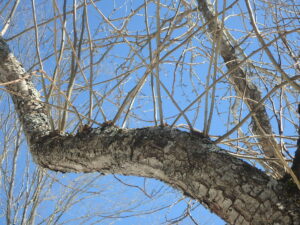
These thin water sprouts clutter up the interior of the tree and should be removed each year
Water sprouts grow every year on most fruit trees. The first year they are pencil-thin and 12 to 36 inches long. Cut them off as they will just clutter up your tree. Trees grow them in response to a need for more food for the roots, and are most common in shady parts of the tree where leaves are not getting enough sunshine. Some varieties are more prone to growing water sprouts than others, and a hard pruning may stimulate them to grow in large numbers.
Dead wood should always be removed. In winter there are no leaves on the tree, and it can be tougher to determine what is dead. Look for dry, flaking bark. But the sure test is to take your thumb nail and scratch off a layer of bark. If you see green, it is alive. If not? It’s dead.
Look for rubbing branches, or branches so close that they will grow together. Choose one, and cut it off. Some trees, maples, for example, often send up branches that originate at the same point and are growing in the same direction. Remove one before they grow together and fuse (which results in a weak spot subject to breakage). Maples and birches, by the way, should not be pruned now when the sap is flowing fast. Do them in the fall, or even mid-summer.
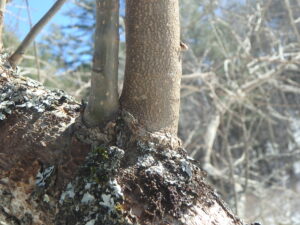
These two branches will grow together and create a week spot so remove one or both
Branches often grow away from the center of the tree, as they should, but compete with another branch directly above or below it. Decide which is the better branch, and remove the other. I also look for branches that are headed into the interior of the tree and remove them.
When pruning, don’t leave stubs. Cut back each branch to its point of origin: the trunk, or a bigger branch. This will promote healing.
Fruit spurs on apples and pears produce flowers and leaves, and are indicators where you will have fruit later this year. They are easy to identify: they are short gnarly branches (3 to 6 inches) that have fruit buds. Fruit buds are bigger and fatter than leaf buds. They do not generally appear on young fruit trees. Learn to recognize them: when deciding which of two branches to remove, keep the one with more fruit spurs.
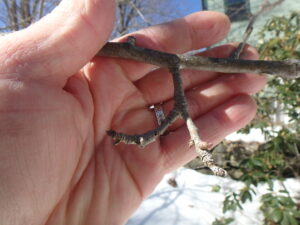
Fruit spurs are short with a fat bud or two
Fruit most often develops on what are called scaffold branches – sturdy branches that leave the trunk on an angle that is almost parallel to the ground, or aiming up slightly. Branches that go more straight up, older water sprouts for example, produce little or no fruit.
You can change the angle of growth of a branch that is only an inch or less thick. Once winter is over, attach string or rope to a branch and tie it to a peg in the ground or to a weight to bend it down. A half-gallon milk jug works well. Just add water until you have the correct angle on the branch. Forty-five to sixty degrees off vertical is fine. You can remove the weights in June.
When pruning, don’t overdo it. Trees need their leaves to feed the roots and fruit. In any given year don’t take more than 25% of the leaves (woody stems don’t count when calculating how much you have taken off).
One last fact: a well pruned tree will produce fruit that is bigger, sweeter and tastier than a tree that has been neglected. I don’t want lots of little fruit and try to remove some each year in June to encourage fruits to grow to full size. Leaves that get plenty of sunshine will produce more sugars for the fruit, so it will taste better. So get to work!
Henry is a gardening consultant living in Cornish Flat, NH and is the author of 4 gardening books. Contact him at
henry.homeyer@comcast.net or PO Box 364, Cornish Flat, NH 03746.
Starting from Seeds: It’s Time to Get Ready!
Posted on Tuesday, March 9, 2021 · Leave a Comment
I love starting seedlings indoors when it’s still cold and raw outside. It makes me dream of summer and the first red tomato. For me, it is still too early to plant most things, and I certainly don’t want to have to baby my seedlings along for 12 weeks or more. But if you haven’t ever set up grow-lights and don’t have all the equipment for indoor growing, now is the time to get everything you need before the stores sell out.
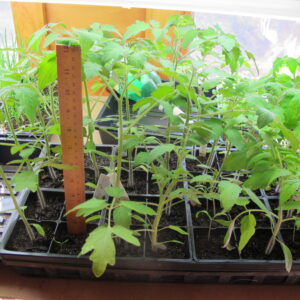
Tomato seedlings that are almost ready for the garden
First, some basics: you need lights over your seedlings in order to get good plants. Yes, I know some people grow things on a bright windowsill for a few weeks, but getting sturdy tomato plants or zesty zinnias requires supplemental lighting.
Second, you can’t use garden soil to grow your seedlings. Ordinary garden soil is too heavy and gets compacted with watering, and it may harbor fungal diseases. You need to purchase potting soil.
Last, you need a place that is at least 60 degrees, but no more than 70 degrees. Cooler temps at night are good. Electric heat mats place under your seedlings will help get quick, even germination, but are not required.
There are several types of lights for growing seedlings. For years I used fluorescent lights: 4-footers with fat T-12 tubes. These work, but now have been replaced with more energy efficient, slimmer, T-8 tubes. There are also LED grow-lights of various sorts that use even less energy, though those can be very expensive.
Sold as shop lights, T-8 2-tube fixtures should cost around $20 each, plus the fluorescent tubes which cost around $8 each. But do not, I repeat, DO NOT spend the money to buy full-spectrum tubes which cost upwards of $35 each. You are not raising plants for sale, and for the short time they will spend in your basement, regular cool white tubes are fine. Or mix cool and warm white to get a broader light spectrum.
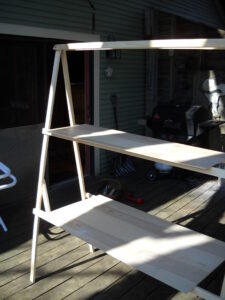
A simple homemade plant stand
If you have a warm basement, I’d suggest that the easiest approach for a starting a few things would be to use a card table and 4-foot fluorescent fixtures hanging from the ceiling. Put plastic over the table to protect it from water spills.
You can also go to my web site,
www.Gardening-Guy.com and search for “Building a Plant Stand”. That will give step-by-step directions for building an inexpensive A-frame plant stand that will hold 6 flats, and have room below it for 4 to 6 more flats on the floor.
Your hardware store can sell you something called “jack-chain” that will allow you to adjust the height of your lights as your plants grow. Ideally, your lights will hang about 6 inches above the top of your plants. Two four-foot fixtures, each with 2 tubes, hanging a few inches apart will illuminate 4 flats (or trays) of seedlings. When you buy your flats, be sure to get those that do not have holes in the bottom, as some do.
The flimsy “six-packs” that fit into the flats come in various sizes, but I always look for the biggest, deepest cells. So, yes, you can get tiny cells that will allow you to plant 48 or even 72 plants in a flat, but there is not much room for roots.
The flimsy 6-packs tend to self-destruct easily, particularly if you try to wash them out for re-use. But there are heavy duty planting trays and cells that will last many years. Gardeners Supply sells them, along with clear domes to go over them. They cost more, but will last forever, and some have self-watering features.
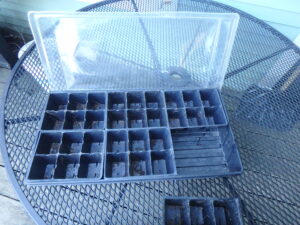
A flat with 6 packs for starting seeds and a plastic cover to contain moisture
What about the soil mix for growing? Buy good quality “Seed starting mix” labeled as such. I mix it with high quality compost in a 50-50 ratio. Sometimes I make my own starting mix using peat moss, perlite, vermiculite, compost and a slow-release organic bagged fertilizer. I start about 10 flats of plants each year, so there are cost savings for making my own mix.
Seeds are very susceptible to drying out, which can be lethal. One way to keep that from happening is to check on them often. Once a day is fine. Or, if you have a busy schedule, buy clear plastic covers that fit over each flat. These, like the flats, are re-usable. They will steam up, and rain the moisture back onto your plants, just like a tropical jungle. Remove them when most cells have plants that have germinated.
How deep should you plant your seeds? About 3 times the length of the seed. Tiny seeds need just a thin sprinkling of soil mix over them. Bigger things like pumpkin seeds can be covered with half an inch of soil mix. Press down lightly with your fingers after covering the seeds so the soil mix is in good contact with the seed.
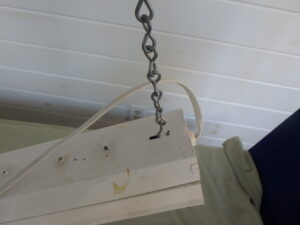
Jack chain easily allows you to adjust the height of your lights
Lastly, water them. I like a soda bottle for watering, as it can deliver a nice slow trickle. Water the soil mix before planting, because if it is too dry, it is resistant to absorbing water.
The bottom line is that starting seeds is fun. And it lets you choose plants you might not find at the garden center. So get your materials and set up your lights. I start tomatoes and other frost-sensitive plants 6 to 8 weeks before I would put them in the garden.
You may reach Henry by e-mail at
henry.homeyer@comcast.net, or by mail at PO Box 364, Cornish Flat, NH 03746. He is the author of 4 gardening books.
Pollen, Allergies and Plants
Posted on Tuesday, March 2, 2021 · Leave a Comment
If you suffer from spring allergies, this would be a good time to know what plants are affecting your comfort. Right now, many trees are dumping their pollen. Most trees are wind pollinated and produce lots of pollen. They depend on the wind to move pollen around – and up your nose.
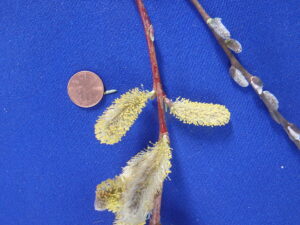
Male pollen producing pussy willow flowers on left with female flowers on right
Although some trees and shrubs produce both male and female flowers, many are dioecious, meaning that male and female flowers are on separate plants. It is thus to their advantage to produce their (insignificant-looking) flowers and lots of pollen before the leaves get in the way. Which for me, is right now. Showy flowers do not necessarily mean that trees like catalpa are low on the aggravation index (they are rated 8 of 10 on the index), but others like magnolias are lower. Both of those are pollinated by insects.
Of the trees, male poplars are among the worst – and in my area, they are just starting to bloom. Other culprits include willows, birches, oaks and some maples, but not all. If you are buying trees, look for trees that have separate male and female plants (as opposed to both on one). Always buy the female specimen if you can, as it is the males that produce the pollen, and cause the allergic reactions. Not all plant tags will tell you if the plant is male or female, but good nurseries may know.
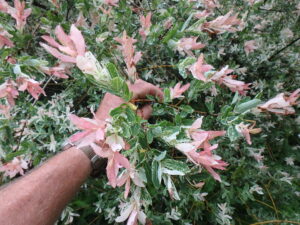
Hakuru nashiki willows do not produce blossoms or allergic reactions
Very popular in the landscape industry right now is the ‘Hakuru nashiki’ willow. It has tri-colored (green, white and pink) leaves in June, and is sold either as a multi-stemmed shrub or as a “standard”. Standards are created by grafting branches on the top of a straight, bare-of-branches stem that is generally about 4 feet tall. As far as I know, Hakuru nashiki willows are all female, so they do not create those fuzzy “pussies” and pollen.
Want a nice pussy willow ( Salix caprea)? Not all are bad for the allergy-prone. It is worth consulting a book like Tom Ogren’s “Allergy-Free Gardening” that lists trees and flowers species-by-species, (and often with cultivars) with their potential for making you miserable. Ogren’s book lists ‘Weeping Sally’ as a pussy willow with the lowest rating for causing allergies, while the male forms of white willow ( Salix alba) are among the worst rating. Even so, many of the males are sold as named cultivars for decorative purposes.
Not all pollen is created equal. Each spring I notice all the yellow pollen dropped on my car by pine trees. Pines produce huge amounts of pollen, but it is waxy and not very irritating to your nasal membranes. And it’s heavy, so it doesn’t fly far.
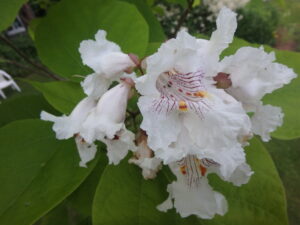
Catalpa blossoms are showy and insect pollinated but still can cause hay fever
After the trees do their thing, along come the grasses. The seven worst offenders are introduced species of grass, including orchard grass, blue grasses and timothy grass, which is commonly grown for animal feed. Grasses are wind pollinated, and their pollen can float long distances. Your lawn should not be a problem so long as you never let the grass get tall enough to blossom. But fungal spores in the lawn can cause allergic reactions, and can be stirred up by mowing, so if you get hay fever, you have a good excuse to get your spouse or kid to do the mowing.
Flowers with flashy form and generally are not significant allergy-producers. Tulips, delphinium and peonies are obviously trying to get attention. They are the flirts – and insect pollinated. Others such as hostas are among those least likely to cause an allergic reaction.
According to Lucy Huntington in her book, Creating a Low-Allergen Garden, members of the daisy family have flowers that are insect pollinated, but their pollen is highly allergenic to most sufferers. Chrysanthemums, asters, marigolds and zinnias can bother folks with allergies. I suppose that is particularly the case if you enjoy sniffing their scents. She also suggests avoiding geraniums (Pelargonium hybrids), strawflowers, dahlia hybrids, foxglove, sunflowers, nicotiana, and cosmos.
Huntington’s book is full of lists and suggestions for low-allergen plants. Here are some of her suggestions for plants suitable for people with pollen allergies:
Annuals: Snapdragons, petunias, annual phlox, scarlet sage (Salvia splendens), purple salvia (S. farinacea), pansies, bacopa, California poppies, nasturtiums and verbena
Perennials: columbine, astilbe, bellflowers (Campanula spp.), bleeding heart, delphinium, daylilies, Siberian iris, peonies, oriental poppies, penstemon, garden phlox, Jacob’s ladder (Polemonium caeruleum), hollyhocks, alliums, globe flower (Trollius spp.), lady’s mantle, coral bells, catnip, hosta, foamflower (Tiarella cordifolia) and periwinkle (Vinca minor).
The good news is this: pollen is generally released in the morning, and by evening much of it has settled down, so evening should be a better time to garden. And rain knocks the pollen out of the air, so run outside and pull weeds after a nice downpour. You don’t have to cut down the culprits, and wearing a Covid mask will help if pollen is really bugging you!
It’s Time for Some Winter Planning
Posted on Tuesday, February 23, 2021 · Leave a Comment
I was recently thumbing through my first book, Notes from the Garden, looking for an inspiration for yet another winter article. In it I read that I had planted my ‘Merrill’ magnolia in 2001. I had forgotten that I planted it just twenty years ago this spring – it feels like it has always been there!
Looking out the window at that handsome tree which blooms each April with a thousand large, lightly fragrant double white blossoms made me think: how many of us plant a tree with a vision of what it will be like in twenty years? I had mainly hoped it would survive to bloom modestly. But it has already been a magnificent tree for a decade or more.
I invite you to draw up a wish-list this winter. Think of big, majestic trees that you wish to have and figure out where you could plant them. Dream of flowering trees. Think of native trees that will feed the baby birds with the thousands of barely noticeable caterpillars that feed on their leaves. Imagine a recliner in the shade of a tree you have planted. Picture grandchildren playing in its shade.
I think it’s important to realize that trees get to be of a good size fairly quickly. Most grow two to three feet per year, some even more than that. So what if you are 60 or 70 or 80 years old? Even if you never live to see it bloom or drop nuts on the lawn, you are improving the environment, now and in years to come.
Years ago I visited author, illustrator, eccentric and well-known recluse, Tasha Tudor at her home in southern Vermont. She was in her late eighties at the time, but still was planting trees. She asked me if I could help her find two specific crabapple varieties that she had planted 30 years before, but was unable to find anywhere.
One variety I found immediately at EC Brown’s nursery in Thetford, Vermont. The other I could not find, so I asked her where she had purchased it. She told me that she bought it at Weston Nurseries, and I called them. The woman who answered the phone remembered her, and the fact that she traveled with a rooster under her arm. Amazingly, she also remembered the fellow who waited on her that day, he still worked there, and he was brought to the phone. He explained that the variety was no longer in production. End of story.
Actually, it was not. I saw Wayne Mezitt, the owner of Weston Nurseries, at a trade show, and told him the story of his people remembering Tasha. He grinned, and said he would make her some of the trees she wanted by grafting branches onto root stock. And he did. Three years later, Wayne and I met and presented Tasha with the trees she wanted. By then she was past 90 years, but still planting trees. Did she ever get to see them blossom? Unlikely, but I love the idea of someone her age planting trees. I hope to do the same.
If you plant trees over a long period of time it is hard to keep track of when you planted them, and the variety planted. Keeping track takes real discipline. In my experience, tags are fine for a few years, but eventually they get lost or the writing fades until it is unreadable.
If you are linked closely to your phone or tablet, that might be one way to keep track of what you plant – until the phone dies or gets replaced. I don’t have a cell phone, so I cannot advise how to keep records on it. But I do take lots of photos and they are in my computer by date, so I should be able to find most anything I plant – so long as I label well – and the computer doesn’t eat things, which mine does from time to time.

This 10 year gardener’s journal is a good way to record garden notes
I like writing things down, using a real pen, sometimes even using my trusty fountain pen. Years ago I bought a 10-year Gardener’s Journal from Lee Valley Tool Company. They still sell them, and at about the same price: $32.90. It is hard-covered and durable. The only thing it lacks is a search function. It has a page for every day of the year, and 10 sections per page – a few lines for every day. In principle I would write the weather, what I planted or pruned or dug out every day. But life gets in the way of even the best of intentions.
I like old fashioned “three-by-five” cards for making lists. To-do lists, grocery lists. They fit nicely in a pocket and good ones are quite sturdy. My Winter Resolution (that’s like a New Year’s resolution, but made after Ground Hog’s Day) is this: I will fill in a note card every time I plant something, whether perennial flower, tree or shrub. I have an old fashioned wooden box designed for 3-by-five cards, and I will use it to keep track of my plantings this year.

Notecards and a file box for storing plant records
So what will go on the cards? First I have to decide if I will use common names or scientific names for alphabetizing the plants. I will use the scientific names, as that is how I think of most of my plants. But I will also include common names. Date planted, source of the plant, where planted, perhaps soil amendments added or any other details that might be useful. If plants die, I will keep the card, but place a black dot on the upper right corner of the card.
Last fall I wrote up a list of woody plants I have planted here in Cornish Flat since I bought my house in 1970. I listed nearly 80 species or varieties. I think, if I have time this winter, I’ll start the project. I’ll fill in a card for each tree on the next raw, gray, wet day.
Henry can be reached at
henry.homeyer@comcast.net or PO Box 364, Cornish Flat, NH 03746. He is the author of 4 gardening books.
The Basics of a Garden Library
Posted on Tuesday, February 16, 2021 · Leave a Comment

I know that many people, especially gardeners under the age of forty, use the internet to find the answers to their questions. That is fine, but the internet is full of “fake news” and spurious assertions. I do use the web, but if I want to learn about something in-depth, I reach for a book. People who write books generally write about things they know. Garden books are written by gardener
Some years ago I taught a class in sustainable gardening at Granite State College, part of the University of New Hampshire system. I asked my students to buy The Garden Primer by Barbara Damrosch. This paperback is a compact 800-pages of readable, educational information about nearly every aspect of gardening. It came in out on 2008, but is still in print. Everyone could benefit by owning it.

For a book on vegetable gardening there is none better than Vermont’s own Ed Smith’s The Vegetable Gardener’s Bible. With more than a million copies sold, this book goes into detail on every veggie you could grow – when and how to plant, how long seeds last, when to harvest, and much more.
For the serious flower gardener or landscape professional I would recommend an 1,100 page book by Allan M. Armitage. His Herbaceous Perennial Plants: A Treatise on their Identification, Culture, and Garden Attributes. This book came out in 1989 and it is now its fourth edition, which came out in 2020. My goal for the winter is to read it, or the relevant parts, cover to cover. Why? Because I can learn from a man who is not only a PhD professor, but a hands-on gardener of many decades.
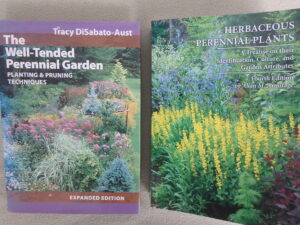
Are you interested in flower gardening? My first choice of books would be Tracy DiSabato-Aust’s book, The Well-Tended Perennial Garden: Planting & Pruning Techniques. She is obviously a well-experienced gardener and designer, and one who has learned to get her flowers to re-bloom, or bloom at a shorter height, and who knows how much sun and water each needs. Staking? Dividing plants? It’s all there and more.
There are plants in the book that I absolutely lust for. Unusual plants that will fill niches in my diverse garden beds. It also tells me why some plants I have tried have died out. It informs me about named varieties to look for that have special attributes.
Dr. Armitage is opinionated and often funny. I like that. It has some photos, but certainly not one for every flower mentioned. This is not a coffee table book, but a book for plant collectors, landscapers – and fanatics. At just under $80, I think it’s a bargain.

Trees? The most prolific and best informed expert, in my opinion, is Michael Dirr. I use his Manual of Woody Landscape Plants: Their Identification, Ornamental Characteristics, Culture, Propagation and Uses every week of the year. It has informed me about any tree or shrub I want to know about. Now in its 6th edition, it sells new for $81.80, but it is available used for much less (usually earlier editions).
Professor Dirr also has written many other books, several of them with terrific color photos (in contrast to his Manual, described above, which has only drawings). I spent one winter going through his Dirr’s Encyclopedia of Trees and Shrubs with its descriptions of 3700 species and cultivars and 3,500 photos.
Pruning is key to keeping your woody plants looking good. My favorite pruning book is by Lee Reich, The Pruning Book. With both diagrams and photographs, this book covers many species and their specific needs. His book, Grow Fruit Naturally is another excellent book you might want.
Soil is the key to good gardening, but a topic that is usually boring and scientifically described. Want at easy explanation of how it works? Try a book by Dianne Miessler, Grow Your Soil: Harness the Power of the Soil Food Web to Create Your Best Garden Ever. It explains very well how soils work, what soil test results mean, and how to correct deficiencies. You don’t need to be a scientist to read this one. ($16.95 in paper).
Stone is a key element in many gardens, part of the “bones” of a garden. Dan Snow, a Vermont dry stonewaller and stone artist, has written a number of fine books on using stone. Listening to Stone and In the Company of Stone both offer practical and philosophical advice and share many fine photos of his projects.
Gordon Hayward, a Vermont landscape designer and prolific author also has an excellent book on how to use stone, Stone in the Garden: Inspiring Designs and Practical Projects. Want to build a stone path or a retaining wall? Hayward simplifies the process. As with Dan Snow’s books, great photographs full of ideas.
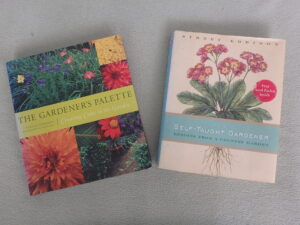
Sydney Eddison is another prolific garden writer with many fine titles. Her The Gardener’s Palette: Creating Color in the Garden taught me a lot about the use of colors in the garden. Her advice is always practical and nicely explained.
So invest in some books this winter, curl up in a comfy place and see what you can learn that will help you, come spring.
Henry is the author of 4 gardening books including
Organic Gardening (not just) in the Northeast: A Hands-On, Month-by-Month Guide. It is a collection of his gardening articles gleaned from 10 years of writing. It has recently been re-printed and is available from Henry for $19. He is at PO Box 364, Cornish Flat, NH 03746. His email is
henry.homeyer@comcast.net.
A Winter Soup from Our Garden
Posted on Tuesday, February 9, 2021 · Leave a Comment

Homegrown soup ingredients
There is something about a bowl of warm soup on a cold winter day that warms the heart and soul as well as filling the tummy. And if the ingredients are from your own garden, the soup tastes even better! Here is a soup I made largely with ingredients from my garden.
This is a vegan recipe, but you can include some of your favorite sausage in it, or cook sausage on the side and add it to your bowl at mealtime if other members of your household don’t want meat.
The quantities listed below are enough for a large pot of soup able to feed six or eight, but they are only intended to give you an idea of proportions. You can cut the recipe in half. Or double it if you have half a dozen ravenous teenagers. Each time I make it I vary the ingredients and spices.
Henry’s Homegrown Winter Soup
4 cups cooked dry beans such as Jacob’s cattle beans or black beans
2 cups leeks ½ cup chopped shallots
2 tbsp smashed and chopped garlic
2 cups chopped kale
5 medium carrots (about 12 oz. by weight)
30 oz. tomatoes, either frozen whole or one large can
1 medium butternut squash (about a pound)
¼ tsp chipotle pepper powder
1 tbsp fennel
1 tsp each oregano and marjoram
2 tbsp tomato paste
1 to 2 cups sweet peppers
2 tbsp finely chopped jalapeno pepper
salt and pepper to taste
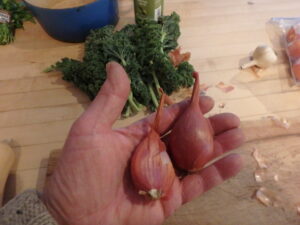
Shallots add rich flavor to a soup and grow well for me
A day ahead of “soup day” I measured out a cup and a half of our home-grown dry beans, and soaked them overnight. Then I drained and rinsed them, and cooked them in plenty of water for an hour and a half. They produced 4 cups of beans when cooked and drained. They should not be hard or crunchy – but not mushy when the soup is done, either. Beans stored longer take longer to cook.
Other dry beans can be used, but avoid pinto beans as they tend do to get mushy when cooked a long time. And if you forget to soak dry beans, you can use canned beans – 3 standard 14 oz. cans would be needed, after draining and rinsing.
I cooked my soup in a 6-quart heavy enameled cast iron French cooking pot. I started by sautéing the leeks, shallots and garlic in a little olive oil on low heat. You can use onions instead of leeks, but leeks freeze well and I grow a lot leeks. My supply of onions from my garden is low by now, so I used leeks. When the garlic started to brown I added a quart of water and the beans, and cooked at medium heat.
Kale still usable in early February
While that was happening I chopped 2 cups of kale that I had picked that day from my garden. Yes, even in early February my kale was still okay, despite freezing and thawing many times. I also have bags of kale in my freezer. I remove the mid-rib before chopping. I added it to the soup, along with 5 medium carrots cut in rounds, not too thinly.
Carrots and onions come in lots of varieties, including those labeled “for storage” Storage carrots last for months in a spare fridge or cold cellar (so long as you keep them protected from mice). The classic storage carrot is a variety called ‘Bolero’. Plant on the Fourth of July weekend for fall harvest. Patterson is the yellow storage onion I grow.
Next I added a little hot pepper – not enough to notice, but enough to add complexity to the broth. I had frozen chopped jalapenos peppers I grew in 2018, and added some along with a smoky dry pepper I buy called chipotle. Fennel seeds compliment carrots well in a stew, so I added a tablespoon of them, and some marjoram and oregano we had grown and dried.
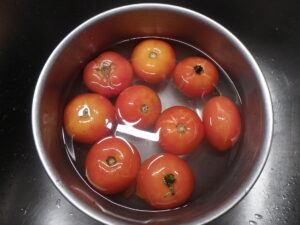
A quick soak in hot water will make these garden tomatoes thawed enough to chop easily
Tomatoes are central to most soups and stews I make, so I freeze large quantities of them whole and store in zipper bags for winter use. I used nine 2-inch tomatoes that weighed 30 ounces – roughly one big can from the store if you don’t have your own. To thaw them, I submerged the tomatoes in a bowl of hot water for 5 minutes or so, and chopped them coarsely.
Why are tomatoes a key ingredient? They contain the fifth flavor our tongues recognize, one called umami. Americans seem not to know much about it. We recognize sweet, sour, salty and bitter, but not umami, which is Japanese for “essence of deliciousness”. So I used not only those frozen tomatoes, but a cup of dried ‘Sungold’ tomatoes and 2 cubes of tomato paste I froze in an ice cube tray.
I have a few winter squash I’ve been storing in a cool room, but they don’t last forever, so I peeled and cut one in small chunks for the soup. After peeling and coring, it weighed about 12 ounces.
Lastly I added 2 cups of sweet peppers. I bought a half bushel last fall and froze it all in zipper bags. No blanching required, and they add a lot of sweetness to the recipe.

Ingredients from the freezer
Use whatever veggies you have in your freezer and larder. Keep tasting, and add spices, salt or sweet things (like more carrots or dried tomatoes) until you have it just right. Bon appetit!
Notes from the Garden is supported by donations. If you wish to donate, you can do so on-line by going to https://gardening-guy.com/store/ Click the donate/store button and follow the prompts. Of course you can do it the old fashioned way: send a check to Henry Homeyer at P.O. Box 364, Cornish Flat, NH 03746.Thanks!
Favorite Trees for Winter
Posted on Tuesday, February 2, 2021 · Leave a Comment
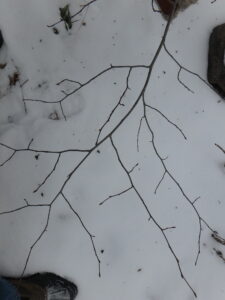
Hophornbeam branches are delicate and graceful in winter
I recently asked a few readers, garden friends and tree experts a question: “What is your favorite tree in winter?” It’s not easy to pick just one, any more than most of us would be willing to name a favorite child. I invite you to think about the question, and perhaps, come spring, you will want to plant one if you haven’t already.
Pamela Kirkpatrick of Swansea, Massachusetts sent me this: I love the winter landscape, and, next to my family, trees are my greatest love. American holly, which comes into its own in winter, both for its gleanings and the way it reflects light. Beech of any kind, for showing off its muscular trunk when not in leaf. White pine, troublesome as it is with its brittle limbs, because it is home to an owl who returns there every winter and serenades us with his call.
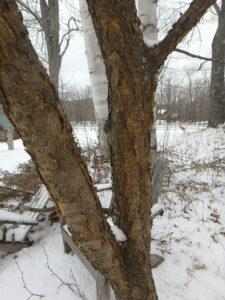
Amur maackia bark is interesting especially in winter
Lynn Schadd of Cornish, NH e-mailed me saying, “Amur maackia is for me the best four season-interest tree in the garden. And right now its magnificent bark is stealing the show peeling, curling, showing off plates of designer colors all of which may be easily seen since the tree has no oak like aspirations of bigness.
Lisa Lovelette of Waterbury Center, VT wrote, “My favorite winter tree is the pine tree when dressed in white. I am a hobbyist photographer and nothing is more beautiful than a stately pine dressed in white when placed in front of a beautiful Vermont sunset, sunrise, or majestic sky…and a rising bright and bold full moon in the background makes the dressed pine a standout.
Anne Raver of Providence, RI is a former NY Times garden writer. Here’s what she said: “My favorite tree is the scarlet oak, or the white oak, or the red oak, any kind of oak. They support hundreds of species of insects, whose caterpillars feed on the leaves, and who provide crucial food for birds. Also, the red and scarlet oaks turn beautiful colors.”
Donnamarie Kelly of Salem, NH wrote, “By far my favorite winter tree is the hemlock. When snow-laden, the boughs remind me of ballerina hands dipping delicately downward. Hemlocks are full, projecting a sense of being in the “woods” even when in a simple grove of two or three trees. “
Julie Moir Messervy, is a world-renowned garden designer and author of many great garden books. She e-mailed, “Our land in Vermont was an old sheep farm, as were so many. My favorite tree (in winter and also all year long) is a stately White Oak ( Quercus alba) that may well date from the 1800s. For me, it’s a “Cosmic Tree” that shades and shields our deck and screen porch from the harsh western sun, while opening its boughs to the cool summer winds. It is home to squirrels, porcupine, and at least 13 types of birds in winter …”
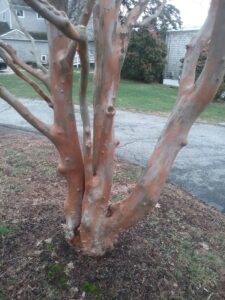
Stewartia bark photo Christine MacManus
Christine MacManus of Narragansett, RI e-mailed, “A favorite winter tree of mine is a neighbor’s Stewartia with its wonderful bark of mottled patterns and colors. I’ve kept my eye on this tree for 40 years and sometimes pull mulch away from the trunk flare. And of course the summer flowers are a bonus too.
My favorite tree authority, Mike Dirr, author of “Manual of Woody Landscape Plants” could not limit himself to just one or two. He e-mailed, saying, “I love Nyssa sylvatica (black tupelo), Fagus grandifolia (American beech), Quercus alba (white oak) , Liriodendron tulipifera (Tulip tree) and Quercus bicolor (Swamp white oak) for starters.”
I know Professor Dirr is particularly fond of “Majestic trees” – trees that tower over the landscape and last for a hundred years or more, and all of those he mentioned can do so.
JD Lavallee of Henniker, NH loves blues spruces: “In the winter, I just loved how the snow is caught in their branches forming beautiful white pillows. And light snows simply add a beautiful dusting of their needles.”
Tom Bacon of Hanover, NH emailed, “I love the majesty of the hemlocks in general, but the way they hold the snow is beautiful in the winter and just stunning compared to other evergreens.”
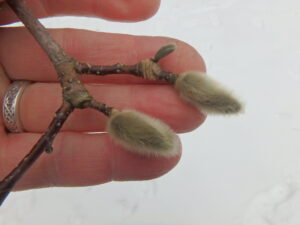
Flower buds on my Merrill magnolia are like pussywillows all winter
As for me? My favorite is the hybrid Merrill magnolia I planted long ago as a specimen tree in the back of the house. I love its smooth gray bark and the fuzzy buds like pussywillows on steroids. Those buds remind me that spring is coming, no matter how cold the weather now. Of the native trees, I love the hop hornbeam (Ostrya virginiana) in winter. The bare branches are fine and delicate, with tiny buds. The lateral branching patterns are so ornate and beautiful that I hung one on the ceiling above my computer.
One last perspective came from my friend Alicia Jenks of Weathersfield, VT. She noted that American beech trees produce a lovely rustling sound on breezy winter days. The young trees hold their leaves until May, and provide a quiet symphony in winter. And pines make such a soothing song on breezy days, too. So go outside to look – and listen – to the trees. Pay attention, and your trees may surprise and delight you.
Starting from Seed
Posted on Tuesday, January 26, 2021 · Leave a Comment
I hate to be the one to give you bad news, but some seed companies are already running out of seeds. Don’t panic: there are, in fact, plenty of seeds out there. And if one company doesn’t have your favorite tomato or zinnia variety, chances are that some other company will.
Before panicking, you might want to go to your local feed-and-grain store, garden center or food coop for seeds, too. Most of those have racks of seeds, some with just one brand, others with several.
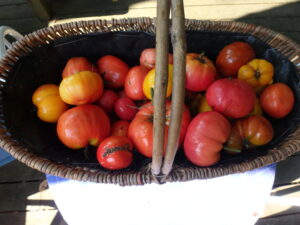
Heirloom tomatoes are often irrecular in size and shape but they are tasty and you can save seed for next year
Most seeds are good for 3 years. Of the seeds I use, onions and parsnips are just good for just one year. Peppers, parsley, corn and leeks are good for two years. Most of the cabbage family (kale, broccoli, etc.) and squash family (cukes and zukes) are good for four years. Basil and some flowers are good for five years.
You can prolong the viability and vigor of your seeds by storing them properly: they do best in a dark, dry place cooler than 40 degrees. Freezing is fine, too, but put them in an airtight container. In fact, that’s always a good idea.
Despite what I wrote above, I have germinated seeds much older than the suggested limits when I have not been able to find the varieties I wanted. There are downsides to using old seeds. They generally germinate at much lower rates. You can test this by wrapping ten older seeds in a paper towel and keeping it moist on a sponge. If less than half germinate in a week or two, buy new seeds. You can do that now, before you place your seed order.
Older seeds also have less vigor. That is the main reason I avoid them, even if they will germinate at 60 %. Not all seeds are created equal, and I want those that are ready to explode with pent up energy, ready to grow.
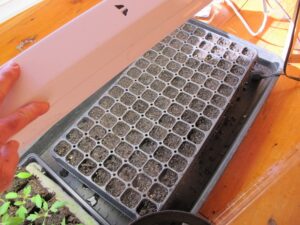
Corn seeds planted in plug tray indoors
It’s important to know what seeds need to be started indoors, and which can do well planted directly in the ground. All your root crops are best started outdoors in the ground, though beets can be started indoors. Beans and peas are direct seeded outside, too. Corn can be started in the ground, or indoors in flats. Crows love freshly germinated corn seeds with a little green leaf, so planting 4-inch plants started indoors is good if you have just a small plot.
Although you can start the vine crops directly in the soil, I have troubles with striped cucumber beetles killing the young plants when they first germinate by stripping them of their first leaves. So I start squash-family vines in small pots indoors a month or so before outdoor planting day, and the plants are big enough to survive some leaf damage by those insect pests.
Tomatoes, eggplants, broccoli, cauliflower, cabbage, kale and lettuce I start indoors in April or buy in 6-packs. Peppers and some flowers need to be started indoors very early: March 1 is good where I am.
What are my favorite companies? This year I ordered most of my seeds from FEDCO Seeds, a co-op based in Maine. I like that it’s a cooperative and does everything in a low-key, sustainable way: their catalog has no color pictures designed to make me drool. They offer small seed packs for as little as $2.00. And instead of saying that every tomato variety is “The Best Tasting” they tell the flaws as well as the positive attributes of each variety.
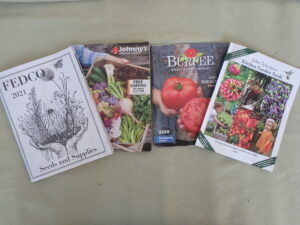
Catalogs are great fun to study
I always get some things from Johnny’s Selected Seeds, an employee-owned company in Maine that is favored by commercial growers. They provide excellent growing information. This year they provide excellent comparison photos in each section – all their tomatoes, side-by-side, for example.
Last year I tried John Scheepers’ Kitchen Garden Seeds and liked them a lot. If you are interested in unusual vegetables like shiso, Karikachi edamame, tatsoi, mizuna and other Oriental veggies, they have plenty to choose from. They even have peanuts for northern gardeners! Like Fedco, no color photos in the catalog.
Like Italian food? Seeds from Italy carries the Franchi brand Italian seeds, and more. They also have kitchen items, garden tools and more. All high quality.
Hudson Valley Seeds started as a seed library in New York State, and became an excellent seed company with seeds others do not carry, like their Siberian watermelon.
Fruition Seeds in upstate New York is another favorite of mine. They grow much of their seed on their 24-acre farm, specializing in heirloom seeds for short seasons like those we have in New England. They have some nice varieties not found elsewhere. The owners are young and full of energy, and grow only organic seeds.
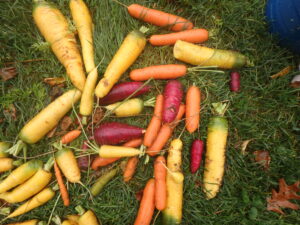
Carrots and most root crops need to be planted directly in the soil
Renee’s Garden Seeds has great seeds – but no print catalog. Still, I order from them most years. I love their mixes of different color veggies in one pack – 3 colors of beans, or two colors of carrots.
And lastly, don’t forget Burpee Seeds, one of the oldest and biggest seed companies for the home gardener. They sell lots of varieties that they have developed, especially disease-resistant hybrids.
So get busy, and buy your seeds now before all get sold!
You may reach Henry at
henry.homeyer@comcast.net or PO Box 364, Cornish Flat, NH 03746. Henry’s book, Organic Gardening (not just) in the Northeast: A Hands-O Month-by-Month Guide has been re-printed and is now available from him for $19.
Why Eating Organic Food Is Important
Posted on Tuesday, January 19, 2021 · Leave a Comment
I’ve been growing vegetables organically all my life. I use no chemical fertilizers or pesticides. I don’t often think about the reasons I do so, any more than I think about breathing – it’s just something I do.

Organic Manifesto
I recently picked up a book written by Maria Rodale called The Organic Manifesto: How Organic Farming Can Heal Our Planet, Feed the World, and Keep Us Safe (Rodale Press, 2010) and it reminded me why I do so. I’d like to share some of the important points with you here.
In the introduction Eric Schlosser (author of the fabulous book, Fast Food Nation) presented some stark facts: American farmers use 1.2 billion pounds of pesticides each year – 4 pounds for every man, woman and child. Some of these pesticides – the organophosphates – were first developed in Germany in WWII as chemical weapons. The federal government does not require reporting of usage, and testing is done by manufacturers, not the EPA or USDA. Most food has some pesticide residue – except for organic foods,which shouldn’t have any.
One of Maria Rodale’s reasons for eating only organic food might surprise you: it has to do with climate change. Soils treated with chemicals, including fertilizers, do not have robust populations of microorganisms. Organic soils do. Key among these living beings are the mycorrhizal fungi that coat the roots of plants in organically tended soils. These fungi sequester huge amounts of carbon, taking greenhouse gases out of the atmosphere and holding it the soil. But they are virtually non-existent in soils treated with chemicals. Grow organically? Eat organically? You are helping the environment.

My organic veggies look and taste great
Secondly, irrigation water for commercial agriculture, particularly in the West, uses large quantities of water, depleting aquifers and polluting ground water. When I traveled through the mid-west in the early 2000’s I was amazed that supermarkets designated entire aisles to jugs of water – no one wanted to drink from their own wells. And there is a dead zone in the Gulf of Mexico that is bigger than New Jersey caused by agricultural run-off of chemicals from conventional fields.
Children are particularly vulnerable to chemicals used in commercial farming. Rates of childhood cancers, asthma, diabetes, autism and other debilitating conditions continue to increase. Ms. Rodale attributes (with copious footnotes to scientific studies) many of these changes to the chemicals children consume. As she says, “Cheap food equals high health care costs.”
The “organic” label on food also means that no genetically modified organisms were used in producing your food. Back in 2010 when Rodale wrote the book, 91% of all soybeans and 95% of all corn produced in America was genetically modified to be tolerant of a weed killer called glyphosate, sold under the trade name, “Roundup”.

Organic fertilizers contain more healthy minerals than chemical fertilizers
There has been much controversy about Roundup, and whether it is harmful to humans. Ms. Rodale points out that Roundup cannot be washed off food: it has a surfactant that allows the chemical to penetrate the cell wall. And since corn and soy are used to manufacture many foods from ice cream to baby food and ketchup, it is everywhere. The federal government does not consider Roundup a problem, though many scientists do.
Ms Rodale never once, in this book, criticized conventional chemical farmers. Organic or conventional, she recognized their hard work and a desire to work their land and support their families. She recognizes that transitioning to organic farming takes time, money, and education.
So what can you do? You may not be able to afford to buy nothing but organic food. But you probably can buy your meats from local farmers that do not use the feedlots of the mid-West that feed their cows and pigs antibiotics. And you can get eggs, as I do, from a local teenager that treats his hens well. (Thank you, Ian’s Eggs).
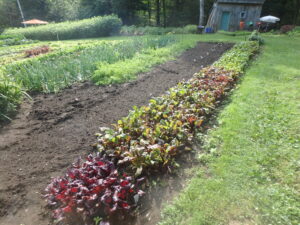
This organic farmer has nurtured soil rich in microorganisms that sequester carbon
For vegetables, you can probably grow some of what you require for vegetables in summer, or buy from a local farm stand. Many farmers are happy to tell you about how they grow their vegetables. The supplier of the local farm stand near me uses an approach called IPA or Integrated Pest Management. This method encourages farmers to use natural controls, and to use pesticides only when a crop is threatened. They cultivate crops to root out weeds instead of spraying herbicides like Roundup.
But the bottom line is this: the more you grow organically, the better your soil will be. If you use only organic methods, you can avoid many chemicals in your food that might be present in grocery store foods.
I recognize that I cannot change the world with what I do. But I have learned to grow plenty of vegetables, and to keep them for eating out-of-season. So think about a bigger vegetable garden this summer, and I will tell you about how to put food up for next winter when the time comes.
Henry is the author of 4 gardening books and a UNH Master Gardener. He lives in Cornish Flat, NH. You may reach him at
henry.homeyer@comcast.net.


