The Art of Japanese Pruning
Posted on Tuesday, October 6, 2020 · Leave a Comment
A few weeks ago I traveled to Shin Boku Nursery in Wentworth, NH to attend an all-day workshop on Japanese pruning techniques. Many of the techniques are useful to any gardener.
The workshop was organized and taught by Doug Roth, the publisher of Sukiya Living magazine (
www.rothteien.com), a journal about Japanese gardening that my wife and I subscribe to. It provides practical and aesthetic advice that I find useful anywhere. Mr. Roth lived for years in Japan, and apprenticed under a Japanese master, ultimately receiving accreditation as a journeyman gardener.
Shin Boku (
www.shin-bokunursery.com/) is a specialty nursery that offers trees and shrubs trained for use in Japanese-inspired gardens. The owner, Palmer Koelb, has been growing specialty trees pruned in the Japanese style there since 1986, and some of the larger trees (in 5-foot diameter pots) he has been training for even longer. There is a lovely Japanese garden there as well as specimen trees for sale.
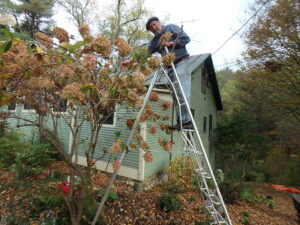
Henry on Japanese pruning ladder
The workshop began with a lesson on ladder safety. Japanese pruning ladders made by Hasegawa were present for us to see and use. These ladders are tripod ladders made especially for pruning. They are made of welded aluminum, and are very light.
Their 2 front legs flare, shaped much like a side of the Eiffel Tower, and a third leg is hinged so that it can be swung out and placed inside or behind a hedge or tree. Not only that, the third leg can be extended or shortened to work on hillsides. The feet are clawed, so they dig into the soil, but they come with rubber “sneakers” to use on pavement or stone. The steps are wide and comfortable on the feet, and some have an upper platform for working.
After a day of using the Hasegawa ladders, I was convinced that they offer safety and convenience way beyond what my old-fashioned step ladders and extension ladders offer, particularly on rough terrain and hillsides. When I got home I made arrangements to buy my own from Alan Bissonnette in Chichester, New Hampshire. He represents New England Ladders (
www.neladders.com), which has representatives and warehouses around the country. Visit
www.neladders.com/dealer-locator/ to find a dealer near you.
The ladder I selected is a 10-footer, one with a platform at the 8-foot level, and a grab bar on the top. I have been using it on hilly terrain, and love that not only can I adjust the length of the third (back) leg, it has a chain connecting the front legs and the back legs to assure that the ladder cannot splay more than recommended. I was tempted to get an 8-foot ladder, but have been pleased with the extra height. I like being able to look down on the top of a medium-size crab apple tree to see what needs to be removed. My new ladder weighs just 30 pounds.
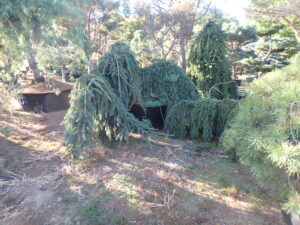
Large trees pruned in the Japanese tradition are available at Shin-Boku nursery
In Japanese gardens the trees are often trained to irregular shapes. That can be accomplished by regular pruning and understanding how to direct growth. The tip of a branch produces auxins, or plant hormones that control growth and fruiting. By cutting back a branch to a junction of branches, one can direct growth. Cut off the tip and one of a pair of side branches, and the growth will essentially follow the direction of the remaining branch. In this way, a tree can be made to twist and turn over time.
Some evergreens produce so many branches and leaves that the interior of the shrub or tree gets little or no light. The interior of those specimens can then lose their leaves (commonly called needles), leaving a dark interior that is unattractive if an outer branch is damaged or removed. You can prevent that with judicious pruning.
I recently worked on a “Bird’s Nest’ spruce. It was a large shrub that was getting too tall and wide, and the homeowner wanted it made smaller. This, I explained, is a multi-year project: if I just cut off the top branches, the brown interior would be exposed and unsightly.
Here’s what I did: First, I cut back this year’s growth to stop the shrub from getting bigger. Then I removed some small branches to allow punches of light to get inside the tree. That will stimulate dormant buds to grow new leaves. I did this primarily where two branches were growing parallel – I removed one, left the other. I did this not only on the top of the shrub, but on the sides as well.
In the workshop each of us received a copy of “Sukiya Living Textbook: Advanced Tree Pruning”. It is nicely illustrated with photographs showing several different styles of pruning techniques, mainly for evergreen shrubs and small trees.
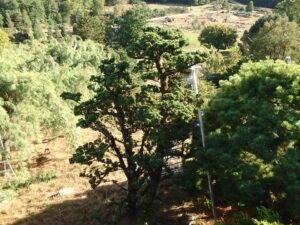
Pine shaped in the Japanese tradition at Shin-Boku Nursery
If you are interested in creating a tranquil corner of your property into a small Japanese garden, I suggest you subscribe to Sukiya Living magazine. It comes out bi-monthly and, according to their website, covers “various aspects of Japanese architecture, horticulture, art, and philosophy. Topics range from centuries-old design principles to modern, how-to construction and maintenance techniques.”
I hope one day to travel with Doug Roth on one of his tours of gardens in Kyoto, Japan. I just will have to wait until Covid 19 has been controlled and a vaccine is available. Meanwhile, I can dream.
You may reach Henry at
henry.homeyer@comcast.net or PO Box 364, Cornish flat, NH 03746. He is the author of 4 gardening books.
Getting Houseplants and Herbs Ready for the Indoors
Posted on Tuesday, September 29, 2020 · Leave a Comment
Most of us bring our houseplants outside for the summer. Now is the time to bring them in, or get them ready to make the move. It’s also the time to put herbs that you’ve had in the ground all summer into pots and get them ready for winter use in the kitchen.
Generally, plants outdoors don’t suffer much from aphids: the pests are kept in check by good insects that munch on them. But move a plant indoors, and they often get covered with those tiny aphids and their honeydew, which makes a sticky mess of your leaves.
The solution is an easy one. Before bringing a potted plant indoors, wash the leaves. I do this by placing the potted plant on its side, and washing it with a stream of water from the hose. I wash not only the tops of the leaves, but the underside, too. Roll the pot twice to wash all the leaves well.
In addition to the leaves, I wash off the surface of the potting soil to get any eggs or aphids hiding there. I then add half an inch of fresh potting soil to replace any I washed off. Then I stand the pot up and let it dry in the sun. For smaller plants, you can wash them in the kitchen sink.
Although spring is generally recommended for re-potting houseplants, it may be needed now if a houseplant has been in the same pot for a long time. If roots are poking out of the holes in the bottom of the pot, or if the plant leaves are smaller than previously, it’s time to re-pot. You can remove a plant from its pot to see if roots are matted and tangled at the bottom of the root ball, and pressed up against the side of the pot.
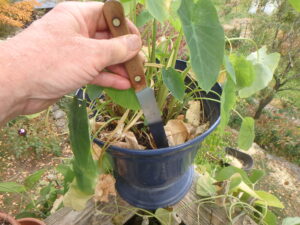
A bread knife can help loosen soil attached to a flower pot
Getting a plant out of a pot is not always easy. If the pot is small enough, hold it upside down, give a tug on the plant and it will slide out into your waiting hand. For bigger pots I use a long bread knife or cake spatula and slide it between the root ball and the pot, poking and pushing all the way around the outer edge to loosen the soil. Then I turn it upside down again and try to remove it.
For big pots, get someone to help you. Hold the plant, and ask your helper to tug and rotate the pot, pulling until the plant comes out. Plastic and fiberglass pots are generally more willing to give up their grip on plants than old fashioned baked clay pots.
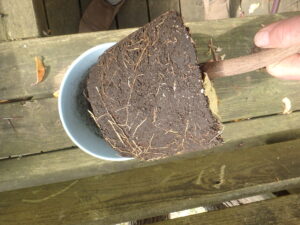
Loosen the soil by tickling these roots and you will have room for new soil
Once the plant is out of the pot, try to loosen up the roots. If they are a tightly tangled mess, you can use a serrated steak knife to cut off an inch or so of roots at the bottom of the pot. Roots on the sides can be “tickled” loose with your fingers, a kitchen fork, or a hand tool such as the CobraHead weeder. Let soil fall off the roots, as it is depleted and will be replaced.
Potting mix is generally based on peat moss, which is light and fluffy but not very nutritious for your plants. I like to mix it with high quality compost – my own, or purchased. I find Moo-Doo brand composted cow manure to be excellent, and readily available. It is made in Vermont.
I like to have an inch of two of my freshly made potting mix in the bottom of the pot, and half an inch to an inch of it all around the perimeter. To make space around the outside requires removing old soil – or using a slightly bigger pot
When adding soil mix around the outside of the pot, use your fingers to push the new mix down, but you may need a wooden spoon or paint stirrer to get it all the way to the bottom of the pot. Water after the job is done to be sure no air pockets are left in the pot.
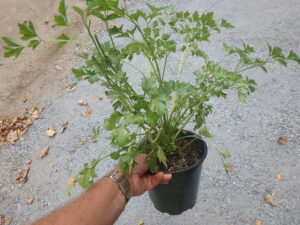
Parsley roots are long and need a deep pot
Some perennial herbs can be moved inside for the winter. These include chives, rosemary, thyme and parsley. Parsley has many deep roots, so an eight-inch deep pot is best. Chives are easy to pot up, and do well on a bright window sill. I will cut mine back in a week, as she looks a bit like Rapunzel now. Basil, no matter how hard we try, is not a good candidate to come inside. It attracts aphids and needs more light than a windowsill will normally provide. I’m going to try moving some dill inside this year, but have not previously tried it.
After you have potted up some herbs, leave them outside for a week or more. Why? It’s best to change just one variable at a time. There is always less light inside, so let the plants get used to being in a pot before moving them indoors. Be sure not to over-water your herbs: most are Mediterranean in origin, and do best in relatively dry soil. That said, please know that a completely dry rosemary is a dead rosemary.
On another note, a few days after a hard frost you should dig up your dahlias, calla lilies, gladiolas and cannas. Store them in a cool, dark place. A brown paper bag with some slightly damp wood shavings used in gerbil cages or sphagnum moss will keep them from drying out too much.
Henry can be reached at
henry.homeyer@comcast.net. He is the author of 4 gardening books, and is gardening consultant and long time UNH Master Gardener.
Planting Bulbs for Spring Blossoms
Posted on Tuesday, September 22, 2020 · Leave a Comment
Now is the time to buy your bulbs for spring blossoms. Winters in New England are long, cold and snowy, so by March I’m ready for spring. Most years I have bulb flowers pushing their way up through mushy snow and fallen leaves in early March, delighting me with their improbably delicate flowers.
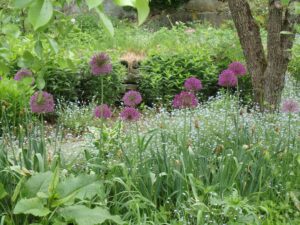
These allium bloomed in early June after the daffodils in the same bed
First the small bulbs bloom: snowdrops, glory of the snow, scilla, winter aconite and crocus. Next come daffodils, tulips and alliums. Finally come summer snowflake ( Leucojum spp.) and Camassia. You have plenty of time to plant bulbs as you can do so until the ground freezes. But I recommend that you get them now before they are sold out. Gardening has taken a big uptick in interest this year, and I predict bulbs will go the way of seeds and hoses – all sold out early.
Here are the basics: you plant bulbs in the fall and they bloom in the spring according to an internal clock. All need plenty of sun, though the little ones that bloom early can be grown under deciduous trees, as they will get enough sun to “re-charge” the bulbs by photosynthesis before the leaves are on. Don’t plant bulbs of daffodils or tulips in the lawn because you won’t be able to mow it until July (if you do, the bulbs will not get enough energy and they won’t bloom).
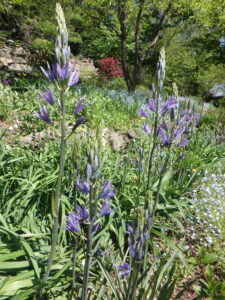
Cammasia is a lesser known bulb plant that blooms in May for me
Planting depth matters. The small bulbs only need 2 or 3 inches of soil cover over the top of the bulb; bigger bulbs like tulips and daffodils generally need 6 inches of cover. Follow the directions that come with the bulbs.
Tulip bulbs are loved as food by rodents like squirrels and chipmunk. Deer will eat the foliage and flower buds – often the night before you planned on picking some. Daffodils are vaguely poisonous, so not eaten by anything. Alliums, in the onion family, are not eaten by anything, either. Crocus are not generally bothered by anything, but this past spring we had a plague of chipmunks that ate the blossoms just before they bloomed. I’ve never had trouble with any of the other small bulbs.
I like to plant bulbs in big batches. Fifty daffodils will knock your socks off when they bloom, but five will hardly be noticed. I know that some stores sell tools that can be used to cut out and lift a circle of soil all in one motion. The idea is to dig lots of holes (3 inches across) and plant one bulb in each hole. I find that method tedious. The same goes for using an auger on a drill to dig holes for bulbs.
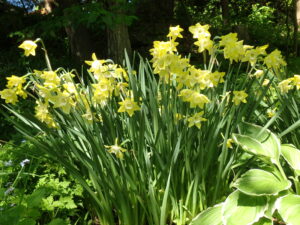
Daffodils look great planted in big masses
What I like is to dig a bulb bed for 25 or more bulbs. Dig down six inches, remove the soil in an oval or circle 24 to 36 inches across. I put the soil in a wheelbarrow or on a tarp so as to keep the area tidy. Once the hole is excavated, I add some bulb booster or slow-release organic fertilizer in the hole with my CobraHead weeder. I generally add some compost, too, and scratch it into the soil at the bottom of the hole, along with the fertilizer.
After all that, I just place the bulbs in the soil, pointy end up. Space them according to the directions, or a little closer than the directions indicate. Daffodils and tulips I space about three inches apart, small bulbs less. Then I take the soil I removed and return it to the hole, being careful not disturb the bulbs. I remove any stones that are the size of the bulbs or larger, and mix in some compost with the soil if it is a heavy clay or very sandy.
What about those rodents that want to eat your tulips or small bulbs? People try many things to deter them. Some sprinkle hot pepper powder on the soil surface, or crushed oyster shells, which are sharp and unpleasant. A variety of animal repellents are sold, and some may do the job. I like to hide the hole with a layer of fall leaves so it won’t be so obvious to rodents.
Back at the end of Bill Clinton’s time in office I got to interview the White House gardener in the fall. They had just planted, for the newly elected President Bush, thousands of tulips, a variety named ‘Hilary Clinton’. Huh. I asked how they would keep the squirrels away – I saw them everywhere.
Dale Haney, the head gardener, told me they keep the squirrels fat and happy – they give them all the dried corn they can eat. That reduces the desire for tulips. And, he said, they put a layer of chicken wire 2 inches below the soil surface after planting. Squirrels are deterred by the wire. I tried that method, and it is not easy to do – I needed to cut the chicken wire to fit my plantings, and it was like handling razor wire. I don’t recommend it.
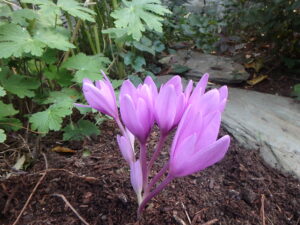
Autumn crocus
There are a few fall blooming bulbs, too. Saffron crocus and Colchicum need to be planted before this, but you might like to try them another year. Colchicum, generally planted in August, is also called “fall crocus” (even though it is not a crocus at all). But the blossoms look like giant crocus, and each bulb produces several blossoms. I love them.
Colchicum are leafless now, but put out leaves in the spring which disappear by mid-summer. Bulbs cost from $5 to $8 each, and are generally sold in packages of three. Good garden centers may have a few for sale potted up and already in bloom now.
I’ve been planting bulbs every year for decades, and find it one of my favorite gardening activities. Now, in fall, when the garden is declining, I plant something and dream of spring. I need that.
Henry is the author of 4 gardening books, and is a UNH Master Gardener. Write him at PO Box 364, Cornish Flat, NH 03746 or e-mail him at
henry.homeyer@comcast.net.
Putting the Garden to Bed
Posted on Tuesday, September 15, 2020 · Leave a Comment
Big yellow school buses are on the road again…or at least a few of them. Tree leaves in the swamps are turning red. Frost and cold weather are sneaking up on us. This year I resolve to get my garden put to bed early so that I am not wearing gloves and long johns as I cut back the daylilies and other perennials on cold, wet fall days. Here is what I am doing now – or will soon.
First on my list is the need to sow some grass seed. I have places where my lawn was killed when a torrential downpour dumped sand from my road onto the lawn. Fall is a better time to sow seed than the spring because the ground is warmer, and it will germinate quickly. In the spring, seed can rot during cold, wet weather.
I will spread some topsoil or compost to improve the soil, then mix it in with a short-tined rake. After spreading seed, I will cover it with a layer of straw. That will help to keep the soil and seeds from drying out, though I will water occasionally if the soil gets dry.
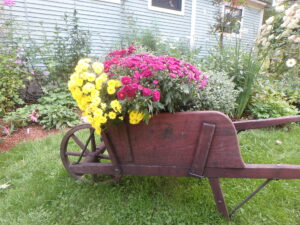
Chrysanthemums add color in the fall
Chrysanthemums are for sale now at farm stands, and I purchased a few pots of them to brighten up the front yard. I treat them as annuals, even though some of them are perennial. But the growers cut back the plants as they grow, causing them to branch out and produce hundreds of blossoms on bigger plants. If I let them over-winter, the plants would have some flowers, but never so many as what the professionals produce. It’s worth it to me to buy a few each fall.
Mums in pots tend to dry out quickly, so I have been soaking mine in my birdbath. That way the pots suck up water, getting it down deep. I could actually plant my mums in the ground, but I like them in pots on the front steps or in my wooden wheelbarrow. They need water every few days.
This is also the time of year when I move shrubs. I recently moved a Diervilla, one called ‘Kodiak’. It was given to me years ago, and it was crowded in between a crab apple tree and a red-veined Enkianthus. I decided it needed more space to grow, and I wanted to expose a stone wall behind it. So I dug it up.
This shrub is about 3 feet tall and wide, and had been in the ground more than 5 years. I used a shovel called a drain spade: a spade with a long, narrow blade. I pushed it into the ground at a 45-degree angle in 4 places around the bush. Each time I pushed the shovel handle down to lift the shrub slightly. Then, when I’d gone all around it, I got the spade under the middle of the plant, pushed down hard, and popped it right out.
I tugged on the plant, and pulled it loose, roots and all. Some were cut by my shovel, others not. I moved it to its new home, covered the roots and watered well. A week later it looks fine.
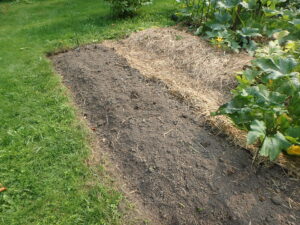
Never leave the soil bare. Cover with mulch to keep out wind blow seeds
The vegetable garden is winding down, and as each crop is harvested, I weed the row and apply mulch as needed it to keep wind-blown seeds from finding a home. My favorite mulch consists of chopped fall leaves: I run over leaves on the lawn with my lawnmower to chop them, and rake them onto a tarp which I drag down to the vegetable garden. It’s too early for leaves, so I’m using straw for now.
When cleaning up the vegetable garden it’s important to keep diseased plants separate from healthy ones (which go on the compost pile). I generally have a location for noxious weeds and diseased plants and do not use that material after it breaks down, or not for many years. It takes a pretty high temperature to kill weed seeds and fungal diseases, and I don’t want to chance getting either one back in following years.
I tend to get a little lackadaisical about the perennial flower gardens late in the season. Weeds and grasses have a way of showing up there, and by pulling them now, the work will be less in the spring. Cindy and I have done a pretty good job of mulching the flower gardens this year using a ground hemlock bark mulch, though some weeds push on through. This is a good time to get rid of those rascals.
Some gardeners cut back all flowers in the fall, others in the spring. Me? I cut back some, but like to leave some tall perennials with sturdy stems to stand proud above the winter snows. Birds enjoy their seeds. And some beneficial insects need places to lay their eggs, or to use as shelter. On the other hand, there is a lot to do in the spring, and cleaning up the flower beds now reduces the work later on.
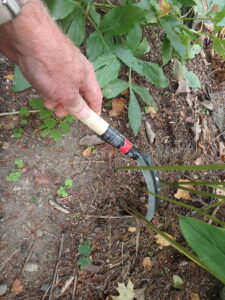
This harvest sickle will slice through stems quickly and easily
Cutting back perennials with a pair of pruning shears is very tedious work. I prefer to use a serrated harvest sickle that allows me to slice through a handful of stalks in one quick motion. I have one that costs under $10 (a Barnet model BLK 730) and is available from OESCOINC.com, or by calling them at 800-634-5557. Just wear gloves when you use it – it’s very sharp.
This is also a good time to divide perennials to make more plants. Peonies, for example, are best divided and moved in late September to mid-October. Dig up daylilies, phlox or asters now the way you would a shrub, and then use a small saw or root knife to divide it into two or more new plants. Most plants like being divided – assuming you give them some compost and a little fertilizer.
Putting the garden to bed can be an enjoyable time – so long as you give yourself enough time to do it in small chunks. So get to work before it gets too cold to enjoy yourself.
Henry can be reached at P.O. Box 364, Cornish Flat, NH 03746 or by email at
henry.homeyer@comcast.net. He is a lifelong organic gardener and the author of 4 gardening books.
Getting Ready for Winter
Posted on Tuesday, September 8, 2020 · Leave a Comment
Like a conscientious squirrel, I put away food for the winter in August and September. I freeze and dehydrate lots of vegetables, and store some in my cool basement. Here are some tips on ways to save food for later.
I grew about a dozen kale plants this year. The workhorse are those that end in “bor” – winterbor, redbor, starbor and others. I get seeds from Johnny’s Selected Seeds of Maine to start my own indoors in the spring, or find them at my local garden center growing in 6-packs. Most of the kale I grow is for winter use because it freezes so well. This week I put up 8 quart freezer bags of kale, and I still have more I may process later.
To freeze kale I wash it first and make sure it is free of (Ugh) slugs and bugs. Then I either pull the leaves off the midrib, or slice it off. I chop the kale into 1-or 2-inch squares, prior to blanching in boiling water.

Blanching kale is worth the work
To blanch the kale I submerse it in boiling water for 30 to 60 seconds. This will kill the “aging” enzymes in kale, allowing me to keep it frozen and good to eat practically forever, if need be. Normally I eat all the kale within a year of freezing it, which is recommended. I could freeze kale without blanching it if I were planning on eating it all in 3 months or so. But blanching also allows me to pack more kale in each bag.
For the blanching of kale and other veggies, I use my big black tin pot that is sold for hot water bath canning – it is roughly 14 inches wide and 9 inches deep, and will hold 7 quart mason jars for canning tomatoes. I fill the canner half full, and bring to a full, rolling boil.
I have a special blanching pot that fits inside it – a metal pot with big holes in the bottom and sides, and handle for putting it inside my canning pot, and taking it out. You can buy a canner at any hardware store, but the inserts are harder to find – a restaurant supply stores should have them.
Then I drop in the kale– I do 15 leaves or so at a time. The water will just barely come to a re-boil in 60 seconds. Use a timer. If you use lots of water and not too many leaves, you can blanch for just 30 seconds.
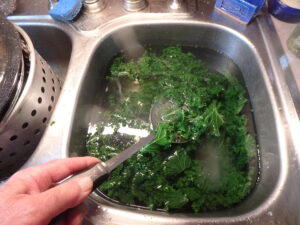
Cold water cools the kale and stops the cooking
Next you want to cool the kale quickly. Some people prepare an ice bath, but I just fill the kitchen sink with cold tap water. I lift the blanching pot and let the water drain back into the canner. Then, with the lid of the canner under the pot, I move from stove to sink, and drop the kale into the cold water. I stir, then scoop it out with a colander or slotted spoon, and put it into my salad spinner. The brand I prefer is Zylis, which has a pull string, not a crank. Sometimes I squeeze the kale to get some of the water out before spinning it.
Lastly, I dump the damp kale out of the salad spinner and onto a clean dish towel on the countertop. I pat it and roll it in the towel to remove more moisture. I fill bags, squeeze out some air, and then suck out as much air as I can with a straw inserted into the bag when it is closed right up to the straw. Still sucking, I pull the straw and snap the zipper shut.
Other veggies I blanch include beans, beets, broccoli, Brussels sprouts, cabbage, carrots, cauliflower, corn, kale, peaches, spinach, and Swiss chard. But not all veggies need blanching. Things I don’t blanch include apples, berries, pears, peppers, leeks, and tomatoes. And I bake or steam winter squash, then freeze it.
Summer squash for use as a side dish needs only 30 seconds of blanching, but squash for soup I don’t blanch at all. This week I put up 11 quarts of grated Romanesco zucchini for use in soups. Even big Romanescos are good, if you remove the seeds. I use the grater blade on my food processor to grate it – it would take forever by hand. One bag of grated zucchini with an equal amount of tomato (which I freeze whole), some onions or frozen leeks, vegetable bouillon, and spices makes a great winter soup.
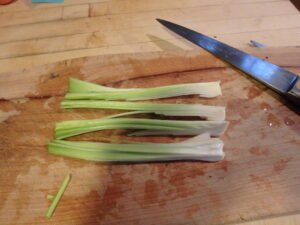
Leeks with leaves cut off and quartered before chopping and freezing
I grow a lot of leeks, in part because they freeze so well. I wash them, take off a layer or so of outer leaves, cut off the tops and quarter them lengthwise. I chop them, put them in freezer bags and suck out the air. They last forever in the freezer. I store lots of onions, but always run out before next year’s crop comes in. And onions don’t last forever, even in cool storage, so I use leeks in soups and stews when I run out of onions. I’ll put up a dozen quarts of leeks or more this year.
I haven’t harvested potatoes yet. I plant mine in June to avoid potato beetles. Didn’t have a single one this year! But it also means my potatoes are still growing now and are not ready to harvest. I have “stolen” a few by reaching under a plant and grabbing a few but not disrupting the others.
Potatoes store well in a spare fridge, or in a cement-block enclosure with a plywood lid in a cold space that stays in the 33- to 50-degree zone. Mice love them, so an old fridge really is best unless you are storing a lot of them. If I had to survive on what I grew, I’d grow a lot of potatoes and store them well.
So get to work. No point in growing a lot of produce and letting it go to waste. Of course, it’s fun to share with friends and the local food pantry.
Henry can be reached at
henry.homeyer@comcast.net or at PO Box 364, Cornish Flat, NH 03746. He is the author or 4 gardening books, and is a UNH Master Gardener.
Flowers Fit for a Much Loved Dog
Posted on Tuesday, September 1, 2020 · Leave a Comment

OLYMPUS DIGITAL CAMERA
Daphne mezereum was the registered name of my corgi, Daffy, who passed away on August 25 of this year. Born in 2006, Daffy was my constant companion who was always ready for an adventure – or especially, a meal or snack. When her back legs gave out, she figured out ways to propel herself forward with glee – ignoring the inconvenience, and trying to overcome the pain. Finally, when the pain was nearly constant, and we reluctantly called the vet.
We buried Daffy alongside her cat friend, Winnie, who passed naturally at age 23 in June of this year. And Abby and Stanley and Emily, all good dogs who have passed on and been buried in a quiet shady place on our property. Each had their graves decorated with flowers from the garden. Let’s take a look at some of the plants I grow, and that I used to commemorate Daffy and celebrate her life.
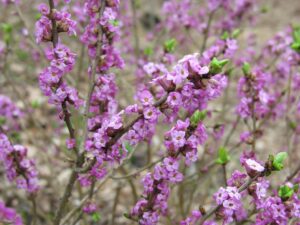
Of course I cut branches of her namesake,
Daphne mezereum or February Daphne. It is a fabulous shrub that blooms in May here in Cornish Flat, displaying pinky-purple fragrant flowers in abundance. It is slow-growing, so easy to maintain. No need to do much pruning – other than stems I cut to force in a vase each year in April.
And I put in her grave a couple of stems from a Harry Lauder’s walking stick shrub. A walking stick seems fitting for a dog that had trouble walking. It’s a curly hazelnut that would not really be good as a walking stick – there are no straight bits. Mine is a variety called ‘Red Majestic’ of the European filbert
(Corylus avellana).
In the spring the leaves are a deep red-purple but develop a greenish tinge as the summer progresses. I have mine in a flower bed, and have been able to keep it to a 6-foot wide and tall tree by annual pruning.
And I sent Daffy off with diamonds. ‘Pink Diamond’, that is. It’s a lovely variety of Hydrangea paniculata. I bought one that is a “standard”, meaning that it came with a straight trunk that had branches grafted on at the 4-foot high level. So it started out as a shrub with some height, and never suffered from the awkwardness common to many hydrangeas that start as multi-stemmed shrubs.
At the bottom of Daffy’s grave I placed boughs from a Canadian hemlock (Tsuga canadensis). This is a native evergreen tree that grows well in sun or shade. In 1972 I dug up several growing wild in a field nearby and planted them as a hedge. They are now 50 feet tall or so. My late sister, Ruth Anne, lived in Canada and loved Daffy fiercely, calling her “the dog of joy”. So these boughs commemorated them both. I no longer promote planting hemlocks because an insect pest, the wooly adelgid, is decimating them – though thankfully not in my area, as yet.
Of the woody plants, the last I placed in Daffy’s grave was a stem from my Bartlett pear. Daffy, always hungry, would gorge on the pears that fell on the ground beneath this tree, so it seemed fitting to put a branch in.
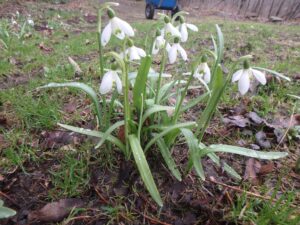
Snowdrops bloom in March and always delight me when they do
I cut fresh perennial flowers for Daphne’s grave, too. Phlox have been gorgeous this year, disease-free and fragrant. Daffy is the only dog I’ve had who noticed flowers. I have a picture of her checking out a vase of tulips. But phlox is in all its glory in sunny beds, so I cut some.
Daffy had a sunny disposition, even at the end when she was in pain, so I included a sunflower. Like Daphne, it was a short one, perhaps ‘Teddy Bear’. There are so many great sunflowers out there, many short and with multiple flowers branching off the main stem. They are easily started from seed. Chipmunks love them when they are just starting, so I grow them in 6-packs until they are tall enough to ignore the rodents. Deer love sunflowers, too, however, when they get bigger.
And roses went in the grave, too. My favorites are the ‘Knockout’ roses. Perhaps because they are not fragrant, they don’t seem to be attractive to the Japanese beetles that can plague old fashioned roses. They are fast-growing, and can reach a height of 4 feet in a couple of months even if all above-ground stems died over the winter. The one I selected for Daffy has had 25 blossoms most of the time this summer.
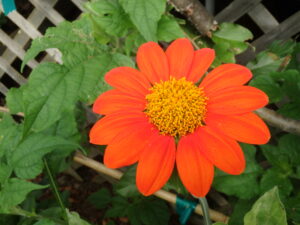
This tithonia blossom is about 2 inches wide on a 6 foot tall plant with many blossoms
Then we added some Shasta daisies, those wonderful, cheerful flowers with white petals around a central yellow button. My patch of those gets a bit bigger each year in full sun. And Mexican sunflowers (Tithonia rotundifolia), a 6-foot tall orange annual in the daisy or sunflower family. We start lots of these by seed each year, and I am always delighted by the results.
I suppose there were other flowers we picked for Daphne’s last day, though it’s all a bit of a blur. I do know that flowers always lift my spirits, and certainly they needed some lifting that day. But I’m doing better now, and being in the garden has helped. Later this fall I will plant bulbs on her grave – snowdrops. They are the first flowers to bloom in spring, and always bring me joy. And after all, she was the Dog of Joy.
Glorious Hydrangeas Are in Full Beauty Now
Posted on Monday, August 24, 2020 · Leave a Comment
When I was a boy, I always took note of cemeteries as we drove by them. I’d lost a beloved grandfather, the original Henry Homeyer, and my mother’s mom. I was taken with a shrub or small tree in cemeteries that I called either “the snowball bush” or the “cemetery bush”.
Back in the day what I now call the PeeGee Hydrangea
(Hydrangea paniculata ‘Grandiflora’) was present in every cemetery. They bloom for months, require no work other than planting, and will grow anywhere. Now there are dozens of species and varieties of Hydrangeas, offering a great choice for small gardens – these never get huge, like a maple or an elm.

My PeeGee hydrangea after 25 years
In the nursery trade the PeeGee hydrangea has fallen out of favor, mostly. Now ‘Limelight’, ‘Pinky Winky’ and others with jazzy names and bigger flowers are more popular. But I love my PeeGee that I planted some 25 years ago. It is blooming with over a hundred large white flowers now. It’s about 9 feet wide and 8-feet tall. Like most hydrangeas, if I wait until just before frost and cut some flower stems to put in a dry vase, they will look good all winter – and longer.
Most hydrangeas like full sun or part shade, good soil, and adequate moisture. Some, like the panicle hydrangeas, bloom on new wood, while others – those that bloom early in the summer – bloom on buds developed the summer before, also called “old wood”.
The blue hydrangeas (H. macrophylla or big leaf hydrangeas) generally bloom on old wood, and for those of us in the northern part of New England, that is unfortunate. Our tough winters ruin the flower buds, so the plants don’t bloom in June as desired. Nurseries in the south grow them, ship them to us in full bloom, but after Year One we are lucky to get three blossoms in September. Period.
Then along came ‘Endless Summer’, a bigleaf hydrangea that promised to bloom all summer long. I tried it, and called it Endless Disappointment. It died back in the winter, grew, but rarely flowered. Newer varieties are out there, and may be tougher, but in Zone 3 or 4, I say buy them in bloom and use as annuals. Not only that, blue hydrangeas produce pink or insipid colors if the soil pH is not acidic enough. ‘Nuff said.
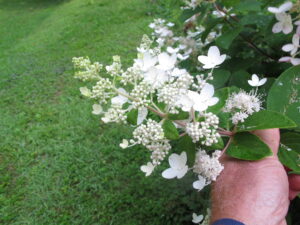
Pink Diamond blossoms are well spaced and not as heavy as many others
I like my ‘Pink Diamond’, a panicle hydrangea with strong stems and fewer florets per flower head than the PeeGee. That means it doesn’t get weighed down by rain, and droop to the ground like many other hydrangeas. It starts out white, then gradually turns pink. It is an excellent cut flower, too.
What about shade-growing hydrangeas? There are two nice ones. H. arborescens ‘Grandiflora’, also known as ‘Hills of Snow’ does well in shade. Its pompoms are much smaller than those of Annabelle, another of the same species, so it does not flop much after a rain. I like it better. It gets to be 5 or 6 feet tall and wide if left to its own, but many people cut it to the ground in late winter. The vigorous new growth will be shorter, and the pruning invigorates the plant.
My PeeGee hydrangea after 25 years
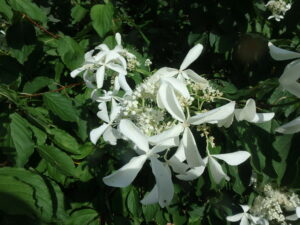
My favorite shade hydrangea is the climbing hydrangea (H. anomala ssp. petiolaris). This tough vine will grow on the north side of a wall and can attach itself to brick or stone. It is slow-growing when young, but after 5 years or so becomes quite vigorous. I attached the stems of mine to the side of my barn when young, but later the stems slipped through cracks in the barn and hold on. Mine has even bloomed inside the barn!
Climbing hydrangea has showy white, sterile, petals on the outer rim of each flower panicle, and less showy, fertile flowers in the center. It blooms in June and the white petals stay white all year, so the flowers always look good. The vines have shaggy, exfoliating bark which is interesting in winter, too.
I recently attended a Hydrangea Walk at the home of Chris Wilson of Newbury, Vermont. Chris is a nursery professional, having worked at EC Brown Nursery in Thetford, VT for over 35 years. Chris collects hydrangeas, lilacs and daffodils and opens his gardens 3 times a year to view them. This time, we all wore masks and practiced social distancing. We didn’t want, as Chris said, “to die to see a hydrangea.” Chris has at least a couple of dozen different kinds of hydrangeas – and a good sense of humor.
Hydrangea Great Star
Chris had two hydrangeas I had not ever seen before that I like. The first, called “Great Star’ (H. paniculata ‘Great Star’) was first discovered in the gardens of Princess Greta Sturdza in Varengeville Sur Mer, Normandy, France. It appeared as a naturally occurring branch mutation of an unnamed seedling of Hydrangea paniculata. It has very prominent wide, strap-like sterile florets that are star-like. I hope to find a specimen and plant it in my garden.
The other hydrangea I saw there is another that does well in shade, H. paniculata ‘White Moth”. Chris had it tucked in near a large tree, and it was blooming nicely.
Don’t have a Hydrangea? I highly recommend them. Most have blossoms now, when most flowering trees are done for the year. So go to your local family-run garden center and see what they have. I bet you’ll find something you like.
Henry is a UNH Master Gardener, the author or 4 gardening books and a gardening consultant. Reach him at
henry.homeyer@comcast.net.
Re-Wilding Your Lawn
Posted on Tuesday, August 18, 2020 · Leave a Comment
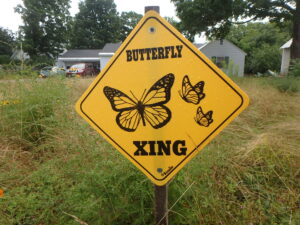
A sign like this lets neighbors know you are not lazy, but letting the lawn grow for a reason
Tired of mowing your lawn, but afraid to stop? What would it look like, and what would the neighbors say? I was on a panel discussing “re-wilding” the lawn on New Hampshire Public Radio recently. Here are a few of the points we discussed.
First, a lawn is the easiest, least time-consuming way to maintain your property. If you want a meadow of flowers for birds, bees and pollinators of all kinds, lots of work is involved. You can’t just quit mowing, or rototill the lawn and broadcast some wildflower seeds, and then step back to enjoy. You would get some nice flowers, but your yard would also fill up with weeds – and invasive trees.
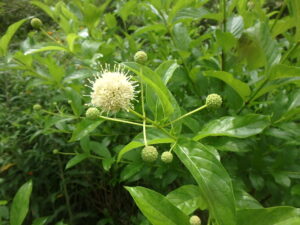
Buttonbush flower
My advice? Start small. A little corner of the yard, say something 4 feet wide and 15 feet long would be a good start. Decide how much time you can commit to it, and how often you want to work in the garden. Can you dedicate half an hour each morning before work? An hour after work? Good gardens are built by people who do something in the garden every day.
Get a soil test done. New Hampshire and Rhode Island have stopped doing tests, Vermont will do them for Vermonters, and Maine, Massachusetts and Connecticut accept samples from out of state. Get a home gardener test with as much info as possible.
Next, you have to remove the grass. That means slicing through the lawn to create one-foot by one-foot squares that you can remove and take away to your (new?) compost pile. Don’t try to do it all at once, do a little at a time.
Do your homework. Read books and go on-line to see what will work in your yard. Do you have full sun (6 hours or more each day), part sun, or shade? Is your site hot and dry or cool and moist? Select flowers that will work in your climatic zone, and get a variety of bloom times: some for spring, others for early summer, late summer and fall.
Improve your soil. All soil can be improved with compost. Buy it by the truckload, not the bag. Get it delivered if you don’t have a truck. Work the compost into the soil after the grass is removed.
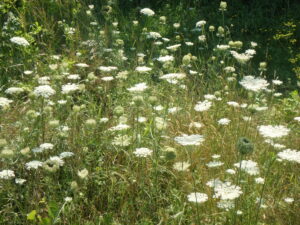
Queen Anne’s Lace is loved by bees and other pollinators
If you want to support butterflies, birds and bees, think native plants. Native plants are those that co-evolved with the wildlife. And let wildflowers be part of the mix. Right now Queen Anne’s lace is in bloom along the roadside. It’s a biennial in the carrot family and is loved by the bees. Learn to recognize the small first year plants, dig up a few and plant them. Once established, the flowers will drop seeds each year.
But what about the neighbors? One of the panelists had done a study in Springfield, MA. She asked homeowners to mow their lawn either weekly, every two weeks, or every three weeks. So that the neighbors would be more understanding, they put signs in the yards telling others that they were part of a scientific study.
They counted insects and found a two-week schedule for mowing was best for bees and pollinators: clover and dandelions had time to bloom, and to provide food without being hidden in tall grass.
To create a sustainable non-lawn, you need to introduce not only those tall, bright flowers like black-eyed Susans and purple coneflower, but groundcovers that will fill in between plants.
One of the panelists, Thomas Rainer, is the co-author with Claudia West of the book, “Planting in the Post-Wild World: Designing Plant Communities for Resilient Landscapes.” In their book they explain that in nature there are plant communities: plants that need roughly the same soil and light, and that co-exist nicely. If you want a balanced plant community, you need a diverse, supportive collection of plants, including groundcovers.
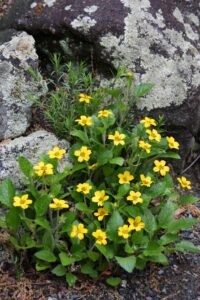
Chrysogonum virginianum is a nice groundcover
Groundcovers can act a bit like mulch: they can prevent soil erosion and suppress weeds. It is often tough to find good native groundcovers like groundsel (Packera obovata) or goldenstar ( Chrysogonum virginianum) for sale, but they are available if you look hard enough. Winecup (Callirhoe involucrata) is a good groundcover for hot dry, sunny places, and is often available. Oregano and thyme can be used as an understory groundcover that bees love, and they are readily available.
And Creeping Charlie (Glechoma hederacea)? It’s that “weed” hated by lawn-lovers because it can “spoil” a nice lawn and spread like crazy in part shade. But it is a native plant with nice flowers and is loved by bees. Think about letting it proliferate in your “non-lawn”.
Lastly, if you want a landscape that is beautiful and low maintenance, think about planting trees and shrubs. Many bloom nicely and all are useful to wildlife. Some native shrubs that I grow and love are fothergilla (Fothergilla major), blueberries, elderberry, buttonbush (Cephalanthus occidentalis) and our native rhododendron and azalea.
If you stop mowing the grass and want flowers, put up a sign. I recently saw one that was very simple: it said “Butterfly Crossing.” Hopefully that appeased the neighbors a little.
Henry is the author of 4 gardening books, and a frequent speaker at garden clubs and libraries, even now, using Zoom or at outdoor venues. Contact him at
henry.homeyer@comcast.net.
Three Plants to Avoid
Posted on Tuesday, August 18, 2020 · Leave a Comment
Three plants you don’t want on your property are wild parsnips, purple loosestrife, and Norway maples. The first causes severe skin reactions in many people, the second can take over our wetlands, and the last can out compete our native sugar maple – and eventually take over our woods.
Wild parsnip is in bloom now. It’s a tall plant, 24 to 60 inches, and has yellow blossoms arranged in flat flower panicles at the top of the stems. It looks a lot like Queen Anne’s lace. It is, genetically, the same plant as garden parsnips, but has escaped and become a weed. Some people are horribly allergic to its sap. Here’s how you and your kids can stay safe.
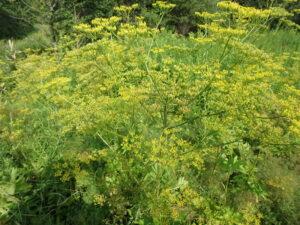
Wild parsnips often grow along the roadside. Many people are easily burned by the sap.
Learn what it looks like, and avoid it. Sap from the stem, if on the skin and exposed to direct sunlight, can cause horrible burns. Not everyone reacts, however. Assume you do. If you get sap on you, go inside IMMEDIATELY and wash the affected area thoroughly.
Wild parsnip has a 2-year cycle. The first year it stays low and develops a deep tap root. The second year it bolts and produces a tall flower stalk. If you have a field of wild parsnip, get it mowed before the flowers set seeds. And re-mowed until it gives up. The sooner you mow it, the less likely the flowers are to produce viable seeds after they are cut down.
First year plants growing now will send up flower stalks next year. And each year, for a while, seeds in the ground will grow new plants. But each year there will be fewer, and eventually they will be gone.
This is the time of year when swampy areas often are ablaze with tall, pink-purple flowers that dominate the wetland. These are the flowers of purple loosestrife ( Lythrum salicaria), an invasive plant that you should not encourage – but that you probably can’t get rid of once established.
But why worry about it? It’s such an aggressive grower that it out-competes native plants. It moves into shallow wetlands where fish and frogs lay their eggs among native plants, creating dense monocultures. Biodiversity is healthy for the environment, and purple loosestrife inhibits many other kinds of plants from growing.
Mature plants develop massive root systems can’t be dug out. They also develop long side-roots that will easily break off and start new plants if you try to remove the clumps.
A big clump can produce up to 2.7 million seeds in a year. And like time-release cold capsules, the seeds become active over time, not all in one year. And since they grow in wetlands, you can’t use herbicides.
If you have big, established plants the best thing to do is cut them down every summer, just above the soil line, preferably more than once. Do it now, and this should prevent them from producing seeds this year. It will also reduce the vigor of the plants. It won’t kill them, but it will keep them from spreading. A string trimmer will do the job, if you have one.
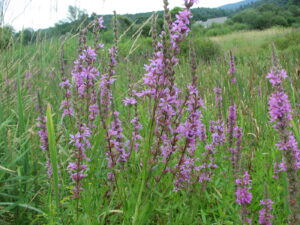
Purple Loosestrife can take over a wetland.004
First or second year plants often show up in my garden near my stream, but can be hand-pulled. Look for plants with a square stem that quickly get 18 to 24 inches tall, and may have a reddish-brown tinge to their stems. Older plants get to be 3 to 7 feet tall or more. Leaves are long and narrow with a smooth edge, and they attach directly to the stalk – without an attachment stem. Leaves generally appear in pairs, across from each other on a stalk. Many flower stems arise from the main stem.
Beetles from Europe have been introduced in some places to eat purple loosestrife, reducing populations by as much as 90%. But those beetles are not available for purchase – at least not yet. So if you have it, cut the plants down. Today!
Lastly, there is the Norway maple, a maple that will thrive anywhere – wet, dry, shady or sunny. It sends roots long distances, sucking up water and soil nutrients. It produces massive numbers of seeds, seeds that blow or wash away and end up in our woods. It can out-compete our native sugar maples, and will. Fortunately, it is now against the law to propagate, sell or transport these bad boys.
White sap oozes from Norway maple leaf stems
The most popular Norway maple is a cultivar called “Crimson King’. It has leaves that are a deep purple – almost black. Many cities and homeowners bought these 50 years ago and installed them. Removing them is difficult and expensive.
Here’s another problem: Crimson King is a hybrid, and its seeds rarely produce trees with that distinctive purple color. So they pass themselves off as sugar maples.
The leaves are a bit bigger and wider than sugar maples, but you can I.D. a Norway maple by picking a leaf. Look at the place where it snapped off: if it oozes a white sap, it is a Norway maple. If you have one, please consider having it removed. Your great grandchildren’s maple syrup depends on it!
Saving the world starts with small steps. If we each do what we can, we can leave the world a better place.
Henry is a longtime Master Gardener and the author of 4 gardening books. Write him at
henry.homeyer@comcast.net or P.O. Box 364, Cornish Flat, NH 03746.
Queen of the Garden: the Tomato
Posted on Tuesday, August 4, 2020 · Leave a Comment
Update 8.18.20
I mention garlic and onions in my sauce, but it has been pointed out to me that sauce with those ingredients needs to be cooked in a pressure cooker at 240 degrees for 10 minutes to avoid botulism.
My mother and grandmother slaved over a hot stove in August and September to can whole tomatoes or to make sauce and store it in jars. I rarely do. Mainly I freeze tomatoes whole. I call them my “red rocks” and store them in zipper bags for use in soups and stews.
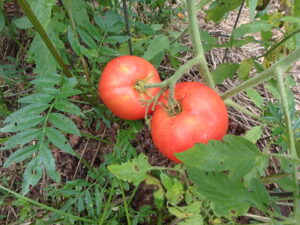
My first slicers are Jet Star and early hybrid
To prepare red rocks I simply rinse them off, allow them to dry, and slip them into gallon freezer-grade plastic bags. I use a straw to suck the air out of the bag after I have the zipper closed 99% of the way. That minimizes frost on the tomatoes in the freezer.
To use frozen tomatoes, I just run hot water from the faucet over them. The skin thaws quickly, and rubs right off. Or I’ll drop a few in a pan of hot water. That helps to thaw the tomatoes and makes them easier to chop up for use. If I freeze cherry tomatoes, I don’t bother removing the skins before cooking with them.
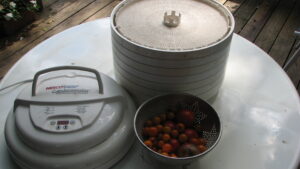
NESCO Dehydrator
I have a couple of food dehydrators that I use to dry tomatoes, too. The Cadillac of dehydrators is the Excalibur. Mine is a $300 deluxe model that blows hot air sideways equally over all 9 trays. My other is the NESCO American Harvester, a serviceable machine that pushes air up or down through a stack of trays.
The downside to the NESCO model is that you must rotate the trays to get equal drying. And it uses 1000 watts of energy per hour, while the Excalibur uses only 660 watts. Still, at about $125 for the basic machine, it is more affordable. You can stack up to 30 round 15-inch trays over the fan and heating element, but the more trays you add, the longer it takes to dry all the food. I find about 8 trays is as many as I want to stack.
Most summers I grow 8 to 12 Sun Gold tomato plants, and each is prolific. Most of the fruit I dry in my dehydrators. I cut them in half and dry, cut side up. I store them in zipper bags in the fridge or freezer, and use them in soups and stews. Dried tomatoes can be stored in the pantry, too.
Sometimes I dry plum or slicing tomatoes. I cut them about 3/8 of an inch thick. They tend to stick to the trays, so be sure to buy the special no-stick screens to put on the trays. That makes clean up much easier.

It’s time to plant more lettuce to go with the tomatoes
A sandwich is not really a sandwich, for me, without slices of tomato. One way to save slices of tomato for winter use is to roast them. I do so in the oven at low heat until they are caramelized and soft, not tough and dry. Then I place them in zipper bags and freeze them – but just one layer of tomatoes per bag. When I crave a tomato in my sandwich, I pull out a few slices and heat in my toaster oven until warm. Not a fresh tomato, but better than most sold in the grocery store in January.
I also make tomato paste. Lots of paste. I store it by freezing it in ice cube trays, and then putting it in zipper bags when frozen. No more half-used cans of purchased paste going fuzzy in the fridge for me.
To make paste I use imperfect tomatoes – and I usually have plenty. I cut out the bad spots, then core them. I squeeze the cored tomatoes in the sink, which gets rid of most seeds and lots of juice. Then I quarter them and place in a food processor. I puree them, then add to a large enameled iron pot and cook them slowly for hours. I know they are done when I can literally stand up a spoon in the pot. I let it sit all night, uncovered, to cool and lose some more water. In the morning I spoon the paste in the ice cube trays. When frozen, I empty the trays and put cubes in zipper bags.
Canning tomato sauce the old fashioned way is hard work and takes hours of work. Part of that work is blending the tomatoes and herbs, salt and pepper to get the flavor and consistency just right. In addition to pureed tomatoes I use onions, garlic basil, oregano, parsley and thyme. I cook it for 45 minutes or so, as I like it nice and thick.
But then there is the canning itself. First you have to boil the jars and lids to sterilize them. Once filled with cooked sauce, one needs to boil the sauce in sealed jars to kill botulism, a potentially fatal disease. Forty minutes at a rolling boil is recommended. All in all, making 7 jars of sauce – which is what a canning pot can hold – takes an evening.
The Lazy Guy technique for making sauce is to freeze it, not can it. I have an aversion to using plastic for storing food, but make an exception for tomato sauce. I have quart plastic containers with screw tops, though one can also use zipper bags. Since I have 2 large freezers, I have plenty of space for garden produce.
People raise their eyebrows when I tell them I grow between 35 and 50 tomato plants each year. But since I eat my own stored tomatoes all year, I can barely grow enough of the Queen of the Garden.
Henry lives and gardens in Cornish Flat, NH. He is the author of 4 gardening books, and is a 20-plus-year veteran of the UNH Master Gardener program. Reach him at
henry.homeyer@comcast.net.


 Click Here to buy from Cobrahead