Get Ready to Grow Vegetables This Summer
Posted on Tuesday, April 7, 2020 · Leave a Comment
In uncertain times, one thing is certain: you can always depend on yourself. If you’re worried about having enough food, grow some vegetables that are nearly foolproof. Gardening is not rocket science. Here’s what you need to know:
- All vegetables do best in full sun. The minimum amount of sun is 6 hours, though you can grow herbs and greens in 4 hours.
- Good soil is very important. Yes, heavy clay or sandy soil will produce some veggies, but improving it with compost will improve your results. Buy some, work it in.
- You shouldn’t use any chemicals. Not insecticides, not herbicides, not chemical fertilizers. The fertilizers can be replaced with compost and organic bagged fertilizers that are made with all natural ingredients and minerals. Your plants will do fine without chemicals, and will be healthier for you to eat.
- Adequate moisture is also key. Newly planted seeds or seedlings cannot dry out completely and survive. Later on, when mature tomatoes or beans have roots deep in your soil, they can endure a period of drought. But if they start to wilt, they are in trouble and need a soaking. Visit your garden every day to see how your plants are doing. Buy a hose long enough to reach the garden.
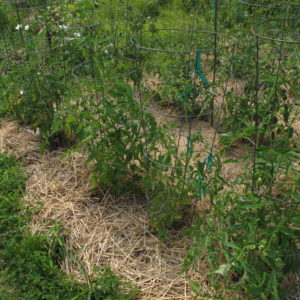
- Weeds are not your friends. They compete for water and soil nutrients, and if big enough, sunshine. For most small gardens, you can keep weeds under control in 10 minutes of weeding – if you do so every day. Mulching will help with both moisture levels and weed control.
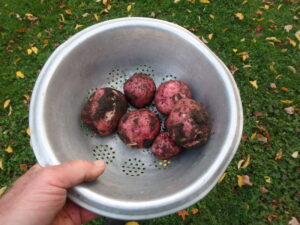
Fresh potatoes from one plant
What should you grow? If you’re worried about having enough food, grow potatoes. So long as you don’t have a swarm of potato beetles eating the leaves, or a blight (like the one that did in the Irish) potatoes are sure winners. They will provide calories better than anything else you can grow, and they store well. I’m still eating mine from 2019.
Next on my list of veggies to grow is kale. It produces a lot of greenery that can be added to any soup, stew or stir fry, adding vitamins A to Z. (Yes, I know, there is no vitamin Z). Unlike lettuce or spinach, kale freezes well. You can pack a lot of kale into a quart zipper bag and put it away for days you can’t to go the store. It’s great in a smoothie, too. I’ve never had a pest or disease on my kale.
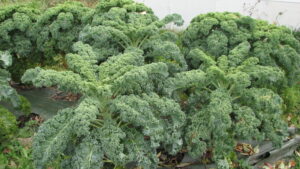
Kale is full of vitamins and is easy to grow
Then there are the winter squash: Blue Hubbard and Waltham butternut will store well for many months – all winter, and into the next season. They can be stored on a shelf in the pantry, or cooked and frozen. Either way, they are nutritious, tasty, and very easy to grow. But they have long vines, and need space. Zucchini for summer eating are great, very productive, and take less space than winter squash.
Tomatoes are more problematic. Yes, every soup or stew I make uses tomatoes. I freeze them whole in zipper bags, I cook them into sauce and paste. But tomatoes get the blight sometimes. They will surely produce some tomatoes, but in terms of a guaranteed crop? Nope. That’s rolling the dice. My suggestion? Grow some cherry or cocktail-sized tomatoes.
The little tomatoes get ripe earlier, and many are quite disease resistant. My favorite is one called ‘Sun Gold’. Defiant is a red medium sized hybrid with good flavor, and high resistance to late blight – but not early blight. I will always plant some heirlooms for flavor – Brandywine and Oxheart are two of my favorites.
Lastly, I recommend planting onions. They are easy to grow, tasty, and keep away scurvy on long ocean voyages, as we learned in grade school. But of course they are inexpensive, and you can buy a 25 or 50 pound sack of them from a farmer. But I like having my own. Buy onion plants if you can get them, or sets (little bulbs) if you cannot. Plant 3 inches apart.
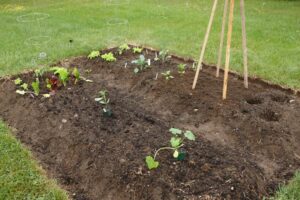
Even a small garden like this produces nice veggies
So how do you actually prepare a garden for planting? Pick a spot in the middle of the lawn. Get rid of the grass in the plot: Use a shovel or a garden fork to dig it out. Shake the roots to save the soil from the roots. This is hard work. Plan on spending half an hour every day digging out sod until the job is done.
You should not just rent a rototiller and chew up the lawn. Tilling won’t kill the grass, just aggravate it. The roots will produce new plants all summer long. So start early. Today, or this weekend. Don’t put it off (unless the soil is soggy).
How much garden do you need? Don’t bite off more than you can chew. A good starter size is a bed is 10 feet by 12 feet. Mound up soil to build two wide beds – 30 to 36 inches wide, with a walkway down the middle and a bare strip along the outside edge of the plot. You will need to improve the soil with composted cow manure as lawns are notoriously devoid of minerals and organic matter.
Here’s what I planted in 10 by 12 bed in the lawn a few years ago: 2 tomato plants with some early lettuce around them. Two peppers, 2 broccoli, 5 potato plants, a tripod of green beans, some carrots and cukes, and one zucchini. But that was a supplement, not subsistence. I’d say you would need 6 beds to produce enough food to make a serious contribution towards feeding a family of two. Let’s hope our farmers and grocers will stay in business!
Planting Bulbs Now for Summer Blooms
Posted on Tuesday, March 31, 2020 · Leave a Comment
If you’re home from work and champing at the bit to DO SOMETHING, planting some bulbs now for summer blossoms might be just your ticket. I recently got some calla lilies and sword lilies and planted them in pots.
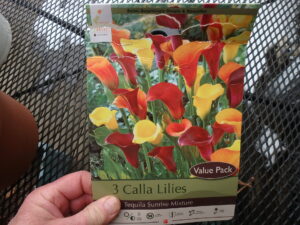
Calla lilies come in various colors and white
Calla lilies ( Zantedeschia aethiopica) come in various colors and sizes. The blossoms are hard to describe: they are often called trumpet shaped, but they aren’t really. Each is an asymmetrical trumpet called a spadix with a yellow spathe inside. The spathe is a narrow, pointed protrusion made of tiny flowers. You’ve seen a spathe if you’ve looked inside a Jack-in-the-pulpit.
Grocery stores often sell pots of short callas with pink blossoms, or taller white ones. These beauties are not true lilies at all, but members of the Arum family which includes Jack-in-the-Pulpit, skunk cabbage and the house plants Dieffenbachia and Philodendron.
Calla lilies are perennial in warm climates, but, like dahlias and gladiolas, must be dug and brought inside before the winter here. They are relatively inexpensive. I paid $12.99 for 3 big rhizomes (a bulb-like modified stem) at Gardeners Supply (www.gardeners.com). Now is the time to start some calla rhizomes indoors.
The calla rhizomes I planted were, at first, mysterious. Unlike daffodils or tulips, there was no obvious top or bottom. No pointy end to go up. But I did a little research and found that the smooth, rounded side goes down and the gnarly side (covered with little bumps and protrusions) goes up. They should be planted 3 to 5 inches deep, and given a square foot of soil surface for 3 bulbs.
I planted 3 calla lily bulbs in an 11-inch pot, which is a little crowded according to the recommendation on the package. Others I planted solo in 6-inch pots. In either case, it’s important to have good deep pots full of rich potting mix. I had saved plenty of last year’s potting soil at the end of the season, and I mixed it with equal quantities of composted cow manure and added a tablespoon of organic fertilizer. Later I will occasionally add some fish and seaweed fertilizer to the water I give my calla lilies.
Everything I read indicates that calla lilies like rich soil and plenty of moisture. That contradicts what I have seen: in Portugal I saw wild calla lilies growing in dry places with poor soil – including right alongside railroad tracks. What is certain is that they do best with plenty of sunshine, six hours or more per day.
One of my favorite summer bulb plants is called a variety of common names: peacock orchid, sword lily, or fragrant gladiolus (even though this plant is not an orchid, a lily or a gladiolus). That’s why I like Latin names. If you ask for Acidanthera murielae, plant-knowledgeable people around the world will know what you mean. But for now, I’ll refer to it as sword lily.
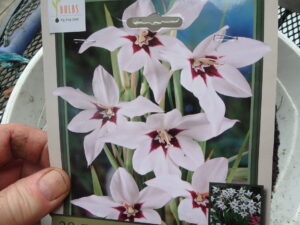
Sword lilies are easy to grow and very fragrant
The sword lily has long, narrow leaves – like swords- that stand 18 inches or more tall. The blossoms are white with deep purple markings in the center of the 6-petaled flower, along with a little yellow at the very center. You get 2 or 3 blossoms per stem, and they are enticingly fragrant, particularly in the evening.
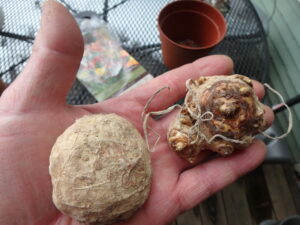
The smooth side of a calla lily goes down
Like the calla lily, sword lilies are tropical so we can grow them here, but they won’t overwinter outdoors. But the corms (bulbs) will survive in a 60 degree location all winter, and you can re-plant them next year. I have planted them in the ground, but favor them in pots because they are so fragrant, they are wonderful on the deck.
According to the directions, you can plant a dozen bulbs in a square foot of soil. So I planted a dozen in 12-inch pot, each bulb 3 to 4 inches deep. You can plant them directly in the soil, of course, but I like starting the early for a mid-summer bloom instead of a fall bloom.
Other summer bulbs include gladiolous, crocosmia, ranunculus and best of all, elephant ear. Those are all delightful plants, each with its own requirements and benefits. All need plenty of sun and to be brought inside before winter.
But in the space remaining, let me say that in Cameroon, West Africa where I spent nearly 4 years as a young man with the Peace Corps, elephant ear was a food staple. There it was called cocoyam, and it was the corm, or bulb, that was boiled, pounded and served as a main dish with a spicy sauce, and perhaps a little meat.
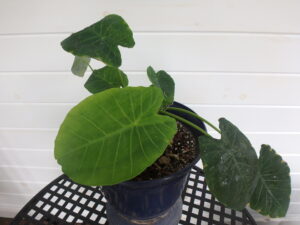
This elephant ear plant should get huge this summer
Elephant ear leaves get huge – three feet long and half as wide. The leaves are also edible, and substituted for the non-existing Tupperware container in Cameroon. Just wrap your lunch in a leaf, tie it up, and go off to the fields. They produce no noticeable flower.
Because of my long association with elephant ear, I often grow it. It likes full sun and wet soil, or at least moist soil. I have grown it in the ground, but mostly grow it in a pot. I have had one all winter, indoors. I had cut it back in the fall, and thought it might stay dormant, but it has been growing in a west-facing window, though the leaves are very small now. You can order corms and plant them now. Each bulb can weigh a pound or more.
So if you are suffering from cabin fever, get some summer-blooming bulbs, a bag of potting soil, and get going. It’ll give you something to look forward to!
You may reach Henry by e-mail at henry.homeyer@comcast.net. He is a UNH Master Gardener and the author of 4 gardening books.
It’s Time to Prune Your Fruit Trees
Posted on Tuesday, March 24, 2020 · Leave a Comment
We are lucky this March: no deep snow to keep us from approaching our fruit trees, ladder and clippers in hand. Some years we still have thigh-deep snow in March, which is the traditional time to prune our apples, pears, peaches and more.
There is nothing magical about March as a time for pruning your fruit trees: you can prune anytime of the year without harming your trees. After the buds open up in late spring they are more easily knocked off, but that is not usually an issue for home gardeners – we have more fruit buds than needed. I think March is the time when, traditionally, farmers were less busy – so they pruned apples.
I recently took a good look at the fruit trees on my property. I have 2 pear trees and numerous apples, both crabapples and standard apples. Since I prune yearly, my trees are in pretty good shape.

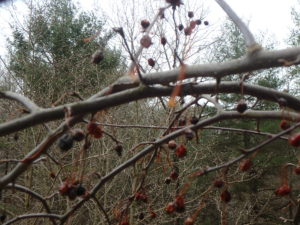
Water sprouts need to be removed yearly
The key to good tree health and production is to allow every leaf on the trees to get sunshine. Shaded leaves don’t do much to produce food for roots or fruit, and those leaves also shade others. I like to say a robin should be able to fly through a fruit tree without getting hurt.
It’s important to recognize the basic nature of each tree. Most pears, for example want to grow tall and lean. However, picking pears on a tall tree is difficult, and you can reduce the height of a pear without damaging it. I have been known to lop off the top 10 feet of a pear tree without adverse results. Yes, the tree did try to send up lots of suckers, or vertical shoots, to replace the portion I removed, but they are easy to snip off each year.
How much can you prune from a tree each year? In the past experts said, up to one third of a tree. Nowadays, experts advise removing not more than a quarter of a tree. How do you calculate that? Leave your trimmings in a pile on the ground as you work. Then you can see how much you’ve taken. Try to calculate the percentage of leaves taken off. A one-inch diameter branch that is 6 feet long has lots of leaves, but a 6-inch diameter branch may have few.
Dead wood does not count in the calculation of how much you can remove. Even now, before leaf-out, you can recognize a dead branch easily: the bark is dry and flaky. If you take your thumb nail and scratch a small twig on a branch, it should show green. If not, it is dead and should be removed.
It’s important to know where to make your cuts. You should leave the “branch collar” on the tree. That’s the swollen and wrinkly part of a branch right where it attaches to the tree or a larger branch. It’s where the tree heals itself. Don’t cut flush to the trunk or a larger branch.
Crossing or rubbing branches need to be removed
Here is what you should remove: 1. Branches that are headed back into the tree or going through the middle of the tree. 2. Branches that are damaged, cracked or split. 3. Branches that are competing for light with another branch – either below it or above it. 4. If two branches that are rubbing, remove one. 5. Those pencil-thin “water sprouts” that shoot straight up.
A few words about water sprouts. These are numerous on some fruit trees, less so on others. If you have a nice open tree that gets good sunshine on all its leaves, the tree is less likely to produce many of those pesky sprouts. They are often a stress response – they may be indicating the roots are not getting enough food, so the tree responds by producing more leaves. So leave a few sprouts if you have many, but also work on training branches to reach out, away from the center of the tree to get more sun.
Fruit Spurs are Short
Where is fruit produced? Most fruit trees produce “fruit spurs” that blossom and also produce leaves. These spurs range in length from 2 inches to 6 inches. For apples, a fruit spur will not produce fruit the first year it grows, only in subsequent years. Most spurs are produced on branches that are on branches that are 30- to 60-degrees from vertical. So those vertical water sprouts will not produce fruit.
You can change the angle of a branch by tying it down, spreading it with a piece of wood or even weighing down a branch with a jar of water. Hang the jar (or 1-quart plastic milk jug) and add water until the mostly vertical branch bends down to a better angle. Remove the jar in mid-June and it should stay in place.
Some fruit trees produce lots of shoots around the base of the tree. Those are an unsightly nuisance, and should be cut right to the ground. Since most fruit trees are grafted to root stock, those shoots are not the same variety as the tree itself.
Later on, if you get a huge number of blossoms, you will need to thin out some of the fruit in early summer. If you don’t do that, your fruits will be small – no matter how nicely pruned your tree might be.
So get out your pruners and saw, and spend a sunny afternoon working on your fruit trees. Not only will your trees do better, you will, too.
How to Make a Spring Wreath
Posted on Tuesday, March 17, 2020 · Leave a Comment
The world seems to be in turmoil. Recent news is disconcerting at best. But I stay cheerful, and you can too, by being creative and/or by enjoying the outdoors. Being outside always perks me up. I love looking at my snowdrops, winter aconite and crocus. For creativity, I recently went out to collect materials for a spring wreath, then made one. I’m happy every time I look at it.
The wreath I made recently uses material from just 3 plants, though others can also be used. Here is what you need:
Several lengths of freshly cut grape vines, each piece 5 to 15 feet long and a quarter to a half an inch in diameter. Thicker vines are hard to work with. It is important to use living, not dead, vines; those I cut were a greenish white inside and flexible, so I knew they were alive. Dead vines are brittle and not suitable.
About 50 stems of red-twigged dogwood. Young stems 18 to 24 inches long with bright color are best. Branching stems are good, too.
About 25 stems of pussywillow. If the gray “pussies” are not fully open, place the stems in a vase in a warm place for a day to two and they will open up, getting fuzzier.
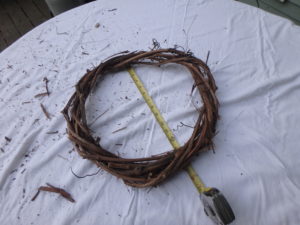
Wreath base ready for twigs
Begin by forming a vine circle 14 to 16 inches in diameter by overlapping (or twisting) one half of the vine over the other half – the same way you would start tying your shoelaces. Then grasp one of the sections of vine and weave it around the vine circle in loops, over and under, pulling it tight as you go. After each piece of vine is in place, squeeze the circle to make it a nice circle.
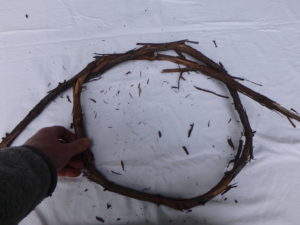
When you run out of vine, tuck the end into the circle and repeat the maneuver with the other part of the vine. Then use shorter, thinner pieces of vine – say 6 to 8 feet long and pencil-thick – and weave them around the wreath base until you have a circle about 2 inches thick.
The great thing about this grapevine wreath is that you don’t have to tie the decorative stems with wire, the way you do an evergreen Christmas wreath. You can just slide stems of pussywillows in between the vines and natural tension will hold them in place. In fact, I had to use a screwdriver to lift the vines at times in order to slide the stems in place.
Finished wreath looks great on a wall
I went around first with the red dogwood stems, poking them into the grape vine wreath every couple or inches, and almost parallel to the grape vines (not perpendicular). I wanted about 12 inches of stem coming out of the wreath and 6 inches woven into the grape vines and other stems. Both willows and dogwoods are flexible and easy to work with. I snipped the ends to a point with pruners to make it easier to insert them between the vines.
Then I added stems of pussywillow, poking them into open spaces in the grapevines, or using a screwdriver to open a space for my stems. When it was nearly done I hung the wreath up where I could work on it and was better able to see where there were gaps that needed twigs, and added a few more.
Where can you source the material for your wreath? If you don’t grow domestic grapes, look in your woods. Wild grapes climb trees in hardwood forests. You can pull them down and cut them up without guilt – they can choke out nice trees if they get big enough.
Red-twigged dogwood grows wild, often along roadside ditches and wet places. If the town road crew mows them down in mid-summer, they will be perfect – young and bright red. Older stems are a grayish red, and not as interesting.
I use a cut-and-hold pole pruner for collecting anything that grows in a swamp (dogwoods, pussywillows and later, winterberry). The pruner will grab the stem at the same time it cuts it, so I don’t get wet retrieving the stems (and even the most obedient Labrador retriever will not bring the stems to you). I got mine from The Wildflower Seed & Tool Company (
www.wildflower-seed.com or 800-456-3359).
Everyone should grow pussywillows. They are good for the soul at this time of year. The type I used in my wreath is called Japanese fantail or dragon willow, Salix udensis ’Sekka’. It is hardy to Zone 4, surviving temperatures as low as minus 30 degrees. It, and 150 other varieties, are available from Vermont Willow Nursery (https://www.willowsvermont.com). By the way, the nursery is for sale, along with 50 acres and a farm house, if you’re interested.
Fantail willow grows to be 10 to 15 feet tall and wide. They are fast-growing and I’ve read that, like most willows, they are weak-wooded and prone to breakage. I have not had any breakage on mine, however. The bark is a nice reddish-brown and quite handsome. They produce huge numbers of those fuzzy blossoms we love.
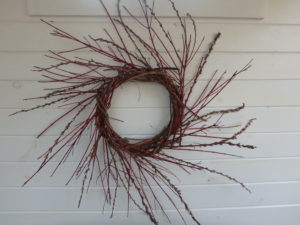
Finished wreath looks great on a wall
My finished wreath was about 36 inches in diameter, for placement on a wall, not a door. If you want a wreath for the door, you should use shorter stems. So go pick materials for a wreath. They’re quite easy to make, and sweet to the eye.
Henry has been a UNH Master Gardener for over 20 years, and is the author of 4 gardening books. Reach him at P.O. Box 364, Cornish Flat, NH 03746.
A Naturalistic Approach to Landscaping
Posted on Tuesday, March 10, 2020 · Leave a Comment
I recently attended a lecture and slide show by Dan Jaffe, horticulturalist at Norcross Wildlife Sanctuary in Wales, Massachusetts. Dan Jaffe is a talented and passionate gardener who single handedly maintains 75 acres of woodland, meadow and bog garden.
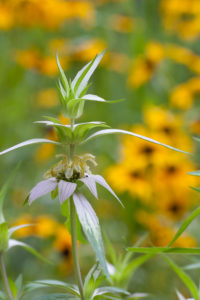
Monarda punctuata Photo by Dan Jaffe
Although building self-sustaining gardens on 75 acres sounds like a lot for one man to do, he does this by working with nature instead of trying to mold nature to fit his will. I’d like to share some of his ideas, as they make sense to me.
Dan Jaffe started by listing problems to avoid. First, he said, avoid over-spacing what you plant. If a plant tag suggests planting 24 inches apart, divide that by two or three (8 to 12 inches apart) to get a mature look in less time. Avoid bark mulch as much as possible – use spreading ground covers like running foam flower or woodland phlox that will fill in quickly but not over-run other plants.
Pruning plants to limit size and thin out excess growth is good, but pruning shrubs into “meatballs and rocket ships” is bad. Limit lawn in a landscape. Don’t think of all insects as pests: your native plants, in particular, are important food for the larvae of pollinators (which are, in turn, good food for baby birds). Don’t rake up the leaf litter in fall – it is home to many beneficial insects. Let short-lived perennials (like columbine) set and drop seeds so they can replenish themselves.
A key feature of a successful naturalistic garden is choosing the right plant for the right place. Start by getting a soil test done before you begin. And look at what is growing at your site before you choose plants – they can tell you much, if you pay attention to them.
If the soil is poor, choose plants that do well in low-nutrient soils. It is difficult to make a sun-loving plant that needs plenty of moisture thrive if you plant it in dry, sandy soil. After the first season you should not have to water or fertilize your plants if you have selected them well.
So, for example, if you want bee balm and have dry, sandy soil, choose spotted bee balm – Monarda punctata- instead of Monarda didyma, the most commonly sold variety. Yes, the latter is sold everywhere, but it needs rich, moist soil. It’s true that the common variety comes in several nice colors and the spotted bee balm does not, but if you want a low-maintenance garden, pick the right plant for the place.
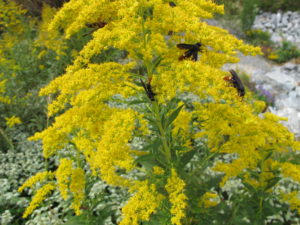
Native pollinators love goldenrod
Learn that any given genus (a scientific grouping of biologically similar plants) has numerous species. Goldenrod (genus Solidago) has 53 species that grow in New England. Granted, some get very tall and spread by root quite aggressively. But there are other species that are clumping, not running in habit and all support pollinators very well. According to Dan Jaffe, goldenrods support 115 species of pollinators in our area.
Wreath goldenrod (Solidago caesia) is a delicate-looking species that I grow and love. It grows in shade or part shade and blossoms in the fall. I bought mine at The Garden in the Woods, a non-profit garden in Framingham, Massachusetts that sells many species of native plants.

Another plant that Dan Jaffe likes is one that I like, too, goldenstar (
Chrysogonum virginianum). It will grow in sun or shade and does well anywhere except soggy soils. Two great aspects of the plant are that it spreads politely and re-blooms often. The best blossoms are in spring. It spreads by rhizome, and can serve as a good groundcover with bright yellow star-shaped blossoms an inch or so across. The foliage is handsome, and low-growing. Dan stated that it is easy to make cuttings that will grow if a node is buried directly in the soil. Technically a Zone 5 plant, I have grown it in cold Zone 4 locations.
Shrubs are good in a natural garden, too. One that Dan Jaffe likes is fragrant sumac (Rhus aromatica). A related species, staghorn sumac (Rhus typina) is well known as a roadside plant 10 to 15 feet tall that spreads vigorously by root and can be a pest. But this one is shorter and better behaved. Although its blossoms are not showy, the fall foliage is excellent and the leaves are fragrant. It will grow in 3 to 6 feet tall and spreads, so it can be used as a groundcover.
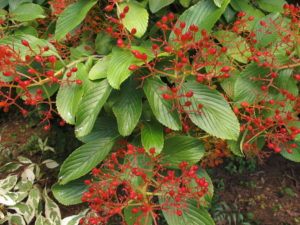
Most Viburnums are nice shrubs that offer flowers and berries.
Another shrub for tough dry and shady locations is mapleleaf viburnum (Viburnum acerifolium). Apparently it has fabulous fall color, from reds to deep purple. It is only 4 to 5 feet tall at maturity. It has nice white flowers in the spring and shiny black fruit in the fall. It is very tolerant to cold, good to Zone 3.
Dan Jaffe did not tell us all to get rid of our lawns. He understands that lawns are nice for kids to play on, and are soothing to look at. But a big lawn is not the best way to support birds or pollinators. Native plants are.
Dan Jaffe and Mark Richardson wrote a wonderful book in 2018 called
Native Plants for New England (Globe Pequot Press) which I highly recommend. It includes nice photographs and good growing information on trees, shrubs and wildflowers you might want to consider for your landscape. His website is
www.dantjaffe.com.
Henry is the author of 4 gardening books. He is available to speak to your garden club or other group. His e-mail is
henry.homeyer@comcast.net.
Pushing the Envelope: Bring on Spring!
Posted on Tuesday, March 3, 2020 · Leave a Comment

Snowdrops are the first flowers to bloom for me
On February 24 this year I went to my vegetable garden with a snow shovel. It was a warm, sunny day, and I was ready for spring. Now people say that old timers like me are more patient than young whipper-snappers, but I’m not sure that’s true. We have less time left on the planet, so some of us want lettuce and spinach from the garden sooner.
Obviously I knew that I couldn’t just shovel snow and plant. But I have a nice cold frame, and I wanted to set it on the soil and allow it to melt ice and snow, and get the soil warming up on sunny days for late March planting. I shoveled off about a foot of snow, and put the cold frame in place. An hour later my thermometer inside read 70 degrees!
My cold frame is one I got from Gardeners Supply. It is 8 feet long, 2 feet wide and is made of cedar planks with a polycarbonate lid that is set on an angle. The lid is hinged and can be left up on a stick to vent some heat on a sunny day, or it can be completely opened in summer.
My grandfather always had cold frames to extend the seasons, and he built his own out of planks and old storm windows. I’ve done that, too, but this light-weight and sturdy cold frame was quick and easy to assemble and to store in my barn after use.
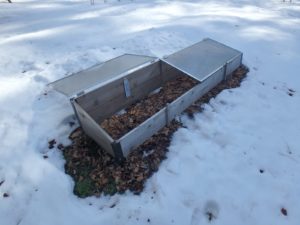
This simple cold frame from Gardener’s Supply can be assembled in an hour
The slanted top should face south or east for maximum solar gain. The cedar panel at the front of mine is 8 inches tall, the back is 15 inches tall. That allows morning sun to get in through the slanted top.
I’ve also used my cold frame as a hot box. A hot box is a growing space that is heated by fermenting horse manure. When using the frame as a hot box, I dig a pit 18 inches deep the size of my cold frame and line the hole with 2-inch thick pieces of Styrofoam insulation. That keeps the cold soil from cooling down the manure so much that it stops fermenting. It is important to get horse manure that is from a pile that is already hot and fermenting. Too much sawdust or straw will inhibit fermenting.
Once the pit is insulated, I fill it with a 12-inch layer of fermenting horse manure in the bottom and then 6-inches of topsoil. I find that seeds planted in the soil germinate quite quickly due to the heat. Most seeds will not germinate in cool soil and germinate quickly in warm soil.
If you use a cold frame, I recommend planting cold tolerant plants. A cold frame will not protect tomatoes, peppers, or other frost-sensitive, heat-loving plants in early spring. Spinach, lettuce, mache (also called miner’s lettuce), cabbage and kale are good choices.
When selecting lettuce seeds for planting, look for ones that are recommended for early season planting. Johnny’s Selected Seeds lists 7 named varieties of lettuce for early season use including Vulcan (a red leaf) and Sparx (a Romaine). Fedco Seed Coop recommends Black Seeded Simpson as the earliest and most popular of the loose-leaf varieties, and I agree that it is a very good one, and very cold tolerant. Read your seed catalog carefully when selecting early season varieties.
Another layer of protection at night is good for plants growing in cold frames in late March or early April. If the temperatures are said to be dropping into the low twenties, you should cover your plants with a layer of row cover or Reemay.
Row cover is a thin synthetic agricultural fabric that will hold in some heat at night. It is also used to keep insects off plants like cucumbers later in the season. Sunshine will pass through row cover, and it allows plants to breathe, so you don’t have to remove it every day if there is a week of cold weather. It does keep a little of the suns UV rays from reaching the plants, but the transmission rate is usually on the package. (The lower the number, the less UV rays reach the plants, but the more it holds heat).
If you are tired of winter but not ready to commit to a cold frame, there other activities for pushing the season forward. You can cut stems of early blooming plants like forsythia, February daphne ( Daphne mezereum) and pussy willows and bring them indoors. Place them in water and put the vase on a sunny window sill. In a week or two you will be rewarded with blossoms.
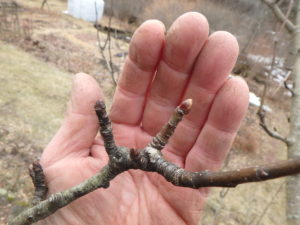
Other blooming trees suitable for forcing are magnolias and apples. Not every stem cut from an apple tree will bloom: look for branches that have short spurs on them. These are called fruit spurs, and each one can produce both leaves and blossoms. Young fruit spurs will only produce leaves, so look for older, gnarly spurs that are usually 3 to 6 inches long. Those straight water sprouts that shoot up vertically don’t normally have blossoms. The furry magnolia flower buds are obvious.
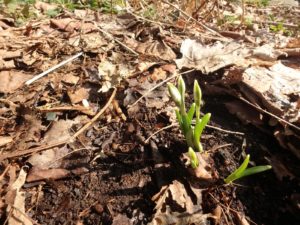
Snow drop buds are up on March 3
One last thing you can do, if you know where you have snowdrops or crocus planted, is to shovel snow off the bed. That will allow them to bloom in early March, as they will push up through frozen soil. And if you don’t have any snowdrops, pay attention to the places where the snow melts off first. Mark the location with a plant tag, or take a photo, and next fall plant snowdrops for early flowers. Glory of the snow, scilla, winter aconite and early crocus are all good early bloomers. And spring will be here before you know it!
Henry may be reached at PO Box 364, Cornish Flat, NH 03746 or at
henry.homeyer@comcast.net. He is the author of 4 gardening books, and is available for speaking to your garden club.
Starting Seedlings
Posted on Thursday, February 27, 2020 · Leave a Comment
Winter is long, and for a gardening guy like me, winter can be oppressive. I keep sane, in part, by starting seeds indoors. I am just now getting ready to start a few plants that need a long head start before they go outside.
Starting plants now means I will have to baby them along for 3 months or so, providing light and water. It’s a chore I like, so it doesn’t feel so much like a chore. For tomatoes and most other veggies, I plant seeds indoors around April 10, and put them outside around June 10. Starting too early stresses most things.
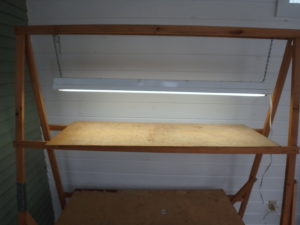
A frame plant stand for starting seedlings
You can’t keep plants happy on a windowsill for 6 to 16 weeks. You will need special indoor lighting and a plant stand of some sort if you do many plants. Fluorescent lights are the standard for home growers. I have purchased four-foot fixtures that hold 2 tubes each. I hang them in an A-frame plant stand I built myself that will accommodate 10 flats of plants and 5 light fixtures.
I do not use special “Gro-Lights” with the same wave length light as the sun, as they are much more expensive than ordinary. I use a mixture of cool white and warm light tubes, or just cool whites, and that has always worked fine.
Many companies sell plant stands. Some light up just one flat of plants, others two, some several. A flat is a plastic tray that holds 8 or more little six-packs of plants. You need to decide if you want something that fits on a table or countertop, or if you want to get into it big time. Get directions to build your own plant stand on my website (
www.gardening-guy.com) and search for plant stand.
So what do I start in March? Onions, hot peppers, perhaps a few flowers such as lisianthus that need a long time to germinate and get to a good size for planting. I find that starting onions by seed offers me the opportunity to grow varieties that I will not find available as ”sets”. I also have found that by growing my own plants, I get better onions. Hot peppers also take a long time to get to get big, so I like to start them mid-March.
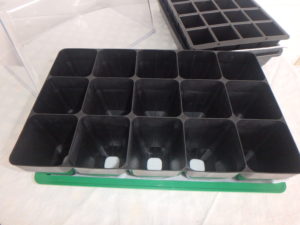
Grow Ease system uses hard, reusable plastic
This year I am making a big push NOT to buy anything plastic that is not reusable by me. That means no flimsy six-packs for seeds. I got some heavy duty, reuseable plastic flats from Gardeners Supply last year, and like those a lot. They are also self-watering, which takes off the pressure to track the moisture of every plant every day. They are called the ”GroEase” system, with either 24 large cells or 15 extra-large cells per flat.
The other way to avoid plastic is to plant in soil blocks. I have a little hand tool that will compact and squeeze out 2-inch cubes of a special planting mix I make. These cubes sit in a plastic flat, but I have plenty of those, and reuse them every year. The tool is sold my Johnny’s Selected Seeds and Fedco Seeds.

Soil blocks for starting seedlings are eco-friendly
Here’s my recipe for the soil blocks: In a wheelbarrow or large plastic storage bin mix 10 quarts dry peat moss, 3 quarts sand and ¼ cup agricultural limestone (powdered, not pelletized is preferred, but either is OK). Mix in ¼ cup of each of these: dried blood, rock phosphate, green sand and granite dust or Azomite (optional). Instead of all those, you could substitute 1 cup organic fertilizer. Then add and mix in: 10 quarts peat humus, 10 quarts fine compost (your own or purchased) and 10 quarts top soil (your own is preferred, but purchased is OK).
Place 4 quarts dry mix in a plastic basin or flat-bottomed container, and add about 1 quart water. Mix until gooey but firm, not watery. Push your soil block tool into the mix, compressing the soil against the bottom of the bin. Then hold the tool over a plastic flat and squeeze the handle, which will push out 4 tidy blocks with a divot for a seed in the middle of each. The 4 cubes just fit across a plastic flat, and 8 rows will fit per flat.
One big advantage the soil blocks have is that they contain all the nutrition a plant needs from seed to planting. Sterile soil mix sold for seedlings runs out of minerals in just a couple of weeks, and one must add fertilizer to the watering mix to keep plants healthy. Many greenhouses water with a dilute fertilizer mix every day. I find soil-block raised plants take off and grow as soon as they get in the ground, as their roots do not get tangled up the way they might in a 6-pack.
How much light do seedlings need per day? Set your lights on a timer and give them light for 14 hours. But keep the lights near your seedlings – 6 inches above the tops of your plants is good. I hang my lights by lightweight jack chain and raise the lights as my plants get tall.
Don’t let your seedlings wilt due to water insufficiency. Check them daily, and water when they are nearly dry. But you don’t want them soggy all the time, either.
So if you are lamenting our long winter, start some seedlings, and talk to them daily. That might help, too.
Henry is available to talk to your gardening club or library group. Just e-mail him at
henry.homeyer@comcast.net He is the author of 4 gardening books.
Gardening Without Work
Posted on Sunday, February 23, 2020 · Leave a Comment
Ruth Stout, born in Topeka, Kansas in 1884, lived to the ripe old age of 96. She was an early proponent of organic gardening and was also (as seen from her writing) a sweet, funny, intelligent and common-sense person. I recently read her book, Gardening without Work: for the aging, the busy, and the indolent from cover to cover in an afternoon. I had heard much about her, but had never actually read this book before, or her most famous one, How to Have a Green Thumb without an Aching Back.
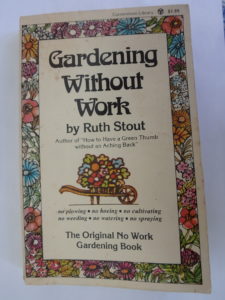
Ruth Stout’s Book
Ruth Stout made a name for herself largely by writing about mulching. Hay was her main form of mulch because it was cheap and plentiful. She got hay that had been spoiled (as animal food) by rain and applied it in thick layers. But she also used leaves, food scraps and any organic matter to enrich her soil as it broke down. She touted the ability of mulch to smother weeds and hold in moisture.
In the 1950’s and ‘60’s, “modern” gardeners and farmers were using DDT to kill insects and chemical fertilizers to push growth. She avoided all chemicals and got great results. She was not trained as a scientist, but depended on common sense and good observation skills to succeed in her garden. Below are some of the things she said in her book.
“My simple way is to simply keep a thick mulch of any vegetable matter that rots on both my vegetable and flower garden all year round. As it decays and enriches the soil, I add more.”
“I never plow, spade, sow a cover crop, harrow, hoe, cultivate, weed, water, irrigate or spray. I use just one fertilizer (cotton seed or soy bean meal), and I don’t go through the tortuous business of building a compost pile.”
Mulching with hay
How often did she mulch? “Whenever you see a spot that needs it.” How deep is her mulch? Eight inches, on average. “Use all the leaves around. Utilize your garbage, tops of perennials, any tall vegetable matter that rots.”
Ruth Stout loved asparagus, and planted plenty. She said the mulch slows soil warming in the spring, so she raked the mulch off part of the patch to get early crop of asparagus, then left some mulch on for late asparagus. That’s good common sense.
She sowed corn and immediately applied a thin layer of mulch, allowing the corn to push up through it. The mulch deceived the crows, which love to eat newly germinated seeds. I once lost two 50-foot rows of corn to crows, who ate it up in one day as soon as it germinated! And peas? She raked off mulch a few weeks before planting to allow the early spring soil to warm up.
What else did Ruth Stout promote? Diagram your garden in winter. Take time to measure and plan before ordering your seeds. Order seeds early, before the best varieties run out. (I agree. I bought Sun Gold tomato seeds this week, as I have had trouble finding them in April, when I start tomatoes in the house). I like her observation that seed catalogs are to gardeners like “catnip to a cat.”
Witch grass, or Johnson grass, a grass that spreads quickly by root, was not a problem for her. She mulched, and added more mulch if it pushed through the mulch. She also used newspapers under the mulch hay for witch grass, which I have found very helpful.
All soils benefit from year-round mulch. She noted that during the dust bowl of the 1930’s, soil was blown away in huge quantities. That was due, in part, to the fact that soil was left bare after harvest, and blown away in dry times. She emphasized the need to always have your soil covered with mulch.
Ruth Stout developed lots of good tricks during her many years as a gardener. One I liked had to do with planting small seeds like lettuce or carrots. She said you can get fairly good spacing by taking a pinch of seed and then dropping it from waist high. As the seeds drop, they spread out. Not for a windy day, of course, but I will try it, come spring.

The first step of mulching as I do it is to put down newspaper
She wrote that one need not buy a chipper to break up leaves for use as mulch. Just rake them onto the driveway. Then after cars run over them a few times, rake them up and use them. Clever. Me? I use my lawnmower to chop up leaves, blowing them all in the direction, creating a windrow. Then I put them into my garden cart or onto a big blue plastic tarp to take them away.
Ruth Stout froze lots of garden vegetables for winter use, including whole ripe tomatoes. I freeze tomatoes since it is the easiest, fastest way to preserve them. But I have only used them in stews and soups. She went one step further: she let them thaw a bit, and ate them with a spoon. So I tried it after reading her book, and agree that although they don’t have the right consistency for sandwiches, they taste good!
I am a fervent proponent of mulching everywhere and believe it works. I suggest you read one of her books this winter, and give it a try.
Henry has been a UNH Master Gardener for more than 20 years. He is the author of 4 gardening books. Reach him at
henry.homeyer@comcast.net.
Can Gardening Save the World?
Posted on Sunday, February 16, 2020 · Leave a Comment
There is much talk these days about global warming. It’s easy to feel hopeless and to think there is nothing we can do. But if we all take a few small steps, it can add up to a big difference.
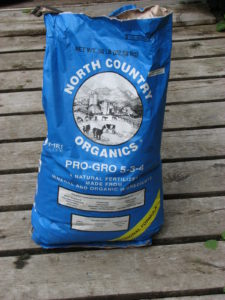
Organic fertilizers contain more healthy minerals than chemical fertilizers
So what can a gardener do to help the environment? Start by growing lots of plants and using no chemicals to do so. There is no doubt that green plants help the environment. The basic process of photosynthesis removes carbon dioxide (which contributes to global warming) from the air, combines it with water and produces sugars that are building blocks for the complex carbohydrates that create the stems, roots, flowers and fruits.
Growing trees is especially good for the environment. They hold onto carbon, a process called sequestering. Of course when plants die and decay or are burned, the carbon dioxide they made goes back to the atmosphere. My wood stove, for example, pumps carbon dioxide back into the atmosphere all winter long. But burning oil in my furnace does, too, and has other contaminants from the oil that go into the atmosphere. Everything is a trade off.
If you grow your own vegetables, or some of them, you can reduce pollution from trucks bringing groceries across the country. The average fruit or vegetable travels 1500 miles to get to you, some much farther. I won’t buy veggies from out of the country for that reason, and because I don’t know if they were grown with toxic chemicals. Truth in advertising: I do eat avocados and sometimes artichokes that come from California.
Chemical fertilizer is made using an energy-intensive manufacturing process to heat, compress and cool gases to turn nitrogen from the air into the nitrogen in fertilizer. The basic feedstock for this is natural gas. A 50-lb bag of 10-10-10 uses the energy equivalent of a gallon and a half of fuel oil. Given that there are tens of millions of gardeners, that petrochemical cost is significant. If each of us just says “No!” to chemical fertilizer this year, and every year, we can have an impact. There are plenty of organic fertilizers that are fine to use. These are made from agricultural by-products and naturally occurring ingredients from things like oyster shells and seaweed.
Conventional farmers also use pesticides including fungicides and herbicides. Some are surface sprays to kill bugs when they eat their lettuce or corn. These wash off with rain, or when you wash them.
There are also pesticides that are “systemic”: Chemicals that are sprayed on seeds or the ground and taken up by the roots of plants, and distributed to every cell in the plant, leaf and fruit alike. These systemic poisons are easier to use and are not washed off by rain, or in your sink. Every bite a bug takes, gives it some slow-acting poison. That is true for you, too. Unfortunately, systemic pesticides are readily available at your local hardware store or gardening center. Just look on the aisle labeled “Death Row” (or perhaps they call it “Pesticides”).
Chemical fungicides are also readily available, and these can be very toxic. I remember interviewing a potato farmer in Idaho that showed me what he did: 4 ounces of fungicide “protected” 30 acres of potatoes that he irrigated with an overhead pivot-style watering system. A human error could easily turn a dose into a calamity. That’s why I eat organic food whenever I can, and grow much of my own.
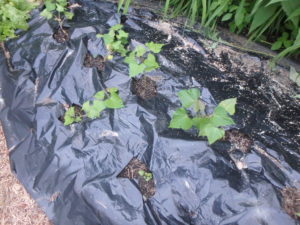
Black plastic used to grow seed potatoes goes to the landfill -not a good practice
What else can gardeners do, besides avoiding chemicals in the garden? Minimize the use of plastics. Yes, black plastic can keep down weeds. But most plastic breaks down in the intense summer sun. Even if you use it for 2 years, you are left with a mass of cracked and ripped plastic that ends up in the landfill for the next few hundred years.
Paper is an alternative to plastic. I read my local daily, and buy the Sunday NY Times on occasion. I spread newspapers in my vegetable garden, and sometimes in flower beds. I cover the paper with straw, hay, leaves or chipped branches according to the location.
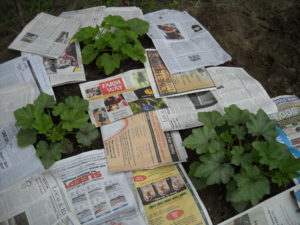
Mulching with newspaper and straw works well
Formerly newspapers used inks with toxic heavy metals, but now they use soy-based inks that are non-toxic. Earthworms love newspaper, and in the course of 12 months they eat most of the paper I lay down. I often use mulch hay over the papers even though they contain some grass seeds because the newspapers keep most of the seeds out of the soil.
Mulching your garden is also a way to reduce water needs of your plants, as the mulch minimizes evaporation. Even if you have a good water supply, it makes sense to use the least water you can. Water is not an unlimited resource, something I often don’t think about as I have not only a good artesian well, but a small stream to available for water, too. Using well water draws down the aquifer that may take eons to replenish.
Anthropologist Margret Mead is credited for saying, “Never doubt that a small group of thoughtful, committed citizens can change the world; indeed, it’s the only thing that ever has.” I agree.
Henry is a UNH Master Gardener and the author of 4 gardening books. You may reach Henry at
henry.homeyer@comcast.net or P.O. Box 364, Cornish Flat, NH 03746.
It’s Time to Order Seeds
Posted on Sunday, February 9, 2020 · Leave a Comment
Ground Hog’s Day has come and gone. The big, fat rodent has made his or her proclamation about the arrival of spring. And of course, I paid no attention. I think the birds are better about announcing spring, but so far the cardinals are not singing their spring songs, and the red-winged blackbirds have not shown up. So I know I have time to purchase seeds.
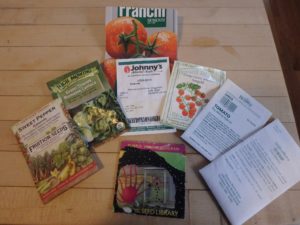
It’s time to sort through your seeds to see what you need
Most seeds are good for three years, and most packets have a lot more seeds than I can use in a year. I store them in loosely closed zipper bags in a cool closet – with the date I bought them clearly marked on the packages. I have a hard time throwing out seeds that are old and should be tossed. But I know they lose vigor with time, so about now I will go through them all and toss out the older ones, and figure out what I need to buy. I once found a packet of seeds of my mother’s that were 50 years old. I had to try germinating them, but none grew.
Not all seeds last three years: parsnips and onion seeds are good for just one year. Leeks, in the onion family, I have successfully used in year two or even three. Parsley is good for just one or two years, but is always hard to germinate. If using older seeds, I plant more seeds as some will germinate and others will not.
Corn seed is usually considered to have 2-year viability, as are peas. I, for one, will not grow corn again. I can go years without ever seeing a sign or footprint of a raccoon,n but if I grow corn, raccoons will show up to pick my corn before I do. I am not willing to invest in an electric fence to keep them out, and don’t believe that playing an all-night talk radio station will deter them, as some claim. Plant corn, the raccoons will come. Forget about it!
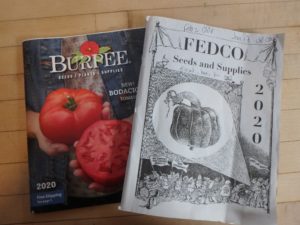
Of the paper catalogs I get each year, Johnny’s Selected Seeds, Burpee’s and Fedco are my favorites. Why? They each have such a range of seeds, and lots of good planting information. Farmers I have asked about their seed suppliers tend to mention Johnny’s first, which is a good recommendation. Others I like include Fruition Seeds, Hudson Valley Seed Company, Renee’s Garden Seeds, and High Mowing Seeds, which only sells organic seeds.
Fedco is a seed cooperative that many food coops join up with – providing catalogs and then putting together bulk orders to get discounted prices. They are located in Maine, and have a clear policy of encouraging gardeners to save and share seeds. Fedco does not generally sell patented or trademarked seeds. Fedco also does not sell any GMO seeds (no one does, they are only available to farmers) or seeds treated with fungicides. About 30% of the seeds they sell are organic.
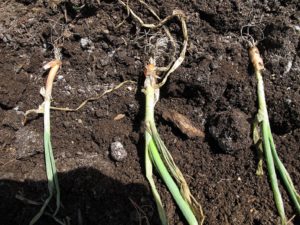
Onions plants from Johnny’s Seeds ready to plant
You may wonder if organic seeds are any better than conventional seeds. They cost a little more, as producing seeds organically is more labor intensive. For example, many conventional farmers use herbicides to kill weeds, but organic farmers must hoe or cultivate the rows with a tractor to kill weeds. This means fewer chemicals added to the soil. So I like to order organic seeds when I can get them, but not everything is available as organic seeds. And of course, buying organic seeds supports organic farmers.
If you are just buying a packet of carrot seeds and some flowers, think about getting your seeds from your local garden center or feed and grain store. That way you don’t have to pay shipping costs. I order 20 packs of seeds or more each year, so the shipping cost is minimal per packet, and I have more varieties to choose from when ordering from a seed company. I like to share seeds with gardening friends, and sometimes we combine our orders. Some garden clubs have seed swaps, too.
New to gardening? You might like to know the things to start in the ground by seed, and those which need to be started indoors in early spring or purchased as plants at a garden center. By seed? All the root crops (carrots, beets, parsnips, etc.). Also peas, beans, corn, spinach, lettuce and other greens.
Seed catalogs are designed to entice gardeners
Potatoes are started from chunks of “seed potatoes” bought at the garden center, or saved from last year’s crop. Onions are planted as little bulbs, or as plants, or started early by seed indoors. All the vine crops (cukes, squash, pumpkins) can be purchased as six-packs, or started by seeds outdoors. Tomatoes, eggplants, Brussels sprouts, kale, broccoli and cauliflower are generally planted as seedlings.
So start checking out the seed catalogs, either on-line or in hand. I have to admit it is quicker to use the search engine at a website to find a specific type of seeds than it is to find it in a paper catalog. But there is something to be said for thumbing through a catalog sitting by the wood stove on a snowy day.
Henry can reached at PO Box 364, Cornish Flat, NH 03746 or by e-mail at
henry.homeyer@comcast.net. Consider joining Henry on a Viking River Cruise from Paris to Normandy in June, 2021. Contact him for more info.


 Click Here to buy from Cobrahead