Plants for Butterflies, Bees and Native Pollinators
Posted on Monday, May 23, 2016 · Leave a Comment
Butterflies are the poster children of the environmental movement. Everybody loves them, and wants to see them thrive. But do you know what you can do to help? It’s quite simple, really. For starters, make sure that your environment includes a wide variety of plants that supply nectar and pollen. And even city dwellers can help.
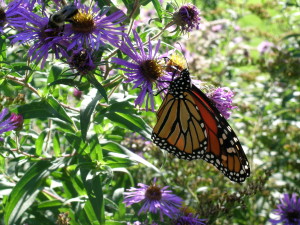
Monarch on asters
Let’s say you don’t have a garden, or that you have limited time and/or space. Or you just have a lawn. You can start by planting some annual flowers in a pot, or buying a hanging planter at the garden center. Most planters sold are full of gorgeous flowers that will bloom all summer. All you have to do is water them.
If watering is too much trouble, transfer your purchased plants into a “self-watering” container. These are pots that have a water reservoir in the base that will allow water to wick up to the plants in the container. Get one about the same size as your purchased planter, along with some potting soil. The potting soil should fill in extra space if your self-watering container is larger than the hanging pot. Once you have it set up, you will just need to fill the reservoir once a week.
Another thing that anyone can do is buy a bird bath. Yes, a bird bath can be useful for butterflies, too. They need a regular source of water. Butterflies love the minerals found in water in mud puddles, so you could dig a little hole and keep it full for them. Maybe your dog, if she’s like mine, will wallow in it, too. Hmmm…
I have a bird bath that is never used by birds, even after I put stones in the middle for them to perch on. Why? Someone finally pointed out to me that I have a stream just 50 feet from the bath, which is more inviting for the birds. But I like the looks of the blue ceramic bird bath, which I now call my ”butterfly bath”.
What else can you do? Start by swearing off pesticides. I know it’s easy to spray Japanese beetles or potato beetles, but chemicals that kill one kind of bug will kill others, including butterflies and the caterpillars that become butterflies. So hand pick your pests, or agree to let them live. Many insect pests have a short life span and aren’t really as bad as you might think.
Hiking through France I have often been struck by the number and variety of birds, butterflies and pollinators along the trail. I attribute that to the fact that farmers in France allow hedgerows to separate farm fields. Flowering plants like hawthorns, blackberries and wild cherries are not mowed down, but allowed to grow – and provide space for birds and insects to nest in and thrive.
Here in America President Nixon’s Secretary of Agriculture, Earl Butz, told farmers to “get big or get out”, encouraging them to plant commodity crops every square inch, “fencerow to fencerow”. That policy has affected our birds and butterflies over the years. But on a small scale, we can allow native plants to grow and blossom along our property lines. Leave wild spaces wherever you can.
If you want more butterflies, think first about the caterpillars that will become butterflies. What do they like? Dill and fennel are among the best plants for many species. Hollyhocks, lupine, milkweed and butterfly weed, thistles and willows are all good for caterpillars of various sorts.
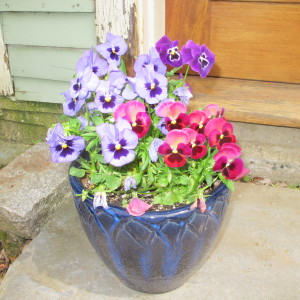
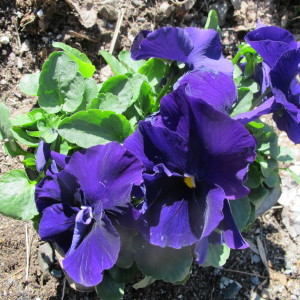
Pansies are used by butterlies
Then, for nectar and pollen, think about creating a garden that blooms from early spring to late fall. Annual flowers are great because most will do just that. Alyssum, calendula, cosmos, marigolds, nasturtiums, pansies, verbenas and zinnias are some that are especially good.
Of the perennial flowers, here are some good ones: asters, bee balm, daylilies, delphinium, dianthus, globe thistle, hollyhocks, Joe Pye weed, lavender, liatris (gayfeather), oregano, phlox, purple coneflower, sage, scabiosa, sedums, Shasta daisy and yarrow.
Weeds are good for butterflies, too. You know milkweed is beloved by monarchs. Queen Anne’s lace is loved by many. Towards fall I often see goldenrod just full of bees and butterflies. And not all goldenrod is 5 feet tall and aggressive. You can actually purchase tidy ones like‘Fireworks’ (a variety of Solidago rugosa), or a small shade-loving one, Solidago caesia. Talk to your local nursery – they can get them from North Creek Nursery in Landenberg, Pennsylvania (wholesale only).
The very best plant for butterflies is probably butterfly bush (Buddleia davidii). This is a shrub that is generally hardy only to Zone 5, meaning that temperatures colder than minus 20 will kill it. In warmer zones it can spread aggressively and even be considered an invasive pest. But is great for butterflies, and often will survive in Zone 4, just dying back to the ground each year, but blooming late in the summer. It can be a large shrub, but there are smaller varieties, too.
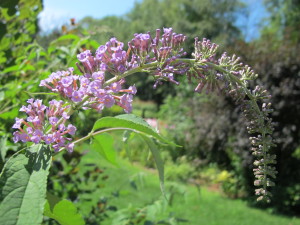
Butterfly bush
Remember: butterflies and bees need nectar or pollen – from spring dandelions to late fall-blooming witchhazel. You can do your part – and enjoy seeing both your flowers and the butterflies, too.
To learn about bumblebees – all of them you see right now are queens – go to Henry’s blog: https://dailyuv.com/news/843726. While there you can sign up for an e-mail alert every time Henry posts.
More on Growing Great Veggies
Posted on Monday, May 16, 2016 · Leave a Comment
This year Mother Nature, if she were a middle school student, would be at best a tease, and at worst a bully. Or maybe the Wicked Witch of the West. She gives us warm and sunny – then threats of snow or hail. Come on, Spring, let’s get with the program. We have veggies we want to plant!
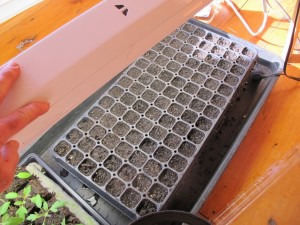
Corn seeds planted in plug tray indoors
Recently I wrote a column that promised tips on growing vegetables “A to Z: Artichoke to Zucchini” – but didn’t finish the B’s and skipped to zucchini. Huh. Today I’ll be less ambitious: The last of the B’s and most of the C’s. There really are a lot of great veggies we can grow.
Beets are best started outdoors once the soil temperature has warmed to 60 degrees or even warmer. Yes, they grow well in cool temperatures, but are slow to germinate in cold soil. Plant 2 to 3 inches apart, and be prepared to thin them in a month to 3 to 4 inches apart. Each “seed” is actually a seed capsule containing 2 to 6 seeds. They like soil that is near neutral in pH, so if you have acidic soil, add a little limestone. And they are deep rooted, so plant in fluffy soil for best results.
Hoping to jump the gun this year, I planted some beets in flats indoors on April 10. I started them on an electric seed warming mat but only got 20 percent germination, and the plants have long stems and are flopping over – even with bright fluorescent lights over them. I won’t do it again. I’ll plant mine outdoors this week.
Carrots also want fluffy light soil – and few if any stones. Comb through the soil carefully to get out rocks – I use a CobraHead weeder for that. Add lots of compost and some bagged organic fertilizer at planting time and again in early July.
Carrot seeds are tiny, but it’s worth your time to plant them individually, or nearly so. It will save a lot of time thinning them later on. Put seeds in the palm of one hand, and push one away from the rest with a pencil or pocket knife. Pick it up, plant it, and repeat. Tedious, yes. I like to plant them about an inch and a half apart, and thin to 3 inches when the thinnings are big enough to be worth eating.
Cauliflower is fussy. If it gets too hot or too cold it will “button” and not form a proper head. And unlike broccoli, cauliflower makes no side shoots (with rare exceptions). There is a purple one that I have grown, gorgeous in the garden but it turns gray when cooked.
Likewise, I don’t grow celery. It attracts slugs, gets woody and tough if the soil dries out, and is generally unsatisfactory. But I’m a serious cook and often need that celery flavor. Instead, I grow celeriac, also known as celery root. This is a great root crop that is pest free and stores for a long time. It’s funny looking with lots of roots that I cut off the bulb. Then I chop or grate it.
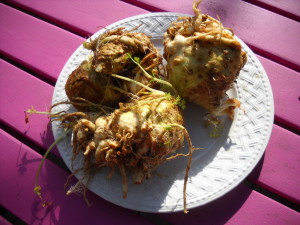
Celeriac
Celeriac, unfortunately, is not often sold in 6-packs at the garden centers. But it’s worth asking for it as the seeds germinate slowly and take a long time to get big. I planted mine on April 10 and they are just an inch tall 5 weeks later. Still, it will grow well into the fall so you could try planting seeds. Celeriac needs soil with plenty of moisture all summer.
I avoided growing corn for decades, instead I bought just a couple of ears at a time. I’m a bit like a raccoon: I tend to glut on it when there’s plenty in the garden ‘cause it’s so darn tasty! But for the past 2 years I have grown it. Here’s what I have discovered: you do need to plant it in blocks of 4 rows to get good pollination. And it needs plenty of supplemental nitrogen to do well. Last year I ran out of fertilizer and thought that since the soil was good, it would do fine. But corn in that section was short and spindly.
Fencing is probably the best to keep out coons, but I also used some solar powered blinking red lights that are said to scare them off (www.niteguard.com). Those are touted as deer repellents, too. I had some raccoon damage, but I probably needed more of them as the corn patch was very long. You need a minimum of 4 units to point in every direction.
Cucumbers are a summer favorite of mine, and I’ve already started some seeds indoors. They’ll go outside in mid-June after frost and when the soil is nice and warm, say 65 degrees. I used to plant seeds outdoors, but the plants were often killed by striped cucumber beetles that would strip off all leaves in a single night. Now I plant them when they have vines 6 to 12 inches long with some nice big leaves.
If you have had trouble with beetles but want to direct-seed your vine crops, you can cover the hills with row cover, also called Reemay. It is a thin agricultural fabric that breathes and lets sunshine and rain through. But sometimes the beetles, which emerge from the soil, are already waiting for you before you put it down. Be sure to rotate your planting sites for vine crops like cukes.
Mother Nature, if you’re listening: I’ve had it with this weather. Don’t make me release the flying monkeys.
Henry is now blogging twice a week. See the blog at https://dailyuv.com/henryhomeyer. You can sign up to get an e-mail alert every time Henry posts something.
Building a Hot Box for Early Spring Greens
Posted on Monday, May 9, 2016 · Leave a Comment
Is your lettuce lagging? Your spring greens tired of cold, gray days? You can make a self-heating “hot box” in your garden using a cold frame, some fresh horse manure and some hard work. Lots of hard work, actually. But your lettuce and spinach will reward you sooner rather than later.

Cold frame in place on hot box base
A month ago I got a cold frame from Gardener’s Supply Company (www.gardeners.com) in Burlington, Vermont. It is a nifty 8-foot by 2-foot cedar box with a slanting sides and a clear polycarbonate top that is designed to capture the sun’s heat and warm the soil inside. It assembles in an hour with just a screwdriver or screw gun. I placed it in my garden facing southwest for maximum solar gain.
Inside the cold frame I put a radio-frequency thermometer that sends the temperature to me inside my house. I found that on sunny days, with the top panels closed, that the temperature easily hit 100 degrees, or even more. It has a prop stick for each of the two opening doors on top, allowing one to vent the heat on warm days. Or you can open the top completely for hot days. It did a great job of warming the top inch or two of soil.
Lettuce and spinach can take some frost, so it didn’t matter much that at night the cold frame only kept the air temperature 3 or 4 degrees warmer than the outside air, which occasionally dropped into the mid-twenties. But I wanted an even warmer environment for my small greens.
Back during WWII when folks really grew much of their own food, people made not only cold frames, but also “hot boxes”. And I had tried it, too, some 20 years ago. The principle is easy: bury fermenting horse manure beneath a cold frame, and the heat will rise, warming the soil and air above it. I forgot just how much work that entailed.
The first challenge was to find horse manure that was not mostly bedding. Harrumph! Horses tend to be pampered these days. But I found a horse breeder who had some good fresh manure that was not full of hay or shavings. He loaded a scoop into the back of my aging pick-up truck, though that was more than I really needed. Four or five wheelbarrows is plenty.
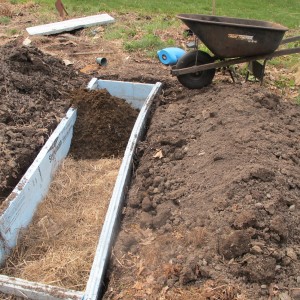
Filling the hot box
Next I dug pit a foot deep and the size of the cold frame. That took an hour or so of hard work. I set the good top soil to one side, the subsoil to the other. Then I lined the pit with 2-inch thick Styrofoam (blueboard) insulation. Why? To keep the cold soil from cooling down my fermenting manure. I wanted the manure to stay hot so it would keep fermenting. The temperature of the manure I unloaded from my truck was in the mid-fifties, but the next day, when I was ready for my project, it had heated up to the mid-eighties. Yes!
For compost to heat up, I knew, one needs both nitrogen and carbon-based materials. Manure has plenty of nitrogen, hay and leaves are rich in carbon. So in the bottom of the pit I tossed in a layer of old hay, then I added 4-inches of manure, then a layer of hay and leaves, then another 4 inches of manure. Finally, using the good top soil I’d set aside when digging the pit, I filled up the pit.
Did it work? You bet! When the air outside is 40 degrees inside my “hot box” it is 55 degrees. At night my box keeps the air 10 to 15 degrees warmer than outside air.
Into this deluxe new domain for plants I planted 5 red cabbage starts, a dozen lettuce plants, 3 clumps of watercress, a few Swiss chard plants and 3 cilantro. All of those I’d started indoors a month earlier. I have room for some spinach that I will start by seed.
Bottom heat is good for quick germination and growth, so I imagine fresh salads tomorrow! Oh, okay, not that fast, but certainly much sooner than I would have them if I was depending on Mother Nature to warm the soil and air.
The only worry I have is that some morning I will leave the house for the day and forget to prop open the lids of the frame. If the sun comes out it could get lethally hot. But as a dedicated gardening guy, I guess I just need to put a reminder with my car keys! That should prevent any “heat emergencies”.
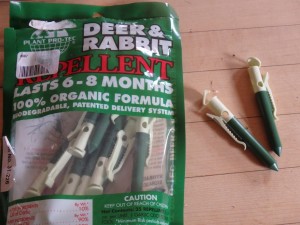
Deer Repellant
On another note, tulips are coming into blossom for me. I protect mine from the deer with a makeshift fence and some garlic spikes. The garlic spikes are small plastic cylinders with a clip to attach to a twig or fence and food-grade garlic oil inside. A barrier requires you to activate them by puncturing the seal with a little tool they provide. Once opened, they are stinky! Available at garden centers or on-line (www.plantprotec.com). They claim to provide protection for 6 months or more, though a fence is your best protection if there are a lot of hungry deer around.
Read Henry’s twice-weekly blog posts at www.dailyUV/henryhomeyer. Read his article there about preventing Lyme disease (https://dailyuv.com/news/837178).
Shrubs with Fragrant Flowers
Posted on Wednesday, May 4, 2016 · Leave a Comment
Some gardeners grow flowers for their beauty in the garden. Others for their magnificence in a vase. A few select species largely for their scent. My friend Nelia Sargent of Claremont is in this third category, largely because she is blind. I called her recently to see what flowering shrubs she likes best.
Nelia loves shrubs because they pack so many flowers in a small space. And, unlike most perennial flowers, they have their blossoms close to nose level. Who needs to bend over to sniff a peony if you have old fashioned shrub roses standing up 3 or 4 feet tall? Here are some of her favorites along with a few of mine –roughly in sequence of their blossoms.
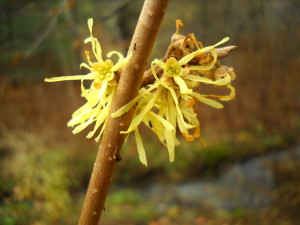
Common witch hazel
First for her, in late March or early April, is a witchhazel hybrid (Hamamelis x intermedia) called ‘Arnold’s Promise’. This flowers heavily with yellow strap-like petals an inch long originating at a reddish calyx cup. Although this bush can get large – up to 20 feet tall and wide, I have never seen one half that size, here in the North Country. I have our native witchhazel which blooms in late fall, but this hybrid is a great plant and one I should get. It’s very fragrant.
At the same time (or soon thereafter) is February Daphne, a tidy pink shrub that is very highly fragrant. I love this one so much I named my corgi after it. I’ve had mine for a dozen years and never had to prune it, which is a plus. I’ve seen it growing wild by the side of the road, which makes me wonder if it will be invasive sometime in the next 50 years. But since I’ve not gotten one seedling and it grows slowly, I’m not too worried.
Nelia Sargent then listed a number of viburnums that are fragrant and lovely. Three that she mentioned are Viburnum juddii, V. carlessii, and V. burkwoodii. Don’t be put off by the Latin names. Just pronounce the species names like juddii with an E-I sound at the end. All three species were named after horticulturists.

Buds of Viburnum Juddii
Viburnum juddii gets to be 6 to 8 feet tall tall, with blossoms about 3 inches across. V. carlessii, also called Koreanspice viburnum, gets to be 4 to 5 feet tall and wide, with 2 to 3 inch semi-snowball flowers. The Burkwood viburnum can get 8 to 10 feet tall with spread about 2/3’s its height; like the others, its flowers are pink in bud, opening to white and highly fragrant.
In recent years there has been an invasive beetle that has terrorized many viburnum owners. Cornell University has listed viburnums according to their susceptibility. Burkwood viburnum was listed as moderately susceptible to defoliation, but V. carlessiiand V. juddii were in the group least attractive to the beetle. You can see the entire list at http://www.hort.cornell.edu/vlb/suscept.html. I have had a Judd viburnum 3 years and never seen one of the dreaded beetles.
After the viburnums bloom, and overlapping with them, are the lilacs. Nelia Sargent noted that there are early, mid-season and late lilacs, so one can have fragrant lilacs for at least 5 weeks. First for her comes one called Sister Justina, a white one that stays tidy and does not send up root suckers. ‘Gertrude Lesley’, a double white is also early and nicely fragrant. The common lilac,Syringa vulgaris, has 800 or 900 named varieties. Most are mid-season and nicely fragrant. These spread by root, sending up suckers that will create a hedge if you are not attentive.
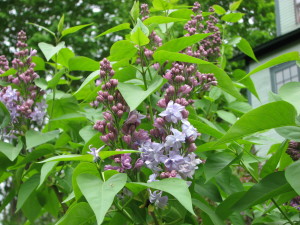
Lilac
Fragrant late season lilacs include Miss Kim (a cultivar of Syringa patula), a slow-growing variety that is (mistakenly) sometimes called a miniature. Mine is now over 8 feet tall, definitely not a dwarf! Another late beauty is ‘Donald Wyman’ (Syringa x prestoniae ‘Donald Wyman’) which is hardy to Zone 2 (minus 50 Fahrenheit) and will thrive despite pollution and compaction in wet or dry soils! One tough plant.
The final shrub on Nelia’s list is mockorange (Philadelphus coronarius). Not related to oranges, this 10 to 12 foot shrub has white blossoms that are sweetly fragrant. That said, be advised that not all cultivars are fragrant, so buy one in bloom. It is an old fashioned flower and not particular to soil type.
Roses can be lovely and fragrant, but many of the modern hybrids have little or no scent. The Knockout roses are fabulous disease-resistant roses that bloom most of the summer, but I’ve only encountered one that was fragrant. On the other hand, rugosa roses are highly fragrant, as are many of the old fashioned roses. I recommend buying them when in bloom if fragrance is important.
I agree with Nelia Sargent: shrubs with fragrant blossoms are a good addition to the landscape. And they are often great for our native pollinators, too.
Read Henry’s garden blog at https://dailyuv.com/henryhomeyer. You can sign up for an email link to the blog every time Henry posts something.
Tips on Growing Vegetables, A to Z
Posted on Wednesday, April 27, 2016 · Leave a Comment
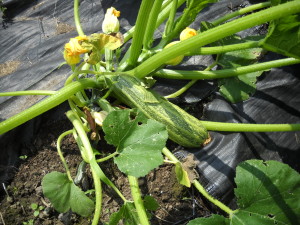
Romanesco zucchini
It’s time to start thinking about the vegetable garden. We had frost recently, and will again, but this is a good time to think about what to plant. I can’t cover all plants I will grow – or have in the past – but I’d like to share a few tips on plants I love, starting with artichoke and going to zucchini.
Twenty years ago it was unheard of to grow artichokes in a New England garden. The first time I grew an artichoke from seed it developed into a huge plant, but didn’t start to produce “chokes” until cold weather came in the fall. So I built a little plastic-sheathed hoop house over it, and harvested my one and only artichoke in October – after snow! The local paper sent a reporter and a photographer.
Here’s what I’ve learned since that first effort: start early. I planted seeds March 3 this year in 6-packs and transplanted seedlings into bigger plastic pots in mid-April. Now the plants have 4 large leaves, and are ready to go to my cold basement (45 degrees) where I will set them up under lights on a timer, giving only 10 hours of light per day for the next10 days. This will fool those poor artichokes into thinking they have gone through a winter. Artichokes, you see, usually only produce in their second year. I’ll plant mine outside in early June. In California, artichokes are perennial – though I’ve never succeeded in overwintering them here.
Now locally grown artichokes are sold at farm and seedlings are sold, too, in case you haven’t started any. They will produce lovely foliage plants – and a few small artichokes. Some farms grow them in unheated greenhouses to stimulate them to produce their first year.
“B” is for beans. There are many varieties; all can be placed in one of two categories: bush beans or pole beans. Bush beans produce a nice yield of beans over a 3 to 4 week period, and are done. Pole beans, once they start producing, will continue to produce some beans until fall – if you keep picking them. Not only that, pole beans are better for casual gardeners, as many varieties still are yummy even if the beans are not picked on time and get large. Bush beans that get large, get woody. My favorite pole bean is ‘Kwintus’ from Cook’s Garden Seeds. ‘Kentucky Wonder’ is also great, and available everywhere.
Beans are legumes, and have nodules in their roots that can harbor nitrogen-fixing bacteria. These bacteria take nitrogen from the atmosphere and fix it in the soil – transforming it into nitrogen useable by plants. Free fertilizer, if you will. You can buy a packet of inoculant at garden centers. Wet your beans at planting time, then sprinkle the inoculant on the beans, and plant. A packet of inoculant will do a lot of beans, but won’t work next year, so share your leftovers with another gardener. And if you don’t get any in time, you can sprinkle it over the soil and water it in.
“B” is also for broccoli. I start mine by seed, but it’s getting a bit late for that now if you want early broccoli. But it is plentiful at garden centers, and quite cold-tolerant once hardened off and well established. You can plant seeds outdoors by seed in mid-July for a fall crop.
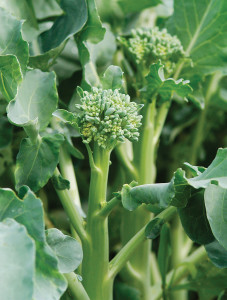
Happy Rich
My favorite broccoli substitutes are two relatives that don’t ever produce a big head, but are quick-growing and produce very numerous mini-heads, what we would call side-shoots on broccoli. One is called piracicaba, and is available from Hudson Valley Seed Library (www.seedlibrary.org). It’s actually a tropical broccoli, so does well in the heat so summer when many others are feeling wilted and sad.
The other is Happy Rich, a hybrid sold by Johnny’s Selected Seeds (www.johnnyseeds.com). Like piracicaba, it has a lovely flavor – and you can eat the leaves and stems if you are so inclined. It produces all summer and well into the fall.
The last of the “B” vegetables, for today, at least, is Brussels sprouts. This vegetable is not universally well loved – too many cooks and lunch counters over cook it, serving mushy sprouts. But they are wonderful if lightly steamed and served with butter or vinegar.
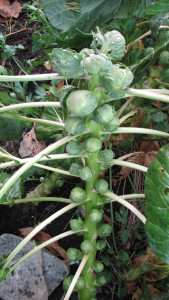
Brussels sprouts
Some gardeners never get big Brussels sprouts because they let the plants grow taller and taller, putting all their energy into growing tall. So here is what you need to do: cut off the top of the plant in early September. Labor Day at 10 am, to be precise. Cut off the top 3 to 4 inches, which is where upward growth occurs. Then the plant will use its energy to create big sprouts.
Skipping forward to “Z” as promised, my favorite zucchini is one called ‘Romanesco’. It has a striped, ridged exterior and firm flesh that is very tasty. What’s wonderful about it is that, unlike many summer squash and other zucchini, the flesh is still tasty and usable even if the squash goes unnoticed and develops into a big fruit.
Romanesco zucchini plants are rarely found at garden centers, but seeds are readily available. Buy the seeds now, plant outdoors in June or early May indoors in 4-inch pots.
Sorry I skipped a few vegetables in this year’s tips, but there will be more in future columns. Meanwhile, I’m going outside to plant some carrots – they come after the “B’s”.
Read Henry’s blog at https://dailyuv.com/henryhomeyer. You can sign up for an email alert every time he posts a new entry.
Gardening Gifts for Mother’s Day
Posted on Wednesday, April 20, 2016 · Leave a Comment
When I was a boy, I generally bought my mom some pansies in a little wooden box for Mother’s Day. Mom is long gone, but I’ll be thinking of her and all she did for me when Mother’s Day rolls around on May 8. If your mom is a gardener, or just appreciates the beauty of the living world, there are plenty of good gifts for her.
Pansies
I like giving pansies for Mother’s day for a number of reasons. First, they are cheerful and full of color. And they are hardy, surviving and thriving outdoors even if we get frost. And they look good even without wrapping paper (I am still challenged when it comes to wrappping).
Each pansy plant is relatively small at the beginning of the season, but they will give a nice punch of color even while they are bulking up. Pansy grower Jenny Wright of Unity, NH tells me that pansies “…would rather be in England where it is cold and rainy.” So later, in August, they tend to sulk until fall rains come.
Perennials are good gifts, too. Right now some of my hellebores are blooming. Don’t know hellebores? You should. These early-spring beauties have evergreen leaves and come in a variety of colors from white to pinkish to shades of purple or even green, both as singles and doubles (with extra petals). Hybridizers have been developing new colors because they are relatively fool-proof plants.
Hellebores are plants that do fine in shade, or partial shade. They prefer moist, well-drained soil but will do fine in dry shade, too. In the beginning of spring the evergreen leaves on hellebores look pretty ratty. I’ve cut those back to tidy up the bed, and I see that new leaves are already unfurling. I’d say that by May 1 the hellebores will be looking dramatic.
Another early spring flower that will look good on Mother’s Day has a rather unappealing common name, lungwort. I prefer to call in by its botanical name, the one used by scientists, Pulmonaria. There are actually three species of Pulmonaria but all are very similar. Cold hardy to minus 40 Fahrenheit, they grow in full to partial shade in ordinary garden soil of moderate fertility, but don’t do as well in a very dry location.
Pulmonaria is a good groundcover, one that stays relatively low and spreads by root. The flowers can stand up above the leaves to 8 to 12 inches, but the leaves are low. Most varieties sold have spotted leaves, though I have one, probably Pulmonaria angustifolia, that does not. Mine has absolutely iridescent blue flowers that almost seem to light up at dusk or on a cloudy day.
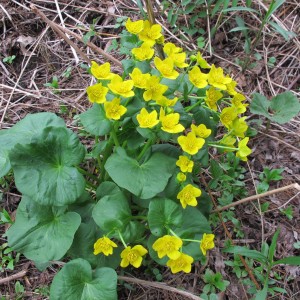
Marsh marigold
Marsh marigold (Caltha palustris) is a wildflower, but one that is sometimes sold in nurseries. As the name implies, it grows in wet places, even in standing water. It needs a location that is at least moist all year. It is a brilliant yellow flower about 2 inches in diameter. It is hardy to Zone 4, minus 30. It is not related to annual marigolds sold everywhere.
Your mother probably doesn’t have marsh marigolds – most people don’t – so if she has some wet areas near her garden, think about finding one for her. There is a fabulous double variety called ‘Multiplex’ that I planted near my stream last year. I got it at E.C. Brown Nursery in Thetford, VT. The leaves are up, and I can’t wait until the blossoms appear.
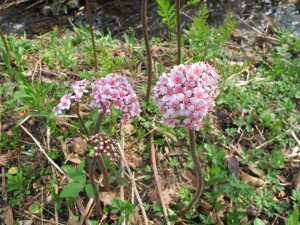
Darmera peltata
Another lesser known plant near my stream is the umbrella plant (Darmera peltata). This blooms in May before the giant leaves appear. It is a native – I have seen it wild along the banks of the Rogue River in Oregon – but it is not native here in the east. The pink flowers appear as drumsticks of florets on a tall stem. The leaves will stand up 2 feet and be 2 feet in diameter later this summer. Available at E.C. Brown Nursery.
I am reluctant to recommend buying a tree or shrub as a gift unless I know the recipient has asked for it. After all, shrubs take up more space than flowers, and generally last longer. But you know Mom best, and if she likes flowering shrubs and has space for more, think about getting the early blooming azalea ‘Cornell Pink’ (Rhododendron mucronulatum).
This shrub blooms before most others (except February Daphne). As the name implies, the blossoms are pink. A nice pink, not garish at all. Its only liability is that it blooms so early that some years a hard frost can ruin the buds, I’m told. It’s never happened to me, or to anyone I know, but the literature always warns about it. The shrub can get large – 8 feet tall and wide, or larger – if not pruned.
If you’d rather not buy plants, think about other things useful to a gardener. A CobraHead weeder (www.cobrahead.com), some nice garden gloves, or perhaps a colorful tubtrug. Trugs, as I call them are handy bucket-substitutes. Unlike the standard 5-gallon pail, these are flexible with 2 soft handles. Easy to pick up with one hand, they come in sizes from very small to quite large (11 gallons). Available at Gardeners Supply (www.gardeners.com), or your local garden center.
Mom, if you’re watching me, I planted some pansies this week. I hope you like them.
Henry Homeyer is blogging at https://dailyuv.com/henryhomeyer. Sign up for an e-mail every time he posts. He is the author of 4 gardening books, and lives in Cornish Flat, NH.
It’s Time to Re-Pot Many Houseplants
Posted on Wednesday, April 13, 2016 · Leave a Comment
Plants are smarter than you think. It’s true that most have a hard time remembering their nine-times tables, and are darned if they know the capitol of Nebraska (though even I might need help from Mrs. Google on that). But, for example, they know spring is on the way – even if they haven’t been outside.
When spring arrives the sun coming in the window is stronger, days are longer, and plant roots are growing. Plants know it’s time for some special care – bigger pots and more water. If you haven’t repotted any houseplants in recent years, you might want to do so now.
There are two schools of re-potting. Some good growers say, “don’t mess with the roots. Just put the plant into the next bigger sized pot, and let its roots find their way into new soil”. The other school of growers say, “tease out the roots and cut them back to encourage them to divide and grow new roots”. I’m in the second school. Especially for large plants that are already in big pots.
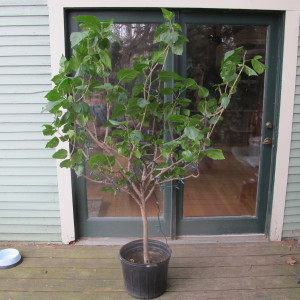
Hibiscus ready for re-potting
I have a hibiscus plant, a small tree, really, that was given to me more than a decade ago. It came in a cheap plastic pot about 14 inches in diameter, and a foot or so deep. Up until very recently it’s been in that same pot. The plant is 6 feet tall, decorated with lights, and blooms regularly – and has for years. This winter blossoms were scarce, so I decided that it was time to give it some new soil, compost and fertilizer.
Over the years my hibiscus has lost a lot of soil – until I re-potted it, the soil surface was 4 inches below the top edge of the pot. Some washed out with watering. Some was taken up by the plant. And some organic matter just oxidized and disappeared. That’s right, organic matter in soil can “burn up” and disappear with time –whether in your garden or in a pot. It’s why adding compost to the soil every year is standard practice in the vegetable garden.
Some big indoor plants develop big, fat roots that encircle the pot if not re-potted. When re-potting those, I get out my root knife or scissors and cut back the roots. Not so this one. It has small, fibrous roots. I teased out the roots with my CobraHead weeding tool and tickled them loose with my fingers. I let the tired old soil fall away.
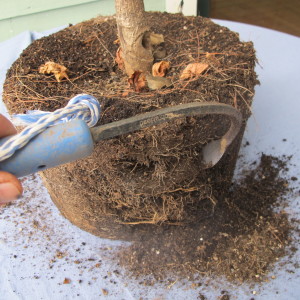
Loosening the soil around the roots
To re-pot that hibiscus, I slid it out of the pot and placed it on an outdoor table on an old sheet. I removed about half an inch of soil all around the root ball, and even more on the bottom. I cut back the few long roots I came across. Then I measured the root ball. It was just 8 inches from top to bottom. My pot is 12 inches deep, and I wanted an inch of free space at the top. So I added 3 inches of “soil” to the bottom of the pot and gently packed it down.
The soil mix I used was a 50-50 mix of peat-based commercial potting mix and a fluffy light compost I buy by the truckload for my outdoor gardens. I ended up using12 quarts of this mix. I added about a cup of Pro-Gro brand organic, slow-release fertilizer to the bucket of planting mix. And I added half a cup of green sand, a naturally-occurring product that contains potassium and lots of trace minerals. It is mined in New Jersey from what was once an undersea deposit.
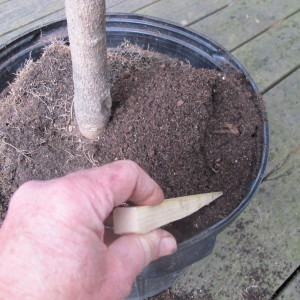
Pushing soil down the sides of the pot
After teasing out the roots I placed the root ball back into the pot and filled the space around the edges with my soil mix. I used my fingers and a piece of kindling – a wedge-shaped board that could get almost to the bottom of the pot – to push the mix down the sides of the pot.
Finally, I gave my re-potted hibiscus a good long drink of water. To the water I added Superthrive, which touts itself as “the original vitamin solution.” It contains seaweed extracts and plant hormones, and is very good for stressed plants. It’s very concentrated: half a teaspoon in 2 quarts of water made a very good boost for my plant. I’m a firm believer in the value of Superthrive.
If you’ve been paying attention, you know that most houseplants need more water now than they did in December. Take rosemary, for example. If you brought in your rosemary plant last fall, you probably got into a rhythm: water it every Sunday before church. Or Wednesday after bowling. Or whatever. But you knew it needed the same amount of water every week.
Then, all of a sudden, you might have noticed your rosemary was super dry. In fact, you might have noticed that it was dead. I’ve lost more rosemary plants in March and April than at any other time. A totally dry rosemary is a dead rosemary. So if yours is still alive, double the watering!
Come summer, you’ll probably bring many of your houseplants outdoors. I know I will. So I’ve started bring a few out for a little direct sunshine. By slowly introducing them to sunshine now, they are less likely to get sunburned when they move out full time. An hour or two a day is a good re-introduction to the sun.
Oh, and by the way, the capitol of Nebraska is Lincoln, not Omaha. I know. My hibiscus told me.
Read Henry’s blogs at https://dailyuv.com/henryhomeyer. Henry is a UNH Master Gardener and the author of 4 gardening books. His website is www.Gardening-Guy.com.
Forcing Shrubs to Bloom – Now!
Posted on Monday, April 4, 2016 · Leave a Comment
I don’t know about you, but I am more than ready for spring blossoms. My little bulbs like snowdrops are blooming already, but I want my magnolia, crabapples, forsythia and daphne to bloom, too. Fortunately, I can easily speed up the process –indoors. Here’s what I’m doing.
I have cut branches with flower buds and brought them inside to force them in a vase of water. It’s important to know what to look for when you cut branches to force.

Apple fruit spurs
Let’s start with apples. What you need to cut are older branches with little stubby outgrowths on them. Those stubs are called fruit spurs, and if they are at least 2 years old, they should produce flowers and as well as leaves. Most apple trees also create pencil-thin straight new shoots each year. These are called water sprouts and will not produce blossoms in a vase, only leaves. Sometimes I pick water sprouts, too, as even leaves are pleasant in early spring.
Fruit spurs most often are produced on branches that are growing at a 30 to 45 degree angle to the trunk or a main branch. Some young trees tend to be very vertical, sending most branches virtually straight up. If you bend a vertical branch to a broader angle, it will often develop fruit spurs in a year or two. Just tie it in place from now until early June and it should stay at the new angle.
An apple fruit spur produces not one flower, but a few, and leaves, too. Just put the branches in a vase of water in a sunny window. In a week or more the branches will burst open with blossoms. When I prune fruit trees, including apples, crabapples and pears, I regard the branches carefully and pick those most loaded with fruit spurs to bring into the house.
Some 20 years ago I planted a small magnolia in my back yard in the middle of an open lawn. Over the years it has reached full size – perhaps 25 feet tall and nearly as wide – and it blooms reliably on my birthday in late April. I have already cut some branches and put them in a vase, and they will bloom indoors within a week or so.
My magnolia is a ‘Merrill’ hybrid. It is a perfect 4-season plant. In the spring mine has more than a thousand 4-inch, lightly fragrant blossoms. In the summer it has glossy green leaves, and no pests. In the fall it displays colorful seeds and bright yellow foliage. In the winter the buds that will open in spring look like pussy
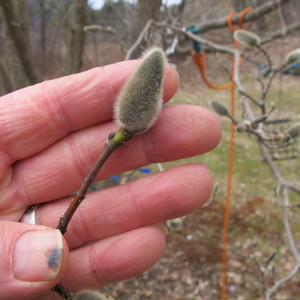
Magnolia bud
willows on steroids. And it is growing in moist soil near a stream, a location where many trees would not thrive (many do not like wet feet) . Other than the ancient, stately maples on my property, it is my favorite tree.
Then there is the forsythia, one of the earlier things to bloom in our part of the world. For decades gardeners in northern New England grew old fashioned varieties of forsythia and got blossoms low on the bushes, but not above the snow line. Flower buds on any early-blooming shrub are formed the summer before, and must survive the cold temperatures and winds of winter. Those forsythia buds were not hardy in my zone.
But all that has changed. There are now varieties that are fully hardy in Zone 4 – where temperatures drop to minus 30 degrees Fahrenheit each winter. Prime among them are New Hampshire Gold (developed in my home town of Cornish, NH by the late Paul Joy), Vermont Sun, Meadowlark and Northern Gold. These bloom everywhere. When cutting stems for blossoms, pick vigorous young stems. By now you should see some hints of gold in the buds on those branches.

Daphne the dog with Daphne the shrub, and magnolia stems
I‘ve been growing a tidy shrub called February Daphne for a dozen years or so. Its proper botanical name is Daphne mezereum. I love this plant so much that when I got a corgi puppy 10 years ago, my first AKC registered dog, I named her Daphne Mezereum. Of course I call my wonderful dog Daffy (except when she rolls in nasty stuff, when I may use her full name to reprimand her).
February Daphne may bloom somewhere in February – New Jersey, the garden state, for example – but for me it blooms in April. Early April if the weather is mild, like this year. I picked some recently and the buds, nearly open, popped open almost immediately.
The rule of thumb is this: the closer you are to the outdoor bloom date, the quicker a branch will bloom in the house. Lilac, which is still many weeks from blooming for me, will not quickly or easily force in the house now. A week before those buds open? Piece of cake.
On another topic, an important one for gardeners, is the presence of deer ticks in the garden. I recently researched deer ticks and the diseases they carry, including Lyme disease. Ticks are already out and biting. If you wish to go on-line, you can see my piece that gives 7 ways to prevent Lyme disease, along with photos of the ticks. Just go to https://dailyuv.com/henryhomeyer.
Henry is a UNH Master Gardener and the author of 4 gardening books. He lives and gardens in Cornish Flat, NH. His web site is www.Gardening-Guy.com.
Getting the Vegetable Garden Ready
Posted on Monday, March 28, 2016 · Leave a Comment
I talked to a gardening friend who has already started planting a few things in his vegetable garden. Not me! Despite a few warm sunny days, it is way too cold and wet in my garden to do much of anything. Seeds will rot in cold, wet soil. Here’s what I’m doing – or not doing.
Technically, spring is here, but the soil temperature in my garden is in the thirties, even when the air gets into the fifties or warmer. We need consistently warm temperatures before I will plant outdoors because it takes time to warm up the soil. I want the soil to reach 50 degrees or warmer before I plant.

Soil thermometer
Yes, I take my soil’s temperature, much as I would a sick puppy or a child trying to avoid school. I have a thermometer that looks like an old analog oven thermometer: a steel probe with a round button with a dial on top that shows the temperature. Mine was designed for use in compost piles, so the probe is a couple of feet long. You can look at your local garden center, or order one from Gardeners Supply Company (www.gardeners.com) in Burlington, VT.
I’m not ready to rake off the leaves I spread on my vegetable beds last fall. In October I weeded my vegetable garden and then covered it with 4 to 6 inches of leaves that I’d run over with the lawnmower and raked up. The leaves kept the soil from washing from my mounded raised beds into the walkways (the beds don’t have planks to contain the soil).
Unfortunately, the layer of leaves is also an insulator, so the soil will stay colder than bare soil until I remove it. But the leaves inhibit weeds from growing, too. That’s a good thing. Since my soil is still pretty soggy, I don’t want to walk in the garden or disturb the soil.
Soil is actually a bit fragile at this time of year – step on it (or rototill it) and you can ruin its structure. So the leaves keep weeds from growing until I rake them off in late April or early May.
Once the leaves are off the beds and raked into the pathways, two kinds of weeds will grow: annual weeds and perennial weeds like dandelions and witch grass. Annual weeds grow from seeds and are easy to kill: you can run a sharp hoe just below the surface, slicing off the tops from the roots. That will kill annual weeds when they are small.
If you don’t get around to hoeing your beds and the weeds are well established, you could toast them! That’s right, cover a bed with clear plastic, seal the edges with soil, and in just a day or two of hot sunshine, they will be toast. I’ve measured the temperature in a bed being solarized, and on a 60-degree day, the temperature got over 100 degrees.
Perennial weeds need to be pulled. Their roots contain stored energy from last year, and generally even a scrap of root can regenerate and start a new plant. That is one of the reasons I don’t recommend rototilling. Chop up witch grass roots and each piece with a node will produce a new plant if it is within a few inches of the soil surface. It’s true that plowing a field and turning the sod under a foot of soil will kill most grasses, but that’s different than rototilling.
Stella Natura 2016 cover
Meanwhile, indoors, it’s almost time to start planting. Generally I recommend starting most things 6 to 8 weeks before I put them outside. I plant tomatoes outdoors in early June. So April 10 is my planting date most years. I use a biodynamic calendar called Stella Natura (www.stellanatura.com) to advise me about planting dates. It uses the planets, stars and the moon to determine good times for planting fruits (tomatoes and peppers), roots (carrots and potatoes), flowers (artichokes and cauliflower) and leaves (lettuce and kale).
This year April 10th is a root day, but the two days before, according to Stella Natura, are fruit days up until 2pm on April 9th. At that point there is a blackout period until 6pm, and I will definitely not plant anything then. My informal experiments with blackout days have shown me that there is a significant disadvantage to planting then.
So what should you do if you didn’t weed and prepare your beds last fall? Start weeding, a little every day, as soon as your beds dry out. An easy way to see if your soil is ready to work is to grab a handful of soil and squeeze it. Hold that ball of soil, and tap it with a finger. If the soil is ready to work, it should crumble. If not, wait.
And when your soil is ready to work, think about creating some mounded, raised beds. You can do this by loosening the soil with a garden fork, then raking the loose soil into beds that are about 3 feet wide and stand up 4 to 6 inches above the walkways. Add a thick layer of compost on top, and scratch it into the soil at the top surface, and you’ll be ready to plant.
We all want to start gardening now, but do wait until your soil is as ready as you are!
Read Henry’s blog by going to https://dailyuv.com/henryhomeyer. He is posting 2 or 3 times a week. You can sign up for an email alert every time Henry blogs that will take you right to the entry.
Growing Tropical Fruits
Posted on Monday, March 21, 2016 · Leave a Comment
Last fall in my weekly newspaper column I commented that, if I’d been a good boy all year, I hoped Santa would bring me lemon or lime tree, one that would bear fruit indoors. Santa did not do so, though I can’t imagine why. But many kind readers emailed me saying, “Go to Logee’s Greenhouse (www.logees.com) in Danielson, Connecticut. They will have just what you want.” So after presenting at the Rhode Island Flower Show in February, I went to Logee’s. I got what I wanted – and more.
I met Byron Martin, whose grandfather started Logee’s in 1892. He showed me plants that had been alive longer than he had – some dating back to his grandfather’s days. By now the business has 14 greenhouses – including the original greenhouse.

Byron Martin in Logee’s Greenhouse
Byron literally grew up in the greenhouses, and is a vast reservoir of knowledge. He also has a good sense of humor. In one greenhouse he showed us the Miracle Berry plant and invited us to taste the fruit. “Just chew it a little”, he said. “Spit out the seed.” It was nothing remarkable, pleasant, but nothing special.
Later, in a different greenhouse, Byron picked a lemon, cut it open and offered me a piece. “Try this,” he said. “It’s nothing like any lemon you’ve ever tasted.” Wow. It was sweet. I mean sweeter than an orange. He grinned and explained that the Miracle Berry changes the way your taste buds perceive flavors. The regular lemon he offered tasted sweet and delicious.
In addition to running a fabulous tropical greenhouse, Byron is also the co-author with Laurelynn Martin of Growing Tasty Tropical Plants in Any Home, Anywhere (Storey Publishing, 2010). This book really does tell you everything you need to know about growing tropical fruits. I wish I’d gotten it years ago.
The book explains not only how to do things, but why. I like that. So, for example, I knew that one shouldn’t transplant a small plant into a big pot, just go to the next size. It’s fine to move a plant from a 4 inch pot to a 6 inch pot, not a 12-inch pot. But I never knew why.
The book explains that a small plant in a big pot may develop root rot. Its small root system will not suck out the water from the far reaches of the pot, so the potting soil will remain cool and wet, and that can easily promote root rot. Makes sense.
Growing Tasty Tropical Plants has tips for success, plant by plant and best bets for beginners. It tells you how to grow coffee, tea and bananas. Cinnamon? Sure, you can do it. And what about those avocadoes from the pits we all have started? No, the book explains, those will never produce fruit – but there are kinds of avocado that will give you fruit.
As an organic gardener I appreciate that the Martin’s book explains easy, safe ways to control pests and diseases. Neem oil is produced by a tropical tree and offers pest control for many insects without resorting to synthetic chemicals. And a sharp blast of cold water can greatly reduce the population of aphids or spider mites. (I’ve been known to shower with my house plants).
Key lime before pruning
So what am I growing now? I started with a key lime. This will produce fruit on a 2-foot tall plant, blooming in late winter or early spring and producing fruit in the fall into winter. The book explains that it needs temperatures of 60 degrees or more, as much sun as possible, and well-drained potting mix. It will not do well in consistently wet soil mix.
Then I got a Meyer Lemon. With proper pruning it will produce fruit when just three feet tall and is on the “Best Bets for Beginners” list. Like the lime, this plant will go outside in full sun for the summer, and can tolerate temperatures down to 50 degrees. At Logee’s, most of their lemons grow in 12-inch baskets high in the greenhouse as they love heat. Each of those plants produces about 30 lemons a year!
And of course I had to get a Miracle Berry (Synsepalum dulcificum). According to the book, if kept in full sun and fertilized monthly, it fruits heavily twice a year. And, according to some, chewing on a mature fruit will change the taste of lousy red wine into something a wine aficionado dreams of.
Byron gave me a bay plant so I can have leaves for use in the kitchen, and a neem tree just for fun. I knew the neem tree from my years in Africa, its native home. Interestingly, Bambara farmers in Mali called it the equivalent of the “manure tree”, having figured out that it improves the soil (by fixing nitrogen). According to Byron’s book, neem oil will smoother and eradicate white flies, mealybugs, thrips and more. I bought a small bottle of it.
In a year or two I should be harvesting lemons and limes. I have a good sunny window for the winter, and they will go out in the summer. And if you want to try some of these things, think about a road trip to Logee’s.
Henry is now blogging regularly. Go to https://dailyuv.com/henryhomeyer to see his posts. You can sign up to get an e-mail every time he posts, too.


 Click Here to buy from Cobrahead