Plans for the New Year
Posted on Wednesday, January 6, 2016 · Leave a Comment
I wonder why it is that so many of us make resolutions at this time of year: lose weight, keep a clean desk, be nicer to people working for political candidates that call us during dinner time … and so on. As a gardener, I don’t tend to think so much about resolutions, but more about what I hope to do in my gardens, come spring. What plants shall I try? What new gardens might I develop?
I recently got a catalog from a wholesale plant nursery, Van Berkum’s of Deerfield, NH, and spent an evening drooling over their catalog and thinking about all the plants I wanted. I made three kinds of notations: a star for everything I simply must have, a check for everything I’d like to have, and a dot for everything that sounds interesting. Needless to say, there were way too many marks to buy them all – I just don’t have room. Here are some of the starred plants.
Meehania cordata Credit: Van Berkum Nursery
Meehan’s Mint (Meehania cordata). I’ve never seen this, so I’m intrigued. It is for shade or part shade, likes moist soil, and spreads slowly by stolons (roots). It has showy lavender-blue flowers in May-June, and is a native wildflower that comes originally from Appalachia. I know where to plant this: under some old apple trees where my primroses bloom in pinks, whites and magenta. The foliage is just a couple of inches tall, and the blossoms stand 3 to 4 inches above it.

Dalea purpurea Missouri Botanical Credit: Missouri Botanical Garden
Purple Prairie Clover (Dalea purpurea). Browsing the on-line photos that are not included in Van Berkum’s printed catalog, the photo caught my eye. Nothing like the clovers I know, it stands 24 to 30 inches tall, and has showy cylindrical cones covered with tiny magenta flowers. The blossoms remind me of teasel flowers in that only part of the cone is blooming at any given time. Native to Missouri, it is hardy to Zone 3 (minus 30 degrees) and needs full sun.
White Cloud Calamint (Calamintha nepeta). I’ve seen this and even planted it for one of my gardening clients. I love it, and although it is listed as a Zone 5 plant, the one I planted wintered over last year, even with a cold winter. It forms a globe-shaped plant loaded with tiny white flowers, reminiscent of baby’s breath. I need one (or more)! Full sun, it tolerates dry soil.
‘Miss Manners’ Obedient Plant (Physostegia virginiana). I love obedient plant, but it is not obedient at all. It’s a thug! Tall, with wonderful pink flowers, it is great in a vase. But my goodness, getting it out of my garden was a struggle. But I miss it, and am tempted by this plant which is, allegedly, “not invasive”. Only 18 to 24 inches tall, it has white flowers and loves moist soil, and I have plenty of that. I’ll keep a sharp on it, and it if takes off, yank it!
Geum rivale Flames of Passion Credit: Van Berkum Nursery
Geum rivale ‘Flames of Passion’. This is a small perennial that does best in part shade and takes drought. I want it, largely, because it was introduced by one of my gardenheroes, Piet Oudolf. One winter when I was passing though Holland I visited him at his home in the countryside; I loved the fact that he had commissioned someone to carve life-size stone sheep and had them “grazing” around his property.
Piet Oudolf is a garden designer extraordinaire; among his projects is the High Line, a garden a mile and a half long built on an abandoned elevated railway line in New York. I plan to go there this year on my 70th birthday, April 23. Let me know if you want to join me for a garden walk there. It would be great fun to walk it with interested gardening friends – new or old.
Feather Reed Grass, ‘Karl Foerster’. I’ve got to try this tall grass, having heard it lauded by gardening great Bill Noble when I interviewed him recently. It’s his favorite plant. It grows 36 to 60 inches tall in a big clump, and is lovely from early in the season till late. Full sun.
I love delphiniums, but hate staking them up. There is a new group of them, the New Millennium Hybrids, that “shouldn’t need staking” if planted in full sun. I’ll give one or two a try, and see how they do.
Lastly, I absolutely must get an Itoh peony. This is a cross between a tree peony and an herbaceous peony, and at maturity can produce up to 50 blossoms over the course of a month. Expensive, but I’ve decided it‘s worth it. They come in a variety of colors, and I will buy mine when in bloom, so I will know exactly what I’m getting. I just need to figure out where to plant it. But, hey! I’ve got all winter to do that.
So make your gardening resolutions, or create a wish list for what you hope to plant. You can see photos of the flowers I mention on line at www.vanberkumnursery.com. They are strictly wholesale, but their website has a list of retailers that carry their plants.
Henry Homeyer can be reached at PO Box 364, Cornish Flat, NH 03746 or by e-mail at henry.homeyer@comcast.net.
One Gardener’s Plans for the New Year
Posted on Saturday, January 2, 2016 · Leave a Comment
Each year after the winter solstice I take some time to think about my garden of the past year and to make plans for the upcoming garden season. What worked? What didn’t? It’s good to think about such. I won’t say I’m making any gardening resolutions this year, but I’ll share with you my aspirations. But I won’t feel bad if I don’t accomplish exactly what I hope to do. Each year life has a way of getting in the way of best made plans.
The past year was a good one for me. In past years my vegetable garden has been getting shadier – trees have a way of getting bigger, and even relatively distant trees have been cutting down on the hours of sunshine in the garden. This past year I was lent a nice plot in full sun, a plot with good soil that belongs to a friend and that had been farmed organically. It was bigger than I needed, but a farmer agreed to till it and get it ready for planting. So my partner Cindy Heath and I planted all kinds of veggies including sweet corn and dry beans – crops I hadn’t had room for in past years. And we planted extra food to give away.
Our vegetables did well. There was sufficient rain and perhaps because the land had been fallow for a year or more, pests and disease problems were minimal. Even the potato bugs were few. We fenced off the beans (both dry and green, both loved by deer), and the raccoons didn’t do much damage to the corn. We had plenty for us, our friends, and the coons. (Maybe the coyote urine I put out in little Airwick containers helped keep the coons away.
So will I plant the “farmette” (as we called it) again this year? You betcha. It was a lot of work, but I really enjoyed having as much space as I wanted in full sun. I love having excess vegetables to share, and my little farmette allows me to do that.
My grandfather, John Lenat (1885-1967), had a regular vegetable route in his later years. He drove around his town (Spencer, Massachusetts) in his bright red Nash Rambler giving tomatoes, lettuce and cucumbers to his friends. He’d never accept a nickel for his produce. I remember being amused that he even brought tomatoes to give the checkout clerk at the A&P Grocery store. In those days there were no soup kitchens or homeless shelters, but there are now, and they are happy to accept what any of us can contribute.
This year I’ll also plant some flowers at the farmette. A dear friend gave me a gallon Ziploc bag of dried zinnia seed heads from her garden. She tills a patch of soil that is about 4 feet wide and 50 feet long each year just for zinnias. Big, tall, brightly colored zinnias. And each year she harvests enough seeds in the fall to plant it again – and to give away plenty, too. So I shall try the same.
I looked in my Johnny’s Selected Seeds catalog to see what zinnias might cost in bulk, for those of you who want to try a similar effort. A thousand seeds of the ‘Benary’s Giant Series’, costs $29.30, but the ‘Giant Dahlia Flowered Series’ costs just $12.15 for an ounce that has 3,200 seeds. Since I have never tried a mass planting like that before, I can’t advise you as to how many seeds you might need for a mass planting. I plan to scatter seeds on tilled soil, rake them in, and hope for the best.
Our farmette is about 6 miles from my house. I’ll plant most of our veggies for canning, freezing and dehydrating over there. But I’ll also continue to grow some veggies at my home garden, focusing on things that do well with less than full sun: lettuce, kale, herbs, leeks, carrots, and Brussels sprouts. I’ll also plant a few tomatoes and summer squash at my home garden for the convenience of being able to pick them for dinner.
This year I’ll try to slow down a little, too. By the time planting season comes I’ll be 69 years young. And although I’ve been gardening for others for a long time, I think I’ll try to minimize the time I spend in other people’s gardens this coming year. Become more of an advisor, and less of a digger, weeder and wheelbarrow pusher. I’ll try to focus on my own gardens, given that I have expanded them.
What else will I do in 2015? I’ll work hard at controlling the invasive plants that are always trying to get a foothold. Just cutting back purple loosestrife 3 times in the summer will do much to keep it from expanding its territory. And I’ll keep an eye out for garlic mustard, which so far has not made it on to my property, but is within a mile of my house.
The list could go on and on. Re-build the garden arbor that has started to fall apart. Dig out some of the biggest goldenrod that I (foolishly) have allowed to get too rambunctious. Try new kinds of flowers. Plant some early-season raspberries that will be done by the time that new kind of fruit fly arrives in late summer. And so on.
So take some time in your easy chair and make your own plans. And feel free to share them with me if you like, I’m always happy to get mail or e-mail. Maybe you’ll inspire me to try something new. My best to you all for 2015.
Contact Henry by e-mail at henry.homeyer@comcast.net or write the old fashioned way to P.O. Box 364, Cornish Flat, NH 03746. Please include a self-addressed stamped envelope if you have a question you want answered.
Eating My Own Veggies
Posted on Wednesday, December 30, 2015 · Leave a Comment
A dozen years ago I decided to become rich and famous by writing a bestselling book. I would travel the country, talking to farmers – some conventional, some organic, some using that “new” technology of the time, GMO agriculture. I thought my book would explain what eaters wanted to know about how their food was produced. It would outsell Fast Food Nation.
I outfitted my aging van with a bed, a fridge and a small battery-operated fan for those days when the temperatures exceeded 100 degrees (the van had no AC). I drove across the country, talking to farmers along the way. I had made arrangements to work on a 300 acre organic farm in Idaho for a few weeks, working alongside the Peruvian laborers. Unfortunately, I never found a publisher for the idea, so I never wrote the book. But I learned a lot about commercial agriculture.
In Idaho, I remember bouncing along on the back of a 4-wheeler to see a conventional potato farmer’s fields. He stopped and added 4 ounces of fungicide into an irrigation pivot that served 30 acres of potatoes. What would happen if one of his laborers, many of whom do not read English, had added a quart of fungicide instead of 4 ounces? And why, I wondered, did the farmer have a garden where his wife grew veggies for their use, including potatoes? That reinforced my conviction that I want to eat organic food, preferably food I grow myself.
This past summer I had access to a large field that been tended organically for years, but allowed to go fallow. I grew potatoes, tomatoes, squashes of all sorts, corn, beans and more. I called it my farmette.

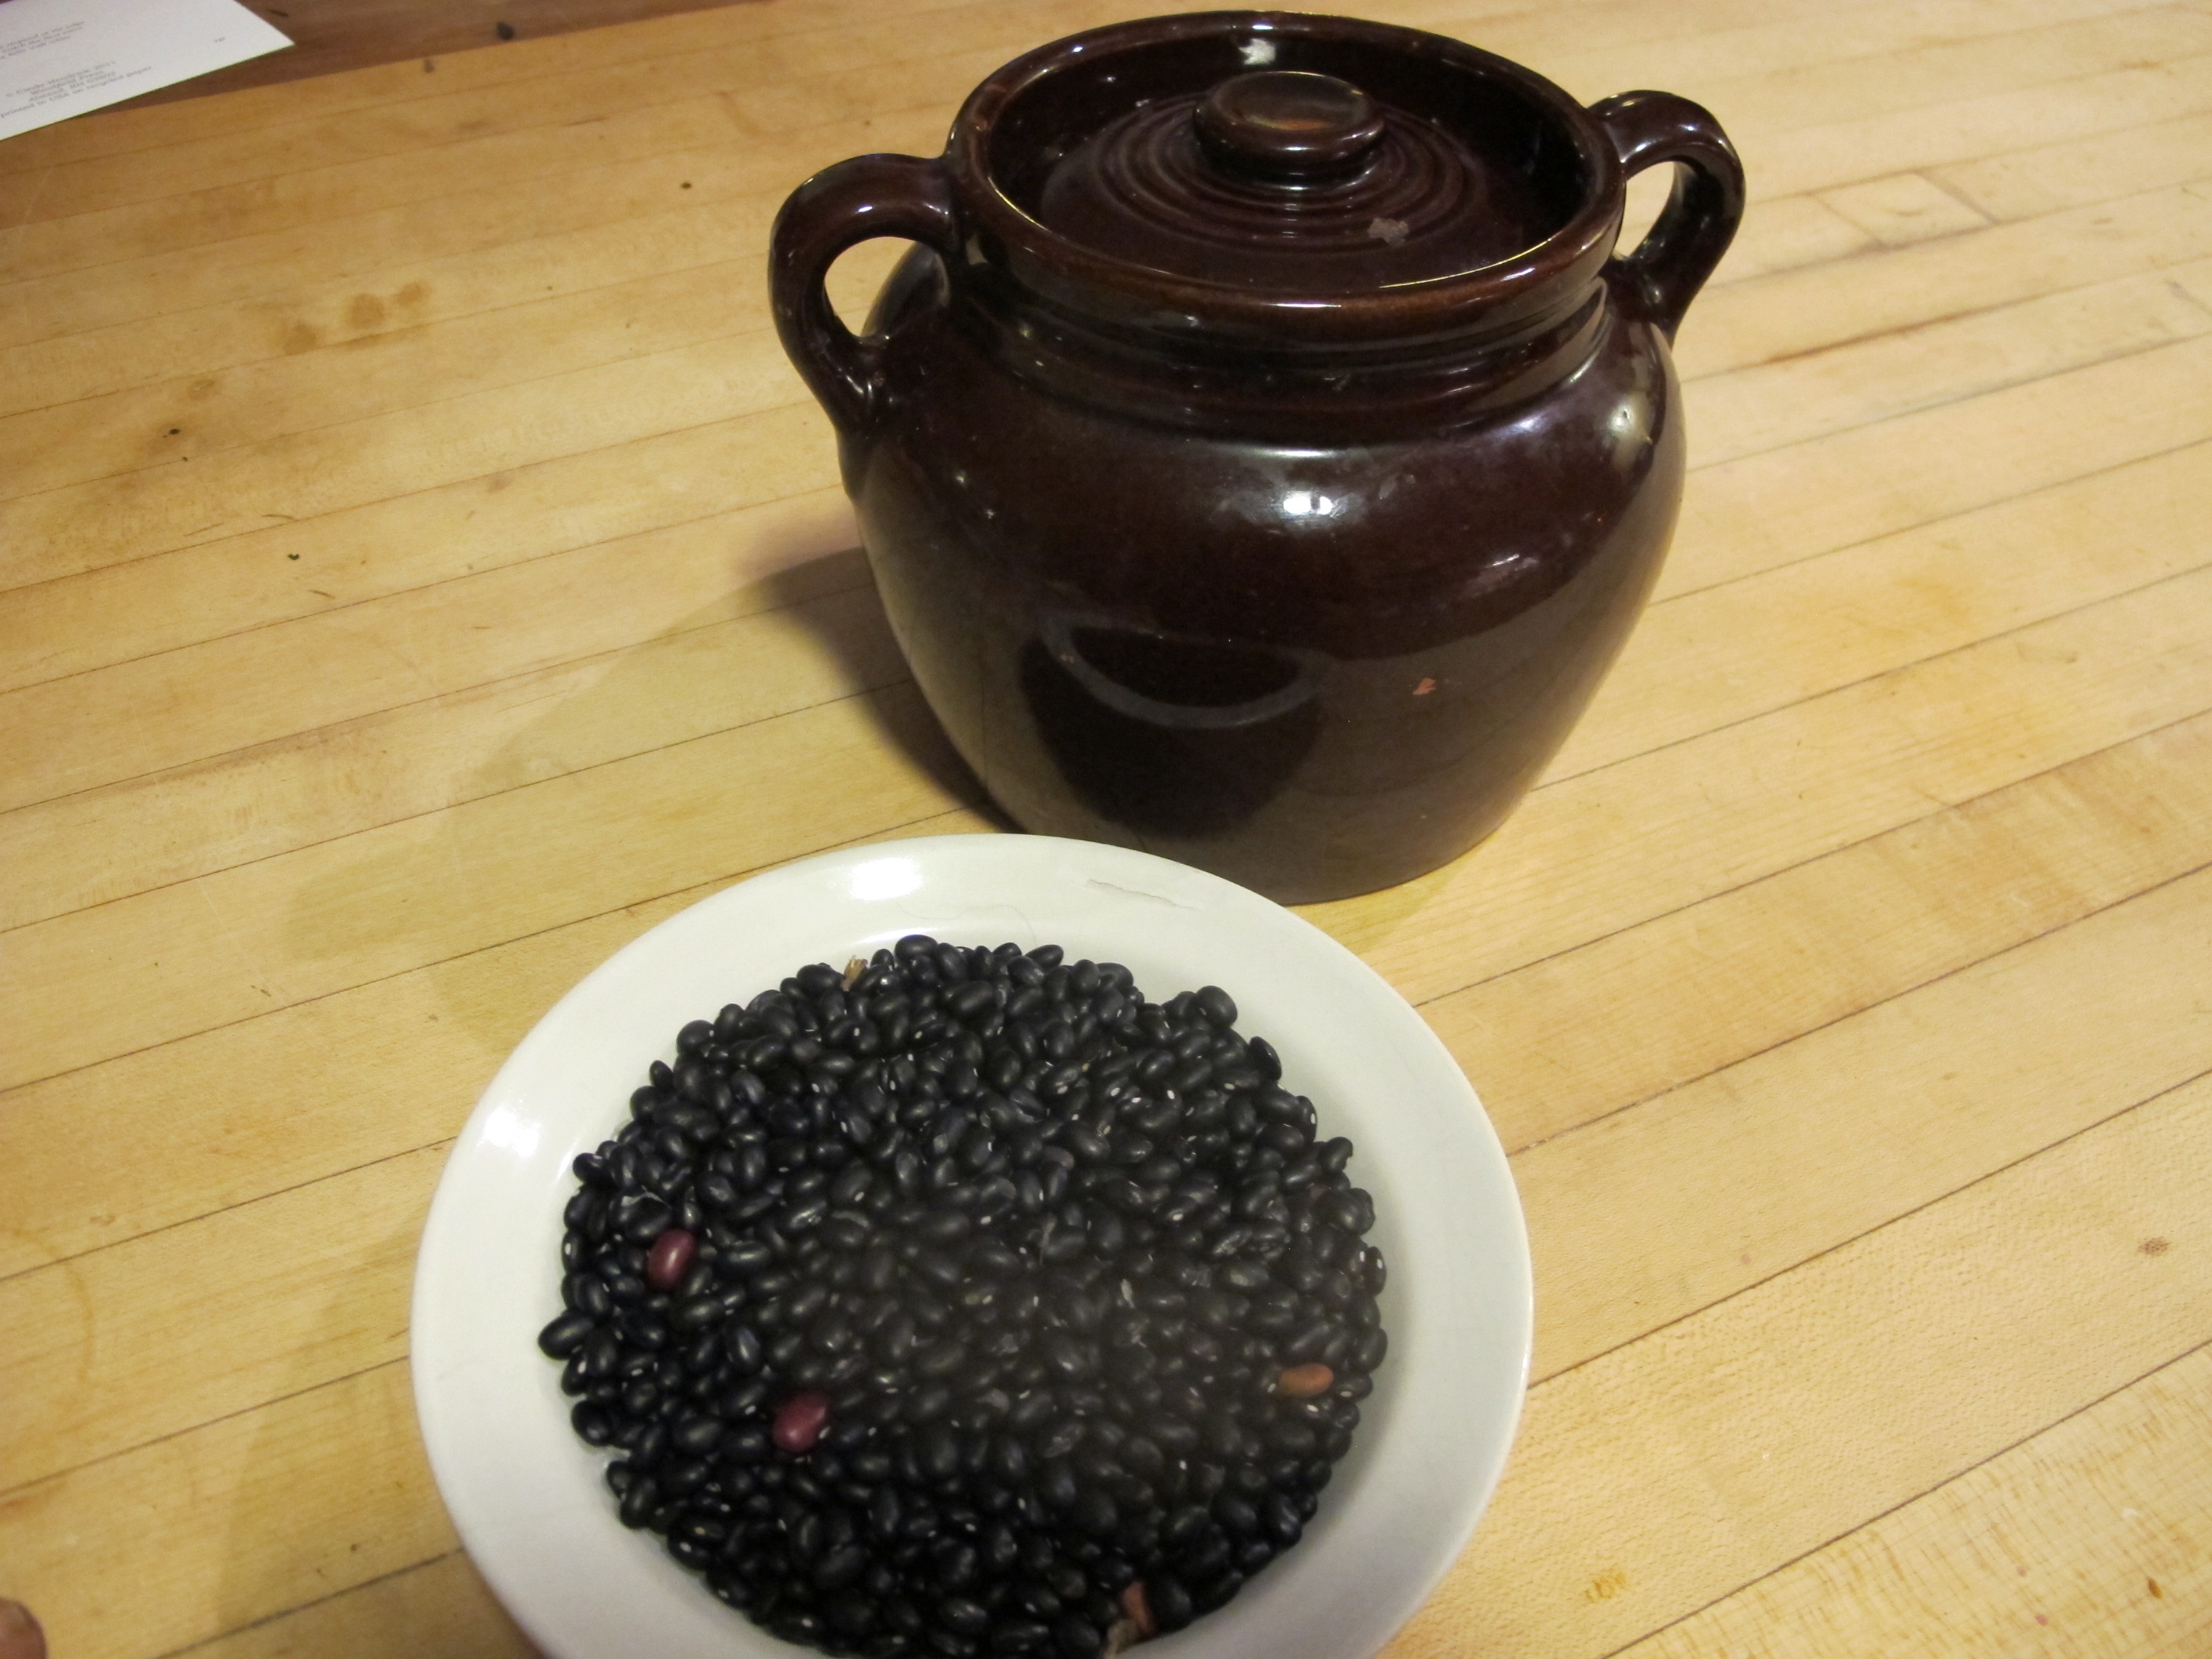
Dry beans from Henry’s garden, and bean pot
In the past I had only grown beans for fresh eating or for freezing. But with plenty of space, I also grew beans for drying despite the fact that dry beans are not expensive – at least not the conventional ones. Still, I thought, wouldn’t it be nice to make baked beans or chili just using my own dry beans?
Dry beans are a lot of work – beyond just planting, weeding and protecting from the deer (who love them). The bean pods must get totally dry either in the field or in the barn or house. In good weather, letting them dry on the vine is best. Then they must be threshed or hulled. That means getting every last seed out of the shells, which can be tedious. And it is hard to get all the bits of the outer hulls separated from the beans. Winnowing outdoors on a windy day is the easiest way to do so. Fortunately my partner, Cindy, finds getting dry beans ready for winter use to be a nice contemplative task.
Invited to a solstice potluck, I decided to make a pot of baked beans just using my own ingredients – or as close to it as possible. The beans were a big success, so I’m sharing the recipe with you. And, obviously, you can buy the beans or anything else you lack from your own garden.
Henry’s Spicy Maple Beans
½ lb. bacon, chopped (optional)
2 cups dry black beans, soaked overnight in plenty of water
3-4 cups chopped tomatoes – frozen whole, or from a can
2 large onions, chopped medium to fine.
2 cloves, minced
2 cups dried pears or other dried fruit (apricots work well, too, but use less)
1 to 2 cups dried cherry tomatoes
3-4 ounces tomato paste
1 teaspoon dry mustard
1 tablespoon Herbes de Provence (or rosemary and thyme)
Dried hot pepper to taste – ½ teaspoon of chipotle is a good start. Jalapenos or Espellette are good, too.
½ cup maple syrup or more, to taste
Salt and pepper to taste
Water as needed.
I began by rinsing the beans that had soaked overnight, and cooking them for an hour with plenty of water. They soak up considerable water.
In a heavy enameled pot I fried the bacon, then drained most of the fat. I used a local thick-cut smoked bacon, Garfield’s, from Meriden, NH – just down the road from me. Then I added the onions, and cooked at low heat until translucent. If making vegetarian beans, use olive oil to sauté the onions.
To the onions and bacon I added the beans and immediately covered with water. I added the chopped tomatoes that I had frozen whole last summer, the tomato paste, the maple syrup, spices and garlic, and continued cooking at low heat. The beans should be covered with liquid at all times.
Dried pears or other fruit add a nice sweetness to the beans, but you can add more maple syrup instead. I chopped my pears into small pieces, and added them with the dried cherry tomatoes to the pot.
I cooked the beans on the stove top for an hour, tasting often to see if I needed more hot peppers, other spices or maple syrup. Then I transferred everything into a ceramic bean pot and put it in the oven, covered, for another 2 to 3 hours at 300 degrees. Watch out for juices bubbling over – I always keep a cookie sheet under the pot. Add water if the beans get too dry.
For me, at least, eating something wonderful created from my own veggies and fruits is a real treat. I know that it has no toxic chemicals and that the ingredients have been grown with love. So start planning your vegetable garden now – the days are already getting longer.
Henry is the author of 5 books. His website is www.Gardening-guy.com.
Buying Cut Flowers
Posted on Wednesday, December 23, 2015 · Leave a Comment

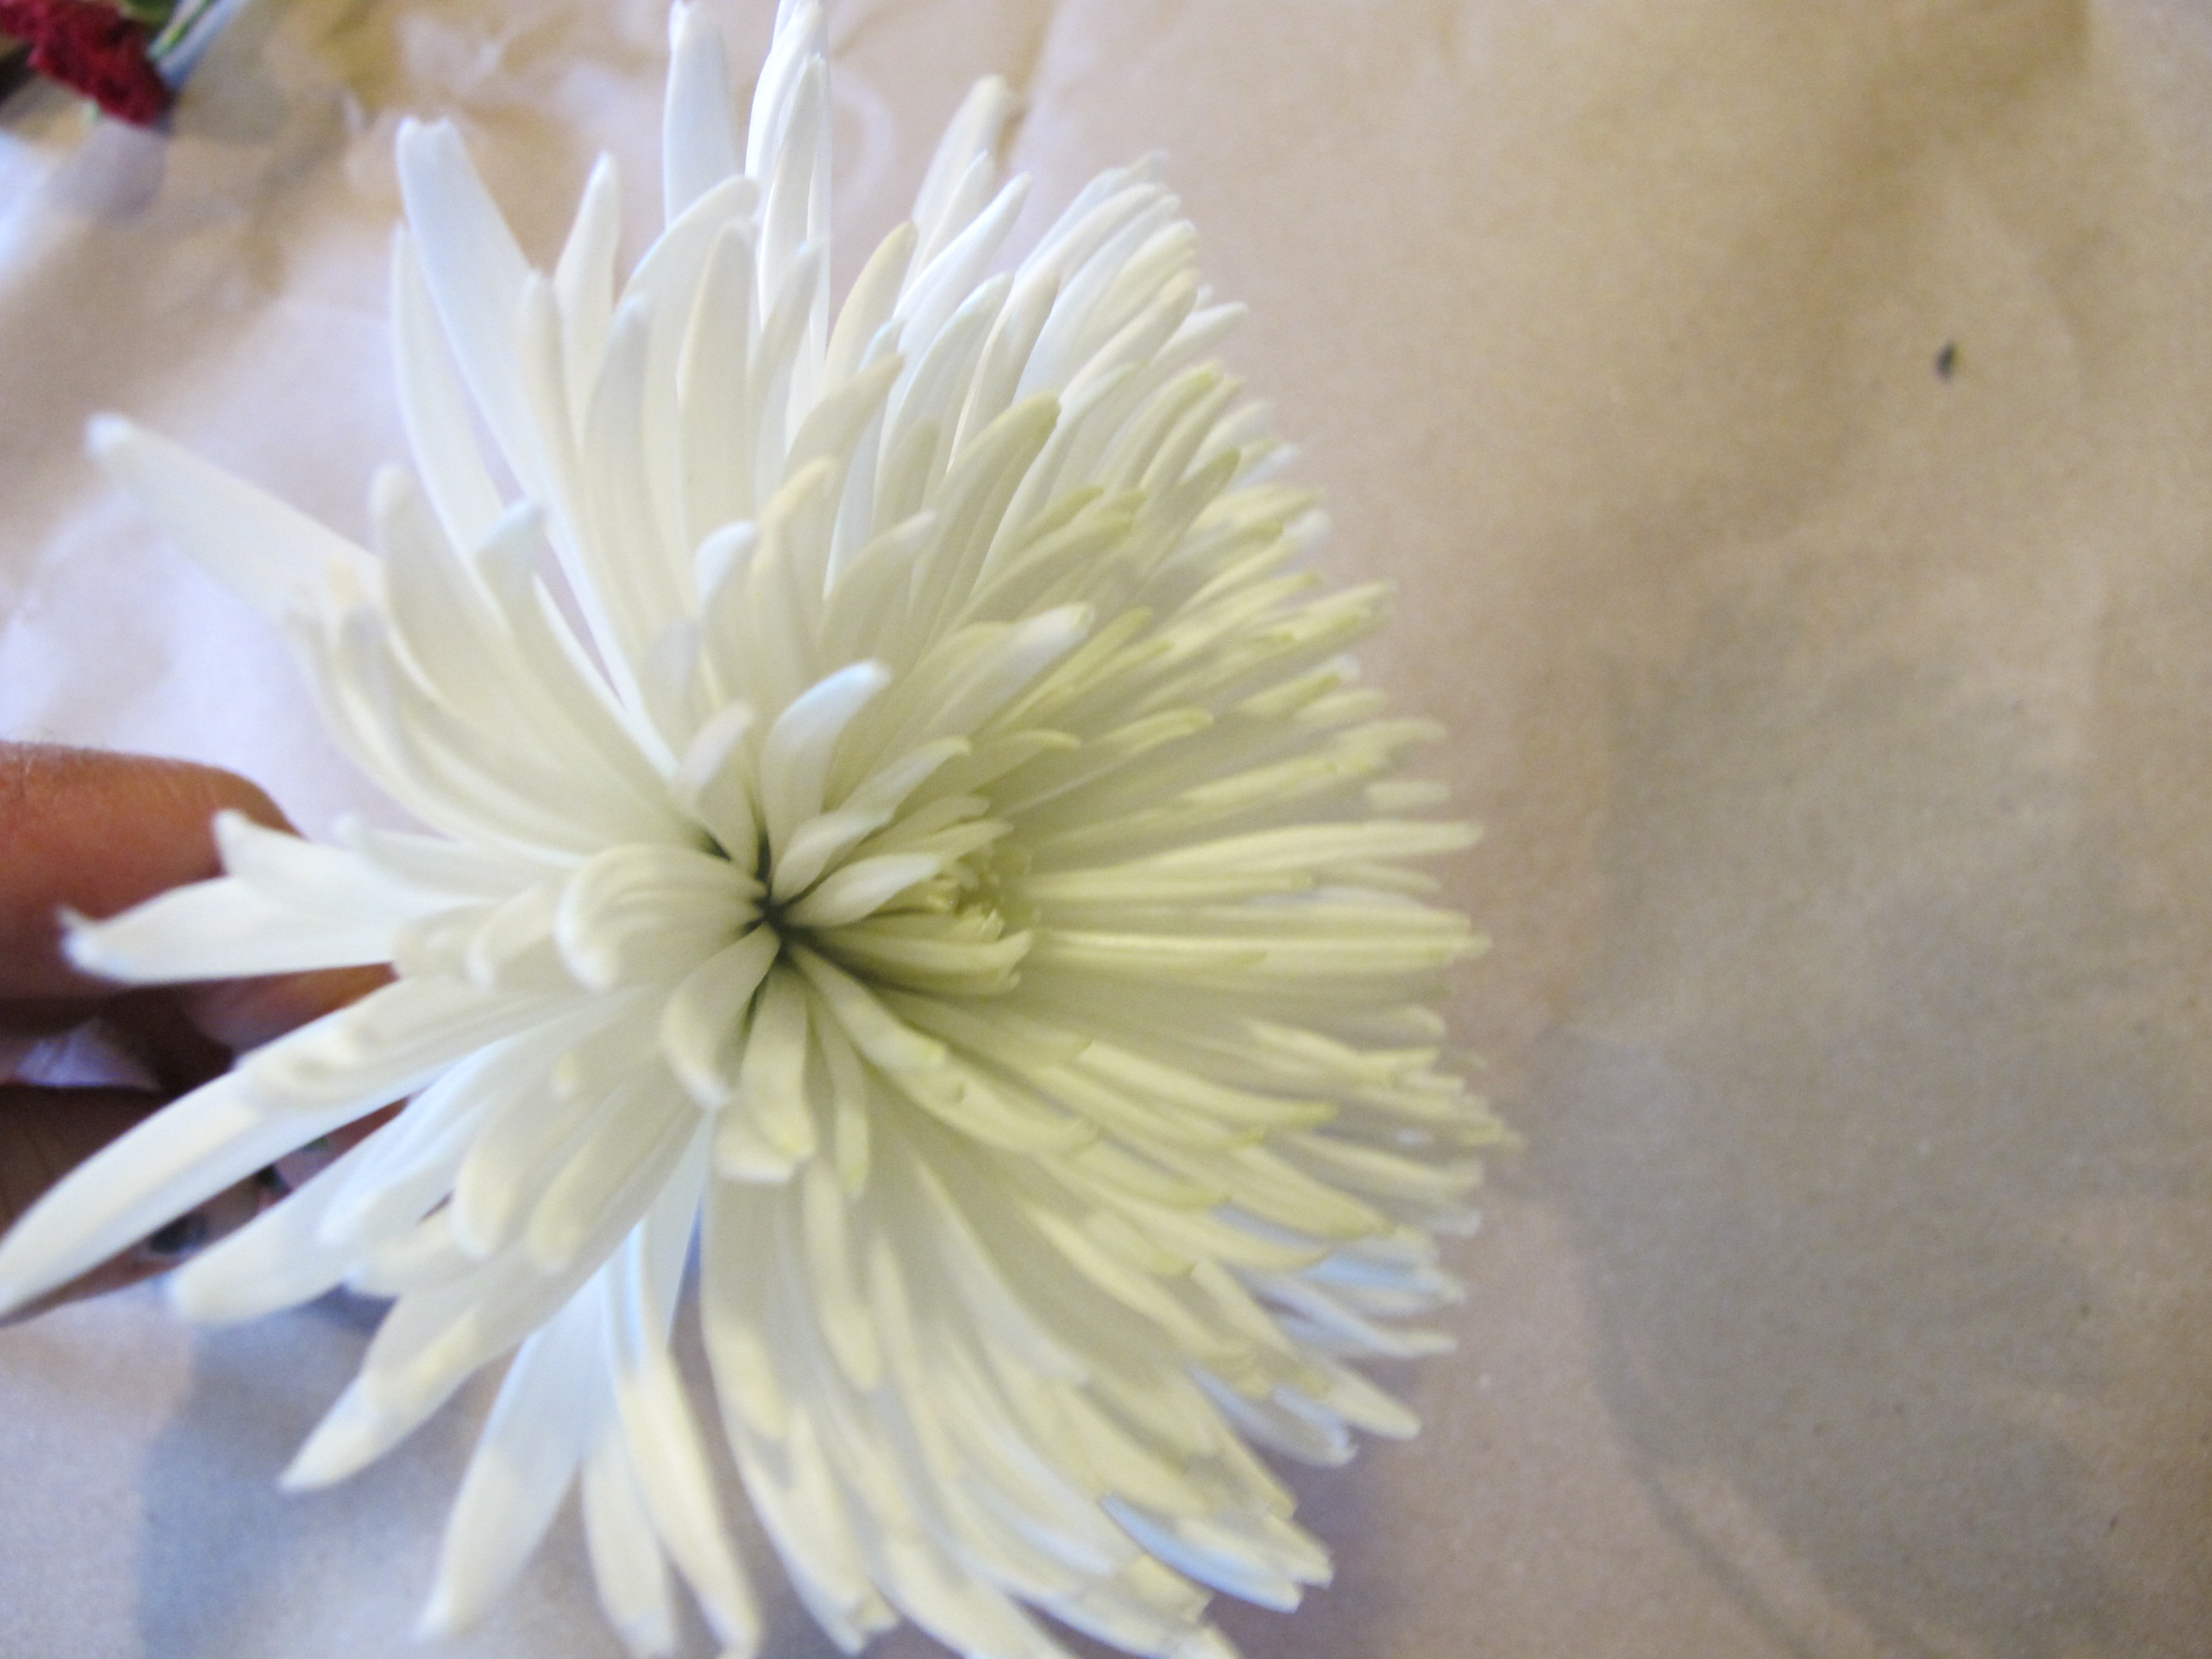
spider mum
Technically, winter is here – despite the lack of snow. The sun is often lurking behind gray clouds, and on a good day we get just 9 hours of light. I miss the colors of summer. I still try to keep fresh cut flowers on the table – even if they’re not flowers from my garden.
Cut flowers are among modern America’s true bargains. For the price of a bottle of wine – or even a few of cups of fancy coffee – you can buy flowers that will grace your table for up to three weeks. But there are some things you should know about getting good table-life for your investment.
First, you need to buy fresh flowers that have been carefully tended – and you can’t beat a florist for that. Yes, grocery stores sell bouquets, but many grocery stores sell bouquets in the fruit and vegetable department. Apples and some other fruits give off ethylene gas, which promotes ripening – or in the case of flowers, getting old and unattractive.
Cut flowers need to take up water to stay fresh and healthy. Stems tend to scab over after a day or two, which means they cannot take up replacement water, or not much, so they suffer. A floral shop has trained personnel who trim each stem in the store every other day, taking off three quarters of an inch each time. And someone who regularly changes the water to keep to keep it fresh. Chain grocery stores probably count on you buying their flowers before the flowers need to be trimmed or their water changed.
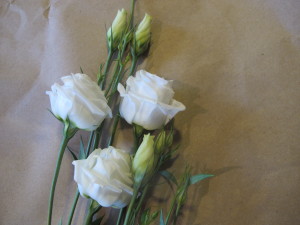
Lisianthus
When you bring your flowers home, get them right in water. And follow the 3-second rule: never take longer than 3 seconds to get your flowers in the vase after trimming the stems. Most florists give you packs of powder to put in the water, and the stuff works to keep flowers fresh longer. It inhibits bacteria from growing, which is good. Bacteria will impede water take-up.
If you want maximum life out of you flowers, NEVER let leaves enter the water. Leaves will rot, promoting growth of bacteria. And keep your arrangement cool if you can. Putting it near a radiator or woodstove will shorten its life. If you have invested in roses or tulips, you may wish to move the vase to the entryway or mudroom at bedtime to keep the flowers extra cool during the night – or put them in the fridge.
Some flowers are better picks than others if you’re on a budget and can’t afford to buy new flowers every week. Here are my recommendations for good cut flowers:
- Lisianthus: These look like silk flowers to me: perfect white, pink or lavender-colored bell-shaped flowers on long stems. Tough to grow in the garden, they are perfect in a vase – I’ve kept them for up to 3 weeks.
- Miniature carnations: Each stem has 2 to 4 blossoms. They come in a variety of colors. Mix dark red “minis” with red roses to make a bouquet of roses look fuller. And even after the roses go to

Alstromeria
Valhalla, the carnations will still be good!
- Chrysanthemums: These come in a variety of sizes and colors, from the huge spider mums to little guys. I love the scent of the flowers –it’s not overpowering, but it’s there if you sniff them.
- Statice. I grow these for use as dry flowers, which tells you that they really do last forever – even out of water. They come in blue, purple, pink and white.
- Spray roses: Instead of a single blossom per stem, these have 2-5 blossoms, giving you more bang for your buck. Will last about a week with proper care
- Alstromeria: Each long stem has clusters of 2-inch lily-like blossoms in pinks and reds, with yellow throats. Very long-lived. Great value.
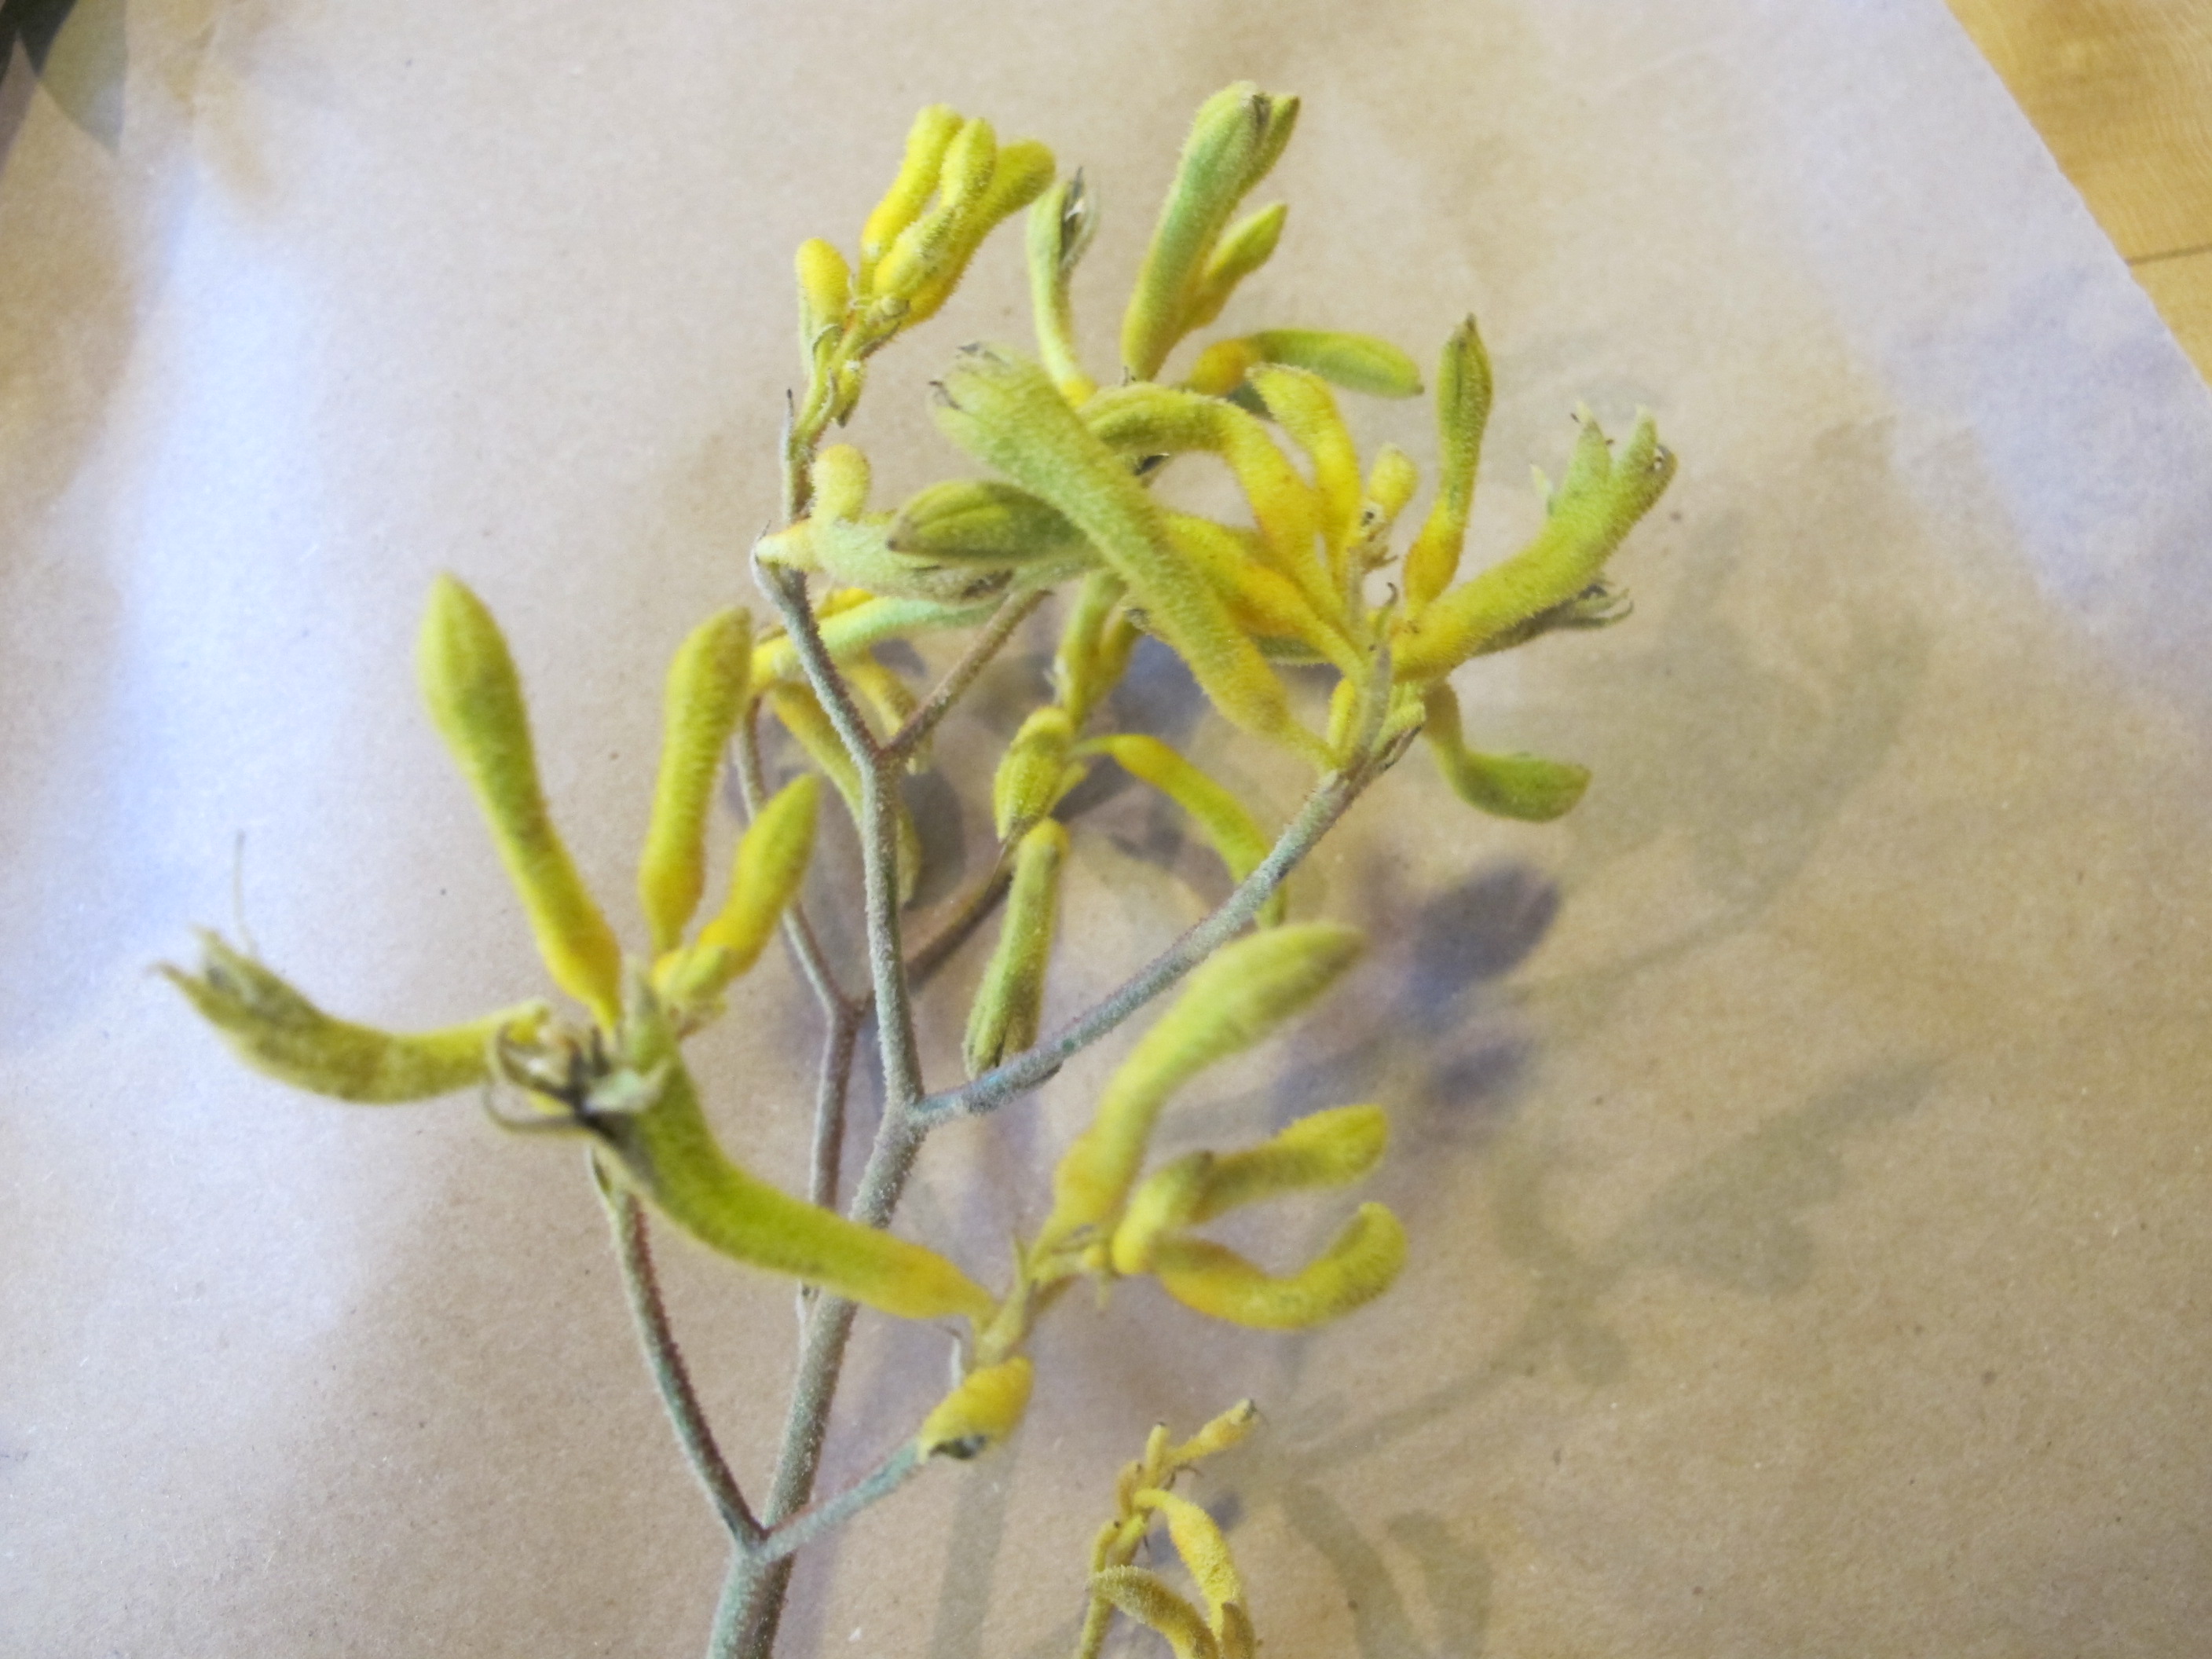
- Kangaroo paws: These Australian natives are fuzzy and cute. They come in pinks, reds and browns, and last very well. Not every florist will have them, but ask.

Kangaroo Paw
Looking for a fun project with your kids? It’s easy to change the colors of chrysanthemums. Leave them out of water for 12 hours, then cut off 2-3 inches and put them in water with food coloring. Obviously, you should start with white chrysanthemums. The colors you get may not be exactly the color you see on the food coloring, but it can be quite dramatic.
Everyone loves to receive the gift of cut flowers, even guys. So treat your loved one – or yourself- to fresh flowers this winter. They’re cheerful, and can make winter less oppressive.
Henry is the author of 4 gardening books, including a new, revised second edition of The New Hampshire Gardener’s Companion: An Insider’s Guide to Gardening in the Granite State. His website is www.Gardening-guy.com.
Growing Fruit Indoors
Posted on Wednesday, December 16, 2015 · Leave a Comment
When I was a boy of eight or nine I planted a grapefruit seed, hoping it would produce a tree that would provide us with a nice source of winter fruit. Ten years later it was 3 to 4 feet tall, with nice shiny leaves. I went off to college, leaving it in the care of my houseplant-challenged mom. Unfortunately, it pined for me and died a slow death – probably due to overwatering.
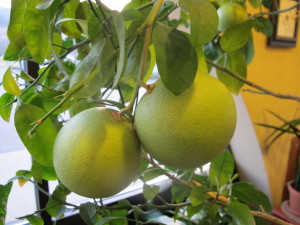
Dr Fields’ indoor grapefruits
My grapefruit tree never blossomed in the 10 years I cared for it. So I was amazed to encounter a grapefruit tree loaded with fruit in the south-facing windows of my optometrist, Dr. Chris Fields in Lebanon, NH. He told me that he had planted seeds 22 years ago when his son was born, and that this was its second year of producing fruit.
Dr. Fields said it bloomed magnificently this past spring and that he went around with a paint brush, transferring pollen from stamens to pistils. The year before he had allowed moving air to do the pollinating, and he had fewer fruits. Some of his fruit felt heavy and full of moisture, others felt light – as if they were made of green Styrofoam. Huh. He’s not sure if they will fill up later.
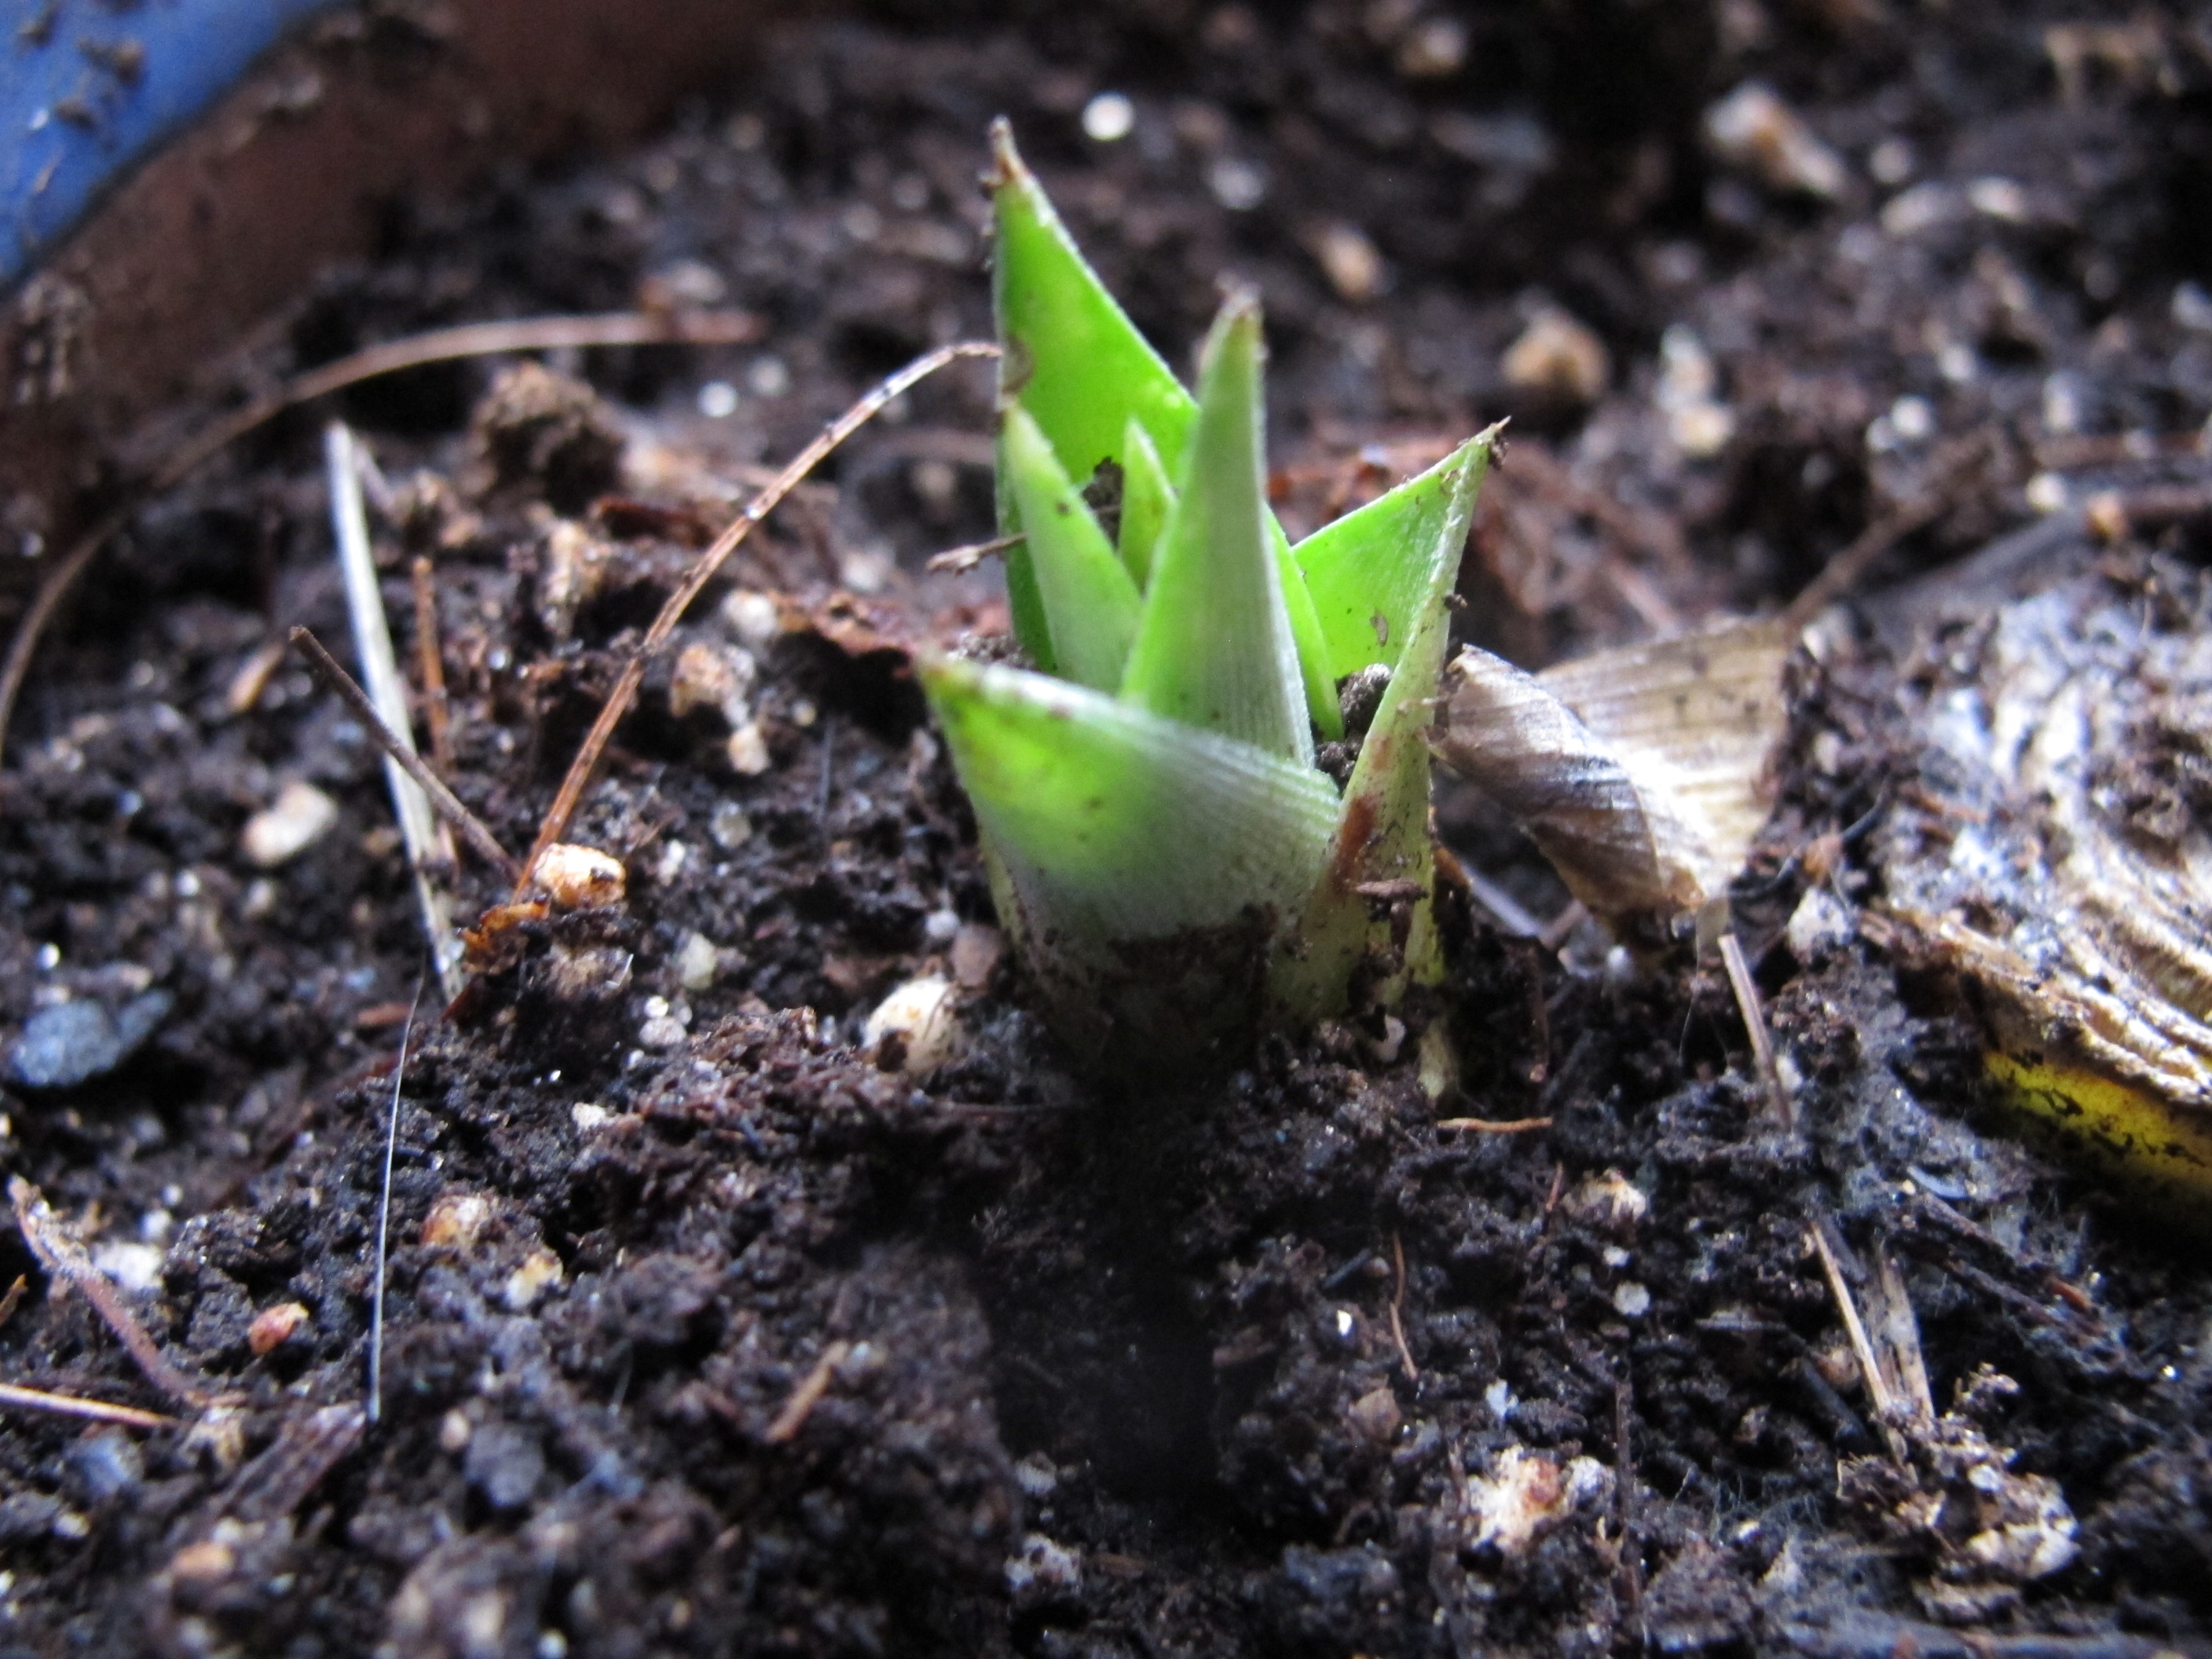
Meanwhile, I am experimenting with my pineapple plant. I reported in this column last summer that I had bought a pineapple plant, even though I was told that after harvesting its one fruit, the plant would die. I ate the fruit in July and kept it going all summer, enjoying the large, shiny strap-like leaves.
Each fall I pick the “team” of plants that get to come inside for the winter, and competition for window space is tough. The pineapple did not make the team this fall, and after a few hard frosts I went to clean out the pot for winter storage. Much to my surprise, there were two new green shoots growing beneath the frosted leaves, and the root system appeared vigorous.

Pineapple starting to grow
So I cut off all the old, dead leaves and re-potted the youngsters and brought them in. We shall see what happens, but my mouth is watering as I think about the fresh pineapples I (may) get next summer, or perhaps the summer after. It’s always fun to experiment.
Back when I was a kid a common school project was to start an avocado plant by suspending a pit by three toothpicks in a glass of water, allowing the base to just kiss the water. But when I tried that a few years ago, I was unable to get one growing. I asked Mrs. Google, and she explained why: avocados need to be started soon after picking. And with modern refrigeration techniques, avocados can be kept edible for months – but older fruits will not start new plants from their pits. Makes sense.
In the fall of 2013 I spotted an avocado plant growing in the compost pile and rescued it, potting it up and giving it a place for the winter. These last two summers it has lived on the deck, getting sun and rain and generally enjoying life outdoors. It is now 30 inches tall, and the stem is half an inch in diameter. Of course I remember avocado trees from my time in the Peace Corps in West Africa – they were bigger than full-sized apple trees here when they were loaded with fruit, so I doubt that mine will ever be anything but a handsome houseplant.
I bought a small banana plant a dozen years or more ago, and kept it outdoors on my deck each summer, bringing it in for the winter ever since. It came with the variety name ‘Cavendish’ which is what most commercial bananas are.
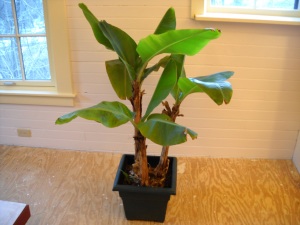
My Cavendish Banana
In a 12-inch pot the banana plant got about 3 feet tall, but never taller. And it never hinted at producing fruit – though it did create several other small banana plants that could be dug and re-potted. This year I gave it to Dr. Fields – if he can get a grapefruit tree to produce, maybe he’ll get the bananas to produce, too. I told him that I want one of the bananas if it produces, though.
So Santa Claus, if you are reading this, here is my wish: I want a lemon or lime tree that will produce fruit for me here in Cornish Flat, New Hampshire. Yes, I know, Santa, that I have apples, plums and pears that produce nice fruit outdoors. But that is not the same. I want fresh citrus in winter, and know a number of people who have succeeded in growing lemons or limes indoors. And I’ve been a good boy this year … mostly.
Henry is a gardener who will try growing almost anything once. His email address is henry.homeyer@comcast.net. Let him know if you ever got a banana tree to produce. His mailing address is POB 364, Cornish Flat, NH 03746. He is the author or 4 gardening books.
Working in the Rain
Posted on Wednesday, December 9, 2015 · Leave a Comment
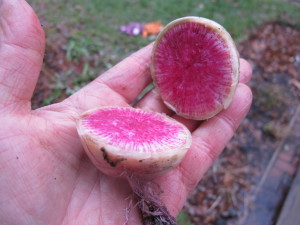
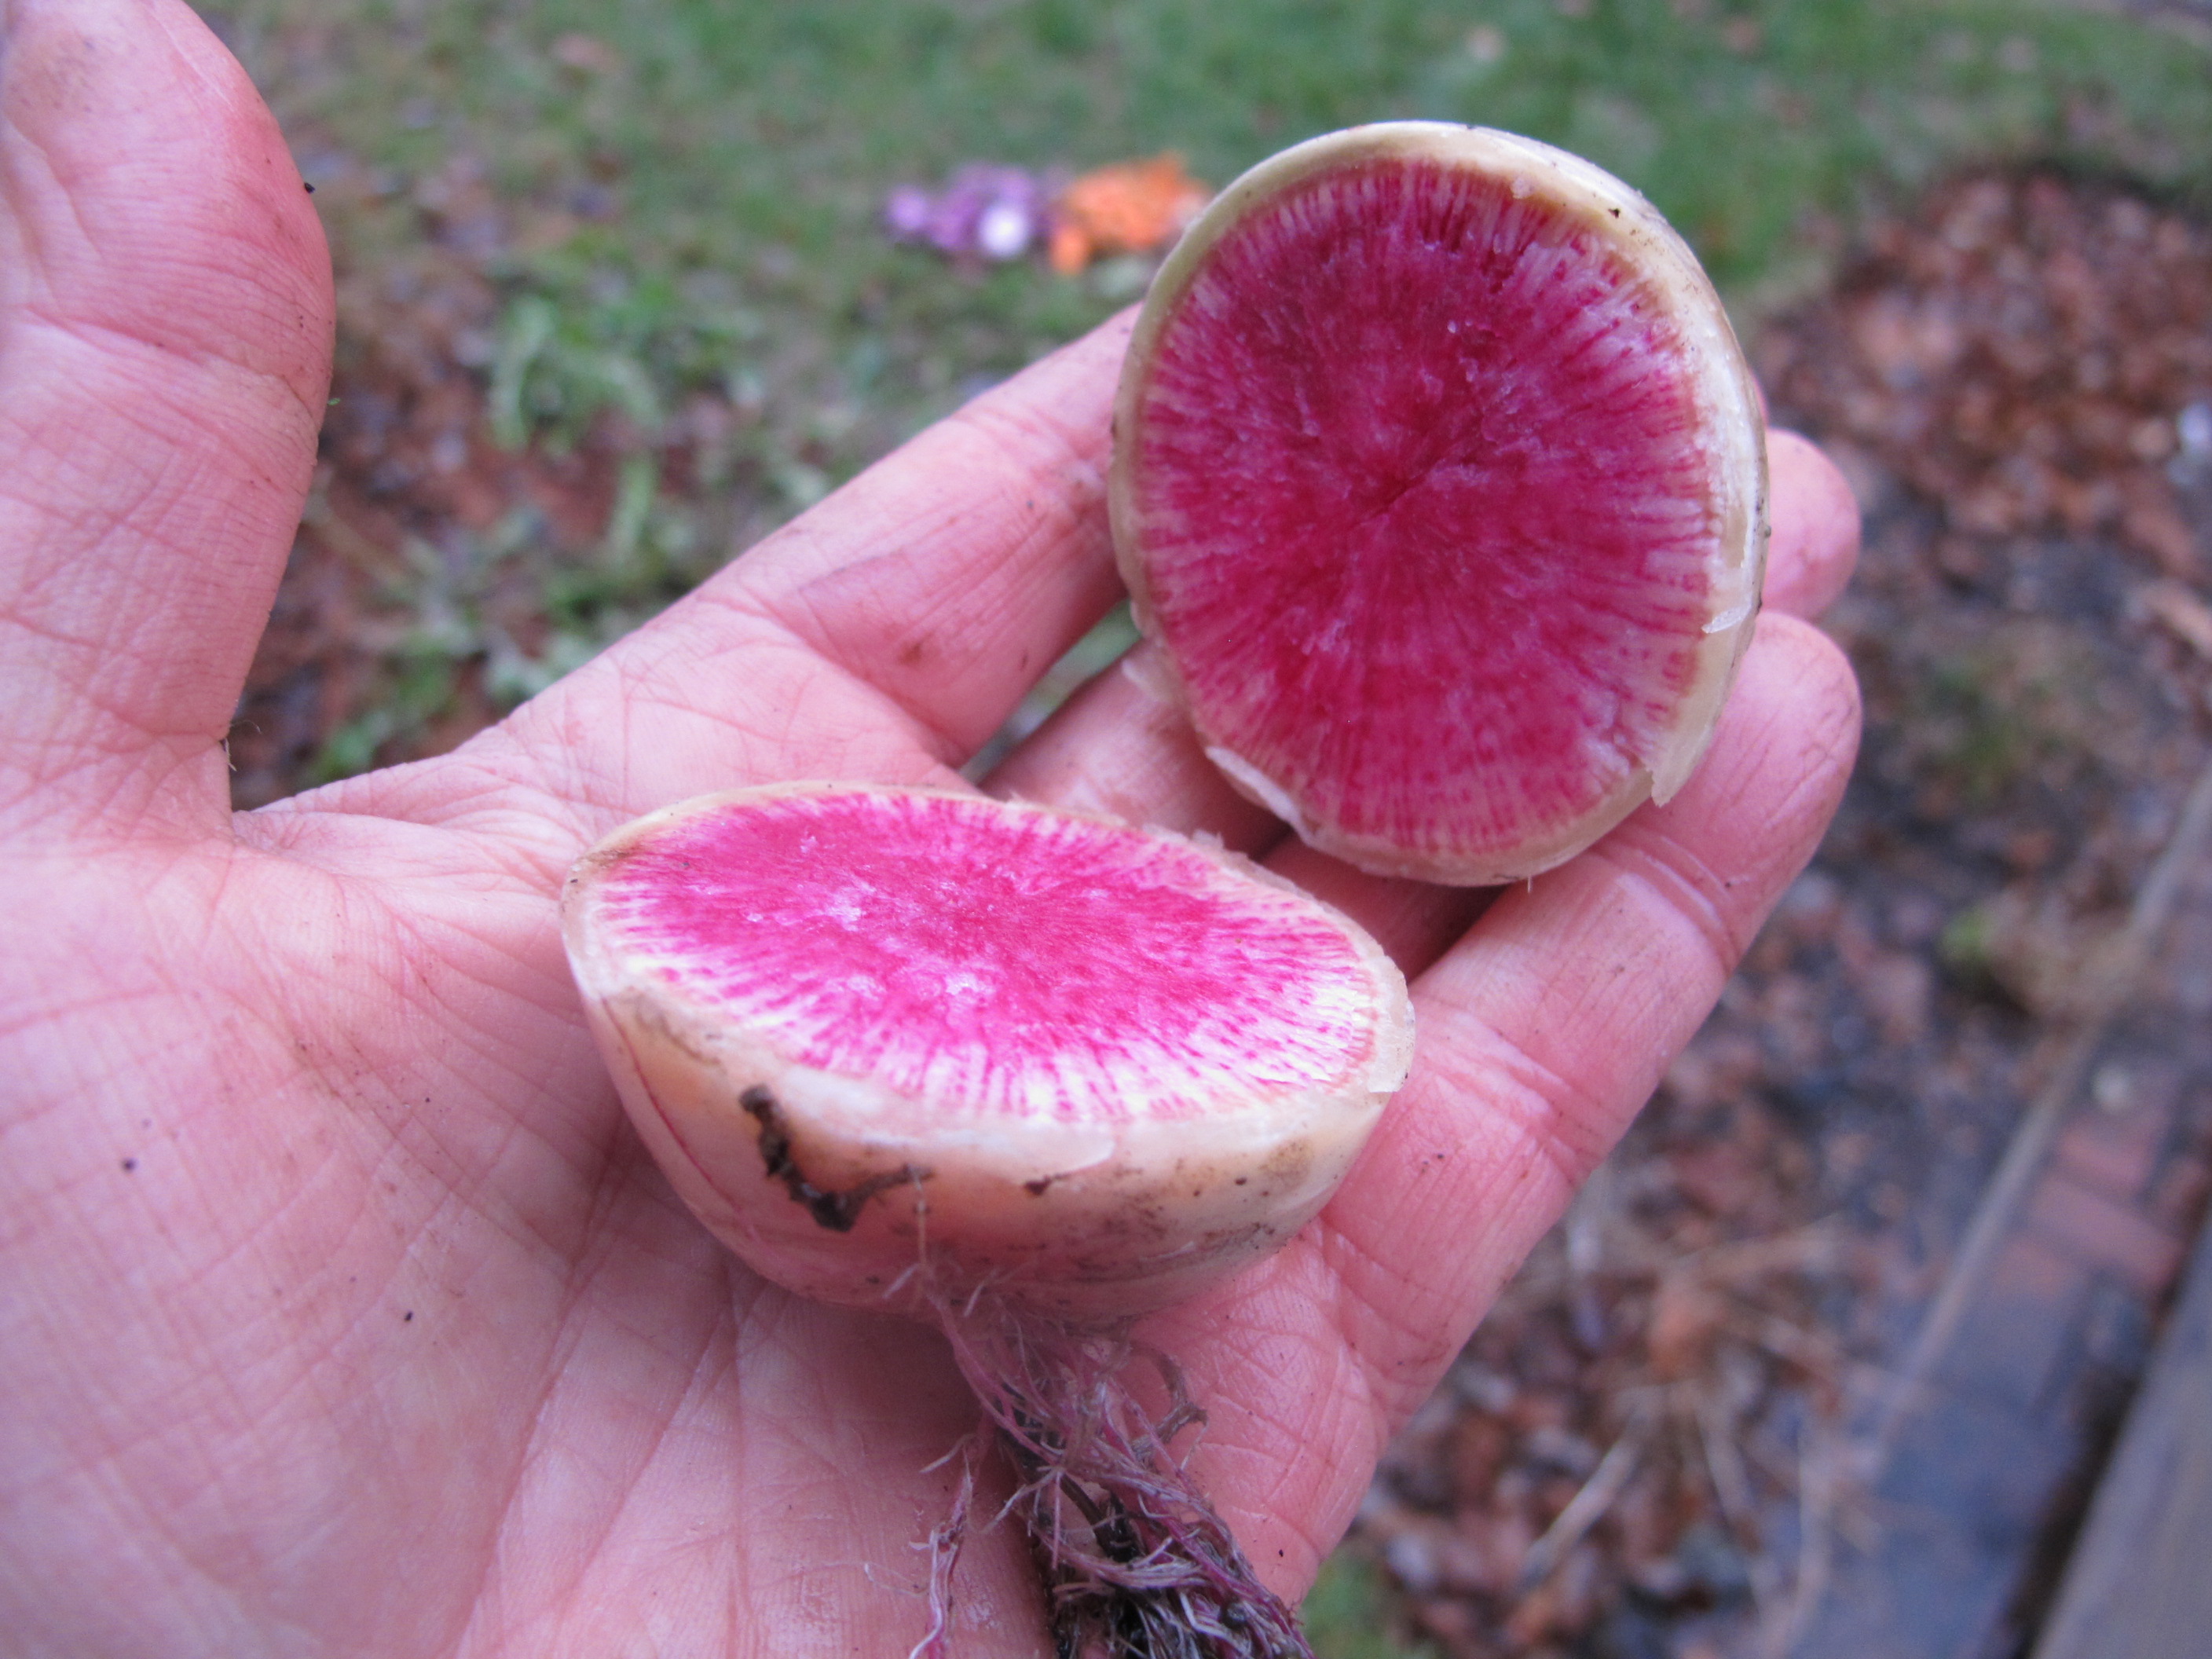
watermelon radish
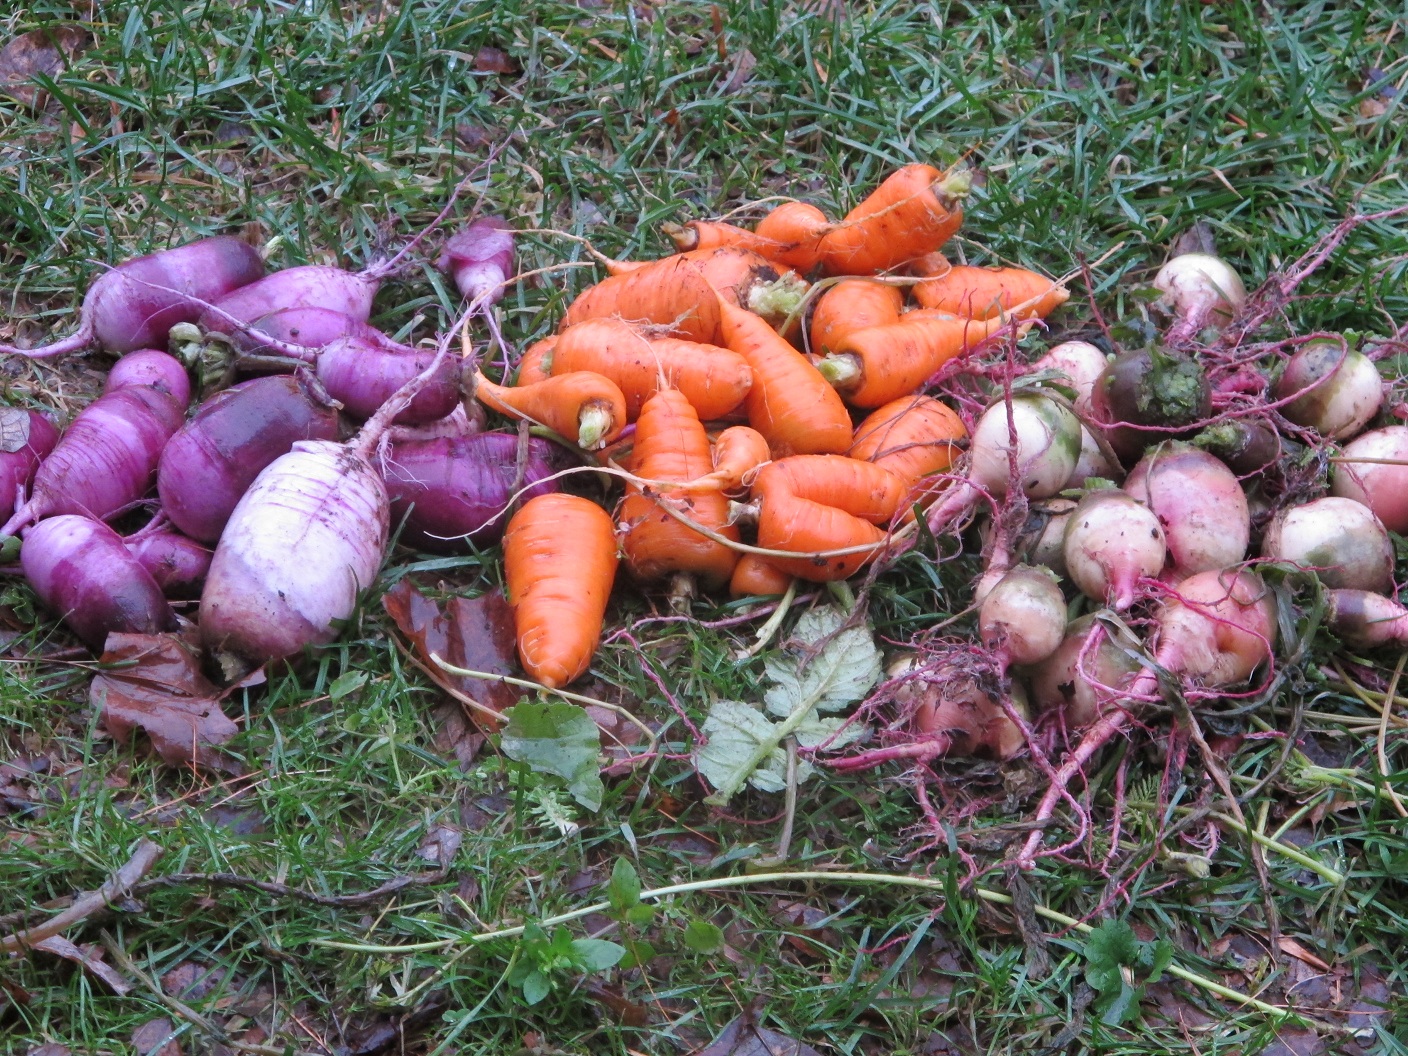
After a cold snap recently we had 3 days of cold rain. By the second day, with no relief in sight, I went out to my garden and dug up the last of my root crops – carrots, watermelon radishes and purple daikon radishes. I figured that I’d better get them out of the ground while the getting was good. I came back wet and muddy, but feeling much more cheerful than before I went to the garden.
By day three, I was positively squirrely. I needed to do something outdoors. So I got dressed for an extended time in the garden: I layered on some Ibex brand wool long johns, two layers on top, and one on the bottom. Ibex makes its products from Merino wool, so they are not scratchy and seem to last forever. Then I put on rain pants and an LL Bean Gortex raincoat that keeps me dry and helps keep me warm. Rubber-palmed stretchy garden gloves protected my hands. Finally, I put on wool socks and my insulated Muck brand boots. I was ready.
I often warn gardeners not to walk on the garden soil when it is wet for fear of compacting it and ruining its structure. But I had some raised beds in the vegetable garden where I had harvested root crops – but not the late-season weeds that were there. I figured that so long as I worked carefully and never stepped off the walkways that I’d be fine.
I used a garden fork to loosen the soil near tap-rooted dandelions, then carefully tugged them out. How had so many escaped my notice? Well, I guess it was the “late-season weed blindness” that many of us suffer from. It is often spring before I notice certain weeds – because they’re blooming.
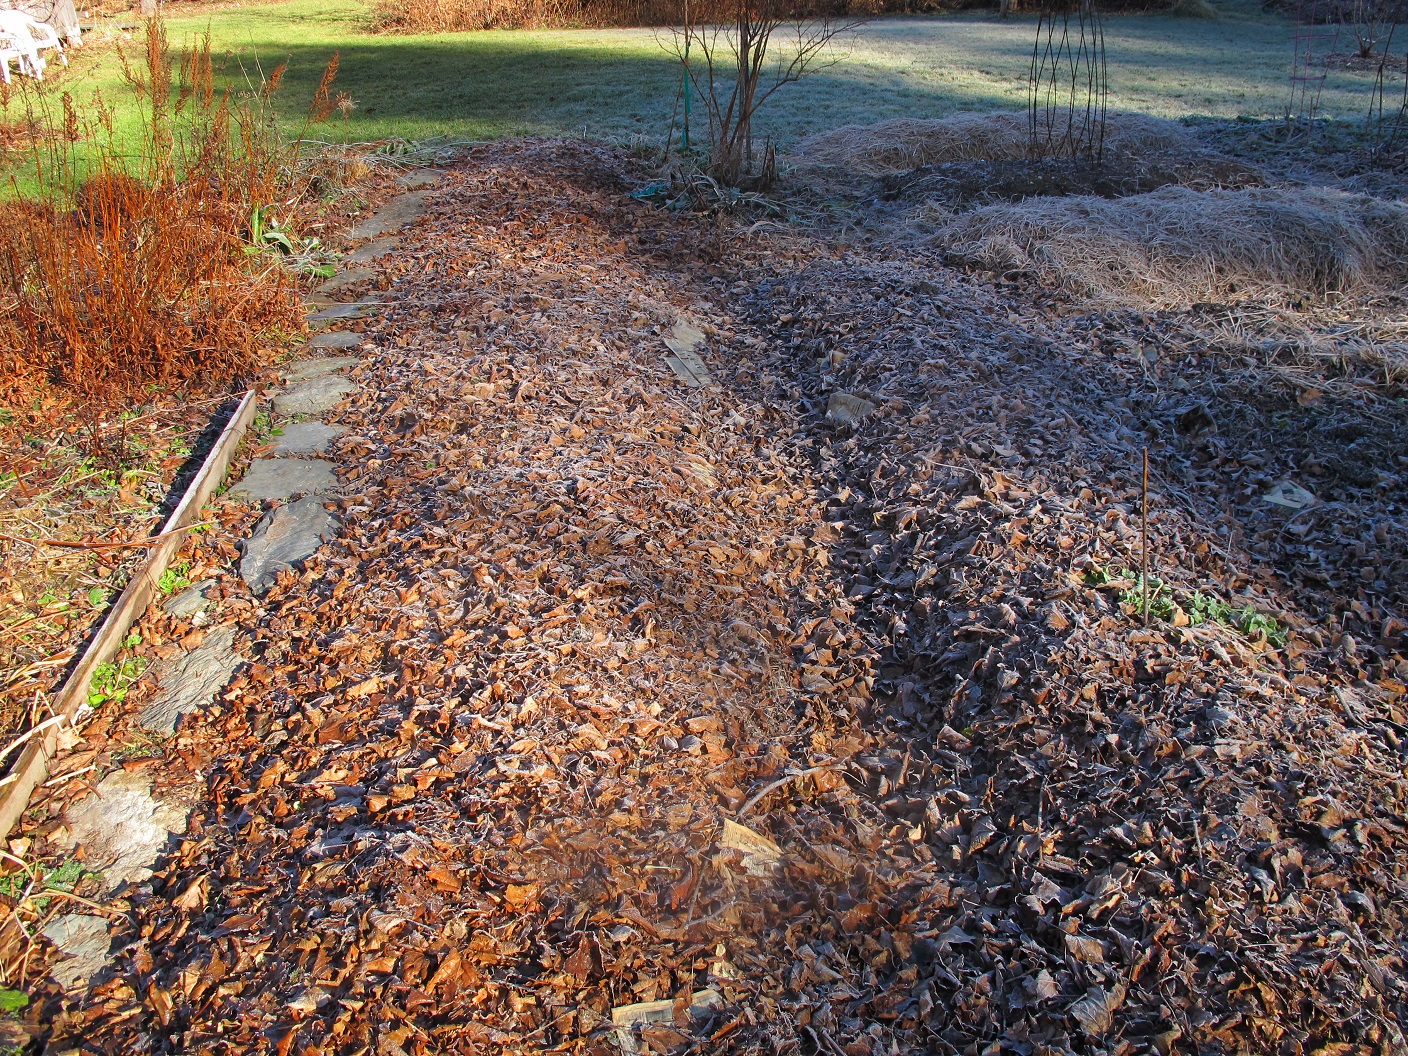
Vegetable beds ready for winter
I did know, however, that I had a fair amount of chickweed (Stellaria media) in my garden, as that weed grows whenever the ground is not frozen – including early and late in the growing year. I once interviewed author David Mas Masumoto (author of Epitaph for a Peach) who told me that chickweed is a ”good weed”. It’s good because it blooms early and beneficial insects like ladybugs depend on its nectar for food before the aphids turn up as lunch.
Chickweed is a low-growing annual that has very small pointed leaves, each only a quarter to half an inch in length. The flowers – and mine are present now – are small and white; on cold rainy days, the flowers are just like me – buttoned up tightly. With a hand lense or field scope you can see that it has fine hairs on only one side of the stem in a single band. It pulls easily, and best of all, it is edible in salads! I think it tastes like mache or miner’s lettuce – okay to mix in, but not as a prime salad ingredient.
After about 15 minutes my hands were cold, so I went in and found my Ibex glove liners, which solved the problem. Wool is warm, even if wet. And I put on another layer of socks, and that kept my feet warm, too.
I buy composted cow manure by the truckload, and still have a supply left from last spring’s delivery. So after weeding out two small beds I brought down a couple of wheelbarrows of compost, spread it on top of the beds and gently stirred it into the top few inches with a long-handled potato fork.

Late season harvest
I grow my vegetables in beds that are mounded up, or occasionally boxed in with planks. In either case, plants take out soil ingredients, and every time you pull a weed (or carrot) some soil goes with the roots, no matter how careful you are. So beds need new soil or compost added each year to keep their size.
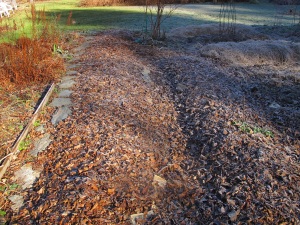
Once the beds were all prepared for spring, I found some lawn that had been covered with late-falling leaves – oaks. Oaks are among the last to shed their leaves, and so had escaped earlier raking. I gathered them up and used them to cover the beds.
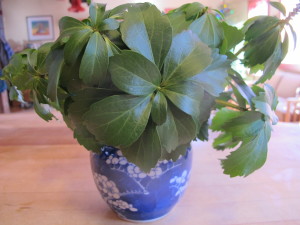
Pachysandra
During this period of cold, cloudy, dark, damp, dismal miserable weather I collected some greenery to use in vases this winter. Pachysandra is a common shade groundcover that will look good all winter in a vase of water. In fact, it will even set out roots into the water. Just keep the leaves out of the water, and change the water from time to time. It doesn’t need to be on a sunny window, and can complement any flower arrangement you buy at the store. So I picked some and brought it in.
What else did I do during the week of wet weather? I did a little pruning – nothing major, no ladders, I just tuned up a few shrubs and a small tree. I have a common ninebark, one called ‘Diablo’, which looks as neat as an unmade bed right now. But I resisted the urge to prune it as I know it blooms early in the summer, and pruning it now would remove the flower buds. Lilacs, forsythia, and rhododendrons: all these and more have their buds ready for spring. Some flowers I can sacrifice, others not.
So if you get tired of being indoors, go ahead, dress up warmly and get out there – even if it’s raining. It’s very restorative.
Henry can be reached at P.O. Box 364, Cornish Flat, NH 03746 or by email at henry.homeyer@comcast.net. Please include a SASE if you wish a reply to questions by regular mail.
Wreaths
Posted on Wednesday, December 2, 2015 · Leave a Comment
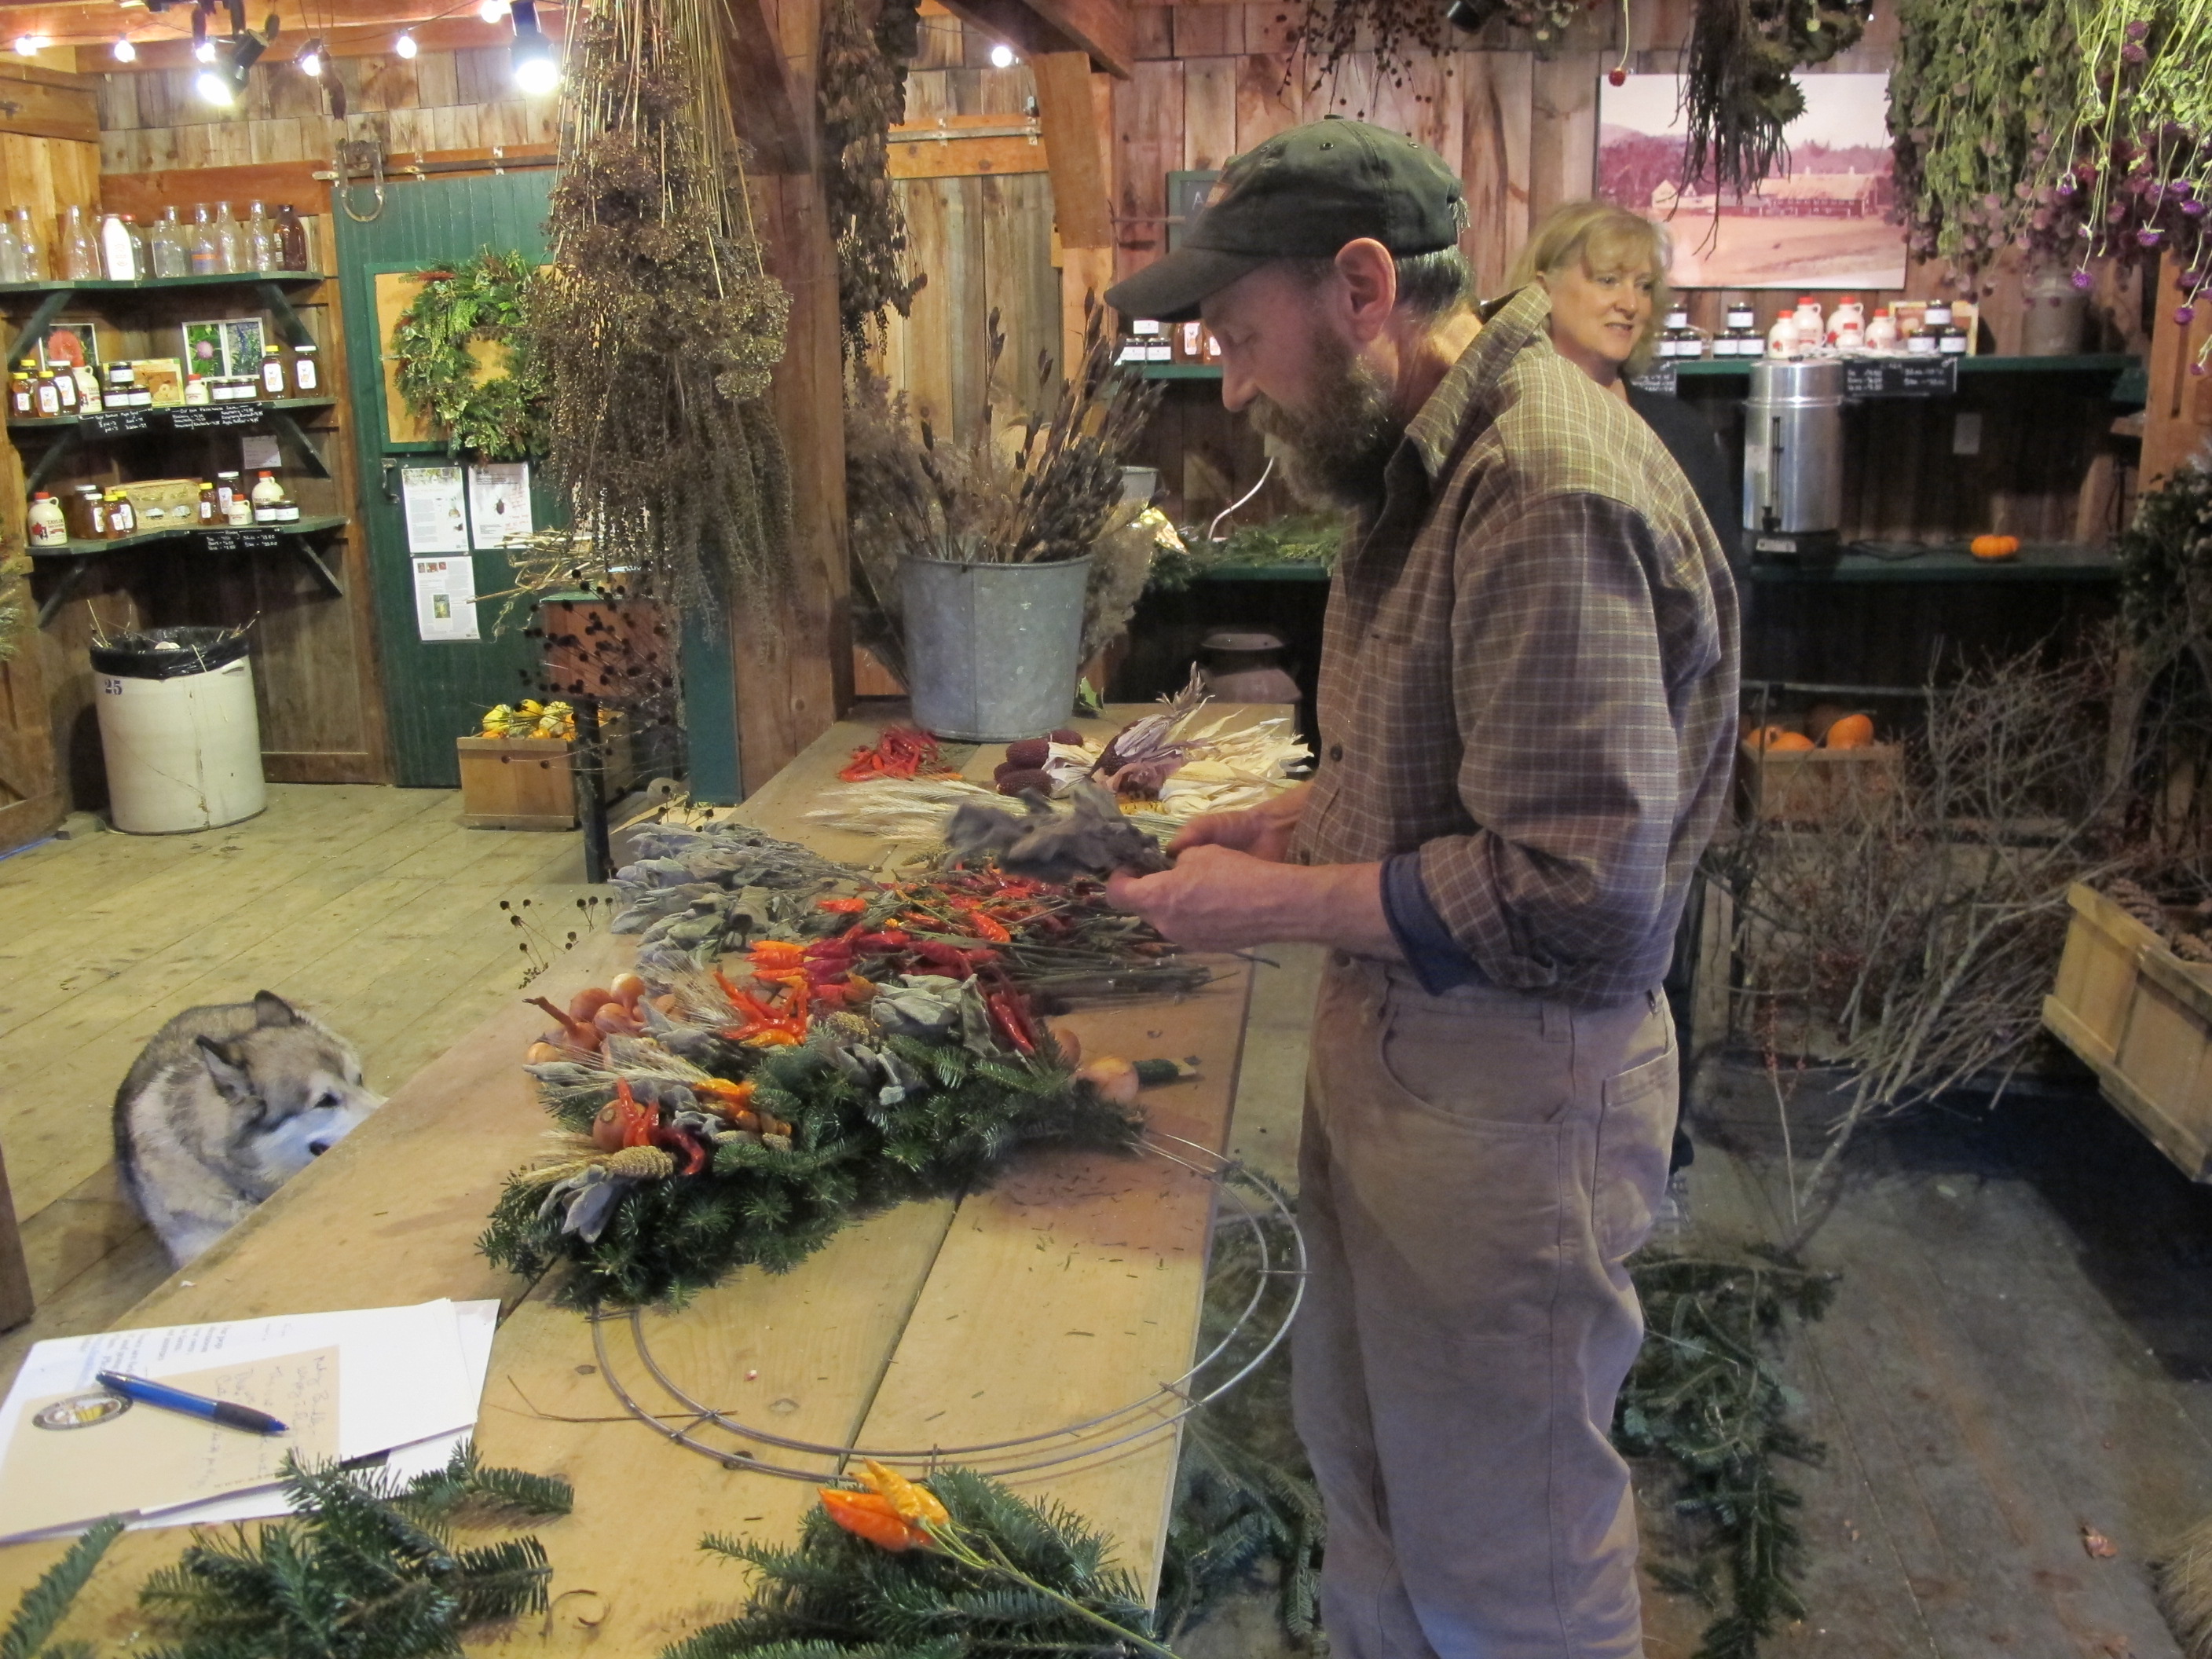
Lights, decorated trees, carols on the radio and in the stores: all these say the holidays are here. For several years now I’ve been too busy (or too lazy) to create my own wreath, but this year I was inspired to make one. I saw some simply amazing wreaths made by Gary Hamel and Amy Franklin of Riverview Farm in Plainfield, NH (www.riverviewnh.com) and called Gary to see if I could come and watch them work. Later I made my own – and you can, too.

Gary Hamel working on a wreath
Gary is an artist and Jack-of-all trades. His mother, Alice, made a wreath for their front door every year using materials from their farm to celebrate the solstice and brighten the season. On a flyer for wreath workshops at Riverview Farm, Gary wrote that a wreath is ”the symbol of unending years. The evergreen boughs represent the continuing presence of life in winter’s deep sleep. The dried flowers are the memory of the season past, and the grasses and seeds are the presence of the year to come”. I like that.
The Franklins at Riverview Farm grow and collect materials for their wreaths all year. Prime among the ingredients are dried Thai peppers – some red, some yellow – which grow several to a stem. They hang them in the barn to dry and get ready for wreath season. Also available for use in wreaths are dried miniature ears of corn, stems of rye and decorative grasses, shallots, rose hips, dried flowers, cones, nuts and and dried leaves. As Gary said, “this is not your grandmother’s wreath.”
Gary explained that the four herbs of the advent season are rosemary, sage, lavender and thyme, so he likes to use them in wreaths, too. Fragrant herbs like those four and others such as Sweet Annie (a vigorous growing perennial in the Artemesia genus) smell great when making the wreaths, but probably aren’t noticeable to most people once they are on the front door.
Making a wreath is not tough work at all. First I went to a Christmas tree farm and got a “reject” – a balsam fir tree that would not normally be salable. I wasn’t sure how many branches I would need, so I lugged the whole tree home. It turns out that I only needed about five branches.
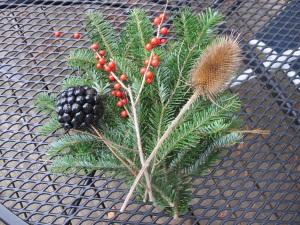
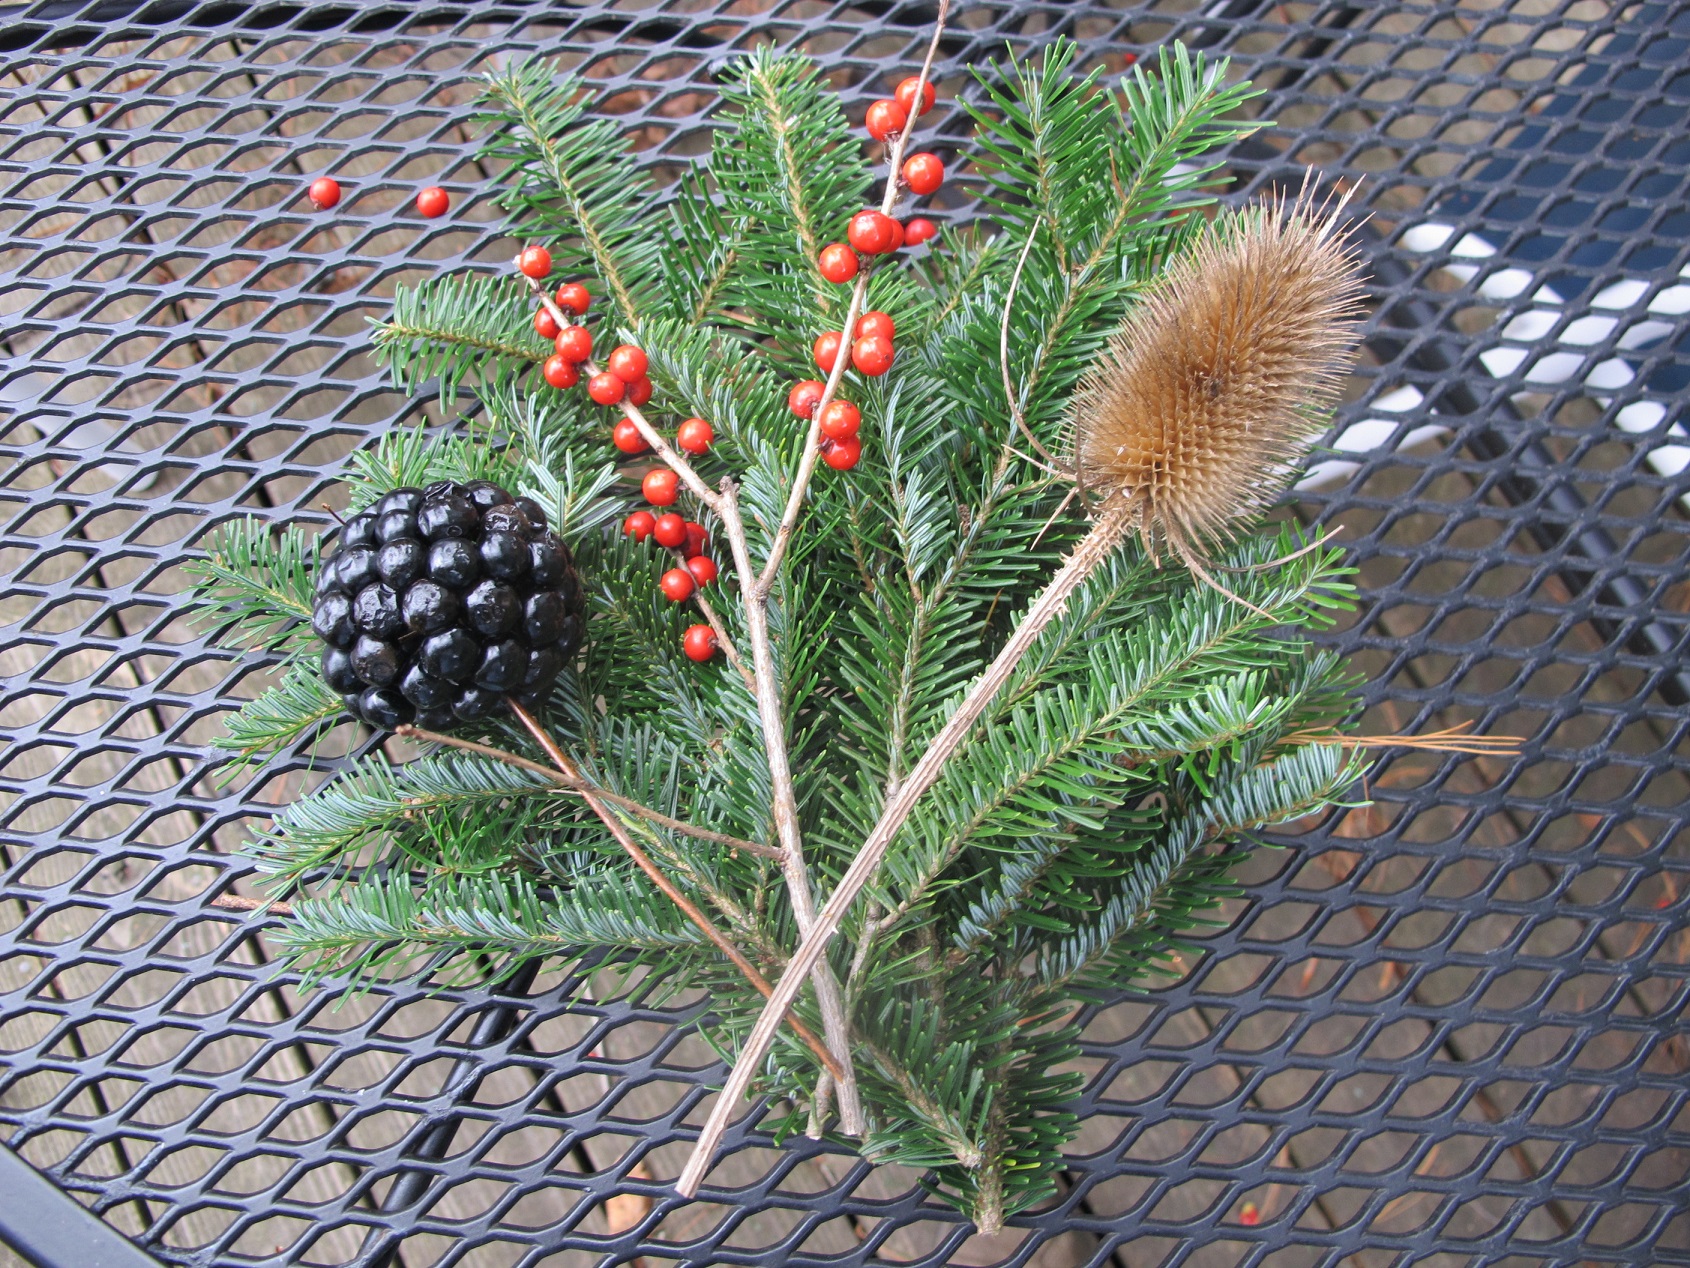
Fir, winterberry, carrion berry, teasel ready to tie on
Balsam fir is probably the best tree for making wreaths, though Gary and Amy also mix in some cedar or pine in some of their wreaths. Spruce is also suitable, but a bit prickly to work with. Canadian hemlock is not suitable – the needles fall off too soon, even if kept cold.
I wanted some bright color for my wreath, so I put on my barn boots and headed off to a local swamp where I had seen the bright red berries of winterberry, our native deciduous holly (Ilex verticillata). Winterberry usually grows in standing water, and most years I get my feet wet, boots or not.
This year I got smarter: I brought my pole pruner. The one I use has a pistol grip like a pair of hand pruners which allows me not only snip off berry-laden branches, but also to grab the cut branches by squeezing gently on the handle. The one I use is made by ARS and sold by an orchard supply company in Massachusetts, OESCO (www.oescoinc.com).
Winterberry tends to drop its berries, but Gary Hamel told me how to prevent that: get a can of clear Rust-oleum paint and spray the branches. At the hardware store a helpful clerk suggested that of the various clear products, lacquer would work best as a glue, so that is what I used. When I made my wreath, only a few of the berries fell off.
I collected other dried plants for my wreath including goldenrod stems with galls, teasel (a weed with wonderful prickly seed pods), dried black-eyed Susan and bee balm stems, red-twigged dogwood and 2-inch spheres of blue-black berries of the wild vine, carrion berry (Smilax herbacea). I sprayed the carrion berries with the lacquer to keep them from falling off, too.
A key to a good wreath is making the stems secure. Buy a spool of green wreath wire from your local garden center or florist, and a wire wreath form. I used a double ring 18 inches in diameter. This year, instead of making bundles and then attaching them, I followed Gary’s technique of using one continuous piece of wire for the entire wreath, tying the bundles on as the wreath progressed.
First, I tied the wire securely onto the wreath form. Then I made and attached my greens and decorative elements. At the base of each bundle I made five tight loops of wire around the stems going one way, then another 3 or 4 turns going back the other. That made the greens very secure.
Each bundle I made started with 5 stems of balsam fir. Two were about 10 inches long, the other three were shorter. Then I placed a stem of winterberry in the middle, and added other elements. I alternated the various elements, some in one bundle, then skipping them in the next, repeating in the third. Only the red berries and fir were in each bundle. Each bundle should be about the size and shape of your hand.
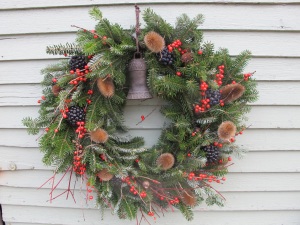
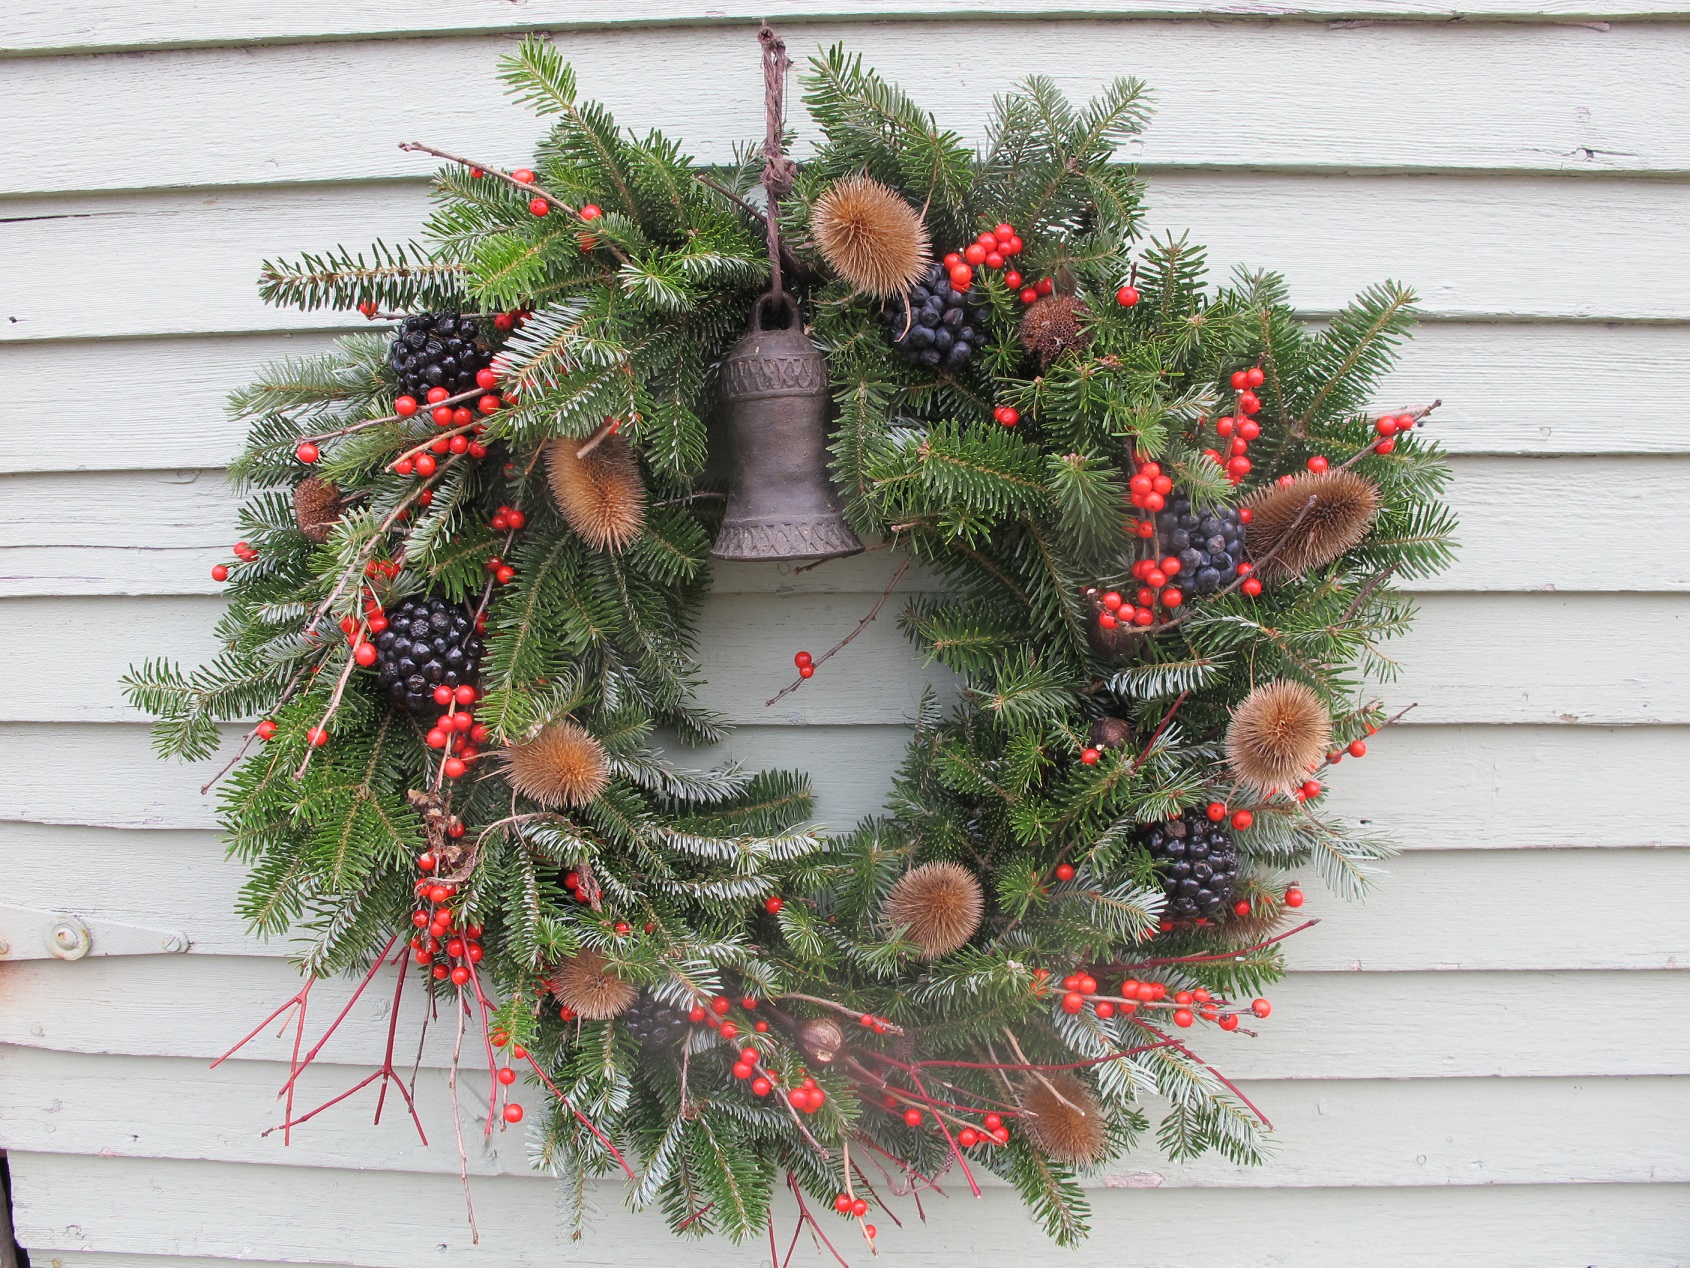
My finished wreath
It takes about 20 bundles of greens to complete a wreath. The only tricky part is at the very end, to attach the last bundle. I see why people use red ribbons at the top: not only to look good, but to cover up the inevitable gap. I didn’t have a ribbon, so I used a brass bell. Gary’s mom insisted that her wreath come off the door on February 2, Groundhog’s Day, also known as Candelmas. She unwound the wire and burned the greens. Me? I’ll keep it up as long as it looks good.
Henry is the author of 5 books. His website is www.Gardening-Guy.com/.
Holiday Gifts for the Gardener
Posted on Wednesday, November 25, 2015 · Leave a Comment
It’s that time of year again. Time to think about buying gifts for our loved ones. For gardeners there are so many things, selecting something is easy – from under $10 to over $500. Let me play Santa, offering you ideas to choose from – or things to avoid.
Let’s start with the no-no’s: Unless your sweetie has asked for more houseplants, don’t buy houseplants. The only exception to that might be an orchid in bloom – if she can consider it like cut flowers and jettison it after it finishes blooming. But in general, houseplants are work, and require space on a windowsill. Likewise avoid buying a do-it-yourself beehive kit or an earthworm farm for digesting the leftover lettuce that would otherwise go in the compost.
On the other hand, a truckload of good compost would be welcomed by almost any gardener. Just don’t have Santa deliver it on the driveway. Santa has to deliver to the garden, or near the garden. Composted barn scrapings are sold by most dairy farmers and garden centers, and by some lawn maintenance companies. Ask for “hot composted manure” or aged barn scrapings. The hot composted stuff should not have any viable weed seeds.
Garden gloves are good gifts. These range in price from $6.95 to $24.95. Now days you can even get them in pink. Me? I like the stretchy gloves impregnated with latex on the palms, but not on the backs, so hands can breathe.
Last summer I got a set of deer-repelling blinking lights. Quite innovative. They are solar powered, and emit a red LED light all night that scares deer or other pests. It is called Nite-Guard Solar (www.niteguard.com). You need at least 4 of these devices, so that one is facing each direction around the garden at eye-height of the deer or raccoon. In my limited use, they seem to be a big help. Of course, with heavy deer pressure, only an 8-foot fence is 100% effective.
Speaking of deer, another problem they present is Lyme disease, carried by ticks that deer and mice carry. There is a gaiter available that is impregnated with permethrin. These gaiters wrap around your pants to prevent ticks from getting to you – and to kill them if they try to attach to your pant legs. If you have a lots of ticks, these may be a great help. Available on line at www.Lymeez.com. This is a new version of one that I tried earlier, and the manufacturer assures me it will be ready for shipment by December 19.
I’m not, in general, a big fan of rototillers, but was given a little one to try out last spring. It’s called the Mantis tiller (www.mantis.com). It only weighs 24 pounds and digs down to a maximum of 10 inches. I used it for working compost into the top 6 inches of my vegetable garden and found that it did a good job. It starts easily and runs well.
My basic complaint with large tillers is that they can go down 18 inches or so, moving microorganisms from one soil depth to another. This little guy is less likely to do that. Big ones can also damage soil structure, particularly if wet.
This summer I got a sauerkraut crock from Gardeners Supply (www.gardeners.com) and like it a lot. Mine has a 1.3 gallon capacity, and comes with a kit that includes weights to keep the kraut submerged. It has a water-sealed air lock for the cover which allows the gases to be vented, but no extraneous air-borne yeasts or bacteria to enter it.
Every year I mention my favorite weeding tool, the Cobrahead Weeder (www.cobrahead.com). It is available everywhere now because it really works: like a single steel finger it can tease out long grass roots, prepare a place for a tomato seedling, or get under a big weed, allowing you to pull from above and below. If your Sweetie doesn’t have one, get one, and she’ll love you even more!

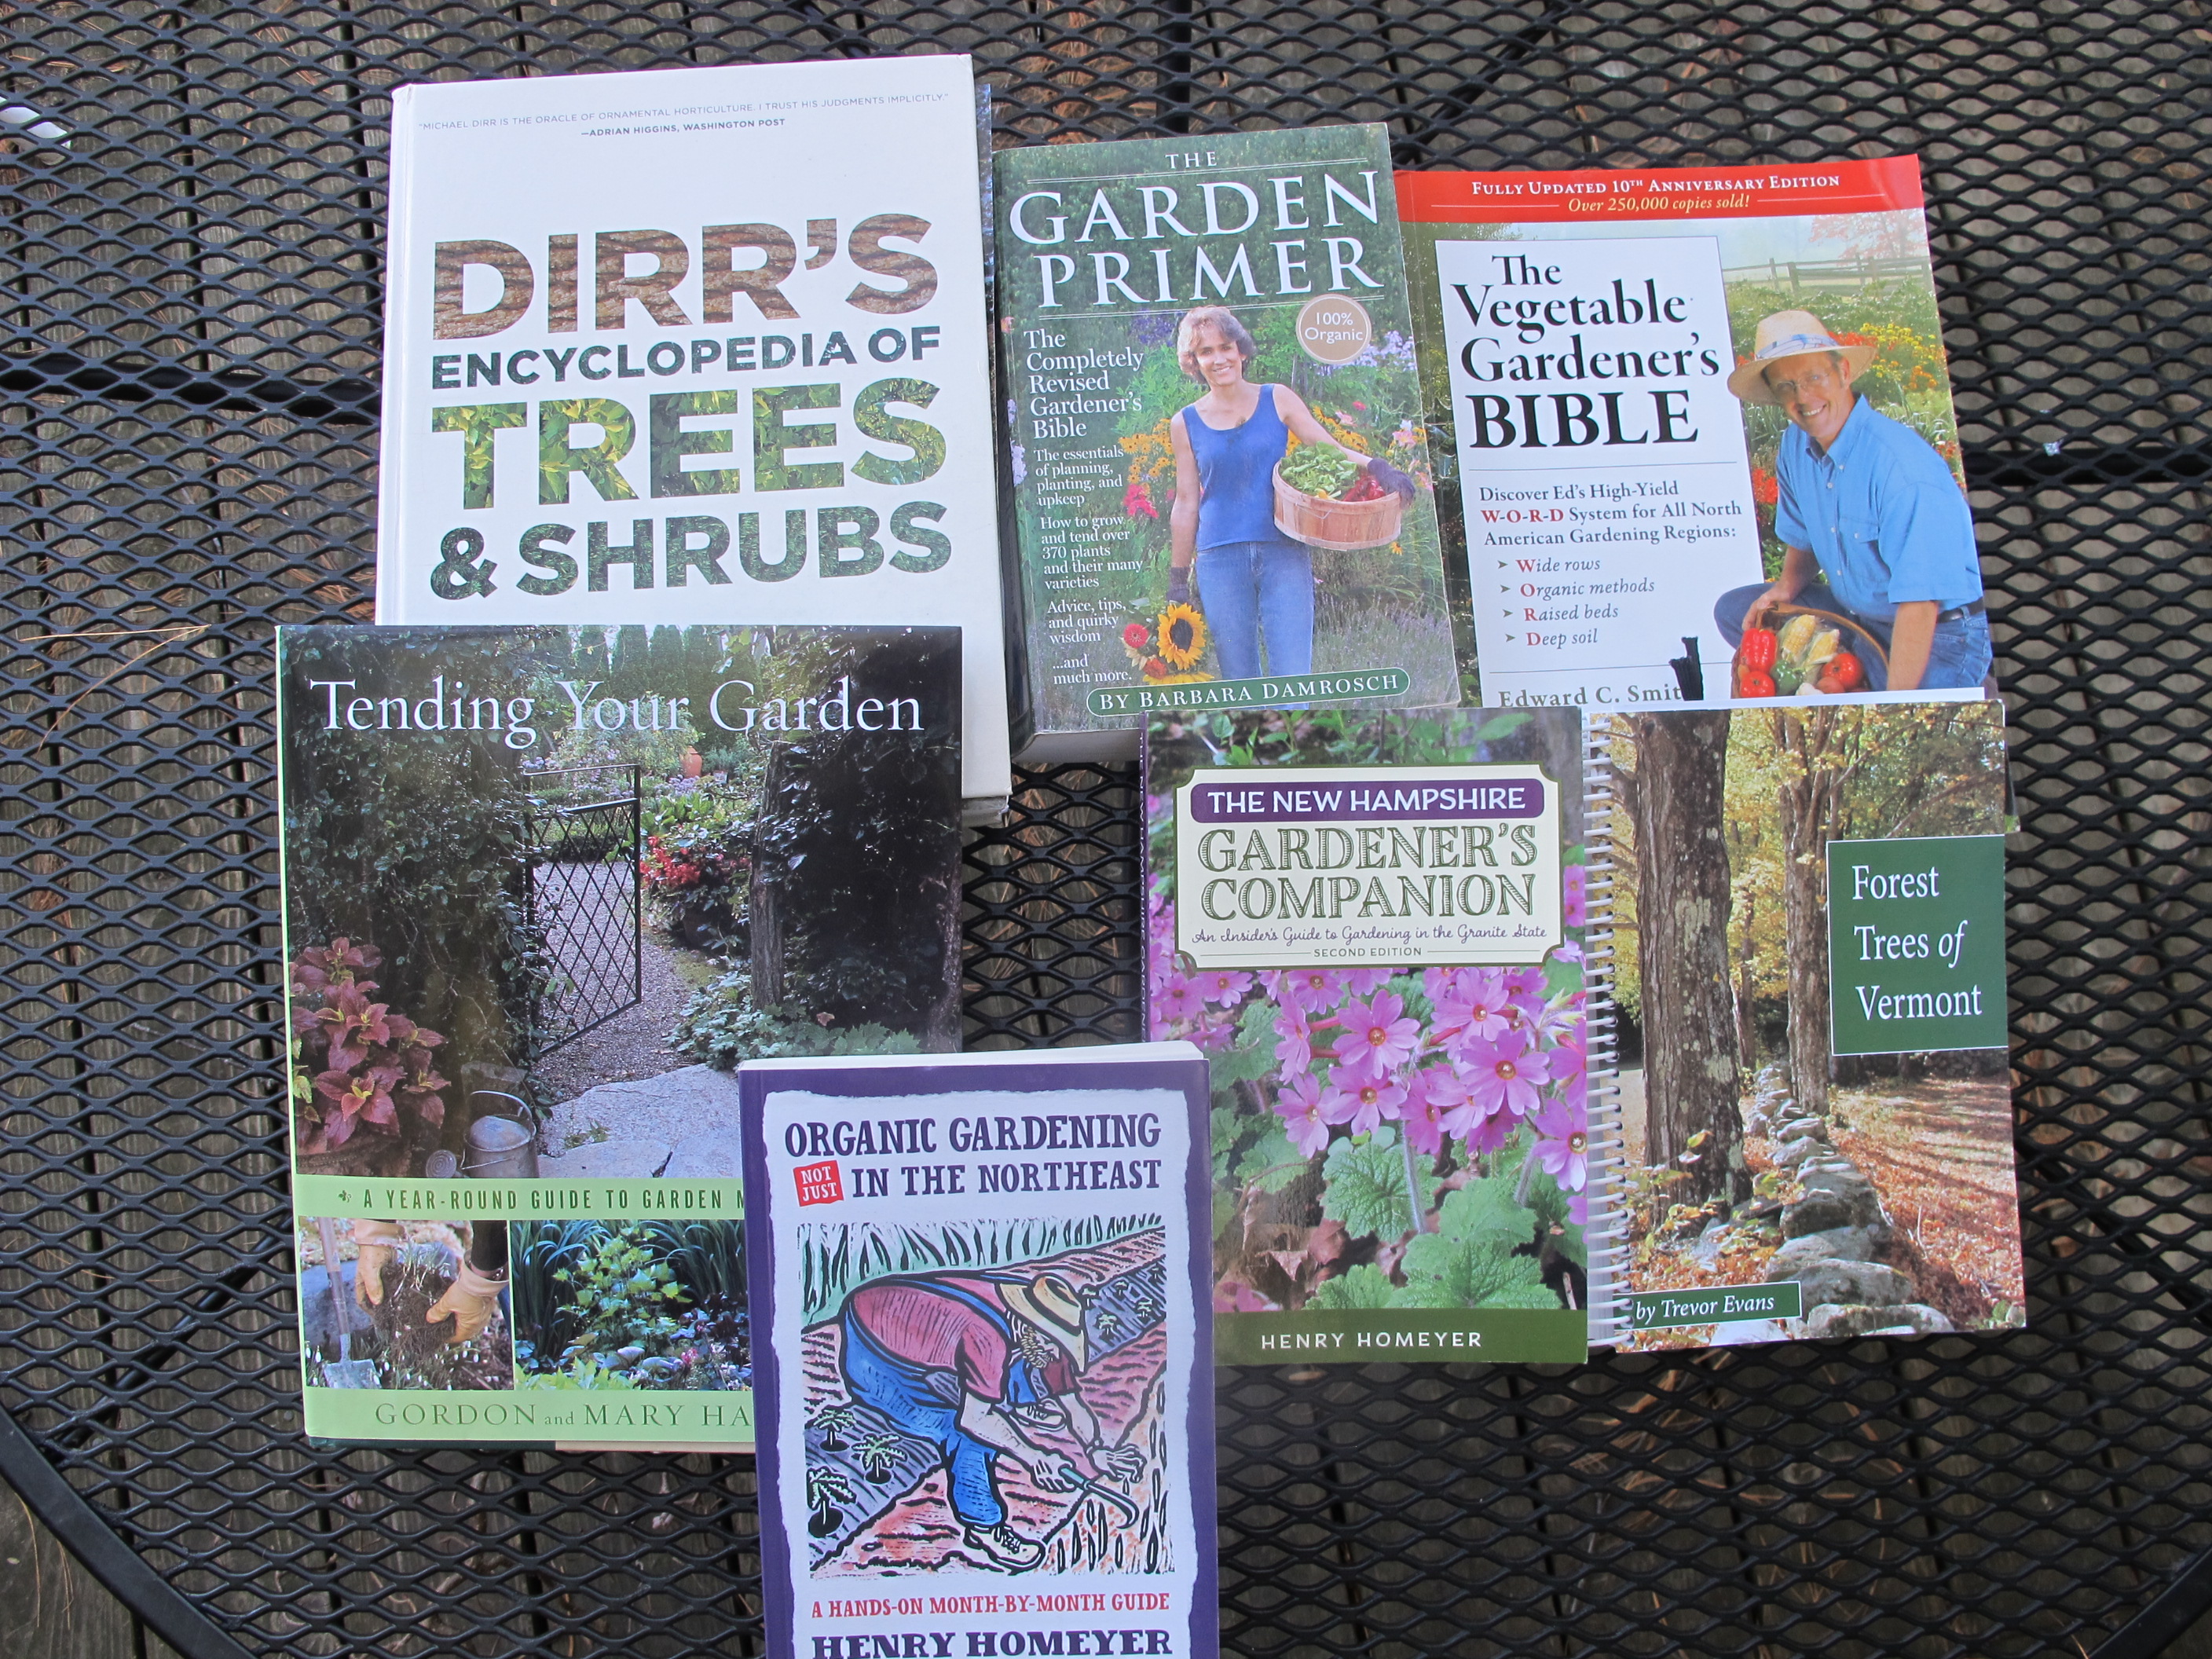
Books are always good presents
Books are always good gifts. I recently got a copy of a nice book by Vermont garden designer and author Gordon Hayward and his wife Mary called Tending Your Garden: A Year-Round Guide to Garden Maintenance. Hayward is a hands-on guy who knows a lot, and the book if full of lovely photos and sensible ideas. I also love his book, Stone in the Garden. In fact, I like all his books!
Forest Trees of Vermont by Trevor Evans is one of the nicest guides to trees I have seen. Great photos, easy-to use, it even comes with a little ruler for measuring leaves! Applicable anywhere in the Northeast. Available from Forestry Press, www.ForestryPress.com.
In general, if you like an author, any book by the same author will be good. Thus you could look for books by Michael Dirr (trees, shrubs), Barbara Damroch (general gardening), Ed Smith (vegetables) or Sydney Eddison (flowers and design). And I would be remiss if I didn’t mention my own books – they cover just about everything, but with an organic bias. My New Hampshire Gardener’s Companion is just out in an updated second edition and is relevant anywhere in New England.
Lastly, if you really don’t know what to get or are too busy to find something good, get a gift certificate to a local, family-owned garden center and let your loved pick a gift. Every serious gardener lusts after new perennials and shrubs, so why not facilitate the process with a gift certificate? And the garden centers would be happy for your business at this, a slow time of year.
Henry’s website is www.Gardening-Guy.com. Send questions to him at henry.homeyer@comcast.net.
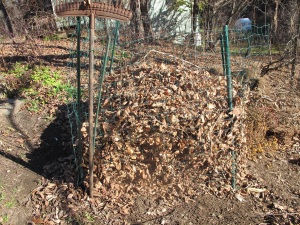
Leaves and Compost and Mulch, Oh My!
Posted on Wednesday, November 18, 2015 · Leave a Comment
Even if you raked your leaves in October, you probably have some more to clean up now. I do. Of course I was off gallivanting for much of October and hadn’t done any raking until recently. Still, trees like oaks and apples are still dropping leaves.
When I was a boy in Connecticut, my gardening Grampy would take the train or a bus from Spencer, Massachusetts each fall to visit us. In addition to getting some homemade apple pie and seeing his grandchildren, he came to help us rake the leaves. We lived in the country with close to an acre of lawn, I’d estimate, surrounded by a mixed hardwood forest. A lot of leaves fell –or blew- onto that lawn.
A simple bin for leaves
If you are of a certain age, you remember that back in the 1950’s there were no blue plastic tarps. We only had a wheelbarrow – one we called “the leaf cart” – to carry off many bushels of leaves. But Grampy was a tailor by trade, and made something to spread out on the lawn. He sewed together old sheets or bedspreads to make a large square of cloth, and brought it with him when he came each year. We raked the leaves onto that and when it was full, he drew the 4 corners together. Then, like Santa about to go down a chimney, he loaded it onto his back and carried it away.
Those leaves slowly broke down and made some of the most delicious compost you could ever imagine. Dark in color, it was loved by earthworms and was a great addition to our vegetable garden, flower pots and flower beds a few years after the leaves were collected.
It makes sense that leaves would make great compost. Trees mine the soil, bringing up minerals that end up in leaves. And, by the miracle of photosynthesis, trees make sugars and carbohydrates that build plant bodies. Re-using these elements is the original recycling. Trees have been dropping leaves and letting the bacteria, fungi and fauna of the forest break them down and re-use the elements for ages. Collecting them for use in our gardens is our way of capitalizing on a natural process.
Long ago I visited garden writer Sydney Eddison in her Connecticut garden. It was towards the end of a prolonged summer drought, one so bad that mature oaks were dying. There was a watering ban, but her flower gardens were thriving and, when I felt the soil, it was lightly damp. I asked her how she did it.
It was simple, she said. For 30 years her husband, Martin, had collected leaves each fall, running them over with a lawnmower and bagging them. He saved them in the barn, and in the spring Sydney spread out the chopped leaves and lawn grass around her perennials after they appeared. This mulch kept down weeds, attracted earthworms and enriched the soil. And it held moisture.
I use my leaves in the garden, too, though I do not bother bagging them. Most I spread over my mounded, raised vegetable beds after they have been weeded and re-shaped in the fall. They keep weeds from getting an early start, and keep out weed seeds that are blowing in the wind. Because they have been chopped, they don’t blow around much, and certainly not after a rain.

Harvesting compost
My neighbors, Susan and Joel Kinne, collect their leaves and put them in a bin they made with steel fence posts and wire mesh. It is about 4 feet on a side, and 4 feet high. I’ve seen the compost they have harvested from their bin, and it is gorgeous. Any self-respecting plant would love some in its soil. According to Joel, it takes between 2 and 3 years to go from leaf to compost, and they never bother turning the pile or doing anything else for the leaves.
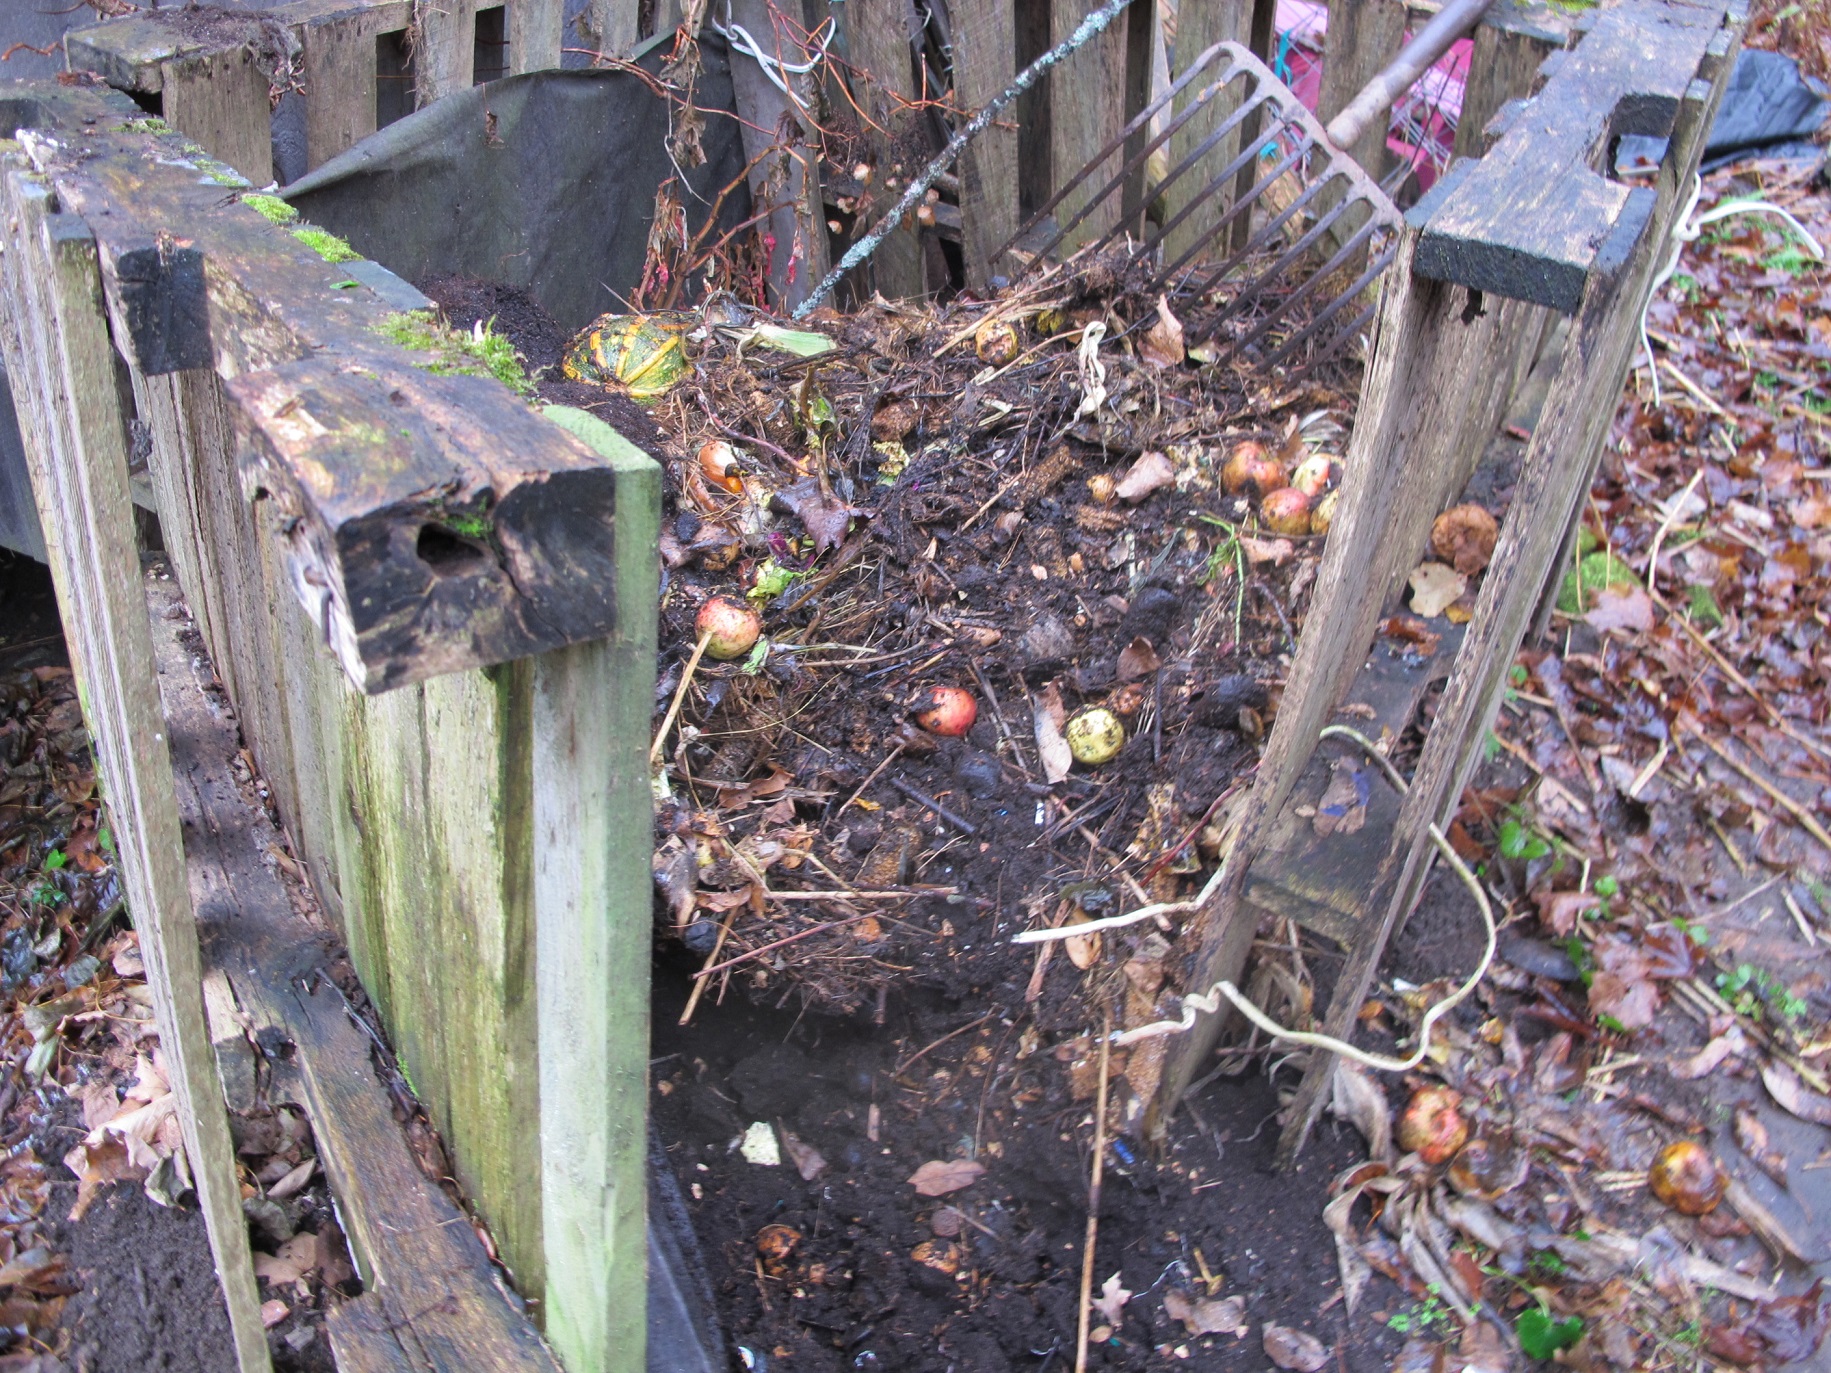
I take my food scraps and the leaves and stems of kale, carrots and other veggies and toss it in a bin I made from old wood pallets. I have to admit I rarely bother to collect the compost – it is more a way of keeping vegetable matter out of the waste stream than making compost. But recently I took off one side of the bin and dug out some of the material from deep under this years’ additions.
I was amazed at the number of earthworms in the top layers – this year’s waste. There hundreds, perhaps thousands. Wriggling and squirming, small ones, medium sized ones. That’s good. They eat the food and their waste, called castings, is high in nitrogen and other minerals necessary for plant growth. More importantly, they are good sources of materials that create good tilth and texture in soil.
Deep down I harvested a bucket of black compost. It was fluffy, despite being pressed down by many pounds of matter above it. I could see bits of eggshell, but everything had been processed. I’ll mix it 50-50 with potting soil and use it to replant houseplants, giving them a fresh infusion of nutrients.
When I was a kid we jumped in the piles of leaves Grampy collected, but I think now, as a (considerably) heavier person, doing so might lead to broken bones. Still, I treasure those memories … and my leaf compost.
Henry is a UNH Lifetime Master Gardener the author of 4 gardening books. His website is www.Gardening-guy.com.
Invasive Plants
Posted on Wednesday, November 11, 2015 · Leave a Comment
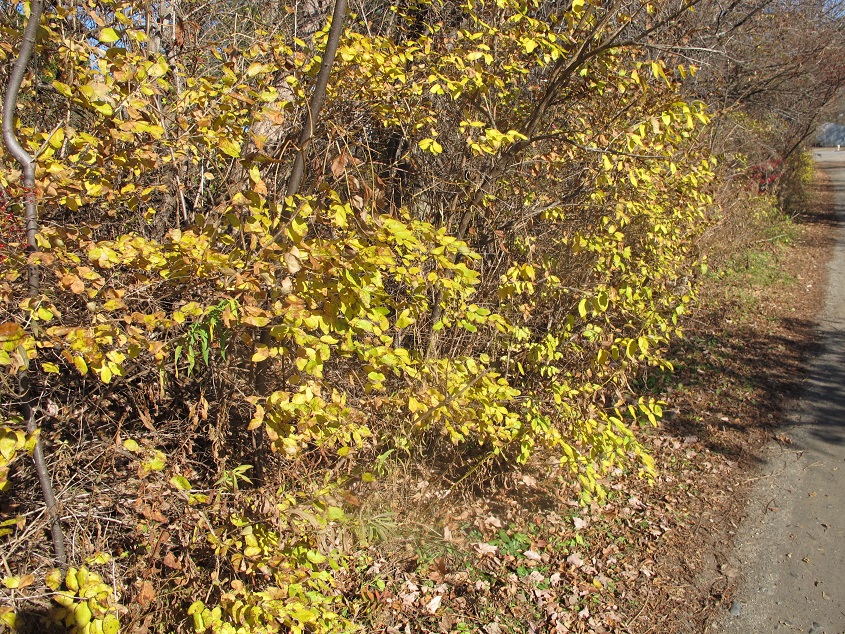
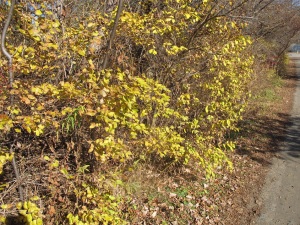
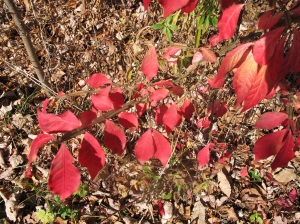
Going for a walk the other day along a public trail I was struck by the number of invasive shrubs I saw. Most trees and shrubs have shed their leaves, but burning bush (Euonymus alatus), Japanese barberry (Berberis thunbergii) and honeysuckle (Lonicera spp.) still have leaves on their branches. Holding leaves and producing food by photosynthesis gives them extra energy to take over the world (or their world, anyway). This is a good time to pull a few of these out because many are very visible right now.
invasive honeysuckle
Why bother, you might ask? Because these invasive plants which come from the China or Japan have no natural enemies here. Left alone, they can take over the landscape, outcompeting our native wildflowers and understory shrubs, although that may take decades. In some places they have created monocultures by elbowing out other plants. Most birds, mammals and insects have evolved while depending on native species for their food and shelter. Do these shrubs provide food? Yes, but it is often not of the same quality as that of our native species.
Cutting down invasive shrubs will not necessarily kill them. Some invasive trees and shrubs react by sending up multiple new shoots from their roots. Instead of one buckthorn, for example, you suddenly have several in a circle around the tree you cut down. That increases the problem instead of solving it.
I have found that buckthorns can be killed without producing the root suckers if I double girdle the tree. By this I mean I cut a ring around the tree with a pruning saw, and then cut another ring a foot higher or lower than the first cut. I cut through the bark and the green cambium layer, but do not cut into the heartwood. If I do this now, the tree will leaf out next spring and the following spring, but slowly die by the third year. Patience is the key. The technique allows you to slowly starve the roots – they can’t get any nutrition from the leaves. Many buckthorns have multiple stems, and you must girdle every one to kill the roots.
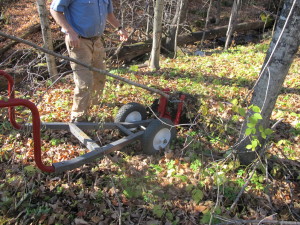
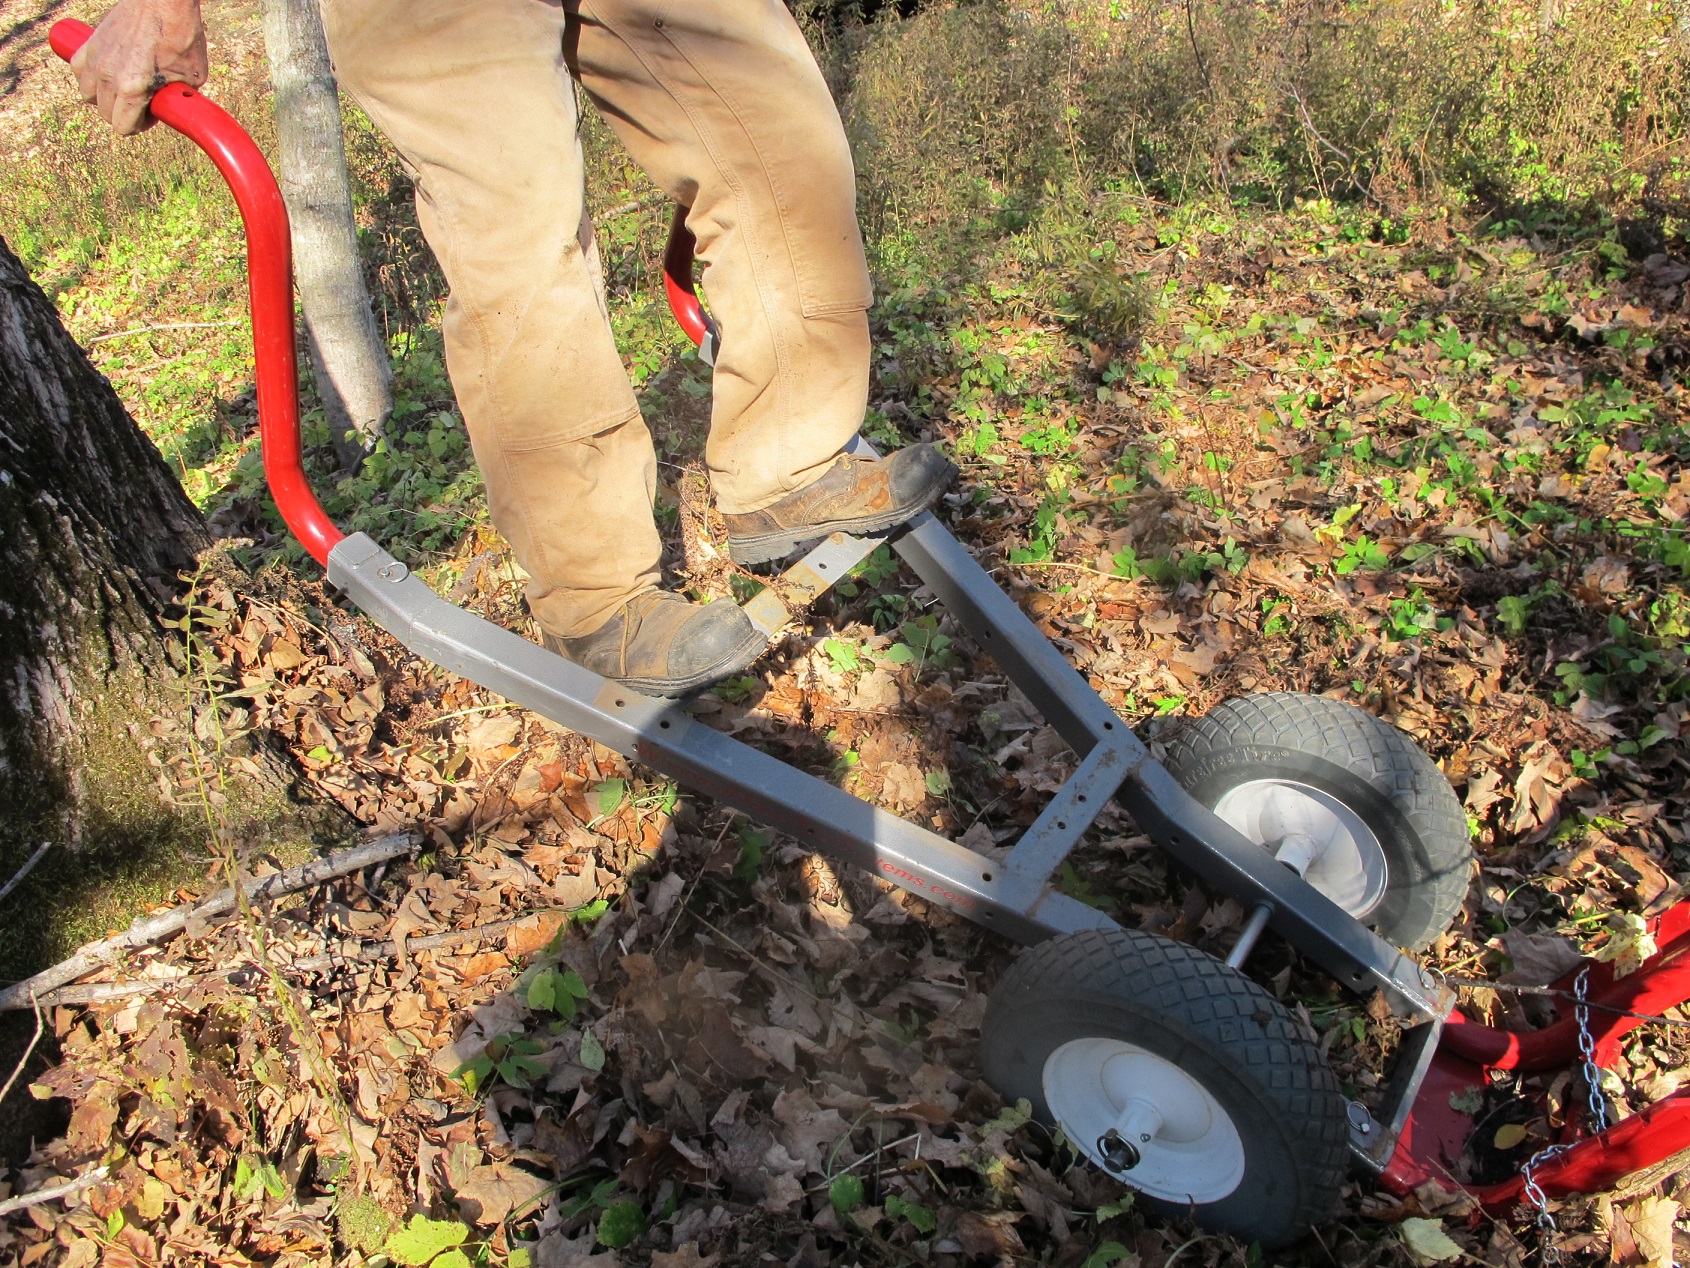
Wheeled shrub puller
For small to medium sized invasive trees and shrubs, pulling them up is another option. I recently met with Gerry Hawkes, an inventor and forester in Woodstock, Vermont to try out a tool he developed to pull invasives (and do other tasks such as hauling firewood and moving large stones). It is a sturdy, 2-wheeled device that uses leverage to pull up a tree, roots and all. We pulled an inch-and-a-half buckthorn tree and a full size multi-stemmed honeysuckle with a trunk that was over three inches in diameter at the base.
The tool we used is called a Wheeled Post and Shrub Puller (http://wheeledhandtoolsystems.com). It is made of sturdy 2-inch square steel “pipe” and stands over 6 feet tall leverage when in the vertical pulling position.
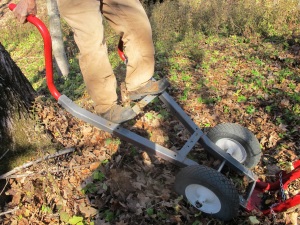
Standing on shrub puller for maximum pulling power
We looped a light chain around the base of the tree and then attached it to one of four notches on the puller to allow us to begin with the best mechanical advantage, which is 12:1. I pulled down on the handle using my weight and it lifted the buckthorn partially out of the ground. Then, to get an even higher lift, we reset the chain to a different notch on the front of the tool and I got the root system right out of the ground! Since this tool is on 16 inch wheels, I was able to roll the tree away with little effort.
I have also used a hand tool called a Weed Wrench that pulls small trees and shrubs. Unfortunately, the company that makes these tools has gone out of business. It was made in four sizes with a gripping mouth-part that clamps down on a trunk, and a handle that uses leverage to pry out shrubs. Two other companies are now marketing similar tools, The Uprooter (www.theuprooter.com) and the Pullerbear (www.pullerbear.com). From what I have read, neither would compete with the tool I tried last week for pulling larger shrubs and small trees.
Burning Bush that self-planted
I think that using mechanical advantage to pull invasives makes much more sense than using chemical herbicides. But I don’t have personal experience following up over several years with invasives pulled: will the scraps of roots left in the ground survive and re-sprout? It’s possible that they will. Still, I think that Conservation Commissions and Garden Clubs would be well served by investing in pulling devices to share with interested townspeople and using along public pathways.
There are no plant police. No one can tell you that your invasive shrubs must be pulled up. Nurseries may not sell them, propagate them or transport them. But I am working hard at removing mine. And even if you live in a city, it makes sense to remove invasive plants on your property. Their seeds may wash down storm drains, and end up in a wetland or river – and spread their genetic material.
Getting rid of invasive plants takes time. I recently chatted with a woman who removed all the burning bush on her property 12 years ago. She is still pulling seedlings that germinate from seeds deposited over a decade ago. But, on the positive side, pulling “thugs” gives you more room to plant other nice landscape plants. So go look for invasive plants now, and try to get rid of a few.
Henry Homeyer is a gardening consultant and coach. He speaks to garden clubs and civic organizations about many aspects of gardening. Contact him at henry.homeyer@comcast.net or visit his website, www.Gardening-Guy.com.


 Click Here to buy from Cobrahead