Late Summer Plantings in the Vegetable Garden
Posted on Wednesday, August 19, 2015 · Leave a Comment
If you are like me, you have some space in your vegetable garden now. I have pulled all my garlic and my peas. Or maybe you planted a big patch of lettuce early on, and it’s been eaten or gone by. In any event, you could slow down and just mulch your empty beds, or you could plant more veggies for the fall.
One of my favorite items to plant now is a fall radish called ‘Red Meat’. It is also sometimes called the watermelon radish or Beauty Heart radish. It has white skin with green shoulders and a red and white interior. You probably will not find seeds for this radish at your local garden center or hardware store, you will have to order it from a seed company. I have gotten my seeds from Johnny’s Selected Seeds in Maine, and see that is available from Kitazawa Seeds of Oakland, CA and Baker Creek Heirloom Seeds. All three companies are excellent.
Here is what is special about the watermelon radish: it grows to 4 inches in diameter without getting tough or woody. And you can only plant it in late summer, as it will bolt if you plant it in the spring.
It is fabulous added to a green salad, or made with into a salad with sweet onions and tomatoes and dressed with a vinaigrette sauce. And like all radishes, it is fast growing. Order now, plant by Labor Day, and enjoy them throughout the fall. Johnny’s catalog lists them as 50 days to maturity. Which means you can start eating the smaller ones in half that! I plant them 2 inches apart, then thin to 4 inches apart, eating the small thinnings. Unlike stronger-tasting radishes, you don’t have to be macho to pull and eat this radish straight from the garden. Yum!
Lettuce, of course is a good fall crop. I like to start lettuce seeds in those small plastic 6-packs left over from spring. I fill them with a good planting mix and lay seeds right on the soil surface, then cover with just a hint of soil mix or vermiculite. Lettuce, planted too deeply, will not germinate well. It needs light to trigger germination, just like many weeds. But that means you need to water regularly to keep the seeds from drying out.
By planting seeds in 6-packs with potting soil it is easier to separate the seedlings from each other than if you planted directly in the ground. I like to plant lettuce 6 inches apart in the garden so that each plant will develop into a nice head. Or if the roots are too tangled, maybe 2 or 3 seedlings can be planted as a clump without problems. Some gardeners like to sow lettuce seeds thickly in the garden, and then cut the leaves when small, particularly if using salad mixes. According to the Johnny’s catalog, which I know is accurate, lettuce germinates poorly in temperature over 75 degrees. So if we have a hot spell, start them in flats in a cool place indoors.

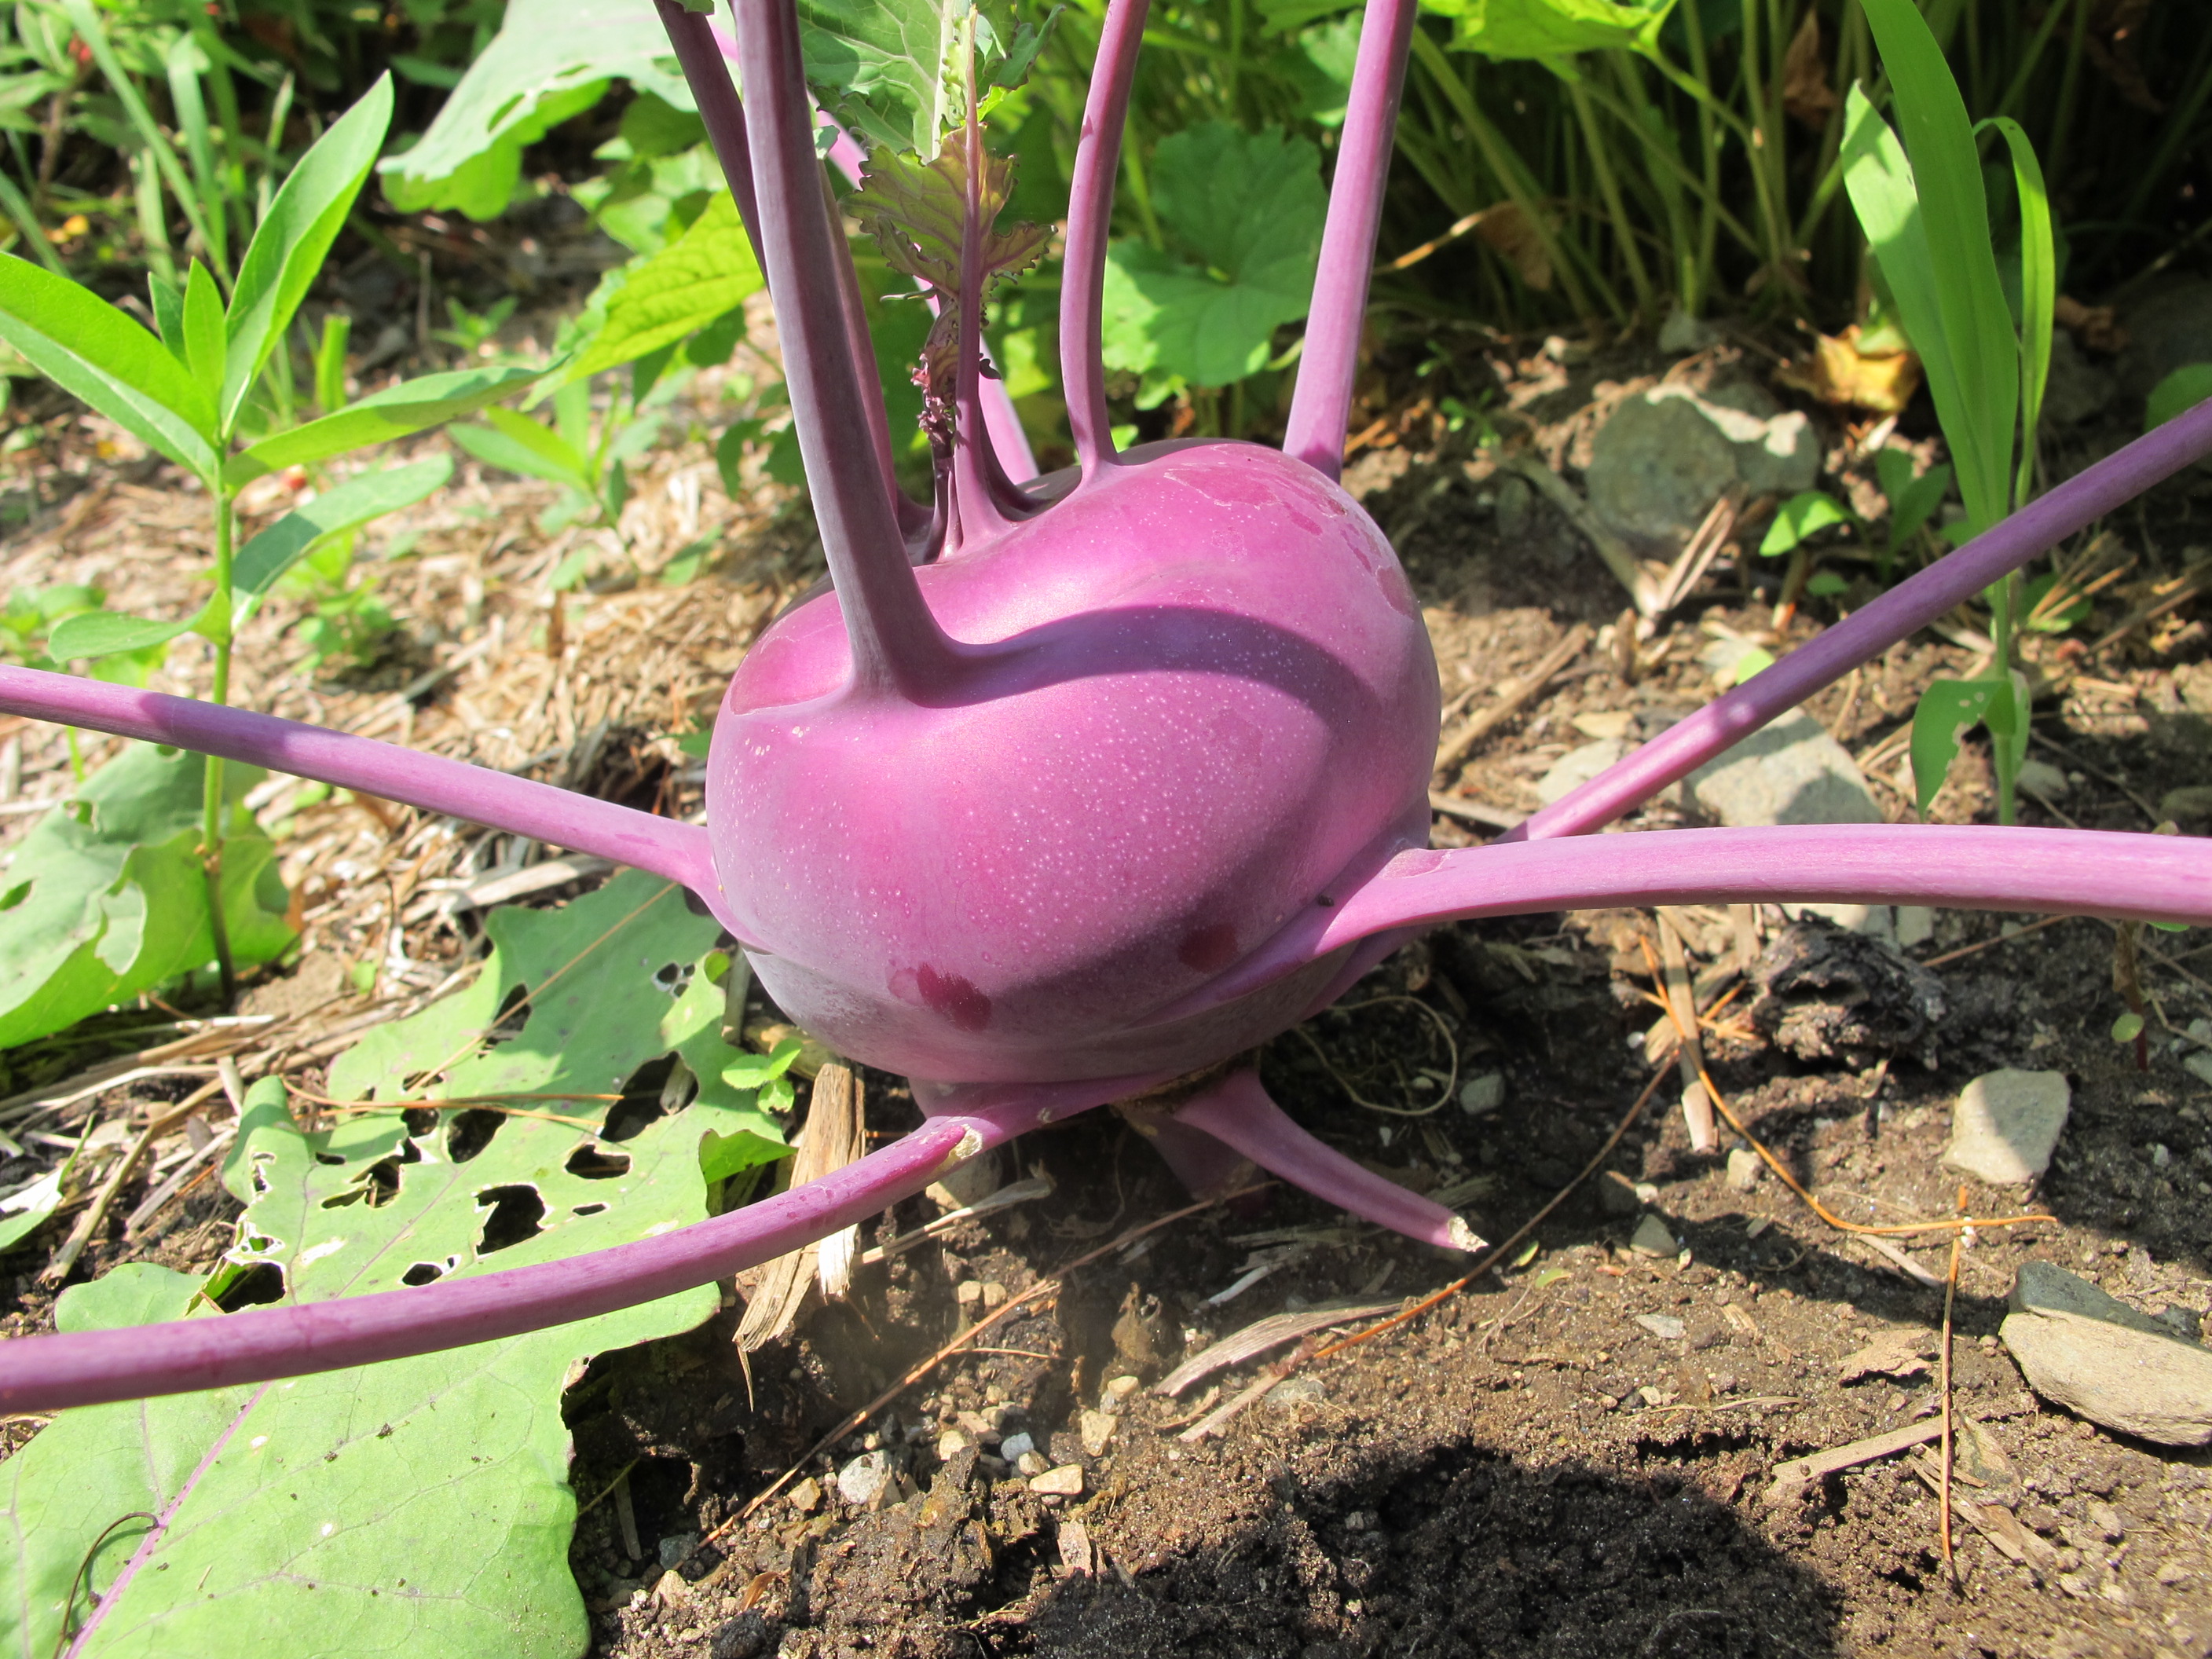
Kohlrabi
Kohrabi is another great veggie, one sadly unknown to many gardeners. It is in the Brassica or broccoli family, and develops a globe-shaped edible stem above ground with leaves emerging from the edible part. People often say, though I don’t know why, it “looks like a space alien.” It comes in purple and green-skinned varieties.
But here’s the great part: certain varieties of kohlrabi reach maturity in as little as 37 days! That said, read the catalog carefully: some storage kohlrabi like ‘Kossak’ can take 80 days to mature and get to be 8 inches or more in diameter. Most varieties should be eaten between 2 and 4 inches in diameter. Direct seed and thin to 4 inches.
Mostly I eat kohlrabi as a coleslaw. I use the grating blade on my food processor (it’s a flat grater blade up top on an extension, not the regular chopping/cutting blade in the bottom of the bowl). That makes quick work of the grating, which I used to do by hand. I mix it 50-50 with grated carrots and add a vinaigrette sauce, fennel seeds and dried cranberries or raisins. Kohlrabi can also be added to a stir fry or stews.
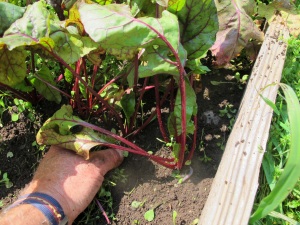
Daphne, my “killer corgi” normally keeps the deer away. No, I do not tie her up in the garden at night. Her very presence each day lets deer know that it is not a good idea to intrude, and generally they do not. But one night this summer a deer came in and ate all the leaves off my beets! The nerve! So I will plant some more beets for fall eating.
Beets are fairly frost hardy and mature in about 7 weeks from planting. So I should have a nice crop of small to medium sized beets in October if I plant now. According to Johnny’s catalog, the “scab” that sometimes appears on beets (raised brown rough spots) can be prevented by keeping beets well irrigated. A fall planting will most likely get plenty or rain, and produce some nice looking beets. The scab does not harm the beets – I just remove it with a potato peeler.
I haven’t even gotten around to putting up my hammock and might not this year! If you’ve been industrious all summer – weeding, thinning, watering and more, you’ve earned some time off. But I find I always want to push the limits, so I ordered more seeds and planed a few things for late fall.
Henry is a gardening consultant and the author of 4 gardening books. His website is www.Gardening-Guy.com.
Planting Trees
Posted on Wednesday, August 12, 2015 · Leave a Comment
Except when the ground is frozen, you can plant trees and shrubs pretty much anytime. Some experts recommend planting in the fall when trees are less likely to suffer from hot weather and dry soil as autumn is generally cool and rainy. Others suggest planting in spring so the tree can get established before our harsh winter. I say, plant when you have the time and the desire. Then take care of the tree, and it will be fine.
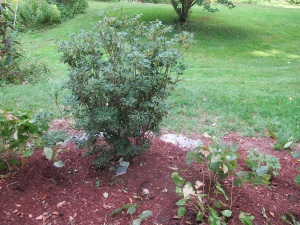
This spring I planted a kousa dogwood (Cornus kousa) to replace a winter-killed mountain laurel. The dogwood is hardy to climatic Zone 5, meaning it will survive temperatures of 20 below zero, and I live in a Zone 4. Most winters we see minus 25. But I have it in a protected spot near the house, and I think it should survive. I’ll probably wrap in burlap its first winter. Of course, I am an incurable optimist – and I have always wanted a kousa dogwood, so I am willing to take a risk. That mountain laurel that died last winter gave me nearly 20 years of blooms and joy, and if the kousa dogwood does the same, I’ll consider myself very lucky.
One key to its survival, I think, is to get the roots to be well established by winter. And part of that is providing adequate water in its first year. So at least once a week I water it deeply. Now, in the heat of August, I water it twice a week. I have mulched the roots with bark mulch to keep the soil from drying out, and to keep the roots warmer this winter.
Redvein enkianthus
This summer I planted a shrub in memory of my sister, Ruth Anne Mitchell, who passed away 6 years ago. A friend told me Ruth Anne loved the redvein enkianthus (Enkianthus campanulatus), so I got one. I’d seen a nice specimen growing in the ground at E.C. Brown Nursery in Thetford, VT and was able to get a four-foot tall enkianthus from them. Since I had never noticed one before, I depended on my woody plant bible – Michael Dirr’s Manual of Woody Landscape Plants to tell me how to plant it.
Dirr’s book has a page or more on every species of plant that grows in America, and is spot-on with its advice. In this case, it said the shrub needs acidic soil, like rhododendrons. So I mixed 2 to 3 cups of garden sulfur into the soil that went into planting hole, along with some peat moss. And I put down a layer of peat moss on the soil surface after planting and covered it with bark mulch.
The enkinathus is hardy to Zone 4, and I can’t wait to see it bloom next June. It should be loaded with creamy yellow blossoms with red veins. The fragrance, according to Dirr, is somewhat unpleasant. Huh. But he says it should have brilliant fall color.
I planted the enkianthus on a hillside, which is always problematical. One must plant trees and shrubs on flat places because they come with a rootball that must be in the ground and the tree must be vertical, not tipping. Perennial flowers are easier: they have smaller rootballs so they require a smaller flat place. And they will straighten themselves up to vertical if planted on a slope.
My remedy for the hillside planting is to dig into the hillside above the tree and to build up the hillside on the downhill side of it. For a shrub with a 16-inch rootball I created a 48-inch flat space. Roots do better if you dig a wide hole – three times the width of the rootball is standard. Then, after placing the tree in the hole, you refill the hole with the soil that you dug out. Why? Because soil in most places is hard-packed and dense. Digging out soil and replacing it creates a nice zone of fluffy soil for the roots to start out in.
Some gardeners think it is good to add compost and fertilizer in the hole. While that is a good plan for a perennial flower, it is not for a tree or shrub. Think of a tree as a wine glass sitting on a dinner plate. The glass is the tree, the root system in the plate. The tree must send roots out far from the trunk, and if you pack the planting hole with compost and fertilizer, the roots will not be inclined to spread out to the un-amended soil.
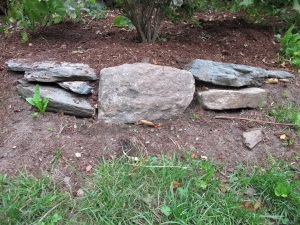
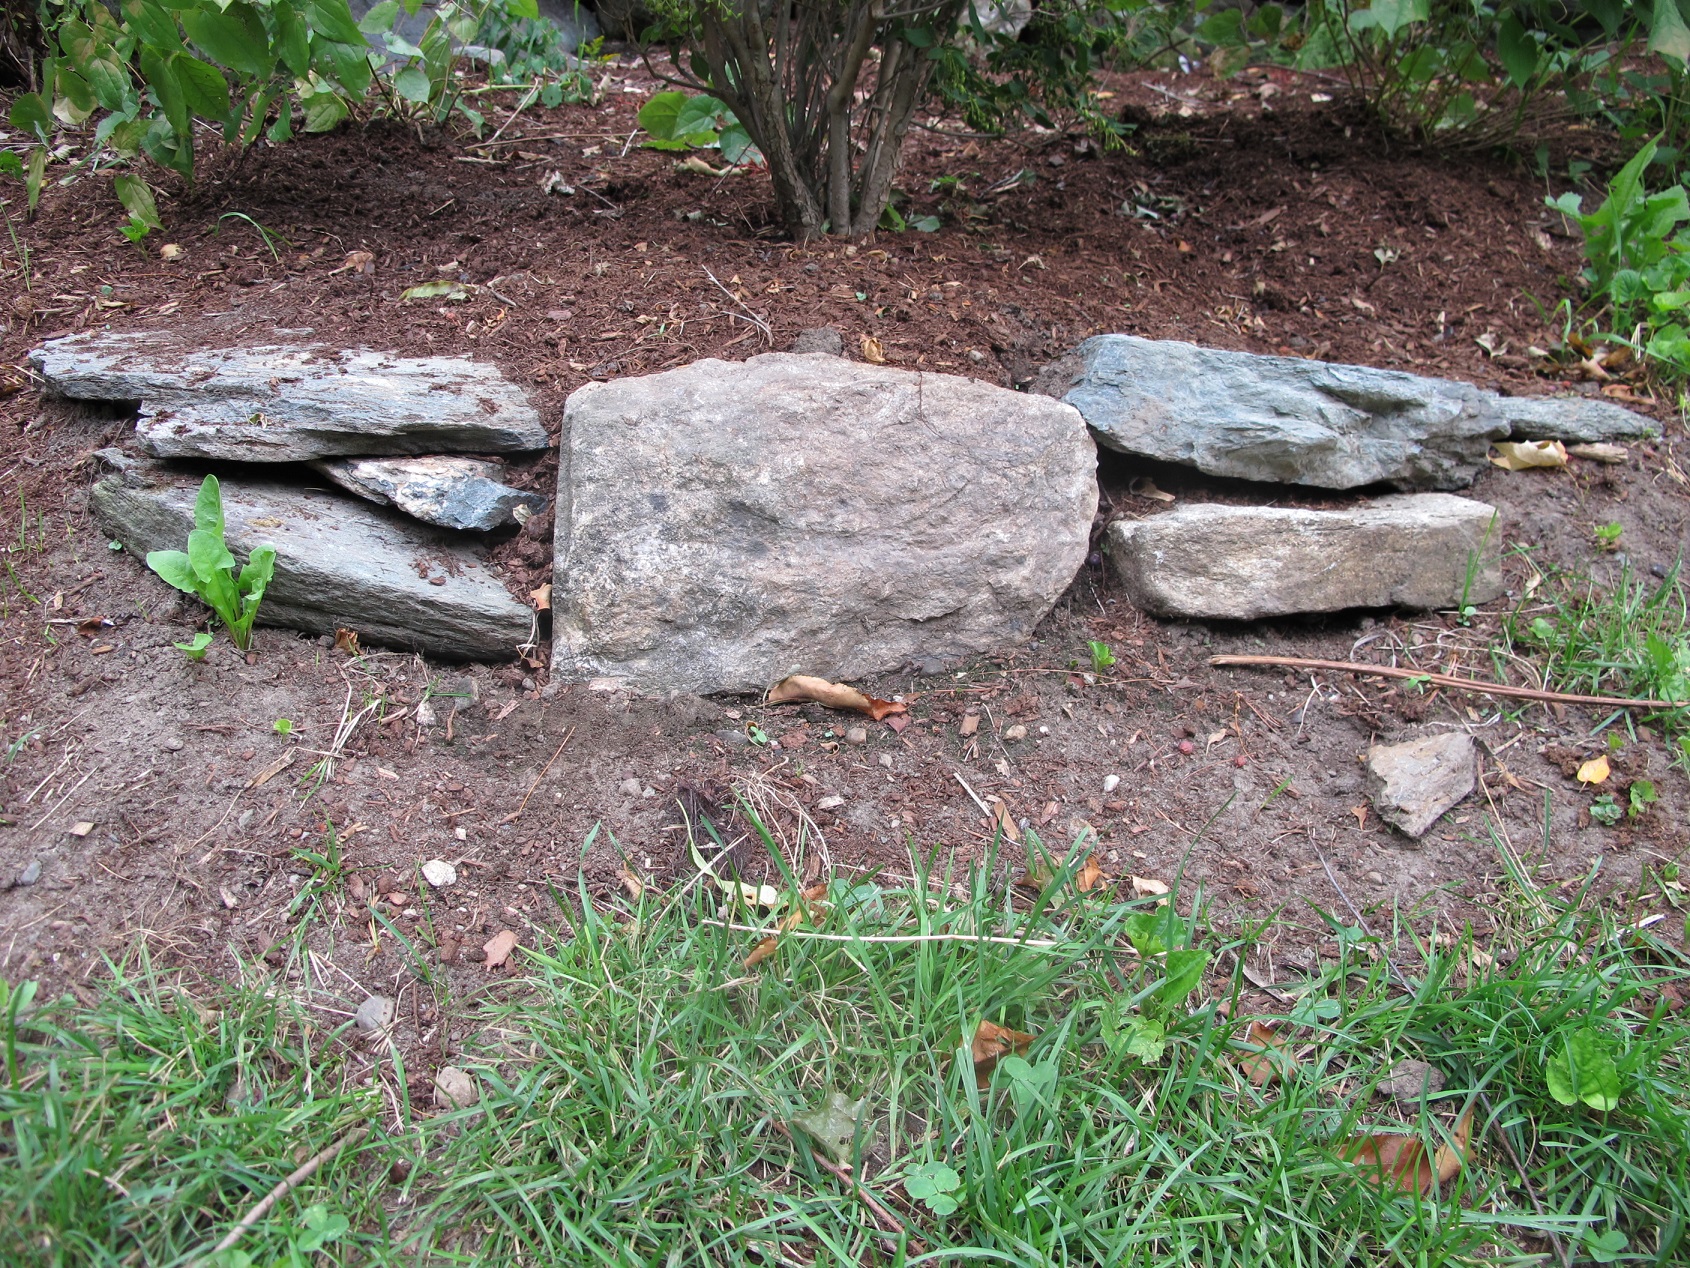
Stones used to level planting area
I decided in this case to build a little stone retaining wall to hold the soil from washing downhill in times of heavy rain. I didn’t do much – I just found seven flat stones and arranged them in two layers on the downhill side of the planting. I didn’t dig a trench and put crushed stone in it as a base, as I would have if the wall were bigger. This was just a 15-minute job. The stones sat on well packed, unexcavated soil and should not move.
If I were to build or buy a new house (though I don’t plan to), the first landscaping task I would tackle would be to choose trees and shrubs and get them in the ground. They take years to reach their peak beauty, and not every tree planted survives. But I keep planting woody plants now, 40 years after I bought my place. I just wish I had more land so I could try everything.
Henry is a gardening consultant and the author or 4 gardening books. His website is www.Gardening-Guy.com.
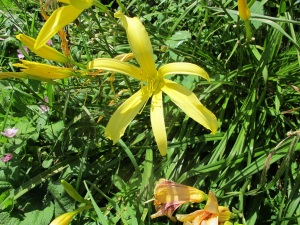
Daylilies
Posted on Wednesday, August 5, 2015 · Leave a Comment
Daylilies are wonderful. All beginning gardeners should have several clumps – you essentially can’t kill them. Like many plants, they prefer good rich soil and full sun, but some varieties will survive and thrive most anywhere. They come in a wide range of colors. They have been bred and grown for centuries and by now there are tens of thousands of named varieties. Now is the time when many daylilies are in their prime.

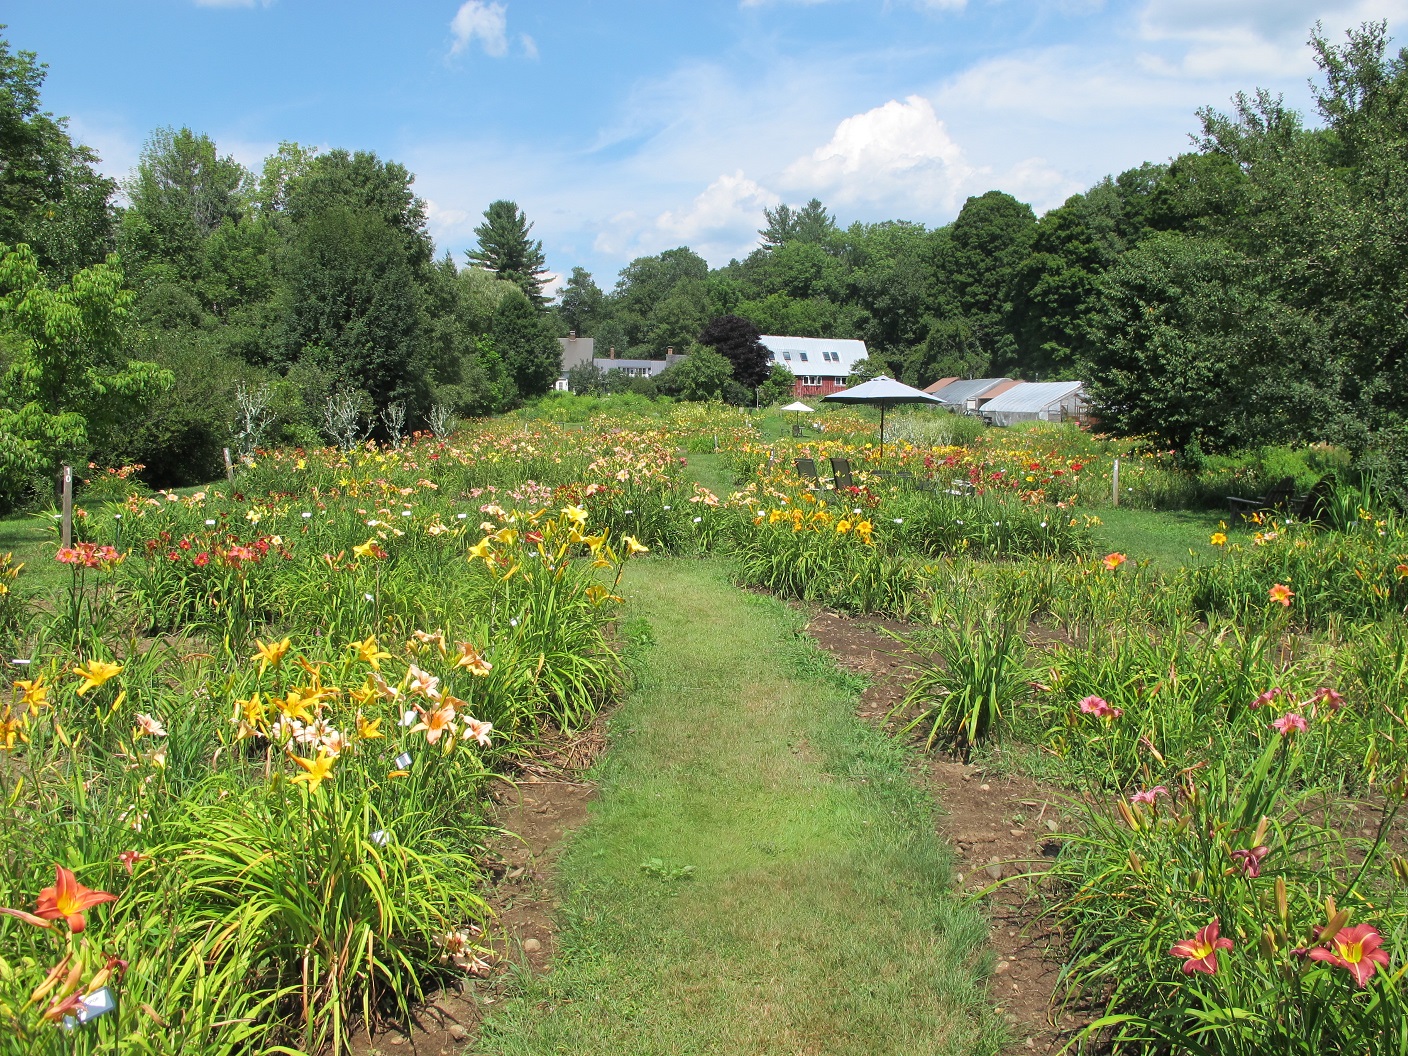
Olallie Daylily Garden
I like to buy flowers in bloom as that way I can better choose the ones that speak to me. So I recently drove to Olallie Daylily Farm in South Newfane, Vermont (www.daylilygarden.com). Chris Darrow, the owner, told me that he has grown at least 2,100 kinds of daylilies, some named varieties, other just bearing numbers from crosses he performed. The farm has about 5 acres of daylilies open to the public, and more daylilies in the 9 acres of field nearby.
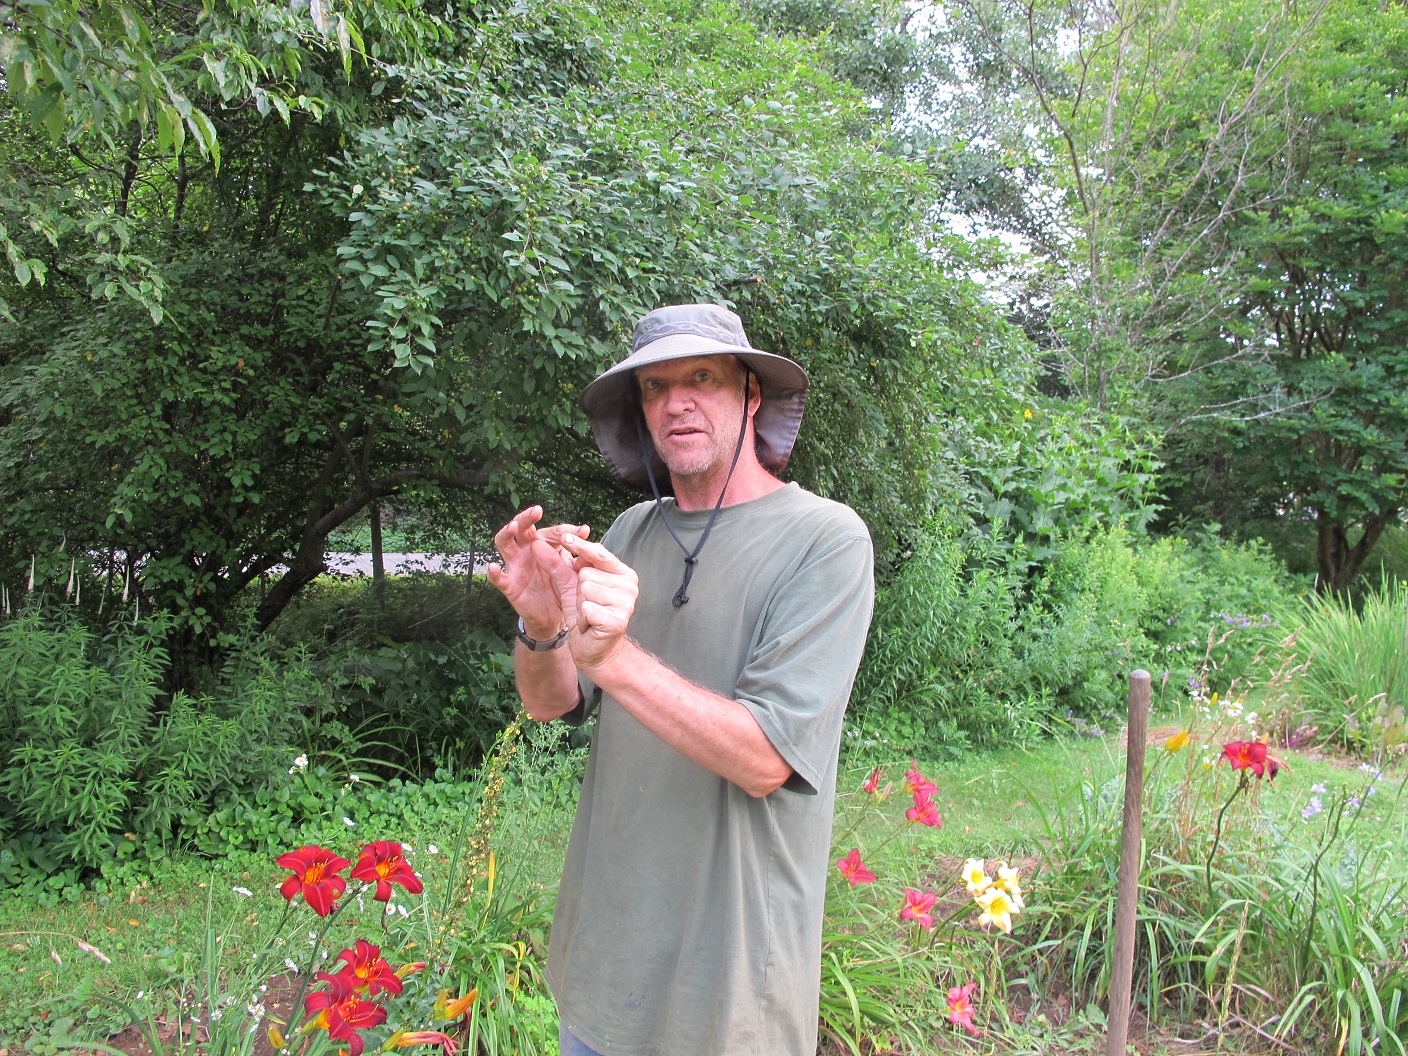
Chris Darrow’s grandfather, Dr. George Darrow, was an internationally known daylily breeder, starting in the late 1950’s after retiring from the USDA. For more than 20 years daylilies were his passion. Chris inherited hundreds of varieties from him and has been breeding them himself for over 20 years.
I was interested to learn from Chris that daylilies are easy to breed. Each flower is open for just one day and most are never pollinated. The female part, the pistil, stands up above the male anthers (of which there are usually six), and bees and other insects can visit them and harvest pollen without ever pollinating them. The pollen is not commonly wind-blown often, either. So daylilies seem to wait for us to do the job.
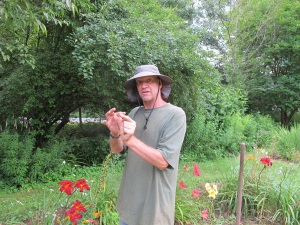
Chris Darrow
Chris explained that all you have to do is snap off a one of the six anthers and touch it to a pistil. You can self-pollinate a blossom or go to another variety of daylily that you like. Plants that are self-pollinated will not usually produce offspring that are identical to the parent. They may, in fact, have a trait that is emphasized – a tall one bred to itself may produce offspring that are even taller, for example. This allows breeders to develop unique varieties – in several generations.
If you cross two different varieties you might get something that is all new and different, something that is fabulous or something that is absolutely ordinary. It’s a bit like throwing dice – you never know what will show up.
Most daylilies have just 2 sets of chromosomes and are called diploids. Some have 4 sets and are called tetraploids. There are plenty of tetraploid daylilies in existence, and often the blossoms are large and showy. But if you cross a diploid and a tetraploid, you will not get viable seed. So it best if you know your variety name. If you know the name, you can go on-line and look it up at the website of the American Hemerocallis Society (www.daylilies.org). There you can learn if yours is a diploid or a tetraploid. The website has a searchable data base of nearly 80,000 daylilies.
If you want to get seeds, do not snap off the spent flower after it has bloomed. Wait until the green seed pod ripens – it will typically take 40 to 60 days – at which time it will break open. Your job is to pick the pod a little before that happens. If you can squeeze a seed pod and it opens and has dark-colored seeds, it is time to pick it. Chris puts the seed pods from a particular cross into a paper bag. Obviously you will need some sort of numbering and recording system, and a way to identify the parents of the cross.
One of my favorites
Daylily seeds need to be cold stratified before planting. This is, essentially, mimicking a winter. Most breeders put seeds in a refrigerator for a minimum of 4 to 6 weeks. Chris Darrow wraps his seeds in moist paper towels for a month starting in February.
To germinate the seeds, Chris Darrow plants them in 32-cell flats in a 60-40 mix of Pro-Mix starting medium and Moo-Doo brand composted cow manure. He puts the seed trays in an unheated greenhouse and lets them warm up slowly. He told me that daylilies are sporadic germinators – seeds might start growing in a week or in a month. It takes 3 years for most daylilies to go from seed to blossom.
If you want to learn more about daylilies, you might want to join the American Hemerocallis Society for $25 a year. That will entitle you to 4 issues of their magazine and a way to connect with other daylily fans. There are regional and national meetings, too.
If you develop a daylily that you think is special, you can register the name with the American Hemerocallis Society for $20. Go to their website, fill out the form, and send it in with a photograph. This can be done on-line or by mail.
Chris’ grandfather lived to be 94 years old. Chris thinks part of Dr. George Darrow’s longevity was his desire to live another year to see what new daylily hybrids blossomed and what they looked like. Maybe that will work for me. I started crossing daylilies last week!
Henry Homeyer is a gardening consultant and author. His website is www.Gardening-Guy.com. You may reach him at henry.homeyer@comcast.net or P.O. box 364, Cornish Flat, NH 03746. Please include a SASE if you want a mail response.
Plants to Watch Out For
Posted on Wednesday, July 29, 2015 · Leave a Comment
If you have a wet area or a stream on your property, you might be seeing some very pretty tall pinky-purple flowers blooming now, or soon. Those are purple loosestrife (Lythrum salicaria), an invasive plant that you should not encourage. Mature plants develop massive root systems and can produce up to a million seeds in a year. It’s one of several plants you should watch out for.
So what can you do? First, learn to recognize purple loosestrife when it first grows, even before blooming. It has a square stem, and it is often reddish or brownish at the base. The leaves are long and thin. Each year I try to find time to cut back the stems more than once, reducing its vigor and preventing it from blooming. I pull new plants, but the established ones can’t be weeded out.
Purple loosestrife came from Europe long ago, and there it is not a problem – it evolved along with insects that eat it and keep it from becoming a pest. One of those beetles has been approved for release in the United States and is helping to control loosestrife in some places, but the beetles are not for sale. By cutting it back, I am acting like a big beetle.

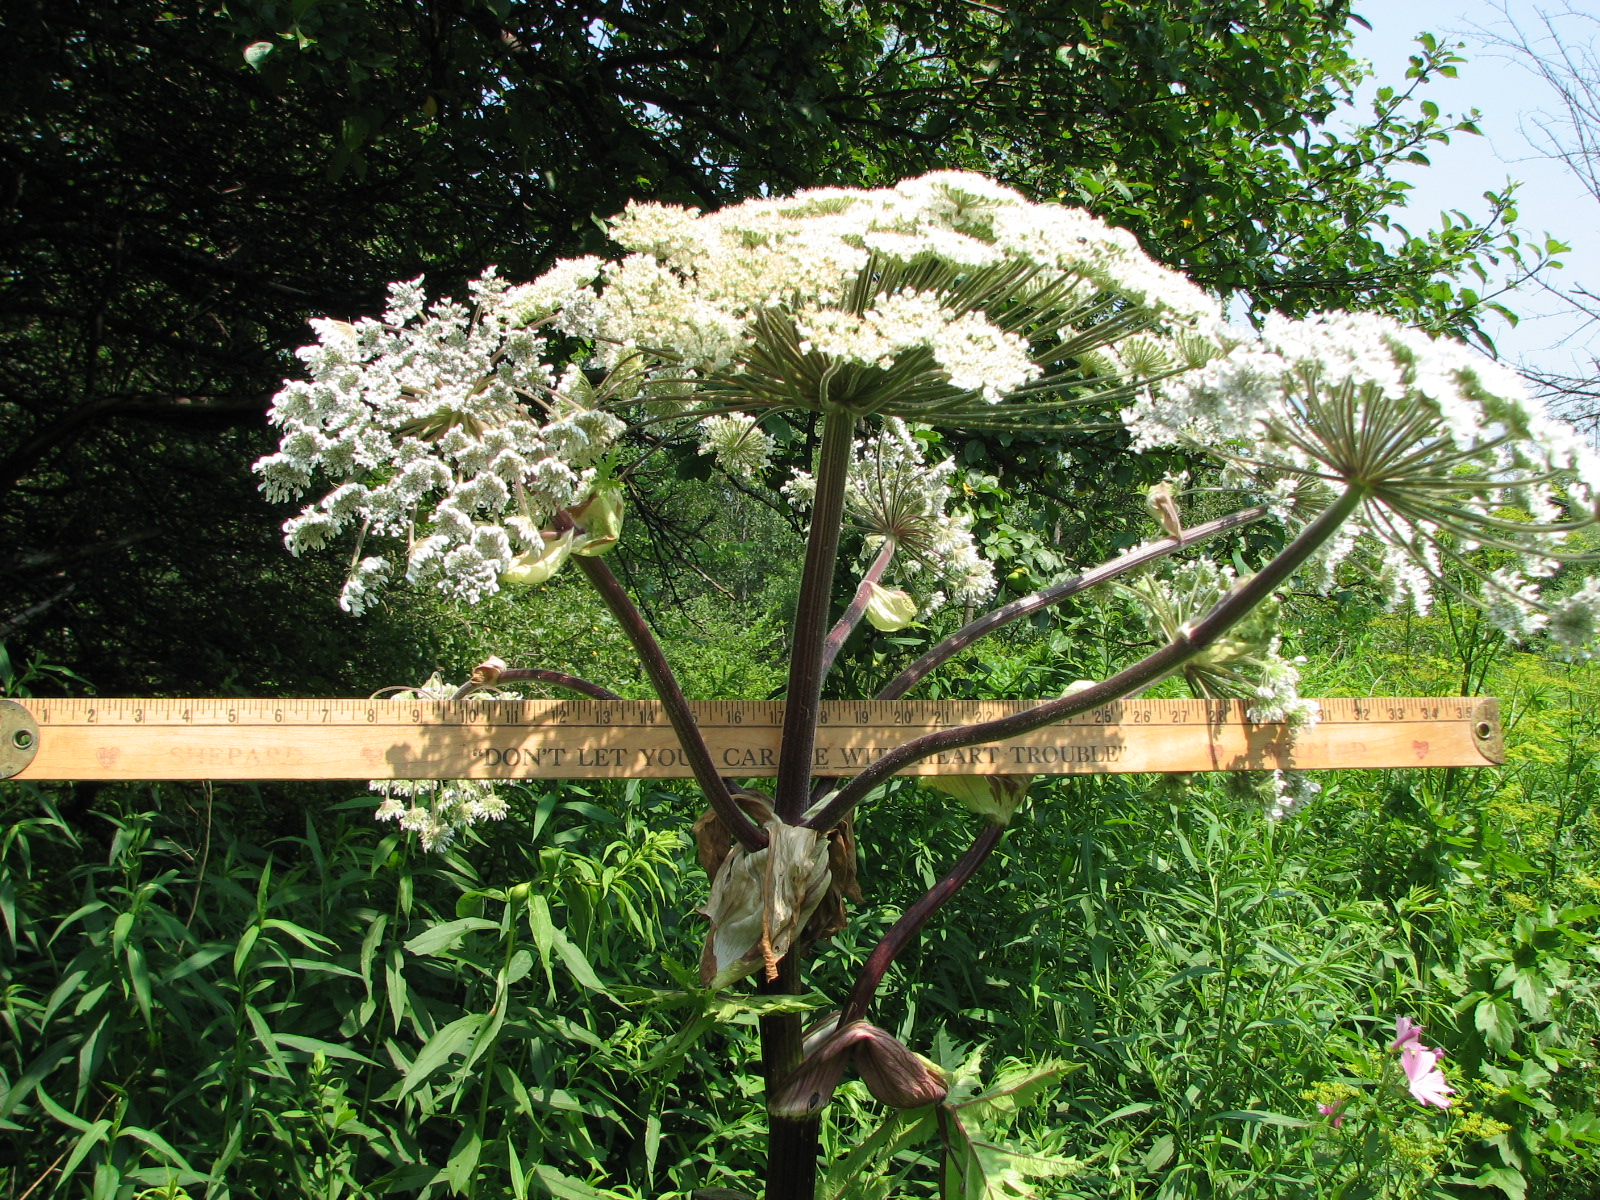
Giant hogweed
Another bad actor is giant hogweed (Heracleum mantegazzianum). It is a huge plant – often more than 6 feet tall, with huge palmate leaves (shaped a bit like maple leaves, or your hand) and numerous small white flowers arranged on umbels (umbels are like the stays of an umbrella) that can exceed 3 feet in diameter. I bought one once, before I knew it was invasive. It can grow anywhere – sun or shade, wet or dry – and has a tap root that goes down two feet or more. Worse yet, the sap is highly toxic to many people and can create severe burns and even scars – particularly if you get exposed to it in full sun.
Fortunately, I am not allergic to hogweed, and I was able to rid myself of it by digging it out with my long drain spade, a shovel with a blade that is only 6 inches wide, but 16 inches long. On the other hand, it is a fabulous looking plant and wish I could safely grow it. It is on the invasive species list in many states.
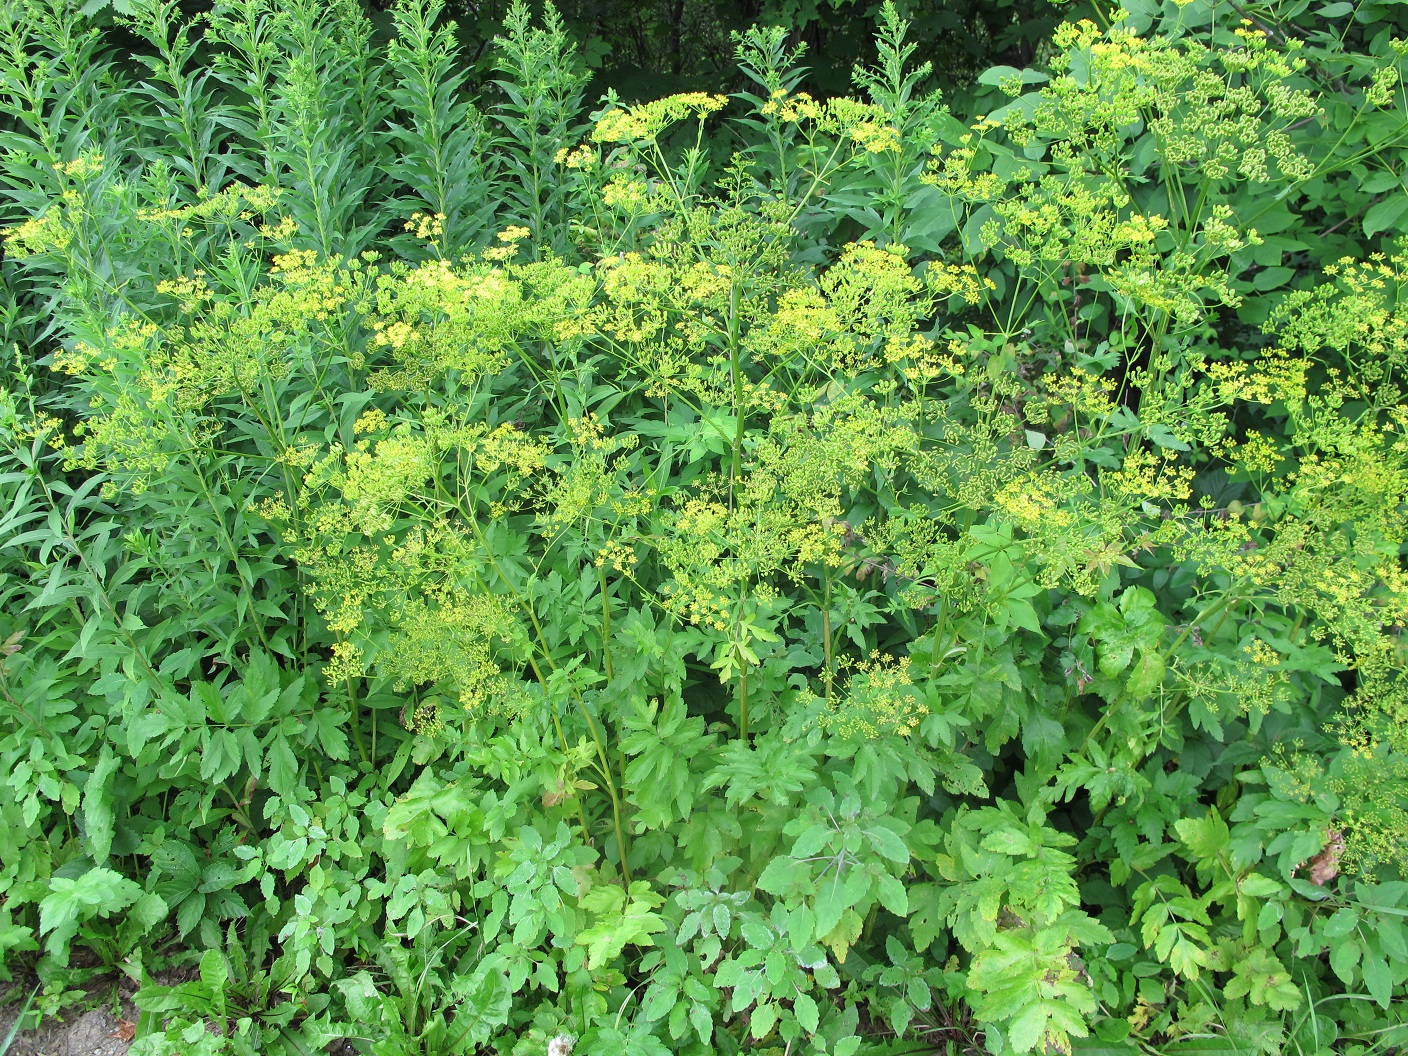
Wild parsnip
A similar plant growing by the roadside right now is wild parsnip (Pastinaca sativa). This, too, has a sap that can burn the skin of many people (but not me). It only grows four feet or so tall, and has a yellow blossom like Queen Anne’s Lace. It is related to carrots – and giant hogweed. According to Sam Thayer’s wonderful book, The Forager’s Harvest, the tall plant we are seeing now is biologically identical to the parsnips we plant in the garden. It is a biennial plant, and Thayer eats the first year wild parsnips, but explains the second year roots are not edible. He states that wild parsnips look a lot like water hemlock, which is extremely poisonous. So do not take any chances!
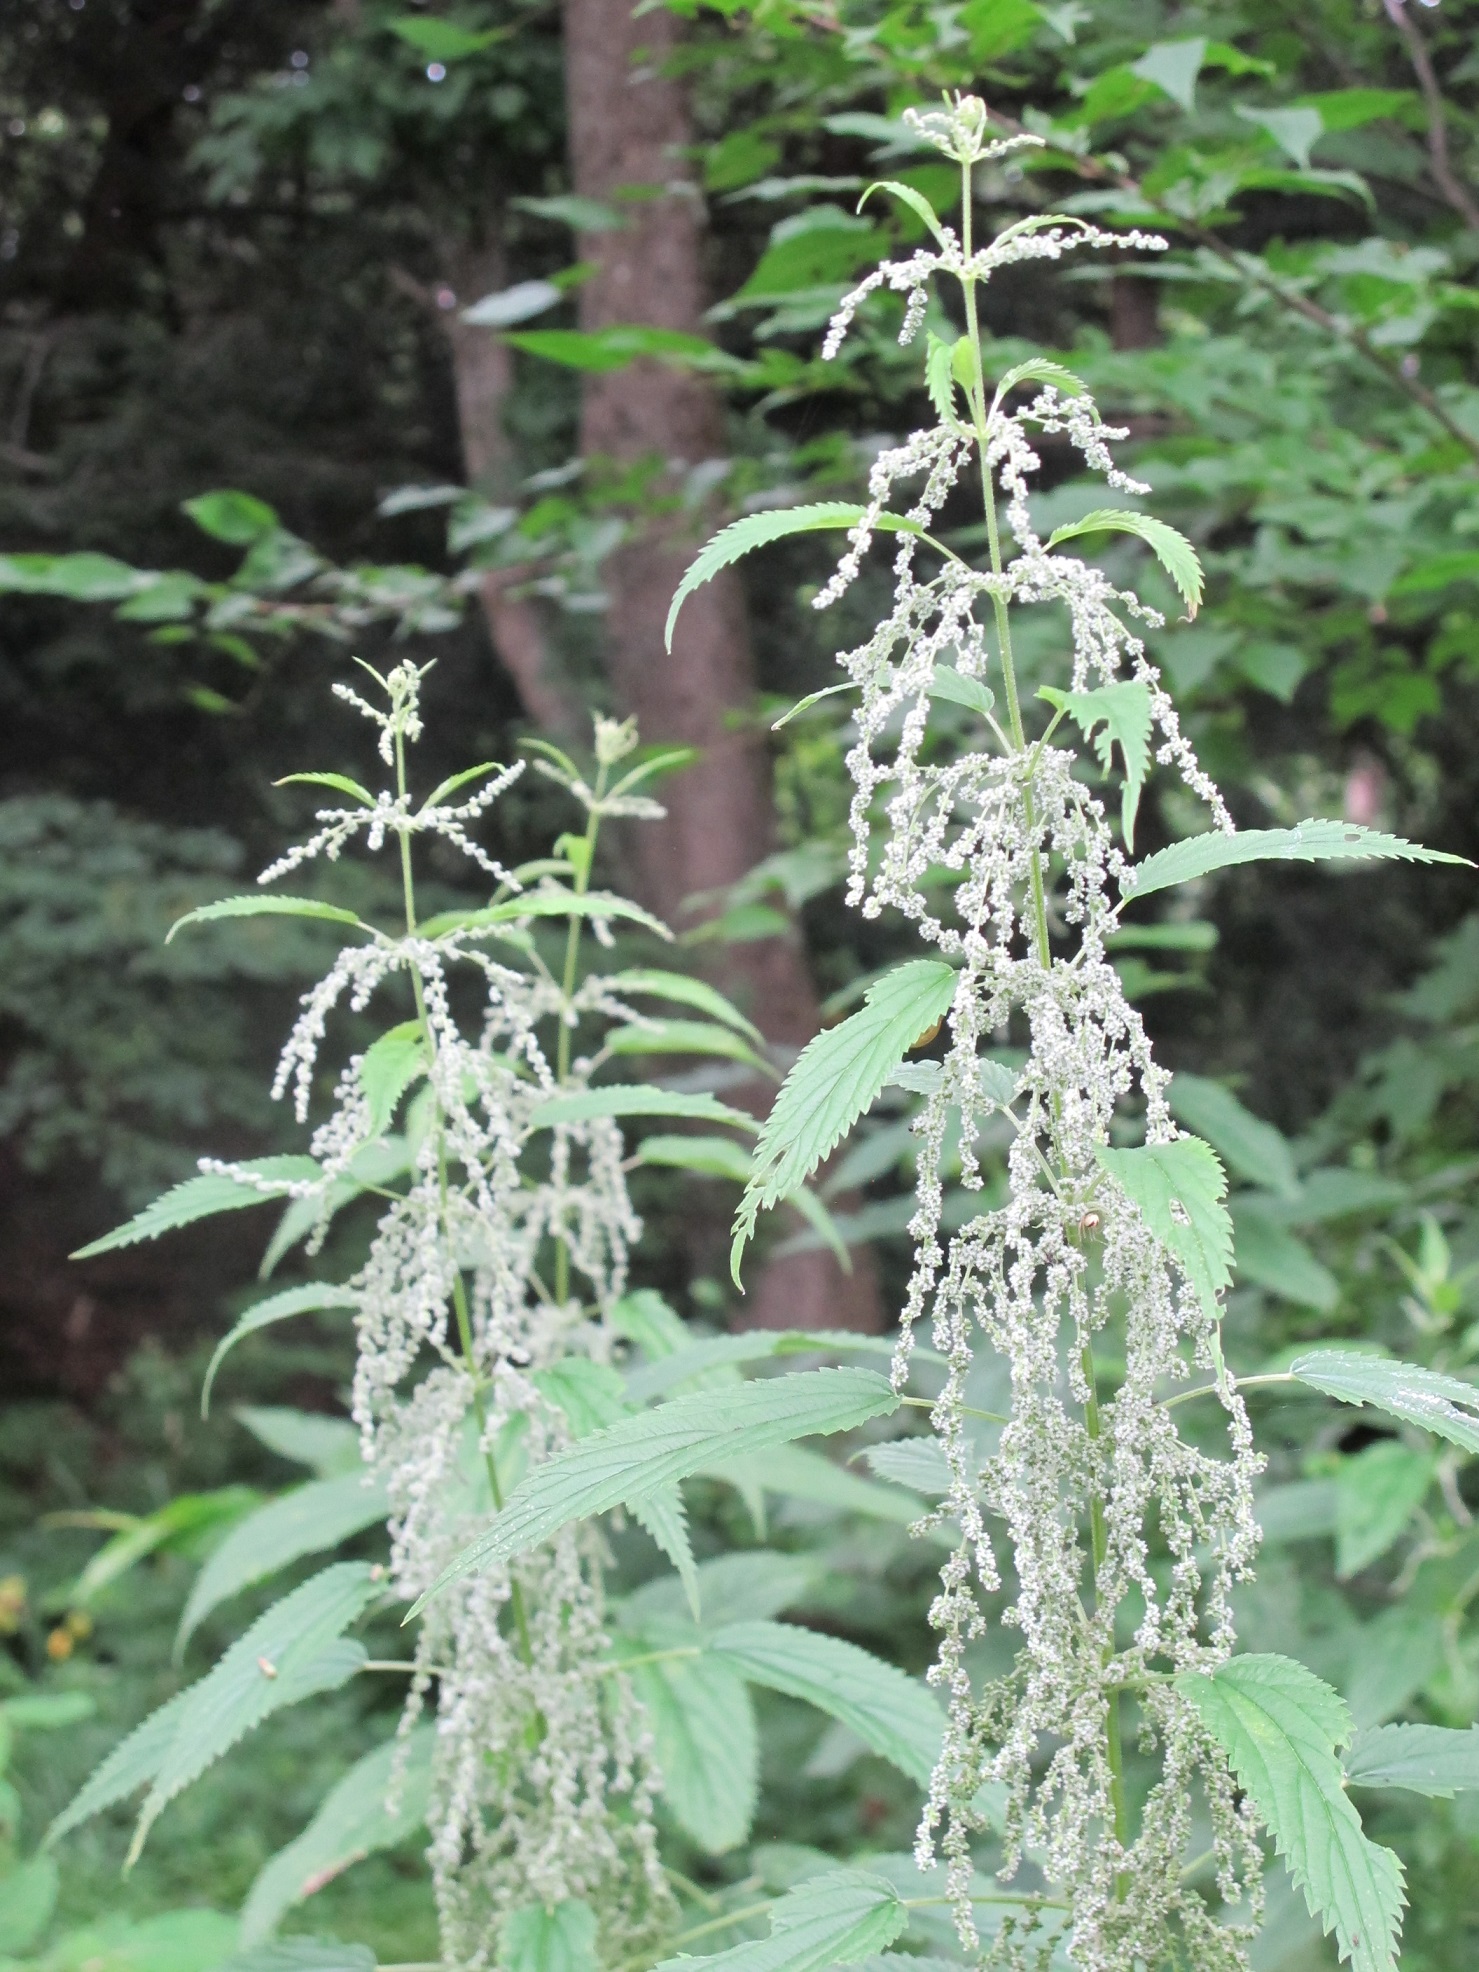
Stinging nettle (Urtica dioica) is another pest – but one that has its virtues. It can grow almost anywhere, but does best in rich, fertile and moist soils. It has tough little hairs that act as hypodermic needles, delivering a cocktail of chemicals that sting and can produce a rash. Cooking or drying the leaves, however, eliminates the sting and nettles have a long history as an edible plant and medicinal herb.
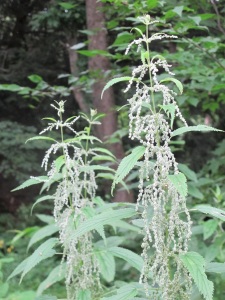
Stinging nettles with flowers
Nettles can be cooked and eaten like spinach early in the spring. At this time of year the stems and leaves have gotten tough and are not recommended for eating. The plant itself gets to be 5 to 8 feet tall with leaves in opposite pairs that have toothy margins. It is very nutritious – it is up to 25% protein when dried. When dried, it makes a tea that I don’t like very much. Nettles are a good source of Vitamin C and A. I generally leave stinging nettles alone, though I pull them, wearing gloves, if they get into a flowerbed or too close to a path.
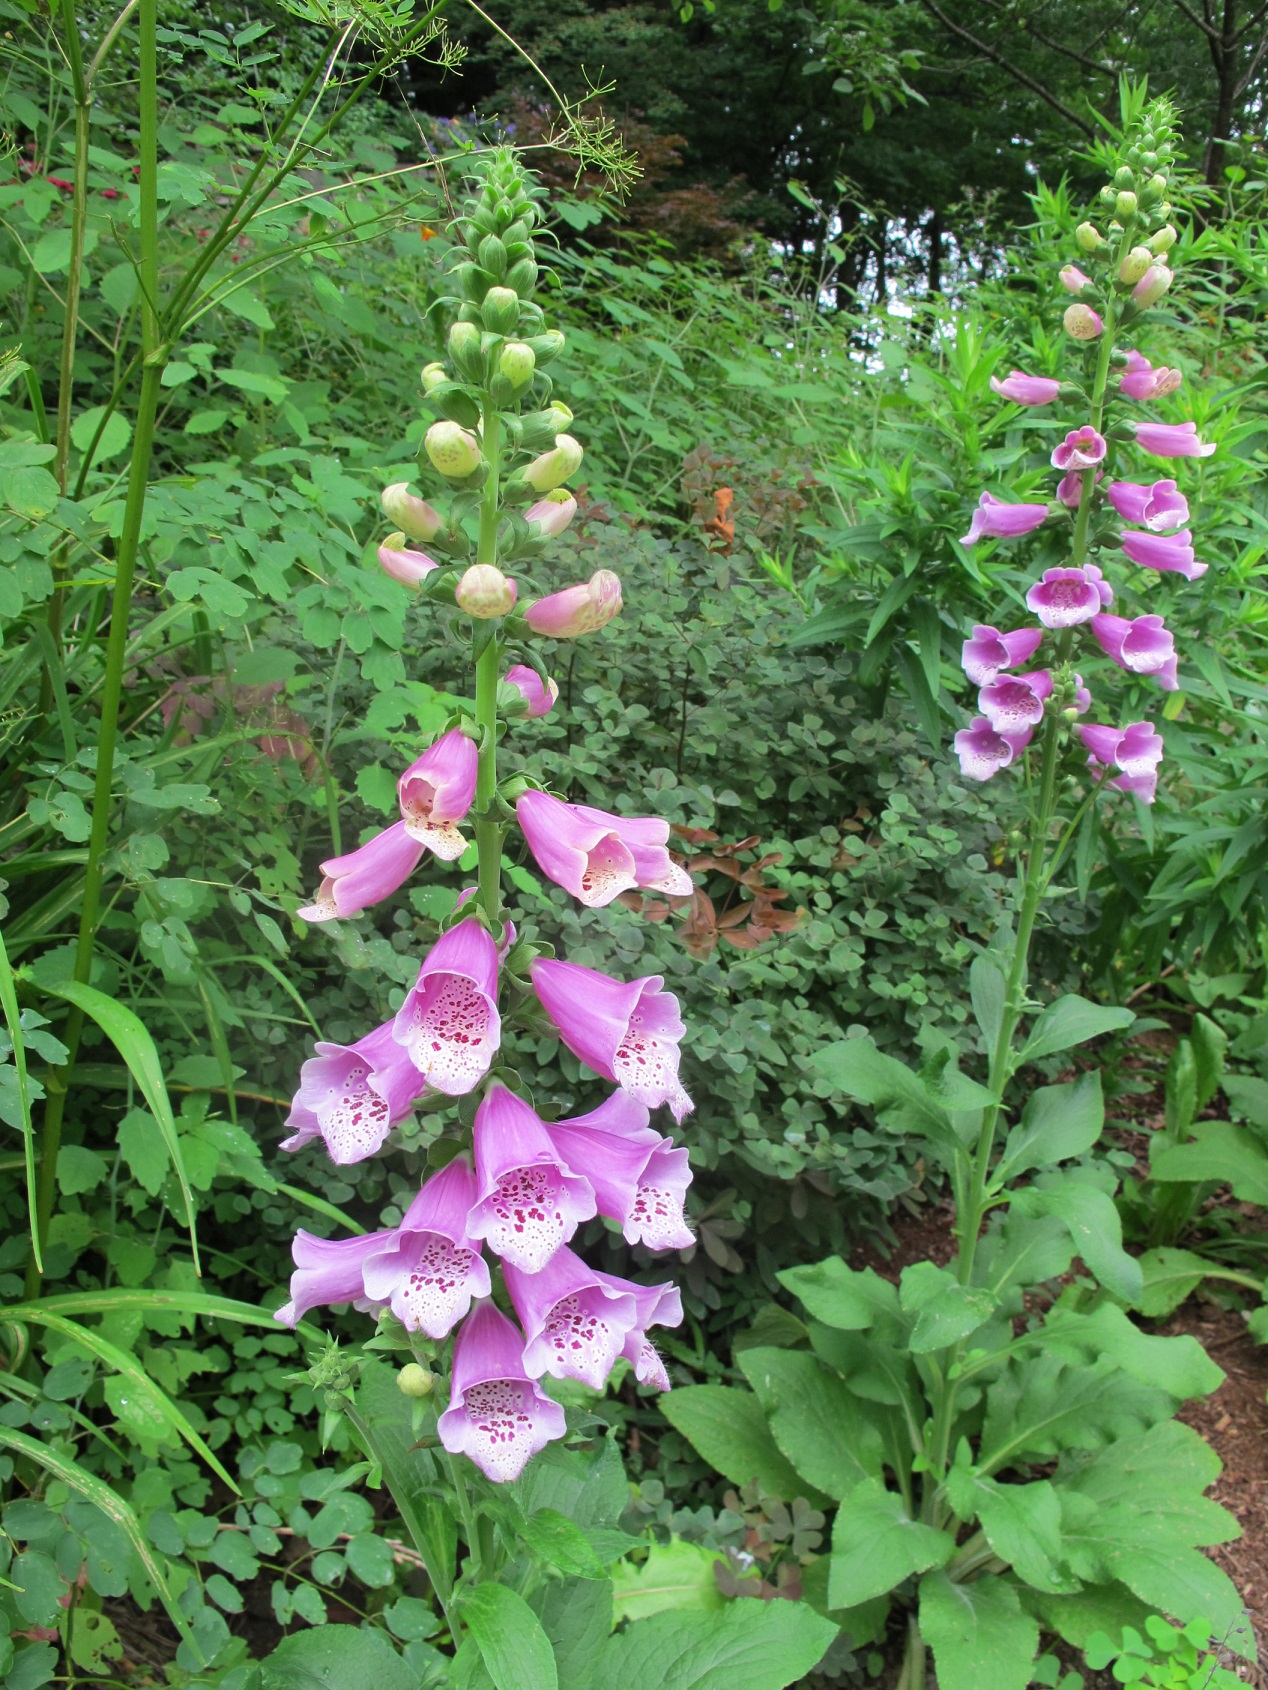
Three lovely garden plants that I grow have potentially poisonous side effects: castor bean (Ricinus communis), angel’s trumpet (Datura spp.) and foxglove (Digitalis purpurea). All three have poisonous seeds and (to a lesser degree) leaves. I don’t worry about them because I can’t see anyone – even a child – eating them. Castor beans and angel’s trumpet both have spiny coverings on their seed pods, and foxglove plants have very tiny seeds.
Castor beans can be used to make ricin, a very poisonous powder that can be fatal if inhaled or ingested. In 2013 a crazy guy sent ricin in a letter to President Obama. Fortunately, like kings of old who had tasters, he doesn’t open his own mail. But the plant is big, with palmate leaves in tones of red or bronze. I find it easy to start from seed.

Foxglove
Angel’s trumpet is my substitute for Oriental and Asiatic lilies, which are so badly attacked by lily-leaf beetles that hand-picking daily can’t keep them looking good. Unlike the lilies, it blooms all summer! It comes in white and purple-flowered varieties; the white ones are much more vigorous.
Foxglove is an old favorite of mine. It’s a biennial that produces pink-purple blossoms on tall stems. If you let it, it will drop seeds to the soil, and, in two years will bloom again unless you have s thick layer of mulch, which will inhibit the seeds.
Knowing your plants – and any potential negatives – is important, especially if you keep animals who are likely to nibble on your plants.
Henry is the author of 5 books. His websites are www.Gardening-Guy.com and www.henryhomeyer.com.
Growing Fruit
Posted on Wednesday, July 22, 2015 · Leave a Comment
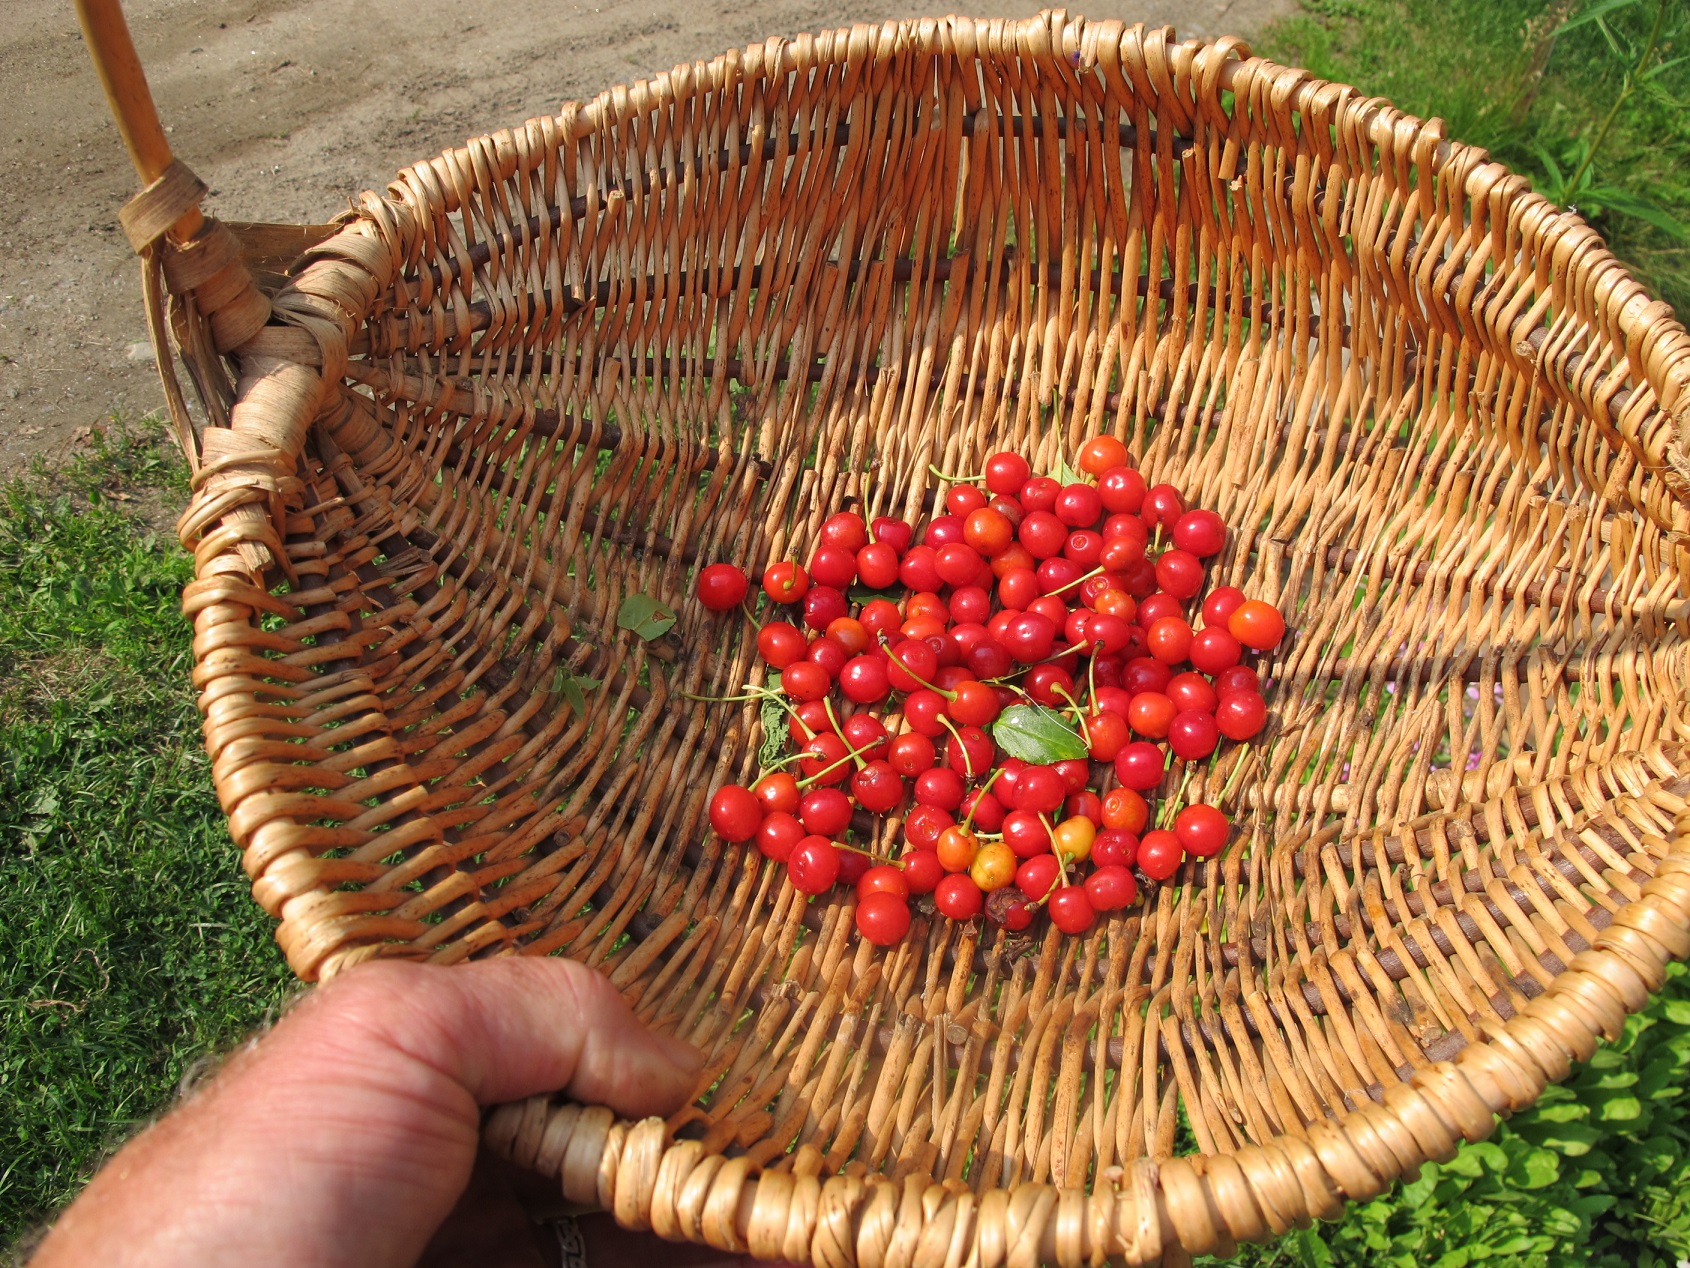
I try not to be too compulsive, but admit that I counted every sour cherry I picked from my tree this year. Give or take a few I ate while picking, I got 111 cherries -not enough for a pie. I planted the tree some 15 years ago, and this was my best crop. Last year I threatened it with the chain saw, and it upped its production from 5 or 6 to over 100 cherries. Maybe next year it will produce a thousand. Maybe not. I’ll probably cut it down.
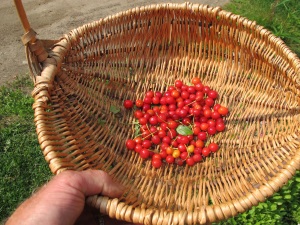
My Sour or Pie Cherry Harvest, 2015
Fruit trees, I’ve always been told, do not like “wet feet”. By that I mean their roots should be in soil that is not consistently wet. Apples, pears, peaches, cherries, and plums grow best in rich soil with full sun and well drained but lightly moist soil. Most of my full sun is alongside a brook with a water table that is consistently high – within two feet in dry times, a foot or less in spring. So, back in the 1980’s, when I was young and full of pep, I built a terrace to grow fruit trees.
A friend had a dilapidated stone wall along his road that he had picked over, taking the nicest flat stones for a wall elsewhere on his land. But he said I could take anything I wanted, warning me that building with round stones is not easy. It wasn’t. But the price was right, and I had a little trailer, so I hauled rocks, a dozen at a time, to my back yard. I built an 80-foot retaining wall, and bought topsoil to backfill behind it. The truck couldn’t get to the site, so I moved many dump truck-loads the final distance by wheelbarrow. Ah, to be young and foolish again.
I tell you all this because I feel like I‘ve done a lot for this darn cherry tree, and I’m pretty sure I’ll cut it down this year or next. I know my e-mail inbox will be full of mail asking me to spare the tree. But my thought is this: if a tree does not live up to your expectations and you have given it a fair chance, get out the chain saw. I have limited space for fruit trees. And 111 cherries is not worth the space. The blossoms are not special, either.
The irony is that since I built the wall and planted fruit trees, I have had good luck planting them in the field near my stream. I just built up something akin to a major league pitcher’s mound, and planted where the pitcher would stand. Ten feet across, and rising up about a foot. I’ve planted plums and apples, and all have done fine. So maybe that old saying about fruit trees not liking wet feet is bogus.
Meanwhile, I mowed down my blackberry patch earlier this summer. I planted a 50-foot row about 30 years ago, and the patch has slowly gone downhill. For many years it was great, and I was only able to keep the bushes contained with a mower. But recently each year there were more fungal diseases, and less production. So I will hire someone to plow the land, and rototill the roots. Then I will cover it with black plastic for the rest of the summer to kill the weeds and roots.
Next year I will plant that patch in strawberries. I will plant some June-bearing plants, probably ‘Earliglow’, that produce their entire crop in a 3-week period. They are great for freezing, and for general gluttony. It’s great to eat strawberries three times a day for a while. But I will also plant some day-neutral berries or everbearing plants that will produce smaller numbers over a longer period.
Most strawberries depend on the length of the day to tell them when it is time to produce fruit. Day-neutral berries are not dependent on that cue. The last time I grew day-neutral berries I got a nice fall crop the first year, then some berries all summer the following years, with a bigger bump in the fall. I planted ‘Tristar’ and was pleased with it. The berries were smaller than most June berries, the size of a dime to a quarter. No fifty-cent sized berries. Commercial growers in California often plant day-neutral berries so they can sell berries all year.
This spring I was at Edgewater Farm in Plainfield, NH and was seduced by a lovely pineapple plant. It displayed lots of long, strap-like leaves similar to that of an aloe plant. And best of all, it had a pineapple growing on top! It was expensive – twenty-five dollars – but I bought it anyway. I knew, from living in Africa, that pineapples plants only produce one fruit, then die. But I also knew that it is possible to start a second plant from the first.
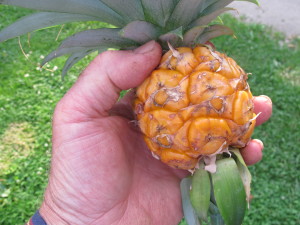
My pineapple harvest
My pineapple lived on the deck in partial sunshine and was a very nice addition to the plants there. But, come mid-July the fruit ripened to a deep yellow and then flopped over on its stem. I tied it up. It flopped anyway. I decided it was time to eat it. It was tasty, but barely one serving after peeling and coring it. Right now the plant looks good, and I’m hoping it will develop a side-shoot. If not, the experiment will be done. Meanwhile, my avocado plant I started from a pit is doing great.
Fruit is a great investment. Plant a fruit tree, sit back and relax, harvest the fruit. That’s the ideal. In fact, my cherries cost me many dollars each, if I add in the cost of the tree, the soil, and minimum wage for my time building the wall to create the space. And you know what? The cherries aren’t even very good eating! Live and learn.
Henry Homeyer is a UNH Master Gardener and the author of 4 gardening books. His web site is www.Gardening-Guy.com.
Red-leafed Plants
Posted on Wednesday, July 15, 2015 · Leave a Comment
When I bought my house in 1970 it had no landscaping. But I’ve lived in it ever since and have been working on the gardens all that time (except when I was off seeing the world and serving in the Peace Corps). The first tree I planted was a Japanese red maple (Acer palmatum). I grew up in Connecticut and my parents had a big one in the yard that I loved. It was, I’d estimate, 40 feet tall and wide, a great broad climbing tree with maroon-colored leaves. So around 1971 I dug up a seedling and moved it north.
That little maple is still alive, but never has gotten close to the size of my parents’ tree. It’s just 10 feet tall with a 12-foot spread. Why so small? It’s growing too far north. It survives, but is stunted by the climate. Not only that, as a nearby tree has spread and shaded it, the leaves are no longer the deep purple they once were; now they have a greenish tinge. Oh well. I later got another and put it in a sunnier location and it has leaves that are a deeper reddish color.
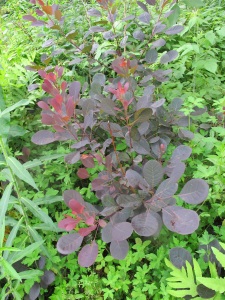
Purple smokebush
Like many gardeners, I like plants with deep red or purplish leaves. They provide a contrast to all the greenery in our landscape. There are some nice trees and shrubs to pick from –including one very popular one that is now on the prohibited invasive species list in most states, the Norway maple ‘Crimson King’. That one is a “sport”, or genetic mutation. All Norway maples (Acer platanoides), including the green ones, are invasive.
The original Crimson King has been cloned and sold for decades. Eventually environmentalists figured out that seedlings from them having been taking over our woods, outcompeting our native maples and other plants. The seedlings generally are green-leaved, so many gardeners think they are sugar maples. Snap off a leaf and look at the stem. If it oozes white sap, it’s a Norway maple.
Norway maples have amazing root systems that steal the moisture and nutrition from the soil for long distances, depriving other plants. So if you have a nice big maple with nearly black leaves, know that it is a thug – and consider replacing it even though no plant police will come after you.
I have a fast-growing shrub with handsome dark purple leaves that would exceed the size of my Japanese red maple if I didn’t give it a yearly “haircut”. It’s a common ninebark (Physocarpus opulifolius), a variety called ‘Diablo’. This is a shrub native to the United States though I have never seen one in the woods. Diablo was introduced in 2000 and has become very popular, mainly for its leaf color which is good from spring to fall, but also for its nice 2-inch pinkish blossoms in June.

Diablo common nine bark
According to me, common ninebark grows too fast. Mine can grow 3 feet in a summer, and I really don’t want it to. I prefer shrubs like fothergilla or daphne that rarely need pruning. Diablo can quickly get to 10 feet tall and wide, and its root system is substantial. Hardy to Zone 2 (minus 50 degrees), nothing is going to kill it. It prefers full sun, but will tolerate anything and survive in bad soil, acid or alkaline. Planted in a row, it could be a good hedge.
Purple smoke bush (Cottinus cogyria) is a purple-leafed plant I’ve have had since 1999. Mine often dies back to the ground after a cold winter, but the roots send up new shoots no matter what. I often cut back all shoots in early spring, which stimulates it to produce new shoots and keep it a tidy shrub instead of a gangly winter-bitten one. These often grow 3 to 4 feet in a season. Doing this means it never blooms, but the foliage is a splendid deep wine color, so I don’t mind. In warmer climes it can grow to be a small tree or large shrub with large diaphanous blossoms – the smoke – that is quite glorious.
I also have a crabapple tree with dark maroon leaves. I called E.C. Brown Nursery in Thetford, VT where I bought it some 15 years ago to see if they could help me identify the cultivar. After some discussion and a look on the web, I decided it was ‘Ruby Tears.’ Mine was trained into a spiral, and has branches that weep or droop down. I’ve kept it small – it is only 8 feet tall and wide. But it has nice dark leaves that are quite striking in the spring, getting a bit greener as the season goes on. It is loaded with pink blossoms every year.
Other dark-leafed crabapples include ‘Prairie Fire’, which I have seen as a full-sized tree, or if grown on dwarfing rootstock, as a small one. All apples are grafted onto rootstocks because the seeds do not breed true. The rootstock determines the ultimate size from dwarf to full-sized. Prairie Fire has greenish-red leaves by mid-summer, getting greener as time goes on.

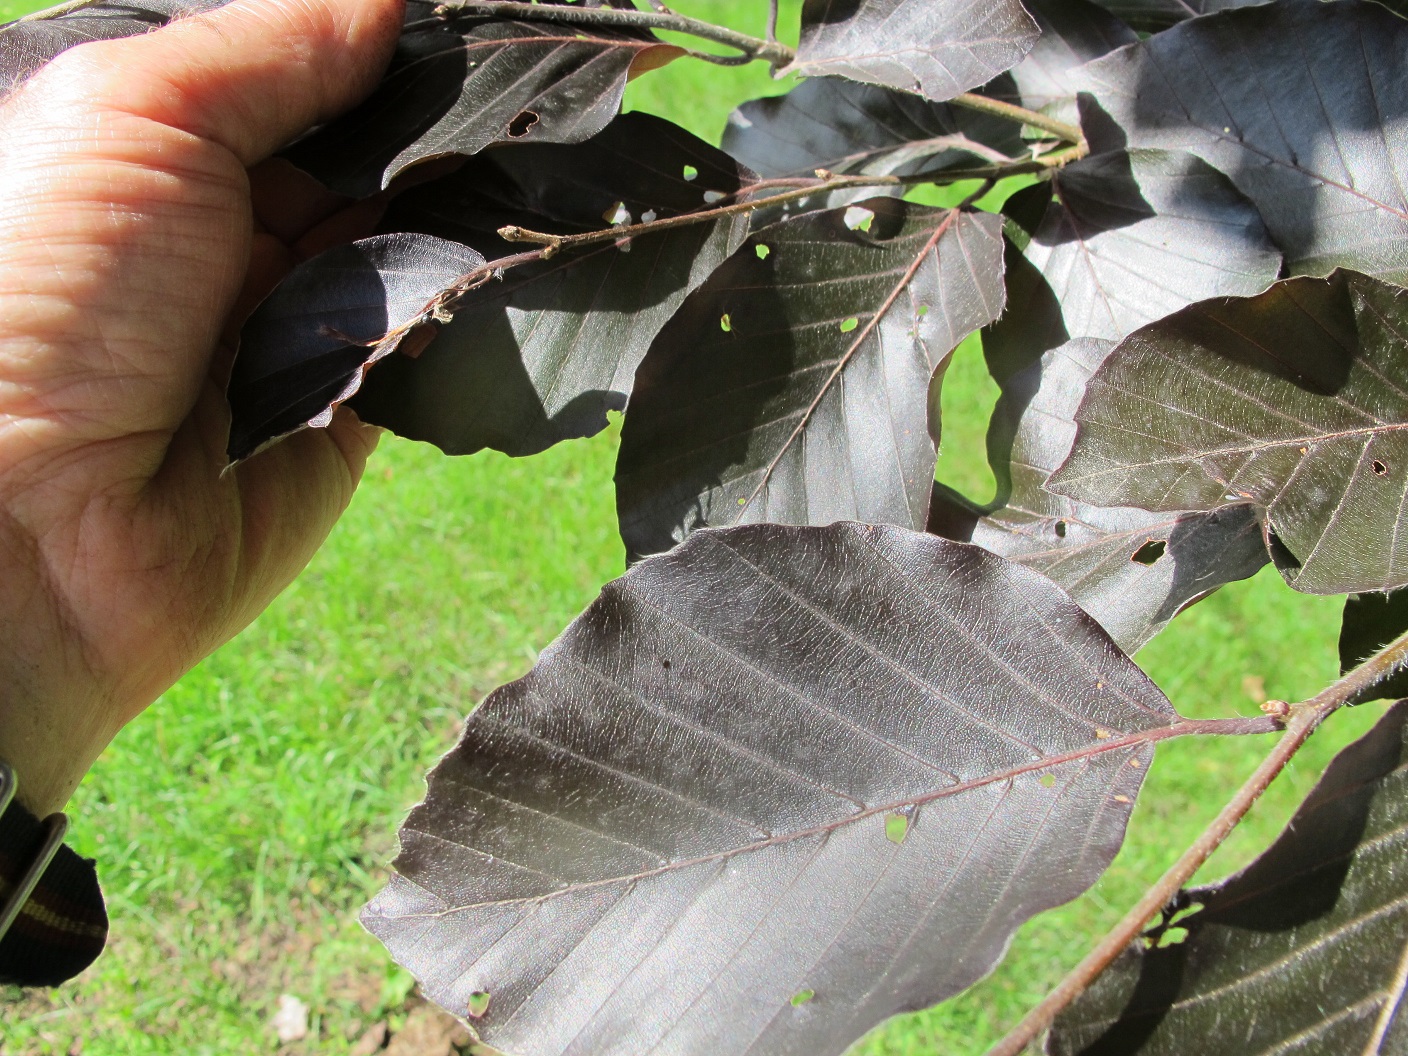
European beech
European beech (Fagus sylvatica) has some very nice purple-to-black-leafed cultivars, and although there is one growing in my town, I have never tried growing it. The leaves are really quite black at this time of year, and the one I have observed is 20 years old or more, about 18 feet tall and 12 feet wide. It is rated as a marginally hardy in Zone 4, but this one has survived winters approaching 30 below zero.
Planting a tree is an investment in money, time and space. Research your choices well, plant them where they will do well, and your grandchildren will enjoy them in the future.
Henry can be reached at his web site, www.Gardening-Guy.com. He is the author of 5 books and is a UNH Master Gardener.
Vegetable Gardening
Posted on Wednesday, July 8, 2015 · Leave a Comment
Certainly the weather is, year after year, a source of much consternation for gardeners. It’s too dry! (May). It’s too wet! (June). It’s too hot! Too cold! People seem to be delighted to complain about the weather. Me? I’m generally pleased by it all. What curve ball will Mother Nature throw at us next?
Despite the yearly weather variations, some things in the garden never change. We must thin our root crops, pull weeds, mulch. We need to pick off potato bugs on our plants, and remove their orange egg masses on the underneath sides of the leaves. We need to pick slugs and snails on the cool, moist days.
One of the most tedious jobs in the vegetable garden is thinning. Baby beets crowd each other, no matter how carefully we planted them. Carrots compete with their brothers and sisters for light, water and soil nutrients. It’s time to get down on your knees and get to work, thinning.
Thinning and weeding is important
I was recently talking to a gardener who starts her beets indoors in flats in March or April, and then divides them up and plants them individually, properly spaced. Hmm. That would certainly eliminate the thinning problem. I’ll have to try that next year.
Carrots seeds are tiny, so spacing them well at planting time is difficult and time consuming. By now, carrots should be an inch apart. Later, by the end of July, carrots need more space – but the thinnings can be eaten, a reward I relish.
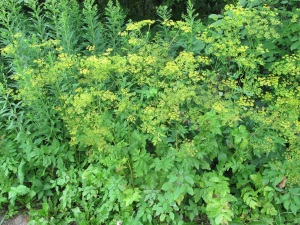
Some years ago I saw prize-winning carrots that were 18 inches long on display at the Tunbridge World’s Fair in Tunbridge, VT. I was flabbergasted. I made note of the grower’s name and tracked him down. He is Joey Klein, an organic gardener in Plainfield, VT with a farm on the Winooski River. He gave me good tips on how to grow long carrots, and they worked. You can start a new bed of carrots now for fall eating and storage.
Joey grows carrots in wide raised beds, each bed about 36 inches wide and mounded up about 6 inches above the walkways. He adds lots of organic matter to the soil, especially good, mature compost. He likes to say that he harvests sunshine. His carrots and broccoli turn sunshine into food. The soil he started with was good alluvial soil that has good drainage and texture – and few rocks, a bonus for anyone who wants long, straight carrots.
If you want long luscious carrots, buy a variety that is destined to be long. Joey uses “Sugarsnax 54” from Johnny’s Selected Seeds. I use seed from Renee’s Garden Seeds, a package of mixed orange and yellow carrots called “Sunshine Orange and Yellow” that gives me huge, long carrots, especially the yellows. Mine are not as long as Joey Klein’s, but are routinely 12 inches long.
I find growing long carrots in a wood-sided raised bed with 8-inch sides allows me to create a custom soil just right for carrots. I use a 50-50 mix of topsoil and compost, mixing my garden soil with compost I buy from a local guy who buys cow barn waste and turns it into light, fluffy compost. A box 40 inches wide will grow 3 rows of carrots separated by 15 inches and with 5 inches of space from the walls.
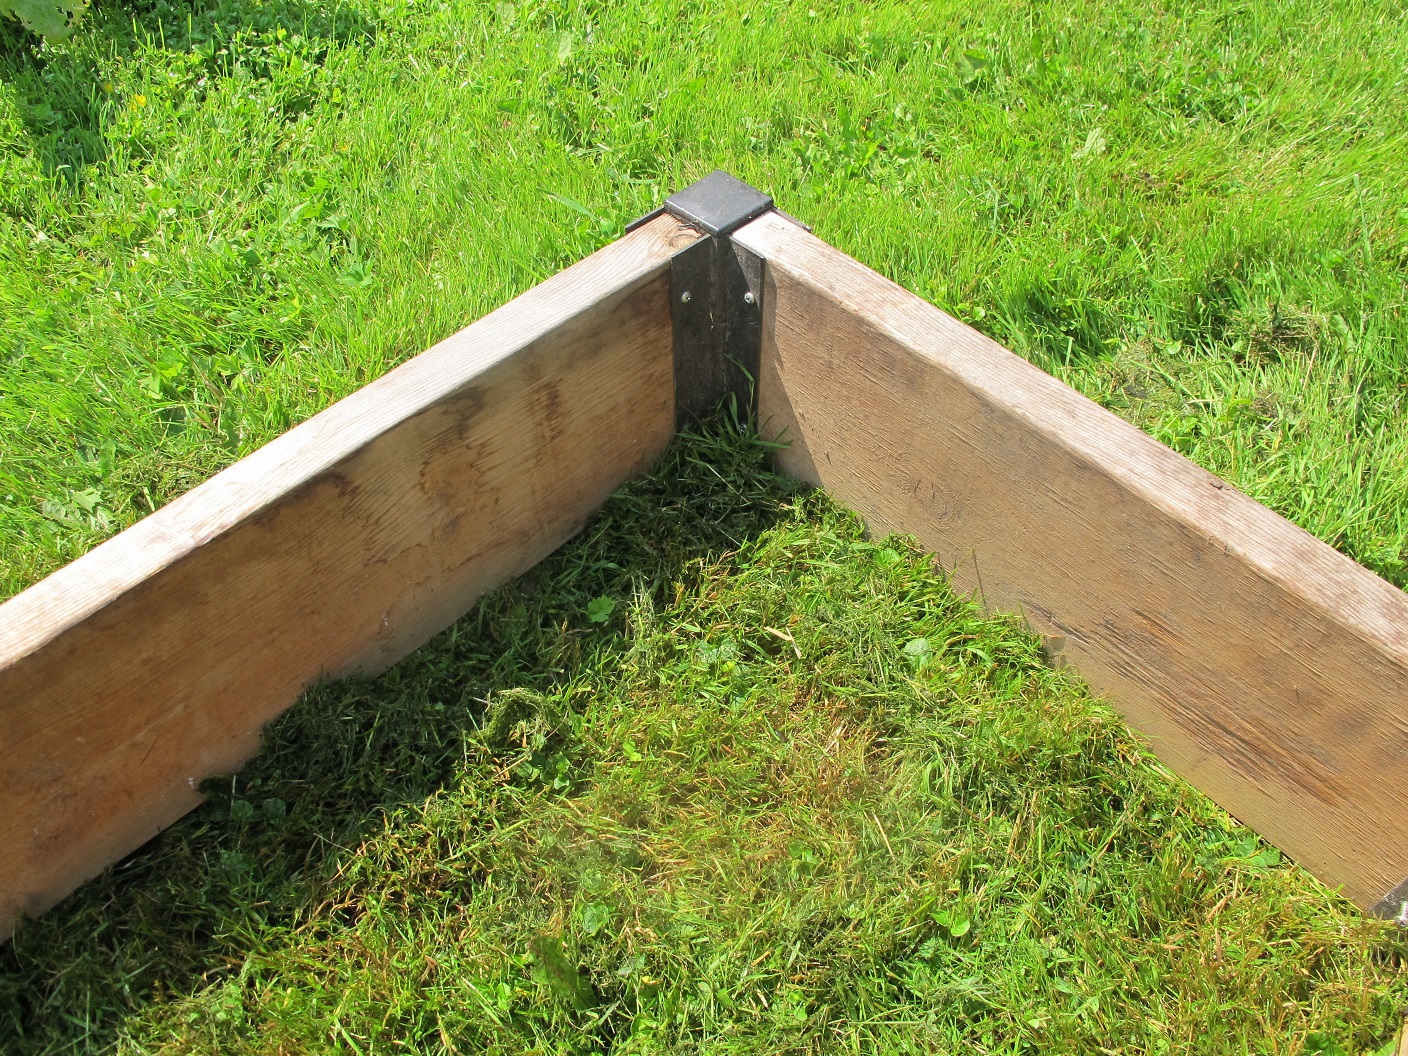
If you are not handy with tools, Gardeners Supply Co (www.gardeners.com or 888-833-1412) sells metal corners that will help you to assemble a nice bed in just a few minutes. Their raised bed corners are sturdy and square, and all you have to do is slide in the 2-by-8’s and screw the lumber in place (a screwgun helps make that job easy).

Metal brakcets to make garden box
You can set the box you build right on your lawn, fill it up and plant! The lawn will die where you place your bed, and by the second year carrots will grow right down into the soil beneath the bed (the first year, they may grow down to the lawn, then turn sideways). Raised beds are great for rainy summers, as they drain well.
To get those big carrots, keep the soil well watered in dry times. Sprinkle some organic fertilizer in the row when you plant, and again 6 weeks later. That second application should be alongside the carrots; scratch it into the soil with a hand tool. Keep out weeds, and thin the seedlings as mentioned above.
Elsewhere in the garden I have removed the row covers from my cukes, zucchini and winter squash. I cover them to keep off the striped cucumber beetles off the young plants, but now the plants are big enough to survive some munching by beetles. When the blossom appear they need pollination by insects in order to produce fruit.
By the way, vine crops like zucchini produce flowers that are either male or female, and the boys appear first. So don’t despair if you don’t get any zukes at first. The ladies will be on their way soon.
We need to visit our vegetable gardens every day – and do a few acts of service for our plants. If we keep up with it all, we are deemed good gardeners and will, most likely, be rewarded with a bountiful harvest.
Henry can be reached at P.O. Box 364, Cornish Flat, NH 03746. Please include a self-addressed stamped envelope if you want a reply. Or e-mail him at henry.homeyer@comcast.net.
Fourth of July
Posted on Wednesday, July 1, 2015 · Leave a Comment
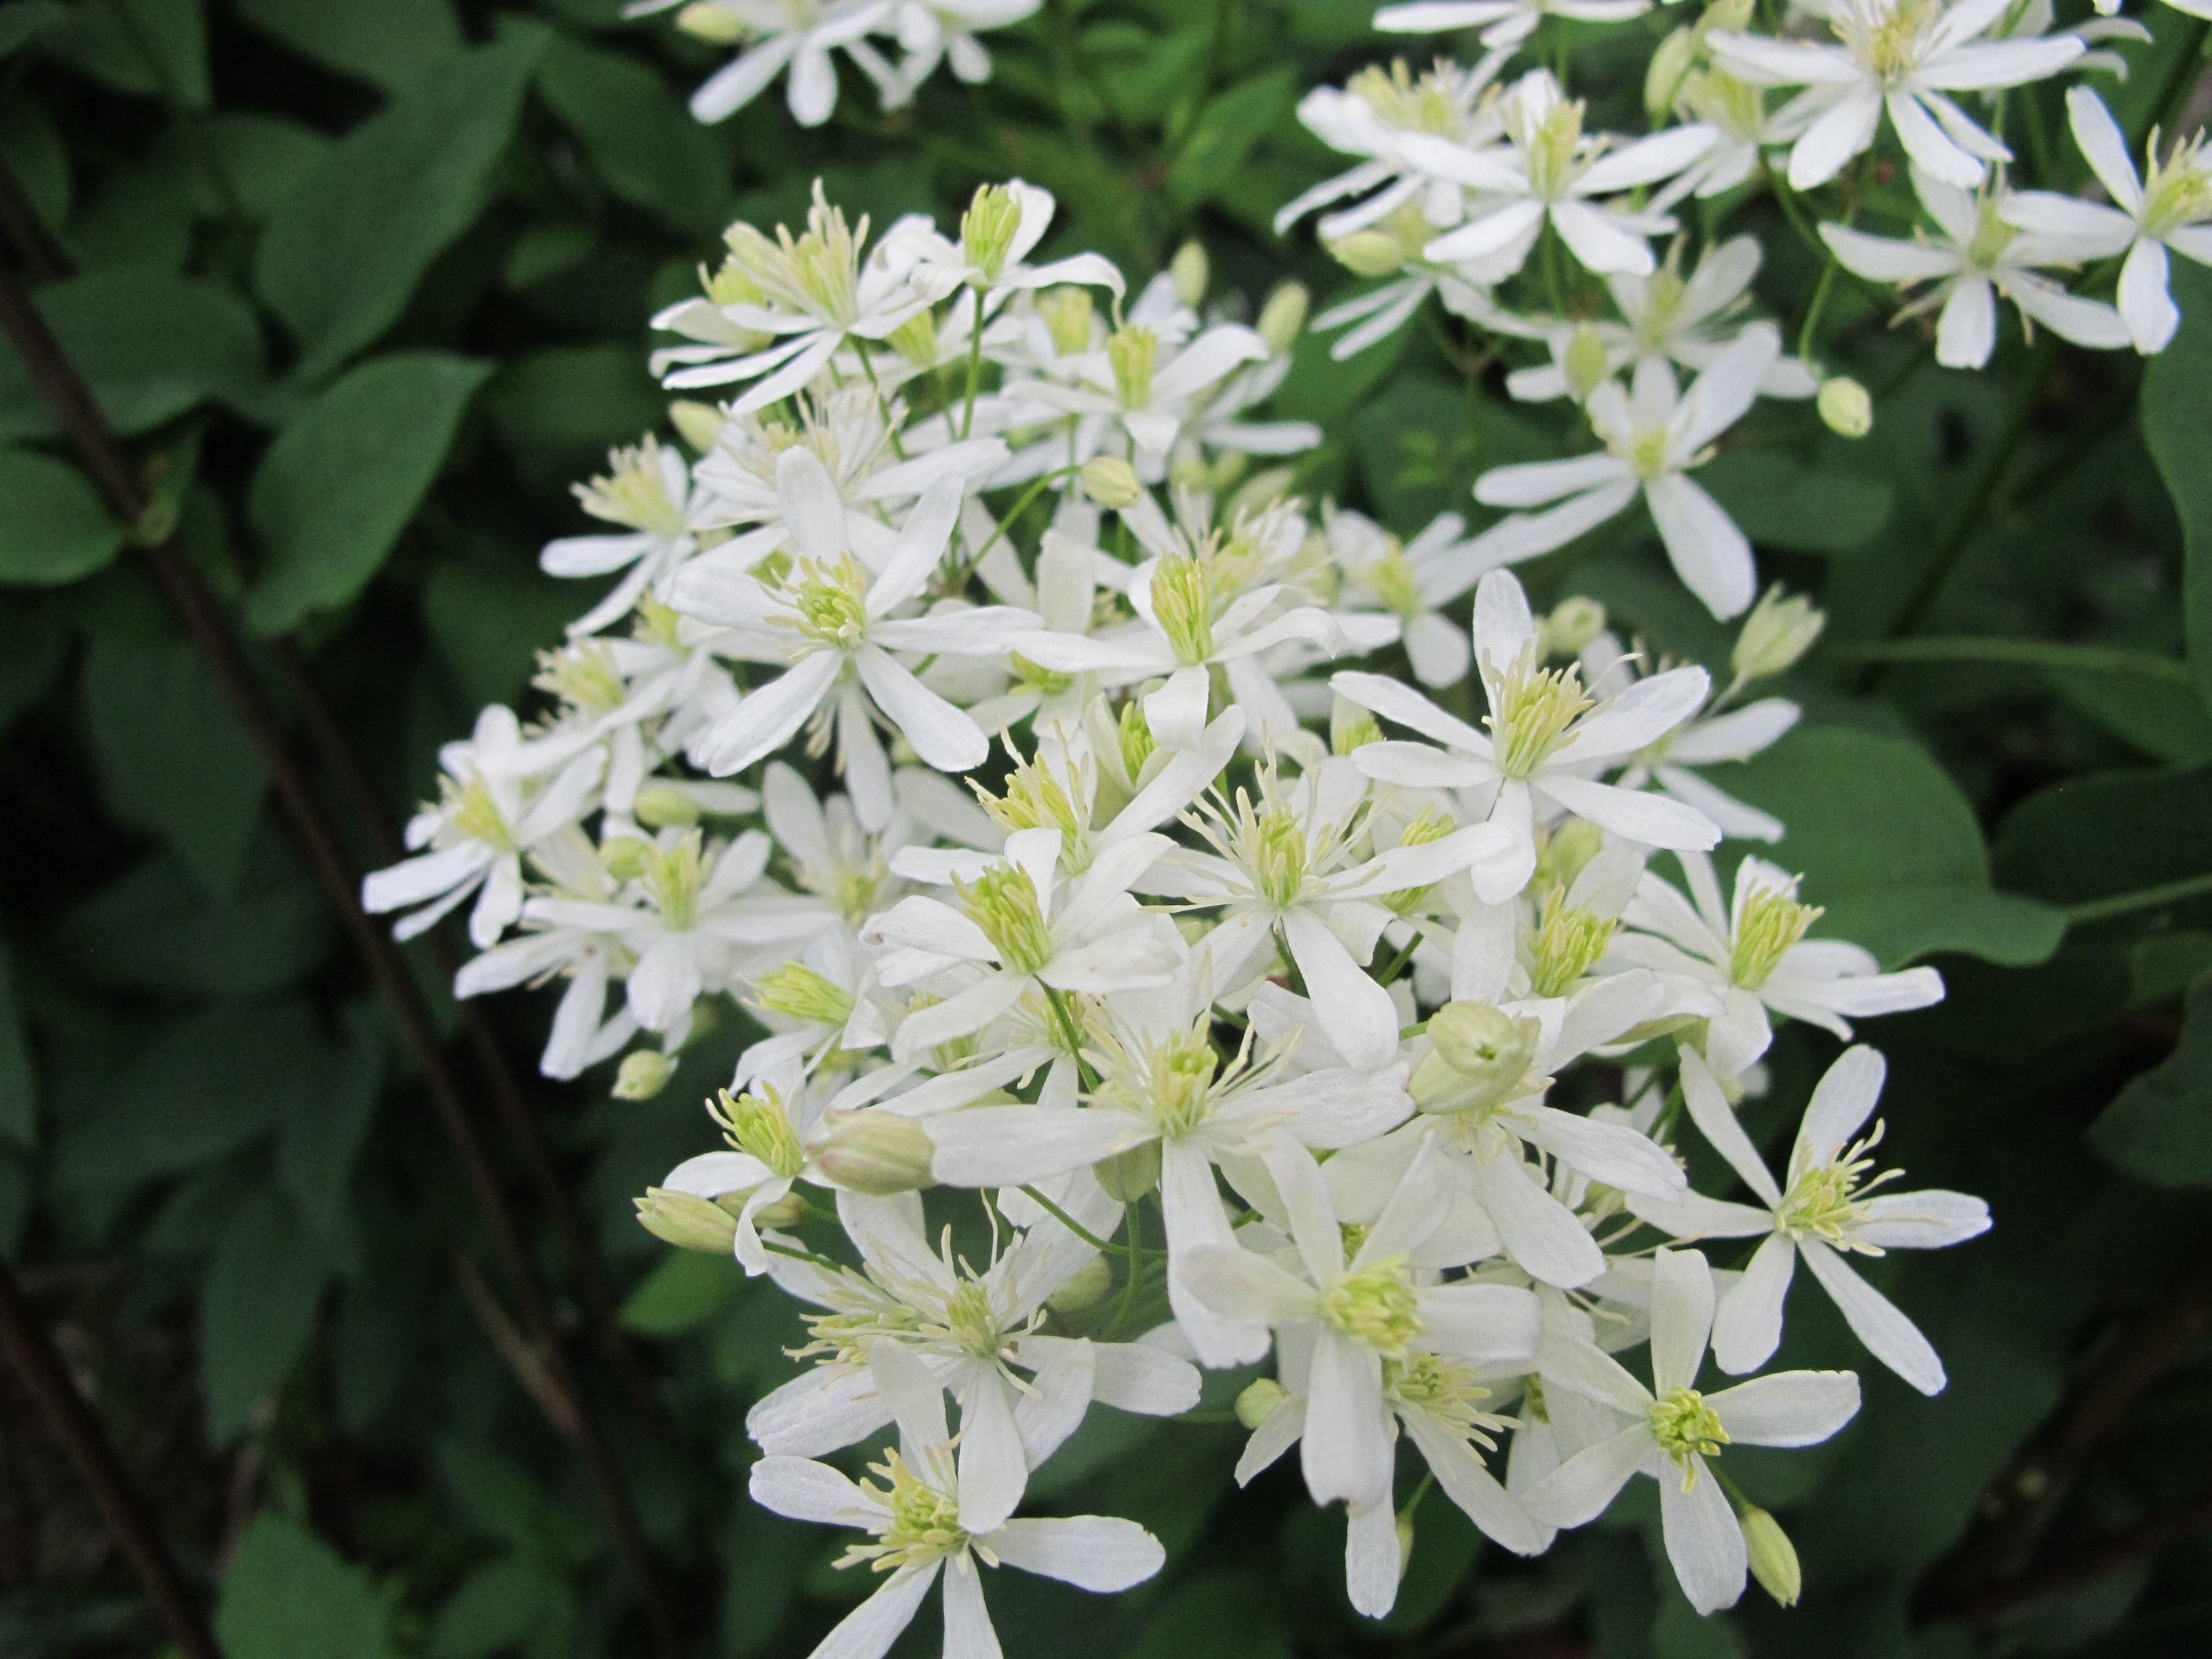
Among my earliest memories is one from a Fourth of July celebration back when I was just a tadpole – perhaps 1949. My sister and I sat on the hood of our parents’ 1938 Buick, a big black sedan, and watched fireworks way past my bedtime. Red, white and blue rockets zoomed skyward, filling us with awe. Now, all these years later, I am awed by red, white and blue flowers that climb up towards the sky. No booms, but plenty of blooms. Right now many clematis vines are ready to show off in patriotic colors in your garden.

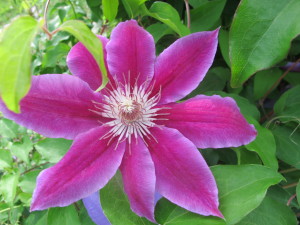
Blue clematis (name not known)
Clematis is a showy vine that confounds many. Unlike most flowers, these come in several different colors – including red, white and blue. Surely you’ve seen showy 4- to 6-inch blossoms on vines growing up trellises. Those were probably clematis. But sometimes gardeners plant the vines and are disappointed. They can be a little fussy. In fact, I have two that I planted earlier this summer that seem to be sulking. I know, however, that within a year or two (or sooner, hopefully) they will start growing vigorously. I have provided them with good soil, some organic fertilizer and a structure they can twine around.
What clematis vines need are hot tops and cool bottoms. They require rich, slightly moist soil that stays cool, but plenty of hot sunshine on the ascending vines. To do that, mulch the roots well with chopped leaves or ground bark mulch. And plant a medium-sized perennial – or more than one – in front of the vine to shade the soil from the afternoon sun, helping to keep the roots cool. An astilbe is about the right size, or perhaps a Shasta daisy.
I called plantsman Gary Milek of Cider Hill Gardens and Galleries in Windsor, VT for suggestions for good patriotic red, white and blue clematis varieties. He said there are two great red ones: ‘Niobe’ and ‘Cardinal Wyszynski’. The latter one is a Polish variety that is free flowering, meaning that it will keep blossoming and growing taller all summer, a definite plus.
Cleamtis recta close-up
White clematis include a variety called ‘Henryi’, which since it shares a name with me, I should get. Gary Milek said it can easily grow 8 to 10 feet up from the ground in one year. Another white one he likes is ‘Gillian Blades’, which has white blossoms and yellow anthers.
Right now I have a white bush-type clematis in bloom, known as ground clematis or by its scientific name, Clematis recta. This gets to be about five feet tall, and unless it is very well supported, it then flops over. Mine is growing in front of a stone retaining wall facing east, so it gets little afternoon sun. My bush is nearly six feet wide right now, but will die to the ground in winter.
The individual flowers are not impressive: each 5-petaled blossom is only an inch and a half across. But there are lots of them. Flower clusters are loaded with them, and the stems are nice and strong, hence great in a vase, and keep well when picked.
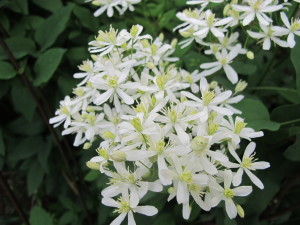
Come fall, I’ll have another round of white clematis blossoms when my ‘Sweet Autumn’ clematis (Clematis paniculata) comes into bloom. Like the bush-type, this clematis has small blossoms, and lots of them. And they are fragrant, or can be. I had one previously that was not fragrant, but generally they are.
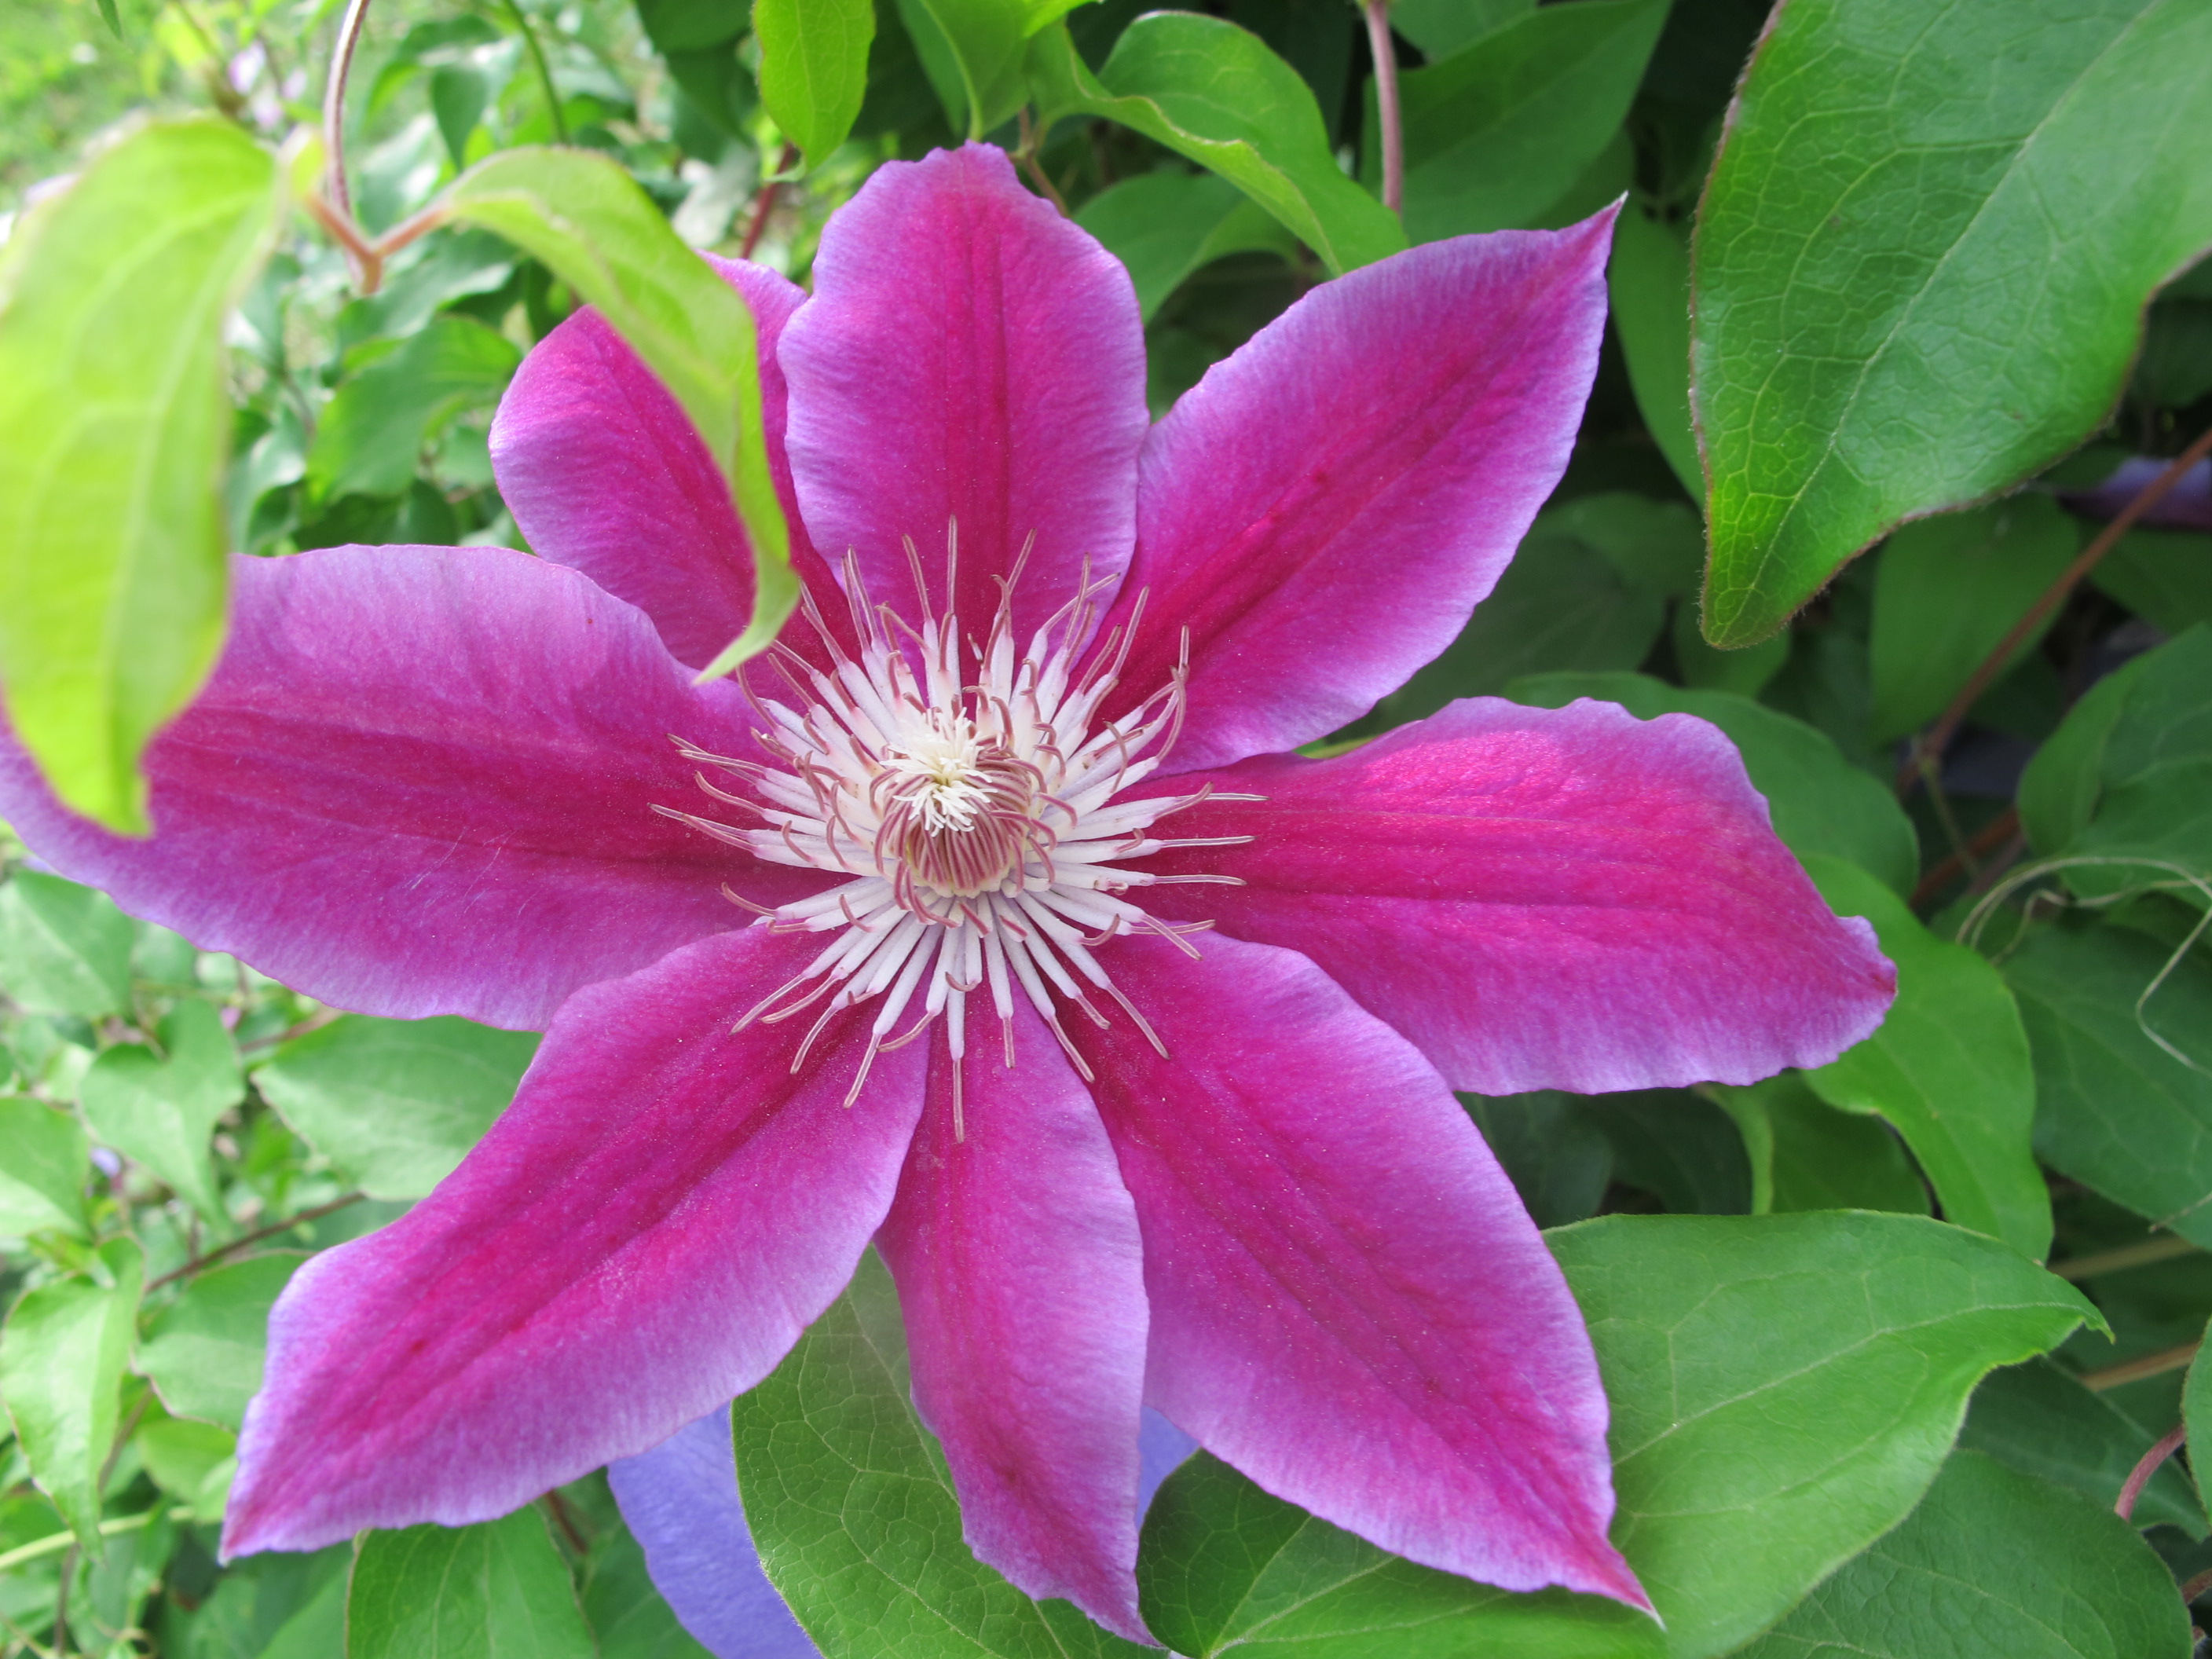
pink Clematis
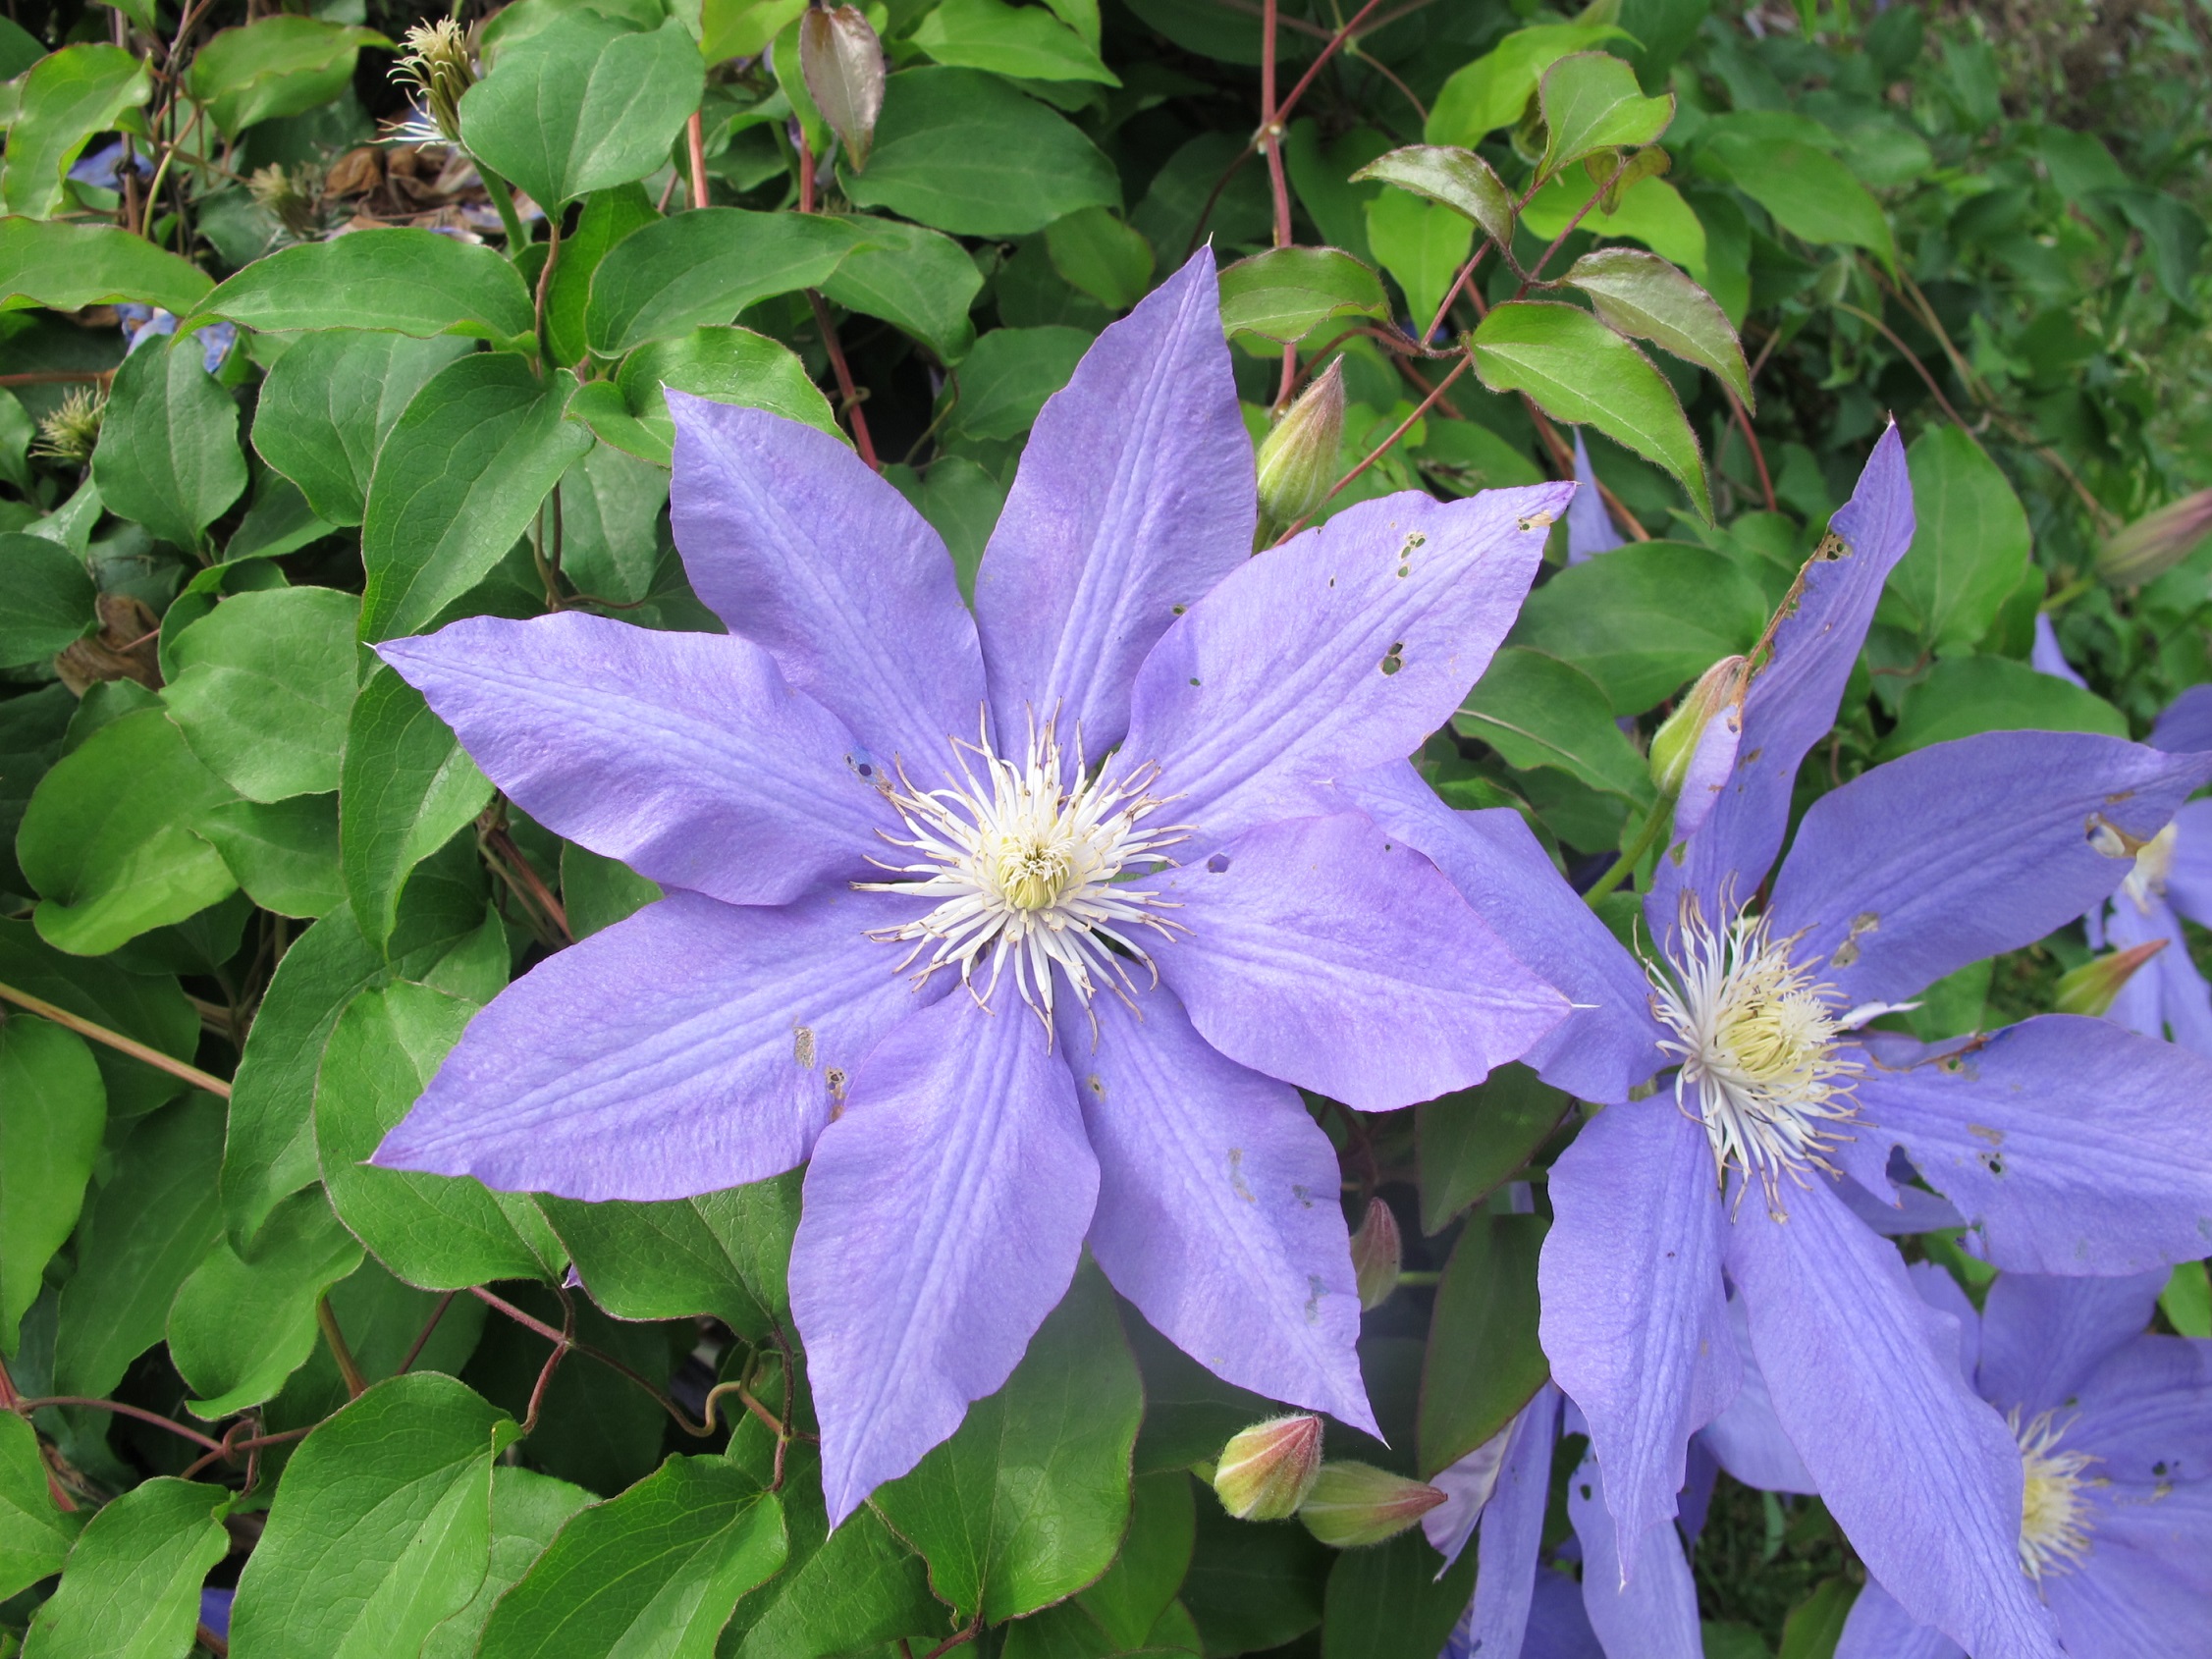
Of the blue or purple-blue clematis, a variety called ‘Jackmanii’ is well known and very popular. It is tough as nails, thriving even after hard winters. Like many, but not all, clematis, it dies to the ground each fall. You should prune it back to within a foot of the ground in the fall or first thing in the spring. Other clematis vines do survive the winter, and should just be trimmed to neaten them up after their early summer blooming.
According to Gary Milek, a truer blue (for the Fourth of July theme) is ‘The President’. It will grow 8 to 12 feet tall, and have two flushes of blooms: early summer (May-June) and then again in fall (September-October). Like many clematis, it has good winter interest: the seed heads are fluffy white, persistent structures.
Other great climbers in patriotic colors? Climbing hydrangea (Hydrangea anomala,subspecies petiolaris) is a fabulous white vine. It will attach itself to brick or rock walls, but needs help to climb a wooden wall. These great vines are slow to start growing after planting, but really get vigorous after 5 or 6 years. Your patience will be rewarded. As they climb, they extend short branches, loaded with big white flower panicles that seem to defy gravity. And they thrive in shade, or part shade. Great for the north side of a barn, where I have mine.
Then there are the red roses. The Canadian Explorer series, developed in Ottawa, are very nice. ‘William Baffin’ is my favorite climber. He grows 8 to 10 feet high, and is technically a deep pink. But that’s close enough for me.
So if you want something to grow up to the sky, there are plenty of choices. I just wish I had that 1938 Buick (which went to the junk yard in 1961). Sigh. Maybe I’ll go buy another climbing clematis to console myself.
Henry is the author of 4 gardening books, and a children’s chapter book about a boy and a cougar, Wobar and the Quest for the Magic Calumet. His web site is www.Gardening-Guy.com.
Pinching? This Isn’t Kindergarten!
Posted on Wednesday, June 24, 2015 · Leave a Comment
I was presenting at an outdoor gardening event recently when a woman walked by wearing a tee shirt that said, “No Pinching!” Maybe she had young kids, or was a kindergarten teacher. Clearly she was not an experienced gardener. Pinching plants is good, and now is the time to do it.
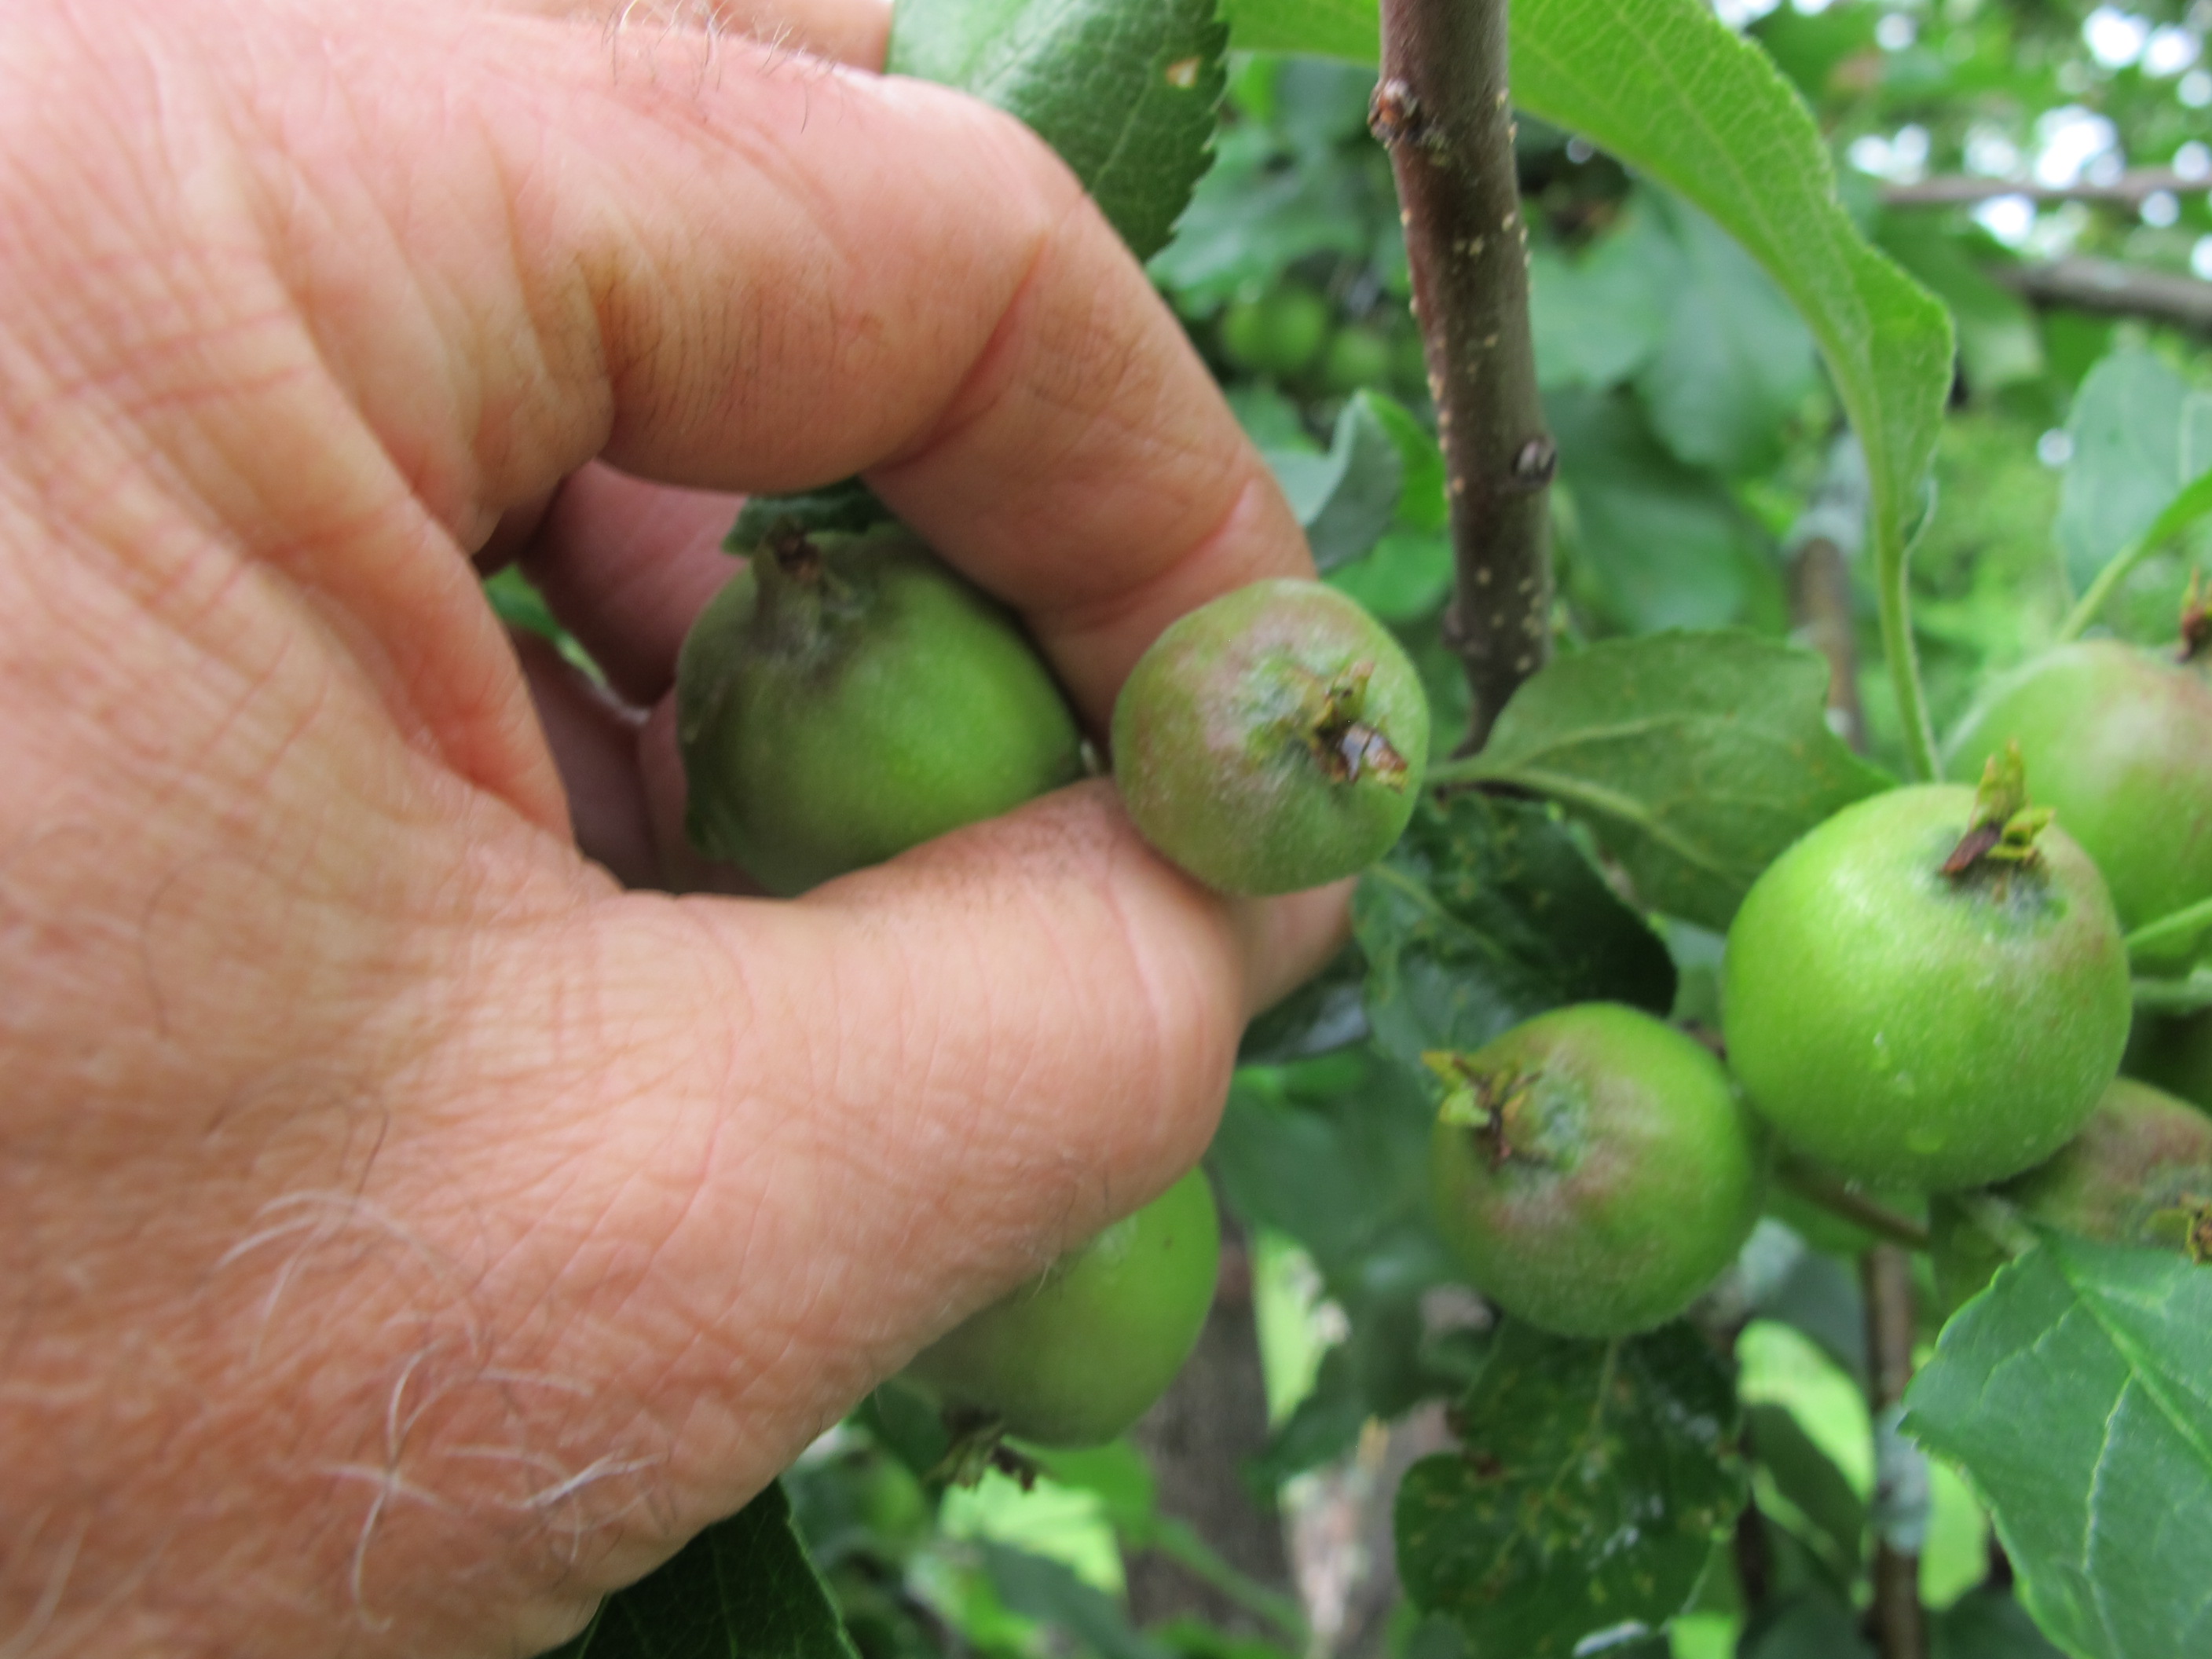
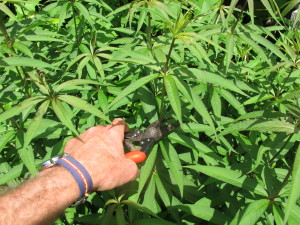
Let’s start with fruit trees. Many apple trees are loaded with small fruit now. Often there are 5 or more fruits together, especially at the tips of branches. If you pick off all but one or two fruits now, they will grow to a nice size. If you leave all the fruit on the tree, each fruit will be smaller. Not only that, you can often see what fruit is already damaged by insects and disease; it is smaller, and discolored. Removing that fruit will help the fruit you leave to be healthier. And eventually, you have to pick all the fruit anyway. It’s easier to do it now than in the fall. Leave the biggest, best looking fruit.
To thin fruit now, hold the cluster of small fruits in one hand, and pinch them off with the other. Holding the cluster helps to avoid breaking off the fruit spur and all the fruit on it. You can use pruning shears, but it is faster just to pinch (or pull) off the fruit. Don’t throw the fruit on the ground; it may be diseased or harbor insect pests, so you want to get rid of it. Come with plastic buckets and place them strategically around the tree as you work.

Pinching off apples
Work your way up the branch. Leave an apple or two every 8 inches. Michael Phillips, the author of two excellent books on growing organic apples, explains The Apple Grower: A Guide for in the Organic Orchardist (Chelsea Green Publishing, $40) that it is good to take all apples on alternating fruit spurs. This promotes a good harvest every year instead of a big harvest every other year, which is common on some varieties of trees. And remember, as you lament pulling off potential pies, that there is a limit to how many apples most of us can use.
I recently pinched off a bucket of blossoms from that terrible invasive weed known as goutweed or Bishops’s weed (Aegopodium podagraria). I have come to accept that I will never rid myself of this noxious pest, but I do believe I can limit its spread. It spreads quickly by root, which I limit with a lawnmower and some pulling. Seeds? From a reading of the literature, that they do not appear to be a primary means of dispersal. Still, in 15 minutes I can rid myself of the seeds, so I do. No point in taking chances.
When picking the goutweed flower heads, I ended up using my pruners, because with each flower, there is usually a lower, secondary flower cluster that is still developing under the shade of the leaves. I want to get both, so I reach down and snip off the stem lower down. Instead of tossing the flowers in the compost, I put them in the household trash that will go to the incinerator. A fitting demise for a devilish plant.
Annual flowers are coming in to bloom now, and pinching off spent flowers is important. I have some nice purple verbena growing in a window box by the front door. I often pause for a few moments and look at it to see if there are spent flowers. There always are, and I pinch them off. This stimulates the plant to set new buds. After all, it wants to make babies – and if an herbivore or a tidy gardener has removed its seeds, it needs to make more, starting with new flowers.
Not all annuals need to have their flowers pinched off. Some are called “self-cleaning”. They drop their flowers once they have finished blooming. Impatiens, begonias, and Euphorbias like ‘Diamond Frost’ are self-cleaning. Those that do need deadheading include annual bachelor buttons, gazanias, geraniums, marigolds, osteospurmums, pansies, pincushion flowers, salvias, snapdragons, sunflowers, verbenas and zinnias.
Another June task is to pinch or cut back tall summer- of fall-blooming perennials that you wish would stay shorter or bloom later. But you must do this now, or soon. It is fine to cut back these perennials when they are starting to form buds. The stems that you cut back – I recommend cutting off 4 to 6 inches – will have smaller flowers and often instead of 1 flower per stem, may have multiple blossoms.
Cutting back Culver’s root
I have already cut back my Culver’s root (Veronicastrum virginicum) and some of my bee balm (Monarda didyma). Both respond well to it. They bloom at a shorter height. My Culver’s root, if left alone, will often flop over –it can reach 4 to 5 feet in height. I cut back stems in a ring around the perimeter of the big clump, leaving just a few at full height in the middle. The lower stems help support the taller ones, and they bloom at different times.
There is a wonderful book by Tracy DiSabato-Aust, The Well-Tended Perennial Garden (Timber Press, $34.95) that nicely explains cutting back, and lists those perennials that respond well to it – and those that do not. She recommends cutting back asters, purple cone flower, Joe Pye weed, helenium, phlox, rudbekias and more.
So go ahead and pinch something. You’ll see it’s good –despite what you may have learned in kindergarten.
Henry is the author of 4 gardening books, and a children’s chapter book about a boy and a cougar, Wobar and the Quest for the Magic Calumet. His web site is www.Gardening-Guy.com.
Weeding
Posted on Wednesday, June 17, 2015 · Leave a Comment
I love weeding. It creates order out of chaos, something I have come to appreciate. An un-weeded flower bed is full of distractions. My brain is constantly instant messaging me: “See that dandelion? You should pull it”. The weeds distract me from the beauty of the flowers and the texture and color of the leaves. I feel better as soon as I get my weeds pulled. That said, I still have weeds. Maybe I need to retire from writing a column!
Weeding also makes my plants thrive. Weeds compete with vegetables and flowers for sunshine, moisture, nitrogen and micro-nutrients. In the early spring when my perennials are just waking up, I am very careful not to yank their little green sprouts, thinking they are weeds. In fact, I often let some of my weeding go until late May or even mid-June when everything is obvious.
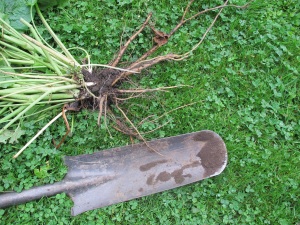
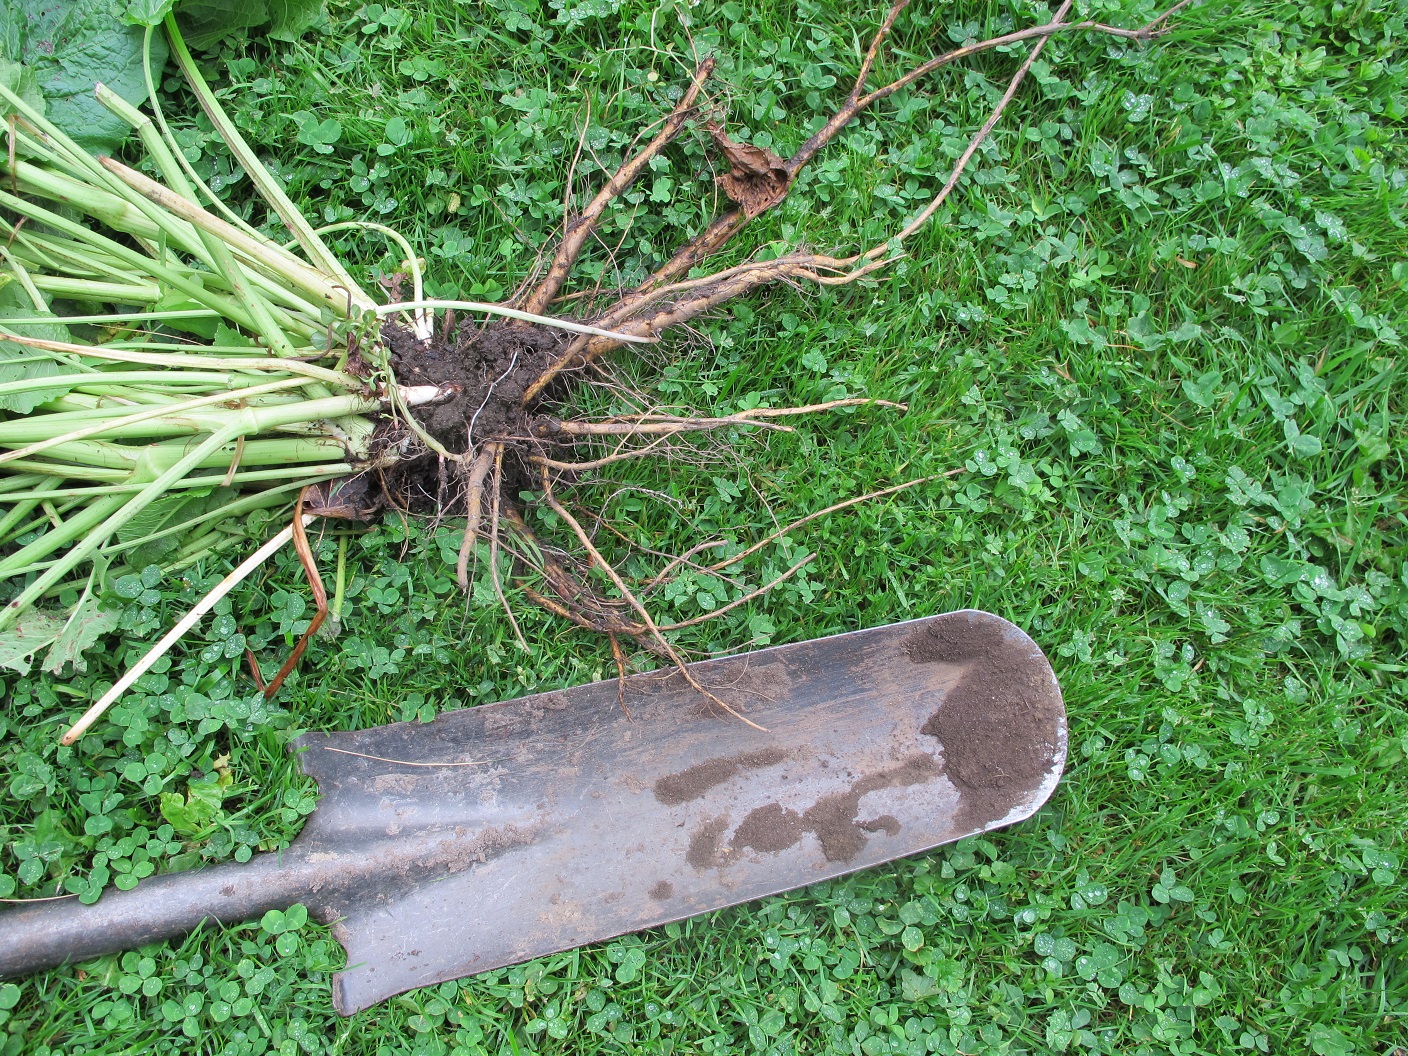
Drain spade and burdock roots it dug
Dandelions, weeds that I don’t mind in the lawn, can get a bit rambunctious in the garden beds, and I pull them without compunction. Because they have a deep taproot, they are best pulled when the soil is moist. I use a long narrow shovel, one sold as a “drain spade” to loosen the soil down 12 to 16 inches. This spade is just 6 inches wide but the blade is16 inches long. I push the blade deep into the soil, pull back a little, then push it forward, and then slowly pull out the weed, the slower the better.
Sometimes I see a little dandelion and just grab it and pull – only to have the top break off while the roots remain. Whenever you leave dandelion roots, or even fragments of root, the plant will grow back.
Burdock and thistles also have tap roots, some going down very deep. The older the weed, the deeper the root. I’ve pulled mature burdock plants with roots nearly two feet deep. This is only possible when the soil is moist.
It’s really critical, especially for any weed that produces lots of seeds, that you not let them flower. If you don’t have time to dig them out, at least snip off the flowers. Many weeds have green flowers, and some will produce seeds even after being pulled if they have already formed flowers. I don’t throw noxious weeds, things like goutweed, in the compost pile for fear they will grow and spread – or leave seeds.
My favorite weeding tool is the CobraHead weeder (www.CobraHead.com). This is shaped like a tine on farmer’s cultivator – or a bent steel finger. I like it because it is narrow in profile and curved in a way that allows me to easily get the blade under the roots of a weed. I pull from below with the CobraHead while pulling the tops from above. I drag it through the soil in a bed after weeding and am always surprised by now many fragments of root it brings to the surface. I can use it with one hand or two. I use it for loosening the soil while planting, too. It is neither right- or left-handed, it is lightweight, and the handle is made from re-cycled plastic.
The CobraHead is great for teasing out long roots, too. I once pulled out a root 39 inches long in one piece, just gently loosening with the tool while tugging on the weed. That root was from a Queen of the Prairie (Filipendula rubra), a lovely pink-flowered perennial thug. It’s great for teasing out roots of invasive grasses.
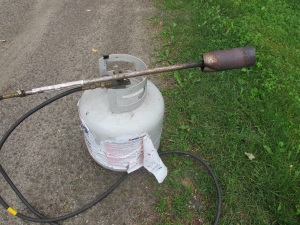
Flame weeder
Another great weeding tool is a favorite of my comic hero, Calvin, of Calvin and Hobbes. I refer to my flame thrower. It is technically a flame weeder, but Calvin and I refer to it as a flame thrower. It’s a metal wand on a 10-foot rubber hose attached to a propane tank normally used for gas grills. Light it, and it sends a flame out of the nozzle that will turn any weed crispy in an instant.
I often use my flame weeder on freshly turned soil. I let weed seeds germinate for a week or more, then burn them off before I plant. I try not to disturb the flamed soil when planting, as seeds that have been buried deeply will not germinate, but those on the surface, or near the surface will. Many weeds have what I call a photo-trigger. No light? They won’t germinate. Or I will flame, then plant seeds, then flame again before my carrots are up. Available from Johnny’s Selected Seeds or Fedco Seeds.

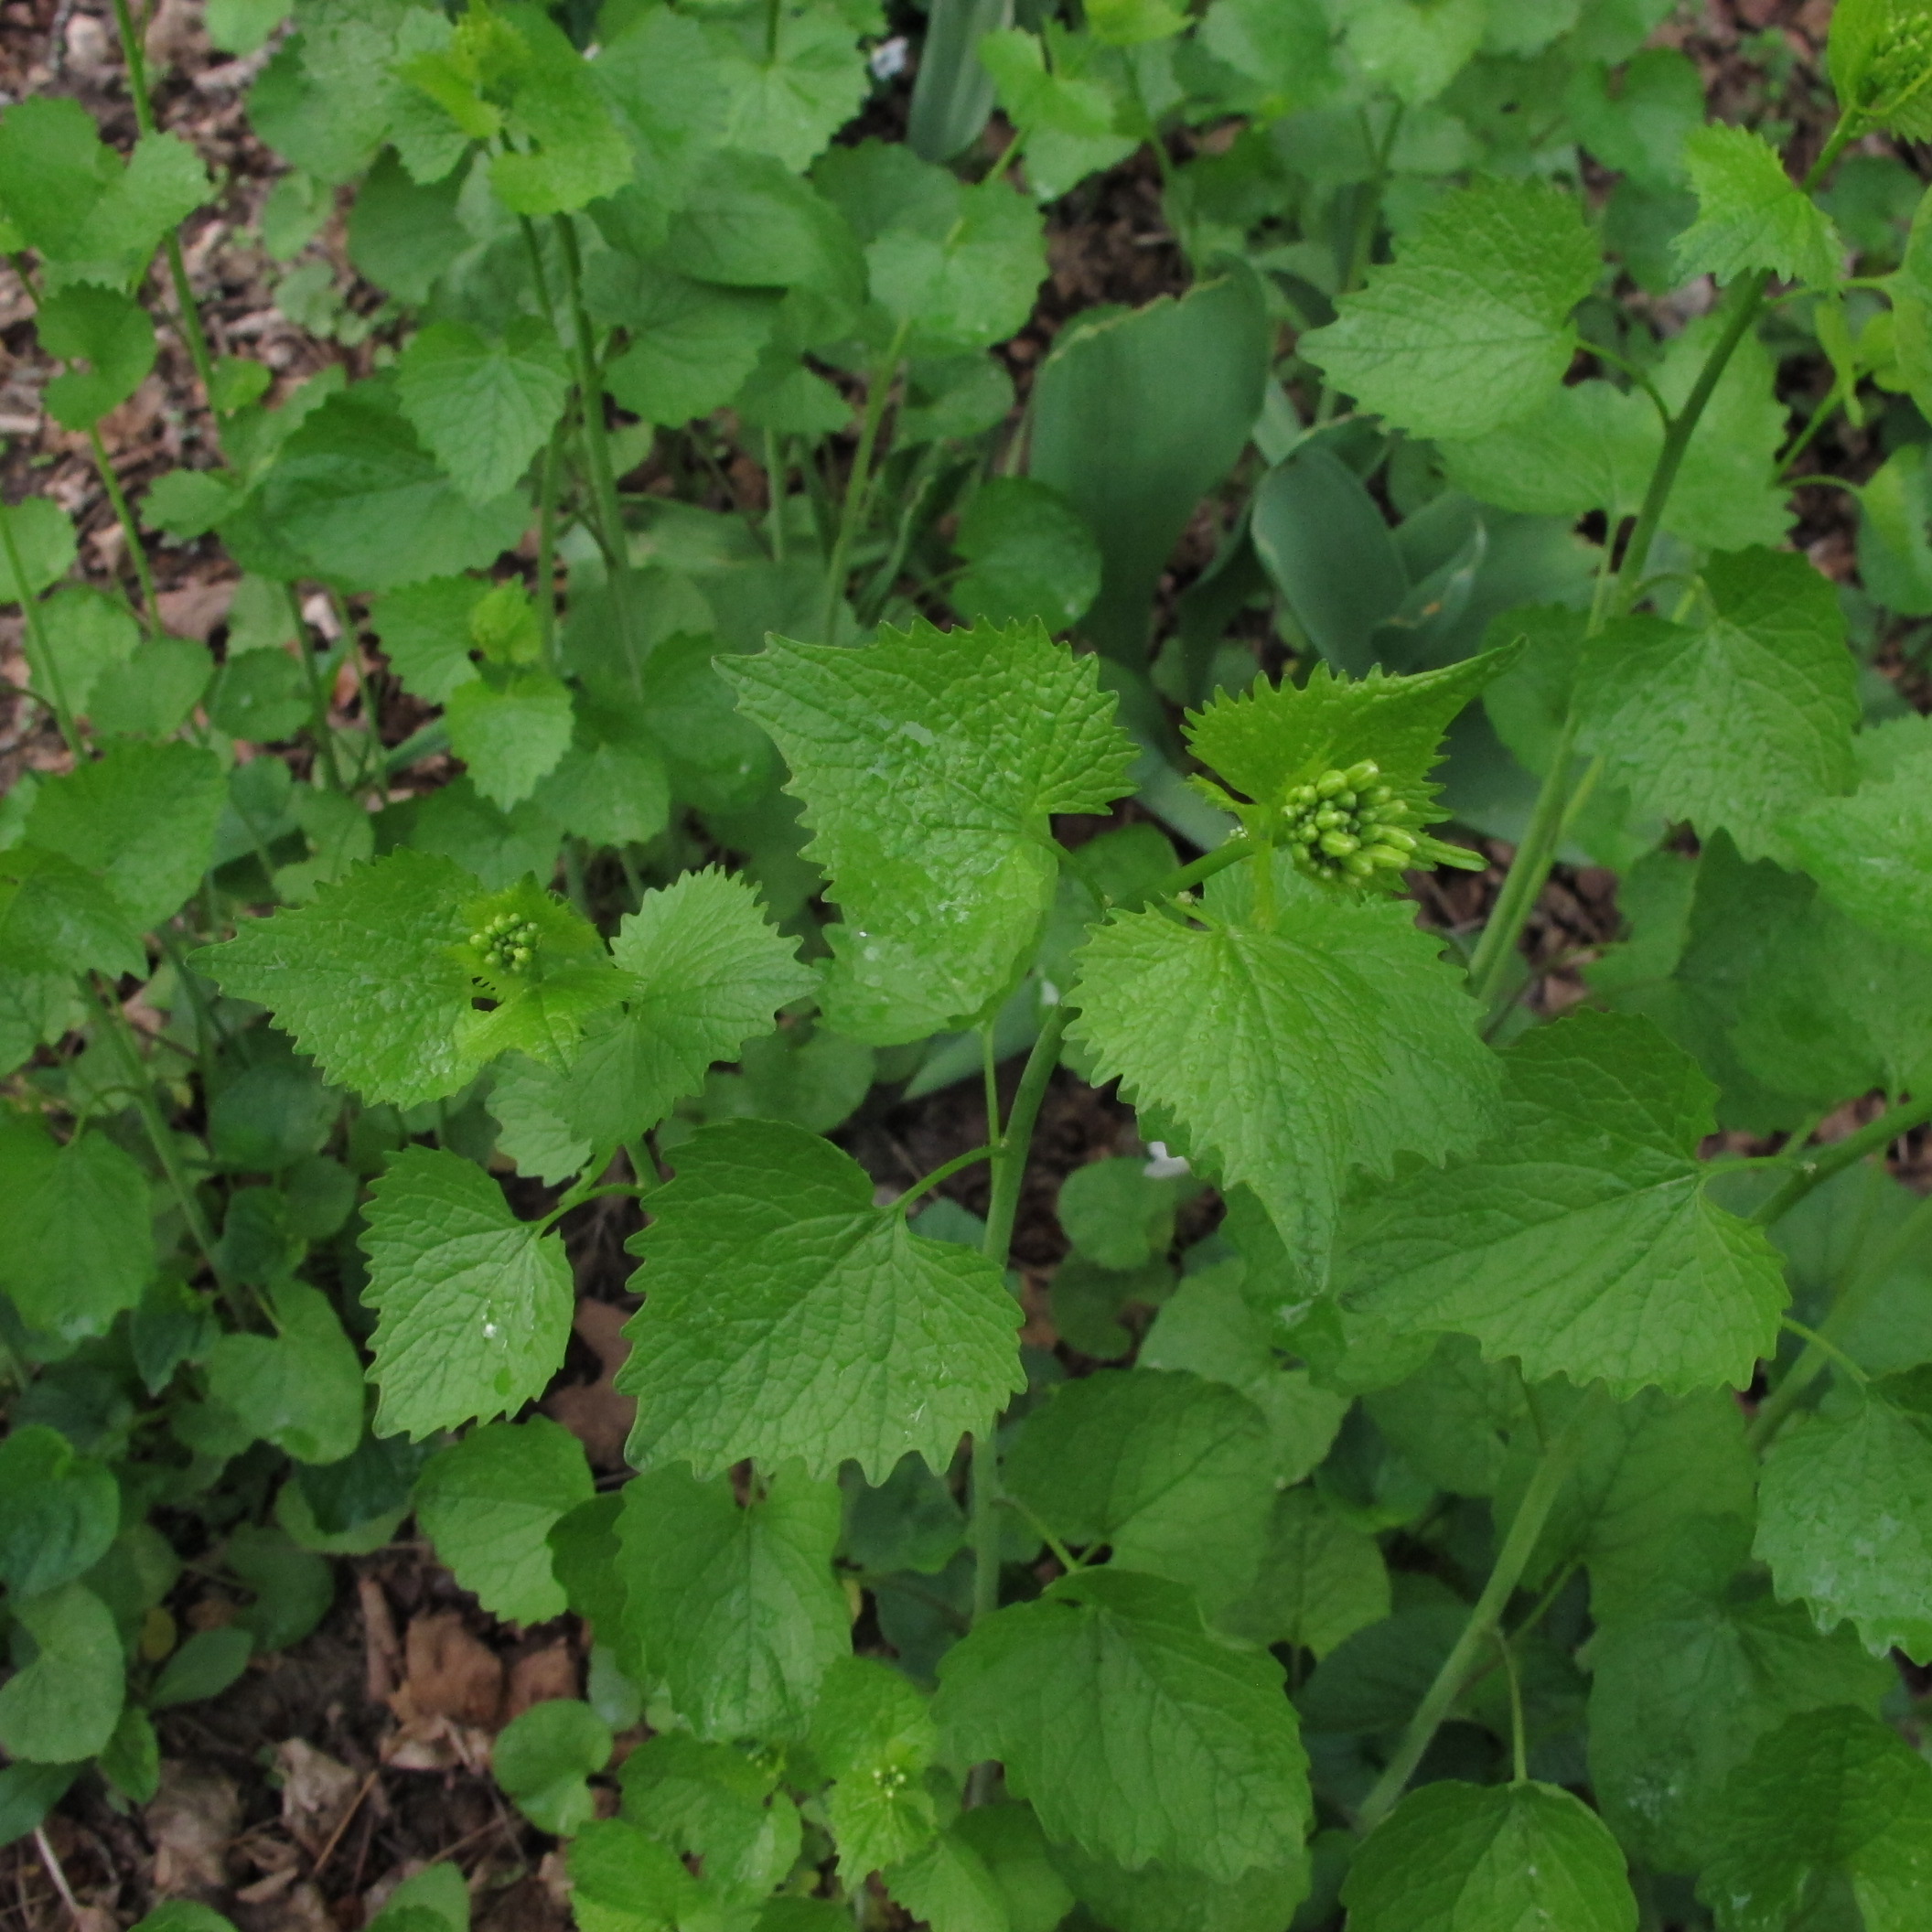
Garlic mustard leaves
One of the worst weeds in the world is garlic mustard. Not only will it outcompete other plants in the understory, it can grow in full sun to full shade, and can produce many tens of thousands of seeds per square yard. Garlic mustard is also allelopathic, meaning that it produces chemicals that inhibit the growth of other plants and mycorrhizal fungi needed for healthy tree growth and tree seedling survival.
A friend last year hired a guy to pull all the garlic mustard under her trees and shrubs. It pulls easily, and he quickly filled wheelbarrows full of mature plants. But this year there were thousands of tiny garlic mustard seedlings popping up all over, even in the bark mulch he had put down. I lent him my flame weeder, and in no time he had burned off the small plants.
Many weeds can be deterred by a good thick layer of mulch. Seeds don’t germinate, or seedlings can’t push through the mulch, particularly if you lay down 4-6 sheets newspaper before mulching. Other, aggressive weeds will. Mature Japanese knotweed roots have been said to push through an asphalt driveway! Still, most garden weeds are really just enthusiastic plants that want to be your friends! My practice is to pull weeds every day, and that way I hope to finally beat them. Hah!
Henry is a garden writer, public speaker and garden consultant. He lives in Cornish Flat, NH. You may reach him at henry.homeyer@comcast.net.


 Click Here to buy from Cobrahead