June in the Vegetable Garden
Posted on Wednesday, June 10, 2015 · Leave a Comment
I know gardeners who rush to get their veggies in the ground, starting spinach and peas in April, carrots, potatoes and more by mid-May and then tomatoes and all the rest by Memorial Day weekend. Not me. I’m just planting many things. Sure, my peas, planted in May, are about a foot tall. And all my root crops – beets, carrots, kohlrabi, leeks, onions and rutabaga are up and looking good. Let’s look at some other vegetables.
Organic corn seeds, the type I buy, are not treated with fungicides and so they might rot if planted in wet, cool ground – and that describes the type of soil I have right now. So here’s what I do: I plant them in “plug trays”. Mine are plastic trays with 98 growing compartments per flat, each a bit deeper than the standard 6-packs I use for starting veggies in flats. I fill the holes with a 50-50 mix of potting soil and fine compost and plant one seed in each.
Corn takes 10-14 days to germinate in cold, wet soil. Last year, the first time I grew corn in many years, my corn germinated on a heat mat in 3 days! I let it grow for a week or so, allowing the roots to fill the soil compartments of my plug trays and develop true leaves.
Then, on a hot sunny day in mid-June, I planted the corn seedlings in the field. It was quick work for two people: I crawled along on my hands and knees, planting corn every 8 inches; my partner, Cindy slipped the plants out of the flat and handed them to me. We allowed 30-36 inches between rows. If space is a constraint, you can plant rows 24 inches apart, but the ears will be smaller. In order to get good pollination, you must plant in blocks with at least 4 rows.
Crows are the bane of corn growers. They love the corn seeds that have just germinated and have some small leaves. By planting good-sized plants, the corn is less vulnerable. It only takes a day or so for the roots to develop the strength to resist crows, and the germinated seed is long gone.
A wise gardener who direct-seeds her corn told me that she sprinkles fresh grass clippings around her corn when it first germinates. The greenery disguises the seedlings, fooling the crows. She does that twice, allowing the corn to be well settled in. Slick!
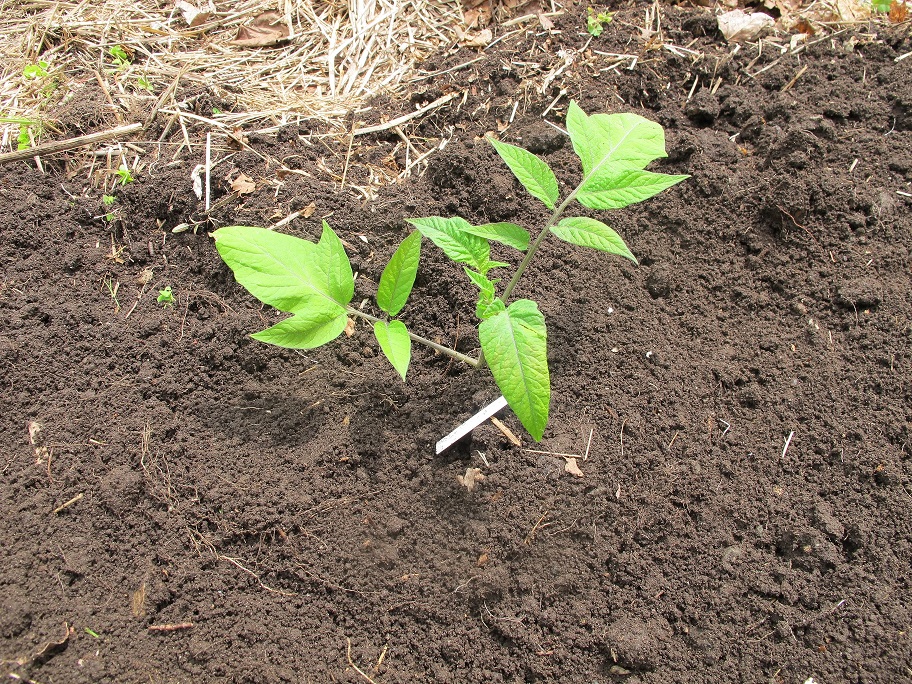
June 10 is my usual day for planting tomatoes, though I’ve planted later, and the plants catch up quickly. I plant tomatoes deeply, or sideways. That way the long stems become shorter and less floppy, and the buried stems develop roots, providing more roots to absorb water and nutrients.
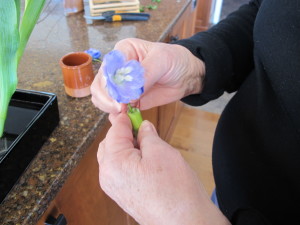
To plant sideways, dig a hole for the rootball and a trench for 6 inches (or more) of stem. Pinch off all the lower leaves and branches, just leaving the top leaves. Cover the rootball and stem, and turn the top up. The series of photos below shows each step.
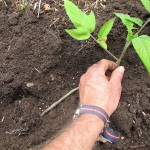
Turn up the top and bury the stem
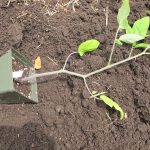
Pinch off lower leaves
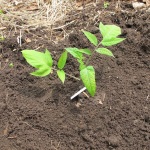
Final product
This year I am not adding any fertilizer in the planting hole. Usually I add some bagged, slow-release organic fertilizer in each hole. But reading Carol Deppe’s book, The Tao of Vegetable Gardening, last winter convinced me that too much fertility encourages tall plants but less fruit. Maybe I’ll do some each way and see for myself.
The vine crops – cukes, zukes, winter squash and pumpkins – would be badly munched by striped cucumber beetles unless I take preventive actions. The dastardly beetles and eat the new cotyledon leaves in a single night! So now I start them in small pots indoors, and let them develop foot-long vines before I put them out.
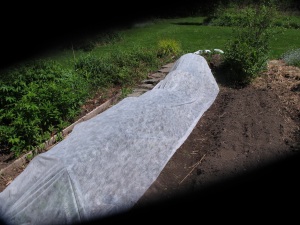
I also cover my vine crops with Reemay or row cover when I plant them to keep those beetles off. I don’t bother using wire hoops to keep the Reemay off the plants, I just lay it down and pin the edges to keep it from blowing away. But I have to remove it when the plants flower, as they are insect pollinated. By then the plants are big enough to survive. Row covers are good for keeping flea beetles off broccoli, too.
Potatoes can be planted in May – or now. I plant in June, in part, because my soil is near a stream and is colder and wetter than many other gardens around. But I also do it so that the Colorado potato beetle will go to my neighbors’ potatoes instead of mine (sorry, Lois). That’s right, they will be munching away on the neighbor’s potatoes before mine even go in the soil.
I plant lots of beans, in part because they freeze so well that I can store them and eat them all year. I plant beans in mid-June when the soil is plenty warm – 65 degrees or more, and when nights are warm, too.
Nights in the 40’s or low 50’s are very discouraging for warm-season crops like peppers, beans and tomatoes. Egggplants hate chilly nights. You can place a dark-colored rock the size of a melon near each eggplant, and it will soak up heat during the day and kick it back at night. I do that for peppers sometimes, too.
Gardening is a dance I do with the weather, the birds and the bugs. Sometimes I get great harvests, other times I do not. Still, I consider myself blessed to have a plot of good soil, an amenable climate, and the good health to pull the weeds! I wish the same for you!
You may e-mail questions to Henry at henry.homeyer@comcast.net. His website is www.Gardening-Guy.com. His book, The New Hampshire Gardener’s Companion, is just out in an expanded 2nd edition.
Season Blues
Posted on Wednesday, June 3, 2015 · Leave a Comment
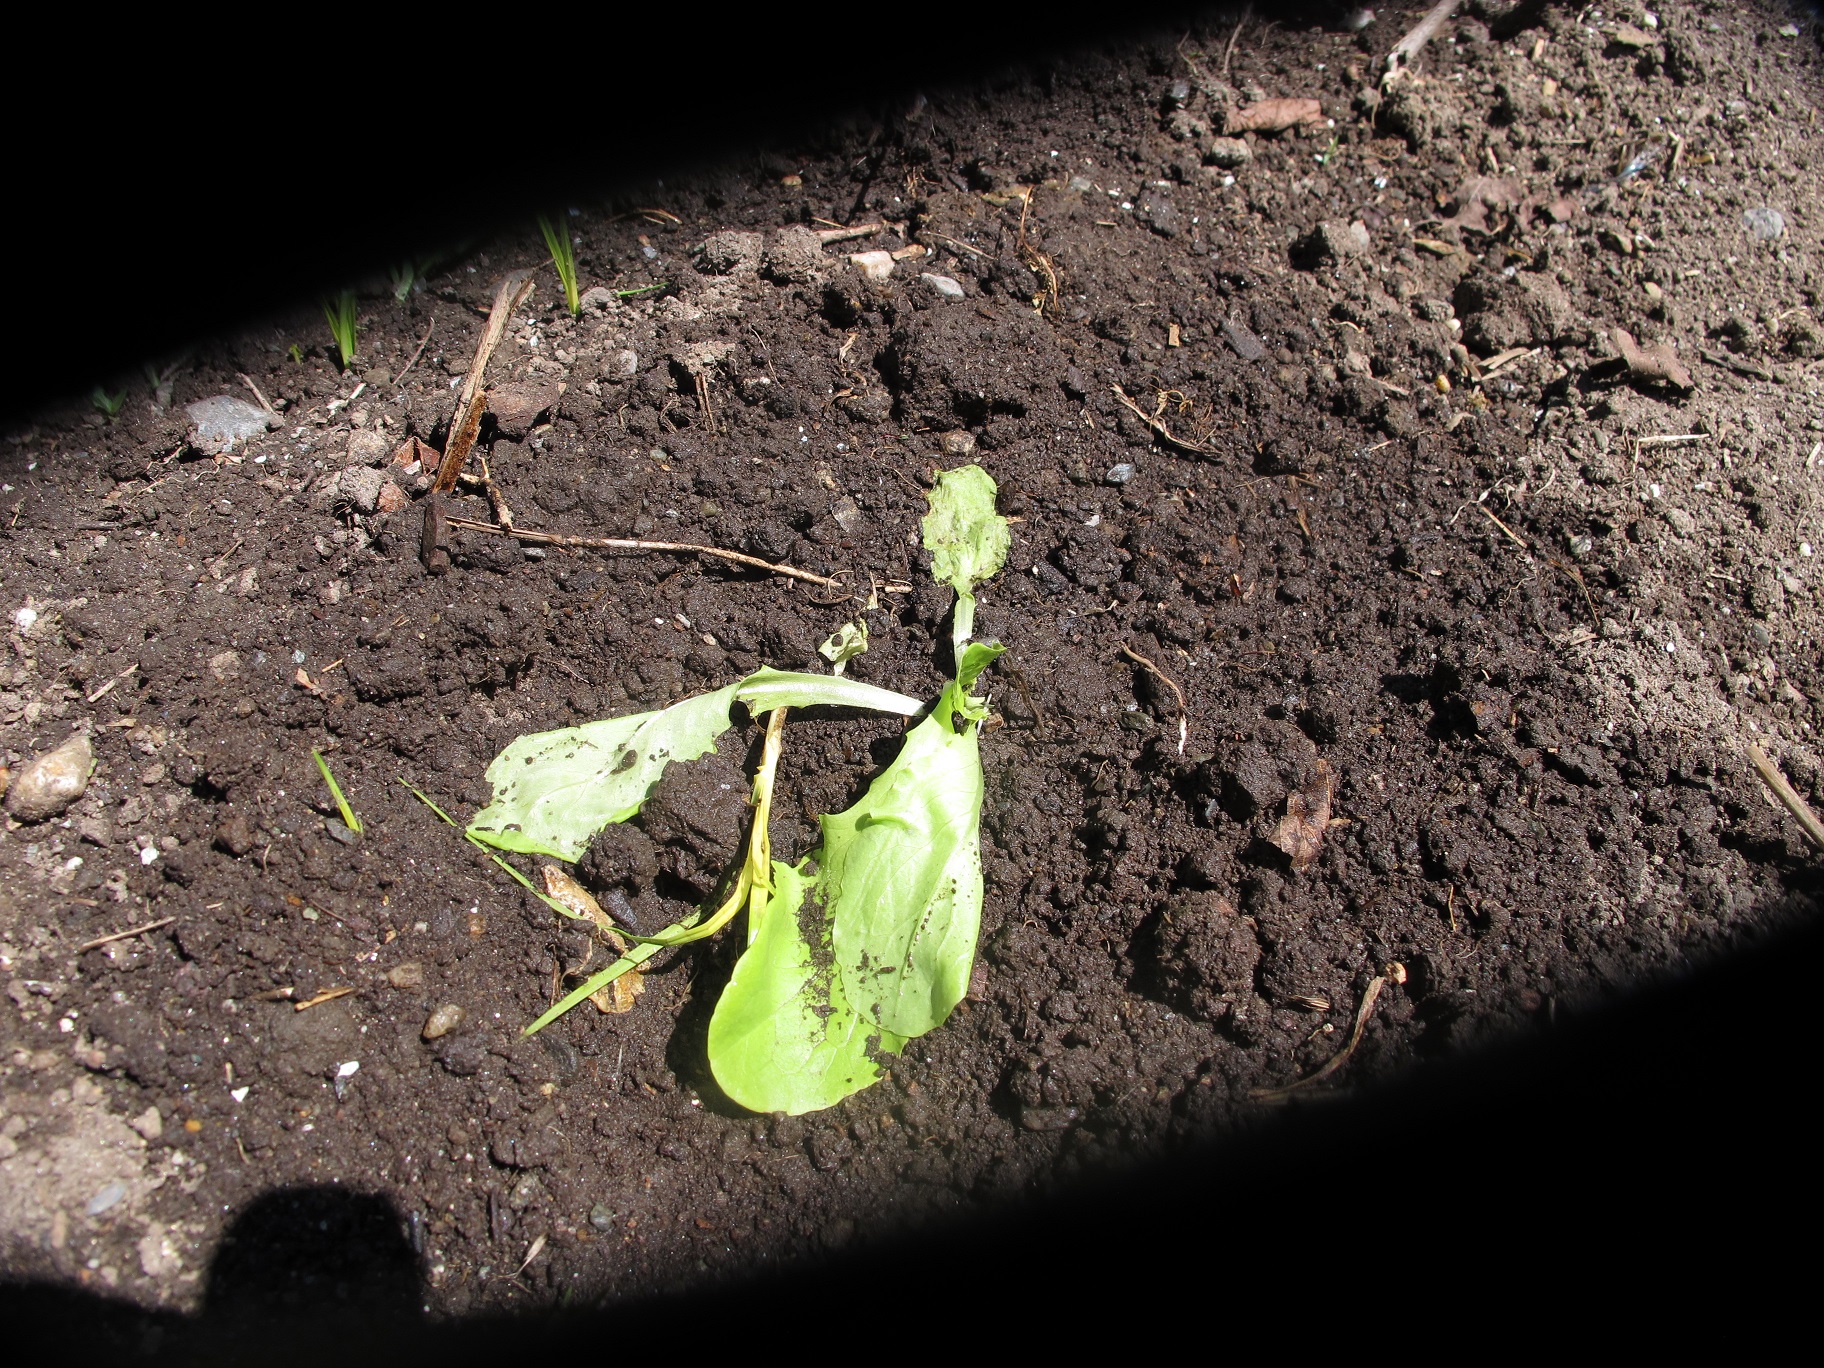
Thank heavens we finally got some rain. I had less than half an inch in the first 29 days of May. If my plants were puppies, they’d have done a lot of whimpering during that last hot week of the month. They’d have been begging for water, complaining of neglect. There are things we can do to help our plants through hot spells, and it makes sense to think about them now, as summer begins.
Just as EMT’s do at an accident scene, sometimes it’s necessary to perform triage in the garden. Pick the plant that is suffering the most and water it. In principle, I don’t believe that established perennials should need to be watered. Put the right plant in the right place and it should thrive. But after a month without rain, watering may be needed and if you have lots of plants, you need to decide where to begin.
I begin with newly planted things that are stressed. These are the ones that have limp leaves, or, worse yet, are flopping over. The very act of planting disturbs roots and the fine root hairs that suck up water from the earth. If you move a perennial or small tree, you have certainly cut off some of the roots – they extend long distances and you cannot see the finest of their roots. Even a shrub purchased at a nursery and carefully planted will take weeks to settle in. Some shrubs even need extra water in year two after planting. And roses do best with more water than most.
How you water is important, too. I don’t water with an overhead sprinkler. They water everything, including walkways and weeds. I use a handheld device called a watering wand that allows me to get water where I want it – at ground level. The 36-inch wand attaches to the hose and has a nice “rose” on the end that turns a potentially torrential deluge into a strong but gentle shower. There are lots of brands, but I find that “Dramm” brand devices work perfectly every time – and are worth the extra cost. I have a thumb switch on the wand that allows me to turn it off and on, and to regulate the flow.

Heat-stressed lettuce
My lettuce, started indoors by seed and hardened off well, wilted badly after planting last week. I planted at dusk and watered it well, but the next day hit 90 degrees. When I saw it gasping for breath at noon, I gave it a dose of a commercial remedy I use for transplant shock. It is called SuperThrive (all one word) and is made from seaweed extract and plant hormones. A capful in a watering can is all it takes, and it does help.
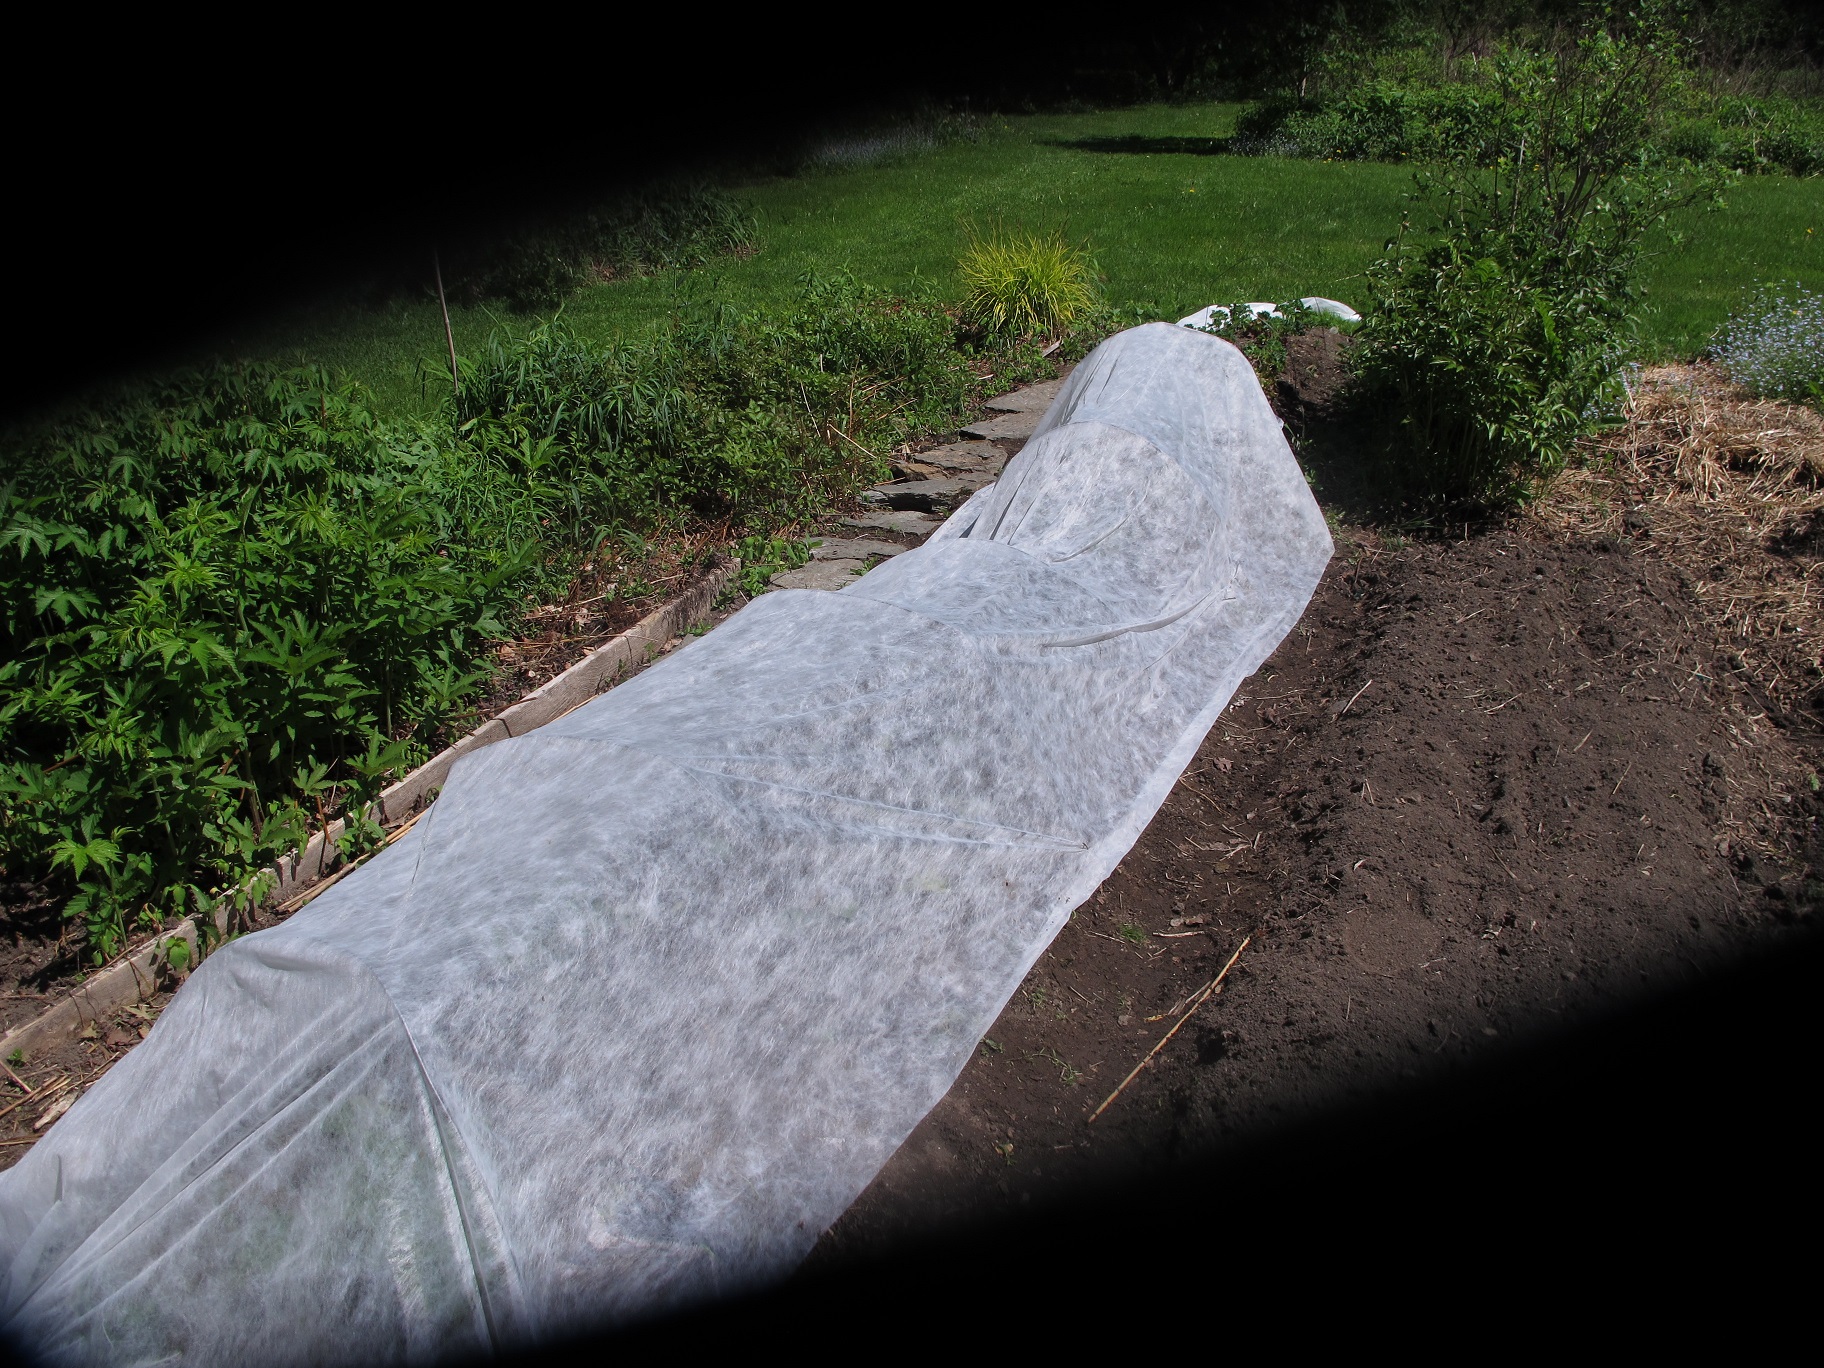
If you’ve just planted veggies that are suffering from the heat and dryness, think about providing some shade. I covered my lettuce with row cover (also called by trademarked names, Reemay or Agribon). I have wire hoops that I pushed into the soil, then draped this thin layer of synthetic fabric over the hoops and pinned down the edges with landscape staples. It protects the plants from hot, drying winds and reduces the intensity of the sunshine slightly. Air and moisture passes through this fabric, which I also use at times to keep insects off plants.
Row cover provides some shade
I also planted a small clematis vine last week, and provided some temporary sun protection simply by simply placing a couple of buckets near it to provide shade in the hottest part of the afternoon. Later I will plant a medium-height flower in front of the clematis to keep the roots shaded and cool, which they like. I’ve been known to use sheets of cardboard to provide shade, or to use a beach umbrella at planting time.
Soils make a big difference in watering needs. Sandy soils dry out and drain fast. Good loam holds moisture nicely. Clay soils can hold too much water, rotting roots in wet times. Adding compost to any soil at planting times helps to achieve that desired “moist, well-drained soil” that gardening articles suggest.
Mulch is good for holding in moisture and discouraging weeds. In the vegetable garden I put down newspaper (4 to 6 sheets thick) covered with straw, hay or leaves. Around bigger plants like tomatoes I leave some open, un-mulched space around the stem. That allows a quick rain or a visit with my watering wand to get moisture to the roots more easily.
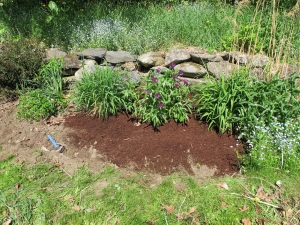
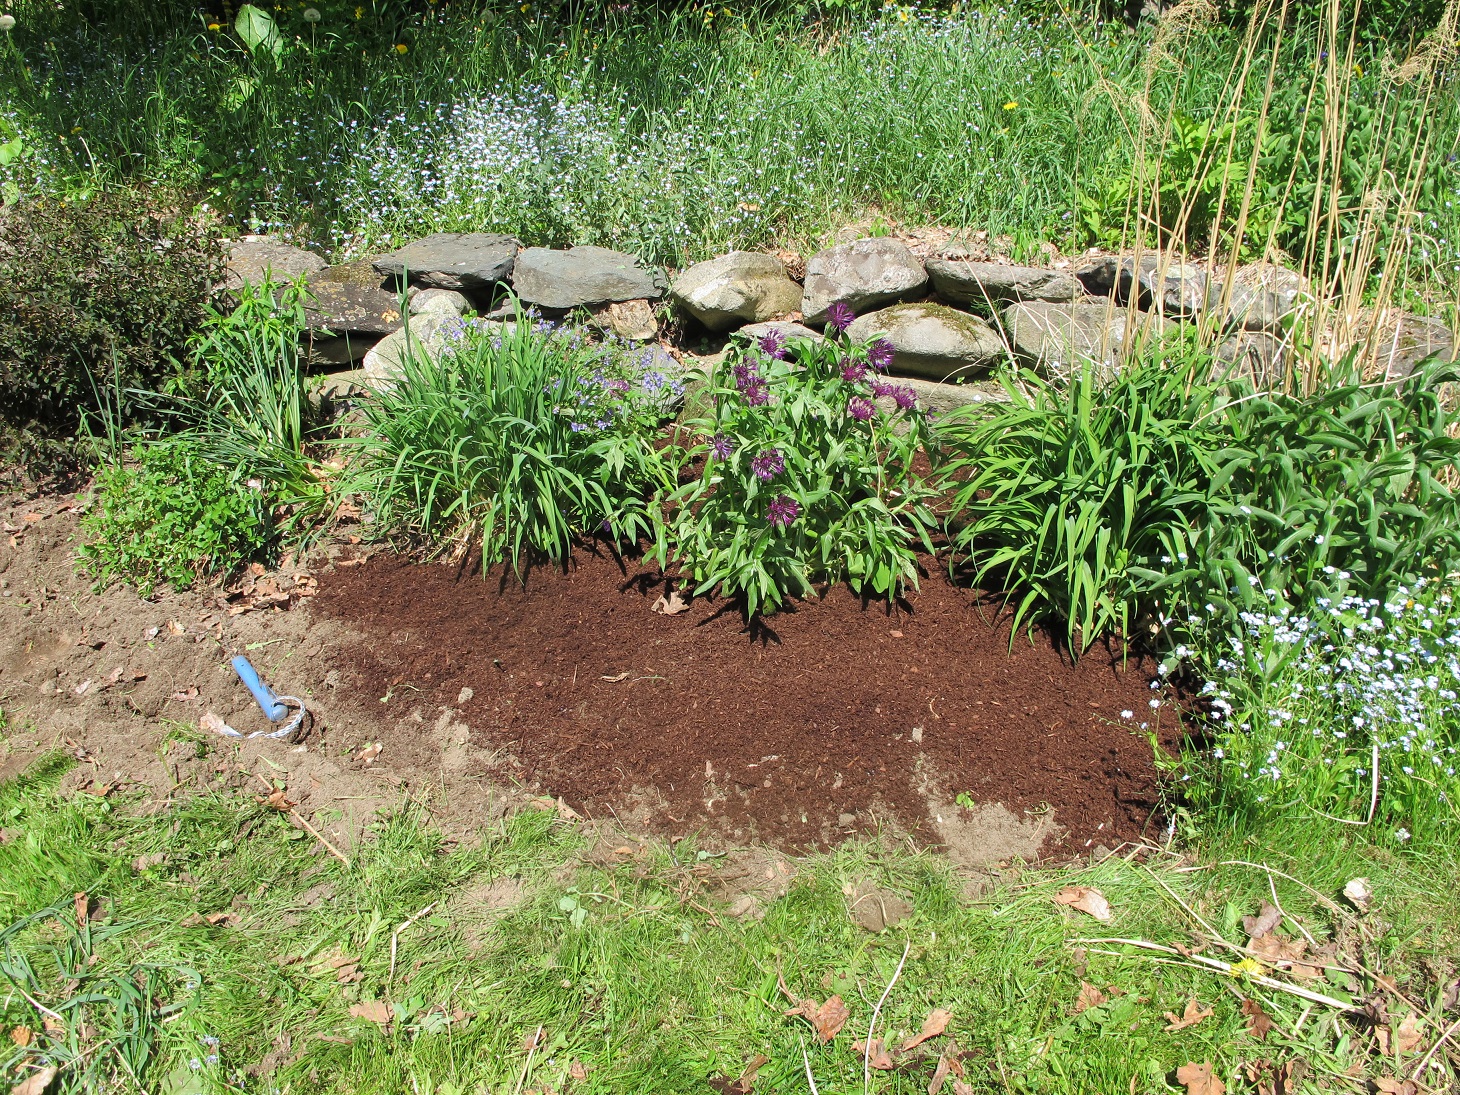
Ground hemlock bark mulch
In flower gardens I sometimes use finely ground hemlock bark that I buy by the pickup-truck load. Some gardeners like to install landscape fabric under the mulch, but I rarely do that. I find that the worst of the weeds can get through anyway, and their roots become entangled with the fabric, making it tough to remove them entirely.
Chopped autumn leaves are great mulch for gardens. They help to keep down weeds, provide organic matter to soil microorganisms, and hold in moisture. Earthworms love leaves. One gardening friend bags all her leaves after running over them with a lawnmower in September, and stores them for use now.
Weeds, well known garden villains, are not just competing with your onions and lettuce for sun and soil nutrients, they also want the water – especially in dry times. Get your garden off to a good early start this summer by weeding for 15 minutes a day – minimum. I have a lot of garden space and try to spend an hour a day pulling weeds. Once weeds bloom and spread their seeds, the work will multiply exponentially, so do it now and have less work later.
Henry Homeyer is gardening educator and author of 4 gardening books. His website is www.Gardening-Guy.com. You may e-mail questions or comments at henry.homeyer@comcast.net.
Heroines of the Gardening World
Posted on Wednesday, May 27, 2015 · Leave a Comment
I’d like to tip my hat the unsung heroines of the gardening world, the members of garden clubs around the region. Garden club members have recently been busy planting annual flowers at their local libraries, in the middle of roundabouts and in front of firehouses. And that is just the tip of the iceberg. The women (and occasionally men) of garden clubs are hardworking and generous. They provide their communities with much that we should all be grateful for.
Garden club planting at Cornish Library
If you are a new gardener, the best thing you can do is to join a garden club. The wealth of knowledge of the members is truly amazing. They know what grows in your town, and what does not. They know when the last frost will nip at the heels of your annuals and who in town has good compost for sale by the truckload. Not only that, garden club members love helping others, especially new gardeners.
The educational programs are a big draw for any club. Join the club (generally from $5 to $25 per year) and you get access to 6 or more speakers over the course of the year. Smaller clubs depend on local experts, but the bigger ones can afford to bring in outside experts and published authors. To me, the speaker programs are the core of the clubs. We all want to learn, and speakers can share information and often offer great slide shows.
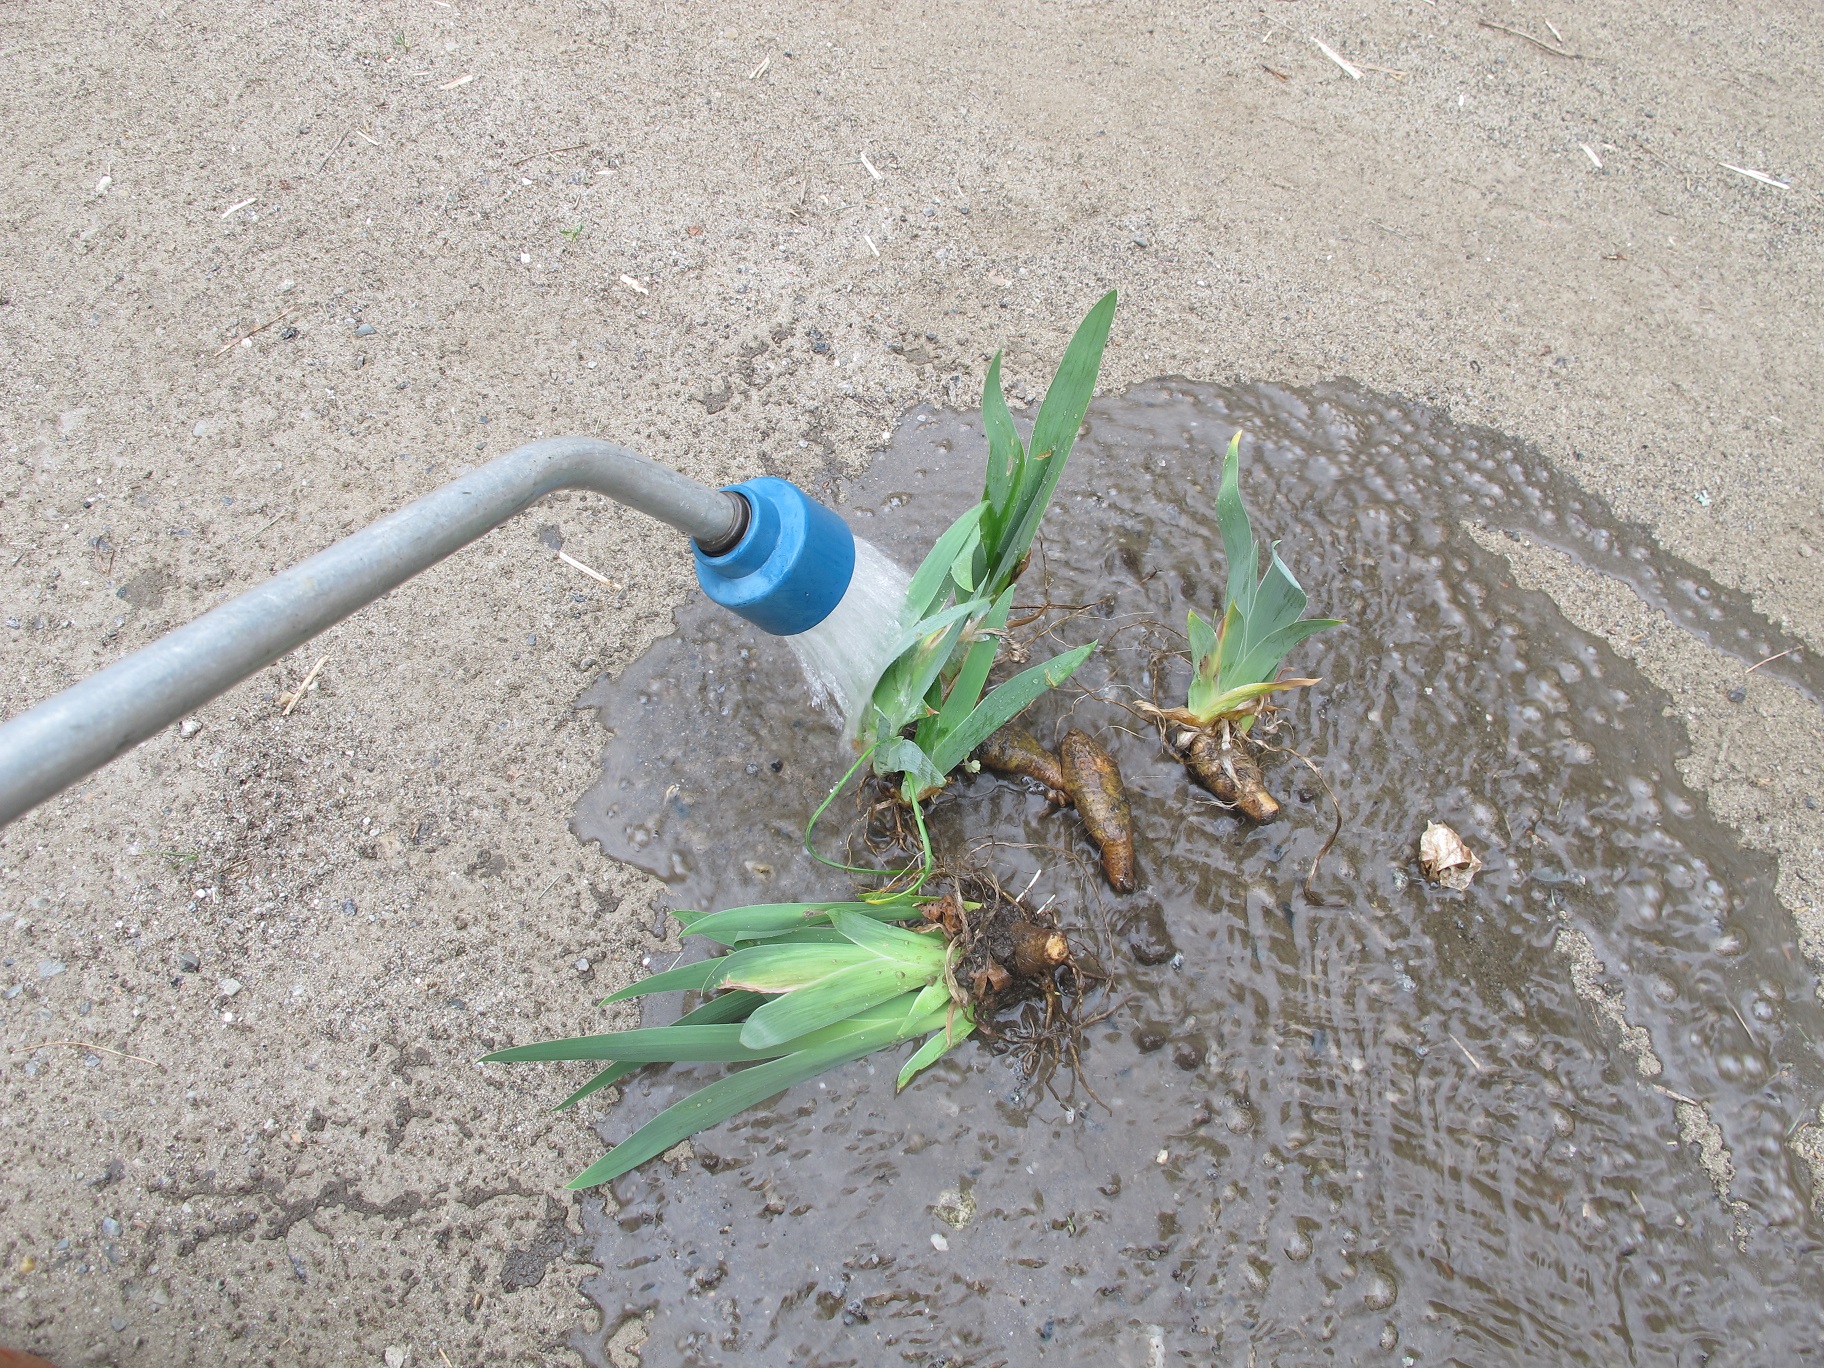
This is the season when garden clubs are having their annual plant sales, another good money maker for the clubs – and less expensive plants for you, the gardener. One word of warning, however, some of these low-cost plants may harbor roots of invasive plants – and unknowingly introduce them to your garden.

Goutweed roots are long and white
Years ago I got goutweed (Aegopodium podagraria) mixed in with iris given to me and have never been able to rid myself of the pest. Once established, goutweed is practically impossible to get rid of – I generally recommend selling the house. Now when getting plants from plant sales I “bare root” them before planting. That means I wash all soil off the roots, removing anything that is not clearly a root from the desired plant. I do this in the driveway so that any invasive plant roots don’t get into my soil.
One of my favorite garden clubs is in Lyme, NH. It’s an informal club called the Lyme Gardeners – no dues, no officers, no pledge of allegiance at meetings. I contacted Anne Baird, who once invited me to speak to their group and made me a lifetime member. In an e-mail she described the club as follows:
“We visit around 16 Upper Valley gardens from May through September, with a focus on working, not show gardens. ‘Pardon My Garden’ allows host gardeners to ask for help with problems, talk about down- or up-sizing, and for visitors to share experience, knowledge, and enthusiasm.
Barerooting plant sale iris
“During the off-seasons, Lyme Gardeners has occasional potluck suppers, with special guests talking about anything from herbal medicines to winter gardens to favorite tools. Anyone in the Upper Valley with a passion for gardening, whether experienced, brand-new, or no longer active, is welcome at any Lyme Gardener event. Join Lyme Gardener’s listserv: lyme-gardeners@lists.valley.net.”
Many garden clubs offer garden tours of members’ gardens. Gardeners often spend weeks getting ready, pulling every weed, edging every bed. Some hire outside help to get their gardens ready. The “Pardon My Garden” events are different. Weeds are to be expected. Gardeners share what they are doing, but visitors do not expect Martha Stewart-like displays. I like that.
Garden clubs often offer scholarship monies to students in their towns. As a regular speaker at garden clubs I often must sit through the official meetings, including the treasurer’s reports. Some of these clubs raise substantial sums of money, and then share it with needy students, particularly to those with an interest in horticulture. Very nice.
My local garden club’s big fundraiser is a raffle at the Cornish Fair, held every year the third weekend of August. The club gets local merchants to donate to the raffle items and tickets are sold for a dollar a pop. To get you there, the Garden Club has a competition open to all for best flower arrangement, best potted plants, best miniature display, etc. My favorite category is “Best Smelling Flower As Judged By a Child”.
So join a club – or start an informal group like the Lyme Gardeners – so that you can learn from other gardeners. We can all learn from the victories and mistakes of others.
Henry can be reached by e-mail at henry.homeyer@comcast.net. His web site is www.Gardening-Guy.com.
Pondering a Few Perennial Flowers
Posted on Wednesday, May 20, 2015 · Leave a Comment
I aspire to be the Goatsbeard King of Cornish Flat. Maybe I already am. I have several, and no one else I know here grows goatsbeard (Aruncus dioecious). It is one of many flowers I grow that do well in light shade, getting bigger and better every year, and requiring very little of me.
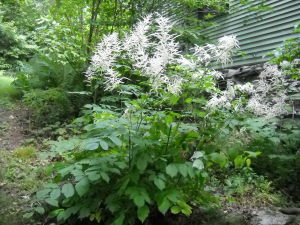
Goatsbeard
Long ago, decades ago, I bought my first goatsbeard. The plant tag said it would grow in shade, so I foolishly planted it under a Canadian hemlock. It survived, but never bloomed. In terms of sunshine, planting it there was akin to planting it in under a box– virtually no light; additionally, there was lots of root competition from the tree. Then after 10 years I moved it to a place that got nice morning sun, but no afternoon sun. It bloomed and thrived, which taught me to move plants that aren’t thriving.
Goatsbeard blooms in early summer with tall plumes of fluffy white flowers (similar to astilbe flowers) rising above its tall foliage. There are male plants and female plants, though honestly I do not know which is which. (It’s not like puppies, where you just lift up the tail and look). Books tell me the males are showier. The leaves on mine are 3 to 4 feet tall and the clumps get bigger every year. I also have a miniature goatsbeard (A. aethusifolius) that is very nice and compact, and stays just 8 to 15 inches tall and has small white spikes of delicate white flowers that, like its big brother, stand above the foliage.
There are many kinds of shade. Most perennials that grow in shade need some sunshine filtered through canopy of leaves, not an umbrella of shade from evergreens. Morning sun that washes a plant for a few hours early in the day is fine for a shade plant but hot afternoon sun generally is too much. And if a plant is rated for use in the shade, moist soil will usually help it thrive if it gets more direct sun than it would like (otherwise it would dry it out in the sun).
One of my favorite flowers is blooming everywhere right now for me. Forget-me-nots (Myosotis sylvatica) have small 5-petaled light blue flowers on 8- to 15- inch stems, though I have a few with white or pink flowers. They spread by seed, creating waves of color in shade or part shade locations, or even in sunny places. These plants are never a problem: if one pops up somewhere that is designated for another plant, it is easy to remove as its roots are not at all tenacious. It is not clear from the literature if forget-me-nots are annuals, biennials or perennials. If perennials, they are short-lived ones.
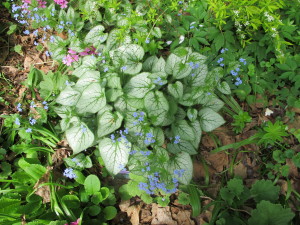
‘Jack Frost’ Brunnera
A perennial with flowers nearly identical to forget-me-nots is Siberian bugloss, more commonly called Brunnera, which is its Latin name (Brunnera macrophylla). A named cultivar, “Jack Frost’, is one of the most common. The leaves are smaller than the standard species leaves, and are “frosted” with white. The leaves are heart-shaped and very handsome all summer. Any plant with variegated leaves – those that have a lack of green chlorophyll in parts – tend to be smaller and less vigorous, as the white portions do not produce food for the plant.
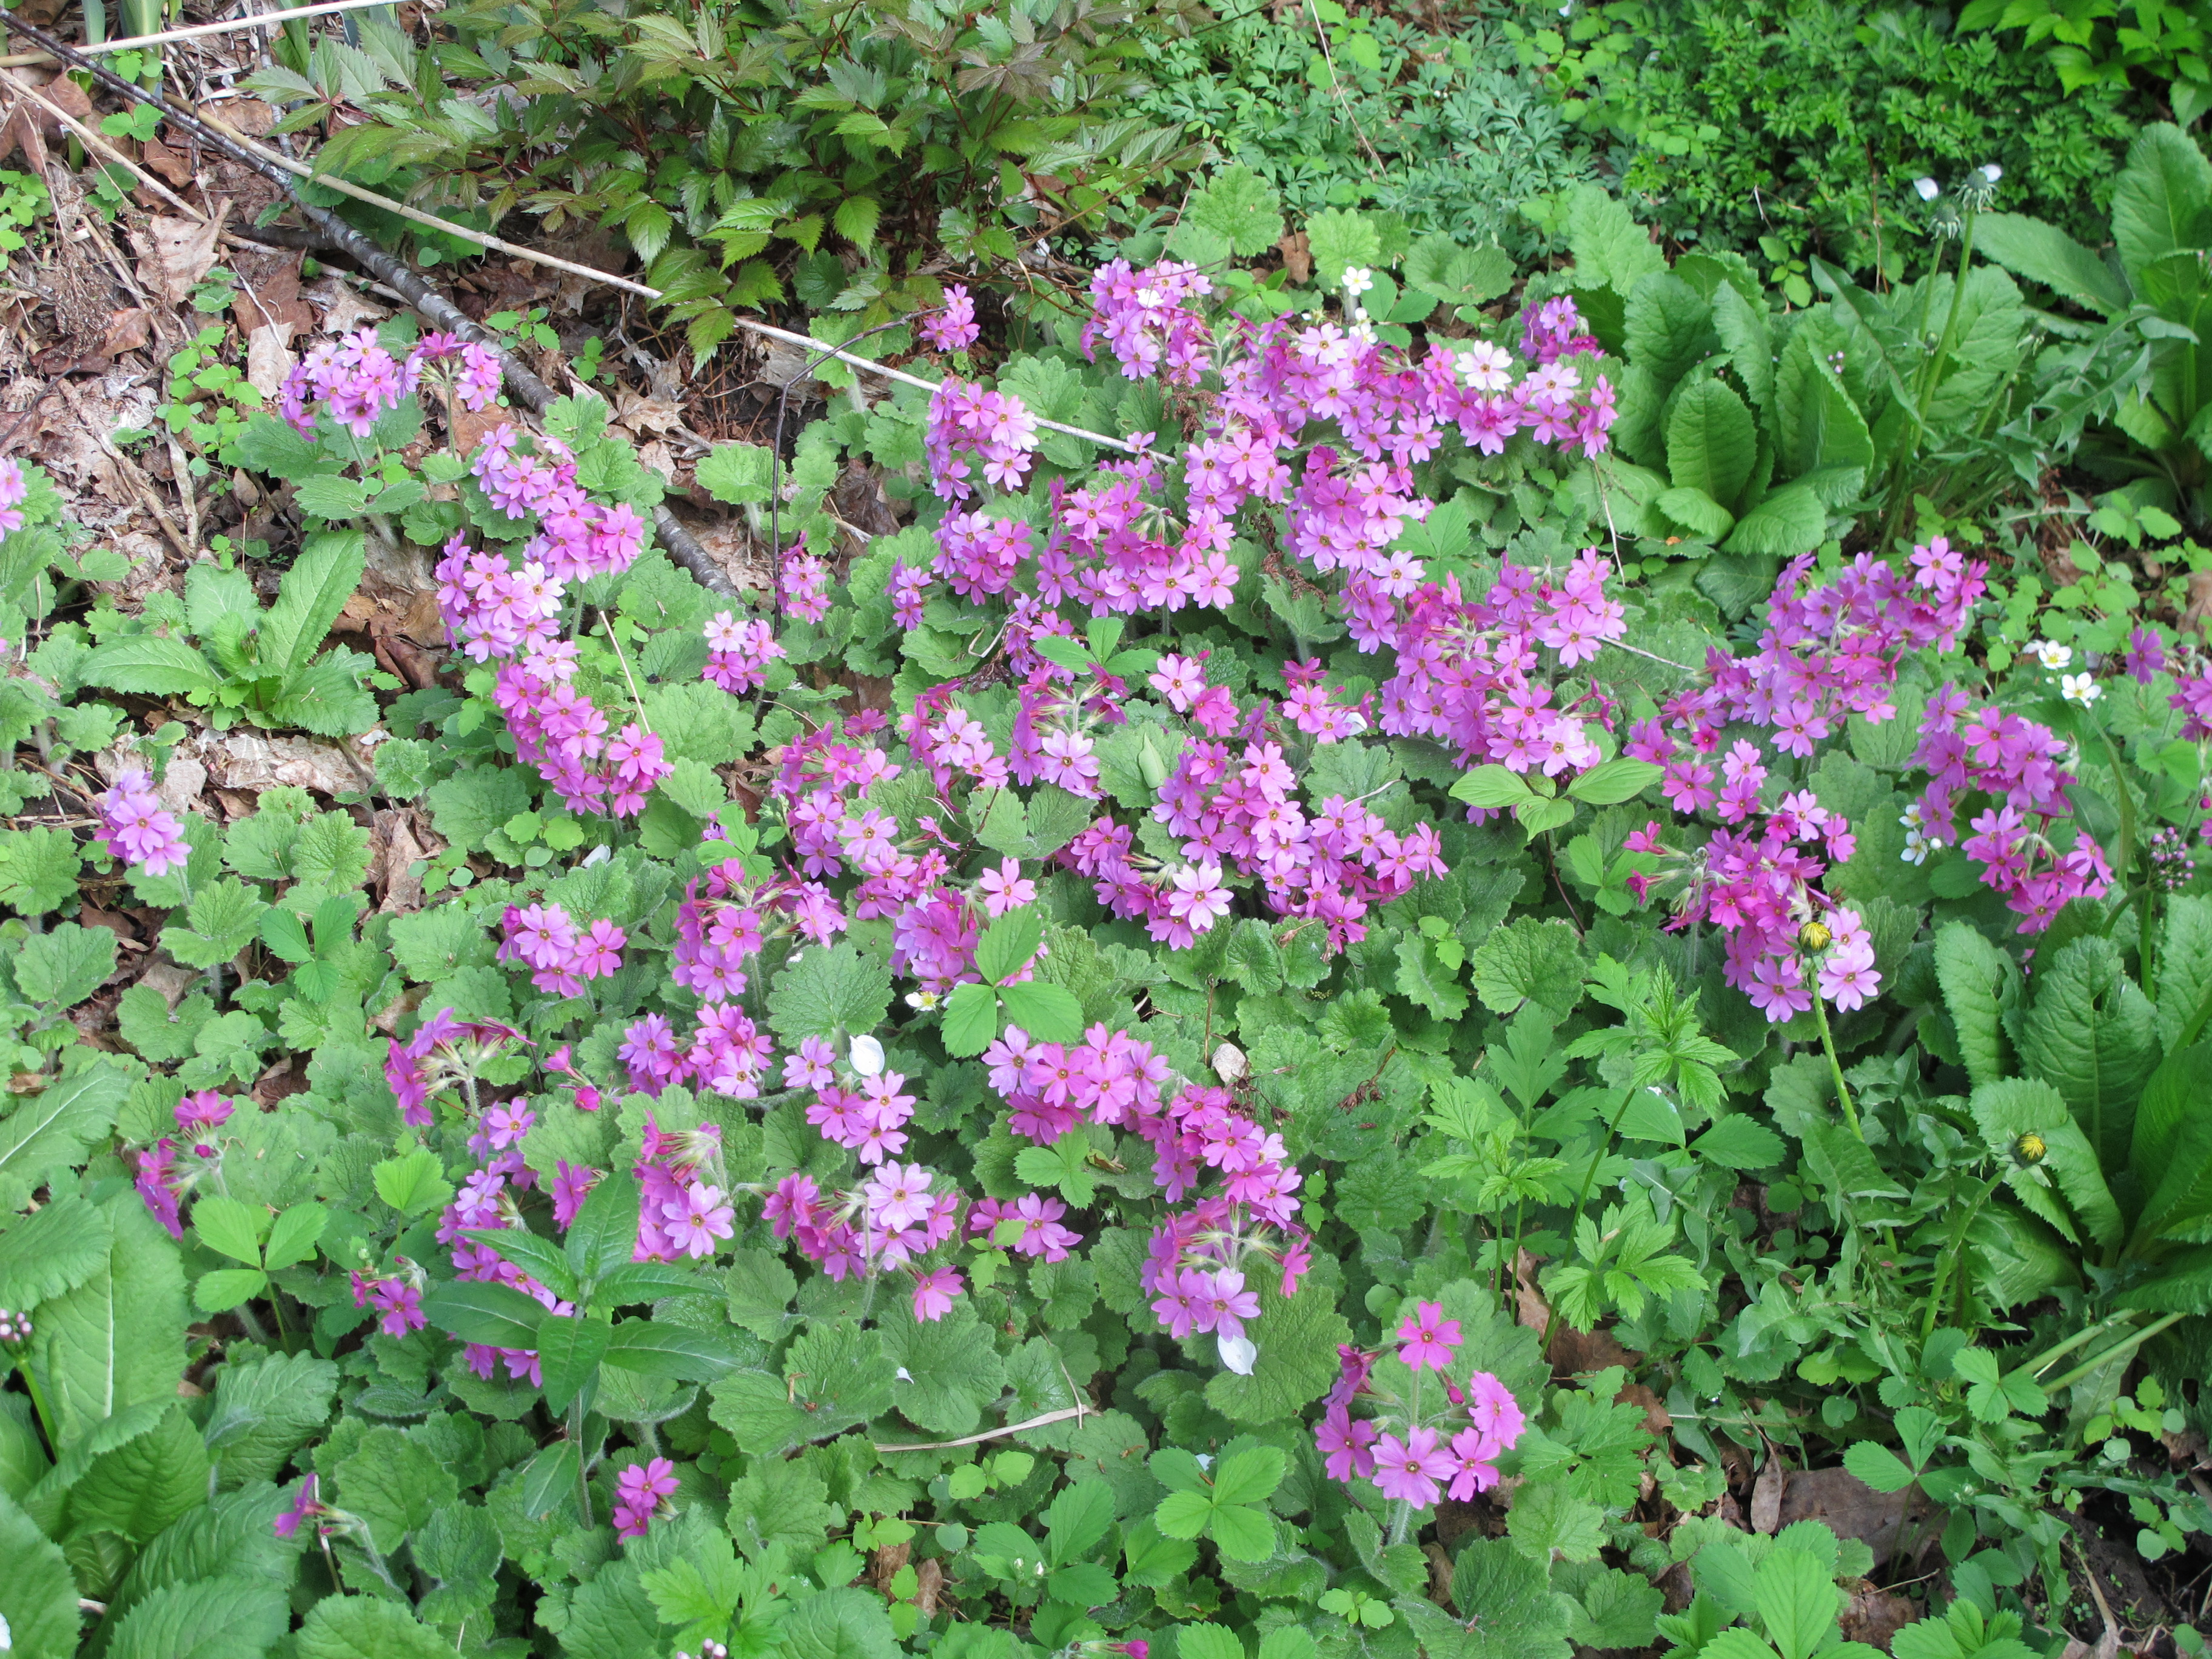
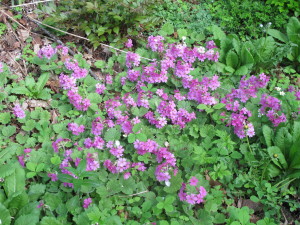
Primroses are in bloom for me now and are some of my favorites. One with no common name is Primula kisoana, a brilliant magenta flower that spreads nicely by root, but never overpowers other plants. It likes shade and will grow in dry or moist soil. I even have it growing on a rock ledge that only has an inch of soil and it is happy there, too.
Primula kisoana
Another great primrose is the Japanese primrose (Primula japonica). This is also called the candelabra primrose because it displays 3 or more tiers of umbels (umbrella-shaped clusters of flowers) separated by a few inches of stem. These need moist or even wet soil and do well for me under apple trees in rich, black soil. Most primroses seem to like growing under apples. This one blooms just after P. kisoana, providing continuous color for 4 to 6 weeks between them.
Since early April – and continuing into June – I have had hellebores blooming in dry shade. Also called Lenten rose (Helleborus orientalis), these have handsome evergreen leaves and 2- to 3-inch diameter five-petaled flowers. The flowers are good looking even when past their prime (like many gardeners I know). I have them growing in dry soil in a shady location that gets a little morning sun. If you haven’t tried them, you should. Their colors range from white to deep maroon, and hybrids now come in doubles (with extra petals). ‘Peppermint Ice’ is a very nice double hybrid.
In that same bed with the hellebores I have some very nice anemones, one called Anemone nemorosa. Not all anemones are nice, however. There is a common one often found at plant sales called Canadian or meadow anemone (Anemone canadensis). It has a pretty white flower, but spreads too quickly and cannot be easily removed or controlled. A thug. But A. nemorosa stays in nice clumps with 1-inch lavender or white blossoms on 6 inch stems. Fall blooming Japanese anemones (A. x hybrida) are wonderful, too.
An easy shade-blooming ground cover is spotted deadnettle (Lamium maculatum). It has small pink-mauve flowers on square stems, but the flowers are not showy. It will spread quickly. Its foliage is 6- to 8-inches tall and each leaf has a white stripe up the middle.
Shade is too often neglected by gardeners. There are so many flowers that will thrive there, you really must try some new ones this year. Head for your local family-owned nursery and see what grabs your fancy. And who knows? Maybe you’ll come home with goats (beard)!
Henry Homeyer is a gardening consultant and author. His web site is www.Gardening-Guy.com.
Early Summer in the Garden
Posted on Wednesday, May 13, 2015 · Leave a Comment
Every spring each of us must decide when to plant our tender annual plants. I am of the conservative branch of the gardening family. I do not want to take a chance damaging – or killing – my tomatoes, peppers, cukes, or annual flowers if a late frost comes along. I know gardeners who are planting everything now – and they might be smarter than me. But I doubt they will get tomatoes before me. Plants going into cold soil don’t really do much growing.
Whether you buy your plants from a nursery or start them yourself from seed, all plants need to be hardened off before being planted. That means introducing them to sunshine and breezes a little at a time so that they don’t get sun or wind burned. Ask at the garden center if their plants have been well hardened off when you buy them.
I have a deck on the north side of my house that gets about 3 hours of morning sun each day, so it is the perfect place to start hardening off seedlings. After 3 days on the deck, I move the trays of seedlings to the west side, where they get afternoon sun but are a bit sheltered from drying winds. After three days there, they are ready to be planted, weather permitting.
I like to plant in the early evening. Robins are singing complex melodies, and the sun’s heat has diminished. Most importantly, plants have 12 hours or so to settle into the soil, absorb some water, and get ready to grow before the sun comes up and bakes them. I also like to plant when cloudy or drizzly weather is forecast, but that isn’t always possible.
Here are some of the things I am planting now, or have planted. Peas went in first, after 2 hours soaking in a dish of water. This allows the seeds to absorb water quickly, encouraging them to start growing sooner than if I just put them in the ground. I planted Sugar Snap peas, which are edible pod peas. I find shelling peas tedious, and like the fact that you get more food if you can eat the shells.
Peas (and beans) are legumes which means that they can take nitrogen from the air and “fix” it into a form useable by plants – but only with the help of nitrogen fixing bacteria. Your soil may have these rhizobial bacteria, or it might not. Without them, the plants cannot fix nitrogen. So you may want to buy a packet of the bacteria, which comes in a powder form. After soaking the peas, drain the water and sprinkle inoculant over the seeds before planting.
Generally the packet of inoculant contains more than you need; it will not be good next year, so share your extra with a friend. I suppose you can mix in water and spread it on the soil around your peas if you have already planted your peas without it. Beans, by the way, are warm weather plants that should not be planted until after risk of frost. If you plant them in cold, wet soil they may rot, too.
Carrots, beets, radishes and rutabagas are good crops to plant now. I planted mine on Mother’s Day, as it was a root day, according to Stella Natura, the biodynamic calendar I consult when planting (www.stellanatura.com). It uses the moon and stars to guide when we should plant.
Beets confused me until I learned that the “seeds” we buy are not seeds at all, but dried seed capsules. Like an apple, each capsule contains multiple seeds. So you can space them perfectly, and still have to thin them later. Johnny’s Selected Seeds (www.johnnyseeds.com) does sell one variety called ‘Moneta’ that only has one seed per capsule – but it often sells out early.
Thinning plants that I start from seed is one of my least favorite activities. It takes time and precision, and it is killing little plant babies! So when planting things like carrots or rutabagas I try to take time to space seeds an inch apart, though I haven’t yet perfected that trick. Patience is not my long suit. By the 4th of July, carrots and beets should be at least an inch apart, and eventually, 2 to 3 inches apart. If crowded, carrots will compete with other carrots just the way weeds compete with carrots.
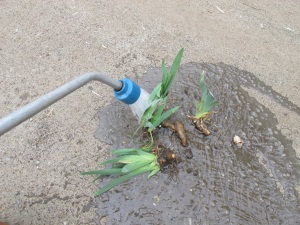
Onion seedlings started from seed and ready to plant
I have also planted onions, which I do as small plants, not sets. My grandfather always planted sets, which are really just stunted onions that grew last year. Growers plant them so close together that they are dwarfed – and you should plant them like big seeds.
This year I planted my onions by seed indoors in early March, and raised them under lights for 2 months before hardening them off and putting them in the garden. I planted them and inch and a half deep, and 2 to 3 inches apart. Some seed companies will sell onion plants in bundles of 50 for those wanting seedlings – I have gotten them from Johnny’s Selected Seeds in the past. Starting from seed is nice because you have more choice about the variety you plant.
I hope to plant kale, broccoli and Brussels sprouts this week – all are quite frost hardy. If I plant cauliflower, I will wait to plant it in June. Cauliflower is the fussbudget of the brassica (cabbage) family. It will “button” or fail to produce a full-sized head if it is stressed by weather that is too hot or too cold, too wet or too dry. The others? Rock solid. In the fall most of the brassicas will continue producing until Thanksgiving or later.
This is a joyous season for me. Planting seeds is magical. Imagine planting a speck, and getting a carrot later this summer. I love it!
Henry Homeyer can be reached at PO Box 364, Cornish Flat, NH 03746. Please include a self-addressed, stamped envelope if you wish a response to a question. Or e-mail Henry at henry.homeyer@comcast.net.
Annual Flowers: A Great Gift for Mom!
Posted on Wednesday, May 6, 2015 · Leave a Comment
Okay, Mom’s Day is coming right up, and you haven’t bought her anything. Instead of getting another electric waffle iron or promising to wash her car, just like you did last year (but haven’t done yet), head to your local family-owned garden center. There are plenty of these, and they are ready and waiting for you. The flowers you get there will be perfect for this climate, and tried and tested by the owners and staff.
Here is what I am suggesting: make a nice planter full of annual flowers that will bloom all summer. Mom will think of you every time she waters it. But before you buy things, think about the sun conditions where she will place it. If it will go on a north-facing deck, you need flowers whose tags include the words “shade” or “part shade.” A few annuals are even labeled “sun to shade,” but they are rare. If the plant is going in full sun, or all afternoon sun, look for tags that say “sun.”
If you are buying a pot to place your gift in, consider these factors: old fashioned clay pots are nice, but they lose water through the pores, allowing the roots to dry out faster than a nice glazed ceramic pot would, or (for those on a strict budget) a plastic or fiberglass pot. If Mom is busy, and I’ve never met one who isn’t, you should probably avoid the clay pots.
When it comes to pots, bigger is better. More room for soil and for plants that want to expand. More potting mix to hold moisture. Don’t think the flowering plant you buy will stay that size. It will grow. Six cubic inches of potting soil per plant is the rule of thumb, though often I don’t follow that – and squeeze in more plants.
Self-watering planters are good, too. These pots have a water reservoir in the base, below a shelf, and a wicking system that keeps roots moist, but not soggy. Fill that reservoir once a week and the soil stays adequately moist in most situations. They cost more, but hey, Mom was good to you. (Remember all those rhubarb pies she made when you were growing up?).
Diamond Frost Euphorbia
What should you put in the pot? Certainly not ordinary dirt (or soil as we are supposed to say). I use a 50-50 mix of potting soil and compost, my own or purchased. Moo-Doo brand composted cow manure works great, but there are plenty of kinds. If you have a 16-inch diameter pot (a nice size) you can also mix into the soil ingredients a half-cup of slow release organic fertilizer, or less for smaller pots.
The basic design principal for planters is this: if you have a big planter (16- to 24-inches across) put something tall in the middle, surrounded by 3-complimenatry-colored medium sized plants, and then squeeze in some “trailers” that will hang over the edges. The trailers may be just foliage plants, or blooming plants. A 10- to 12-inch planter can have a tall or medium height plant, and some trailers. Or you can buy three or more 6- to 8-inch pots and put just one plant in each, and then arrange the pots in a nice trio.
Now the plants. There are plenty of nice ones, from old fashioned petunias (Mom, may she rest in peace, usually got these from me on Mother’s Day when I was a boy), to new things that are trademarked hybrids. Almost all will bloom all summer, though some like Osteospurmum look great in spring and fall, but are just foliage in the heat of summer. I visited my favorite garden center recently, and got lots of the ideas for planters.
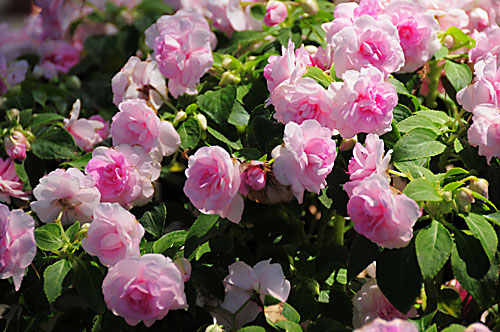
Double impatiens
Let’s start with the shade. Impatiens was the favorite for decades, then a few years ago, along came a blight that ruined them. In pots on a deck, with fresh soil, you will probably do just fine. They are a medium-sized plant that never stops blooming till frost, and come in a variety of colors, and with both single and double blossoms. I am still leery of planting them in the ground, especially if the blight ever struck there in the past.
Other shade plants? Torenia is being promoted to replace Impatiens. It is nice, but not as dramatic (for me, anyhow). New Guinea Impatiens is also good, but is rarely sold in those inexpensive 6-packs. Begonias can be great; I saw a black-leafed one with white blossoms that I liked called ‘Mocca White”. Oxalis is a favorite of mine and I bring it inside each fall and winter it over as a houseplant.

Torenia
For sun there are even more plants to choose from. I like Superbenas, which are trademarked, hybridized verbenas, and Supertunias (the same, but derived from petunias). ‘Diamond Frost’ is a Euphorbia hybrid that has huge numbers of tiny white blossoms all summer. Angelonia has a 20-inch stalk with lots of pink blossoms. Salvias are great plants, with plenty of sizes, heights and colors. Licorice plant (Helichrysum) is a great foliage plants that takes hot, sunny locations. It comes in gray and chartreuse-leafed varieties. Persian shield has shiny purple leaves for hot, dry places.
Don’t take my advice when it comes to plants: ask those friendly folks at your garden center. They deal with them all day, every day, and probably take injured plants home, free. So get Mom something nice, she’ll love you for it – even if the colors clash.
Henry is the author of 4 gardening books (also good Mothers Day presents). His web site is www.Gardening-Guy.com.
Spring Activities
Posted on Wednesday, April 15, 2015 · Leave a Comment
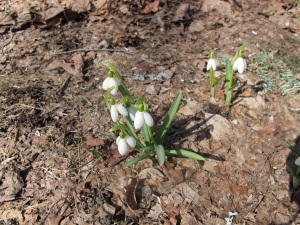
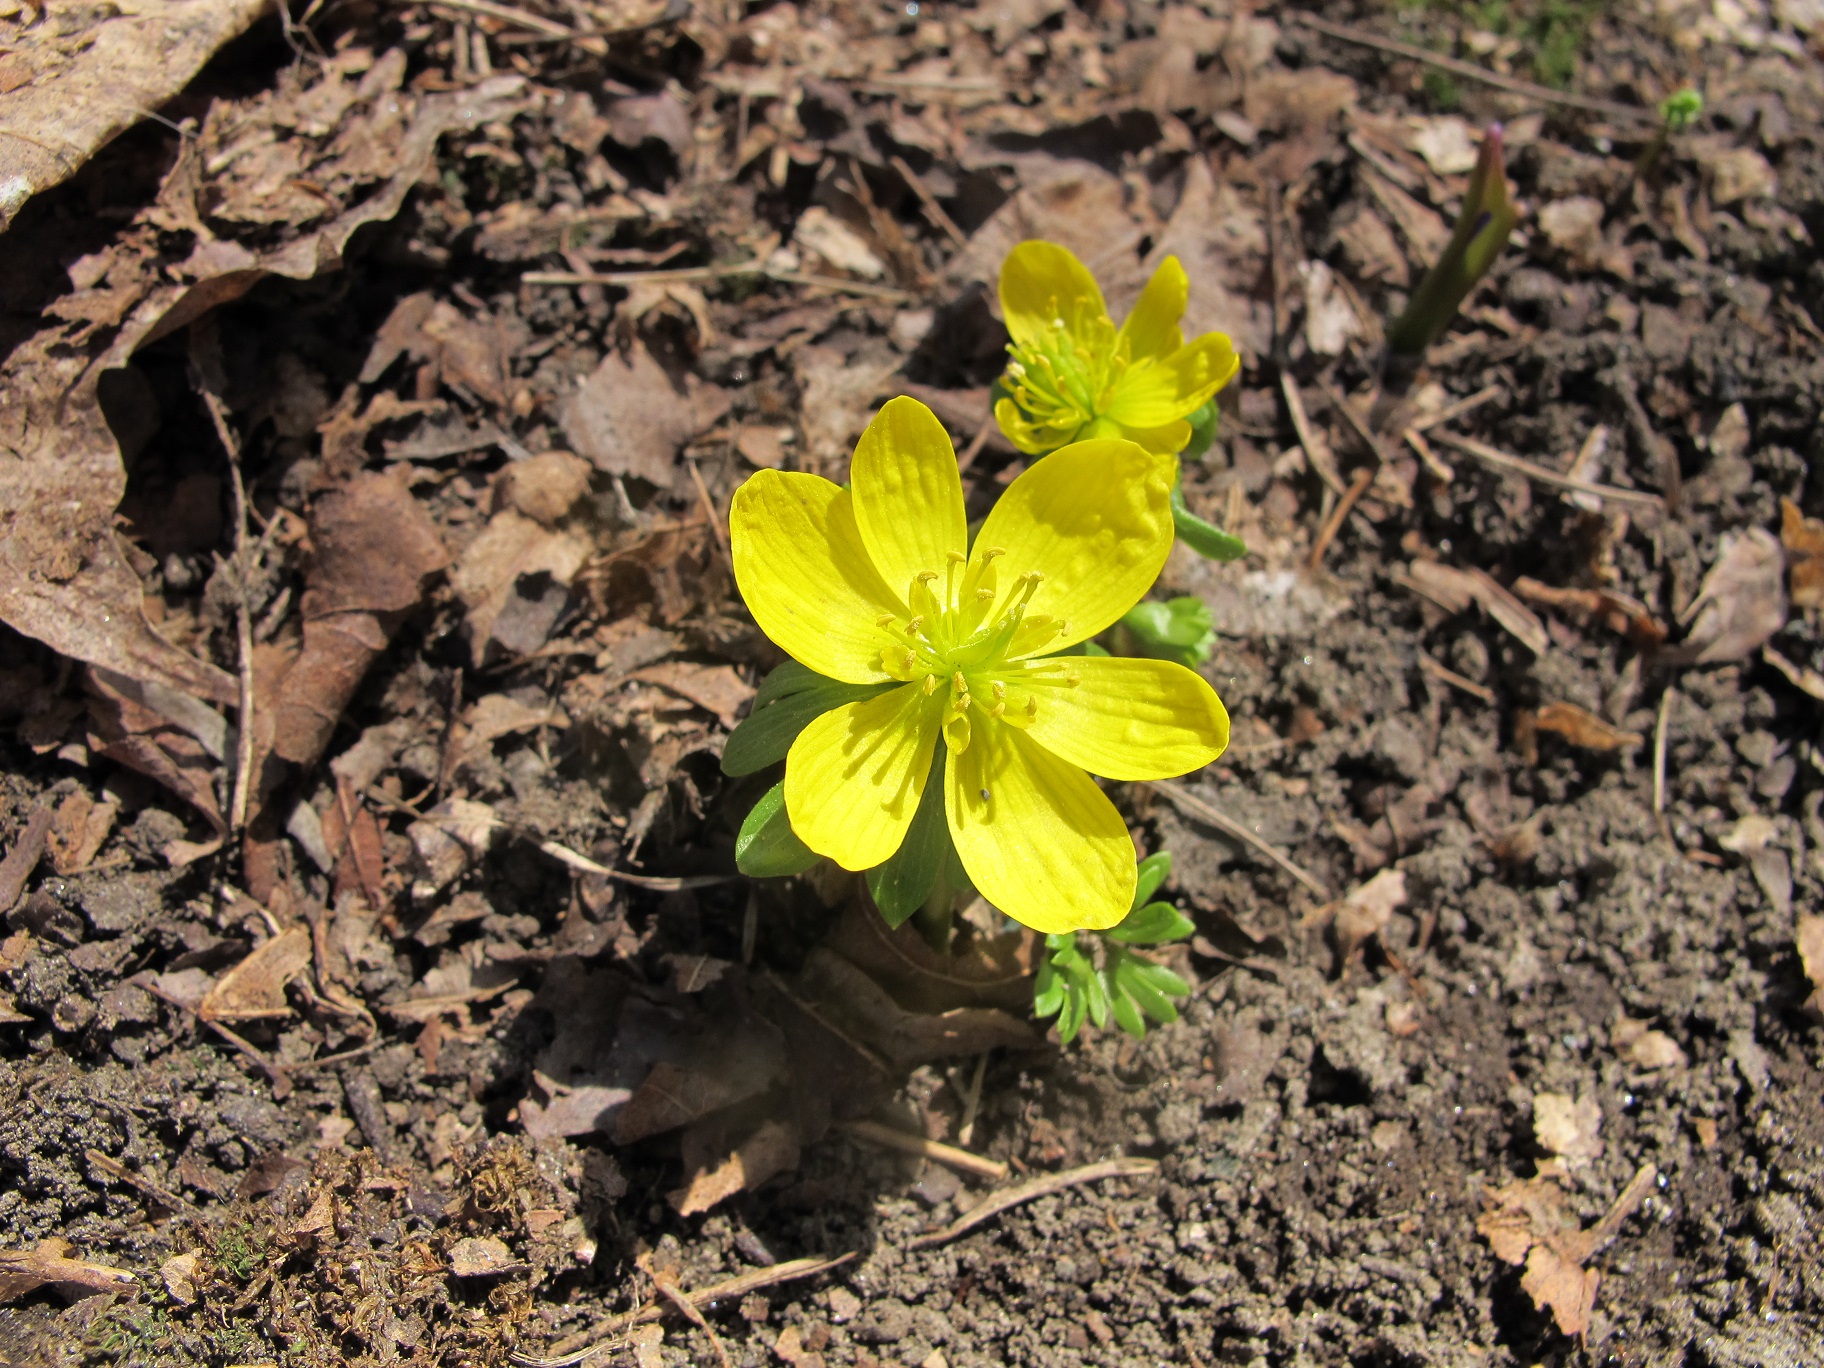
Snowdrops
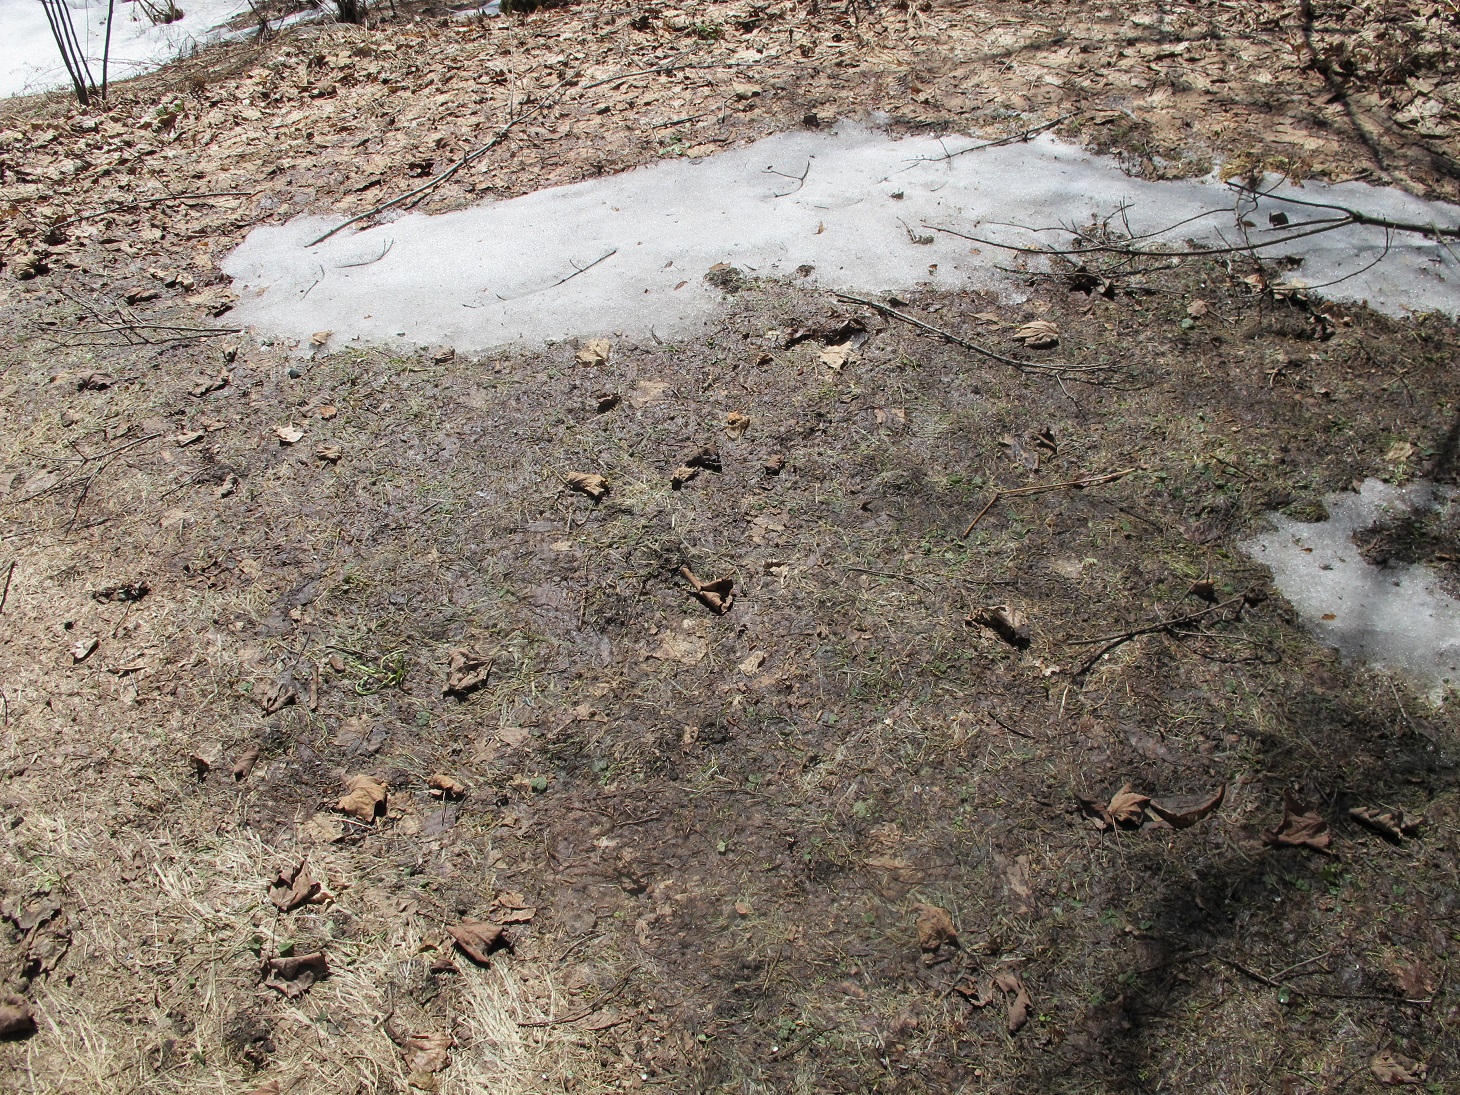
Spring has been slow in showing its colors. Snowdrops, usually up in early March at my house, were a month late. Crocus, the early ones, and winter aconite (a flower that is a nice school bus yellow color) are finally blooming. But everything is slow, and the ground is still frozen a few inches down. I won’t be planting anything outside for weeks.
So what can we do on a warm, sunny day? Maybe we better start by thinking about what NOT to do. Don’t rake the lawn while the soil is still soggy. I recently saw a fellow raking his lawn – even though there was still snow on it in places. Soil structure can be damaged if you compress it and squeeze out all the air spaces in it. This is easily done by walking on it when the soil is still frozen and wet – it’s very fragile. And it’s easy to rip out your grass with a rake if it hasn’t woken up and turned green.
Don’t rototill your vegetable garden early, either. If you are going to rototill, wait until the soil is good and dry. Take a handful of soil and squeeze it into a ball or cylinder. Then, with your other hand, tap it with a finger. It should fall apart. You want the soil crumbly before rototilling, though some clay soils never get to that point. Rototilling sticky wet soil can create heavy clods that roots will not easily penetrate.
So what can you do now? As soon as the snow disappears you can collect a soil sample and send it off to your state university extension service. Just Google “soil test” and your state, and you will find where to send a sample and how to collect it. I usually sun dry a sample on a cookie sheet, and remove any bits of grass, roots and rocks. As a rule of thumb, it is good to collect your sample from the depth where roots will be. For most things, that is 4 to 6 inches deep.
If you live in a house that was built before 1978, its exterior paint probably has some lead in it. Lead paint has been shown to contaminate soil and to be picked up by plants; this is most severe within 20 feet of the house, or even further if you are on a hill. Testing for heavy metals can be expensive: in New Hampshire the test for it is $65. But if you have small children and will be gardening near the house, it is a worthwhile one-time investment. Children are most severely affected by lead poisoning.

This lawn should not be raked yet
Root crops are the worst offenders when it comes to picking up lead and arsenic, another heavy metal. Lead was an additive to gasoline up until 1996 in most states, and lead from exhaust can still be a problem within 100 feet of a major highway. Arsenic was used as an insecticide, particularly in apple orchards up until the 1980’s, either as lead arsenate or calcium arsenate. Heavy metal compounds like that do not dissipate or disappear easily or quickly.
So how can you improve your soil? In a word, compost. Good compost is biologically active, meaning that it is full of beneficial microorganisms – bacteria and fungi. Later, when my lawn has turned green, I may spread some compost on it to improve the soil. All I do is fling compost over the lawn with a shovel, and then use a lawn rake to even it out.
Half an inch of compost spread out over the lawn will help a lot, particularly if you have used chemicals on the lawn. Fertilizers and particularly “Weed-n-Feed” products inhibit the growth and survival of microbes that will give your lawn that springy feel when you walk on it barefoot this summer. Compost adds organic matter and carbon to feed microbes that can’t use photosynthesis to get their own food. Earthworms love compost, too. Add compost, and they will come and help to get it down into the soil.
I have, carefully, raked leaves off one of my bulb beds. I did so recently. I was delighted to see, beneath a layer of leaves, the tips of daffodils and other bulbs were showing. I didn’t walk into the bed, as that would compact the soil, so I just reached what I could from the edge. That meant the back of the bed stayed unraked for now.

winter aconite
I have been known to lay down boards to walk on to avoid soil compaction at this time of year. Six-inch wide boards cut in five-foot lengths are good: they are light enough to move around, but do a good job of distributing my weight. Two or three is all you need. And once, to avoid compacting the soil, I wore my snowshoes. The neighbors probably thought I was crazy!
This is a good time of year to do a little maintenance on your tools. Take a big, rough file and sharpen the edges of your shovels and hoes. Just try to mimic the angle that exists already. A sharp tool works so much better than a dull one.
I apply boiled linseed oil once a year to keep wooden handles from drying out. I paint it on, let it soak in, and then rub the handles with a rag to polish them up. The handle on my potato hoe, which I got from my family’s garage 30 years ago, is probably 50 years old – but still smooth, strong and splinter-free because I take good care of it.
So don’t rush into spring. Enjoy a warm lazy day from the deck and know that soon the soil will be dry enough to start raking.
Henry Homeyer has a new book: The New Hampshire Gardener’s Companion, Second Edition. This edition has 2 new chapters and updated information in all chapters. His e-mail is henry.homeyer@comcast.net.
Ikebana: Arranging Flowers in a Japanese Artform
Posted on Wednesday, April 8, 2015 · Leave a Comment
Some people collect salt and pepper shakers, others license plates or stuffed teddy bears. I collect different species of flowers that I grow in my garden. Although I lost track long ago, I grow well over 100 species and varieties of flowers, probably over 200. If I see something new at a green house, I have to try it. I love them outdoors, but most I grow so that I can have flowers in the house. I love to make flower arrangements, and have been doing it for decades.
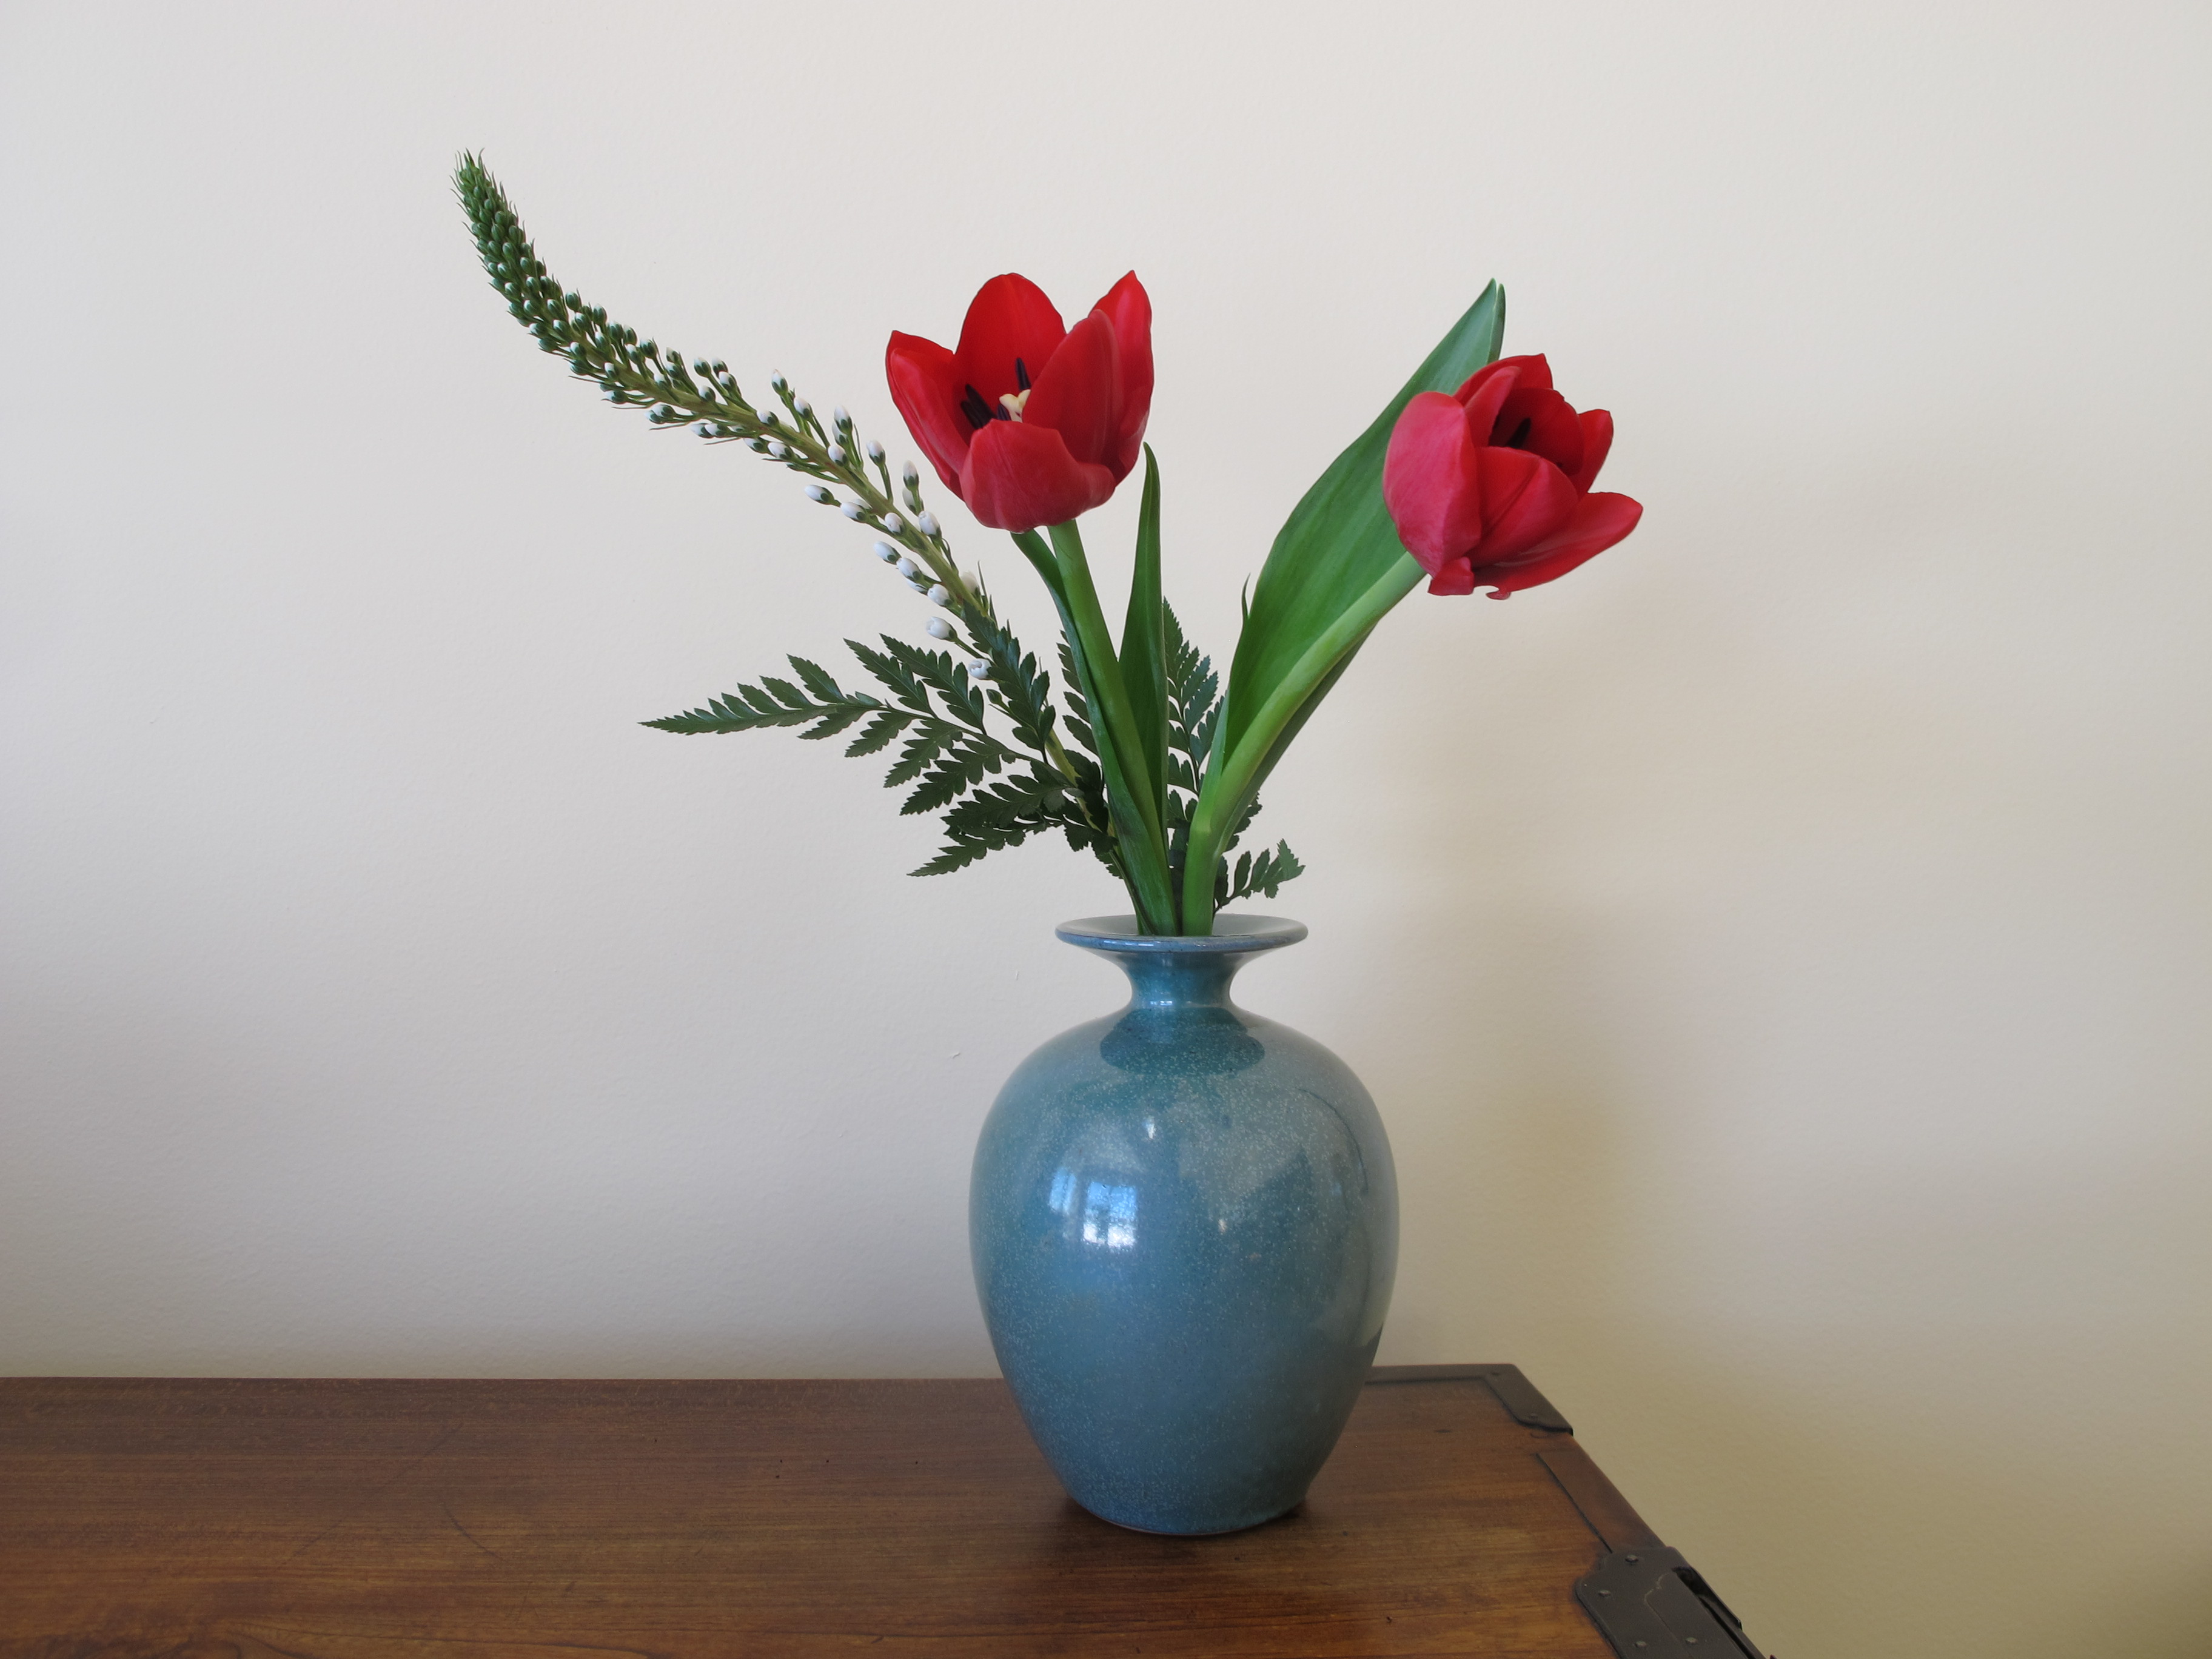
Ikebana or conventional
Recently I met with Joanne Wise of Grantham, NH to learn about a Japanese way of arranging flowers, an art form called Ikebana. Joanne lived in Tokyo for four years and apprenticed under an Ikebana master. I brought a generous bouquet of cut flowers with me, and Joanne provided the expertise, containers and frogs (which are heavy objects with sharp needles poking up to hold flowers in place in a vase).
Joanne explained that there are at least nine schools of Ikebana in Japan, and that she was trained in one called Sogetsu. Ikebana developed in the fourteenth to sixteenth centuries when shoguns (feudal leaders) ordered certain artists to create flower arrangements to bring natural beauty indoors, infusing nature to their palaces. Over time, different styles have developed.
According to Joanne, Ikebana arrangements should have strong lines, usually created by branches, often bare branches. Arrangements also include flowers, of course, but are generally very simple. Some styles use stone and water or even sand as part of the arrangement, often in a simple low bowl.

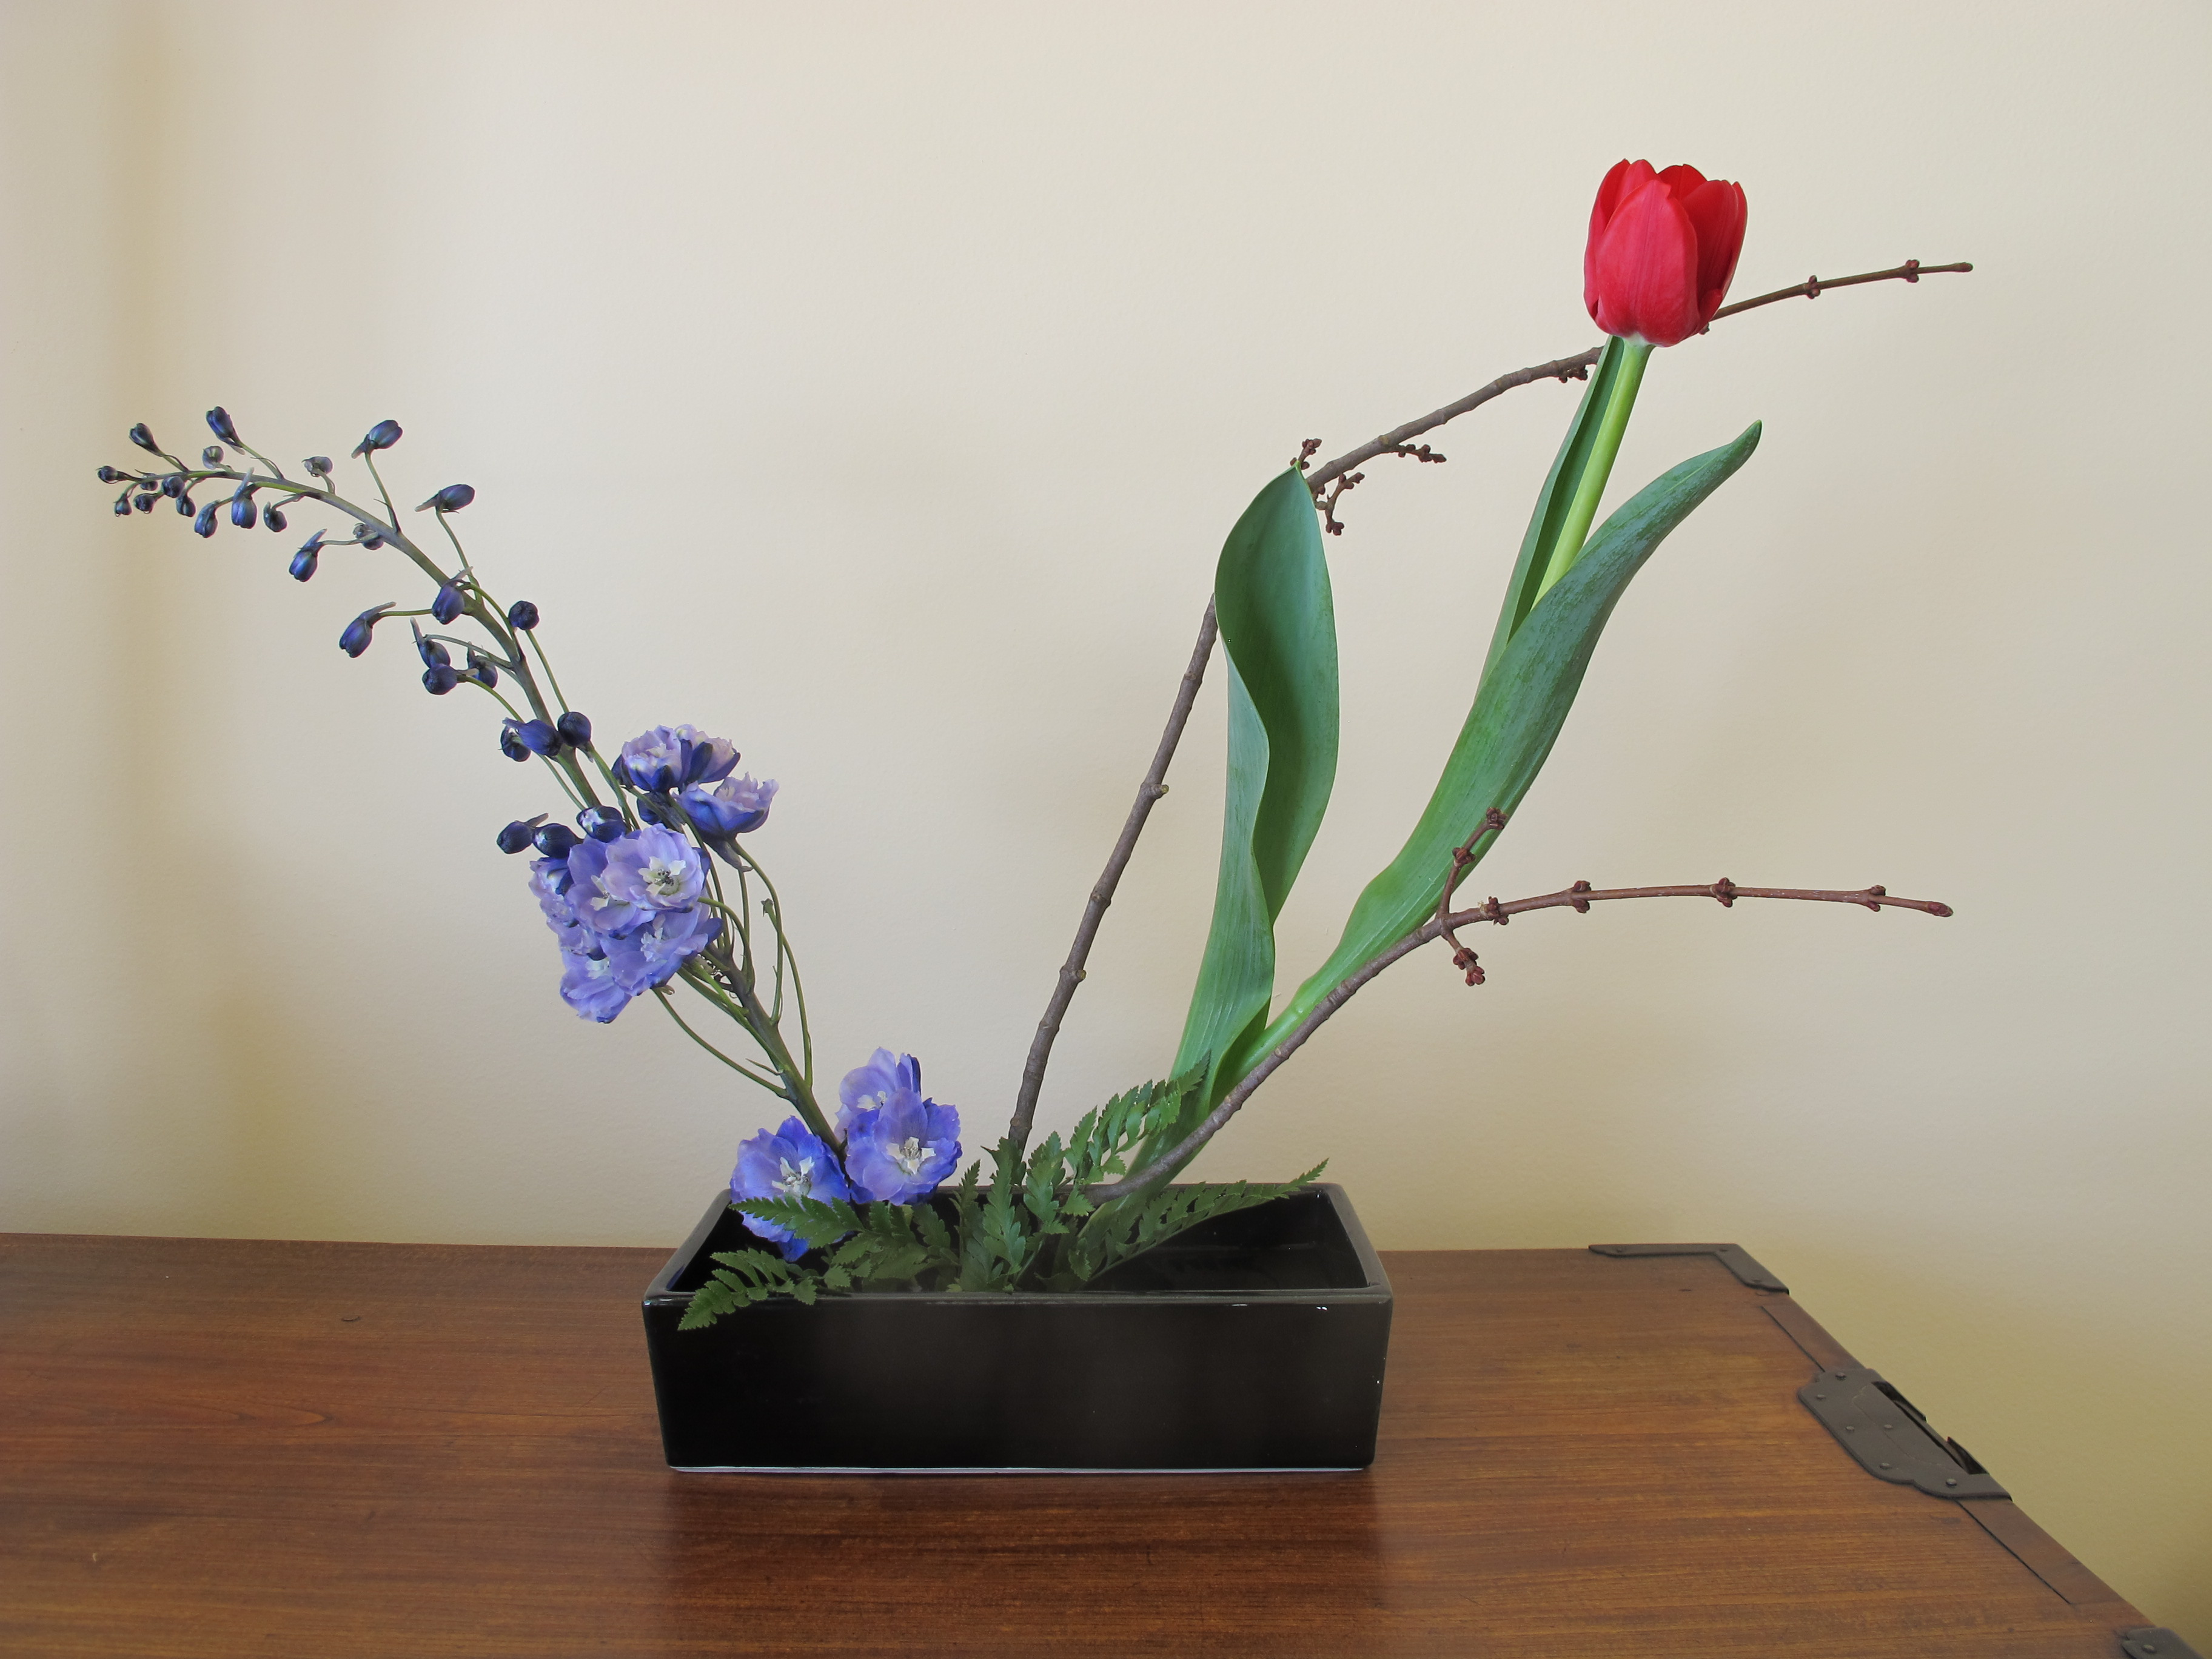
My ikebana
My first arrangement under Joanne’s supervision was in a low Ikebana bowl, a ceramic rectangle about two and a half inches deep. I placed a frog in the middle and then selected two bare branches, which I pinned in place on the frog. I cut the ends of the branches at an angle so that I could more easily push them onto the needles of the frog. A straight cut produces a round cross-sectional cut, but one on a 45 degree angle yields a nice oval with more space to grab the upward facing pins of the frog.
Each branch was placed at an angle of about 30 to 45 degrees off vertical – and the second branch was roughly parallel to the first. Next I placed a stem of delphinium going off in the opposite direction. I stripped off the lower blossoms from the stem, which served to establish a strong visual line. Later I used the blossoms I had taken off to help hide the frog in the bowl.
Simplicity is an important component of Ikebana, so I added just one bright red tulip. The tulip wove its way through the two bare sticks, adding a punch of color. I left the leaves on because they added a simple splash of green. Joanne removed a bit of fern frond that came free with the flowers and used it in the base of the arrangement to help cover the frog.
Getting flowers and sticks to stay in place in an arrangement can be difficult. Joanne taught me some nifty tricks that I will use in arrangements – whether Ikebana or conventional.
The first trick is how to attach a narrow stem to a frog. It’s impossible to do if the stem is smaller than the needle, or nearly so, which is often the case. Joanne showed me how to use a one-inch piece of stem from a tulip or daffodil (or other fat, juicy stem) to create a sleeve that can hold a thin stem inside it. She just poked a tooth pick into the tulip stem, making a small hole that allowed her to insert the thin stem of a single delphinium blossom inside the tulip stem. The tulip stem, along with the blossom, was easily attached to the frog.
Using a small section of a tulip stem as a sleeve for a flower stem too small to pn to a frog
One arrangement we created was in a tall narrow ceramic vase which precluded using a frog in the bottom to hold stems in place. When Joanne wanted to keep 2 sticks together in that arrangement, she used a narrow Velcro strip as a fastener. She tied the sticks together down low, so that the ceramic vase hid the Velcro but the sticks stayed close together.
Joanne uses many different kinds of flowers in her arrangements, but only a few at a time. Some flowers that work well in Ikebana include Siberian iris, alstroemeria, tulips, Irish bells, forsythia, goose-necked loosestrife and chrysanthemums. I prefer to work with flowers like lisianthus or chrysanthemums that will last a week or more in an arrangement, but also appreciate iris and tulips that might only last a few days. Tulips, by the way, will move in an arrangement, bending or twisting their stems – sometimes in opposition to the laws of gravity.
Trying to define Ikebana is, for me, a bit like trying to define love, a fabulous meal or a great bottle of wine. You can describe the ingredients, but there has to be a chemistry that makes it work. As I see it, simplicity and elegance are keys to Ikebana. A lack of clutter is important. Joanne made one arrangement using 2 tulips and a stem of loosestrife in an urn-shaped blue vase with a narrow neck. It could be considered Ikebana, or just a simple conventional flower arrangement.
On another note, go outside today and notice where the snow has melted off the ground first near your house. That is where you should plan on planting early-blooming spring bulbs next fall. Take a photo or place a plastic marker to remind yourself next fall. We all need flowers as soon as we can get them.
Henry’s book, The New Hampshire Gardener’s Companion is just out in a second edition with 2 new chapters and updated material, including pests and diseases common in New England.
Starting Seeds Indoors
Posted on Wednesday, April 1, 2015 · Leave a Comment
After arguably the coldest, snowiest winter on record, I am ready for spring. Okay, maybe the winter of 1934 was colder. So what? I still have snow, and my woodpile is pathetic. I am picking up sticks and burning soggy remnants of previous woodpiles. To keep my spirits up on raw, gray days, I plant seeds indoors.
I started back in March, planting artichokes, onions, leeks and peppers. Now I am planting the brassicas: Brussels sprouts, broccoli and kale. Those hardy souls can go out around the time of the last frost, even if the ground is still cool. My tomatoes, the queens of the garden, I will start closer to mid-April and go in the garden in June – well after the last frost – when the soil warms up to 60 or more.
One key to success with plants indoors is having enough light. A bright, sunny windowsill might be enough for the first couple of weeks in a plant’s life, but to grow good healthy tomato plants for 8 weeks requires artificial lighting.
Shop lights are relatively inexpensive: a two-tube, four-foot fluorescent fixture should cost under $20, plus the bulbs to go in them – which vary widely in price. You don’t need fancy “Gro-Lights”. Those mimic the spectrum of daylight, but for starting lettuce and tomatoes for the garden, ordinary cheap tubes work just fine. And if you can mix cool white and warm white tubes, you can have something close to daylight wave lengths.

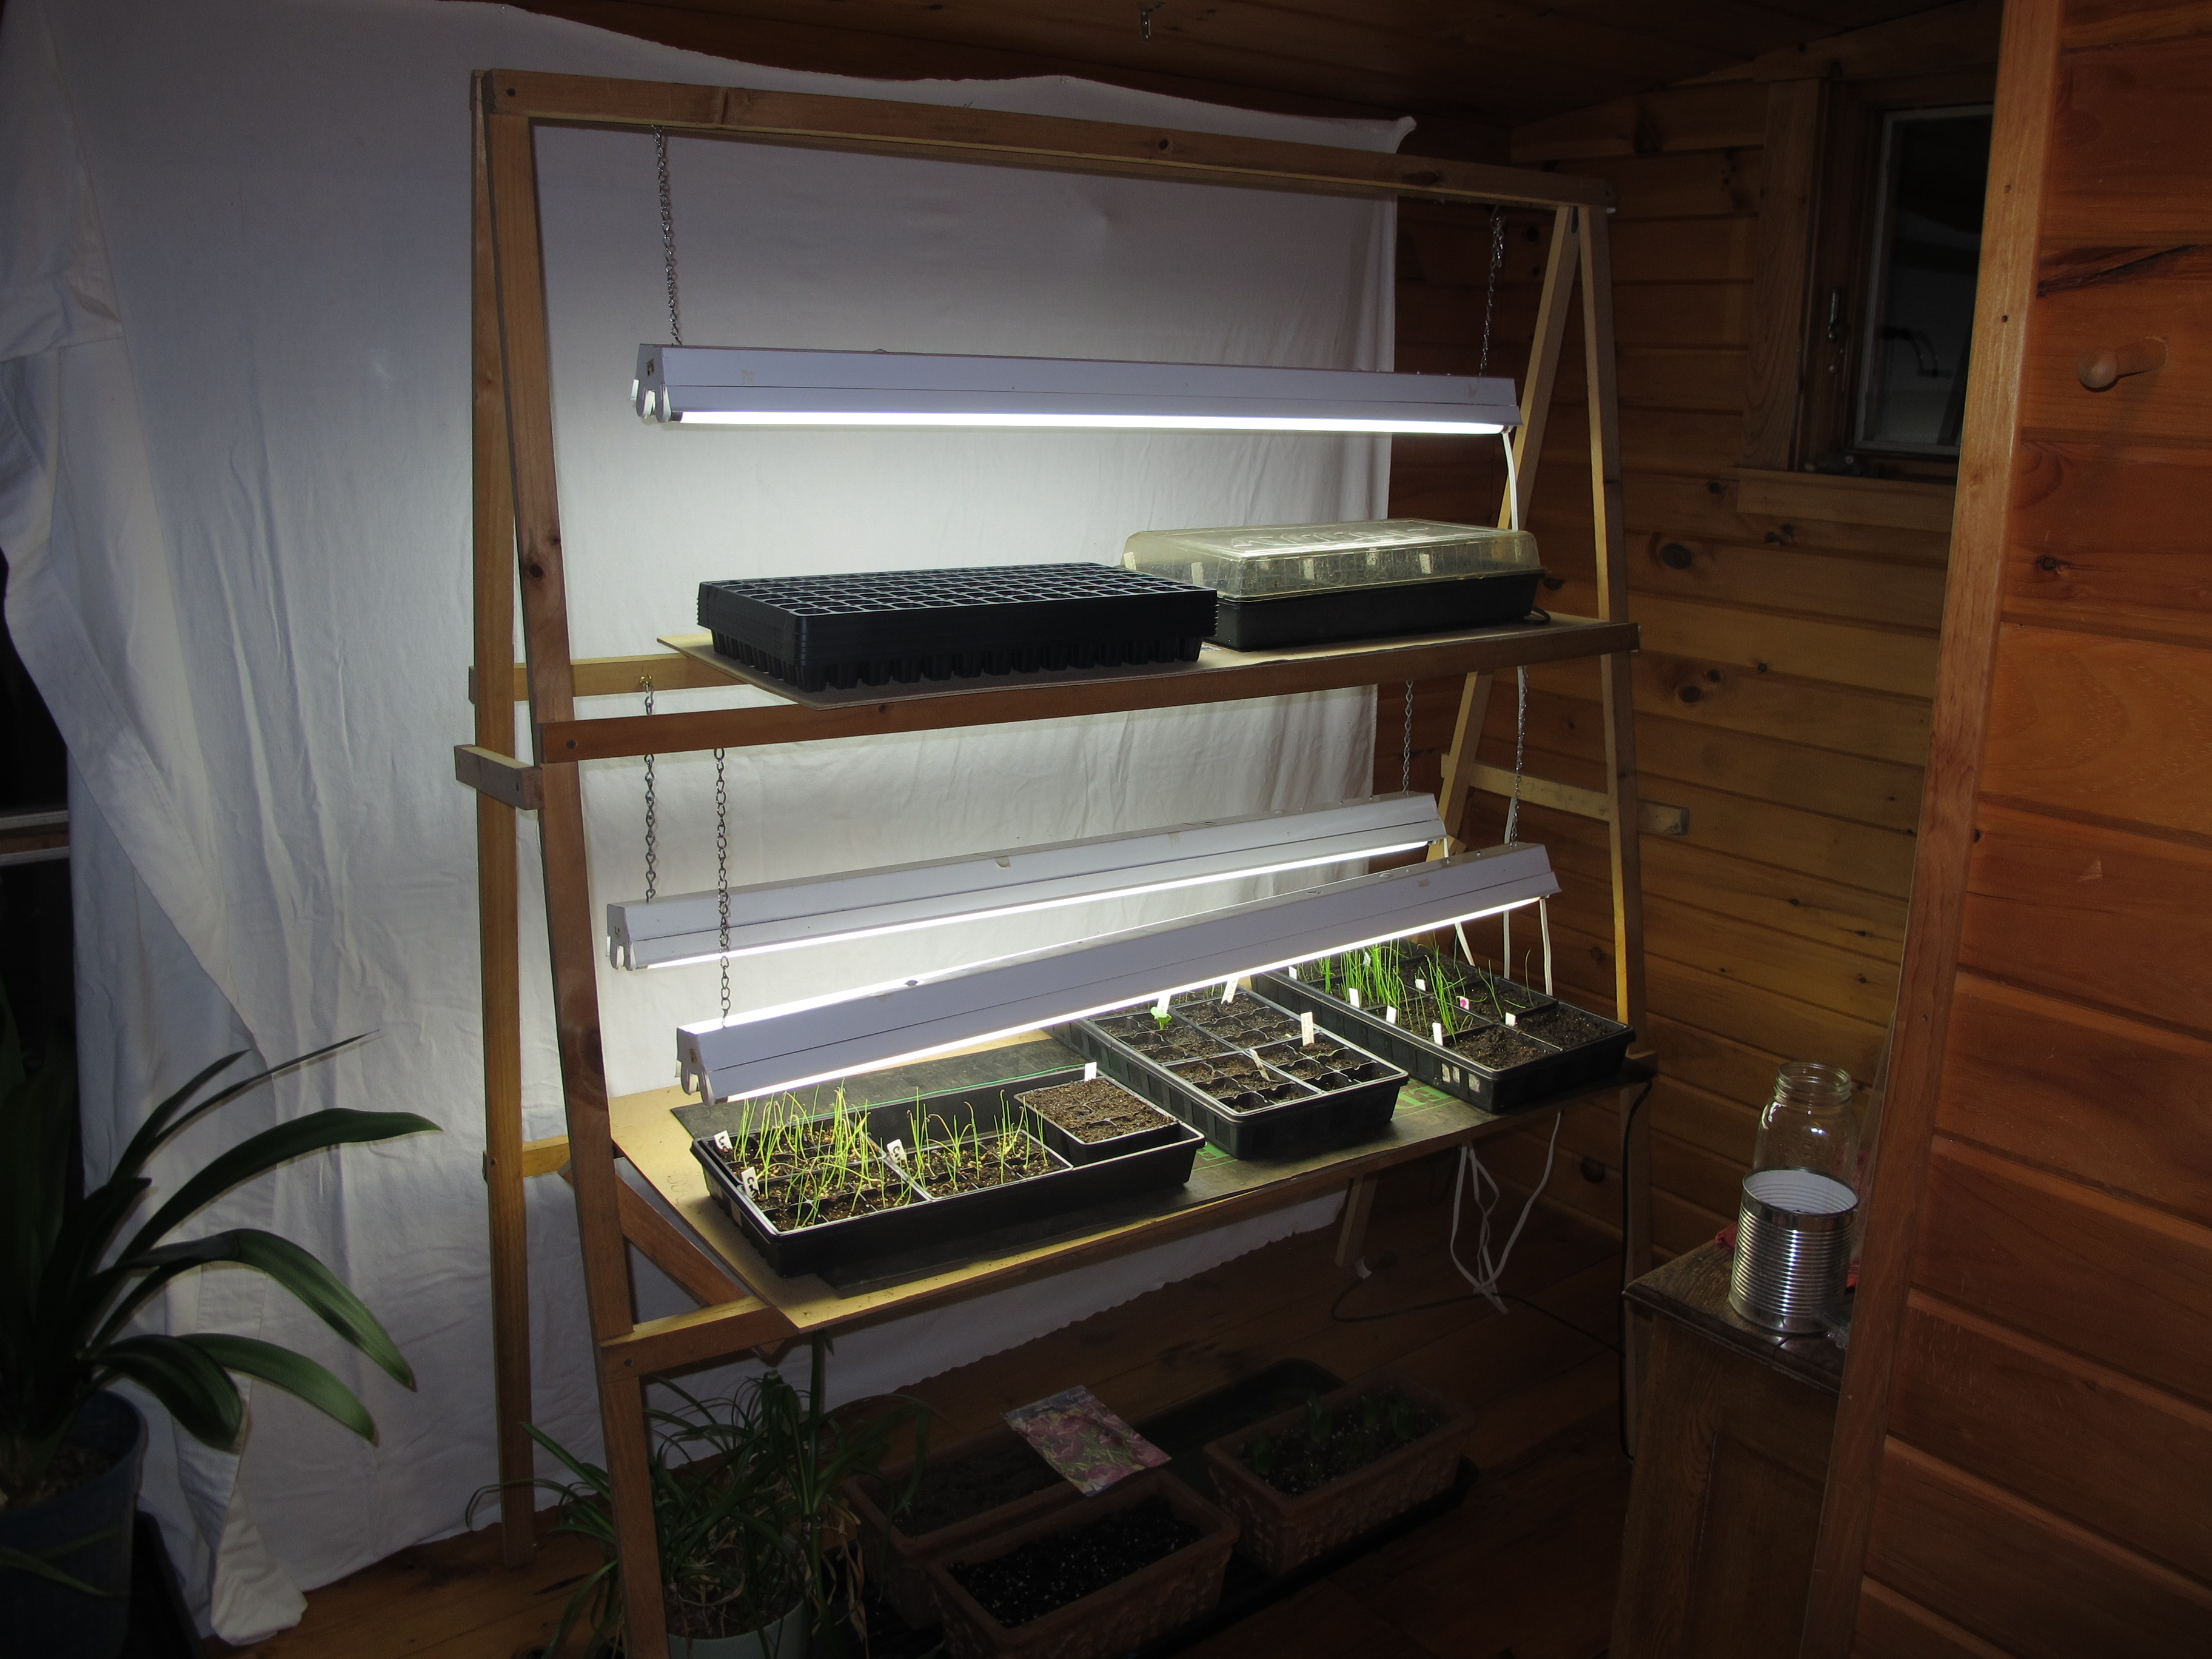
Homemade plant stand
A few years ago I built a simple wood A-frame plant stand that has worked out well for me. It uses 3 fixtures and will illuminate 6 flats of seedlings. I suggested at the time that your local lumber yard will be glad to take your parts list and cut lumber to the appropriate sizes. To get the directions, go to my website (www.Gardening-Guy.com) and type in “Plant Stand” in the search engine, and the article will come up. Or send me a self-addressed, stamped envelope and I will mail you the directions.
Another item that will help you is an electric heat mat to put under the flats while your seeds are getting ready to germinate. Most seeds have a protective mechanism to keep them from germinating too early. They need the soil to reach a certain temperature in order to know that winter has gone by. Garden centers sell 2 sizes: enough for one flat, or enough for four flats.
Last spring I started all my corn indoors in plug trays (containers with over 100 planting places per flat) and put them on a heat mat. They germinated in just 3 days – but would have taken 10 or more outdoors. Corn sometimes rots if the soil is cold and wet. Crows love to steal corn when it is first up, but I planted the seedlings when 3 inches tall and they rooted right in, so the crows didn’t steal a single one.
Moisture is another important factor when starting seeds indoors. Get your planting mix thoroughly moist before you plant. That can be done by placing a tray of planting soil in six-packs in a flat with water in it, and letting the water soak up from the bottom. Or pour water into the bag of soil mix the day before using it.
If the soil mix dries out when seeds are just starting to crack open and send out a rootlet, your seedlings will die. You can prevent that by covering the planted six packs with a plastic dome. These are clear plastic so you can see what is happening, and so that the seedlings that have germinated can get light while others are still waking up. By the time your seedlings are two inches tall, they will be crowding the dome and you should remove it.
Have you ever had bad germination rates? I have. It could be due to bad seed or old seed. In general it is best to buy new seeds every other year, even if you have plenty. Most seeds are good for 3 years or even longer – but at a lower germination rate.
But bad germination may also be due to the position of the moon and stars. I have been following a celestial calendar called “Stella Natura” (www.stellanatura.com) for a few years now, and although I can’t prove that its advice is right, I’ve had some interesting results.
I planted lettuce seeds on a “leaf” day, and then some more the following day, which was a “blackout” day (not recommended for planting anything). Even though I used the same seed package and planting mixture, I got a very low germination rate for seeds planted on a blackout day, but the others did well. The calendar has good days for planting fruits, flowers, roots and leaves. But this year I followed the calendar and still got very low germination for my artichokes, so who knows?
Remember when you calculate the cost of your tomatoes that building a plant stand for $50 and then buying lights for $100 is a multi-year investment. If you like messing around with plants in spring, starting seedlings indoors is a good idea. You can get rare and unusual seeds from catalogs that you would never find at your local farm stand. And, as one of my fridge magnets says, Gardening is Cheaper Than Therapy!
Henry Homeyer is a fruit tree pruner and gardening consultant. Contact him at henry.homeyer@comcast.net or P.O. Box 364, Cornish Flat, NH 03746.
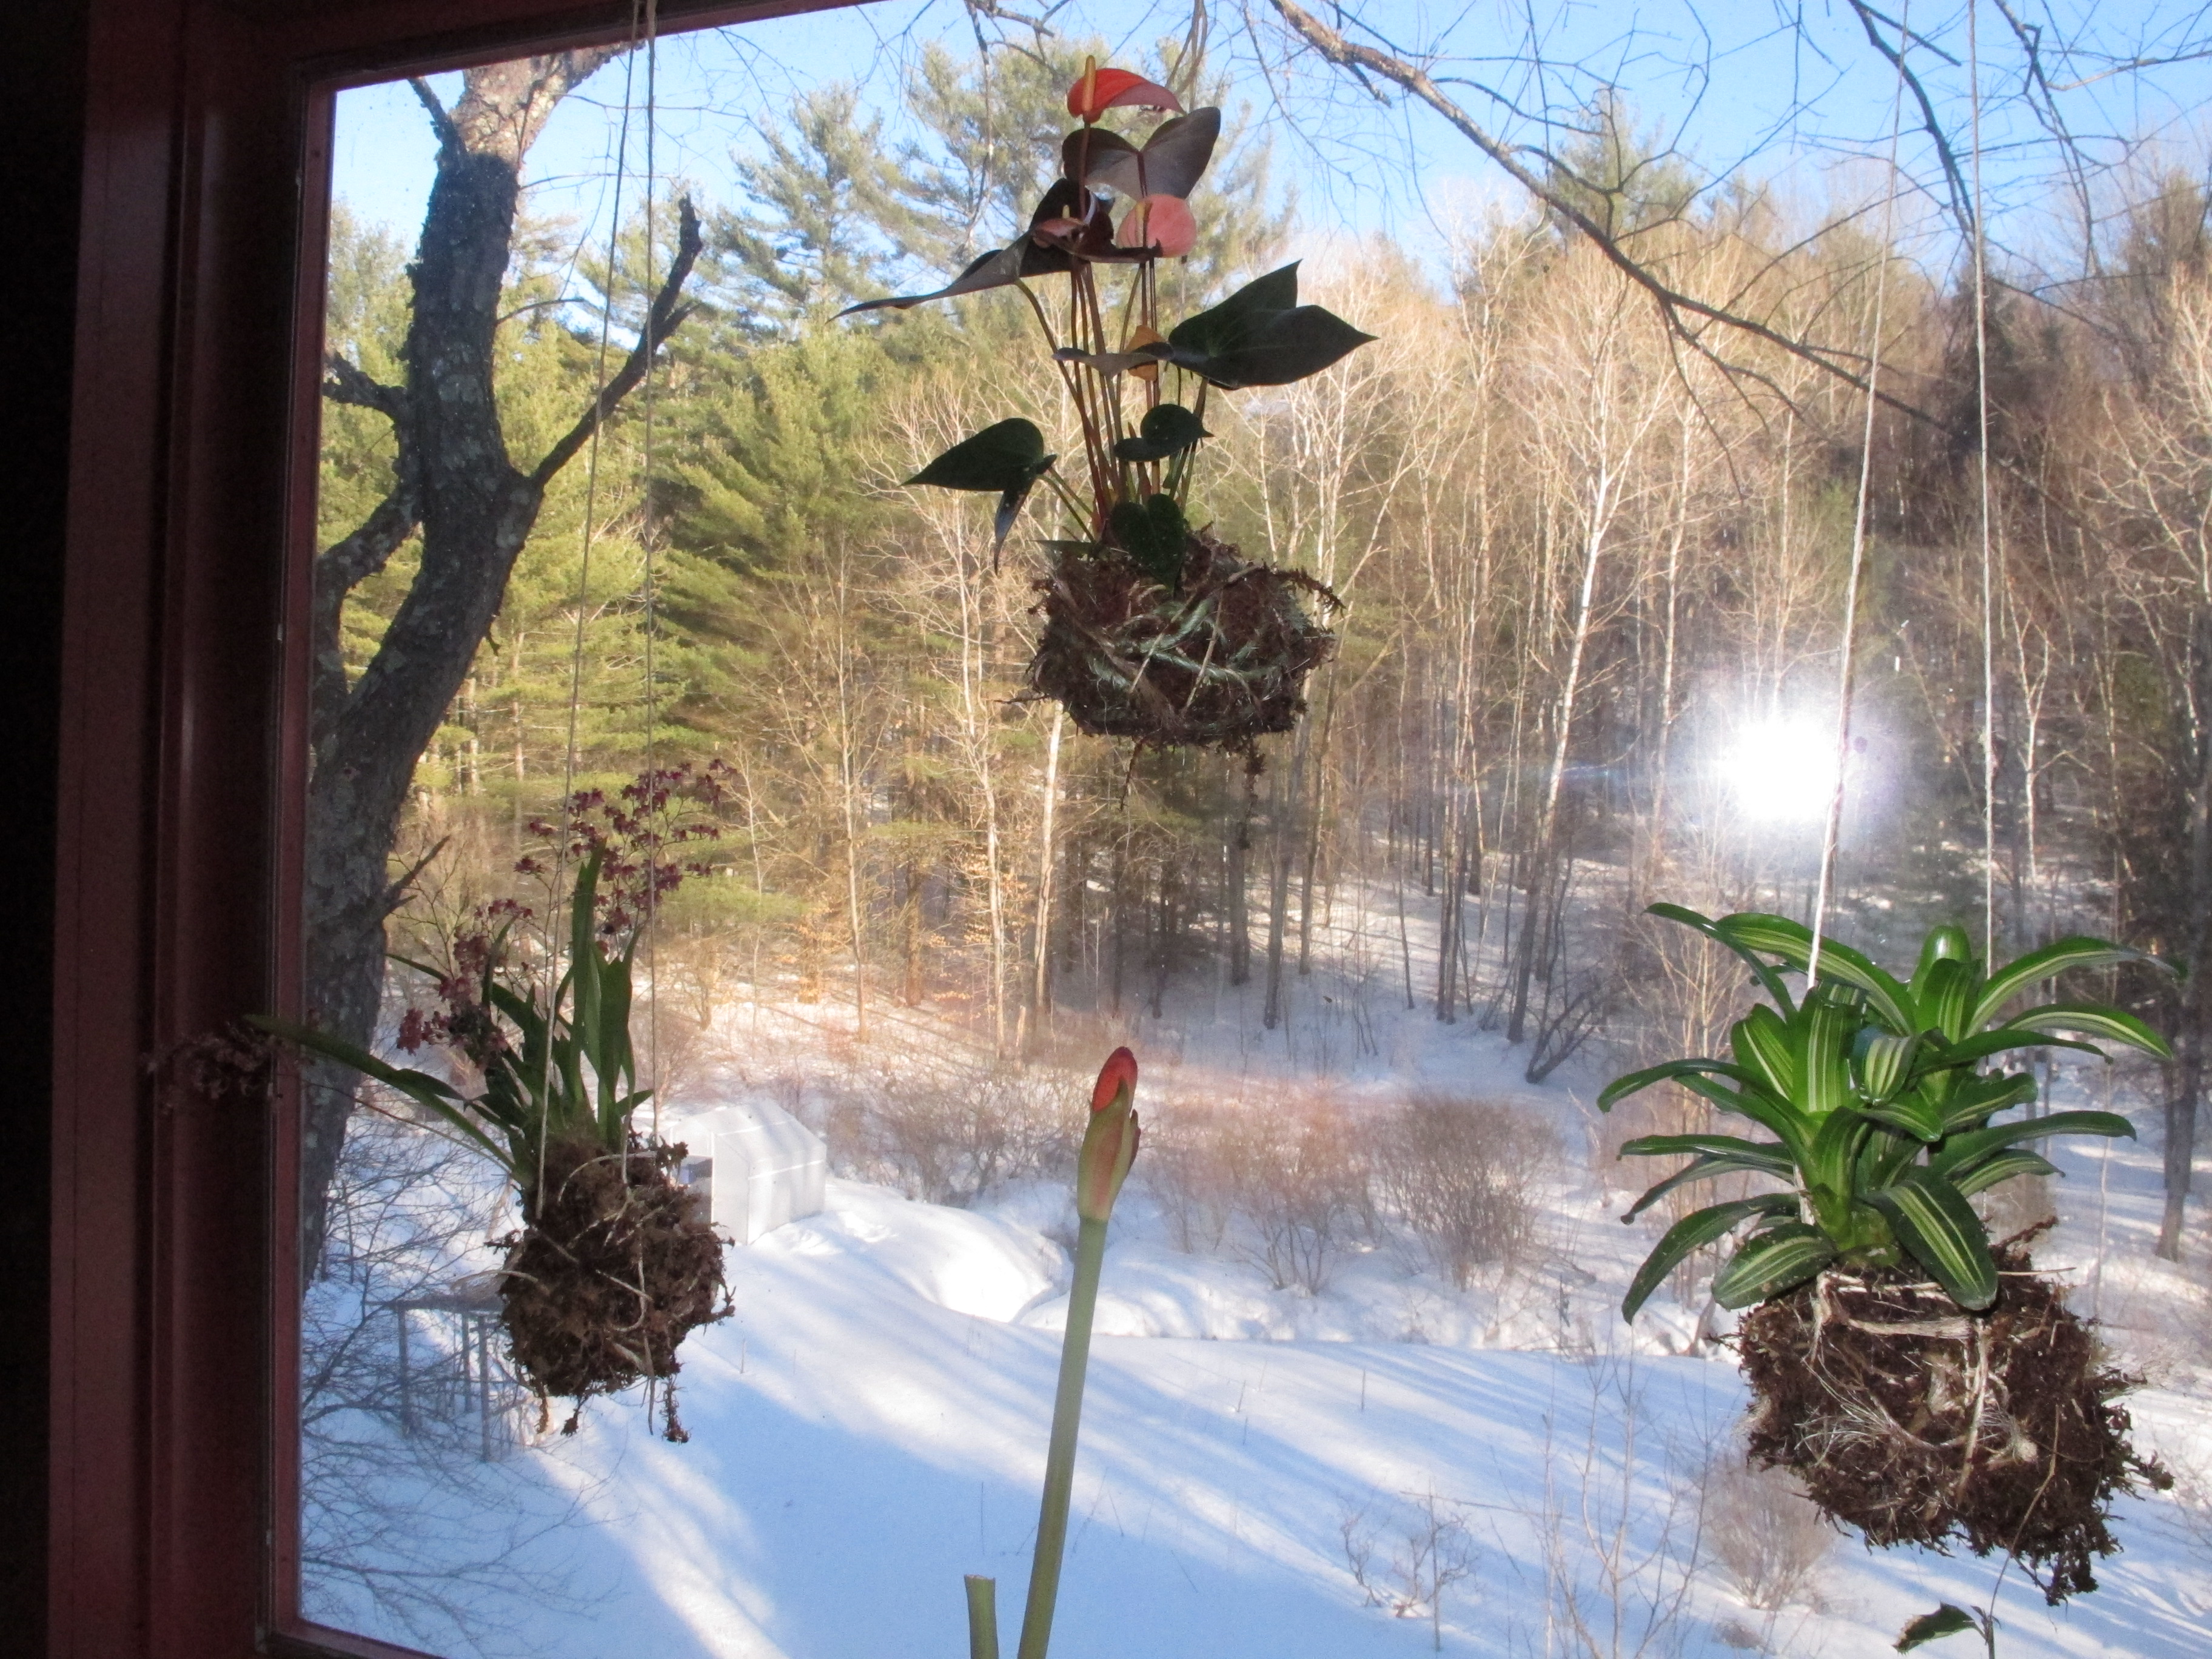
A New Way to Grow and Display Indoor Plants: Kokebana
Posted on Thursday, March 26, 2015 · Leave a Comment
This is the time of year when I am chomping at the bit, all ready to garden, but without much I can do outside. So I was delighted to visit a friend in Maine who was experimenting with a new art form/planting technique: kokebana. This is a Japanese technique for hanging plants indoors – without using pots of any sort of pot, instead wrapping them with moss and strings.

Doing some online research I found that kokebana is also called kokedama, which means ”moss ball” in Japanese. I made three plants into kokebana plants, and it was a great, messy project that made me feel like I was a kid making mud pies. Not bad for a mudseason afternoon.
Kokebana is most successful if you choose small epiphytic plants – though apparently some people even hang small trees as kokebana. Epiphytes are plants that, in their natural state, grow in trees. They do not send roots into the trees or obtain any nutrition from the trees, they just use a tree for a safe haven. Epiphytes might benefit from the remnants of a few rotting leaves or some windblown soil provide a few minerals. They get water when it rains, but generally don’t require much.
Explaining epiphytes to my grandson George, age 11, I said that they did well because they are adapted to grow where nothing else can grow. They’re like those weeds that grow in your driveway: there is no competition. They make good houseplants, too, because they generally do well with little or no direct sunshine and many can go weeks – even months – without getting watered. My kind of houseplants.
To get the materials for this project I went to Longacres Nursery Center in Lebanon, NH. They have a greenhouse packed with all kinds of tropicals, including many epiphytes. I brought a list of good plants for kokebana I’d put together after some online research. Included were Antherium, bromeliads of all sorts, and many orchids. I bought three plants and took them home to make into kokebana.
I went online to see what I could learn about kokebana, and found surprisingly little information. I watched one YouTube video (How to make a String Garden) that showed in high speed how to make a plant into a kokebana, but when I tried their technique, it didn’t work.
They placed strings in a bowl, then lined it with sphagnum moss, added a few stones as ballast, then potting soil and a plant. In fast forward, they tied all the strings around the plant and hung it up. No mess. When I took my attempt at a kokebana out of the pot, everything fell apart.
Having invested in 3 houseplants for this project, I tried another way. I cut 36-inch long pieces of garden twine and spread out 6 or 8 pieces on a table, all intersecting in the middle. Then I spread a layer of sphagnum moss over the strings, creating a disk about a foot across and three quarters of an inch deep. I had moistened the moss, but it was not drippy. I tried to keep the long fibers from separating when I pulled out a chunk from the package so that it would stay together.
Next a spread a layer of moist potting soil over the sphagnum. I loosened the roots of my plant and placed the plant on top of the potting soil. Then the tricky part: forming a ball around the root ball, and surrounding it with the strings. I tried to pull up all the strings at once and hold them with one hand while using the other to form the ball and encircle it with string. Surprisingly, I could do that. My potting soil was a bit sticky, which helped. If I did it again and had some clay, I would mix some into the potting soil.
My strings around the ball were pretty random – this was not a root ball that had evenly placed strings confining it. But the sphagnum moss acted like a screen, holding in the soil. I cut two 48-inch strings, ran them around the ball, and used them for hanging the kokebana ball in my window.
I started with the kokebana in an east-facing window, thinking that some morning light would be good. But they dried out completely in 3 days, and I was worried that I might kill them if I ignored them for a week. So I moved them to a north-facing window where they got bright indirect light, but no direct sunshine. This seems to have worked better.
Soaking the balls seems like the best way to replenish moisture. But it also means that the balls will drip after soaking. I put them in the dish drainer for an hour after soaking, but they still dripped when hung. So I have also tried using a spray bottle to give them water. It requires more frequent applications of water, but it is less messy – I found that moving the kokebana plants for soaking left little bits of sphagnum moss on the windowsill and the table near it. Spraying was more labor intensive, but a bit tidier.
Spring is technically here, as of March 20. Couldn’t prove it by me – there is still snow when I look out the window. But at least I have 3 handsome plants hanging in a window and two of them are in bloom!
Henry Homeyer lives and gardens in Cornish Flat, NH. He is the author of 4 gardening books and one children’s chapter book. His website is www.Gardening-Guy.com.


 Click Here to buy from Cobrahead