Pruning Apple Trees
Posted on Wednesday, March 18, 2015 · Leave a Comment
Often the snow on the hilly south side of my house has melted by early March, allowing snowdrops to push their little noses out of the ground and permitting me to pick buds that open up indoors. Most years by mid-March the snow has melted enough to allow me to get out and move around my apple trees to prune them. Not this year. Snow is still knee-deep here and not disappearing very quickly. It will be April before I get to do much pruning.
The first step in pruning is to really take a good long look at the tree. Are there dead branches? They must go. Are there branches rubbing? You must remove one or the other. What about what I call “invaders”? Invaders are branches that “see” an empty spot and grow willy-nilly through the center of the tree to grab the sunshine. Off with it! Is the interior crowded? If so, it needs work.
Apple fruit spurs
Where you make your pruning cuts is important for tree health. Don’t cut branches flush to the trunk or a bigger branch. Don’t cut into the swollen area at the base of a branch, an area called the branch collar. You can often see a distinct edge to the collar where the wrinkles in the bark in the branch collar stop and smooth bark of the branch begin. But don’t cut off branches too far from the trunk, either. That creates stubs that will die and slowly rot away – leaving an open wound where disease can enter.
In general, it is better to take a few bigger branches than lots of little ones. You can safely remove 20 to 25 percent of a tree’s leaves when pruning, though a well-tended tree won’t even need that much. The amount of wood is less important than the number of leaves, though that is a bit difficult to determine in winter. Pruning an old, neglected apple tree might be done with just a few cuts to remove big branches that are competing with the tree’s central leader or cluttering up the interior of the tree. Then in subsequent years you might work on smaller branches.
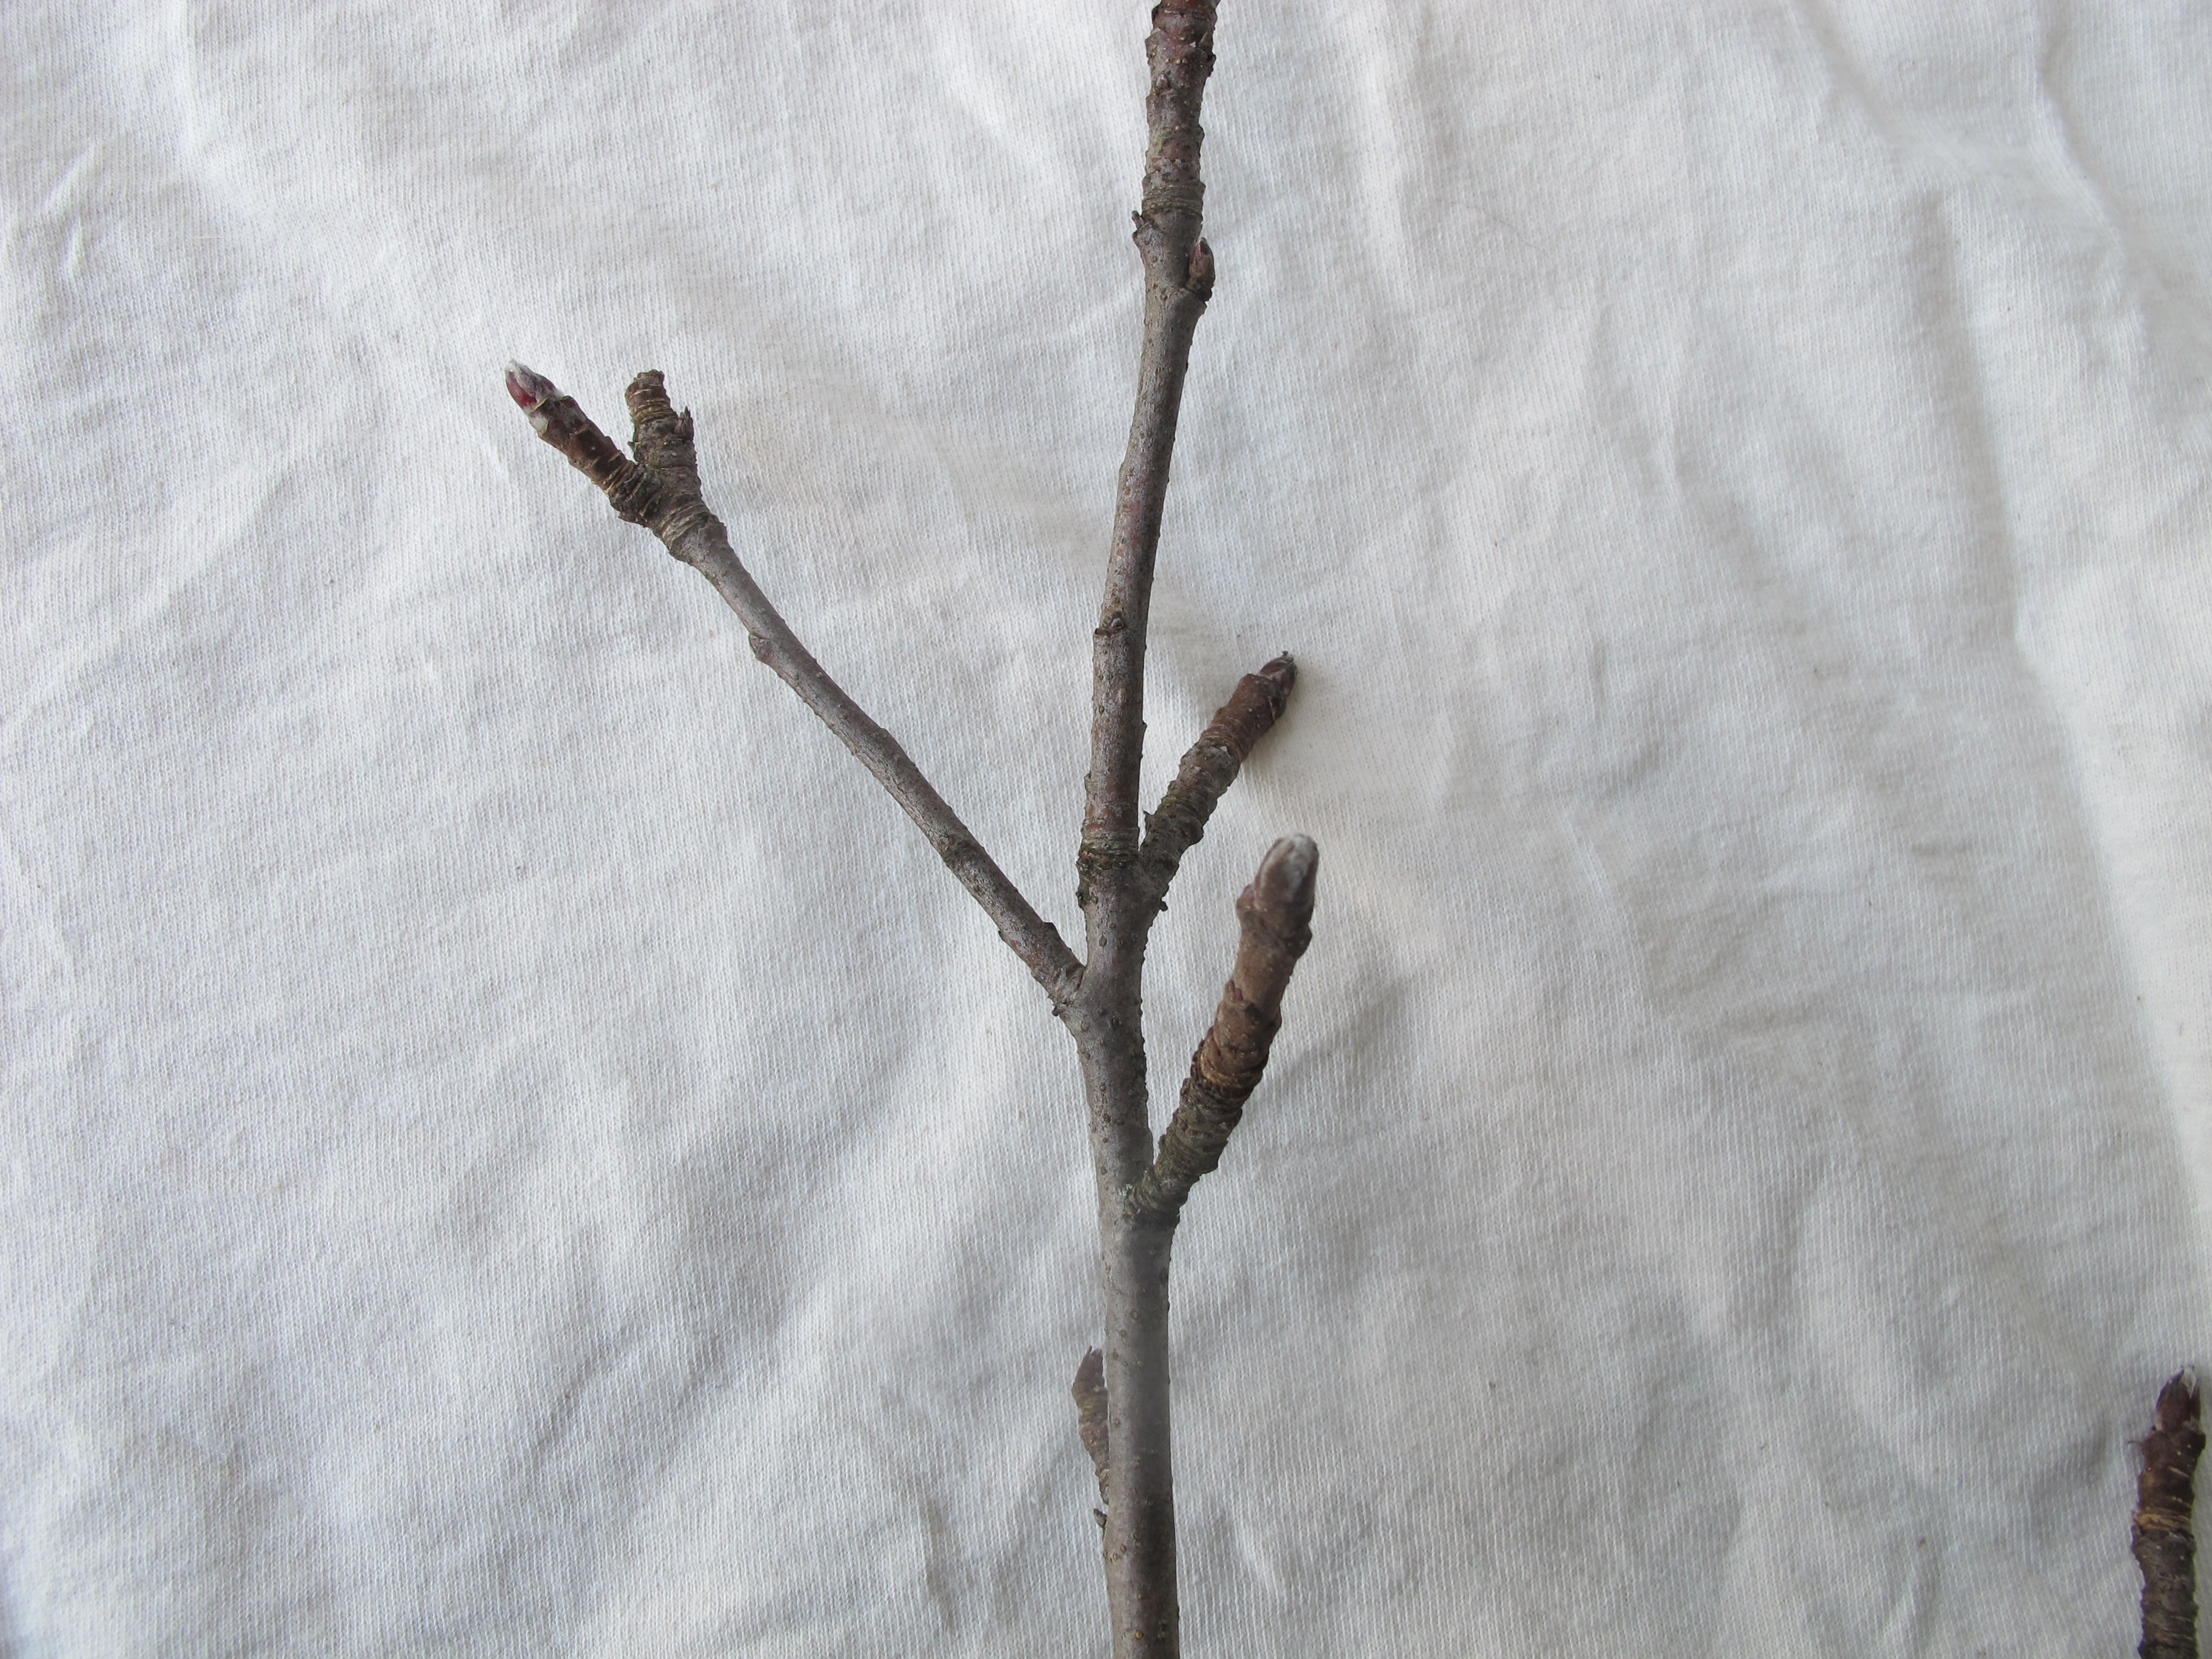
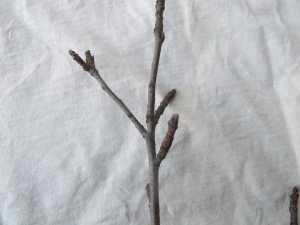
If you want blossoms and fruit, you can see if a branch will produce apples by looking for fruit spurs. Fruit spurs are gnarly little branches – usually just 3 or 4 inches long – that grow off bigger branches, branches that are at least two or three years old. At the tip of each spur is a cluster of buds that will produce leaves and flowers. If you are deciding whether to remove a branch, look for fruit spurs before cutting. Fruit spurs will not produce fruit in their first year.
Apples (and crabapples) tend to send up lots of waterspouts. These start as pencil-thick twigs shooting straight up from bigger branches. They are often a stress response: in summer they grow to produce leaves in the cool interior of a tree when the outer leaves have stopped producing food for the tree because it’s too hot. So even if you cut them out every year, more will come –often in the same place. Same varieties of trees send out a lot of water sprouts, others just a few. If you leave them in place, they will eventually become full sized nuisance branches cluttering up your tree.
A few words about bad crotches. Fruit bearing branches should be at an angle of 45 to 60 degree angle from the main trunk. A bad crotch angle (30 degrees or less) exist when there is a very tight angle between two stems. If the stems develop heavy fruit loads or are subject to heavy ice and snow loads, the weak crotch may break open, damaging the tree.
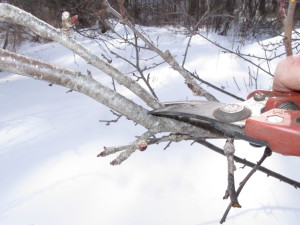
Fixing a bad crotch
Breaking of bad crotches occurs because as the branches grow, they grow together, enclosing bark – and creating a week spot. Prune one of the two branches to correct the problem. Do this when a tree is young if you can. Some trees are more prone to bad crotches than others. Maples, for example, often are full of bad crotch angles (but don’t prune them in spring as they will bleed excessively).
Apples produce the most fruit on branches that are more horizontal than vertical. Sometimes I weight down young branches to make them more horizontal. A milk jug with some water in it will do the job – and you can increase the weight to just the right amount by tying on the jug and adding water. Do that in mid-April and remove it on the Fourth of July.
For me, pruning is not just about getting the most flowers or fruit from a tree, it’s about creating a beautiful form. In winter, especially, I enjoy looking at a well-pruned tree as sculpture. If a tree has big branches hacked off to create a tree with a short profile – as some are in commercial orchards – it is not pleasing to the eye. A tree that tapers toward the top and has nicely spaced branches looks good – and produces a good fruit load, too. Experts say that an apple tree should generally have a central leader or stem that dominates the tree and grows up the middle of it.
Pruning apple trees is one of my seasonal joys. I love sculpting the trees, making them lovely to the eye, healthier and more productive, too. A well pruned apple tree should have enough space between branches that a robin can fly through it – without getting hurt. Un-pruned tree? It’s a messy as an unmade bed. And climbing up an old apple on a blue-sky day to prune it makes me feel like a boy again. I can’t wait.
Henry Homeyer is a professional pruner and the author of 4 gardening books. Reach him at P.O. Box 364, Cornish Flat, NH 03746 or henry.homeyer@comcast.net. His website is www.Gardening-Guy.com.
Spring Activities Indoors
Posted on Wednesday, March 11, 2015 · Leave a Comment
I am NOT going to kill my rosemary plant this March. Really. It is so easy to do, and most of us who grow rosemary have done it at least once. We get a perfectly nice rosemary plant through the winter, and then in March we kill it. Why? Because the sun is stronger, hotter, and because our plants are waking up after a winter’s semi-dormancy and starting to grow. All of that means our plants need more water.
I called Sarah Milek of Cider Hill Gardens in Windsor, Vermont, who is an expert grower of herbs (and all plants, really). She confirmed that rosemary needs more water now. And she said March is also a good time to re-pot rosemary. Your rosemary wants to put on new growth now, both roots and leaves. But if the roots are tangled and snarled, or if the pot is full of roots, the plant really cannot grow well.
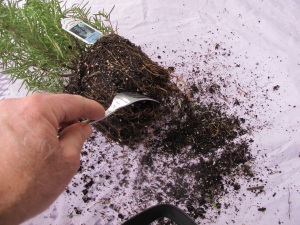
Teasing out rosemary roots with a fork
I took my rosemary plant, which is growing in a 5 inch diameter pot, and knocked it out of the pot: I turned it upside down over the kitchen sink, and gave it a sharp rap on the bottom of the pot with the heel of my hand. Then, with a gentle tug, I slid it out of the pot. I was looking for dead, brown roots – signs of overwatering and decay that need to be removed – but saw none. The roots were light-colored and in good health. They did not break when tugged on.
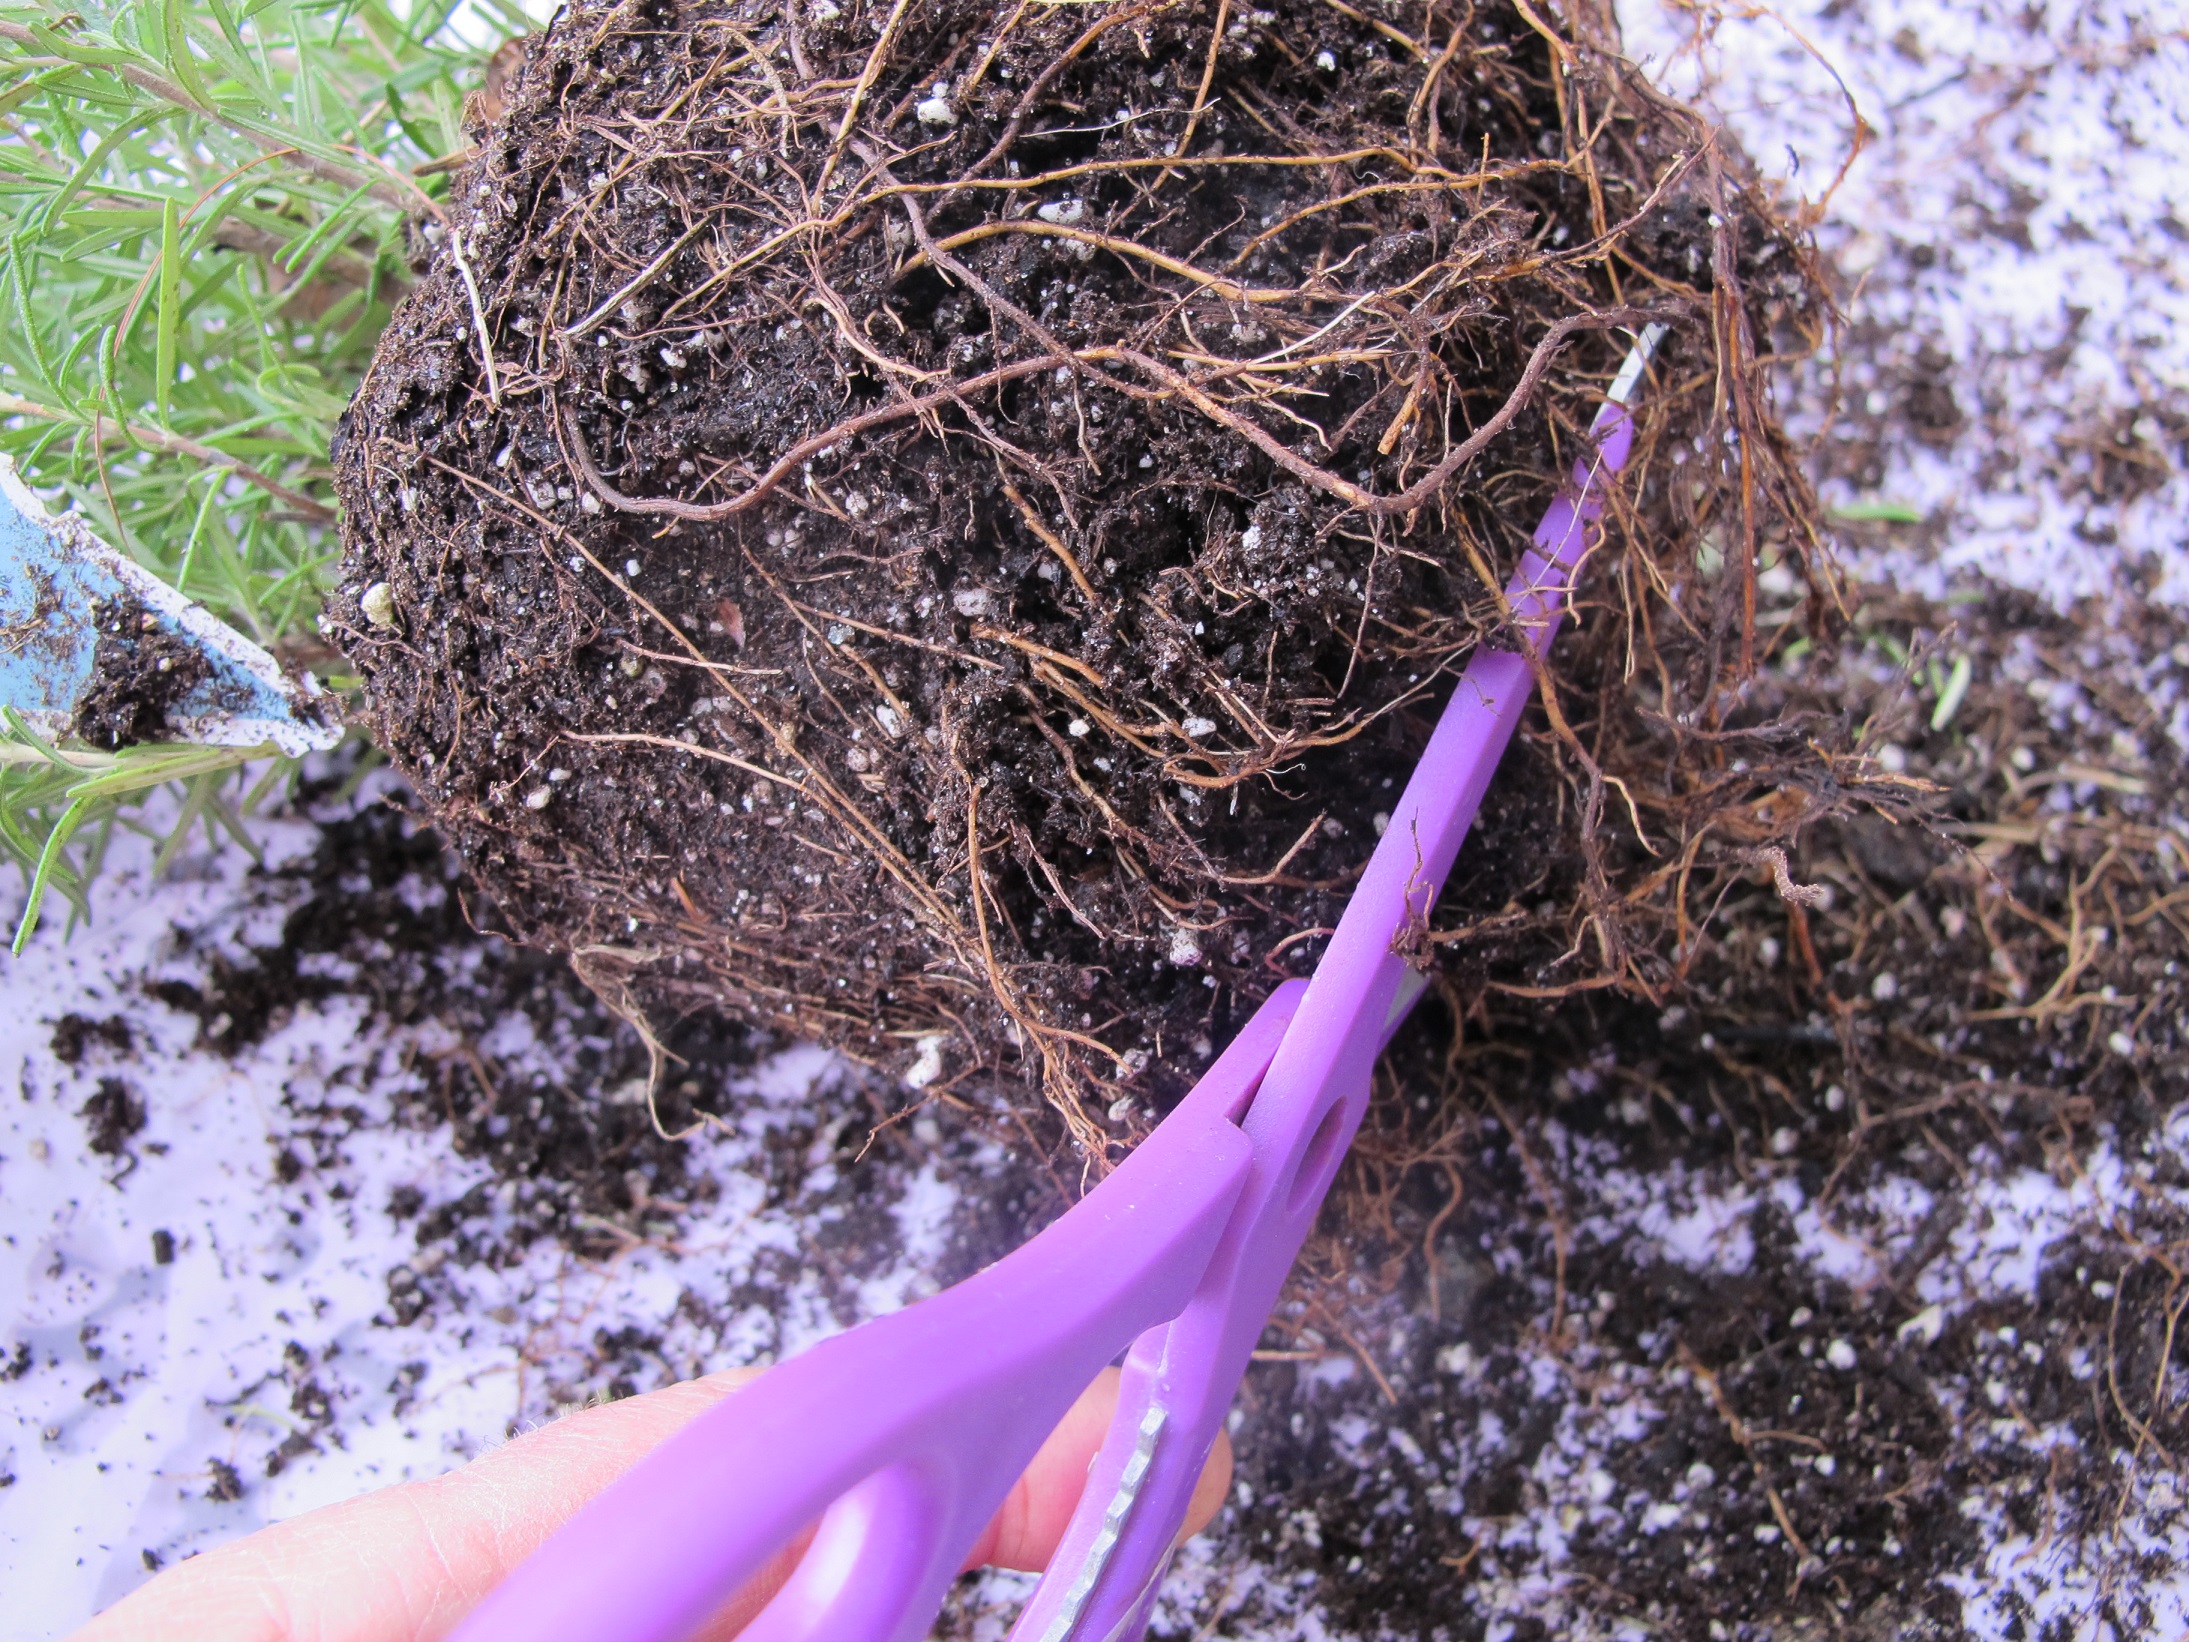
Rather than using a bigger pot, I decided to cut back the roots a bit to stimulate new growth, and to allow me to add fresh potting mix to the pot. Sarah Milek suggests using a kitchen fork to open up the roots and loosen the potting soil attached to the roots. Then it’s easy to cut back the roots with scissors. But, Sarah warned, don’t be overly drastic. A gentle haircut is all that is needed.
I added three quarters of an inch of fresh potting soil at the bottom of the pot and placed my rosemary in it. Then I poured in fresh potting soil around the edges and tamped it down.

Cutting back rosemary roots
Sarah reminded me that rosemary likes to grow with some humidity in the air – which is tough for a household like mine that uses a woodstove every day. She suggested I place some gravel in a dish or pan, and then water the stones before placing the potted rosemary on top of the stones. I’ve also heard that spraying the leaves with a fine mist of water makes rosemary very happy – though my tough love approach to houseplants generally precludes that.
Temperature is important for success with rosemary, and houseplants in general. Most plants do not want a very warm spot, so keep them away from radiators and wood stoves. In this season a south or west-facing window can get pretty hot in the afternoon, so an eastern exposure is better.
I asked Sarah Milek what other houseplants needed attention at this time of year. She mentioned geraniums (Pelergonium spp.). Most of us grow geraniums for their big red, pink or white blossoms that shine on seemingly forever. But in the course of a winter indoors, many have gotten leggy – with long stems, that is. The solution? Cut them back now. I generally cut back to a node, and then take the cutting and root it in water.
Sarah says rooting geraniums is better done in moist perlite. Perlite, the fluffy white stuff in potting mix, can be purchased in bags at the garden center. It is not Styrofoam, which it resembles, but a heat-expanded mineral made like popcorn in an industrial oven at very high temperatures. It holds moisture well but also releases it to plants when needed. It has a neutral pH. Sarah says you should tent your geranium cuttings – put them in a clear plastic bag so that they do not lose moisture.
Perlite is very light weight, so larger cuttings can easily tip over if using a lightweight plastic pot. A heavier ceramic pot would prevent that, or you could place stones or sand in the bottom of a plastic pot. Perlite provides no nutrition so once they are rooted, you need to give them a light dose of fertilizer weekly. Fish or seaweed fertilizer diluted to one quarter the regular dose is fine.
Other indoor activities for the cabin-fever-feeling gardener include starting some vegetables of flowers from seed. I have started onions, leeks and artichokes – all plants that need a long time from seeding to maturity. In mid-March I will plant hot pepper seeds, and then tomatoes, broccoli, kale and other veggies in early to mid-April.
If you have never grown artichokes, you might want to. There are several kinds of seeds available, including Green Globe, Purple of Romagna, Opera and ‘Imperial Star’. In past years when growing Green Globe artichokes, I followed the dictum that you must move them into a 50 degree growing space for 2 weeks at the 3 or 4 leaf stage to fool them into thinking they had lived through a winter. That meant setting up lights in my cold basement. But Imperial Star and Opera (a purple one I have not yet tried) are both grown for annual production, and do not need that cold period. Much easier. My artichoke plants produce 3-7 small chokes each year, but are also very pretty plants suitable for a flower garden.
Spring is just around the corner – and my rosemary plant knows it. It’ll be happier since this year I’m being attentive to its needs.
Henry is a UNH Master Gardener and the author of 4 gardening books. His book The New Hampshire Gardener’s Companion will be out in an expanded second edition later this month. His website is www.Gardening-Guy.com.
The Tao of Vegetable Gardening
Posted on Wednesday, March 4, 2015 · Leave a Comment
Winter trudges along, bringing us snow and sub-zero temperatures, seemingly ignoring the calendar that tells us Spring is officially less than a month away. In between shoveling and carrying firewood I’ve spent considerable time reading this winter. My favorite gardening book this winter is The Tao of Vegetable Gardening: Cultivating Tomatoes, Greens, Peas, Beans, Squash, Joy and Serenity by Carol Deppe (Chelsea Green, $24.95 in paper).
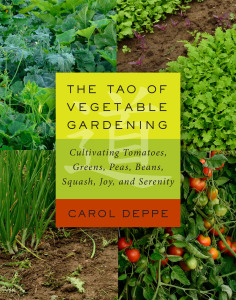
Tao Vegetable Cover
It is rare that a good technical book also deals with joy and serenity, which is part of what distinguishes this book from others. I called Carol Deppe at her home in Oregon and she is as enthusiastic in life as she is in her book. She wrote a chapter in her book called, simply, “Joy.” We are, she asserts, originally hunters and gatherers. Many of us are wired to enjoy gardening – as a way to gather. Recognizing what we love to do, and doing it, makes for a happy person.
The book is full of useful information. When considering a new book I first skim a chapter that is about something I know well. So, for example, if I can learn about tomatoes, I want the book. I did. Carol Deppe has a PhD in biology and has been breeding plants and doing garden research for decades.
So what did I learn about tomatoes? First, that I may be fertilizing them too much, producing big plants but perhaps fewer tomatoes overall than I might. I give each plant a little Pro-Gro (a slow release organic fertilizer) at planting time even though my soil is rich and dark. This year I will plant half with, and half without the fertilizer. And I will keep records.
Carol maintains that irregular watering not only can cause cracking of fruit (which I knew), but that it can also affect flavor, which I did not know. She recommends mulching as a way to keep roots consistently moist, then watering before the soil is dead dry. I mulch, but rarely water – though my soil only dries out in times of drought.
Another factor affecting flavor is temperature. Tomatoes, her book says, taste best if picked in the late afternoon on a sunny day. Cold nights and cool mornings do not help tomato flavor. She often picks 2 to 4 days before full ripeness, and finishes them off indoors where it is consistently warm. Many of the best tasting heirlooms have unripe shoulders even when the rest of the tomato is dead ripe, she wrote, and should be eaten before the shoulders ripen.
She is more attentive to crop rotation than I am. In a small garden there is little space to rotate crops on a 3 year cycle (which she does) – especially since much of what I grow is in the same family: tomatoes, potatoes, peppers (and eggplant, though I don’t grow it). Those plants should not overlap, she says, or be planted in ground that had one of them in the past 2 years.
From the book I learned of some seed companies I haven’t used before and tomato varieties that sound great. From Nichols Garden Nursery (www.nicholsgardennursery.com) I have ordered tomatoes that Carol likes including ‘Legend’, an early tomato (68 days) that produces one-pound tomatoes and is parthenocarpic. That means it can produce fruits without pollination, doing so in cold weather that is not conducive to releasing pollen. She says it is highly tolerant of two late blight strains, too. I never knew there are different strains of the blight.
Nichols Nursery also sells ‘Pruden’s Purple’, ‘Black Krim’ and ‘Geranium Kiss’, others that Carol recommends. ‘Prudens Purple’ is an heirloom that Carol says has flavor as good as ‘Brandywine’, but 2 to 3 weeks earlier. I will try it. ‘Black Krim’, the book explains, reaches full flavor when still half green and firm. If picked when it looks fully ripe, it is overripe, even rotten. I made that mistake once, and never grew it again. ‘Geranium Kiss’, bred by Alan Kapuler (www.peaceseeds.com), is an open pollinated determinate tomato that is very resistant to late blight and produces big clusters of 1 to 2 ounce fruits.
What else did I learn from this book? I learned about ‘Green Wave’ mustard. Carol Deppe broadcasts seed on a weed-free garden bed and then bounces a lawn rake over the soil to disturb the soil and cover the seed. She lets this cooking green grow until it is about 10 inches tall – in about 8 weeks. Then she cuts the top 7 inches off and cooks it up for dinner, or blanches and freezes it. Green Wave is blazingly hot if eaten raw (spicy enough to deter deer), but mild and flavorful after cooking. Seeds are available from her website, www.caroldeppe.com, or from Johnny’s Selected Seeds (www.johnnyseeds.com).
Unlike spinach, Green Wave has real substance after cooking, like kale, so it is good for freezing. And the leaves and stems both are edible when grown in a dense planting (which also shades out weeds). If grown as well spaced out individual plants, the stems are tough and not edible.
The Tao of Vegetable Gardening has a chapter on cooking greens that can be grown like Green Wave, a technique she calls “the Eat-All Garden Greens Method”. The fact that the greens are fast growing means you can harvest 2 crops on the same spot, even here in frigid New England. Carol suggested to me that I plant ‘Green Wave’ after the summer solstice to avoid bolting.
So if you’re still housebound and bored, get a copy of this book and gather some new ideas. It’s good reading in addition to being technically useful. And visit Carol’s website for other seeds, books, articles and further information.
Henry is the author of 4 gardening books, and lectures on gardening. His website is www.Gardening-Guy.com.
Growing Mushrooms
Posted on Wednesday, February 25, 2015 · Leave a Comment
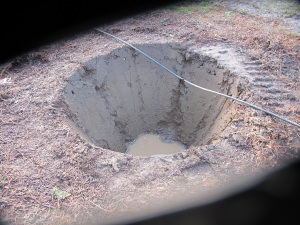
I’ve been growing mushrooms outdoors on logs for about 20 years. I’ve done this by inoculating logs with little wooden plugs called plug spawn that I purchased and inserted into holes I drilled in the logs. Then I let them develop in the shade of a hemlock tree where they generally produce mushrooms in a year or less. Pretty easy. The best time to cut logs for growing mushrooms is late winter or early spring when the sap begins to run, so I am thinking about getting some logs soon and starting another batch. After all, there isn’t much else I can do in the garden for months.
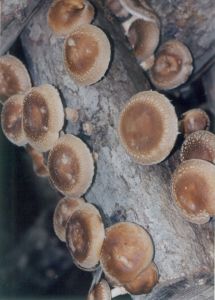
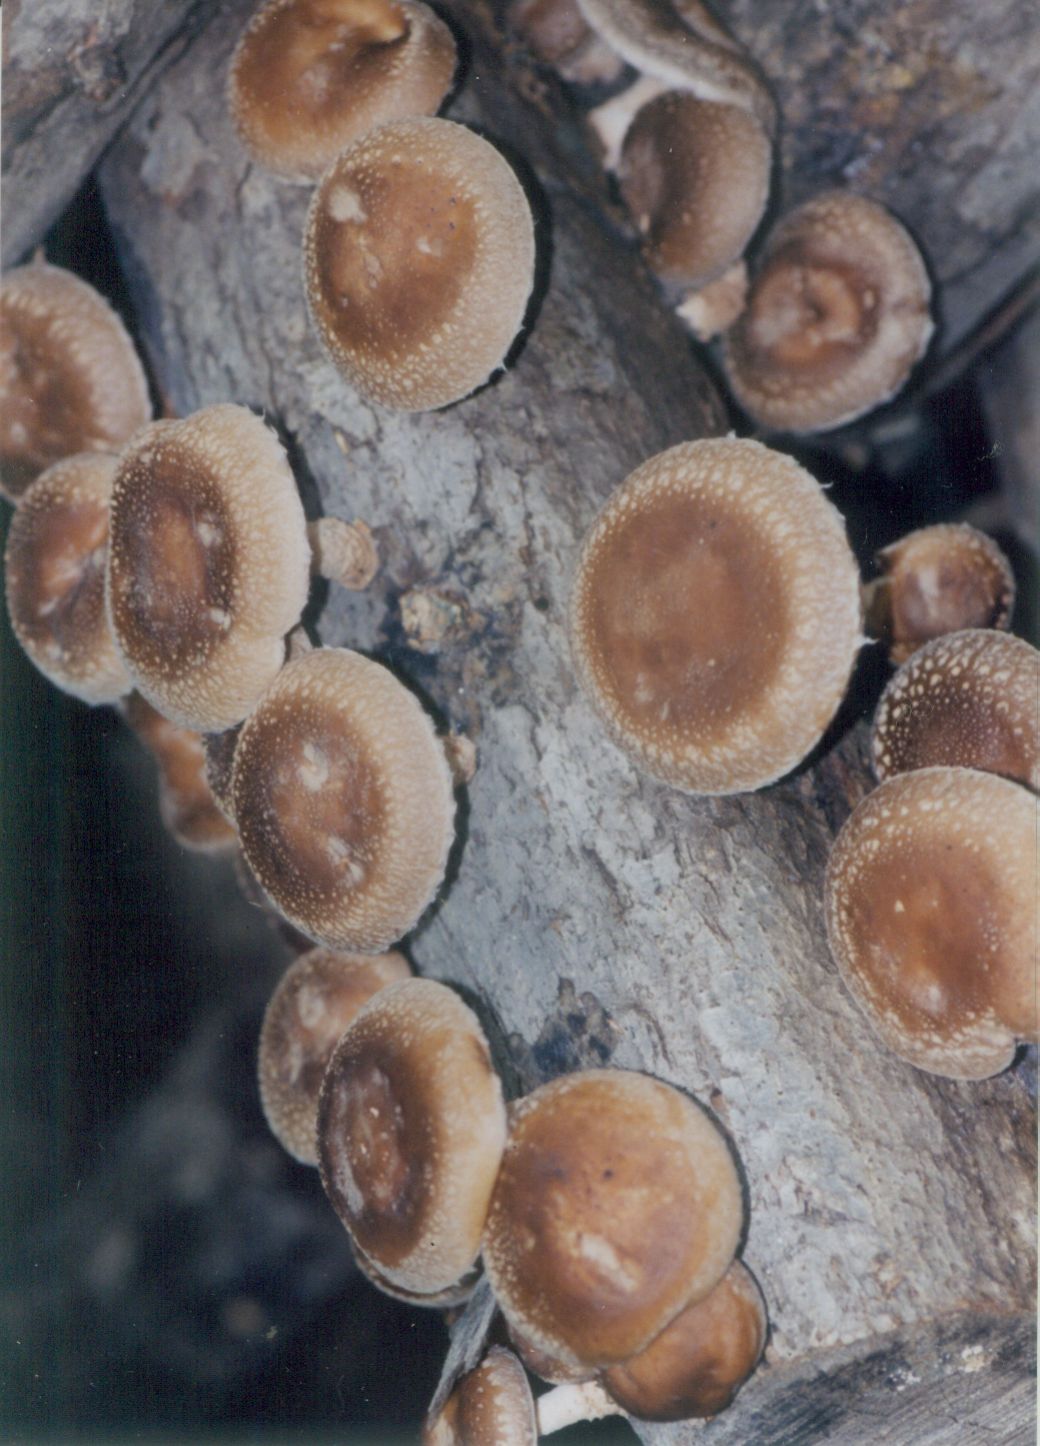
Shiitakes growing in a log in summer
The first step in the process of growing mushroom is finding logs that are appropriate for the mushrooms you want to grow. I have used oak and poplar for growing shiitake mushrooms, but according to Paul Stamets’ book, Mycelium Running: How Mushrooms Can Help Save the World, almost any deciduous tree species is fine for shiitakes, the mushrooms I have grown in the past. Pine, hemlock and other conifers are not recommended.
The logs you plan to use to raise shiitakes or other mushrooms need to be fresh. If you were to go in the woods and find a downed tree, it probably would already have fungi growing in the wood (mushrooms are the fruiting bodies of fungi). So you need to cut down a living tree (or better yet, have a person skilled with a chain saw cut it down for you). Or call up someone who sells firewood and explain what you want: logs 3 to 4 feet long and 4 to 8 inches in diameter that are freshly cut.
In the past I have most often inoculated poplar logs because the trees are fast growing, and I always have some ‘volunteers’ that need to be removed. Oaks are the species most commonly colonized by shiitakes in their native habitat of Japan, and produce for a longer time than poplar, but take longer to produce their first flush of mushrooms – up to 14 months. And they are a tree species I value, so it’s harder to sacrifice one.
I learned from Mycelium Running that not just shiitakes can be raised on logs. These species will also work, and are available from Stamets’ web site, www.fungi.com: Reishi, Maitake, Lion’s Mane, Pearl, Blue and Phoenix Oyster, Chicken of the Woods and Turkey Tail.
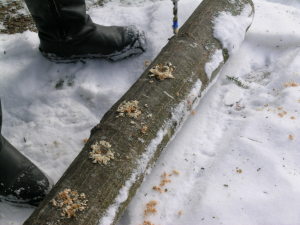
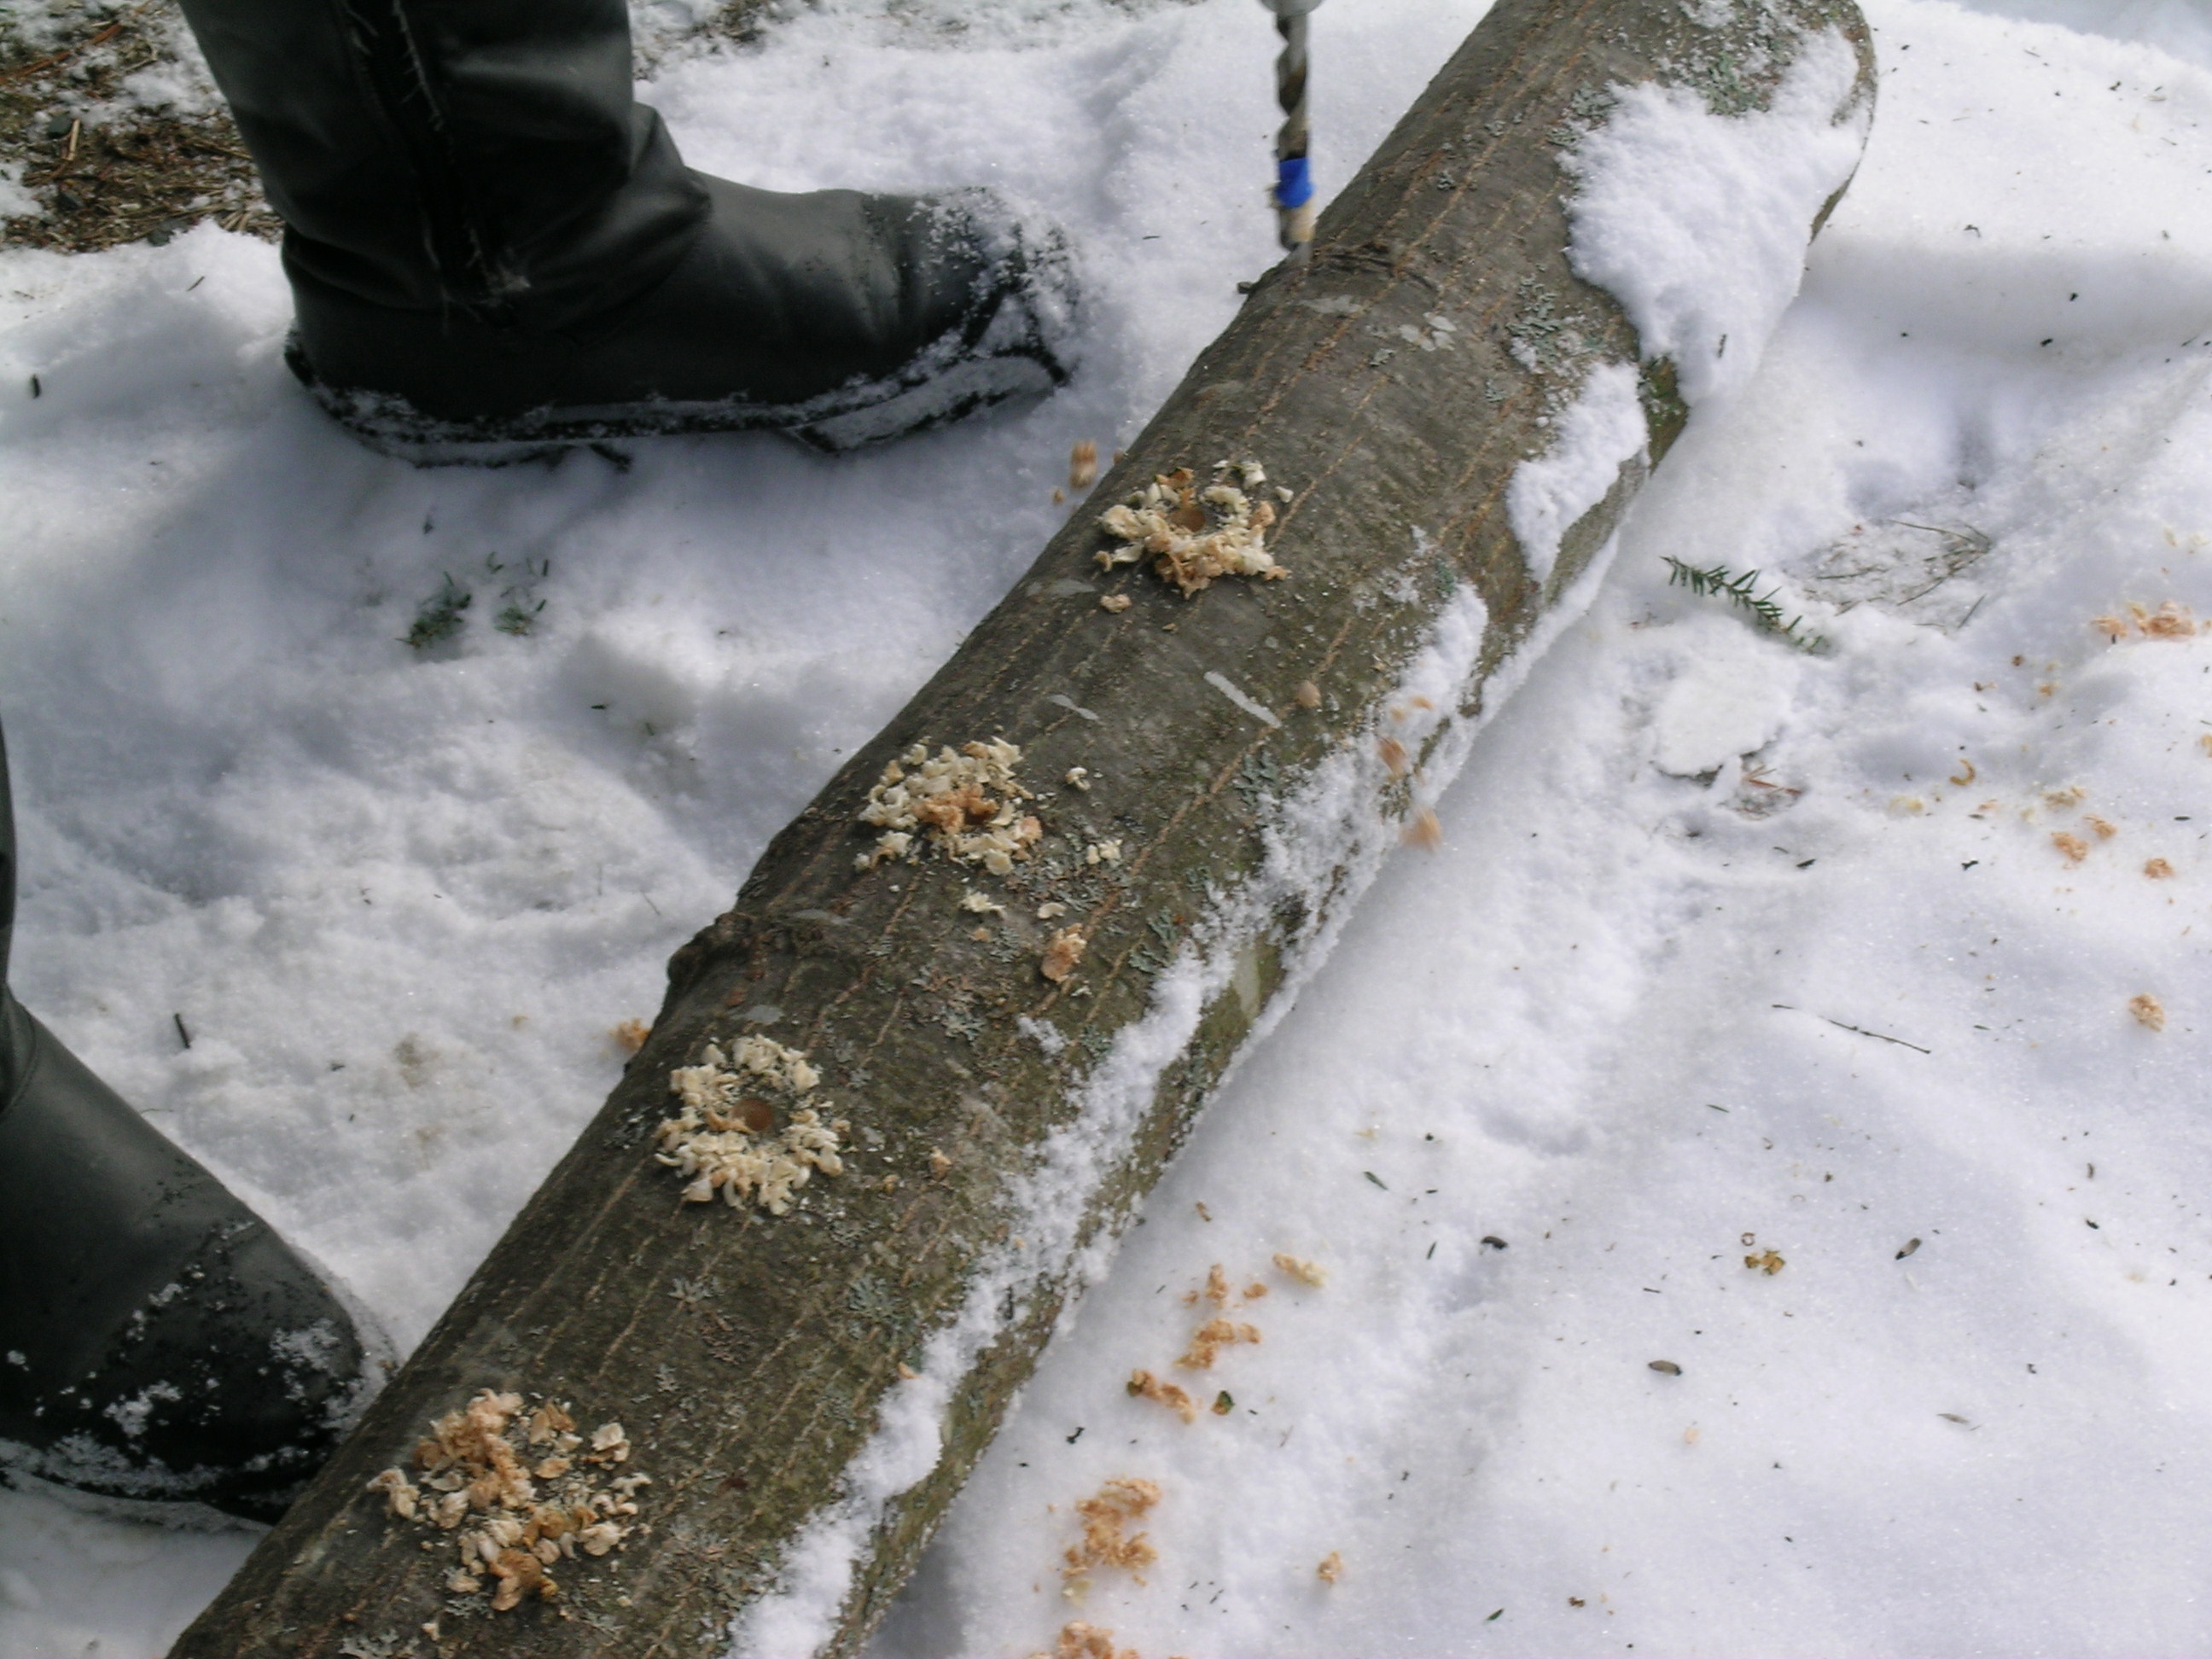
Drilling holes for shiitake spawn
So how do I inoculate my logs? Using a 5/16-inch drill bit, I drill lines of holes about 8 inches apart from one end to the other. Then I drill another row of holes 4 to 6 inches from the first row. I stagger the holes so they don’t line up next to each other, from row to row. Then, with a hammer, I tap in the spore plugs that I have purchased. The holes should go a bit deeper into the wood than the length of the plug.
Finally, I melt some food grade wax (or natural bee’s wax) and paint the ends of the plugs. The wax prevents insects and bacteria that might consume the inoculant before the mycelium (fungal roots) extend and colonize the log. I have also tried inserting thimble spawn, which is made out of sawdust and has an attached Styrofoam cap. I find these are less satisfactory, as the caps do not always stay attached.
Paul Stamets is a self-avowed mushroom freak. He loves everything about them, and has found ways to grow edible and medicinal mushrooms, starting from wild harvested mushrooms. He describes several interesting ways of growing mushroom that I have not tried, but might this summer. Obviously I will only use mushrooms for propagation that I have had positively identified by a mushroom expert – some mushroom are deadly poisonous.
He describes inoculating piles of wood chips, burlap bags of wood chips and layers of cardboard, starting with what he calls “stem butts” from wild mushrooms. He digs up some of the root-like structures attached to the mushroom, along with the mushroom, and then cuts the edible portion off an inch or so above ground level. This “stem butt” is then put into a pile of woodchips or between layers of moist cardboard. The fungi quickly colonize the substrate, producing mycelium that will, when moved to an appropriate substrate, produce mushrooms.
Stamets’ book also describes how to start mushrooms by placing the stem butts into burlap bags of fresh wood chips. He notes that the chips should be free of wild spores, a problem if you just grab chips from a pile of wood chips that has been around for some time.
Finally, and this idea really grabs me, Mycelium Running suggest that you can inoculate stumps with plug spawn right after a tree has been cut down. This allows you to produce edible mushrooms in what is otherwise a spot unfit for planting (unless you dig out the stump, which is a lot of work). He inoculates stumps on their tops, into sapwood, in a ring around the periphery. Stamets notes that stumps take longer than logs or wood chips to first produce mushrooms, but produce for years longer.
My garden is deep in snow. Sigh. But I could buy a mushroom kit that is ready to produce mushrooms indoors, or spawn that I could use to inoculate logs once the cold of winter has passed.
Henry is the author of 4 gardening books and a children’s fantasy-adventure. His Web site is www.Gardening-Guy.com.
Mid-Winter Blahs
Posted on Wednesday, February 18, 2015 · Leave a Comment
I’ve been hearing from friends who are sick of winter. We’re only about half way done with it, but we haven’t had a break – no January thaw this year – and the snow keeps building up. I’ll have to admit that I’m a little tired of shoveling and paying to get my roof cleared. So what can a gardener do? There’s plenty.
First, plant something. Nothing makes us gardeners feel better than planting (unless it’s picking peonies, which we can’t do yet). One of my favorite tricks is to sprinkle poppy seeds on the snow above a flower bed. These seeds are tiny and black, and the sun heats them enough to melt through the snow in the course of the winter. And although the germination rate will be low, I save seeds and have plenty. So it doesn’t matter if only a few find a nice crack in the soil and grow, come summer.
This weekend I will dig out my potting soil and trays and plant some onion seeds indoors. Onions take a long time to grow, so I like to start seeds in February, or early March at the latest. For a long time I just planted onion sets – dry, diminutive onions that are sold to start new onions. But then I learned that one can buy – or start from seed and then transplant – small green onion plants. I find that these plants are more vigorous.
If you don’t want to go through the trouble of raising your own onion plants, some seed catalogs will sell the plants at the appropriate time – but those are a lot more expensive than doing your own from seed.

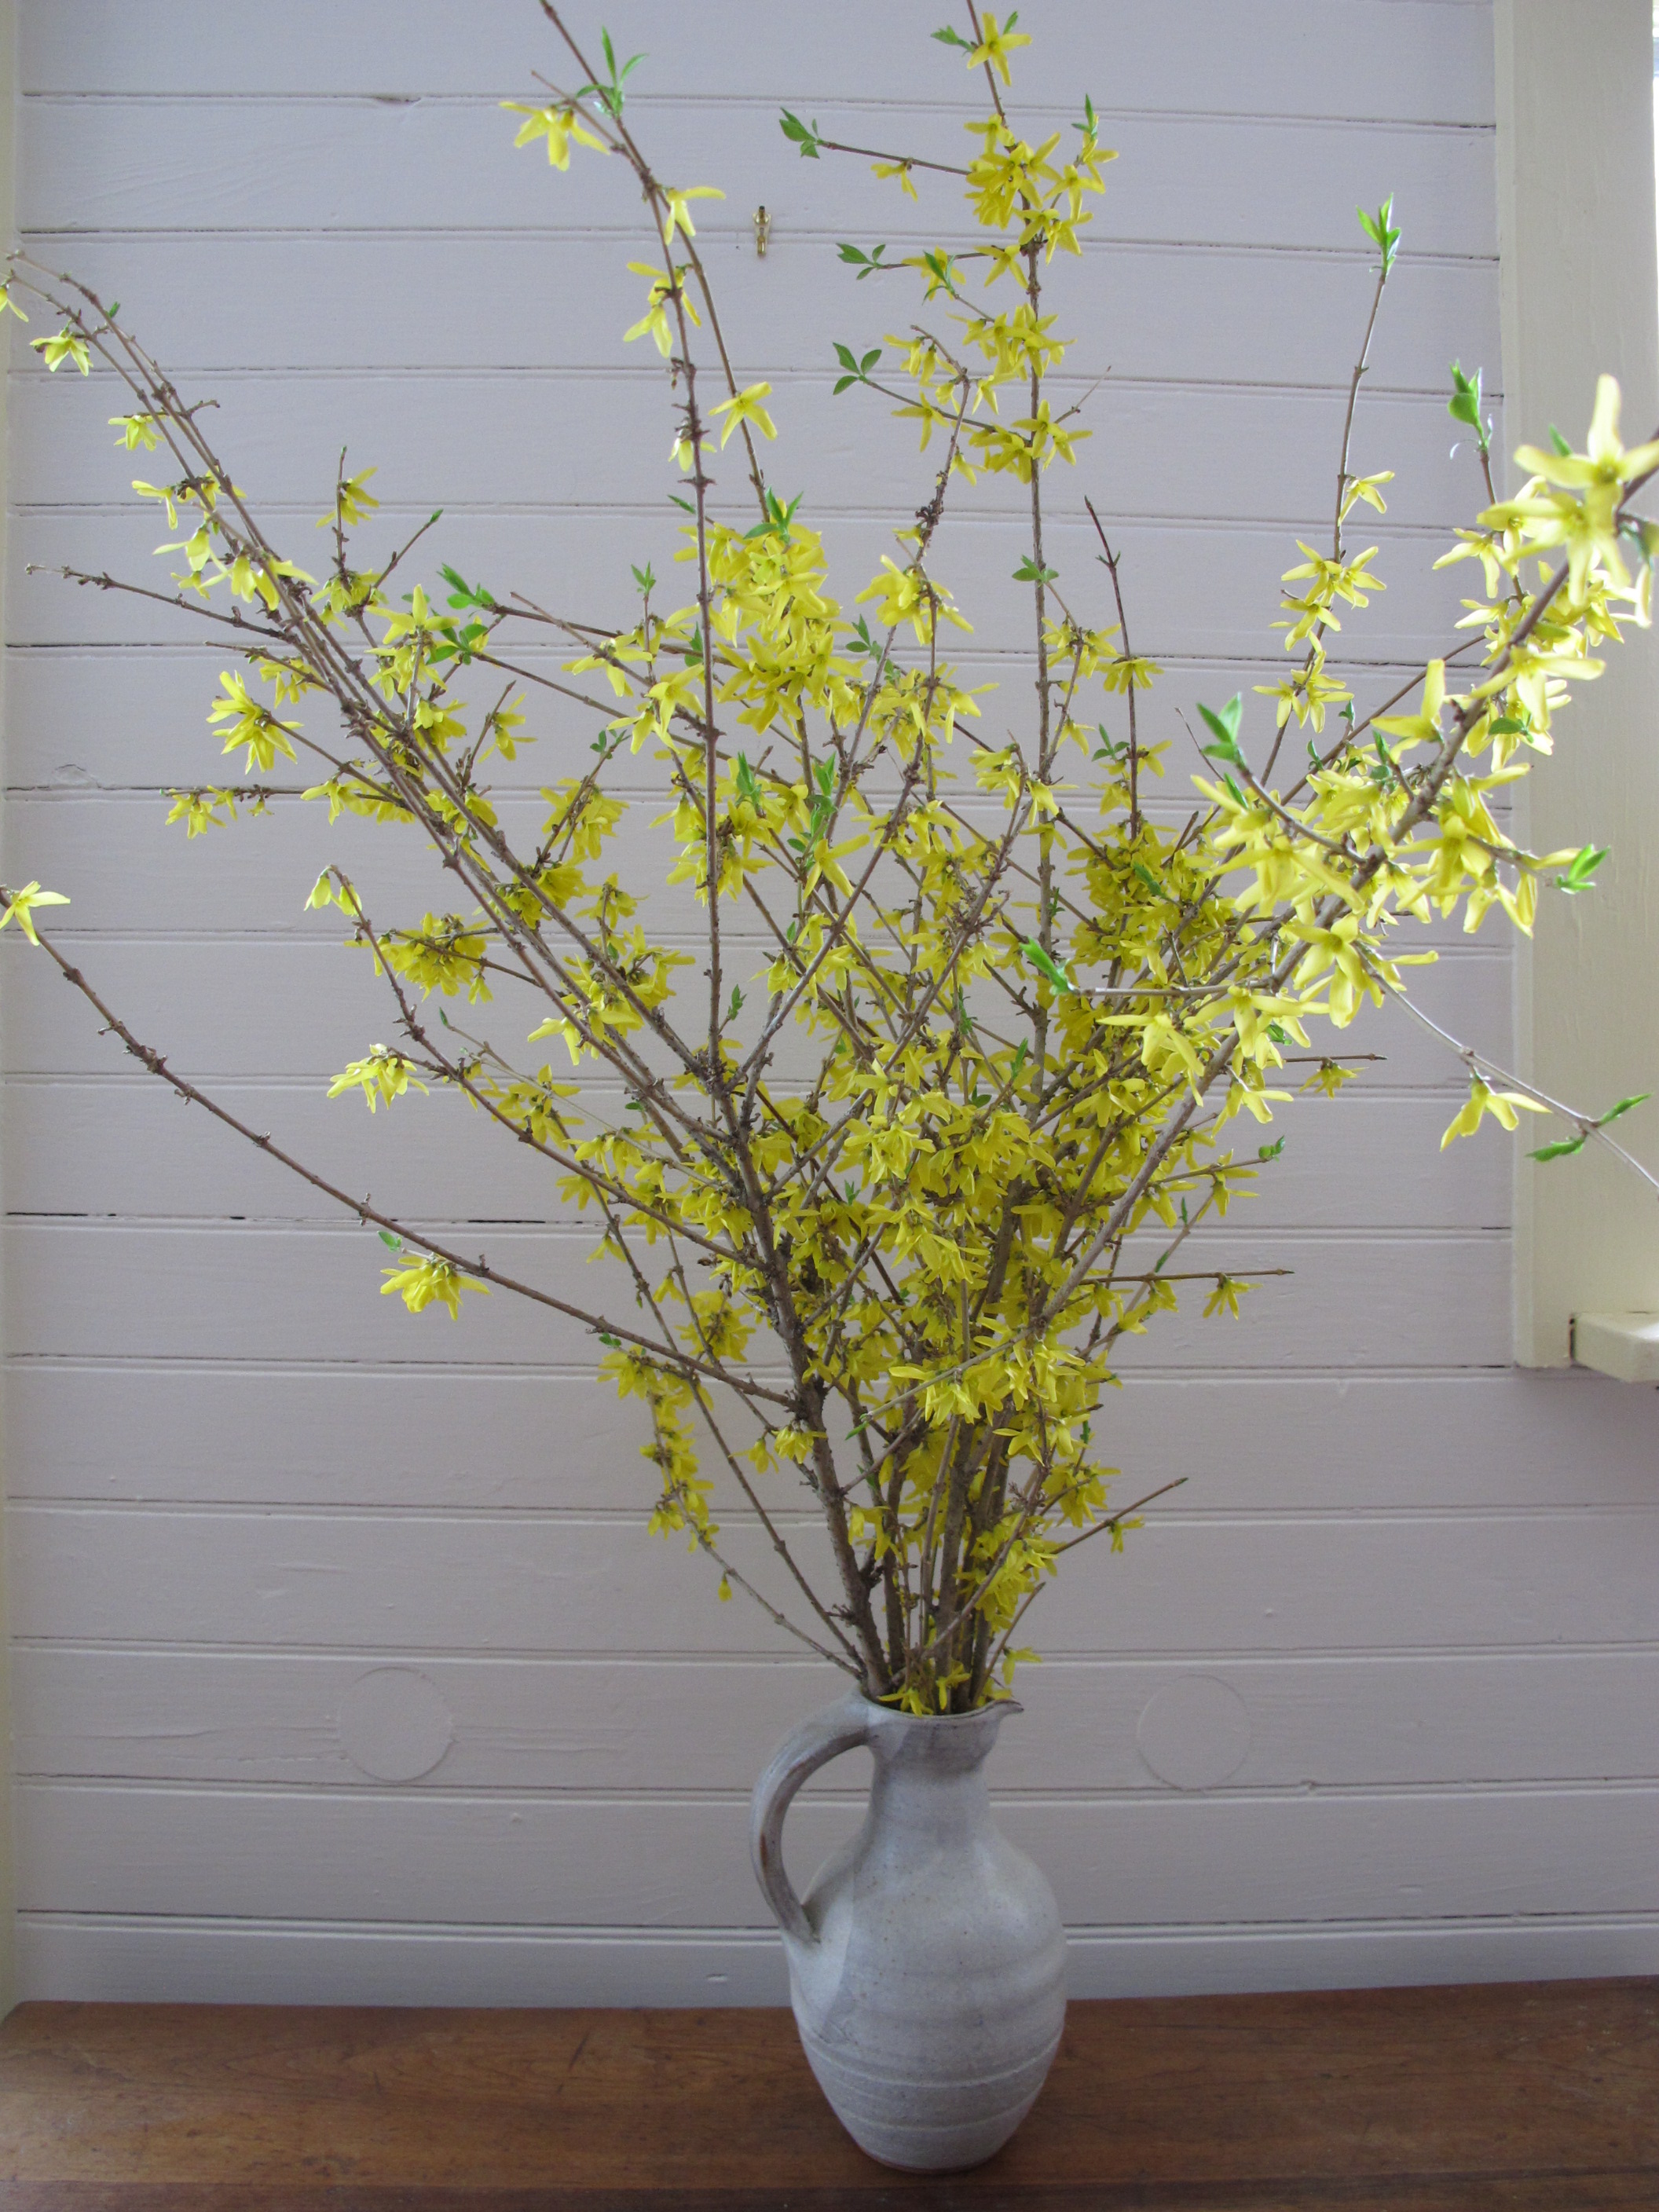
Forsythia
And it’s not too early to cut branches for forcing. I have cut forsythia and magnolia branches, and will make a trip on my snowshoes to the wetland where pussywillows grow. All three – and others, like quince and apple – can be made to bloom inside the house. Just cut stems and put them in a vase with water.
Forsythia is, in my view, an old fashioned plant. My grandfather had a huge patch of forsythia growing as an island in the lawn. It separated his old 1860’s farmhouse from the vegetable garden. They grew tall and dense. I don’t know if he planted them when he bought the place in the 1920’s, or if they were already there. I suspect he planted them.
There must have been a dozen forsythia plants or so, planted in a double row about 10 feet apart. By the time I came along they created a secret hiding place in the middle between the two rows. My sister and I would crawl into the interior of the patch and we were totally hidden from adult view. A fine hiding place it was.
Grampy lived in Spencer, Massachusetts where winter temperatures probably never went much below zero. But living in the cold north, where we see minus 10 to 25 degrees for night after night, means that when I bought my place in 1970, forsythia was not a good option. Yes, it would survive, but the flower buds would be killed by cold temperatures unless buried by snow. I know, I tried.
Hybridizers kept trying different crosses – hybrids- and finally developed plants good for Zone 4 (with temps as low as minus 30). The late plantsman Paul Joly (here in Cornish, NH) developed one variety, ‘New Hampshire Gold’. Other good ones include ‘Meadowlark’, ‘Vermont Sun’ and ‘Northern Gold’. All those were created just with old fashioned breeding techniques, no genetic engineering.

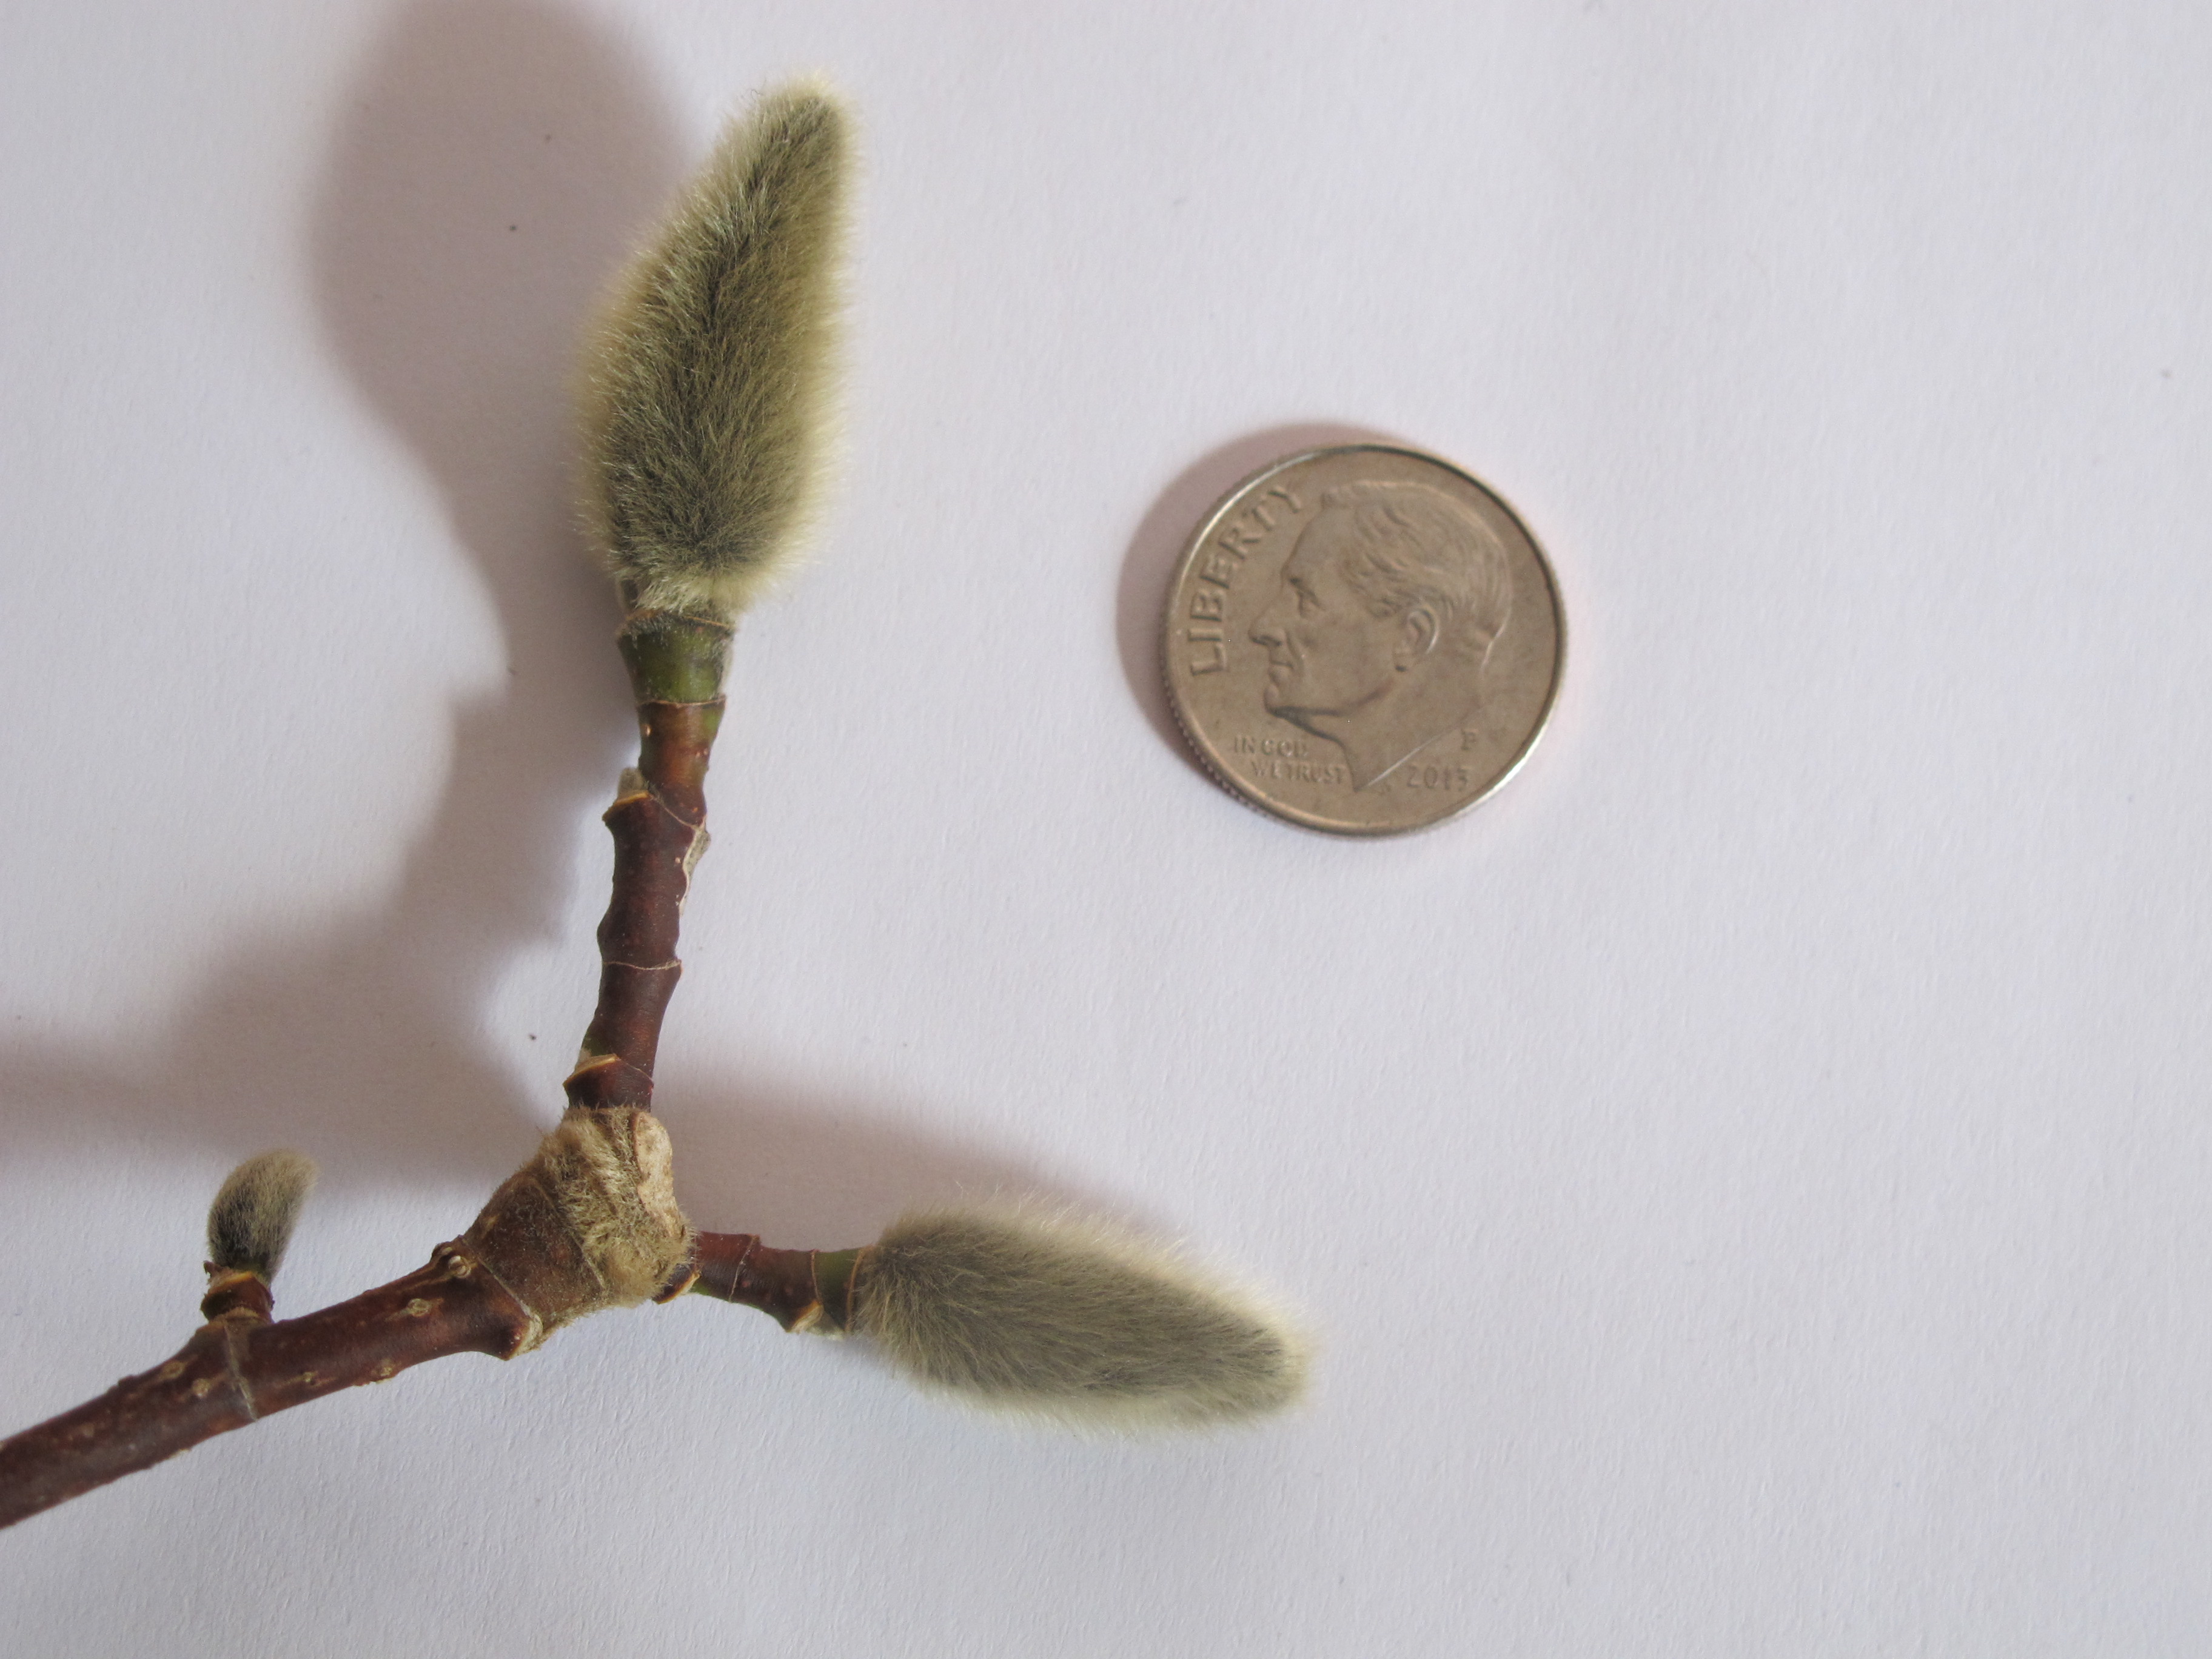
Magnolia bud (with dime for size comparison)
I love cutting magnolia stems for forcing, even though it takes a long time to get the blossoms to open. I love them because the buds are fuzzy and big, sort of like pussywillows on steroids. I have a mature Merrill magnolia that is my favorite tree. It blooms every year on my birthday in late April, it has green glossy leaves all summer, and it has fabulous fuzzy flower buds that I can look at (and that make me smile) all winter. Fabulous plant. If I were sentenced to live in exile on an island and could bring just one tree, it might well be a magnolia (though an apple tree would be in strong competition).
I usually wait until late March to cut apple branches for forcing because that is when I start pruning apple trees. If you want the stems to bloom, you need to pick mature branches, not those young whips called water sprouts. Those straight stems look great in a vase, but will only produce leaves. To get blossoms, you must have fruit spurs, which are 3 to 6 inch branches – spurs – attached to old wood. You will notice fruit buds, which are larger than leaf buds, near the tip of fruit spurs. These will produce a cluster of blossoms, and leaves, too.
Meanwhile, we should all be thankful for all the snow we’ve had. It protects our perennials, the tender ones, from severe temperatures. I once dug down through 4 feet of fluffy snow and probed the soil in my vegetable garden with a thermometer. Just a couple of inches down the soil was 37 degrees. And only the top inch or so was even frozen. Barren winters, with no snow, are much harder on our plants, even if not so cold as this year.
So bundle up, put on your earmuffs and scarf, and go cut some stems and put them in water. Before too long, you’ll have spring in your house – even if it’s still snowing outside.
Henry Homeyer lives in Cornish Flat, NH. He is the author of 4 gardening books and a children’s fantasy-adventure about a boy and a cougar called Wobar and the Quest for the Magic Calumet. His web site is www.Gardening-Guy.com.
Winter Planning: What Size Tree to Buy?
Posted on Wednesday, February 11, 2015 · Leave a Comment
The snow is deep, the temperatures well below freezing. It’s a good time to think about what projects to undertake this year. My friend Evan Schneider, who was in the Peace Corps with me in Cameroon, recently bought a house in Portland, Oregon. He and his wife are retired and realized that whatever landscaping they do, they don’t want to wait 20 years for a shade tree to actually produce enough shade for the two of them to sit in the shade all afternoon reading good books.
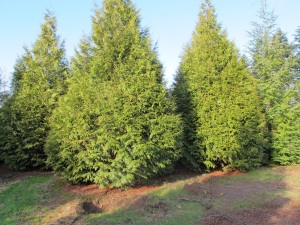
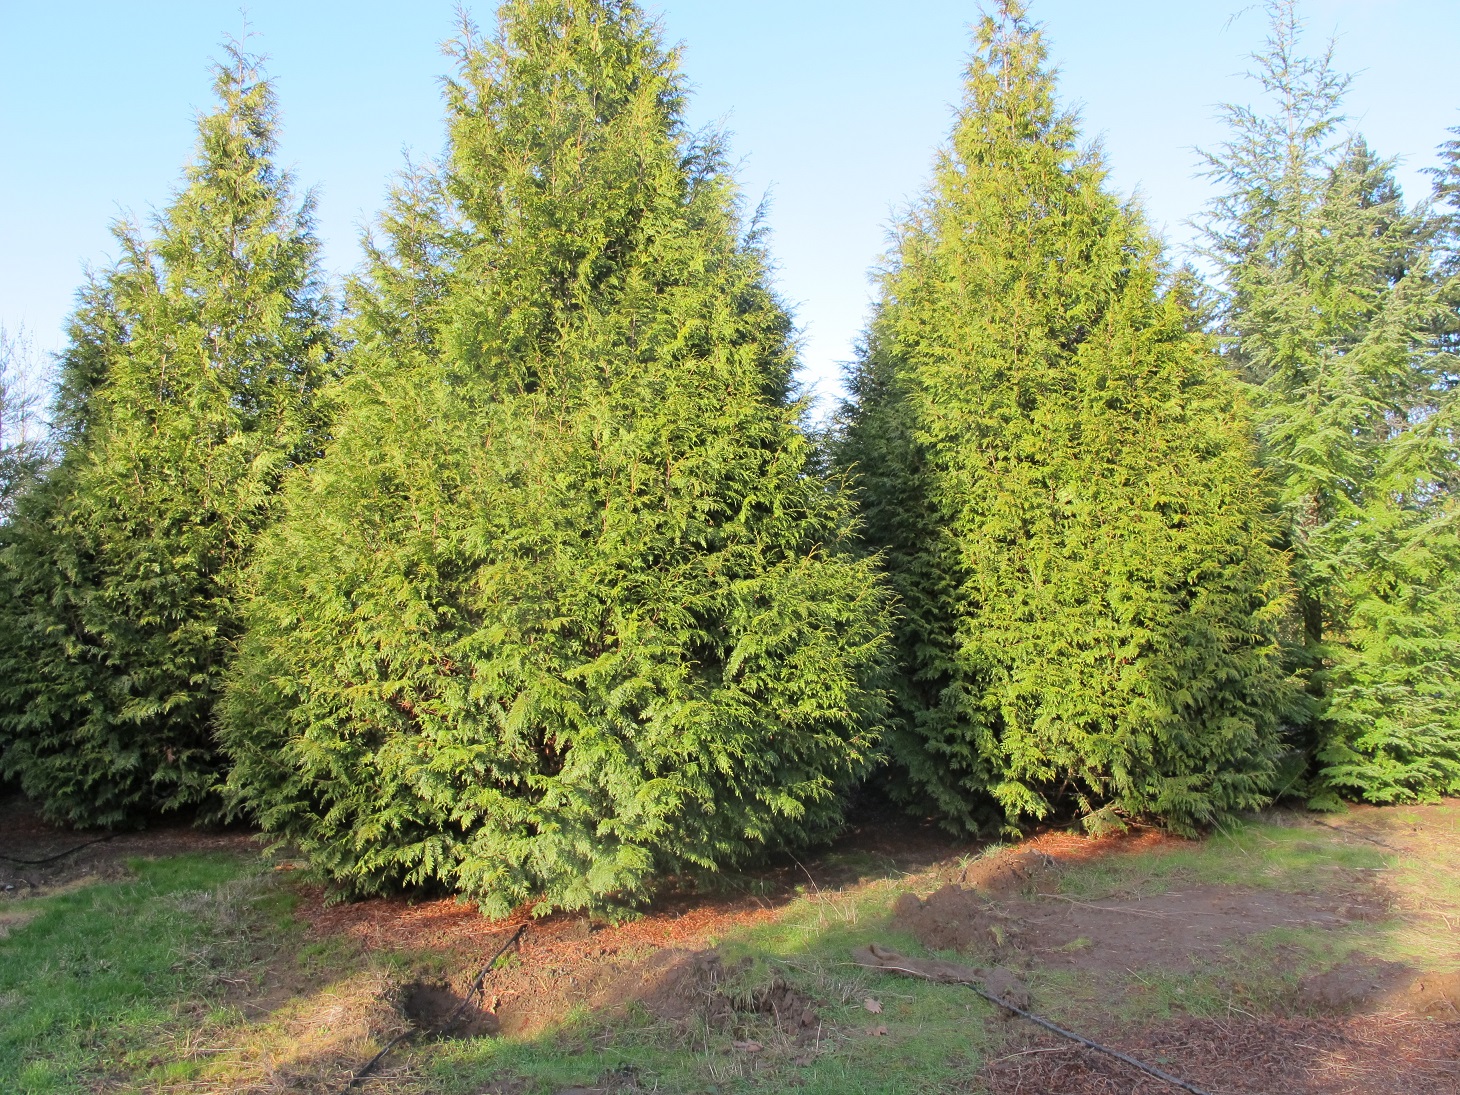
Trees ready to move
In general, I buy the smallest tree available, not the largest. I know that a small tree loses a smaller percentage of its roots when it is dug up for transplanting. Or if it has been growing in a plastic tub, I figure the less time it is in that tub, the less time the roots have to encircle the pot and get tangled. So I was surprised that they had purchased a thirty-foot tall maple tree, and had it installed. I visited them recently, and saw that the tree seems to be thriving.
Evan took me to meet the people who had done the job. The company is called Big Trees Today, in Hillsboro OR, and they specialize in growing big trees in the ground, and then digging them up and installing them. Dan Hickman, the owner, is now in his mid-thirties and is selling some trees that he planted when he was in junior high school (and working for his dad).
Dan said they generally buy small, bareroot trees, plant them in the ground, and then move them 3 times before selling them. After a tree is about 2 inches diameter it is dug up and moved. Digging it up means that the roots are severed, which stimulates new roots to grow and to branch out from the older roots. Then when the trunk is about 5 inches in diameter, it is dug up and moved again. Finally at 9 inches in diameter it is moved for the final time before it is sold. Depending on the kind of tree and how fast it grows, it might be root pruned again without digging it up – by digging down and severing roots.

Tree spade
I once moved a crab apple tree for a woman who had planted it when her son was born. She and her family were moving, and wanted to move the tree, even though her son was, by then, twelve years old (I think). I told her I could do it as a two-step process: First, I would cut the roots along a dotted line about two and a half feet from the trunk. I alternated thrusting the shovel deep into the soil and leaving a shovel-width undisturbed. I did that in the fall, I believe, and then moved the tree the next year. When it was time to dig it up, I dug around the tree three feet from the trunk. That way the previously severed roots had been given time to fork out and grow new feeder roots which were largely undisturbed when I moved it.
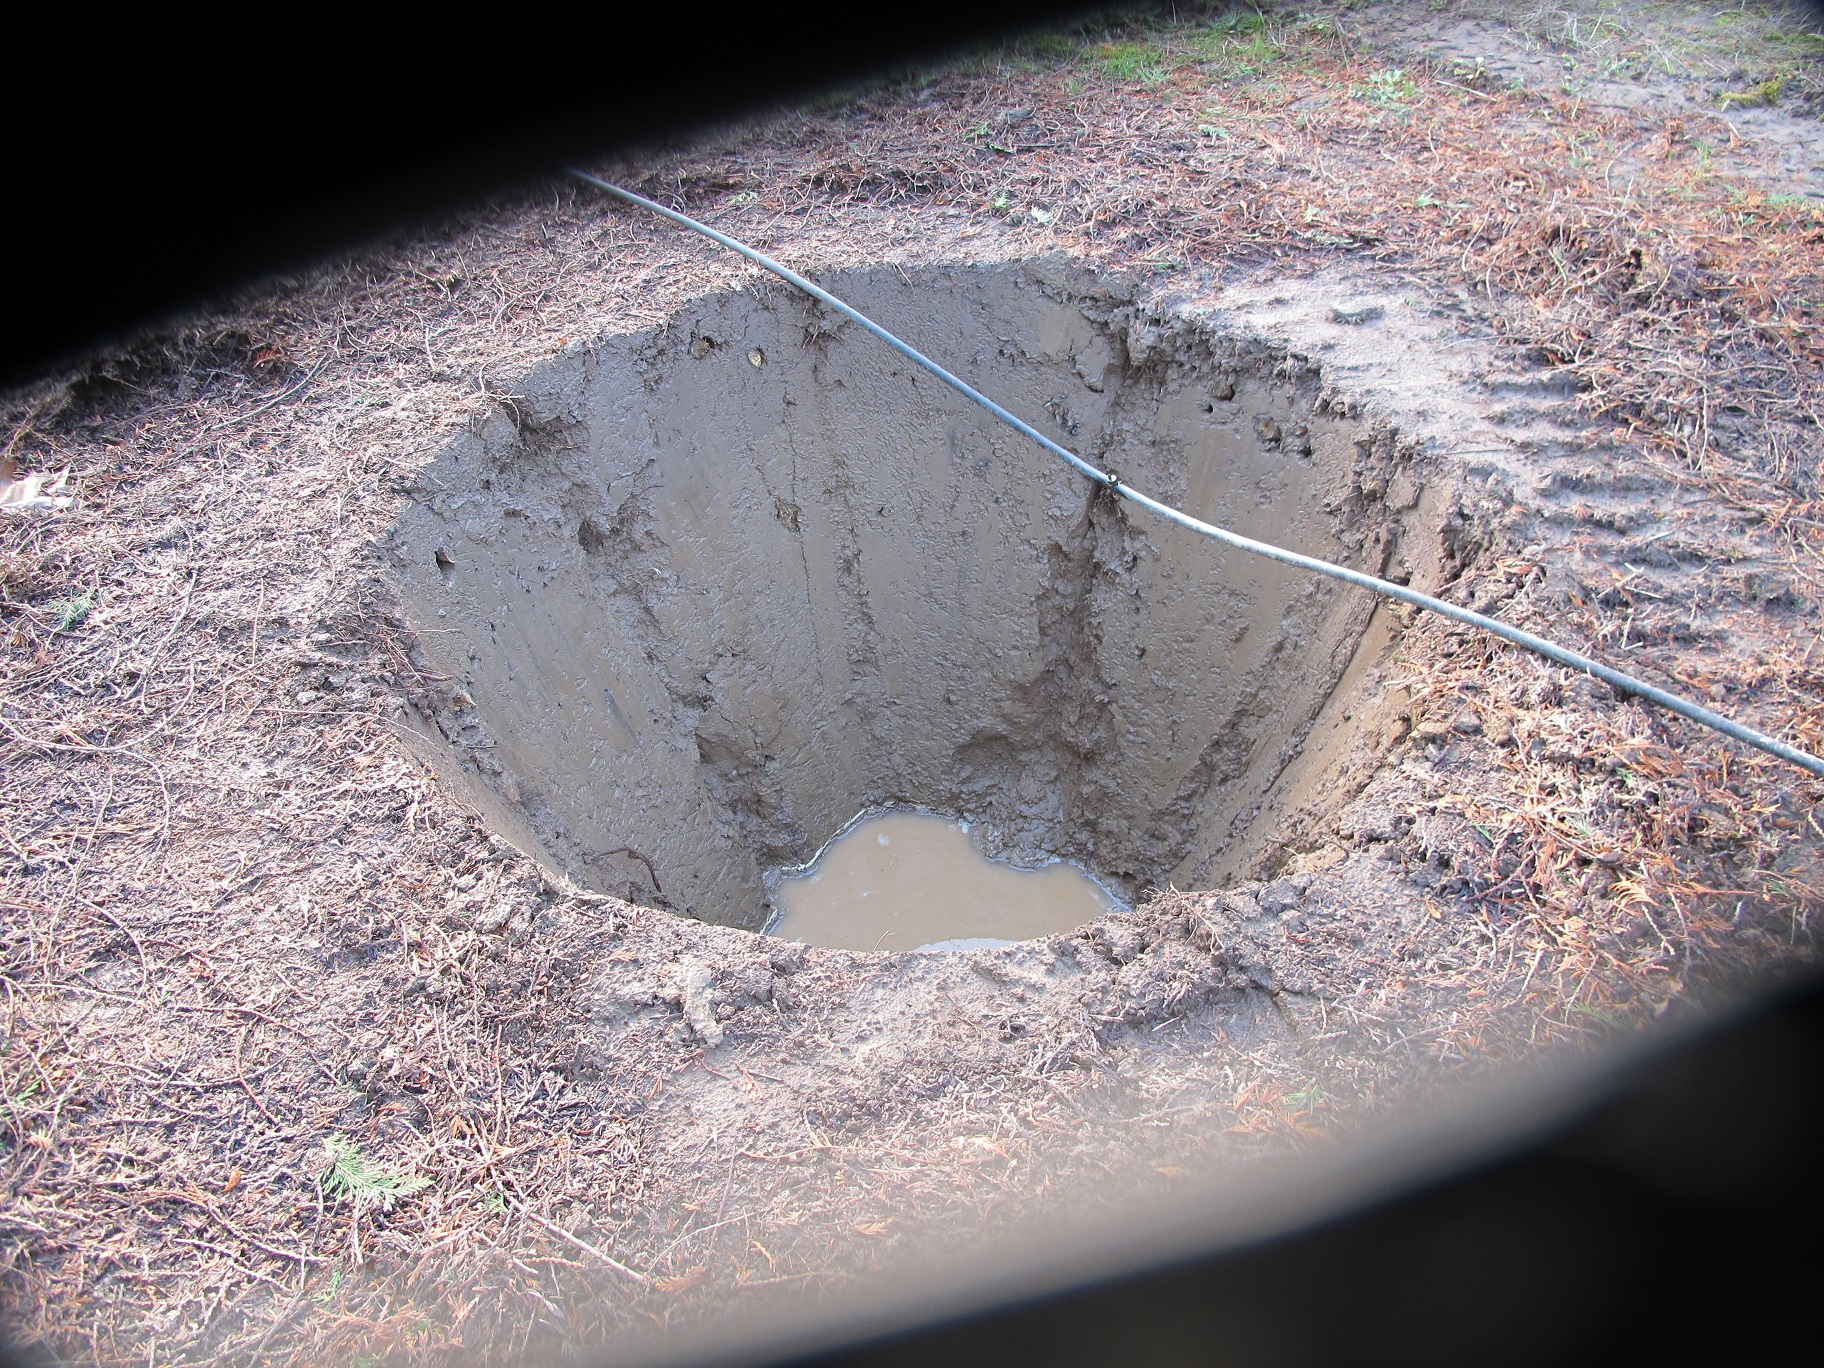
Most commercial firms that move trees have a special tractor-mounted tool called a tree spade. It is fitted around the tree and several big blades are hydraulically powered to slice deep into the earth creating a root ball that is shaped a bit like a huge ice cream cone (though not as pointy).
Dan Hickman told me that it is important that the root ball not fall apart during the digging, the transporting, or the planting. His firm is located where the soil is high in clay, which helps the root ball stick together, especially if kept moist. But they also wrap the root ball, first in an open wire cage, then in burlap.
I have seen trees with root balls wrapped in synthetic burlap, which must be removed at planting time. I once dug up a tree that was 7 years old and was not growing well, only to find that its roots were encased in burlap that had not broken down. Dan Hickman said the burlap they use disintegrates in 3 to 4 months, and they leave it in place. Only after it is planted do they cut away any burlap they can at the soil surface. Me? I’ve always removed the burlap.
Crater left by tree spade
I asked Dan what was the biggest tree he ever moved. He told me that they once moved an historic camperdown elm (Ulmus glabra ‘Camperdownii’) that was 106 years old but in the way of an upcoming building project. It had a rootball 16 feet wide and it weighed 73,000 pounds – over 36 tons! He and his crew root pruned it in the spring, and then dug it up and moved it in the fall. It is doing fine.
What else should you know about buying a big tree? Find a company that has plenty of experience. A company that has invested in a tree spade is probably a good bet, though it can be done by hand. Be sure to have the tree planted at the right depth – you will want it to sit with its trunk flare exposed, not buried.
Set up a watering system so that your big tree never gets thirsty. Digging a big tree severs roots, even if it has been root pruned and has a compact root system. A transplanted tree has fewer root hairs to pick up water and minerals. It makes sense to use a timer that will turn on your watering system on a schedule. You can use a soaker hose or an irrigation system with emitters to deliver the water. It will require more water in the heat of August than in the spring or fall, so will have to adjust it accordingly.
Finally, create a “donut” of bark or wood chips around the tree, covering the roots, but not touching the trunk. Mulch will keep down weeds and grass, and keep those dudes with weed whackers away from the trunk. You don’t want the bark damaged, and string trimmers or lawnmowers can be lethal.
So I’ve re-thought my position about planting big trees. I’m not exactly a spring chicken anymore, so if I want to see another mature tree on my property, I’ll consider buying a big tree. And maybe even having an expert – with the right tools – install it.
Henry lives in Cornish Flat, NH and is a UNH Master Gardener. His Web site is www.Gardening-Guy.com. He is the author of 5 books.
Being Healthy: Growing and Eating Food That is Safe
Posted on Wednesday, February 4, 2015 · Leave a Comment
We’ve come a long way from the day when most families grew their own vegetables and had a few chickens and a cow. From the day when fertilizer was manure of some sort, and when bug control was largely picking off the slugs and bugs. My mom (Elfrieda Lenat, 1916-2009) grew up like that. As a boy we grew a lot of our own organic vegetables, but lacked the farm animals- even though I longed to raise some chickens.
Since my mom’s youth much has changed at the grocery store, too. We are buying more processed foods, foods that contain corn and soy products grown with genetically modified organisms (GMO’s). We are buying produce that has been sprayed with pesticides and grown with chemical fertilizers. The fresh fruits and vegetables from the
store are, we assume, safe to eat. This is America, after all, where our government looks out for us.
But the government is not able to test every box of strawberries or bag of apples to see if there are harmful chemicals in the fruit. According to recent government statistics, the Department of Agriculture tests about one tenth of one percent of fresh produce coming into the country for chemical residues, and less than one percent of our American-grown fruits and vegetables.
We all know that any food identified with a green sticker that says USDA certified organic does not include genetically modified ingredients, and that any sprays have been approved by OMRI, the organic certifying board – though some can still be strong natural pesticides from plants, for example. What about “natural” or “all natural” labels? They have no regulatory meaning. Our own home grown food? If you don’t use chemicals anywhere on the property, those are safe.

Veggies fresh from the garden are healthy and safe
But organic food is more expensive, and sometimes we have to make choices. According to the non-profit organization, Green America, the 10 fresh vegetables and fruits you should buy organic at the grocery store are: apples, bell peppers, celery, cherries, imported grapes, nectarines, peaches, pears, potatoes, raspberries, spinach and strawberries. Save that list, and bring it with you the next time you go to the grocery store – or memorize it. And you can trust your local farmer using an Integrated Pest Management program (IPM) to have safe, fresh food in season, too. Just ask about IPM at the farm stand next summer.
So for example, conventional strawberries from California are big and beautiful – and available almost all year round. But the California growers have lobbied successfully with our government, and they have a loophole in the law. They are allowed to use methyl bromide, a fumigant that they pump into the soil, and then seal it in with a layer of plastic. This kills every living thing, including the fungus called Fusarium wilt that can wipe out a crop of strawberries. Most other countries have banned methyl bromide for its toxicity and for what it does to our ozone layer. But money talks, and lobbyists prevail. Me? I won’t buy strawberries from California, or eat them even if they’re served as a garnish out of season (meaning they are probably from California.)
But let’s go back to corn and soy, which are found in virtually all processed foods from sodas and chips to frozen pizza and turkey pot pies. Virtually all non-organic corn and soy is GMO and is resistant to a chemical herbicide, glyphosate, commonly sold as ‘Roundup’. Roundup makes farming easier and cheaper – by eliminating weeds. So corn and soy fields are sprayed with glyphosate to kill weeds, and the grains are not harmed. But glyphosate is taken up by the corn and soy, so it ends up in our food.
The Environmental Protection Agency (EPA) considers glyphosate safe to use, and the USDA not monitor glyphosate levels in food. Nor does the manufacturer have to say what the “inert” ingredients are in the product, as this information is consider a trade secret. But inert does not necessarily mean inert to us or the environment. Inert to the EPA just means those ingredients do not play a role in killing weeds. Since we don’t know what they are, I want to avoid them.
But here is what makes me most nervous about ingesting glyphosate: even though it does not affect my metabolism directly, it does affect the bacteria which play an important part in my good health. The same metabolic pathway that allows Roundup to kill weeds is an important metabolic pathway in bacteria. So I won’t use glyphosate too kill weeds, and try to avoid food that has been treated with it. That means avoiding processed food.
What about conventional meats, milk and eggs? Glyphosate is showing up there, too, because animals are fed GMO corn as feed – which is treated with glyphosate. So unless you buy organic meats or know that your local farmer is not using feed with GMO corn in it, you can ingest glyphosate from your meat. If you buy your meats at your local farmers market, you can ask your farmers what they feed their animals.
So, as we head into the season for starting seedlings indoors, think about expanding your vegetable garden to include more food that you can store for winter use – or just enjoy fresh off the vine in summer. If you grow your own vegetables, you can insure that your food is safe – and chemical free. I do it, and it feels good.
Henry’s web site is www.Gardening-Guy.com. He is the author of 4 gardening books and a fantasy-adventure for children about a boy and a cougar.
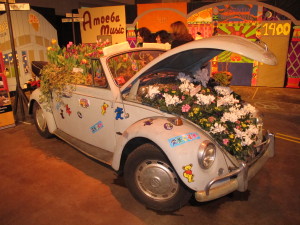
The Spring Flower Shows
Posted on Wednesday, January 28, 2015 · Leave a Comment
I’m a little spoiled this winter: I got to go to Maui in January for 10 days. You would think that I’d be ready for all the icy roads and driveways, having been given some respite. But I’m not. I want more warm sunny days. But I know the cure: the spring flower shows. I’ll go to as many as I can. Here’s this year’s lineup.
The first is the New Hampshire Orchid Society’s “Orchid Fantasy Escape” in Nashua, NH at the Radisson Hotel from February 13 to 15. Admission is just $10, $8 for seniors and free for kids under 12. I think getting kids interested in orchids is a good idea and will try to get my grandchildren to accompany me. George, age 11, already collects succulents, and may find orchids even better. Or perhaps Casey, who loves anything pink, will be the orchid fan. For more info: www.nhorchids.org/show.
Rhode Island Show
Next up is the Rhode Island Flower Show February 19-22 at the RI Convention Center in downtown Providence. This is always one of my favorite shows because it has something new each year, along with favorite displays like the sand sculpture and the displays by the Carnivorous Plant Society and the RI Wild Plant Society. I love the competition among flower arrangers – one year they had a competition for best bikini made of leaves and flowers (on mannequins)!
Admission to the Providence Show is $19 for adults, $16 for seniors and $7 for children 7 to 12. I like being there on Thursday or Friday as the floor is less crowded than on the weekend. And for me, one of the best parts of the show are the educational workshops. This year Barbara Damrosch, author of The Garden Primer, a great basic gardening text, will be lecturing on Thursday and Friday. I’m not presenting there this year, maybe next year. For more, go to www.flowershow.com.

Rhode Island Flower Show sand sculpture
That same weekend is the Connecticut Flower & Garden Show at the Connecticut Convention Center in Hartford. This year’s theme is “The Spirit of Spring” with over 300 booths, great landscape displays and over 80 educational workshops. Admission is $16 for adults, $4 for kids 5 to 12, and $14 for seniors over 62 on Thursday and Friday. If you are traveling from out of state, think about combining the Rhode Island and Connecticut shows with an overnight in one town or the other. For info, www.ctflowershow.com.
Then comes the Vermont Flower Show on February 27 to March 1, one of my favorites. I like that the main landscape display is a collaborative effort, and that the show has many interesting events for children, including a model train display. It is held in the Champlain Valley Exposition Hall in Essex Junction. Tickets are $ 15, or $12 for seniors (age 60) and $3 for kids 3 to 17. For more info, go to www.greenworksvermont.org.
Although Ringling Brothers circus claimed to be the Greatest Show on Earth, the honor should go to the Philadelphia Flower Show, which this year is from February 28 to March 8. Held each year in the Pennsylvania Convention Center, more than 250,000 visitors will walk through the 33 acres of show. Tickets are expensive – $32 for an adult, $27 if bought in advance. Even kids are $17. Still, you gotta see it at least once. Info at www.theflowershow.com.
This year I hope to make it to the Portland Flower Show as I’ve never gotten to it and hear it’s nice. This year’s theme is “A Taste of Spring” and will be March 5 to March 8 at 58 Fore Street. Tickets are $15. More info at www.portlandcompany.com.
Boston is another grand event held this year March 11 to 15 at the Seaport World Trade Center. The theme this year is “Season of Enchantment”, which will bring out the magic of flowers by top ranked garden designers and floral arrangers from all over New England. Like all the big shows, I recommend going on a weekday, as it can get pretty crowded. Tickets are $20, or $17 over age 65.
I called my friend Jill Nooney who has competed at the Boston Flower Show several times. She said she usually spent about 9 months giving birth to her displays – growing the materials needed for them, and putting it all together. And although she has created amazing displays and won blue ribbons, all she really got out if it was bragging rights. So she’s not competing this year. Still, if you want to do a display, go to the show, and start your planning now for next year. For more info: www.bostonflowershow.com.
After a short break, the next show is the Seacoast Home and Garden Show at the Whittemore Center Arena in Durham, NH on March 28 and 29. This show will have 225 exhibitors showcasing their products and services. Seminars and a “Meet the Chef” program round out the schedule. Tickets are $8, just $6 over 65 years of age. More info at www.whittcenter.com.
There’s not much info yet on the last show, in Bangor. Just that it’s April 11 and 12 at the Cross Insurance Center in Bangor and the theme this year is “Naturally Nautical”. For info later, www.bdmainegardenshow.com
We can’t all escape the snow and cold, but we can get a day’s vacation from it – at a flower show. And it’s cheaper than therapy!
Henry Homeyer is the author of 4 gardening books and a UNH master Gardener. His web site is www.Gardening-Guy.com.
How Do We Encourage a New Generation of Gardeners?
Posted on Wednesday, January 21, 2015 · Leave a Comment
I learned to love gardening from my grandfather, John Lenat. He introduced me to his garden and fed me tasty things right from it. He never made me weed – a sure way to discourage young gardeners. But in today’s world, many children don’t have a special person to teach them to garden, or a place to garden. Many have never planted a seed or eaten a carrot or tomato in the garden.
Maybe we need to look at our schools as venues for education about more than the core curriculum. I mean, which is more important? Knowing that 7 times 9 is 56? (Or 63!) Or teaching our children to garden and to appreciate fresh food that they have grown? In terms of health and longevity in this day of fast food and prepared junk food, should we not be teaching our children good eating habits as well as math? I recently visited a school where all the kids love veggies and fruits – food that they have grown there at the school.
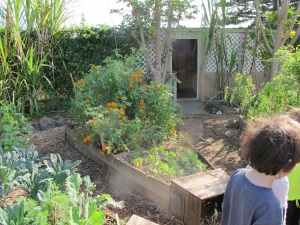
The school garden at Haiku
The public elementary school in the town of Haiku on Maui, Hawaii has included gardening in their educational program. Each child gets twenty weeks of gardening instruction each year, one hour per week for 10 weeks in two different seasons. The school enrollment is about 440 students in grades K-5. The class I visited in the garden had about 25 children, and was taught by a half-time gardening teacher, Crystal Summers.
Ms. Summers was helped on the day I visited by the second grade teacher, Joan Junger, and a volunteer whom the kids called “Uncle Steve”. A class of 25 needs extra adults if each child is going to do meaningful work in the garden. Parent and community participation has been key to success of the gardening program in Haiku, and, according to Ms. Summers, “You have to have a principal who is on board.” Fortunately, in Haiku, they do.
On the day I visited, the children each participated in 3 activities. In one group they each planted a six-pack of marigolds with seeds saved from their garden. They had planted seeds before, and most knew just what to do. These marigolds will be sold in April when they have a flower festival at the school that will raise money for the garden.
The second activity was weeding. The kids were just back from vacation, and weeds had popped up in the walkways while they were away. The children used simple dandelion weeders and dug up shoots of new grass that had grown in their absence. Since they were all doing it together, and they only had to weed for about 10 minutes, the children did not seem to consider it drudgery.
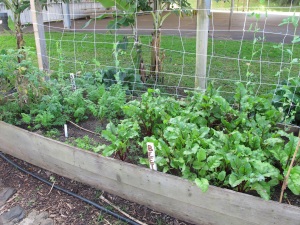
Beets at school garden
The last activity was picking beans. They had a huge bush of “gondule beans”, also called pigeon peas, that had both ripe and green pods. Each second grader was given a pair of scissors and asked to cut and sort the beans. Green pods went in one basket, dry in another. The fresh pods were cut up and eaten by the children at the end of class, along with tiny pieces of a fresh radish that had been harvested that day.
Eating the garden produce is an important part of each visit to the garden. The children are learning not just growing, but the enjoyment of fresh veggies – even if, like the radish, the food has a taste that is different from what they are accustomed to.
One of the things the children like best are the green smoothies they make with garden produce. The principal donated a blender to the program, and Ms. Summers uses it to make smoothies. In the blender goes kale and other greens from the garden, and fruit from the garden or donated by parents. They are lucky – they can grow papayas and bananas right there at the perimeter of the garden.
So how does all this translate for New England school gardens? Because of our climate, we have a much shorter growing season – but now is the time to think about it. First of all, get your principal and parent-teacher organization interested. For example, the garden in Haiku had wood-sided raised beds, which is a good idea, but an initial investment. Fund raisers to get materials for the program would be a big help as most school budgets are already tight.
Next, get the school board interested and committed to it. Getting a teacher or teacher aid assigned to the program would be a big help – but also a budget line item. Although a program could be initiated and run a volunteer or Master Gardener, it would best to have a paid gardening teacher who can work with the kids of all grades. That gardening teacher can also link what is happening in the garden with what is being taught in the classroom. Gardening has the potential to increase math and language arts skills if integrated into a comprehensive program.
There are plenty of fast-growing greens that can be planted in early spring and harvested before school lets out in June. I love the idea of green smoothies – blending lettuce or spinach with bananas and apples, for example. They are delicious and healthy. And yes, someone needs to buy the fruit here in New England, but if we can get our kids craving healthy foods instead of fat and sugar-loaded snacks, we can, perhaps, set a life-long habit that will make a difference.
I feel so lucky to have spent part of my vacation in Maui visiting a school that really is doing more than teaching the 3 R’s. And I hope we can do more here – even if we can’t raise our own bananas.
Henry Homeyer is a lifelong organic gardener and the author of 4 gardening books. His web site is www.Gardening-Guy.com.
Learning and Helping as We Travel
Posted on Wednesday, January 14, 2015 · Leave a Comment
When I packed my bags to go to Maui recently I thought about packing my CobraHead weeder. But in the rush of getting ready I neglected to do so. I wish I had. That’s right, I like to garden even when I go on vacation. There are always opportunities to help out, and to learn. A winter vacation in a warm place can offer more than just a tan and some relaxation.
A friend told me about an organic farm on Maui that serves developmentally disabled adults and sells organic fruits and vegetables to the community. I called the farm and offered a day of help; my three traveling companions accompanied me. It was a wonderful day – and helped me to feel a little less guilty about the carbon emissions of that big silver bird that brought me to Maui.
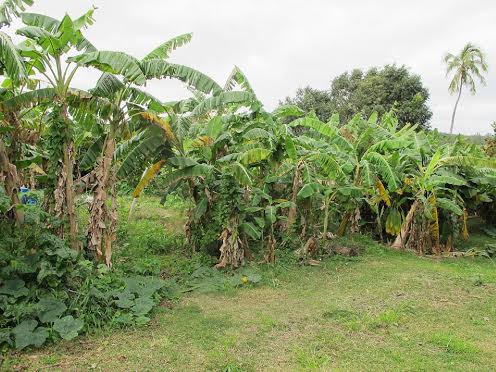
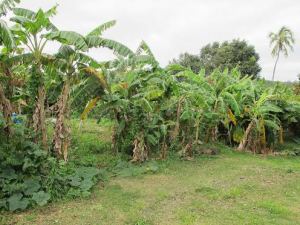 Lokelani Ohana Farm Lokelani ‘Ohana Farm is unlike any I have visited before. It is just over an acre in size and produces 10 kinds of bananas including thumb-sized bananas and “apple” bananas, my favorites. Apple bananas are half the size of bananas we know from the store with a rich flavor that makes ordinary bananas seem as bland as Wonder Bread. There had been a severe tropical storm just before we had arrived on Maui, and some of the banana plants had blown down. We helped by cutting up downed stalks and lugging them off to compost piles. And I got to do some weeding – while it was 20 below back home.
Lokelani Farm is a “vibrant sustainable ‘Ohana where “people with disabilities live, learn and work together with reverence for spirit, creativity and nature, supporting each other’s potential and sharing a life of purpose.”, according to the vision statement in their brochure.
Christina Chang, the director of the farm and programs, told me that the programs have been in existence just since 2005 and are modeled on the Camp Hill initiative of Pennsylvania. Camp Hill has farms and programs that serve developmentally disabled adults in several locations in the northeast. Their farm programs are organic and biodynamic. At Lokelani adults participants learn not only how to garden, but also Saori weaving and other craft skills, and develop better social skills.
So if you wish to help out for a day or more on your next vacation, how should you find a good place to do so? Before heading off to Florida or Nassau or France, do a little research on the internet. Twice before this experience I have worked on farms, once in France and once in the Hebrides off Scotland. Both allowed me to learn as well as to help.
In my previous experiences I had joined the WWOOFer program: World Wide Opportunities on Organic Farms. It matches up volunteers with organic farms for short term work experiences. I worked about a week on each of the farms where I “woofed”; some farms have restrictions about how long a worker must stay and help – a week or a month minimum, for example. In general, woofers get room and board provided and work 4 to 6 hours a day, five days a week. Lokelani had 3 woofers working on the farm the day we were there, but we were not a part of the official WWOOFer program. In general other woofers that I have met have been in their twenties and thirties, but there are no age restrictions.
In order to see what is available, go to the website www.wwoof.net. The website will not give you farm locations or contact info – they want you to pay first to join – but you can see what sorts of jobs and farm placements are available before you join. In the United States the fee to become a WWOOFer is $40. In France it is 25 Euros.
You need to join the WWOOF organization for the country you are interested in – you cannot join once for all of Europe, for example. The web site allows you to sort the farms according to your requirements for length of stay, accommodations, type of food provided. Thus you can select omnivore, vegetarian or vegan diet, and only farms that can provide that will show up on your search.
I also found that there are other organic farms on Maui, some of which provide accommodations and the opportunity to learn and take classes. So you don’t have to sign up to be a woofer if you want to spend some time gardening in winter.
So what did I learn at Lokelani that day? I learned that bananas are incredibly resilient. Cut off the top of the plant, and the roots and base will generate a new stem. The leaves make a great mulch – they will block out sunshine and hold down weeds. I learned what a breadfruit tree (and the fruit) look like, and what macadamia nuts look like right from the tree. I met some very interesting people. I learned that Lokelani is a wonderful non-profit (www.lokelaniohana.org) that is trying to not only help adults with disabilities, but to help the broader community to accept and understand the special love and creativity of people with disabilities.
So think about spending some time on a farm next time you vacation. I’m glad I did.
Henry Homeyer is not answering gardening questions this week. His Web site is www.Gardening-Guy.com. He is the author of 4 gardening books.
|


 Click Here to buy from Cobrahead