Gardening in January
Posted on Wednesday, January 8, 2014 · Leave a Comment
For most of us, gardening in January is limited. Water the houseplants. Read the seed catalogs. Dream of flowering shrubs to add to the perennial border – that sort of thing. But there are activities we can do now– and should.
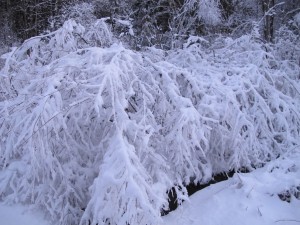
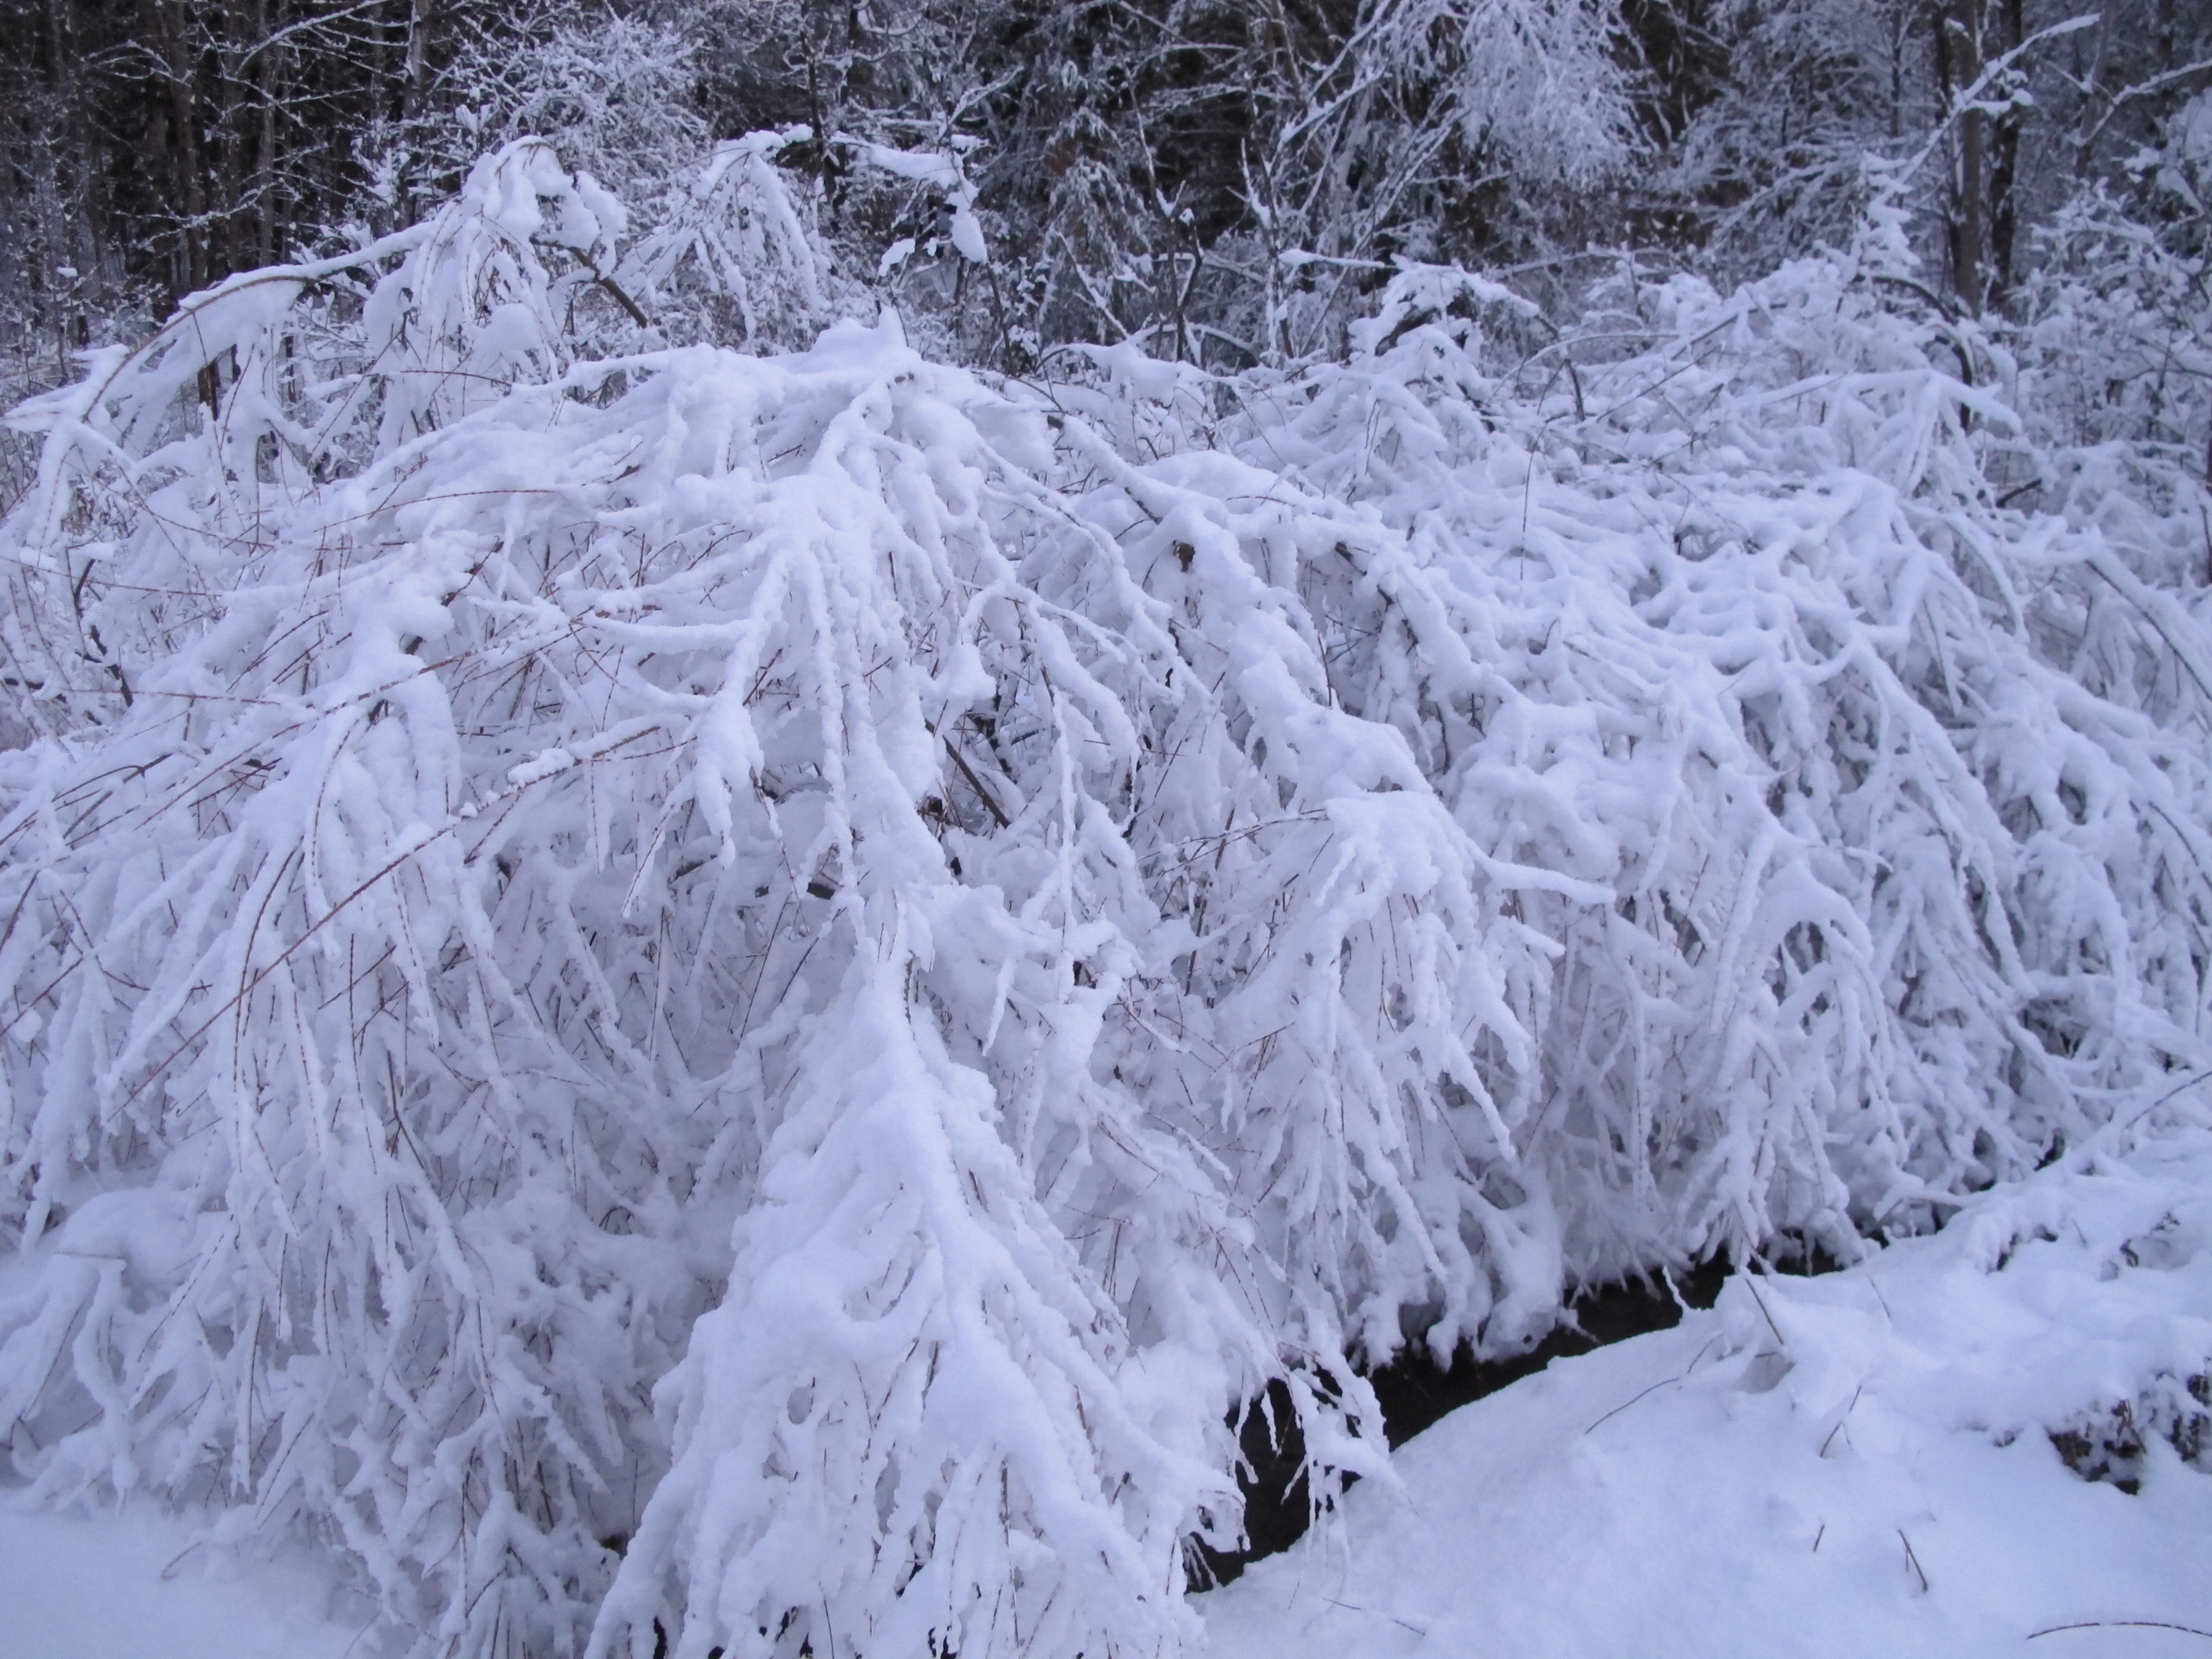
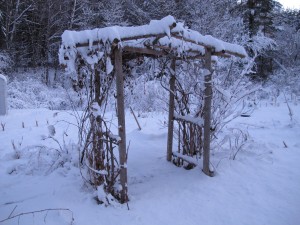
Snow weighing down branch
In late December we had 4 inches of heavy wet snow, followed by cold weather. This resulted in heavy globs of snow and ice frozen to many of our decorative trees and shrubs, and considerable damage. In addition to broken limbs, many branches were bent to the ground – and might stay that way unless we do something.
I went around my garden to knock off snow, or to shake it loose from shrubs that were bent over or burdened by the snow. Some have responded nicely, popping back to their standard shapes, while others may not fully recover until spring.
Of those that bounced back, there is my arctic blue willow (Salix purpurea ‘Nana’). This shrub has varied in its form over the years: for several years it was a classic ‘Nana’ – which means that it was a slow-growing dwarf form. But since I started pruning it a few years ago (or perhaps it hit a teenage growth spurt) it has responded by putting out lots of new growth, sometimes growing as much as 3 feet in a season. I didn’t prune it last fall because the new growth was so distinctive: lots of fine vertical stems in close proximity to each other. It reminds me of a punk rockers hairdo – straight up.
That willow was bent over so that the tips of its branches (which were 6 feet tall or so) touched the ground. I went around gathering armfuls of branches and shaking them gently to shed the snow. The branches did not pop back up and I was worried that the shape of the shrub would be permanently changed. But a couple of days later it is back to its original shape.
I keep my Christmas tree up and in the house until it becomes almost dangerously dry, ready to explode at the first sign of a spark. I consider it a “winter tree” in the New Year and revel in its lights and all the memories the ornaments conjure up. (I have a felt and tinsel Santa from my Mom’s tree that probably came from Germany with her parents around 1900). But if you take down yours before the Ground Hog Day, you can use the branches in the garden.
Evergreen boughs are great to use to protect tender perennials and shrubs. Although we have had good snow cover so far this year, if we get a January thaw followed by very cold nights, frost and cold may penetrate the soil deeply and may kill the roots of tender plants. To prevent that, provide some insulation, particularly for new perennials and shrubs. Place branches over the plants, and then some mulch hay or straw over that. It’s like tucking in your baby at night.
A brief explanation is in order about why some tender shrubs and vines fail to bloom some years. Woody plants make their buds either the summer before and bloom early in the spring or summer on “old wood”. Or they make their buds in spring for summer or fall blooms on “new wood” that grows after winter is over. In the first category are forsythia, lilacs, blueberries and most wisteria. In the second are hydrangeas, summer clethra and Seven Sons Flower tree.
Shrubs that bloom on old wood can lose their blossoms when a cold, strong wind burns off the flower buds. The ‘Endless Summer’ blue hydrangea is sold as a plant that will bloom in June and repeat blooms all summer. But that only happens if the flower buds survive the winter, and often they do not – delaying bloom until late summer on new wood.

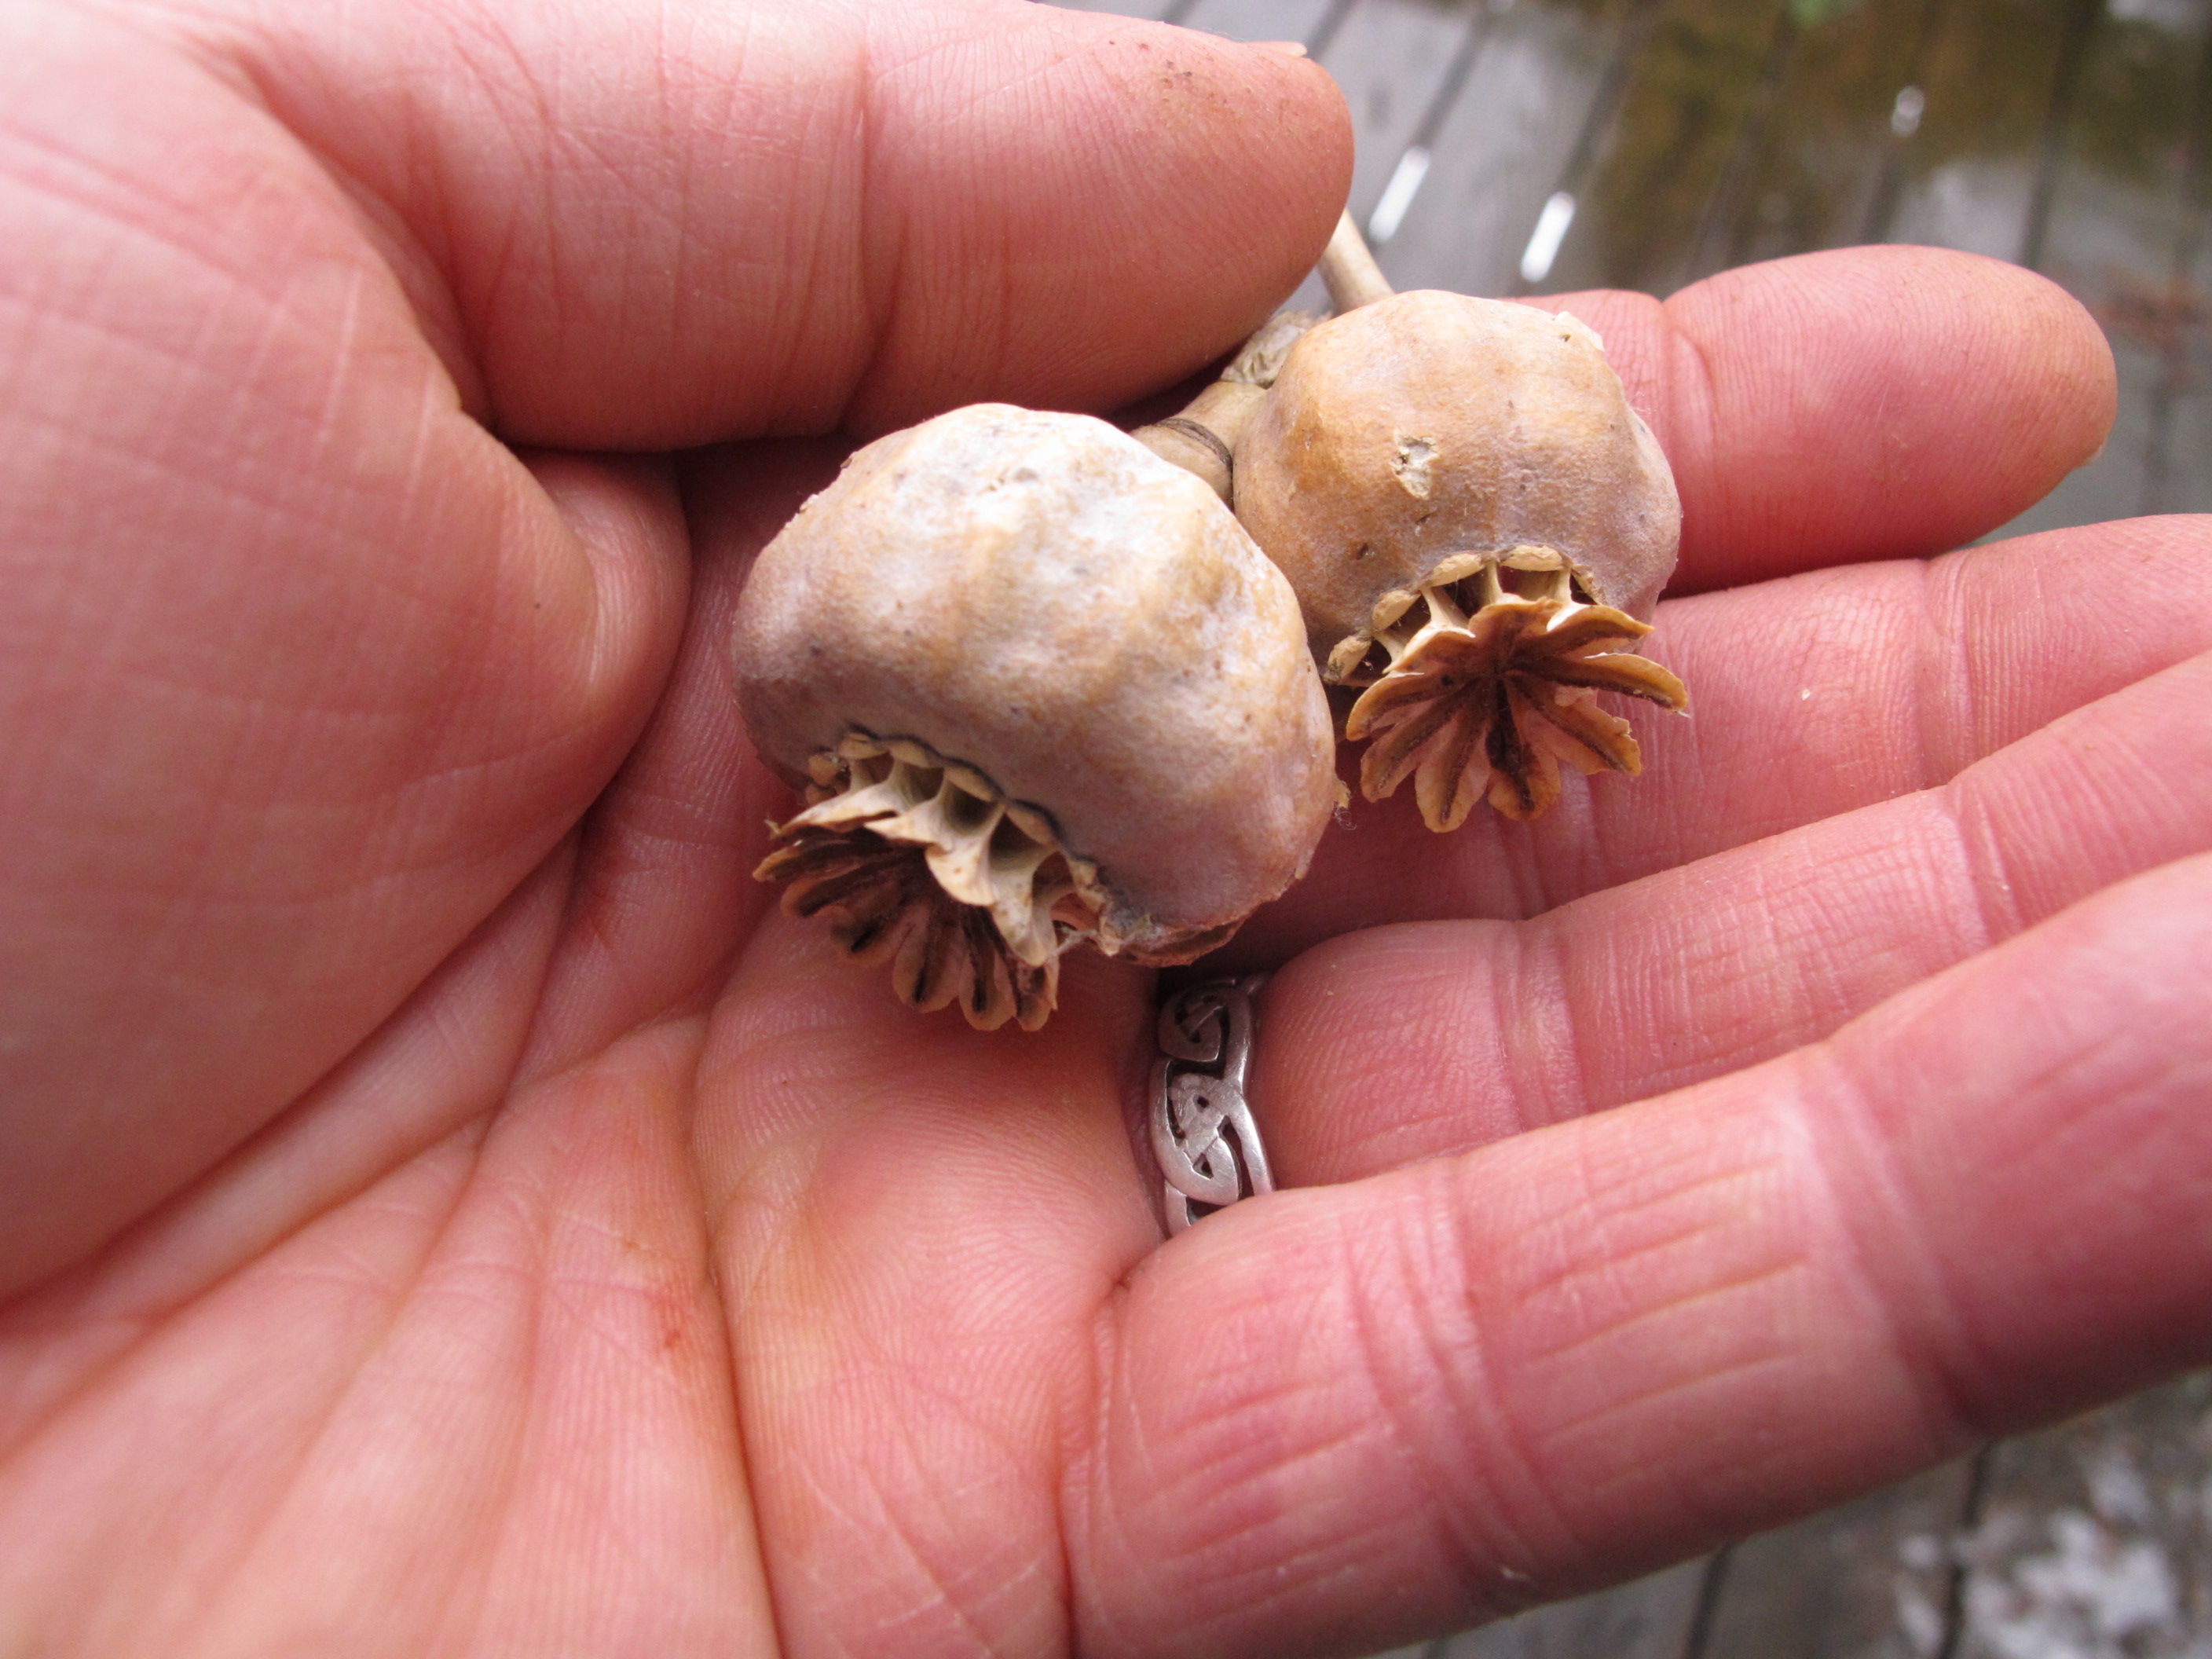
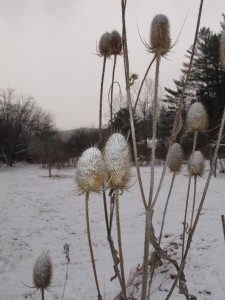
poppy seed pods
Another gardening activity I do when temperatures are below zero is to plant a few poppy seeds outdoors in the snow. I save the seed heads of annual poppies each year in a plastic bag. Then just when winter seems the most oppressive, I sprinkle seeds on the snow over a flower bed that has been cultivated and loose soil on its surface.
Even a cold winter sun will heat up a black poppy seed enough to allow it to melt its way through the snow. If I sprinkle a hundred seeds, at least a few will eventually lodge in suitable places and grow next summer. It’s no work, great fun, and it makes spring seem like a word that is within the realm of the possible -even if the thermometer is below zero.
Henry Homeyer is the author of 4 gardening books and a children’s novel, Wobar and the Quest for the Magic Calumet. Reach him at henry.homeyer@comcast.net or PO Box 364, Cornish Flat, NH 03746.
Resolutions for 2014
Posted on Wednesday, January 1, 2014 · Leave a Comment
On a sunny winter day I walked around my property and made a list of projects I should do in 2014. I knew I’d find a few, but easily found a dozen. Maybe these will encourage you to make your own resolutions for the upcoming year – or volunteer to come help me with mine!
In general I am pretty satisfied with my gardens. Yes, they always have some weeds – both in the vegetable garden and in my flower beds. I resolve to weed more in 2014, and, more importantly, to take my own advice and weed for at least a few minutes every day. Even 5 or ten minutes each day makes a big difference, I know it.
And there are some ‘vigorous’ plants that have taken over sections of some beds and need to be cleaned out or gotten under control. I resolve to work harder at doing so. I have some goutweed (Aegopodium podagraria) that has taken over a few places, and I know now that it is impossible to totally rid my gardens of it. Even if I were willing to use powerful chemical herbicides, which I am not, I cannot get rid of it. I will, however, work harder at keeping it contained. I will try to contain it with landscape fabric covered with bark mulch.
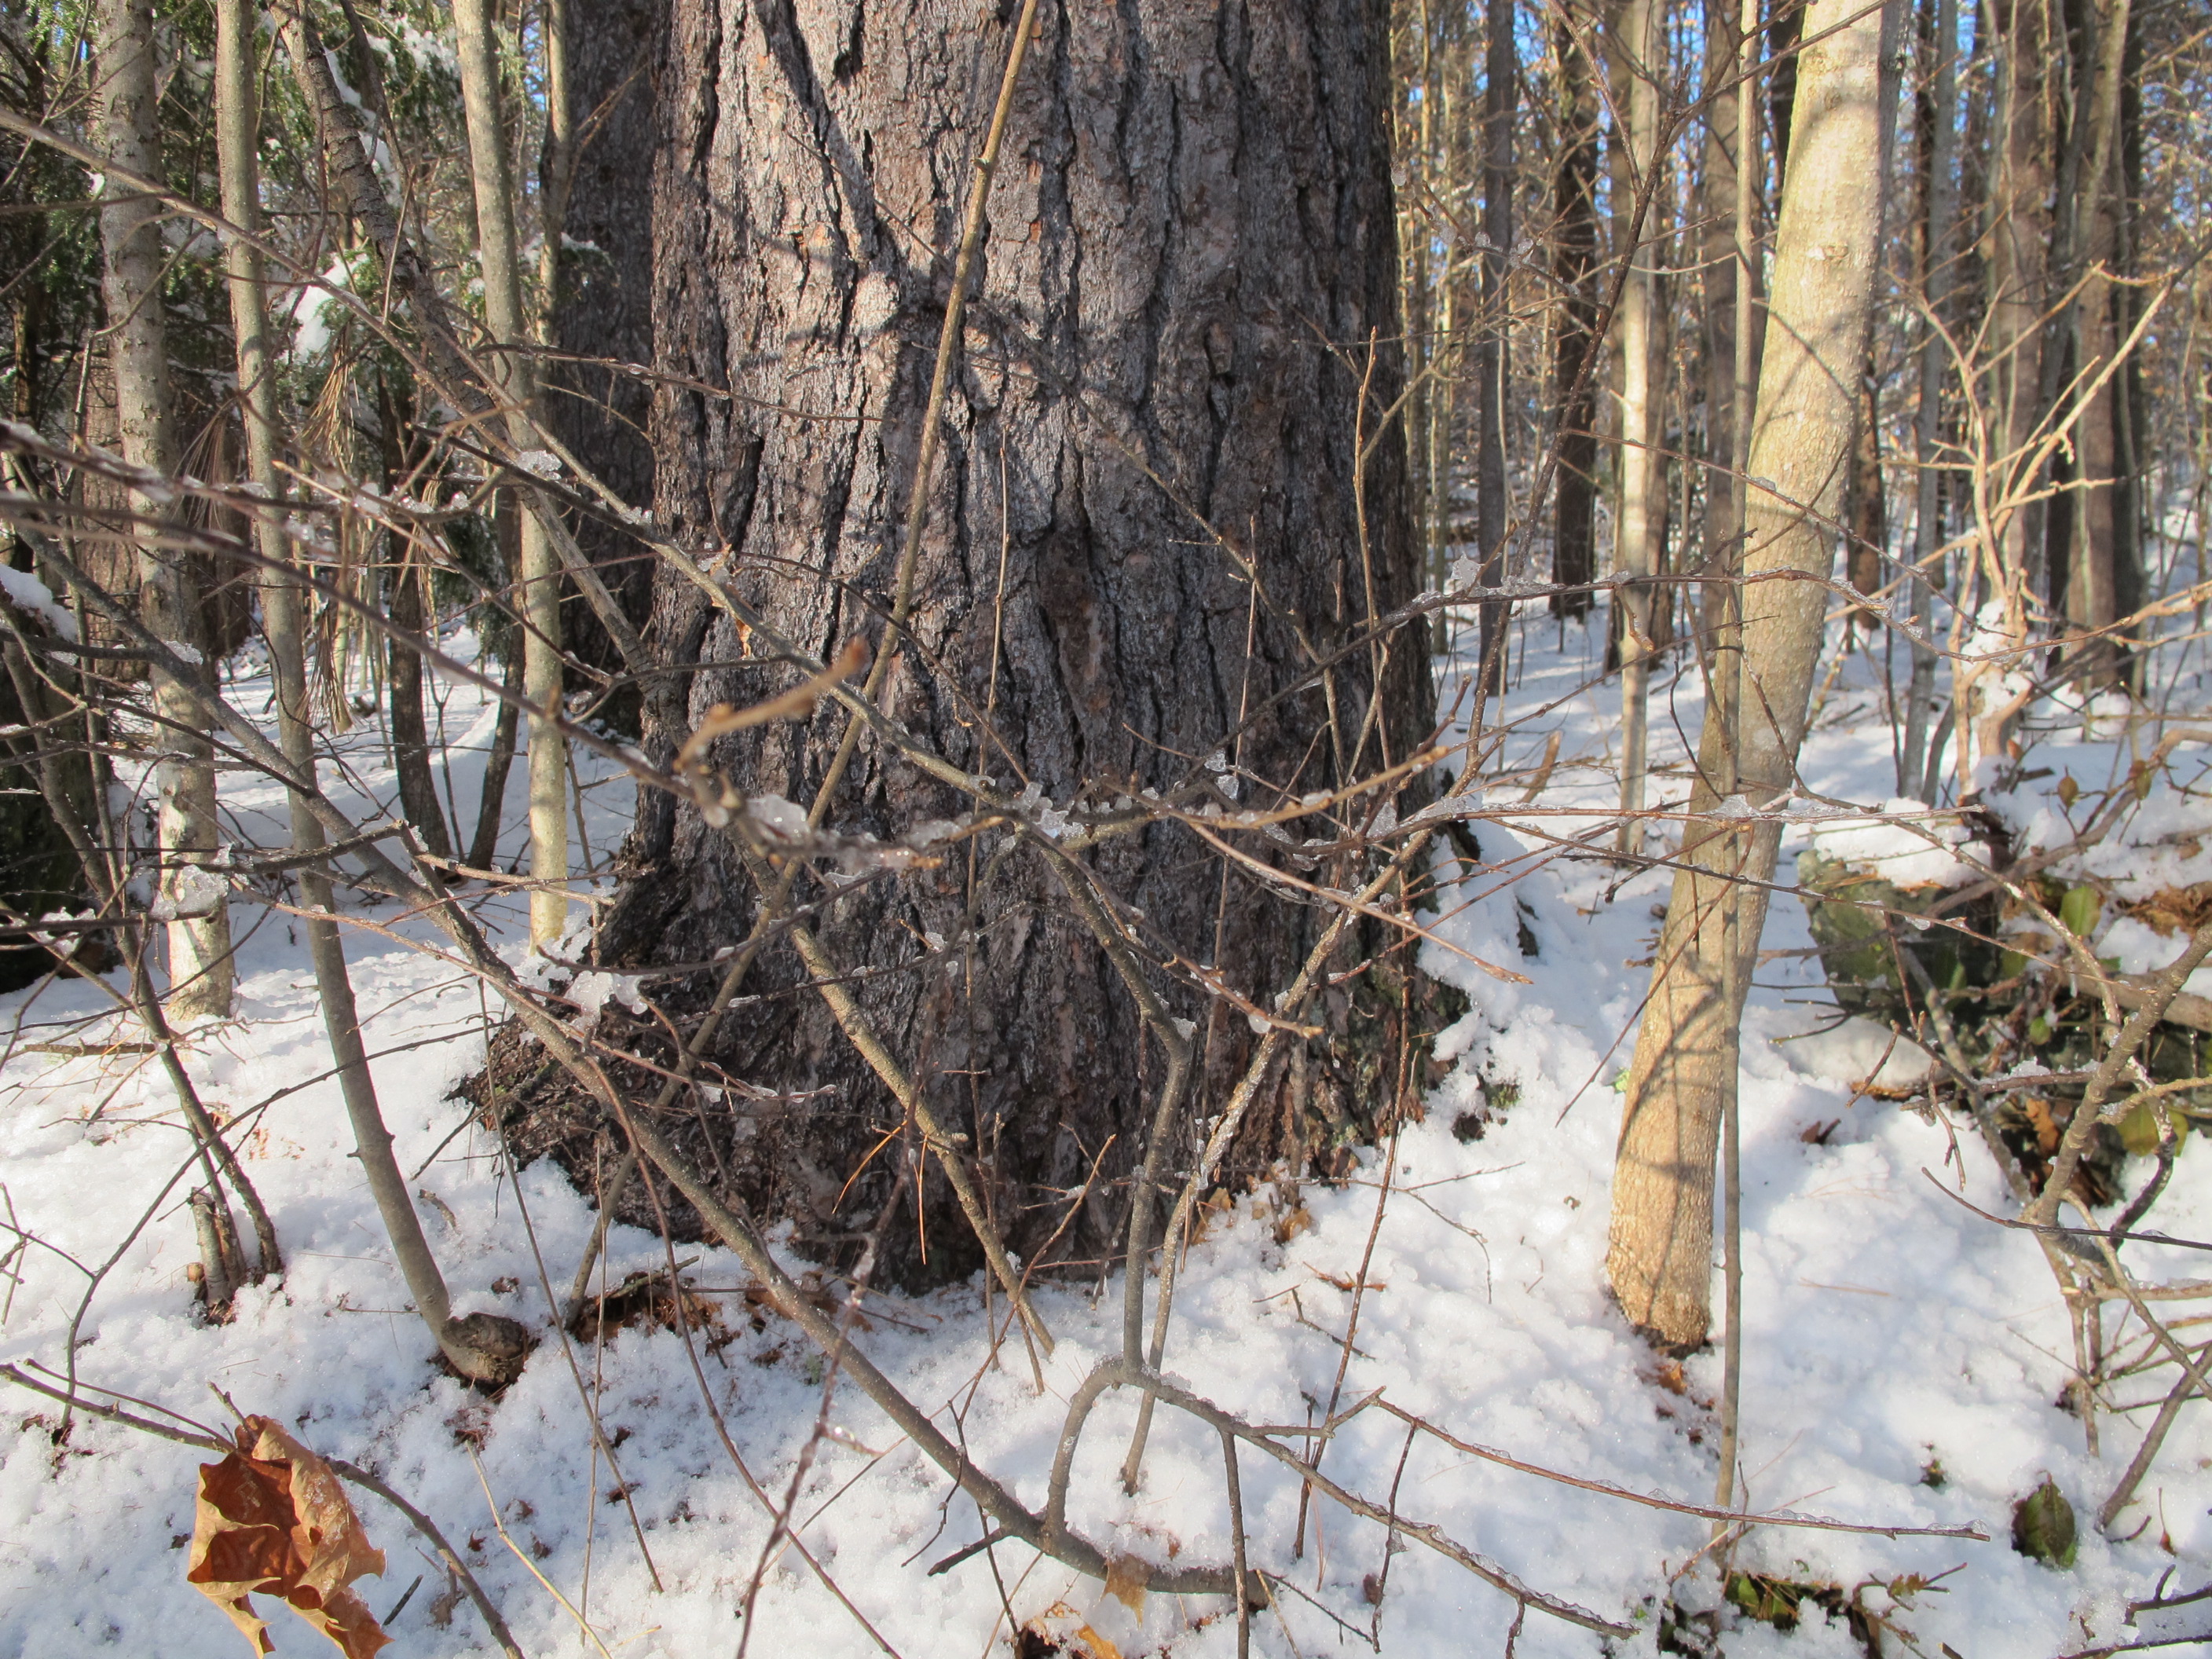
The small trees and shrubs growing round this large white pine will never be able to reach their full size. They will be shaded out and out-competed for water and soil nutrients.
I need to clear out young trees that are popping up around older trees. Trees drop seeds, and too many of those seeds germinate and start to grow – even if they are just a few inches from a mature tree. These babies crowd existing trees, and basically have no future. Instead of letting a young maple grow six inches from a mature pine tree, better to cut if off at the base. This is work that I can do now, before heavy snows fall. I can cut these fledglings off right at ground level.
It is time to add some limestone or wood ashes to my lawn around my maples. This is something I can do now. Maples suffer from the effects of acid rain: the much needed calcium in the soil gets dissolved and washes away. I have a few old sugar maples that are in poor health so I will give them a nice shot of calcium (in the form of wood ash) that I will spread around the trees. How much? I suppose I should get a soil test done and weigh out the quantity of ash according to a formula. But so long as I don’t add an excessive quantity, I feel a “good sprinkling” is fine.
This garden entry needs re-building
I have two cedar structures that I built for supporting vines and both need some attention, which I resolve to give them in 2014. One is a simple entry way with a sloped “roof” that leads into my vegetable garden; it supports a clematis and a wisteria ‘Amethyst Blue’. The other is a hexagon with a tall teepee-like roof that supports a ‘Blue Moon’ wisteria and some grapes. The supporting structures are made from cedar fence posts (which last almost forever), but the thin branches of cedar I used for the roofs have started to rot and fall apart after 15 years or so. I was determined to make the repairs in 2013, but failed to do so.
I have some wetlands behind my stream that I have never utilized fully. The area is mostly grown up in willows and alders. This year I’d like to get rid of some of those, and plant more colorful shrubs: winterberry (Ilex verticillata), red- and yellow twigged dogwood (Cornus sericea) . I have planted some marsh marigolds in that area, but they are largely obscured. It’s time to clean out some of the volunteer growth. I want to keep it wild looking, not manicured, but I do love color in wintertime.
And speaking of willows, I have a willow that I planned to keep about 10 feet tall or so, but it has gotten to be more than twice that. I will do some radical pruning this year and next. One should never hack a tree back (I mean prune) more than 30% in a year, so I can’t do it all at once.
I have a Darwinian flower bed, one that I NEVER weed, one where only the fittest survive, but this coming year I resolve to do a little work there. The tall goldenrods, as much as I love them, have become too dominant. They are elbowing out the fall asters and a few other things. So I mowed the bed last fall, and will try to identify and dig up some of the goldenrods (Solidago spp.) in June. Maybe that will mean finding a young helper – or an intern – with a strong back to work with me.
I planted a spirea ‘Mellow Yellow’ in a dry shady place a few years ago after seeing one growing in a woodland garden in Lyme, NH. But mine has not developed the good color I saw there, so in 2014 I shall move it to a sunnier location. Shade comes in many varieties, and I think more sun will help this plant.
So that’s a good start with the garden resolutions. Send me yours, and if I get enough good suggestions, maybe I can do a column of reader resolutions. I’m at henry.homeyer@comcast.net or P.O. Box 364, Cornish Flat, NH 03746. I will only use first names, so don’t be bashful! Include the town where you live, please. And all my best to you for the New Year!
Henry Homeyer is the author of 4 gardening books. His web site is www.Gardening-Guy.com.
Consider the Birds
Posted on Wednesday, December 25, 2013 · Leave a Comment
Even Ebenezer Scrooge, (at least in his post-enlightenment days) probably had a bird feeder. Virtually everyone I know does, at any rate. Why? Because live birds are fun to watch, colorful, and because we pity them on cold mornings. Ten below zero? Those little chickadees are puffed up and fat-looking, increasing their tolerance to the cold by fluffing up their feathers. They seem to rely on us for food, but in fact, what we provide is more like dessert.
According to some studies, in winter birds only get about 25% of their calories from seed we buy. Maybe less. All year long they eat seeds, bugs, berries, nuts and all sorts of scavenged food. But we can help them by planting shrubs and trees that provide high calorie, nutritious food. Which is to say we shouldn’t be planting Fruit Loops – or the equivalent – we should be planting native species that are the equivalent of oatmeal or other healthy foods.
If you wish to plan on planting some bird-friendly plants, there is a wonderful book to help you: Richard DeGraaf’s Trees, Shrubs and Vines for Attracting Birds (University Press of New England, 2nd edition 2002, paper). It lists more than 160 woody plants used by birds and lists the birds that use each for food, cover or nesting.
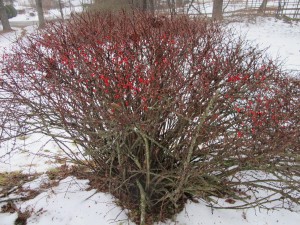
Barberry hedge
A friend of mine has a barberry hedge and since barberries are on the invasive species list, I’d love to see the backhoe come next spring to pull those prickly shrubs out by their roots. I see barberries throughout the woods and at the edges of the fields – planted by the birds, and taking over the understory.
So what would I substitute as a hedge? Looking though DeGraaf’s book, I see plenty of shrubs that would serve the birds better. Common barberry (Berberis vulgaris) is eaten by just 7 species of birds. Highbush blueberry, on the other hand, is eaten by 52 species of birds, according to his book. But some might note that barberries persist during the winter (they are not very palatable to most birds), so they can serve as emergency rations.
But there are native species that also have berries that persist for most of the winter, but will not take over the undergrowth and squeeze out other species. There are plenty of viburnums that have good berries, some of which persist into winter. Viburnums, in general, are fast growing shrubs with nice flowers and berries. I particularly like one called Viburnum sargentii ‘Onodaga’ that has spectacular clusters of white blossoms in early summer. On the downside, however, there is an insect pest a beetle – that is killing or damaging some viburnums, so check at your family-owned, local nursery to find which species are susceptible to the beetle before buying.
And there is of course, the common cranberrybush viburnum (V. opulus) which produce masses or red berries that persist into winter. DeGraaf’s book lists 31 birds that eat the berries, including several thrushes, bluebirds, catbirds, bluejays, flickers and flycatchers. Definitely a better hedge than barberry.
Our native dogwoods of various sorts are attractive to birds, and some are fast-growing and suitable to use as hedges. Redosier dogwood (Cornus sericea) does best in wet spots, but will grow in ordinary garden soil, too. It spreads by root, so it will fill in to form a hedge in no time. The bright red (or yellow) stems of new growth can be spectacular for winter viewing. Some 20 species of birds eat the fruit.
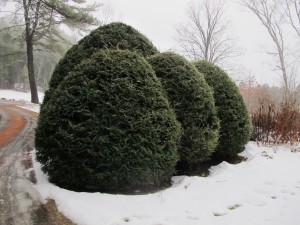
Hemlock hedge
Full sized trees are important to birds, too. They can provide shelter, nesting sites and food. Two common evergreens are among the best: white pine and Canadian hemlock. White pines provide food for 46 species of birds, and almost as many use them for nesting and cover. They are easy to grow and tough – just keep them well away from salted roads, as salt can kill them.
Canadian hemlock is the preferred nesting site for robins, blue jays and wood thrushes, among others. The seeds are good winter food for juncos, chickadees, goldfinches, blue jays and others. And unlike pines, one can use them to create hedges. That said, many people start out using hemlocks for hedges, only to get lazy for a few years – and discover that their hedge is 12 feet tall! That’s delightful to the birds, but may not give you the size hedge you wanted.
Apples, crabapples and nut trees are good for birds, too. Not all crabapples appeal to birds, but some favorites include Snowdrift, Sugar Time, Indian Magic, Sargent, Red Jewel, Prairie Fire and Golden Rainbow. Even hard nuts are helpful – often after squirrels finish with them there are tasty tidbits left in the shells for birds.
Almost anything you plant will provide something for the birds, but do your homework this winter to see what would please both you and the birds.
Henry Homeyer can be reached at henry.homeyer@comcast.net. His web site is www.Gardening-guy.com. He is the author of 4 gardening books.
Exploring New Trees and Shrubs
Posted on Wednesday, December 18, 2013 · Leave a Comment
Snow has come. The leaves are raked. The garden is as put to bed as it’s going to get. It’s a good time to think about what worked this year and what didn’t. I was pleased with a number of new shrubs that I planted in the last two years and think you might like to keep them in mind next spring when the ground thaws.
The very last shrub that I planted this year was – I have to admit- an impulse buy: scarlet beauty sweetspire (Itea virginica ‘Morton’). I was at E.C. Brown’s Nursery in Thetford, VT (www.ecbrownnursery.com) in mid-November to get a small tree for a special project. And there by the driveway was a shrub that still had its leaves, and they were bright red! I mean as red as burning bush (Euonymus elata) that shrub, loved by many but now banned in most states, that turns a brilliant red in fall. It called to me a soft voice,”I could be yours. I need a home before winter …” So it came home.
According to the tag, it is a medium growing spreading deciduous broadleaf shrub with a height of 3 to 4 feet that spreads 2 to 4 feet. Before I decided on it, I checked my favorite plant reference text, Michael Dirr’s Guide to Woody Landscape Plants. It told me that it is hardy to Zone 5 –safely surviving winters of minus 20 degrees. The plant tag said it was hardy to Zone 4, which means it will survive 30 below zero. I decided to get one, even though we do see temperatures colder than 20 below, on occasion.
Dirr’s book also described the flowers as white, lightly fragrant and about half an inch in diameter, blooming in early summer. He noted that given full sun and plenty of moisture the flowering can be “staggeringly beautiful”. That sounded good to me. Especially since the leaves were dramatic in their fall colors – and I have a nice wet spot near my stream. I am always leery of plants that spread by root, so I ‘ll keep an eye on this one to be sure it doesn’t take over.

Disanthus cercidifolius
Another nice shrub that I got in 2012 that had great fall foliage is the “redbud hazel” (Disanthus cercidifolius). Not a redbud or a hazel, this shrub has leaves that look like redbud leaves. The leaves turn a brilliant red early in the fall, with hints of orange and purple. I planted mine in 2012 and it overwintered nicely, but did not bloom this year. Though as I read Dirr’s book, I now notice that the flowers are “non-showy” half-inch diameter dark purple flowers that appear in October. So maybe there were a few, and I missed them in among the red foliage.
Redbud hazel plants need light to moderate shade, along with deep moist soil that is rich in organic matter and protection from the wind. Mine is suitably planted, and has survived minus 20 degrees. They can grow 6 to 10 feet tall, though mine did not show rapid growth in its first year.
Another nice shrub that I planted in 2012 has many names: Carolina allspice, common sweetbush, sweet Bettie, spicebush and my favorite, sweet bubby. Which is. of course, why plant geeks like me prefer the Latin name: Calycanthys floridus. Don’t be intimidated by Latin nomenclature, just pronounce every letter – and say it with gusto and everyone will be sure you know what you are talking about (that works for me, anyway).
Sweet bubby is, according to the literature, very adaptable: it will grow in sun or shade, acid or alkaline soil. But it does like rich, moist soil and I have plenty of that. I originally planted it in full sun, but the leaves scorched a little that first summer. I assumed that since I had kept it in the pot in a shady spot for a month or more, the scorching was just a reaction to the sudden shift to full sun. But it scorched again this year. So this fall I moved it to light shade near a big old wild apple tree.
The flowers of Calycanthus are striking: deep maroon up to 2-inches across and they can be deliciously fragrant. But not all varieties are fragrant, so if the scent is important to you, buy in early summer when the blossoms are on the plants at the nursery. Some, I have read, may even smell like vinegar. Mine do not have a noticeable fragrance.
Calycanthus
I have seen a Calycanthus that was 8 feet tall I in Woodstock, VT, but it was clearly a plant that had been around a long time. Mine has not grown much in the two years I have had it. It can spread 6 to 12 feet, and the two specimens I see regularly seem to be more interested in growing sideways than getting tall.
The only other woody plants I installed this year were a couple of striped or moose maples (Acer pennsylvanicum). This is a small understory tree that I notice in the woods in winter – the bark turns a bright, light green with dark stripes. It is rarely sold in plant nurseries, so grab one if you see it for sale. It is said to grow even in terrible soil conditions, but likes moisture and acidic soil.
We can’t plant anything now, but we can plan and dream.
Henry Homeyer is the author of 4 gardening books and a children’s fantasy-adventure about a boy and a cougar. His web sites are www.henryhomeyer.com and www.gardening-guy.com. He can be reached at PO Box 364, Cornish Flat, NH 03746 or henry.homeyer@comcast.net.
Holiday Decorations
Posted on Wednesday, December 11, 2013 · Leave a Comment
This time of year is tough on many gardeners: there is little daylight and little to do in the garden. And there are no flowers to pick and place on the table. Recently the weather has been dismal: dark gray days with precipitation off and on. Over the centuries people have combated the darkness with candles, bonfires, holiday lights and sprigs of greenery placed on the door or brought inside. Let’s look at what we can do.
First, I regularly visit my local independent florist. Florists are a dying breed, along with independent bookstores and family-owned hardware stores. Call me an old codger, but I believe that there is value in supporting all of these institutions, even if I pay a dollar or two more for what I buy. The owners of these institutions have a wealth of knowledge, and are happy to help you find just what you need. And often their prices and quality are actually better.
For example, I believe that the flowers I get from my florist last longer and look better than flowers bought at a big box store. I ask my florist to put together a bouquet of flowers for me, and she picks a nice selection – $10 will usually buy a generous bouquet.
Keeping the bouquet fresh takes regular maintenance: I change the water every day or two, and trim off half an inch of stem each time. It’s also important to remove all leaves that might get into the water. When the leaves die, bacteria grow and slime forms – blocking the uptake of water to the flowers. So they wilt.
A few years ago I called my florist to see if she had any potted phalaenopsis orchids for sale. Surprisingly, she told me to go to a big box store, and I did. I was amazed to see them for sale under $15. Certain big box stores obviously have suppliers who sell them truck loads of these hardy and gorgeous orchids. So most florists don’t even try to compete.
Phalaenopsis orchids are relatively easy to maintain and can be coaxed to produce more blossoms in future years. They want bright diffuse light: a table top in a bright room is fine. The key is to avoid overwatering. These orchids are sold growing in a fast-draining bark mixture without soil. The roots are in a plastic mesh pot with holes which sits inside a ‘cache’ pot that has no drainage hole. I lift the inner pot out of the outer, and allow water to run through the bark chips once a week. I allow it to drain, then return it to the cache pot. If you water the plant in the outer pot, it collects water at the base – eventually drowning your orchid.
I also scavenge twigs, branches, dry flowers and berries to add to flower arrangements, or to create arrangements in their own right. Each fall I cut hydrangea blossoms and store them in tall flower pots without water. They last well all winter.
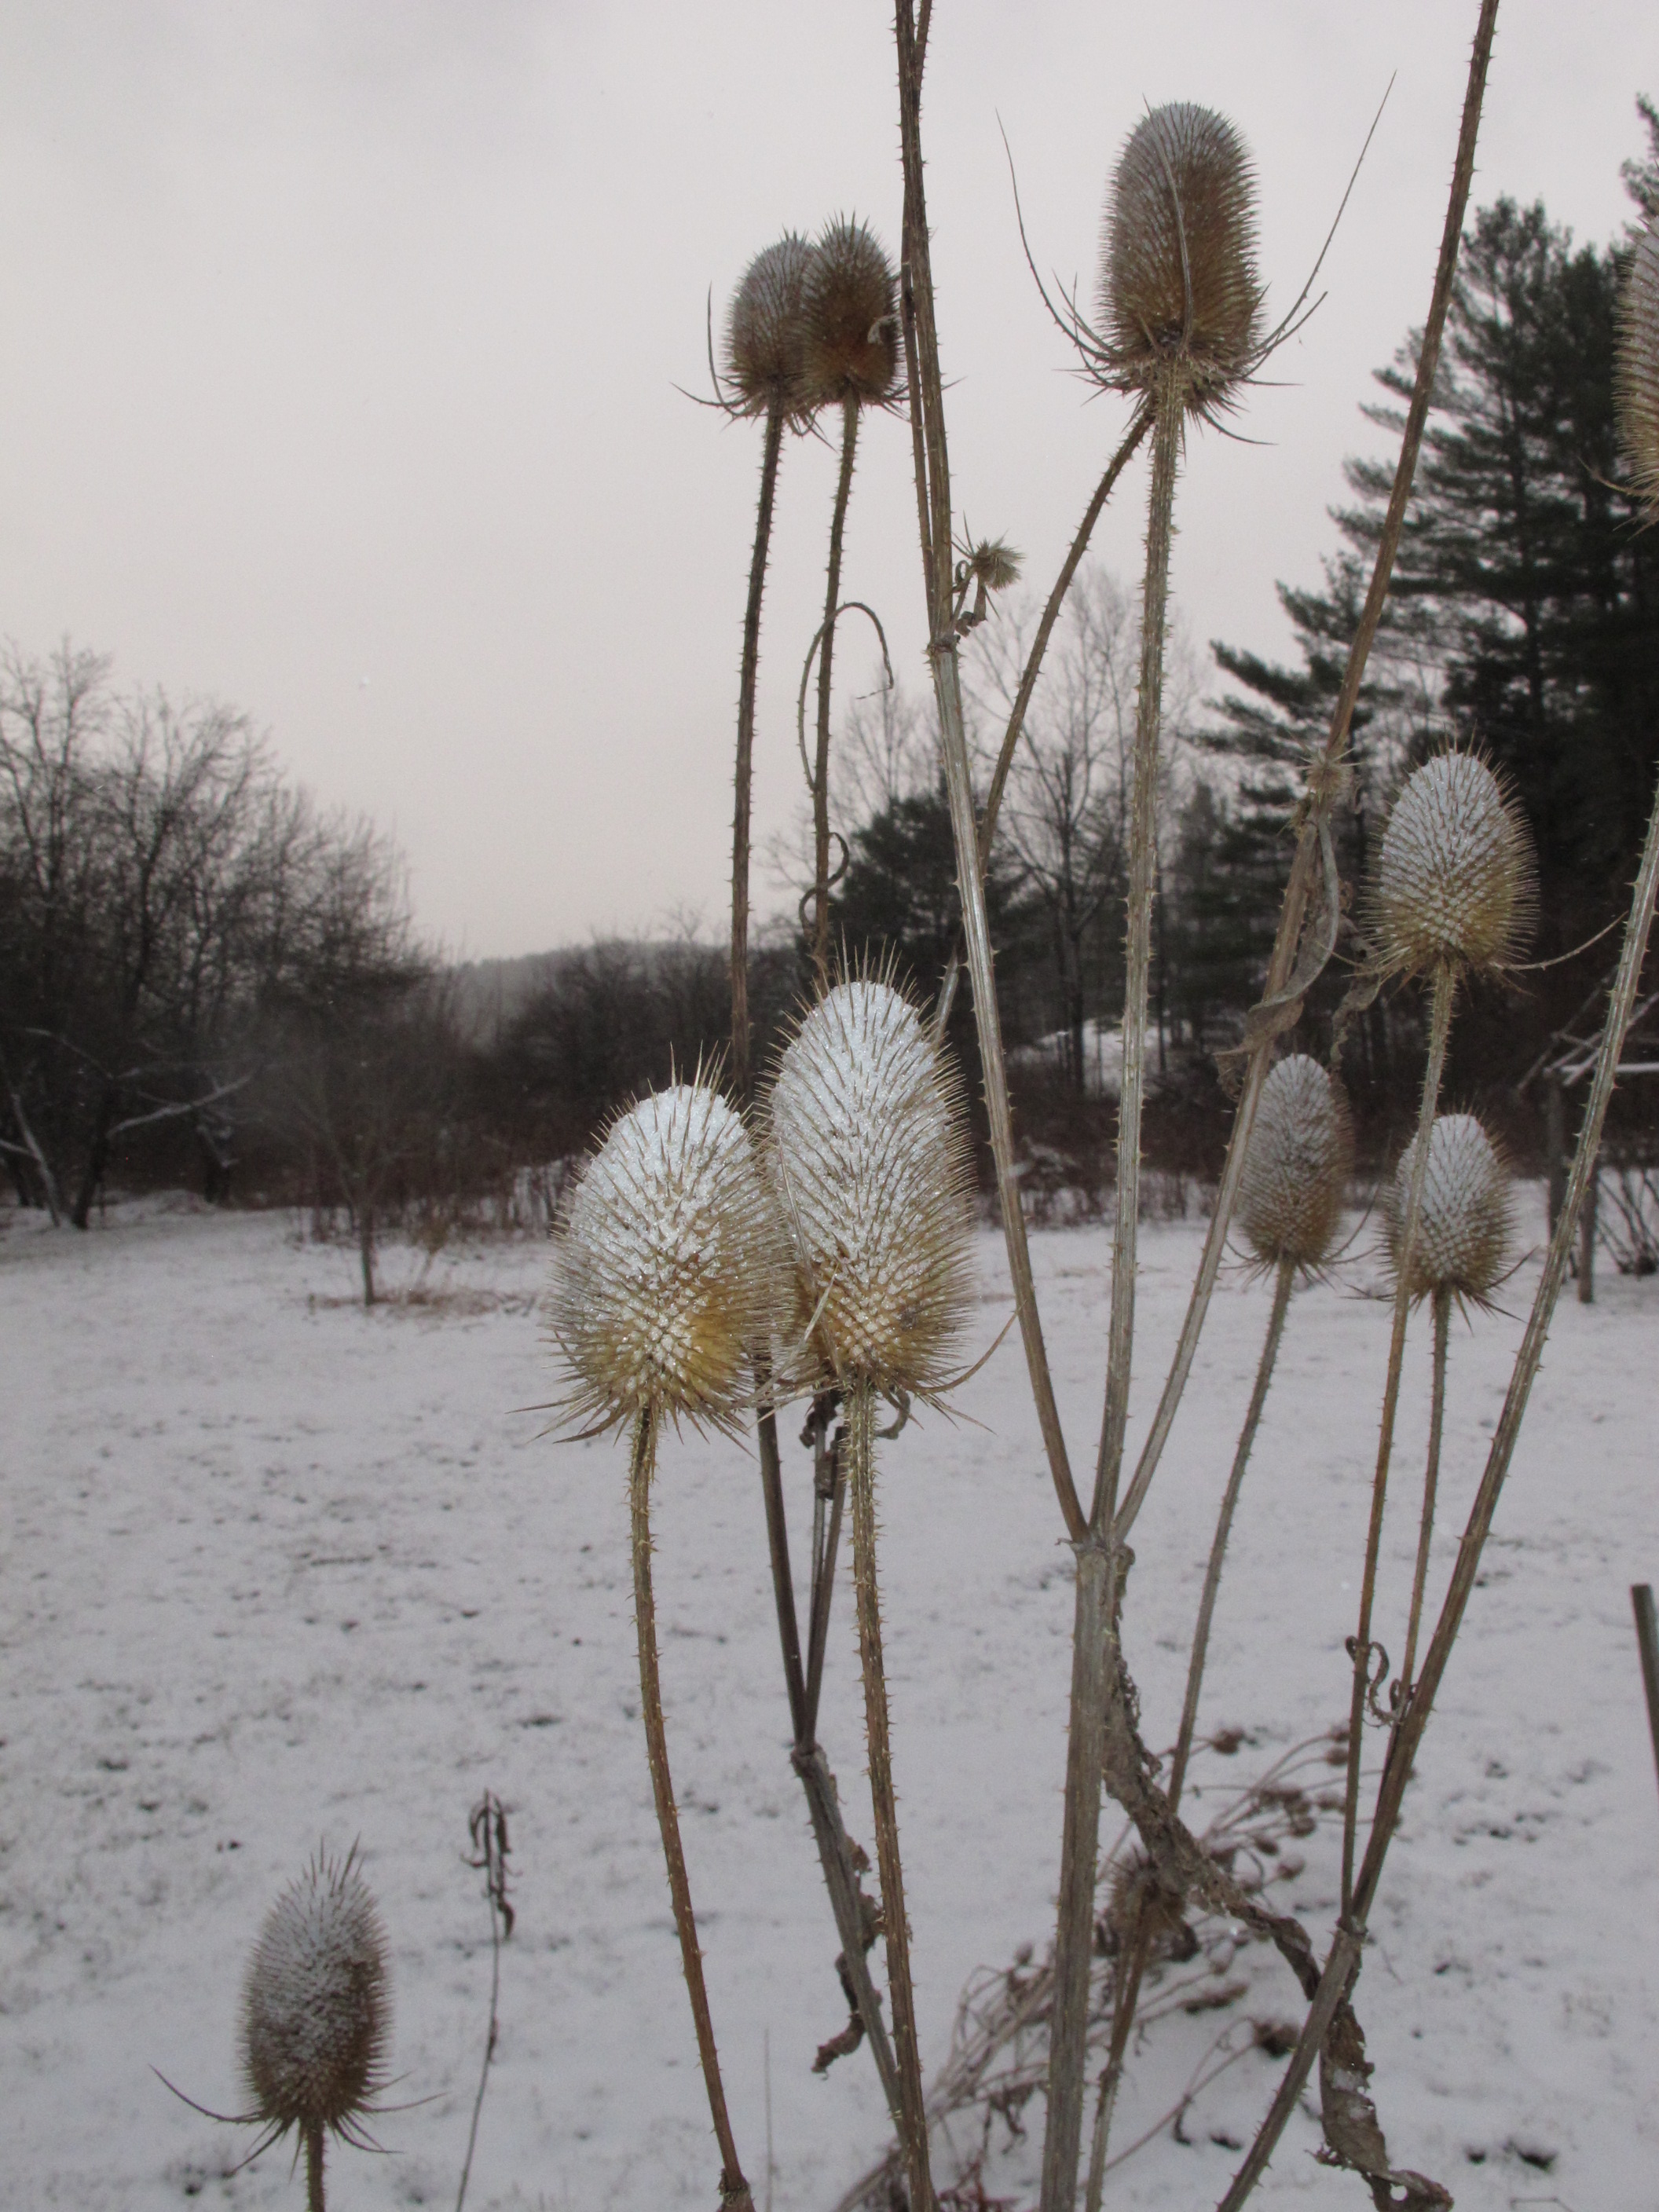
Teasel
Teasel is a dreaded weed for corn farmers in the Midwest, but I grow a few plants each summer and use it as a dry flower in winter arrangements. This plant is biennial, meaning that it blooms in its second year of life, and then dies. It gets to be over 6 feet tall and displays wonderful seed pods that have sharp barbs and spines. The key is to learn to identify the first year plants, so that you can weed out most of them before they mature.
Evergreen boughs are nice indoors at this time of year. Just be careful where you make your cuts. Never take the top of a small tree, or the tip of a prominent branch. Most do not replace the missing branch, or will send out several new branches instead of just one. So you can spoil the look of your evergreen by snipping branches carelessly. Cut inner branches, or take pieces from inconspicuous places.
Canadian hemlock is plentiful in woods everywhere, but the needles do not last well indoors. (Identify them by their short, flat needles). Your best bet is to buy a Christmas tree that is a little too tall – and the cut off branches at the base to use in vases or swags. White pine lasts well in a vase and is very common (Identify them by their 5 long, soft needles per cluster of needles, one for each letter in w-h-i-t-e).
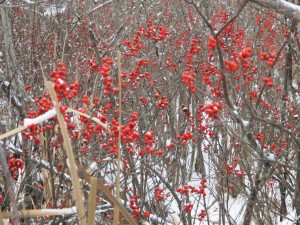
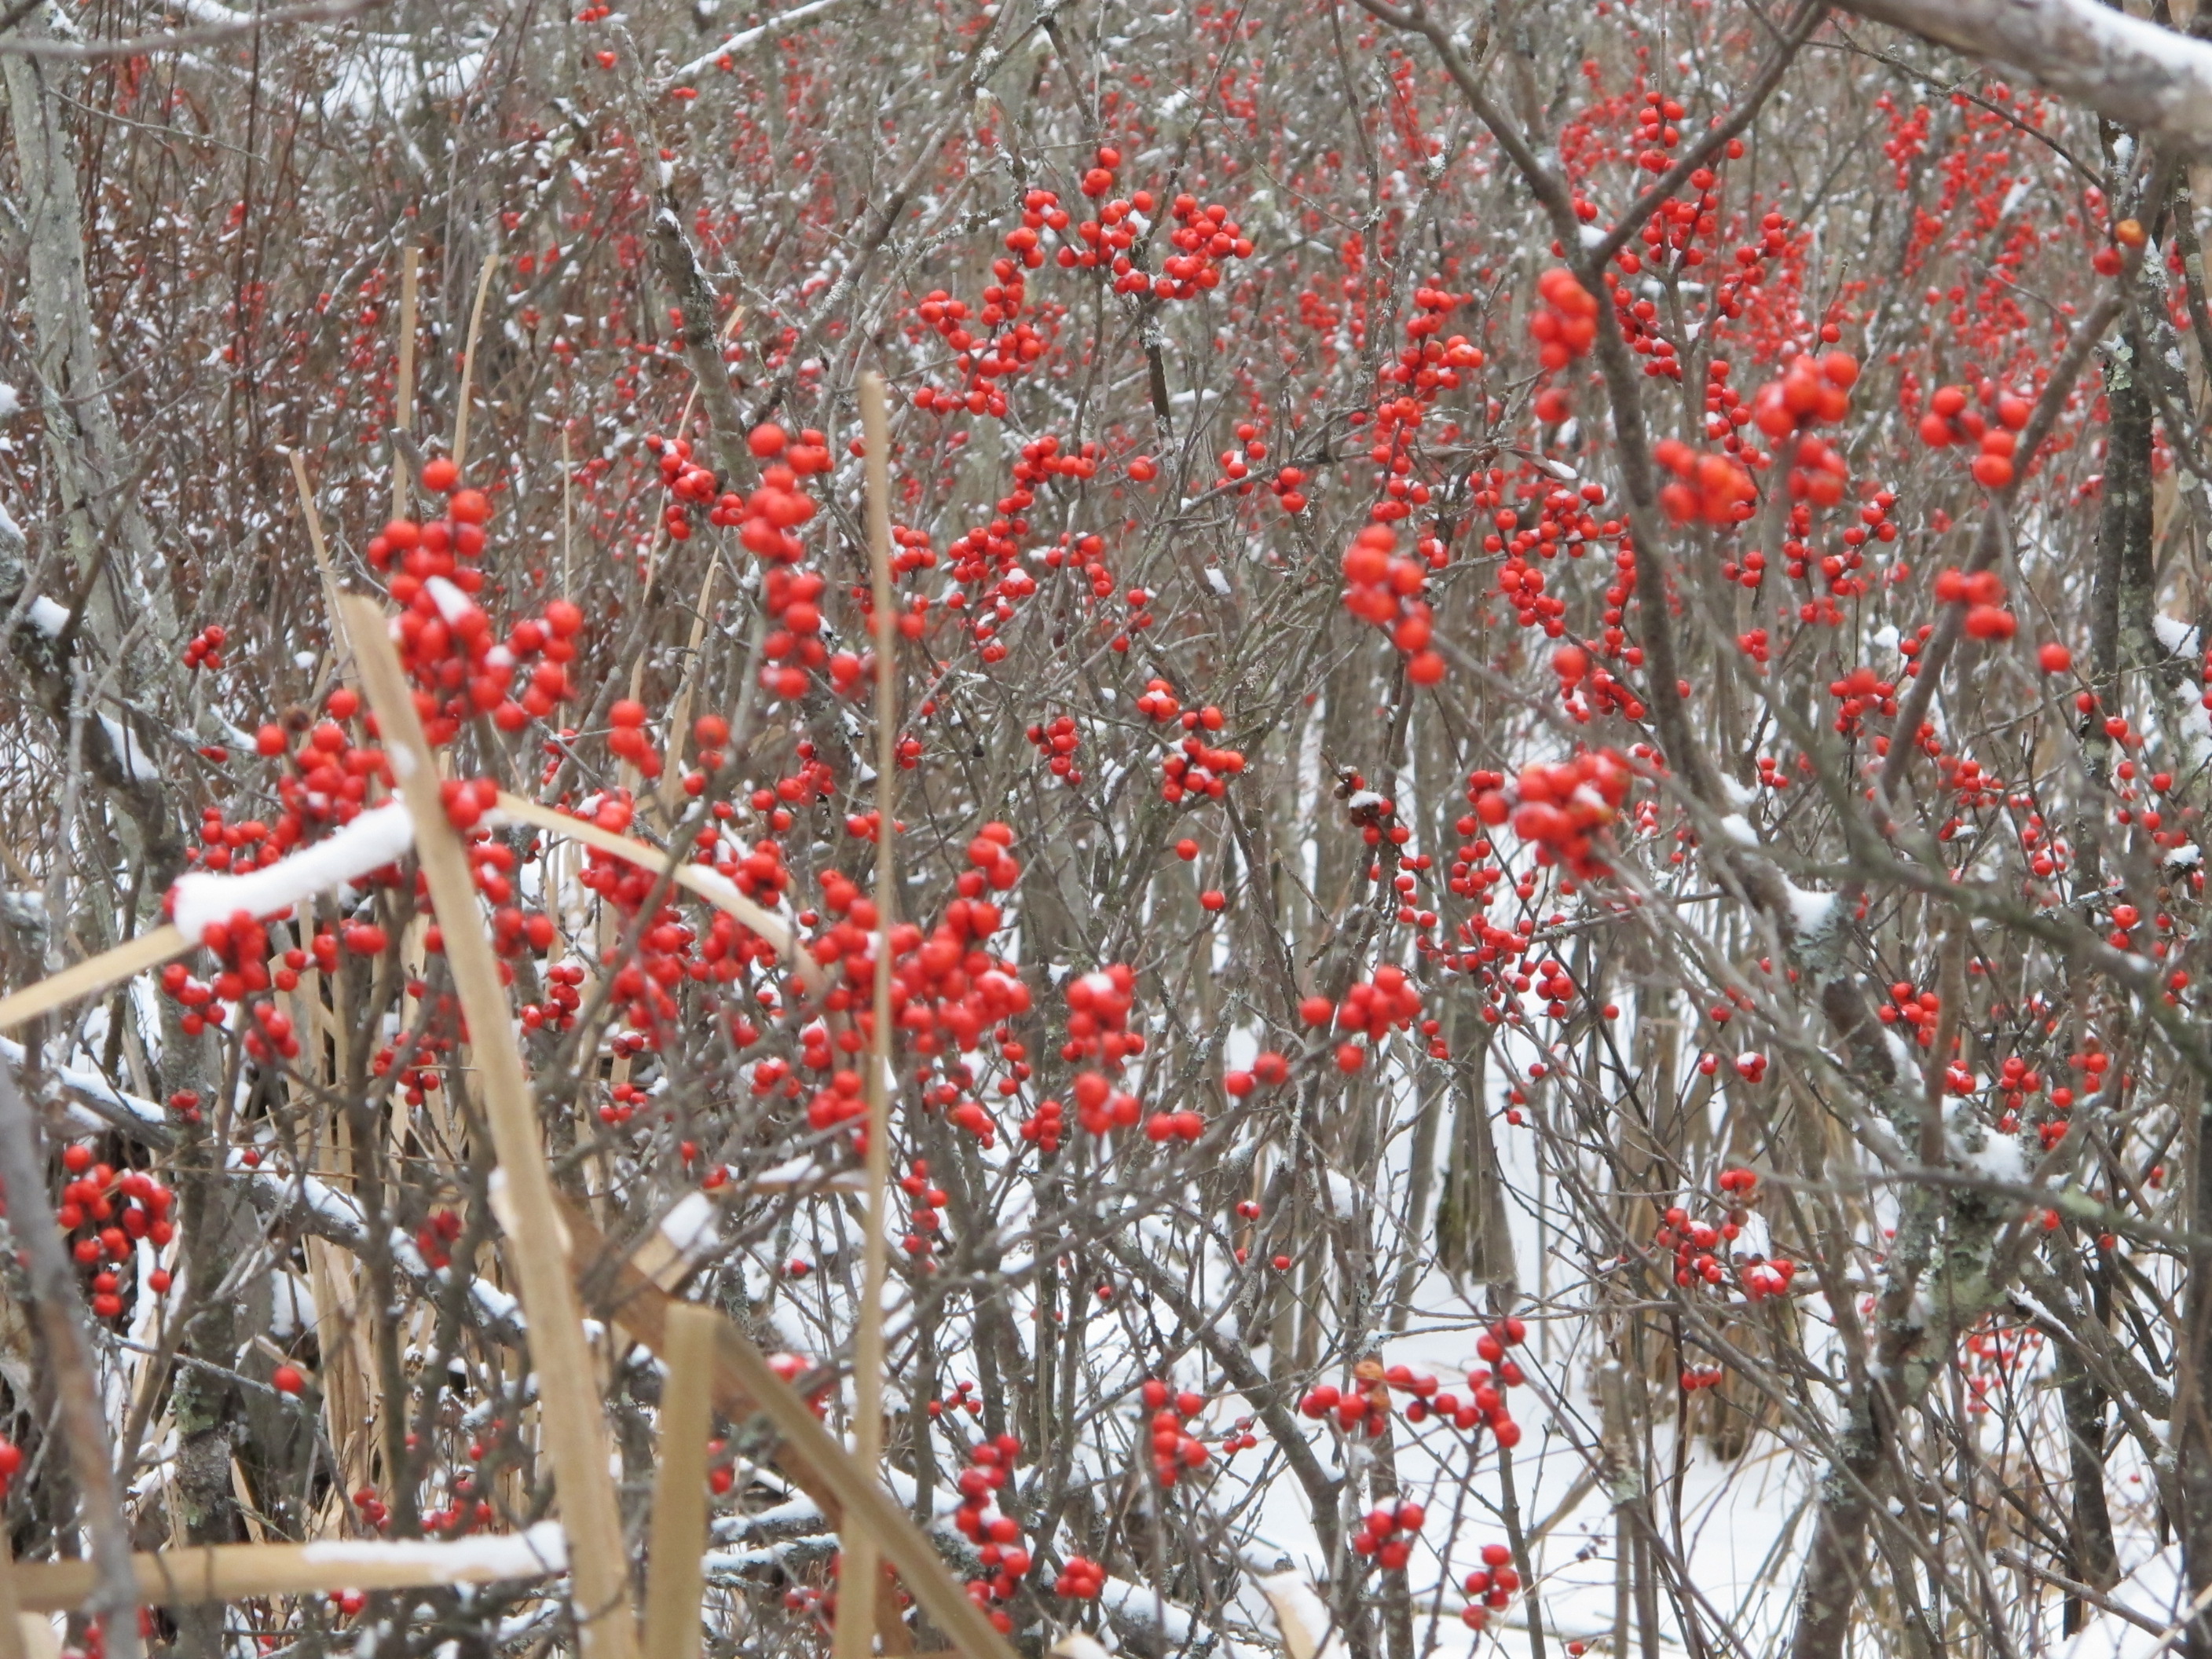
Winterberry
Of the berries, the brightest and best looking is winterberry (Ilex verticillata), our native deciduous holly. These are understory trees or tall shrubs that grow wild in wet places and swamps, but also make satisfactory garden plants. They are dioecious, which means you need a boy bush to go with the females – or no berries. The berries are commonly sold by florists and grocers, and look great – though they tend to drop a few berries on the table before long. I don’t know how to keep that from happening. (Tell me if you do, please).
Last but not least, I am cheered up by outdoor winter lights. In recent years the industry has come up with LED lights that use almost no electricity – less than 5 watts a string instead of the 5 watts a bulb we had in my youth. So I place them in my garden on trees and shrubs and run them late into the winter. It’s all part staying cheerful while living in the Great North.
Henry Homeyer lives in Cornish flat, NH. You may reach him through his web sites: www.henryhomeyer.com or www.Gardening-guy.com.
Japanese Gardens
Posted on Wednesday, December 4, 2013 · Leave a Comment
I recently visited an old college friend in Seattle, Washington and while out there we went to some nice gardens in the area. The Bloedel Reserve is on Bainbridge Island, a 30 minute ferry ride from downtown Seattle. It is a private 150-acre estate that was once the summer home and gardens of a wealthy Seattle family. The founder’s vision was “to provide refreshment and tranquility in the presence of natural beauty,”; the Reserve’s mission is to “enrich people’s lives through a premier public garden of natural and designed Pacific Northwest landscapes.”In my opinion, it meets its goals well.
The best part of the Bloedel Reserve, for me, is the Japanese garden. I have visited several Japanese gardens, and this one is a fine example of the style. It includes a tea house, a dry garden, a small flowing brook that enters a nice pond, large stones, lovely trees and flowers in season. Although I don’t aspire to create a Japanese garden, I recognize that many of the elements that are so attractive in a Japanese garden can be utilized in my own garden – or perhaps yours.

Dry Garden at Bloedel
On the surface, at least, the easiest part of the Japanese garden is the dry garden, also called the flat garden or hira-niwa. Generally in Japanese gardens this is a space without vegetation: raked sand or fine gravel that is interspersed with stones of various sizes and shapes. To me, the fine gravel represents the sea and the large stones in it, islands. Some Japanese gardens include trees on islands in the dry garden, but this one did not. At Bloedel Reserve, the shape of the dry garden was rectangular, though I have to say I prefer the curves of others I have seen – they seem more natural. It is traditional to rake the sand or gravel regularly to create interesting patterns in it.
If I were to create a dry garden, I would certainly install a weed barrier beneath the gravel. I wouldn’t use plain black plastic – as effective as it is in keeping out weeds – as it would hold water. There are a variety of woven weed barriers that allow moisture to pass through, although some grasses and weeds can send roots through them. It’s important to have the dry garden flat.
It would be essential to have some kind of edging to keep grasses from creeping into the dry garden. Plastic edging exists in various forms – rolls, sections that interlock – but I have never found them easy to install or very effective at keeping out grasses. I like the “professional” edging made of steel or aluminum that comes in 10-foot sections and is held in place with metal pegs. It generally comes with a black painted surface. It is quite flexible, allowing one to create smooth curves, and can be installed using an edging tool or spade to cut through sod. Stone pavers would also work nicely.
Traditionally there is a tea house that overlooks the dry garden, and Bloedel was no exception. This is a place to sit and reflect on the tranquility of the gardens. The tea house has large glass panels on the side facing the dry garden, which create a visual frame for the dry garden from inside.
There are also benches throughout the gardens where one can sit and observe or ponder the state of the world. I think sitting places are important for any garden, the more comfortable the better. I have two stone benches in my gardens, but rarely sit on them for long – the stone is hard and often cold. But wooden ones, or wooden chairs, are more comfortable. And now days brightly colored Adirondack chairs in recycled plastic are not only comfortable, they are inexpensive – but not very Japanese.
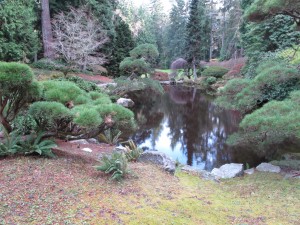
Water at Bloedel
Water is an important element of a Japanese garden, and traditionally they have both streams and ponds. The technology exists to create re-circulating streams and waterfalls, or to install a nice small plastic-lined pool. Goldfish or koi are an important element to small manmade pools, as they help to keep the water clean. At Bloedel a dry stream was created using stones “flowing” down a hillside.
The vegetation of any Japanese garden is important, too. Japanese red maples (Acer palmatum), rhododendrons, cherry trees and various evergreens, (particularly weeping evergreens) are commonly used for vertical elements. Weeping red maples stay small and can be very effective in Japanese gardens, but often are not hardy in Zones 3 and 4.
At Bloedel the perennial plants were largely dormant in late November, but I recognized the leaves of hellebores, decorative grasses, ferns, mosses and groundcovers.
It’s good, I think, to dream of garden projects, especially in these dark days of December. And who knows? Maybe I’ll decide to create a small Japanese garden next summer – but if you do, let me know as I’d love to visit it.
Henry Homeyer can be reached at P.O. Box 364, Cornish Flat, NH 03746 or henry.homeyer@comcast.net. His Web site is www.Gardening-guy.com.
Holiday Gifts for the Gardener
Posted on Wednesday, November 27, 2013 · Leave a Comment
When I was a boy I believed in Santa Claus long after most other kids had given up on him. I must have been in fifth grade before I started to doubt the story of the jolly old elf. I’m not sure if that was due to my own personality, or because my parents and older sister deluded me. Or maybe I was just plain dumb, back then. But now, as the holidays approach, I try to choose gifts that only the real Santa would know are perfect. For gardeners, it’s easy.
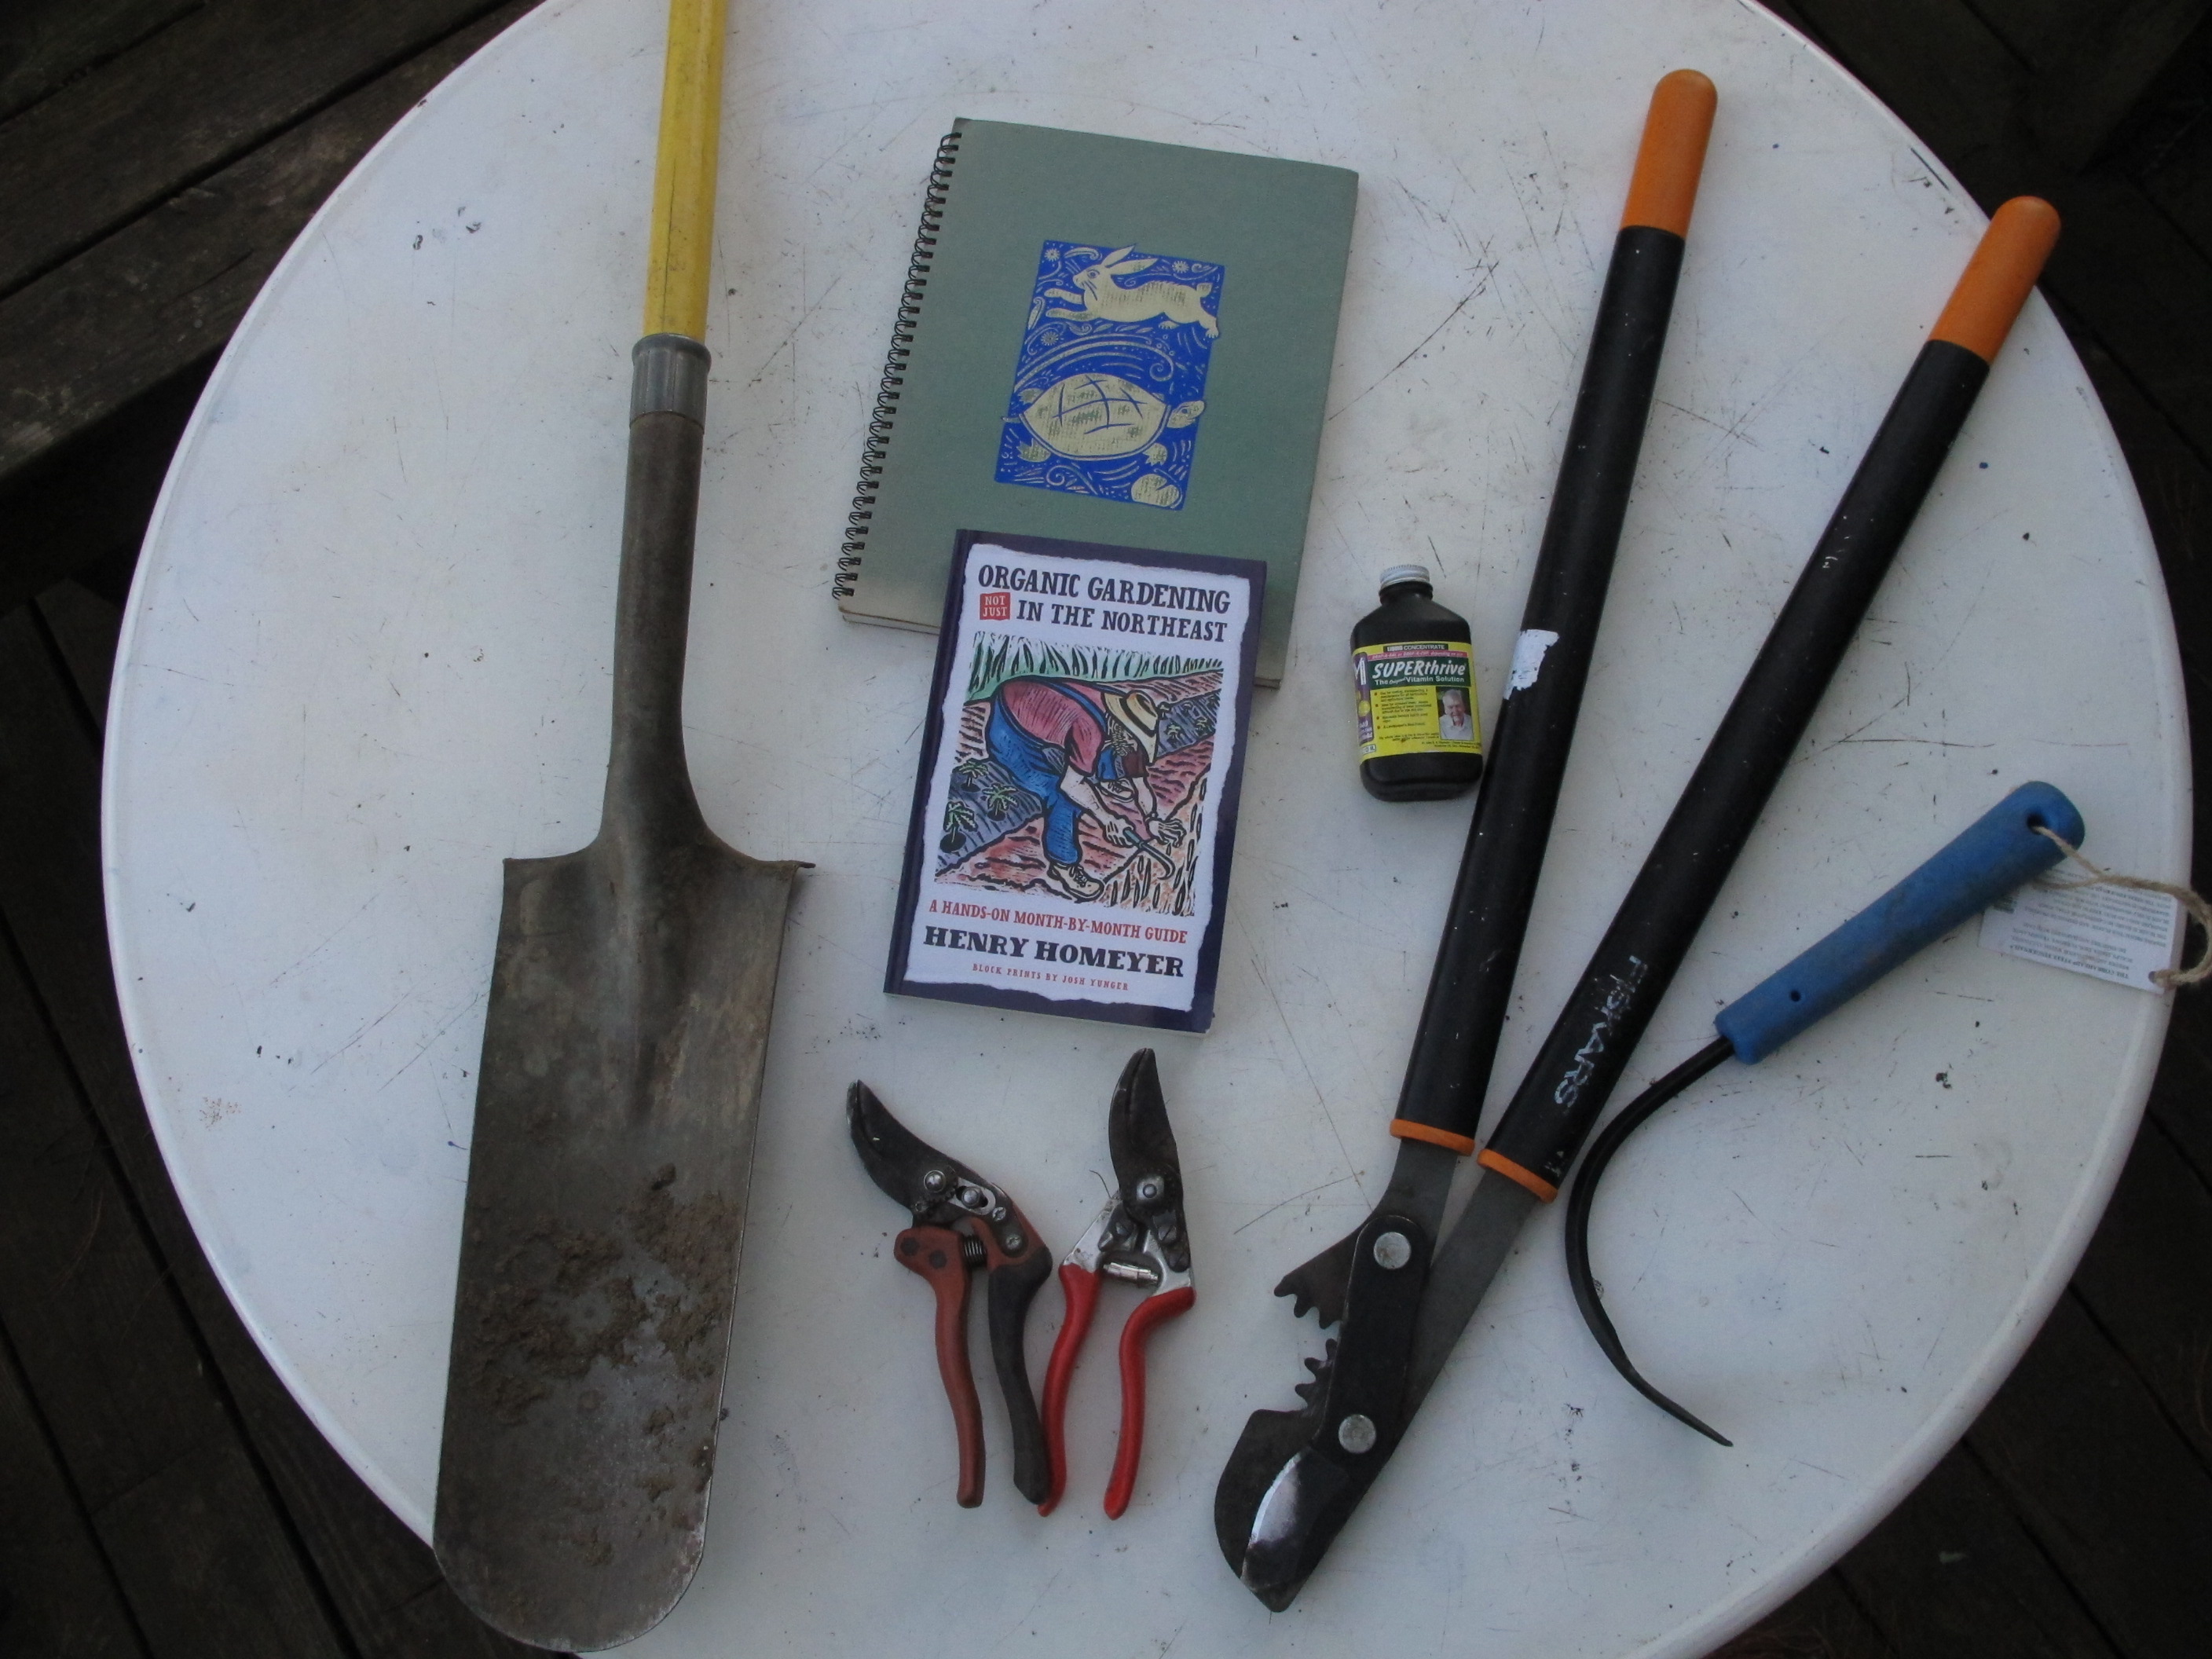
Every Gardener needs some basics: a good weeding tool, a pair of hand pruners and a transplant shovel. For me, the weeding tool is a no-brainer: virtually anyone who has tried a CobraHead weeder (www.CobraHead.com) agrees that it is perfect. It’s precise, light-weight and is fabulous at teasing out long roots. Curved like the tine of an old-fashioned horse-drawn cultivator, I think of it as a steel finger. Available at good gardener centers everywhere, or from the company on-line for less than $25. And it will last forever.
Pruners and loppers are great gifts, too. Most of us –by my age at least – tend to misplace pruners, so even if your loved one has a pair, a second is always a great gift. And they get dull, so a new pair of sharp ones is a treat. Don’t go to a big box store and buy the cheapest you can. Buy quality pruners even though they can cost in excess of $50. The two brands I like are Bahco and Felco. Both are excellent. They come in different sizes for different size hands, so talk to a knowledgeable sales person. I personally do not like those with rotating grips that allegedly prevent carpal tunal.
I’ve had a pair of loppers made by Fiskars for at least 10 years that still work great – I use them a lot, even on large diameter branches. They are geared, so they don’t take great strength to use – and they never get “sprung” the way so many loppers do. Mine is the PowerGear 32” lopper, rated to cut branches up to 2 inches in diameter. Available locally for a little under $50. They also come in smaller sizes. All are lightweight and of good quality steel.
Transplant shovels are often overlooked by gardeners, but they do a much better job at moving plants than an ordinary shovel, so everyone should have one. I got mine at my local hardware store –LaValleys – where it is called a drain spade. Not sure why. The blade is long and narrow – 15 inches long and just 6 inches wide. I like the long blade for getting under the middle of a perennial and prying the plant loose after a few judicious probes. At less than $20, even Santas on a budget would approve.

Holiday gifts
At the lower end of the cost spectrum are plants. I don’t advocate giving anyone a house plant -that’s too much like giving a puppy. Most gardeners have enough –nay, too many – house plants. But an amaryllis bulb is a good gift. They bloom, and then you can either throw it away or hold on to it and coax it to bloom another year (though that’s often more trouble than it’s worth). Prices range from grocery store amaryllis under $8 to fancy ones already potted up and ready to bloom at a florist shop for $15 or more. The bigger the bulb, the more expensive – and the bigger and more dramatic the blossoms.
Also around $10 would be a small bottle of Super Thrive. This is a seaweed and plant hormone extract that is great for helping stressed plants. And right now, many house plants are stressed due to the short days and lack of light. I find it helps them, and I also use it on transplants in the spring. Available locally.
A good blank book with quality paper is a nice gift if your loved one likes record keeping. It’s great to be able to look back, 5years later, and know the name of the variety of bulbs or daylilies you planted. Such a book is also good for sketches of the garden.
On the other end of the cost scale would be a nice dehydrator. I wrote recently about the Excalibur 9-tray dryer for fruits and veggies (www.excaliburdehydrator.com). It’s about a $300 present, so think of it as an investment: it’s an energy–efficient dryer for your tomatoes and apples and more.
Books are excellent presents, too. Santa, are you listening? I want Michael Dirr’s Encyclopedia of Trees and Shrubs. I know it’s expensive ($79.95), Santa, but it has 952 pages and 3530 color photos. It’s the new bible for woody plants by my favorite, highly opinionated tree expert. He even wrote a nice blurb for the back jacket of my last gardening book (Organic Gardening (not just) in the Northeast, A Hands-on, Month-by-Month Guide –just $17.50 in paper). And if you want us to keep on believing, we have to get the goodies. And I’ve been good this year!
Henry, a.k.a. Santa’s Helper, can be reached at the North Pole, P.O. Box 364, Cornish Flat, NH 03746 or henry.homeyer@comcast.net. Like Santa, he makes no promises except for his gardening book, which he can send you signed and personalized.
Successes in the Garden
Posted on Wednesday, November 20, 2013 · Leave a Comment
We had a cool, wet summer this year, and tomatoes were a disappointment. If you read this column regularly, you may know that my zucchinis were a bust. I did get some cukes, but like most gardeners, I didn’t have big yields – not enough to bother making pickles. Pumpkins ? Zippo. It would be easy to focus on those failures, but instead I want to share my successes – and hope you had some, too.
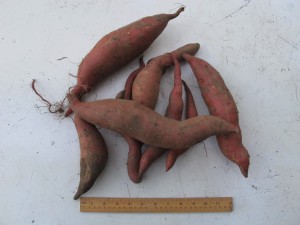
My Sweet potatoes
After a 15 year hiatus, I grew sweet potatoes this summer, and they were wonderful! Easy, productive and tasty! What more could a gardener want? When I tried them once before, I did not get much production, so I asked an expert before starting over. I called Geo Honninger of Hurricane Flats Farm in South Royalton, VT. Geo is an organic gardener who does real well with sweet potatoes and sells them at various farmers markets in my region.
Geo said that sweet potatoes love rich soil, plenty of moisture, and most of all, heat. To do that in this climate takes some extra effort. He advised me to grow them in mounded raised beds (my normal way of planting) and to cover the beds with black plastic (which is not something I would normally do). The plastic absorbs the sun’s heat, and radiates it down through the soil to the roots. On a year like this, that was very important.
I mixed plenty of compost into the raised bed and ran a soaker hose along the surface so that I would be able to get water to the plants after the black plastic went down – the plastic keeps most rain water out.
Last spring I ordered “slips” of a sweet potato called Beauregard from Johnny’s Selected Seeds (www.johnnyseeds.com). Slips are anemic-looking little plants with some root and a little bit of stem and leaf. Not impressive at all, I had my doubts. Geo told me to rip a hole in the plastic every 18 inches or so, and plant a slip in each hole. I stirred in a little Pro-Gro organic fertilizer for each plant. I used a hand trowel to create the hole and planted the 8-inch long slips straight down.

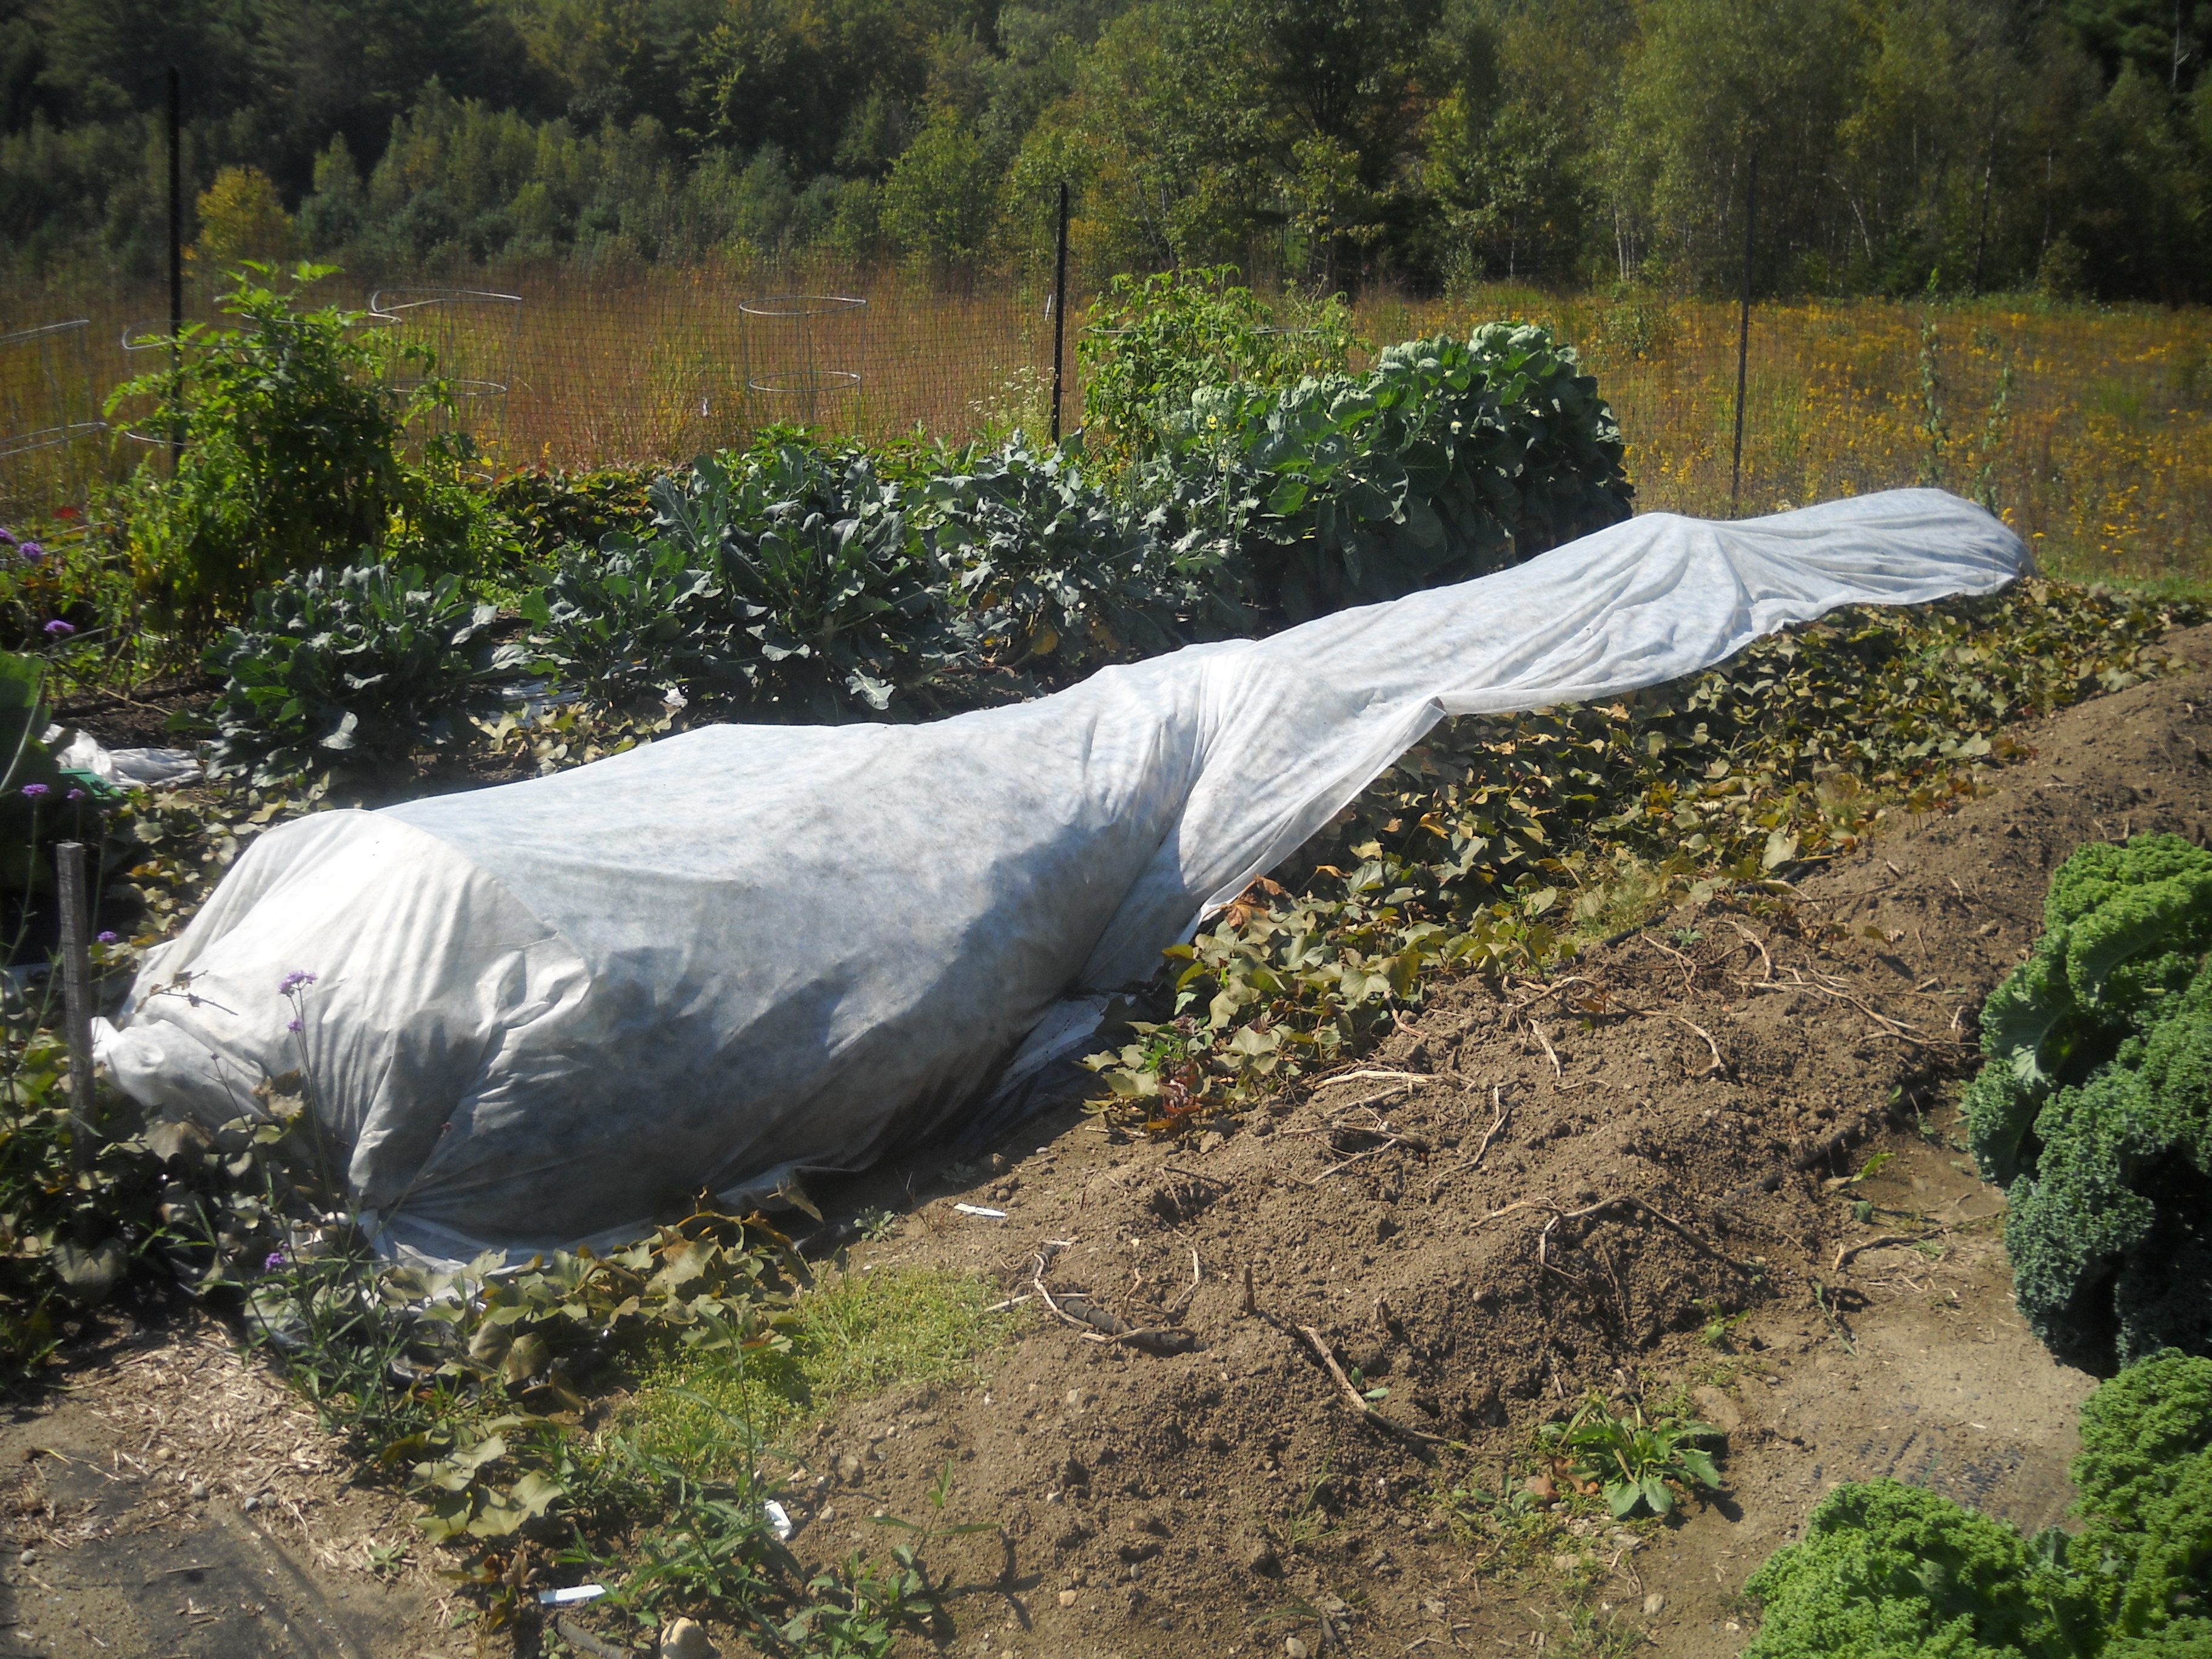
Sweet potatoes covered with Row Cover
Finally I set up wire hoops about 4 feet apart and covered everything with row cover, and pinned down the edges to keep it from blowing away. Row cover is an agricultural fabric that breathes, but keeps in the heat and keeps out the bugs – though sweet potatoes are not bothered much by insects or diseases. Row cover allows moisture to pass through, but most rain rolls off the surface.
The vines filled up the space under the row cover, crawled out and got into the walkways. My watering system failed early in the summer, but that didn’t seem to matter. I guess water reached the plants by capillary action, absorbing it from the wet soil in the walkways.
The slips come in bundles of 25, 100 and 1,000. Not knowing how they would do (and not having much space) I opted for 25 plants, and 24 of them grew very well. A bundle of 25 costs $18.25 and fortunately, I had some black plastic and row cover in my barn. Still, it was more expensive than planting carrots or kale, that’s for sure. But the pay off was huge: I got about 60 pounds of food for the winter in a 32-foot row.
According to the Johnny’s catalog, I should have cured the sweet potatoes for 4-7 days unwashed in a well ventilated place with a temperature of 85 degrees. I didn’t do that, but even if I had read the recommendation, I don’t have such a place. But I do know that sweet potatoes should never go in the fridge. They should be stored in a humid, dark place at 60 degrees. The best I can come up with is to store them in brown paper bags in the house. My cellar is humid, but too cool.
What else did well for me? Celery root, also called celeriac, loves wet soil, so they did well. Bush beans were great – but I had low germination for my pole beans.
I got a pretty good crop of hot peppers, too, a French variety called Espelette. I wrote earlier that I tried planting some in the cavities of cement blocks. I’d heard that the blocks provided extra heat at night – which peppers love. I did some in blocks, and they produced peppers earlier than those planted in the ground. But the peppers planted in the ground ultimately produced many more fruits than those in cement block, so I won’t bother using blocks next year.
Growing your own food is a lot of work, but great satisfaction. And I know that I won’t get a big harvest of everything every year. But when I dug up the first sweet potato plant and pulled 3 one-pound potatoes I yipped and hollered like a boy who’d just gotten a brand-new red Schwinn bike.
Henry Homeyer is the author of 4 gardening books and a children’s fantasy-adventure about a boy born with a mustache and an ability to speak to animals. Learn more at www.henryhomeyer.com
Drying Fruits and Vegetables
Posted on Wednesday, November 13, 2013 · Leave a Comment
This was a fabulous year for most fruits, particularly apples and pears. The abundance of it all made it impossible to eat all the fruit when ripe, so I have been processing fruit for the last few weeks. And
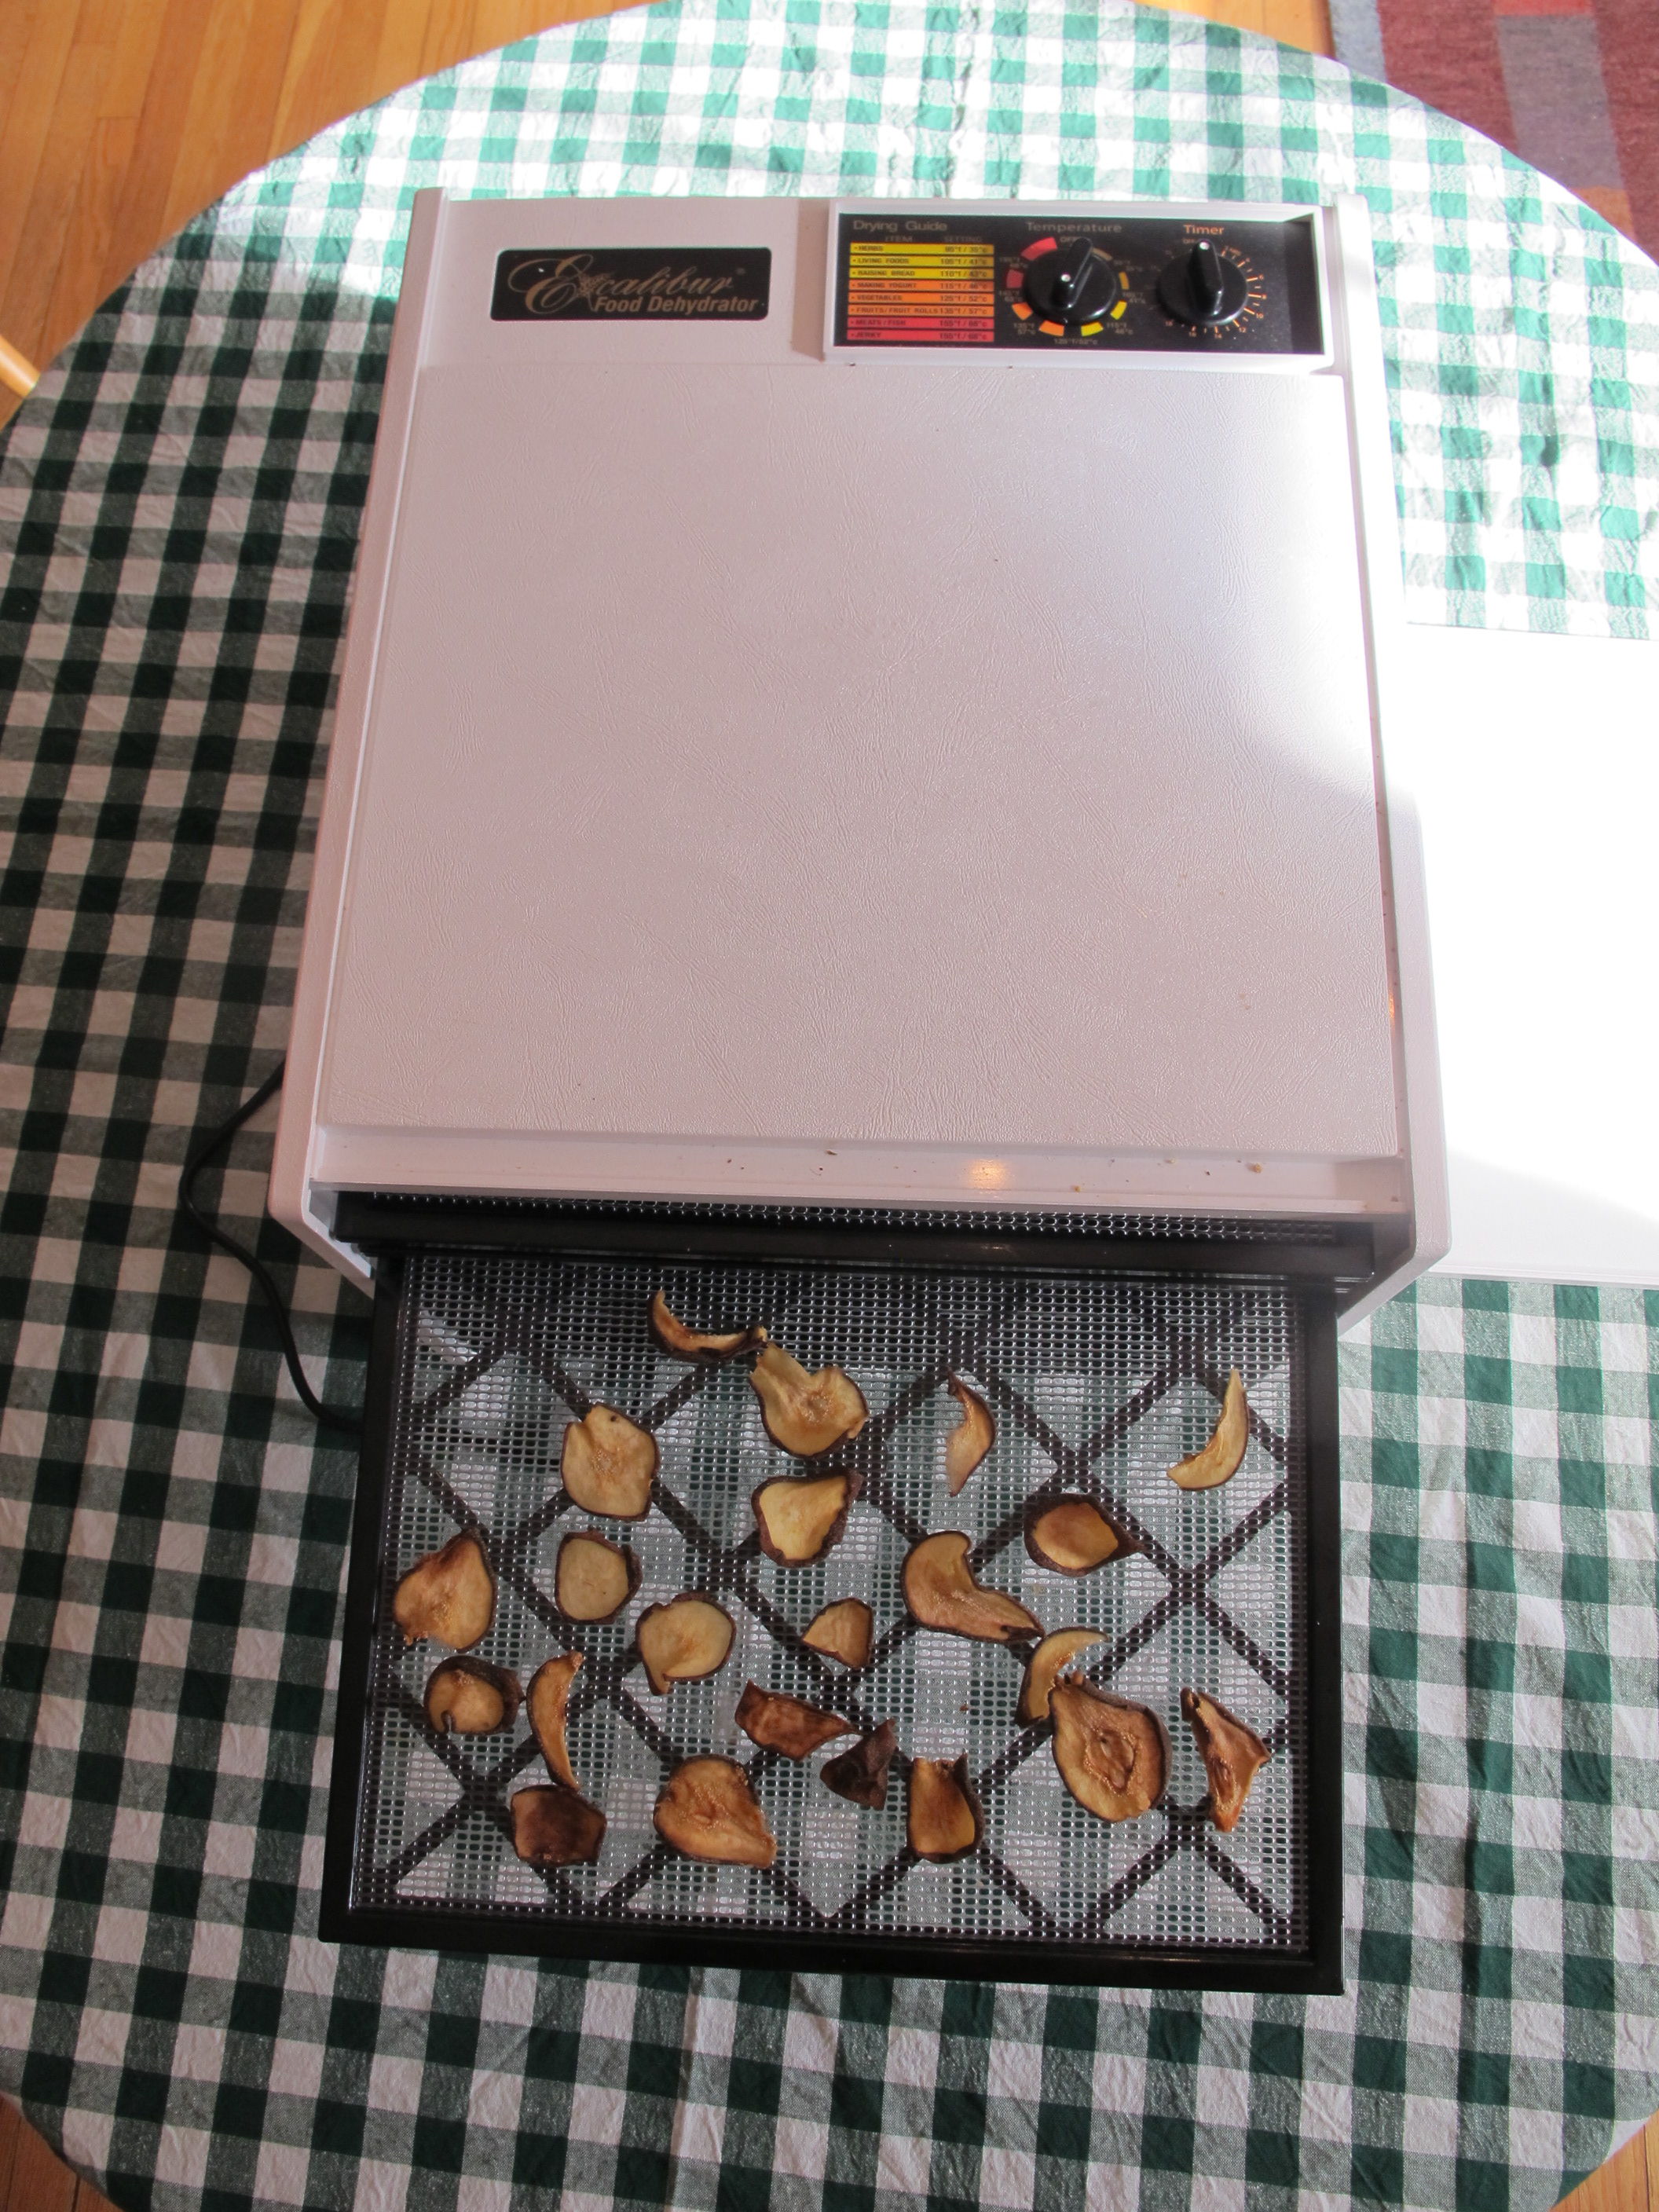
The Excalibur, by contrast, gets even heat and air on every tray because the fan/heater is in the back of the unit, so each tray gets equal air flow. The model I have has 9 trays, each measuring 15inches square. Not only that, the heater is programmed to fluctuate in temperature within a drying cycle to keep the fruit from getting too hot.
The NESCO unit uses 1,000 watts of energy per hour – that’s equivalent to a lot of curly light bulbs burning – but the Excalibur uses just 666 watts. Still a lot, but a lot less.
I compared the drying time for a batch of fruit, each dryer holding 15 sliced pears and 11 sliced apples. The NESCO dryer needed 9 trays for that amount of fruit, while the Excalibur needed only 7 trays. I left 2 trays empty in the Excalibur so that the 2 dryers would have equal quantities and I could compare drying times.
It’s difficult to estimate moisture content (to determine when a batch of dry fruit is adequately processed. I like the fruit chewy, not brittle. The bottom-heated NESCO dryer and the Excalibur dried the fruit in roughly the same amount of time – perhaps the Excalibur was a little quicker. The Excalibur is much quieter.

Excalibur with pears
In reading the instructions I learned that dried fruit is considered “raw food” if properly prepared. Too much heat can kill the enzymes of fruit, and that occurs, according to some research, at an internal fruit temperature of 140 degrees. But it is all right to start fruit at a higher temperature for the first two hours. There is a lot of water in the fruit at the onset – and the evaporation cools the fruit so the core temperature never hits 140 degrees – even if the machine is set at 155 degrees. This also shortens the drying time considerably, saving energy.
I have always dehydrated my hot peppers especially the very hottest ones. I dry them until they are brittle, and then put them –seeds and partitions included – in my coffee grinder. This allows me to sprinkle just a little bit of “heat” into a dish – or a lot, if it pleases me.
Blueberries have a waxy outer skin, and at lower temperatures they take forever to dry. But by cranking up the temperature for a while I can dry them in a reasonable time. I bet you could freeze them first – they often burst on freezing – then dry them.
Last weekend I finally pulled the last of my carrots. A few were damaged by rodents, or had cracked. I stored all the perfect ones and dried the others. I scrubbed them well, then cut them in thin slices. I started off doing the slicing with a knife, but soon switched to my food processor, which has a special “julienne” blade that did the job nicely. I will use the dried carrots in soups this winter.
I know that some gardeners like to make dried foods to take on the trail. You could dry carrots, green peppers, squash, tomatoes and onions – the start for a good stew. You can dry meat, too, or make jerky, but I’ve never tried that. Maybe this winter.
Dehydrating fruits and vegetables intensifies the flavors and brings out the sweetness. I love to nibble on my dried pears (which I make with skins-on) while driving the car. They provide me with great satisfaction – they’re as good as eating chocolate chips, but healthier.
Henry can be reached at P.O. Box 364, Cornish Flat, NH 03746 or henry.homeyer@comcast.net. His Web site is www.Gardening-Guy.com.
Preparing Bulbs for Forcing
Posted on Wednesday, November 6, 2013 · Leave a Comment
Winters here can be long and cold. Sometimes they are burdensome for a guy like me who loves being outside playing in the garden – planting and picking flowers, or harvesting lettuce and berries. But like the squirrels, I’m planning ahead and burying some little round things for future enjoyment. Nuts? No, I’m not. I am planting bulbs in pots now so they will bloom indoors in February and March.
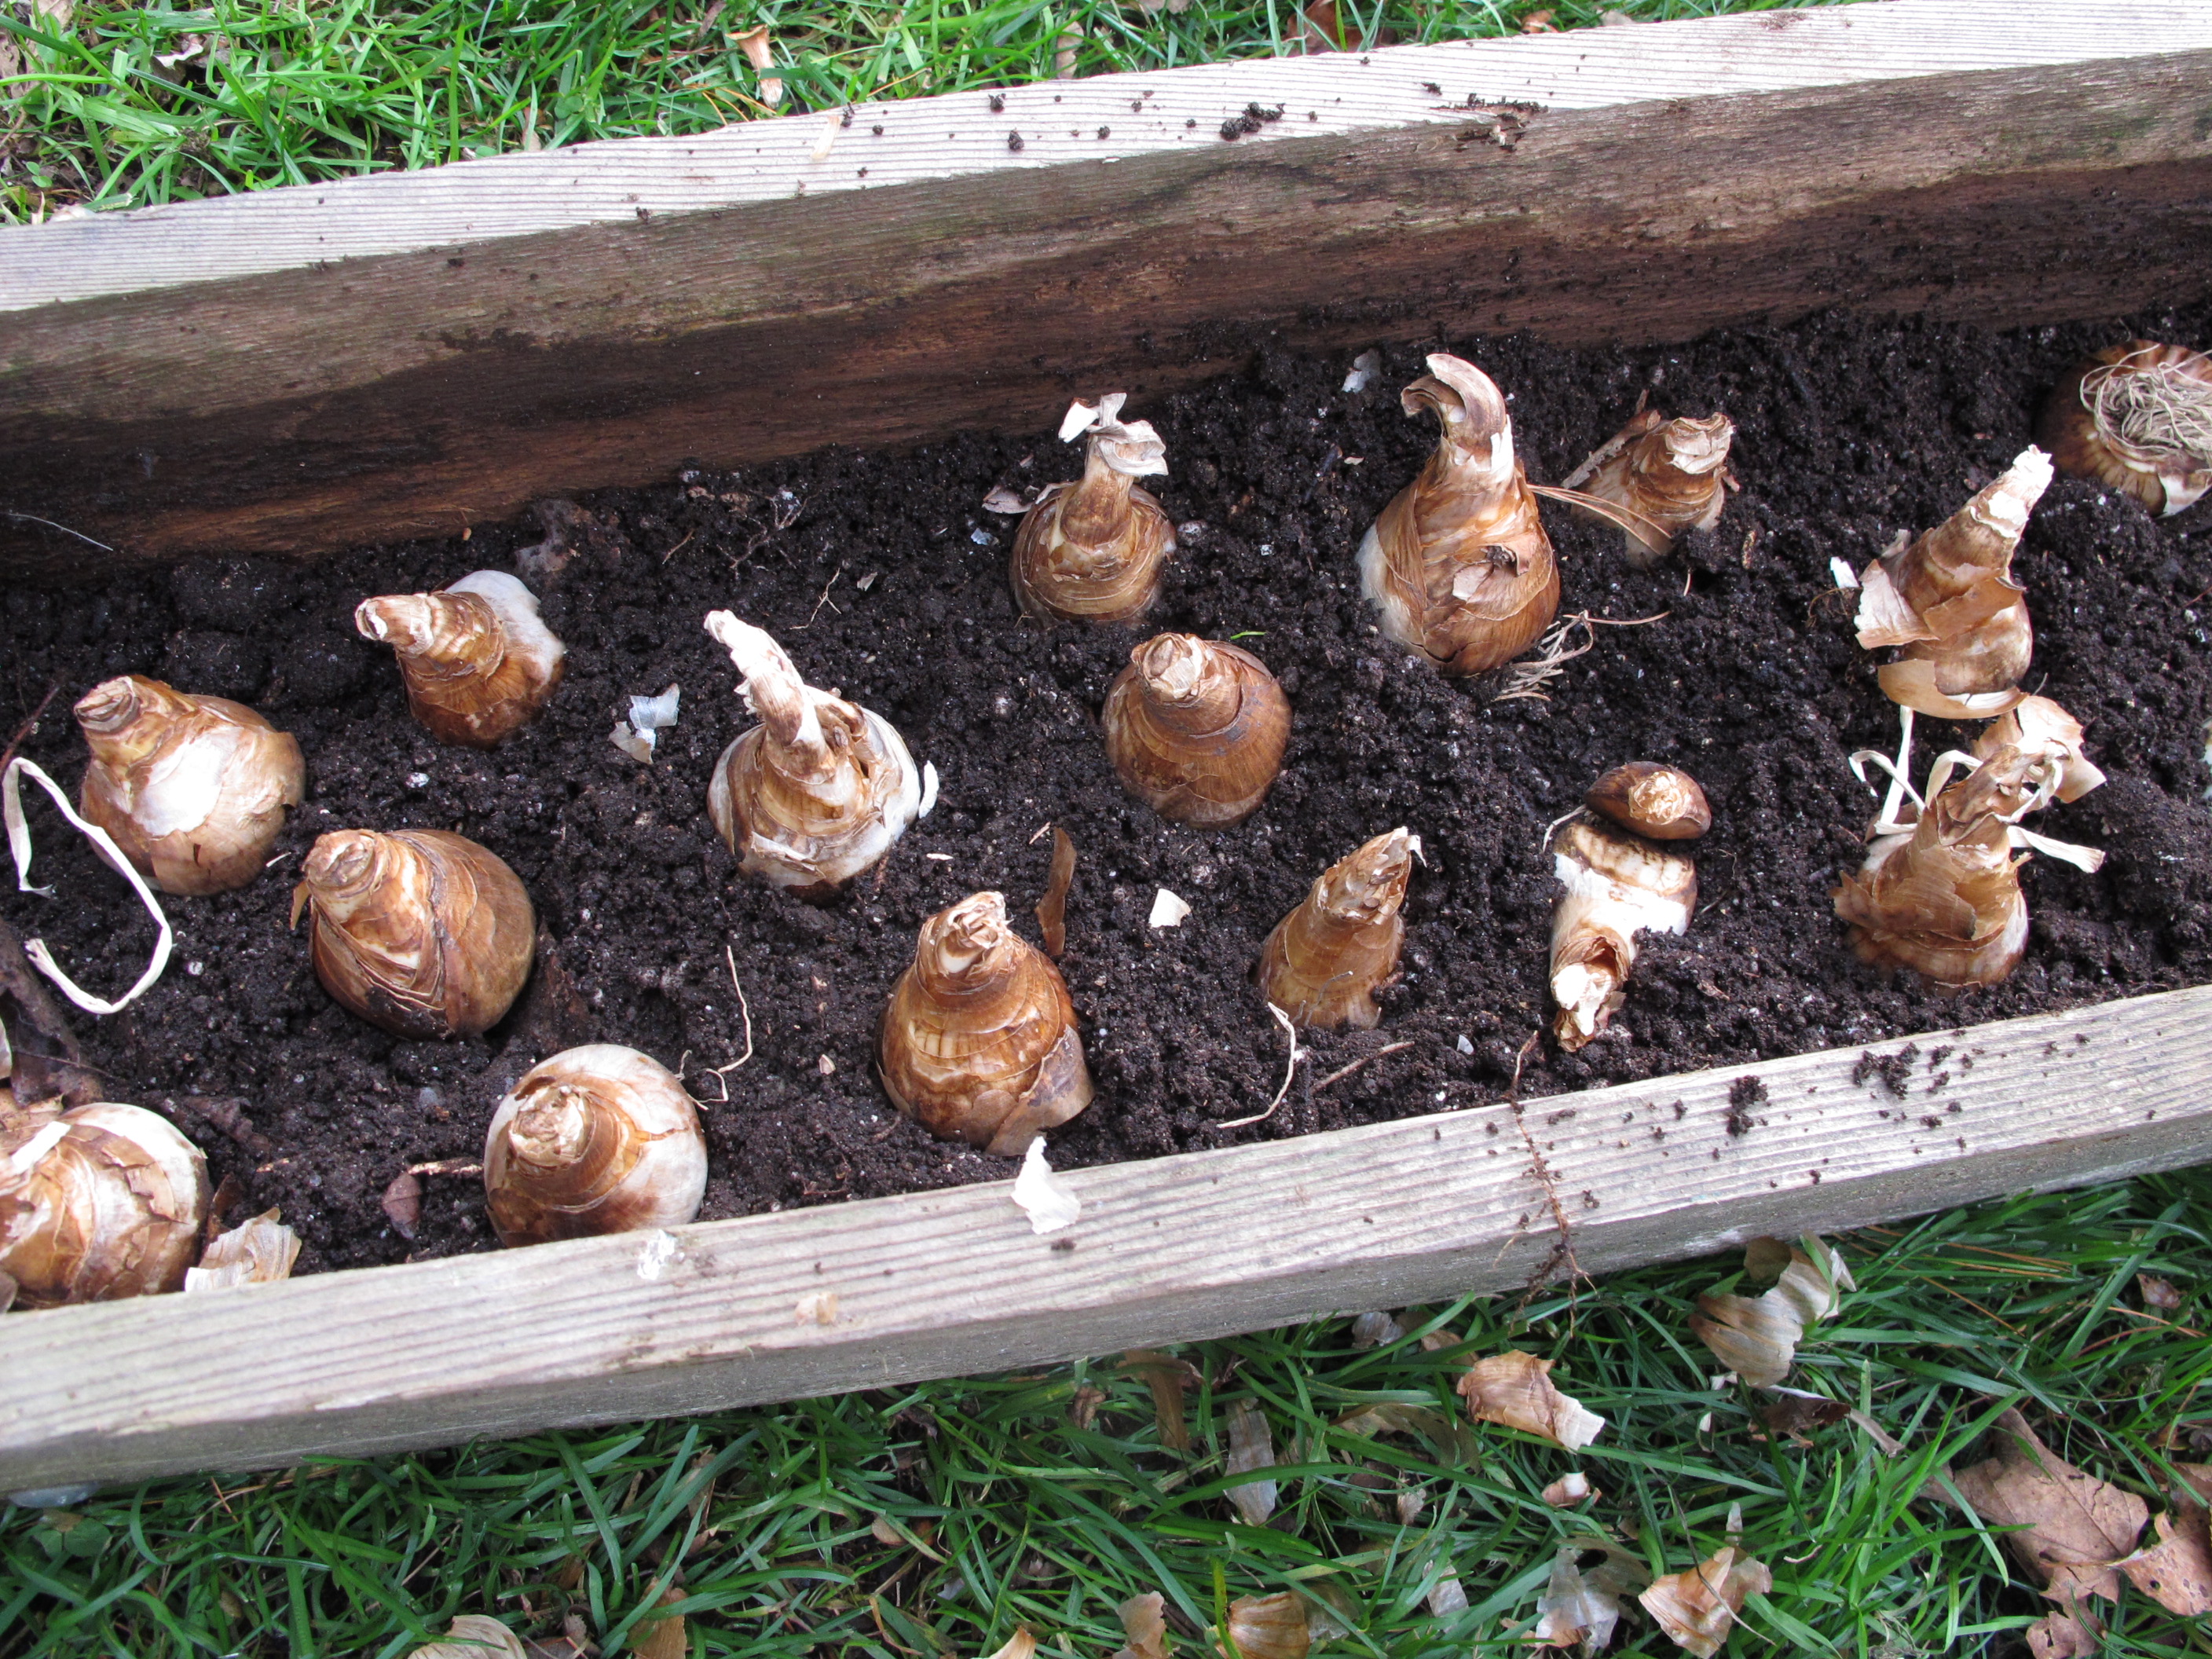
Each fall in early November I plant tulips and daffodils and sometimes crocus in pots, planters, and in a window box that I take down and bring into the basement where it’s cool and dark. Almost any spring bulb can be planted for forcing, and now is the time to do it.

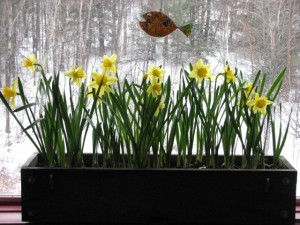
Daffodils for forcing
One nice thing about forcing bulbs is that the deer cannot get them. Tulips are like magnets for deer and rodents in many neighborhoods, though my fierce and determined Corgi, Daphne, does a pretty good job of deterring them for me. But tulips growing inside are unlikely to be bothered by anything. That said, one year rodents did get in my basement and dug up tulips that were in pots, so I sometimes cover containers of tulips with wire screening I get at the hardware store called hardware cloth.
My window box is one I built over 10 years ago out of cedar and it is still holding up nicely. (A nice winter project might be to make one yourself. Directions are in my first book, Notes from the Garden, which is now out of print but available at many libraries.) The box is 36 inches long and 7inches deep and 9 inches from front to back.
Outdoors I plant tulips and daffodils so that their tips are six inches below soil surface, and 2 to 3 inches apart. But in my window box I plant them closer together to cram as many bulbs as possible in the space given. I plant them in 2 inches of soil mix so that they have plenty of space for their roots, but this means their tips are just below the surface of the planting medium after I fill up the box.
I start the process by dumping out all the plants and soil from my window box. I take a stiff scrub brush (the one I use for cleaning out garbage cans) and clean the window box as often roots and dirt are sticking to it. I have drilled holes in the bottom of the box for drainage and I check to see that they’re not clogged.
Garden soil is great for growing bulbs outdoors but is not ideal in a container. In a pot it tends to get compacted by watering. So I make a mix that is 50% compost and 50% potting mix that I buy. That mix is very light and fluffy because it contains peat moss and perlite. Perlite is an expanded mineral – sort of a rock popcorn. It’s the white stuff that looks like Styrofoam in potting mixes.
Forced Daffodils
I planted 25 large daffodils in my window box, which was a bit of a squeeze, but will be dramatic when they bloom. Some years I plant 2 or 3 varieties of daffodils in it to stagger the bloom time, but this year I went for the “Big Bang” look – all blooming at once. I will bring the box out of the cold basement in early March.
After planting I water the mix lightly if it is dry. Bulbs won’t do well if sitting in soggy planting mix, but they also are living beings that are growing roots and that need some moisture. If the soil mix dries out too much, I sometimes do a light watering half way through their winter rest.
When selecting bulbs for forcing, “early-season” varieties are best. Some varieties will be listed as “good for forcing” and those are ideal. Daffodils I give a minimum of 90 days of rest before bringing them into a warm room to start the process of above-ground growth. Tulips I recommend 120 days – 4 months from now is mid-March. If you bring them up without proper rest, you will get foliage but no blossoms. Crocus are ready in 10 weeks or so, but can be planted in the same container as daffodils – as a second layer of bulbs above the daffodils.
Those 8-inch plastic pots that are used for perennials at the garden center make good pots for forcing, too. Half a dozen tulips in one will make a very nice display indoors while there is still snow on the ground. Plant several pots and bring one into the warmth every week for a continuous display.
Oh yes, temperature is important, too. The ideal temperature for forcing bulbs is 40-45 degrees. Anything over 50 is too warm, and below freezing is too cold. You might have a place in your garage or on the steps of the bulkhead, or even in an unheated mudroom. It is best to keep the pots in the dark, but you can create that by placing a plank over the top, I suppose.
So go get some bulbs and pot them up for a late winter delight. It’s easy, it’s not costly, and you can plant those bulbs in your garden after they have done their work – cheering you up.
Henry Homeyer is the author of 4 gardening books and a fantasy-adventure for children, Wobar and the Quest for the Magic Calumet. His Web sites are www.henryhomeyer.com and www.Gardening-Guy.com.


 Click Here to buy from Cobrahead