Lessons from an Asparagus Patch
Posted on Wednesday, May 7, 2014 · Leave a Comment
On a recent cold, gray Sunday I was looking for a good project to do in my garden. I decided to clean up my asparagus bed and get rid of last summer’s dead stalks and those sneaky weeds that had avoided my lethal grip. I had planted a new asparagus patch in 2012, so this is the first year that I can harvest a few stalks – and I can’t wait. I want to give my asparagus every advantage.
First, some basic information about asparagus. It is a perennial vegetable that, well tended, can produce for 25 years or more. It often grows in the wild, especially along roadsides where it competes with grasses and weeds. But in the garden it’s a fussbudget and won’t do well unless kept well weeded. In the wild it is known to grow in marshy places, too, but domesticated asparagus prefers well drained soil – but not dry soil. And full sun is best.
Asparagus roots radiate out from the center of the plant, and can be quite near the surface. When weeding it’s important not to disturb the roots, and to recognize them and cover them up if you expose them. The roots are brown and can be the diameter of a pencil lead near the tips, to the diameter of a pencil itself near the center of the plant.
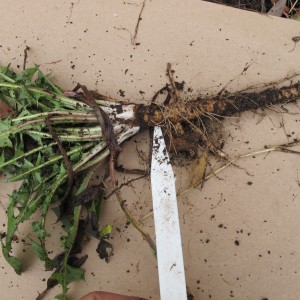
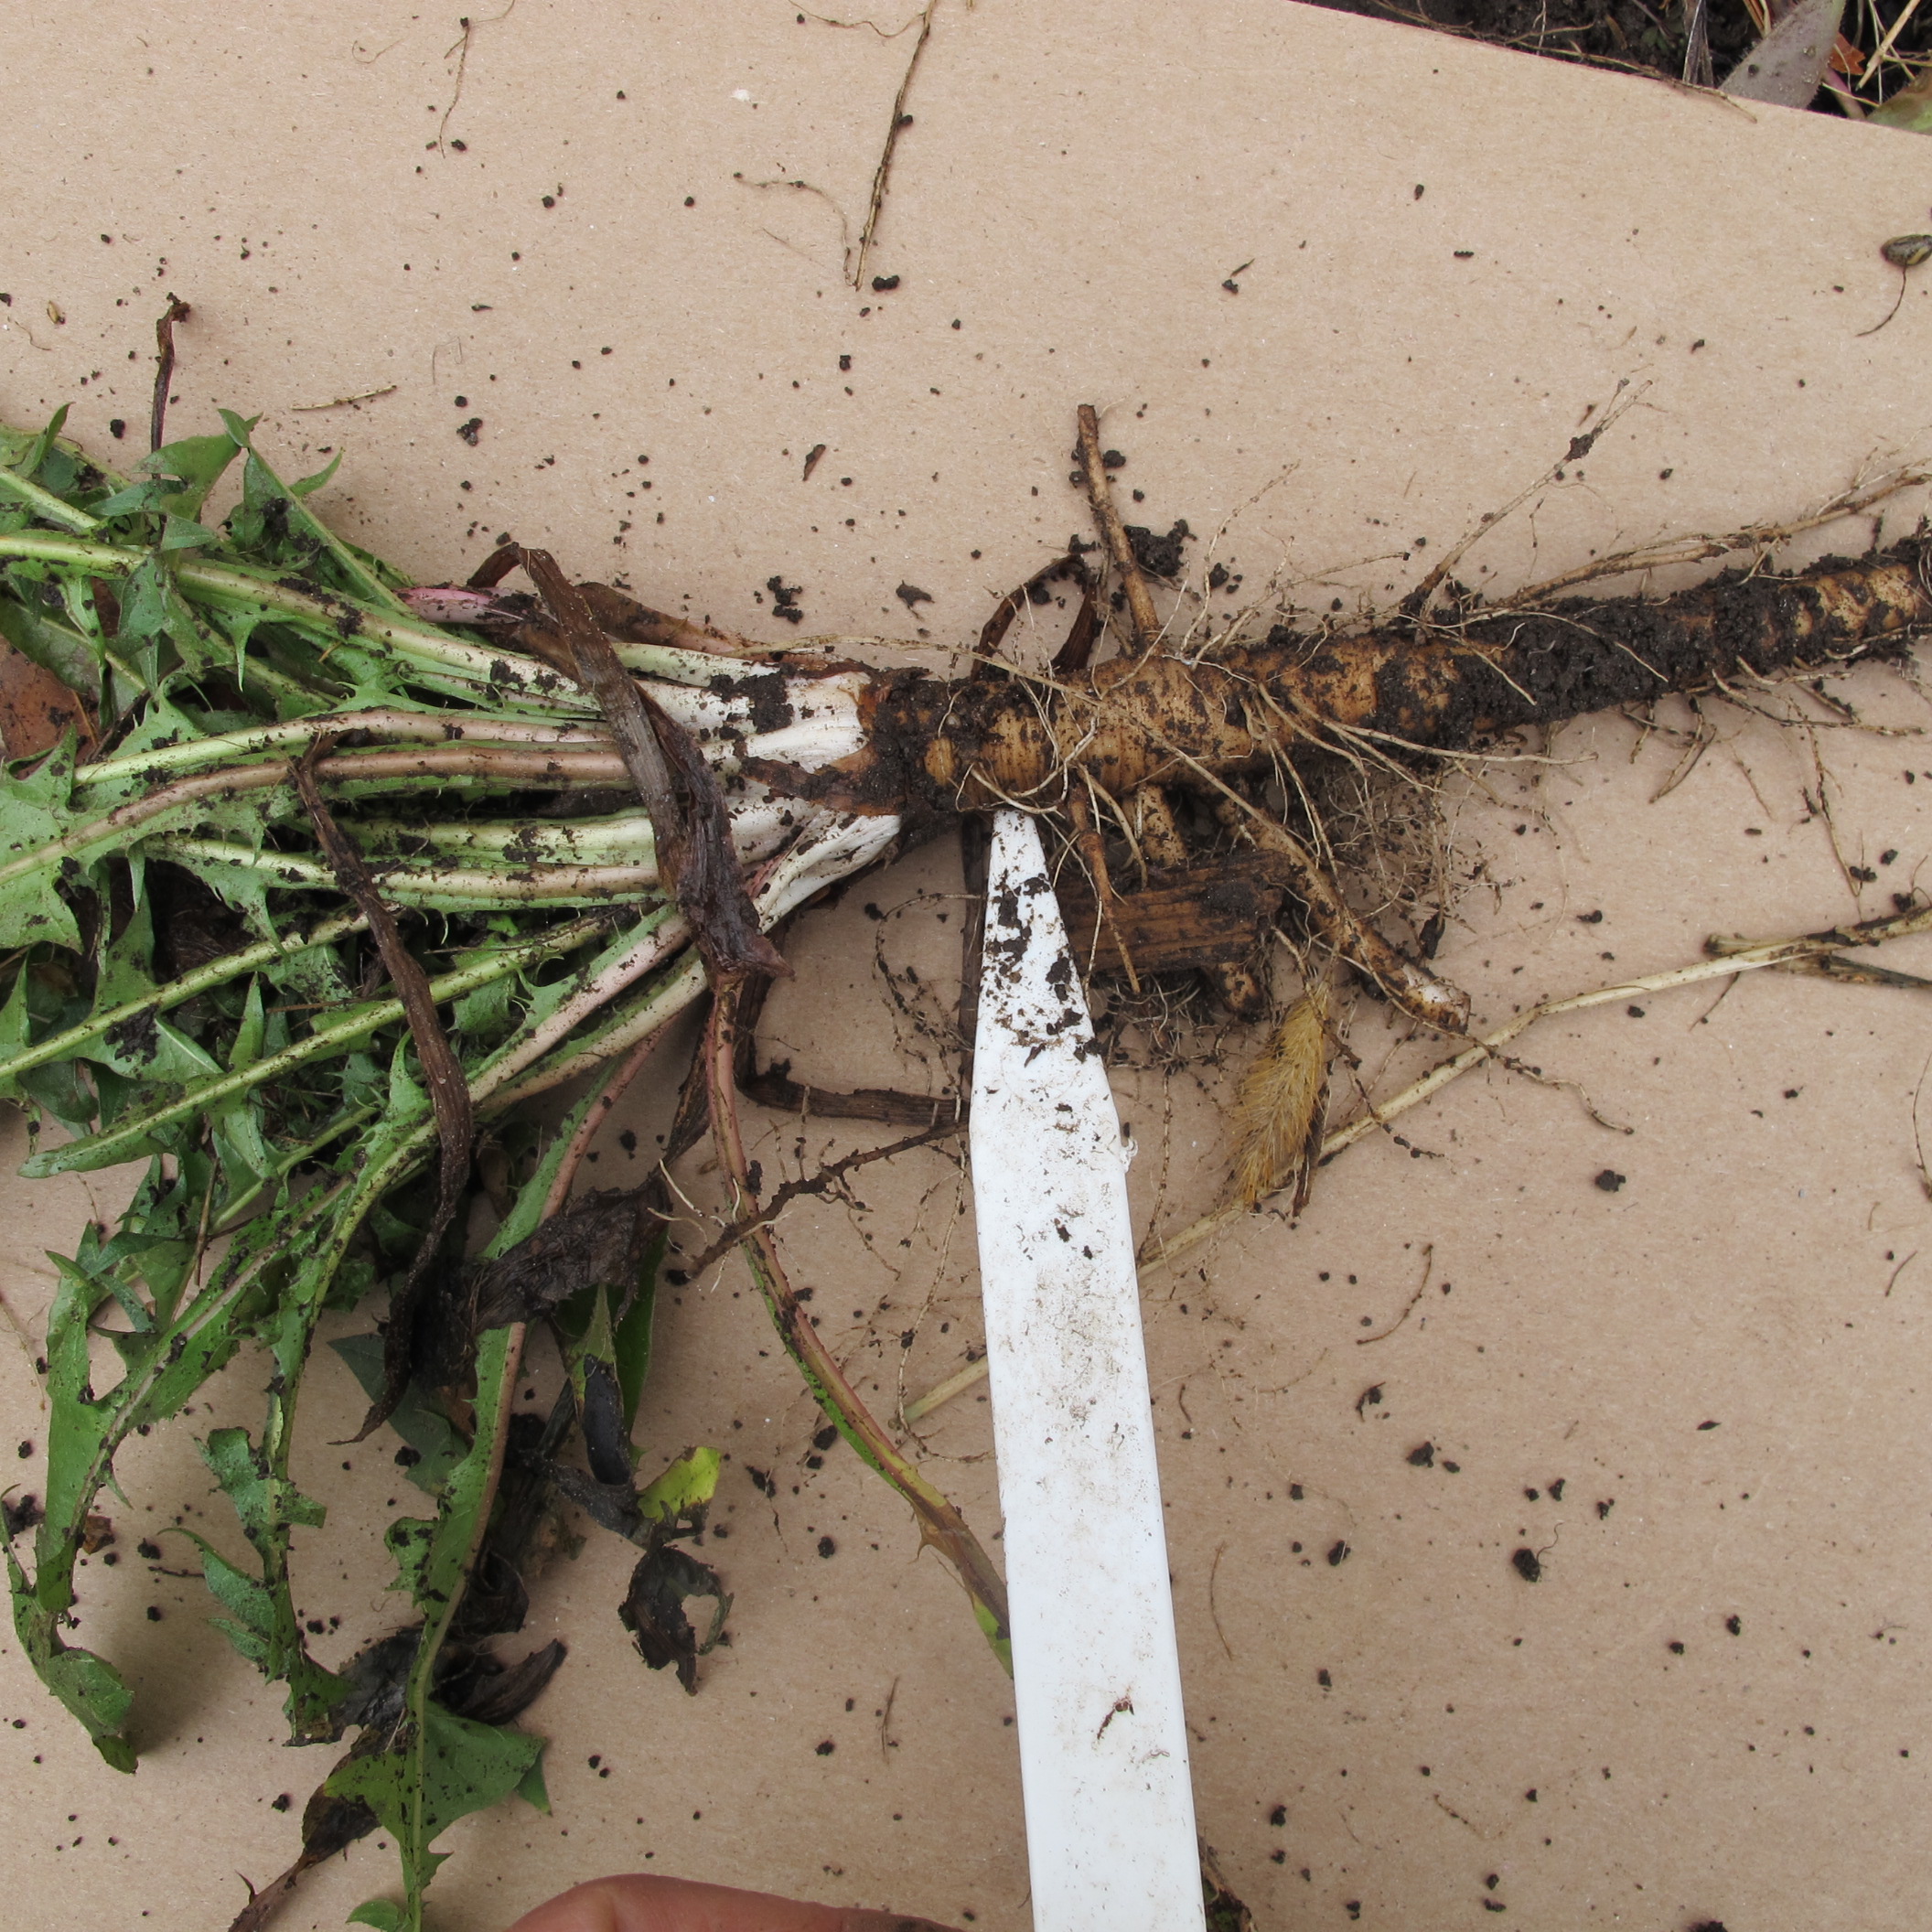
Dandelion. pointer shows where to grab it to pull out
I use a CobraHead Weeder which I like a lot. It is a single-tined weeder that works like a curved steel finger. It allows me to get at weed roots without disturbing the asparagus roots. In my bed I had a fair number of dandelions. I pushed my weeder into the soil about 4 to 6 inches, and then dragged it toward me on one side of the dandelion and then on the other side. That loosened up the soil without breaking off its deep tap root which resembles a scrawny carrot.
Next I grabbed the dandelion below the crown and applied gentle upward pressure so that I would not snap off the root. As with most perennial weeds, a morsel of the root left in the ground will grow and start over again. Most every time I got the entire root system.
Grasses, particularly witch grass, can be a real problem in the garden, and I had a little in my asparagus patch, though not a lot. Witch grass spreads by rhizomes, or roots that extend laterally. I get under the grass with my curved tool, apply some pressure from below at the same time lifting from above. Gently, so as to avoid breaking the white roots. Then, as the grass comes out, I am able to see where the roots are going, and tease them out, loosening the soil with my CobraHead and lifting. I often got roots that were 18 inches long or more. The roots have nodules where more grass leaves grow, so if you break off a root at a nodule, the plant continues to grow.
The ground was still quite wet when I was weeding my asparagus patch, so I stayed out of the bed itself as stepping in it would compress the soil and might damage roots. I brought along a kneeling pad – a simple foam pad – that kept my knees dry and protected them from sharp rocks. Some gardeners like kneepads for that function, but I’ve never found them terribly comfortable.
I plan to add 3 to 4 inches of compost over my asparagus bed, but first I want any weed seeds or broken bits of root to send up their new growth. I will remove those weeds, and then apply compost and a layer of mulch. We need some warm sun to get the weeds growing.
For mulch I use wood chips that I get from a local arborist by the truckload. They are free and easy to spread. I’ll wait until the soil has dried out and the tender asparagus shoots are poking up. I leave a little ring around the location of each plant to make life easier for my asparagus.
I know a fellow who bought a nice house with a mature asparagus patch. He loved asparagus and delighted in his free daily dose of it. But he wouldn’t stop picking, despite my warnings. For a young patch, pick for a month. For a healthy mature patch, six weeks is good. But never pick for more than 8 weeks. Asparagus needs plenty of time to re-charge its batteries, if you will. The fronds are actually leaves, and they need time to produce the food necessary for the roots to thrive. But he kept on picking long past the 8 weeks, and the next year he barely got a crop.
One last thought: if you are buying asparagus roots to plant, pick a variety that produces all male plants. The ‘Jersey’ series is all male, but the ‘Martha Washington’ roots are not – they will produce seeds, which is a waste of energy, and will produce lots of babies that will crowd your mature plants.
Henry Homeyer can be reached at henry.homeyer@comcast.net. His Web site is www.Gardening-Guy.com. He is the author of 4 gardening books and Wobar and the Quest for the Magic Calumet, a children’s fantasy adventure.
Transplanting Tomato Starts
Posted on Wednesday, April 30, 2014 · Leave a Comment
This year I started my tomatoes indoors much earlier than I usually do. Normally I start them on April 10 at 10:14. Only kidding. I start them, most years, during the second week of April. That way they are well established by the time they are planted outdoors 8 weeks later – but not crowding the root space provided by a standard flat.
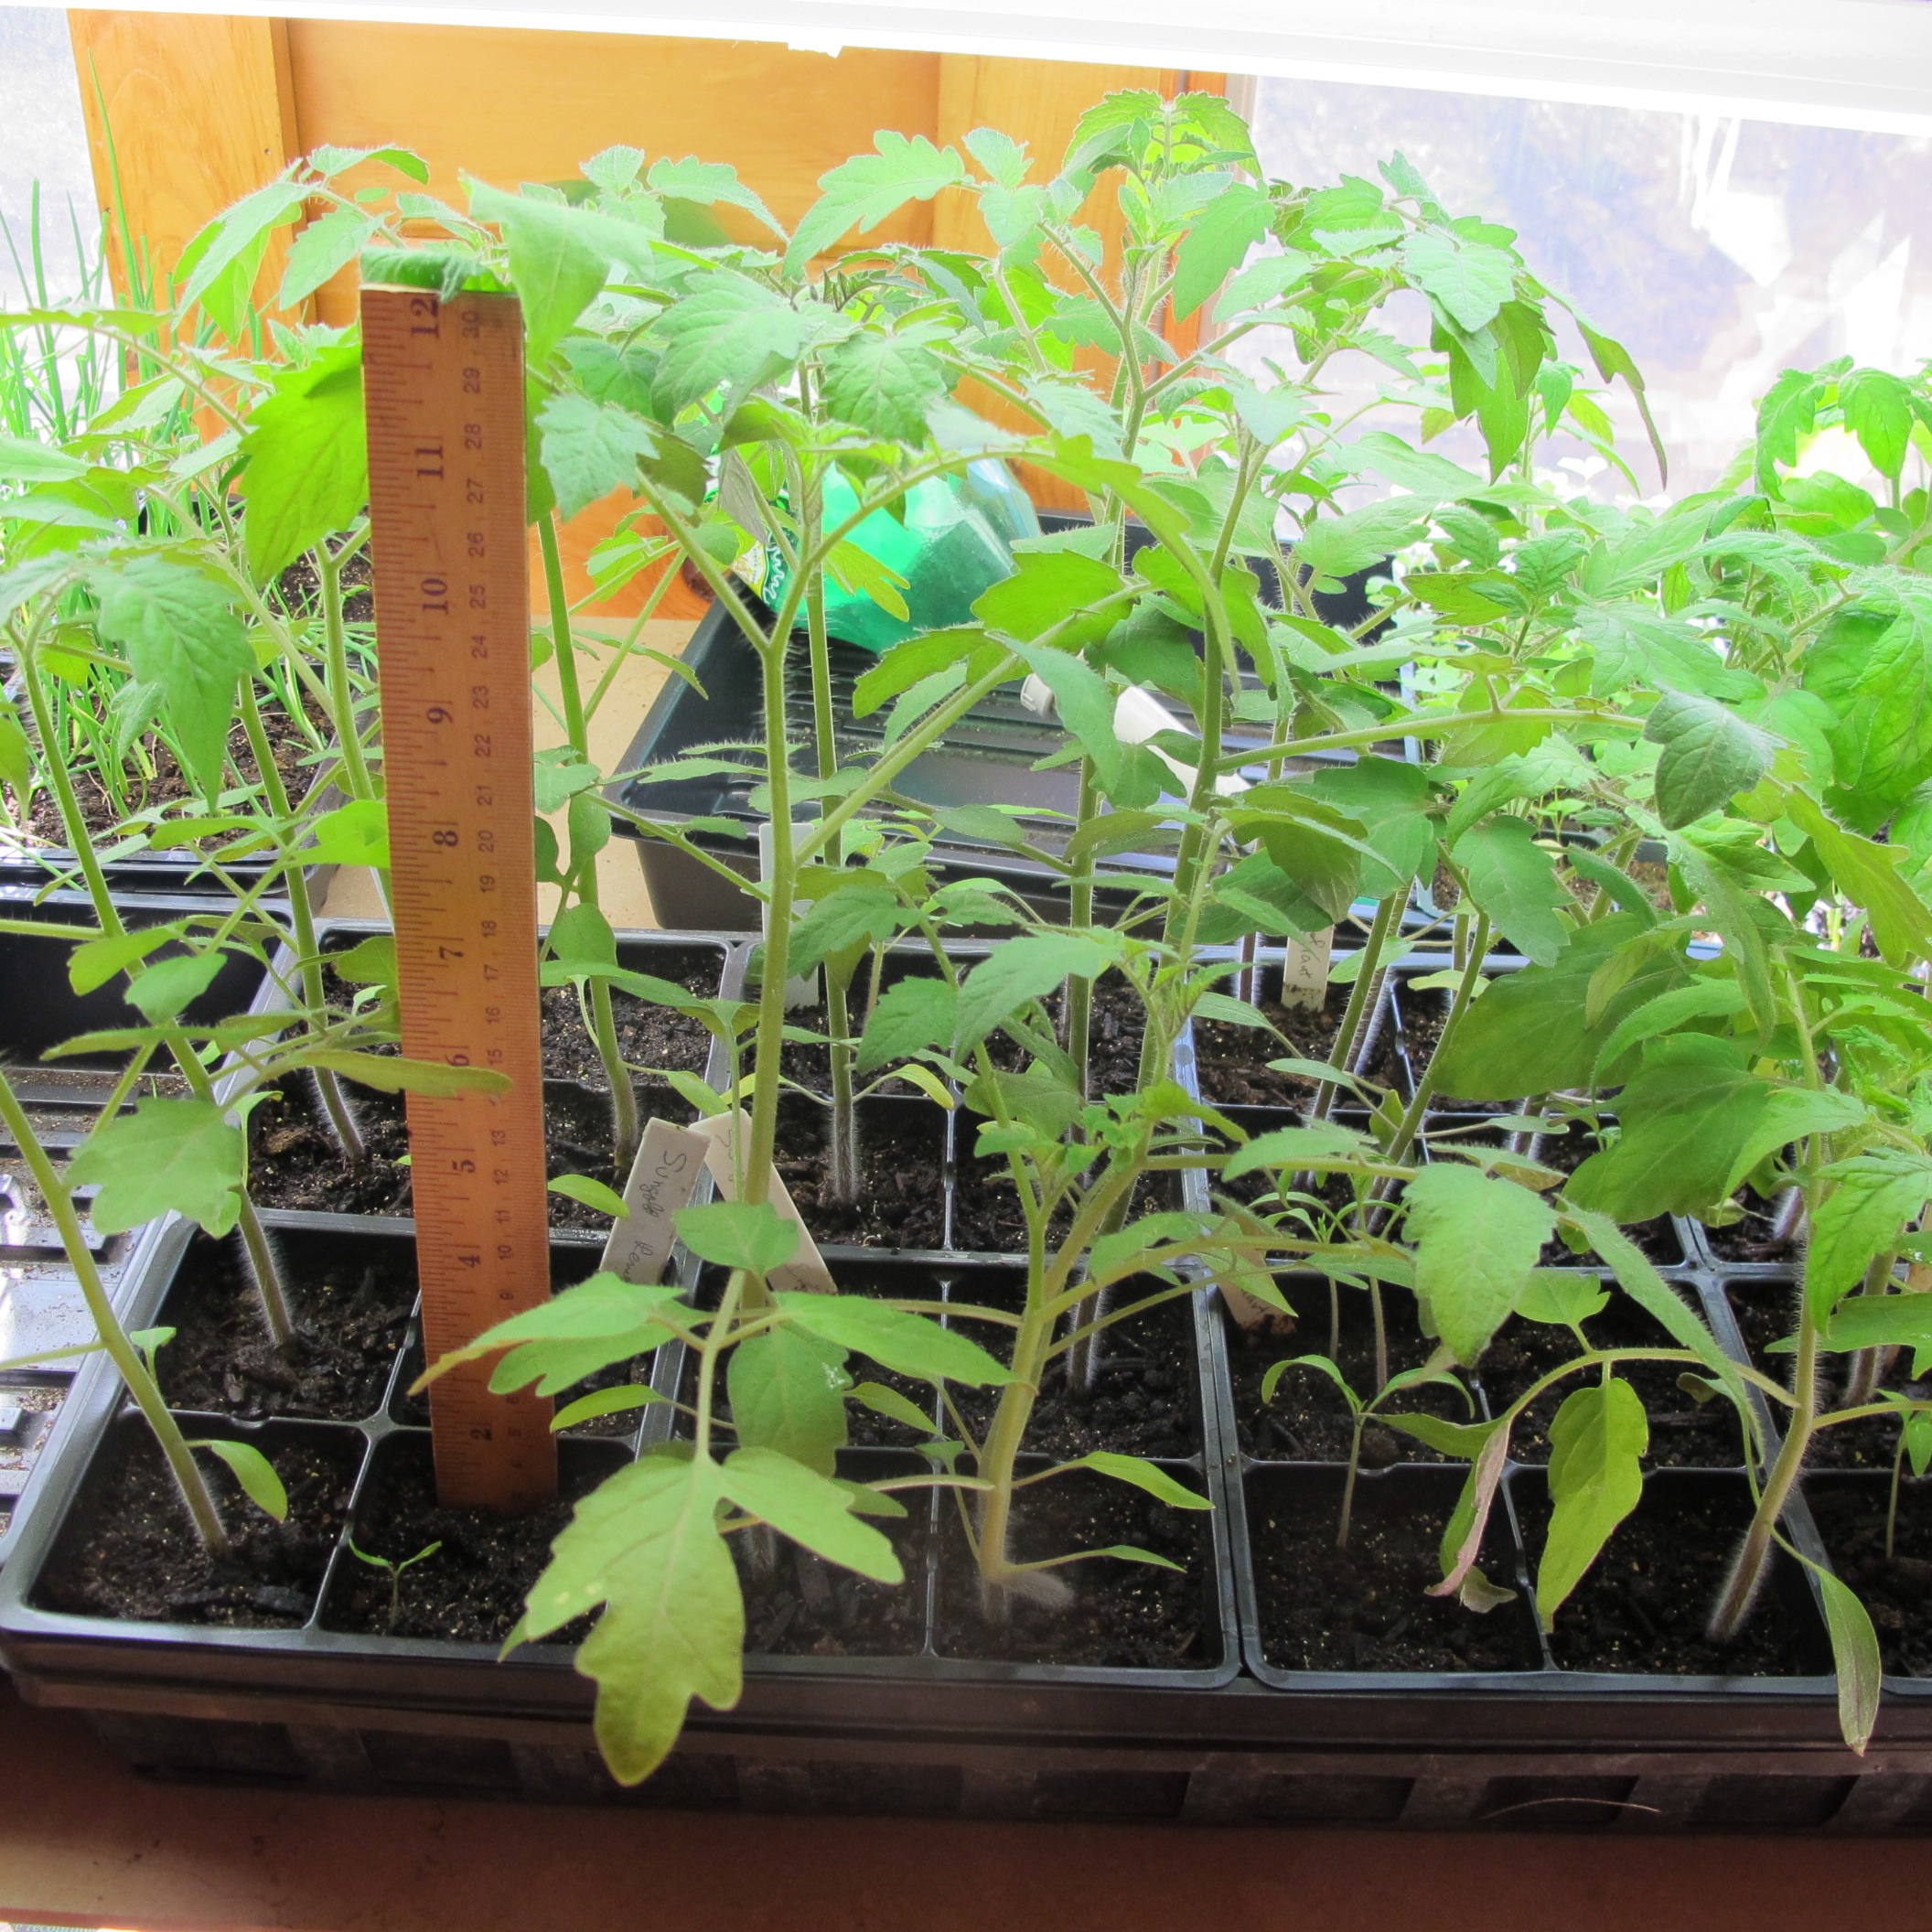
But this year I started most on March 24, 3 weeks earlier. Why? Because the winter was so long and harsh I was ready to see little green things growing under lights – and was willing to take on the responsibilities of nurturing them. But this year I will have to transplant my seedlings into 3-inch pots in May to avoid root crowding.
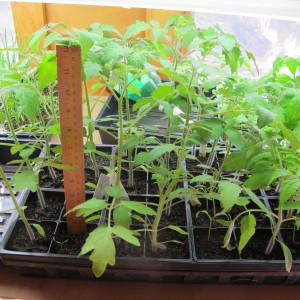
Tomato seedlings ready for bigger pots
I will pick a date for transplanting according to the Stella Natura calendar (www.stellanatura.com). This is a biodynamic planting calendar that is “supported by lunar and planetary rhythms”. For each day of the year, and every hour, the calendar designates one of 5 categories: good for working with or planting flowers, fruit, roots, leafs, or none of those – a “black-out day”. I will pick a fruit day for my transplanting .
I’ve done just a little testing of the recommendations of the Stella Natura calendar, but enough so that I feel obliged to follow it. Probably you have had times when you planted seeds and got a bad germination rate. I have. I blamed the seeds – or my planting technique. But a few years ago I tried planting a 6-pack of lettuce on a leaf day, and then again the following day, which my biodynamic calendar indicated was a blackout day. The first lettuce germinated at close to 100%, while the second at considerably less than 50% and many of the plants that grew were stunted or died. Same soil mix, same temperatures, same watering. So now I follow the calendar – at least as far as avoiding the black out days.
According to the calendar, “scientific studies showing that plant metabolism, growth rate and water absorption tend to peak around full moon. …The full moon enhances germination. Sow seeds 2 or 3 days before the full moon to receive its optimal drawing power”.
It’s important, when transplanting seedlings to bigger containers, to use a planting mix that is warmed indoors for a day or so. Potting mix coming right from the barn might be chilly enough to shock tender little roots. I use a 2 quart juice pitcher and measure out 10 quarts of commercial seed-starting or potting mix and 10 quarts of compost in a plastic recycling bin.
I stir in a cup of Pro-Gro or other organic fertilizer and a cup of Azomite or other rock powder, then moisten the mixture enough so that the dryness of the commercial potting mix, which contains peat moss or coir, is overcome. Then I let it sit for a day or more to warm up indoors.
Azomite is a rock powder mined in Utah that contains 70 naturally occurring minerals and trace elements harvested from a layer of volcanic ash that was later inundated with sea water. Although I do not have scientific proof of its ability to improve growth and vigor of plants, I have done some informal experiments with rock powders, and believe that they help.
If you use the same plot every year for decades, as I have, trace minerals of the soil may well get used up, so adding a wide variety of minerals makes sense to me. I add Azomite or finely ground granite powder to increase mineral diversity in my planting mix and also in my soil.
I re-use plastic pots each year, and believe it is a good practice to clean them before re-using. I wash them in the sink with soapy water, or sometimes fill the top shelf of the dishwasher to clean them. This helps to eliminate any bacterial residues that might not be good for my seedlings.
Also key to success with indoor seedlings is a good light source. I use ordinary fluorescent lights that I hang over my seedlings. I keep them about 6 inches above the seedlings, Light intensity diminishes exponentially with distance. My lights hang on chains, and I raise the lights as the seedlings grow. I have the lights on a timer so they are on just 14 hours a day. Little plants need rest, too.
Don’t keep your seedlings too warm. Sixty-five degrees is good for the day time, but leave a window ajar at night to let temperatures drop to 55 degrees – though I admit that don’t do that most nights.
Growing seedlings from seed requires some work, but I do it every year because I love tending my seedlings. I save money doing it, and can grow plants I would never find for sale at a garden center, too.
Henry Homeyer can be reached at P.O. Box 364, Cornish Flat, NH 03746. Please include a self-addressed, stamped envelope if you want a question answered by mail. Henry’s e-mail address is henry.homeyer@comcast.net. His website is www.Gardening-Guy.com.
Pussy Willows
Posted on Wednesday, April 30, 2014 · Leave a Comment
In general, I don’t sing. I can’t carry a tune, and words to even the simplest of songs seem to disappear from my brain in about 20 minutes. Always have. So it was a surprise to me when, walking by a clump of pussy willows, I remembered a simple childhood tune about them and was inspired to sing it – and to ponder the joys of pussy willows. They are cheerful flowers that appear just when we need something lovely in the garden. To me they are pure fun, and not just for little children. We should all have some.

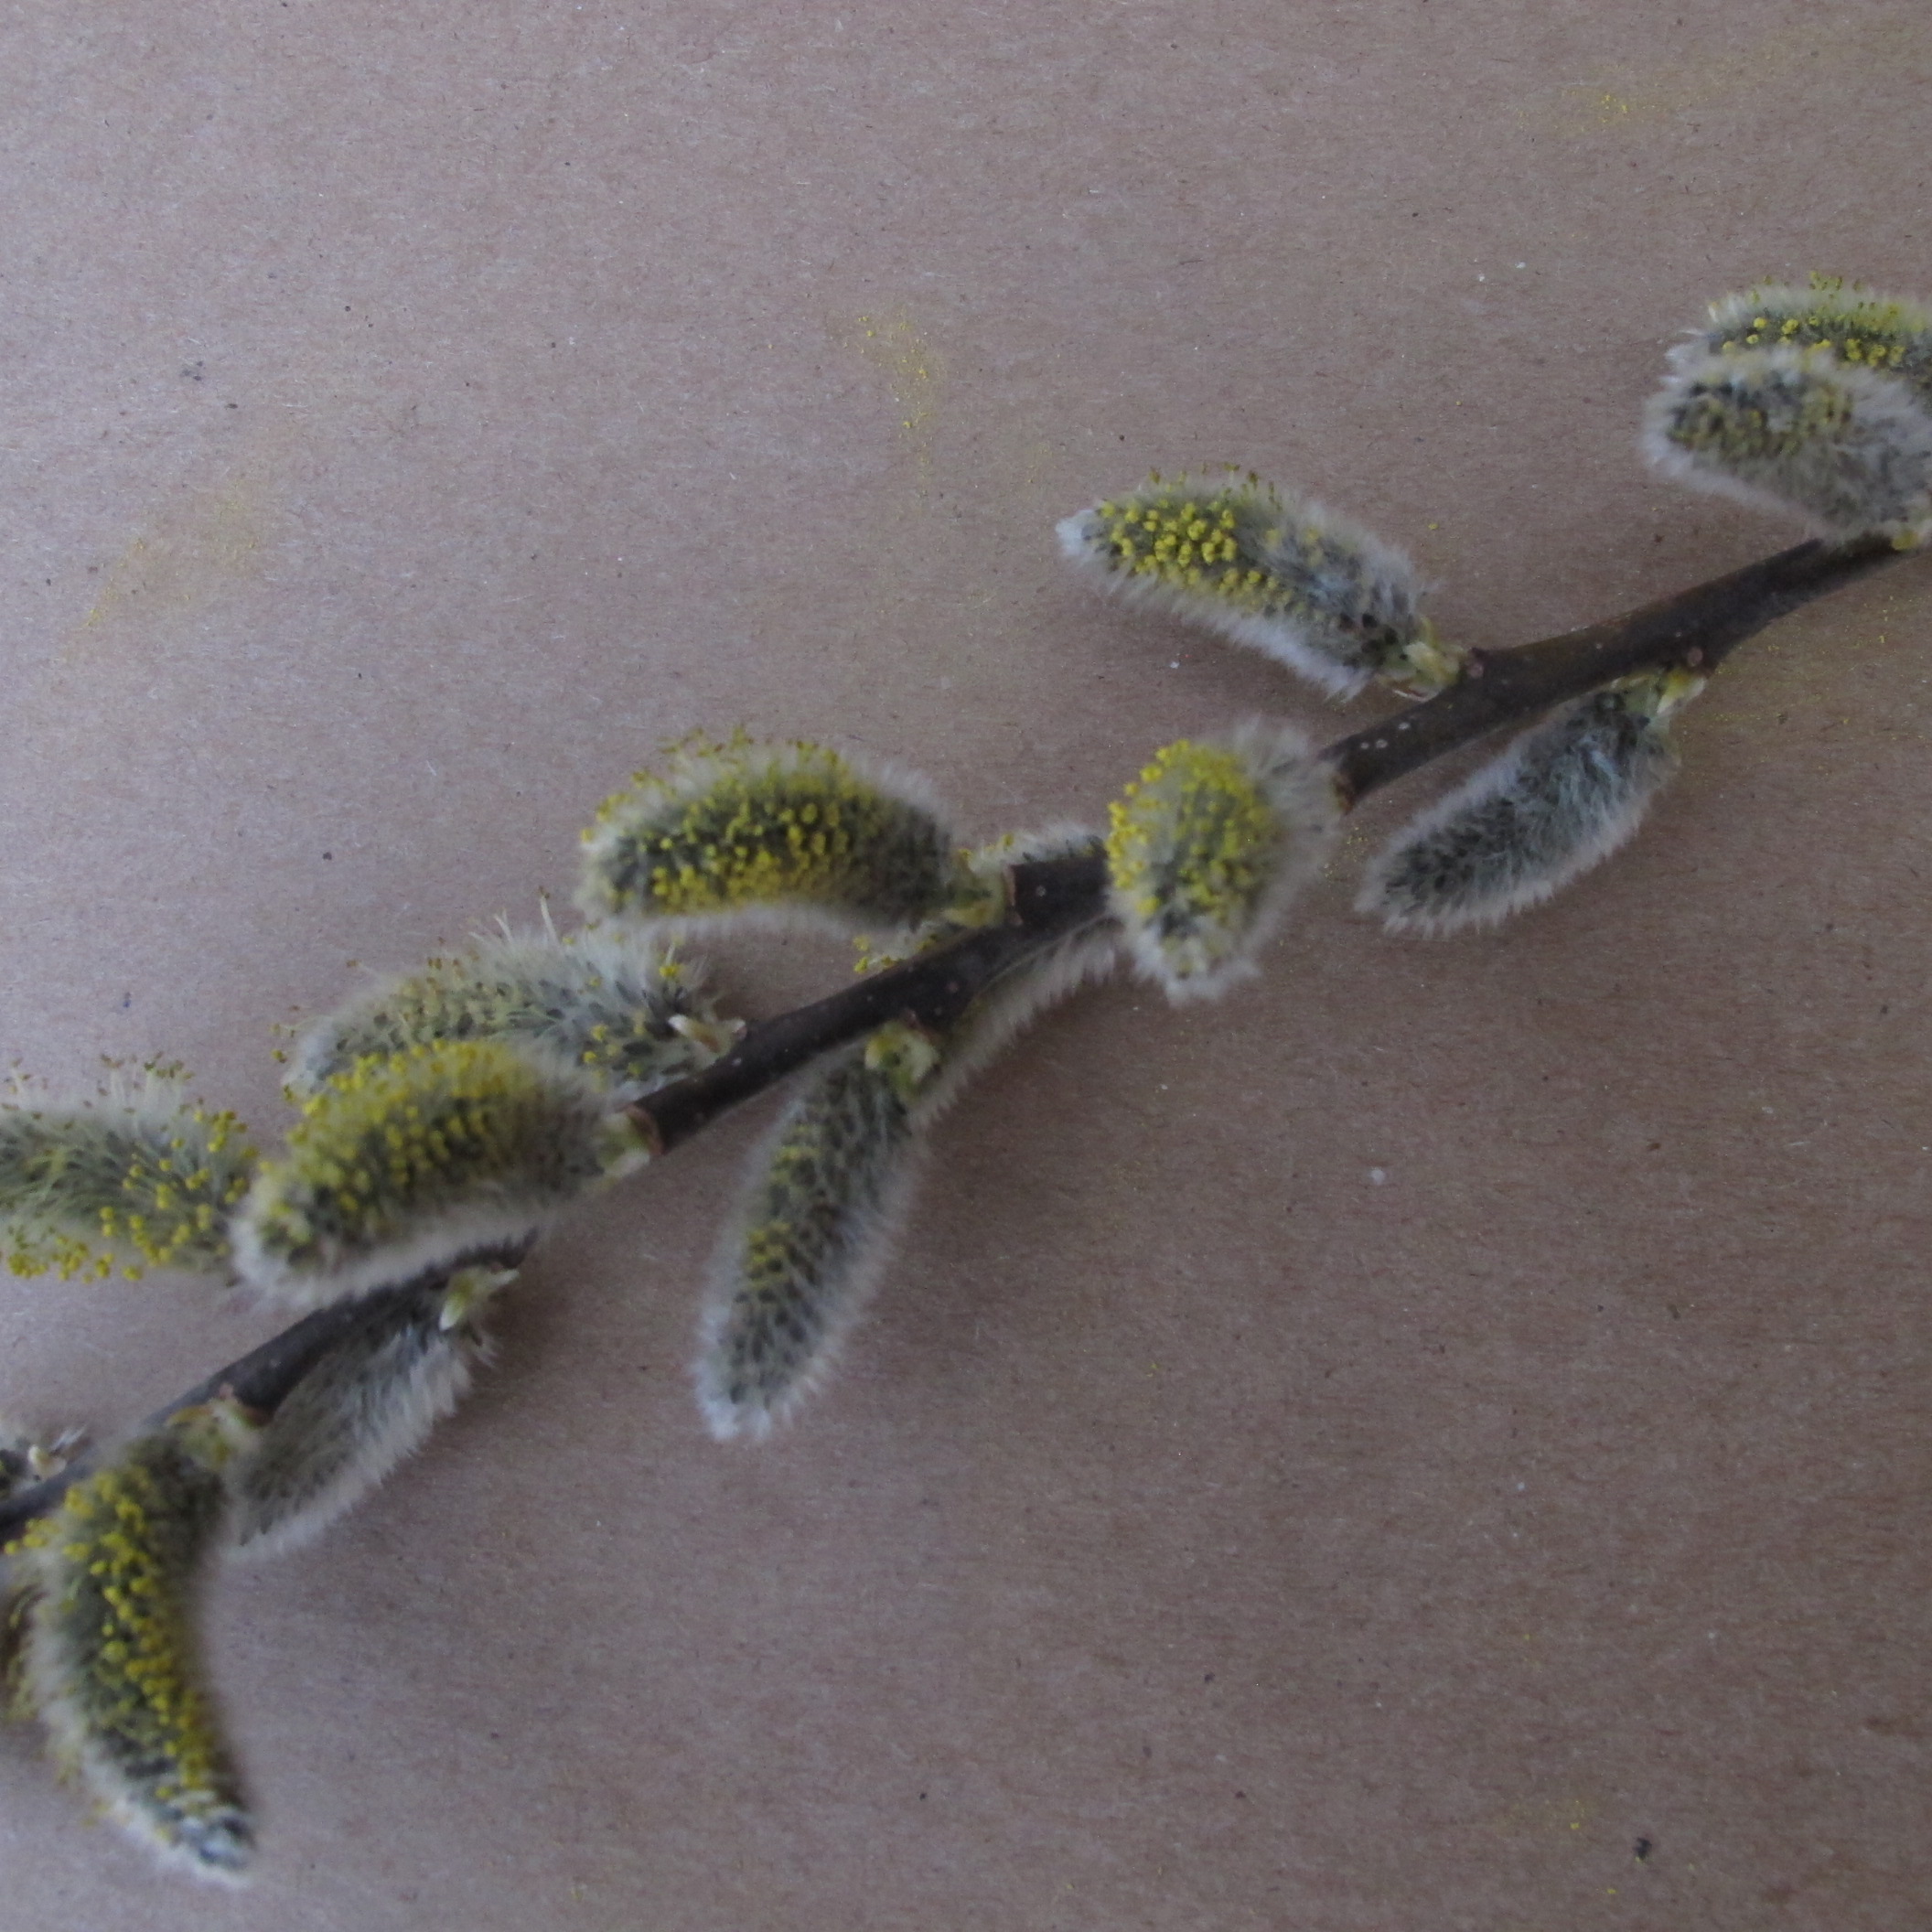
Pussy willow showing pollen
What we call pussy willows are actually the male catkins – pollen-producing parts – of two species of willows (Salix caprea and Salix discolor). Both grow wild, and are available at nurseries. Pussy willows, like all willows, like wet, swampy areas. They will grow up to be small trees, but can be kept to a manageable size with yearly pruning – and now is a good time to do so.
Fortunately for those of us who depend on pussy willow bouquets to chase away the mud season blues, the more you trim your pussy willows, the more vigorous and productive they will be. Left un-pruned, pussy willows can easily reach 20 feet tall. Since they bloom on their upper branches, picking good-looking stems can be next to impossible if the bushes are allowed to get too tall.
When harvesting pussy willows in the wild I bring along a pole pruner. Any type will work, but I like mine best: it’s an ARS brand, model 180L 1.8. Unlike other pole pruners I’ve tried, this has a handle to squeeze, just like regular pruners (not a string or handle to pull). That feature allows me to have great control. With it I can reach up and nip off pussy willows that are 12 feet or more above ground.
The pole pruner in question is made by a Japanese company, ARS, and is available from OESCO, a tool dealer in Massachusetts (www.oescoinc or 800-634-5557). Not only that, it weighs less than 2 pounds, so it is easy to maneuver with one hand. It is not designed for use on anything thicker than about three quarters of an inch in diameter. Cost? About $95 plus shipping and worth every penny. I also use it to cut the dead stems in my blackberry patch. I can reach in with it to cut ta cane, then grab it and pull it out.
In addition to bringing spring into the house, pussy willows are great for honeybees. According to beekeeper Margot Maddock of Lyme, NH, pollen from pussywillows is one of the first sources of food for honeybees in the spring. It is even earlier than that nuisance in the garden, chickweed, which is also good for the bees.
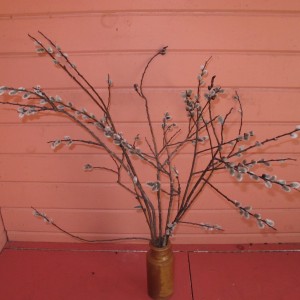
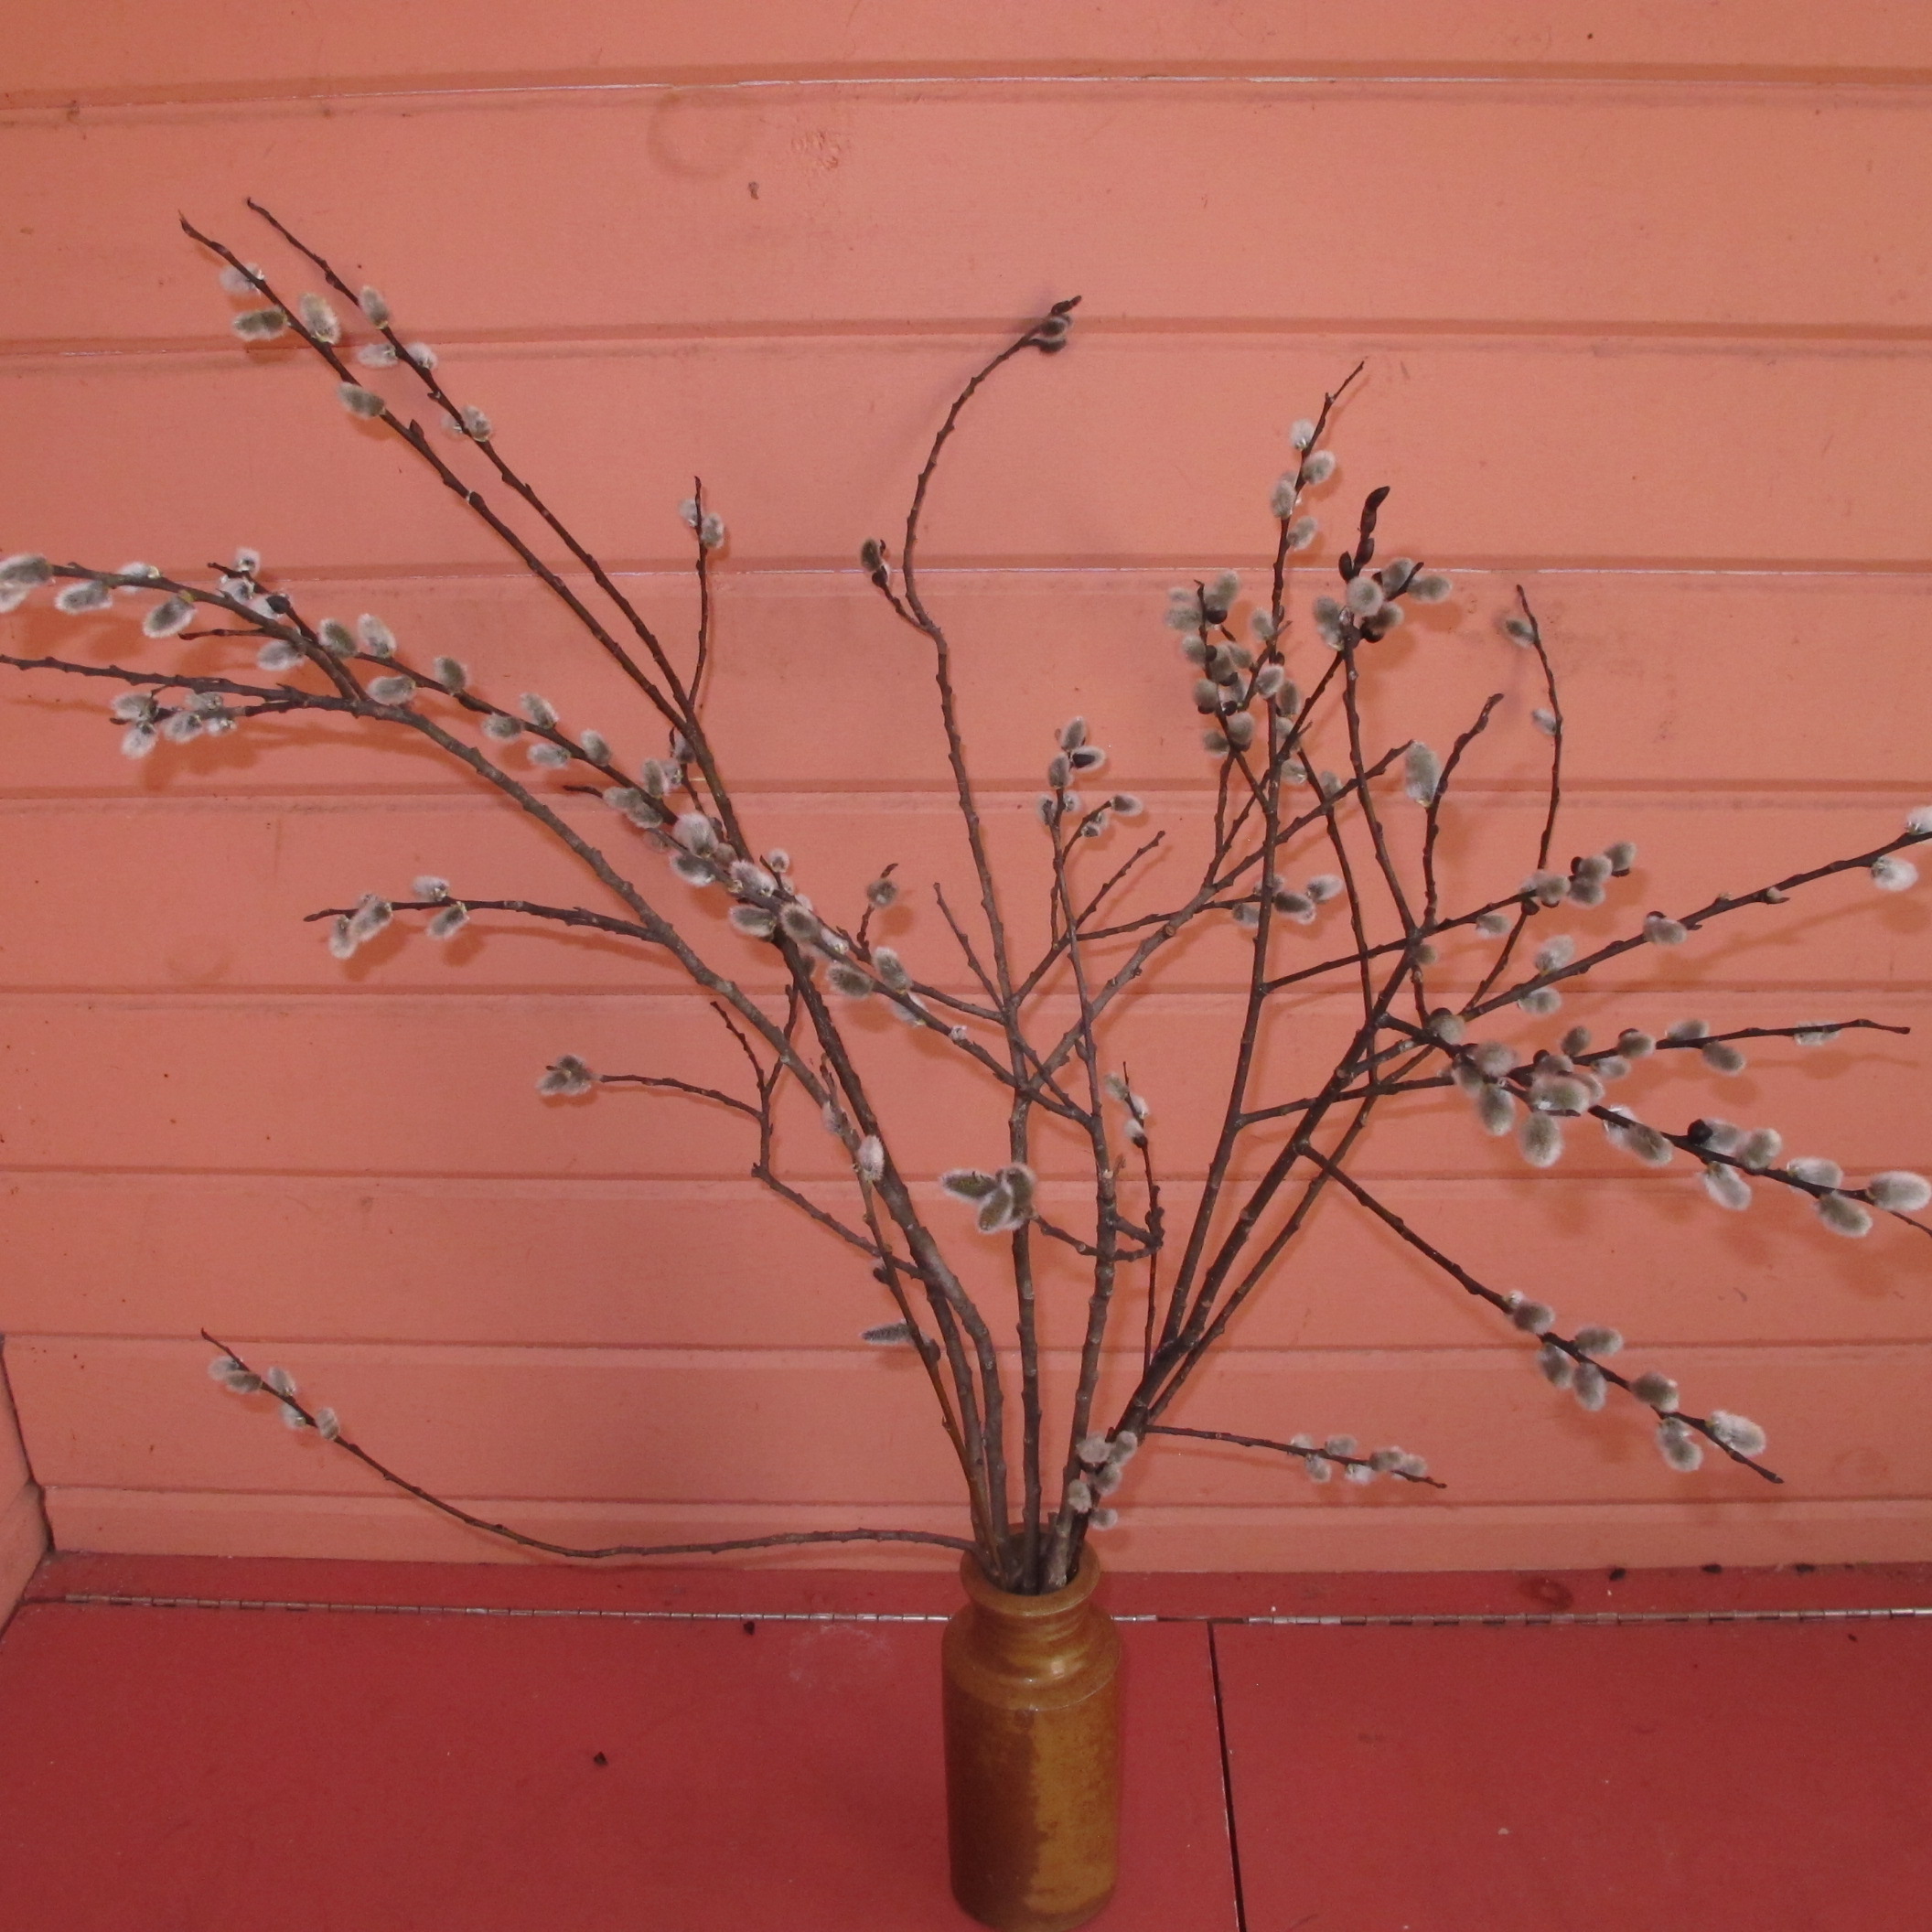
Pussy willows in a dry vase
If you put your cut stems of pussywillows in a vase and add water, they will continue to mature and produce a yellow pollen that will eventually fall on your tablecloth. But if you put them in a dry vase, they will stay frozen in time. I’ve been known to keep pussy willows looking good on my desk for months that way.
Rooting pussywillows is easy. Cut a stem about a foot long and push most of it into the soil where you would like to have pussy willow growing. But be sure that you keep track of which end is up, and leave a couple of inches sticking out of the ground. If leaves or side shoots have started to grow by the time you do this, rub them off before you push the stem into the ground. Although pussywillows grow best in moist soil, they will grow in ordinary garden soil, too. You will just need to be sure the soil does not dry out until the stem is well rooted.
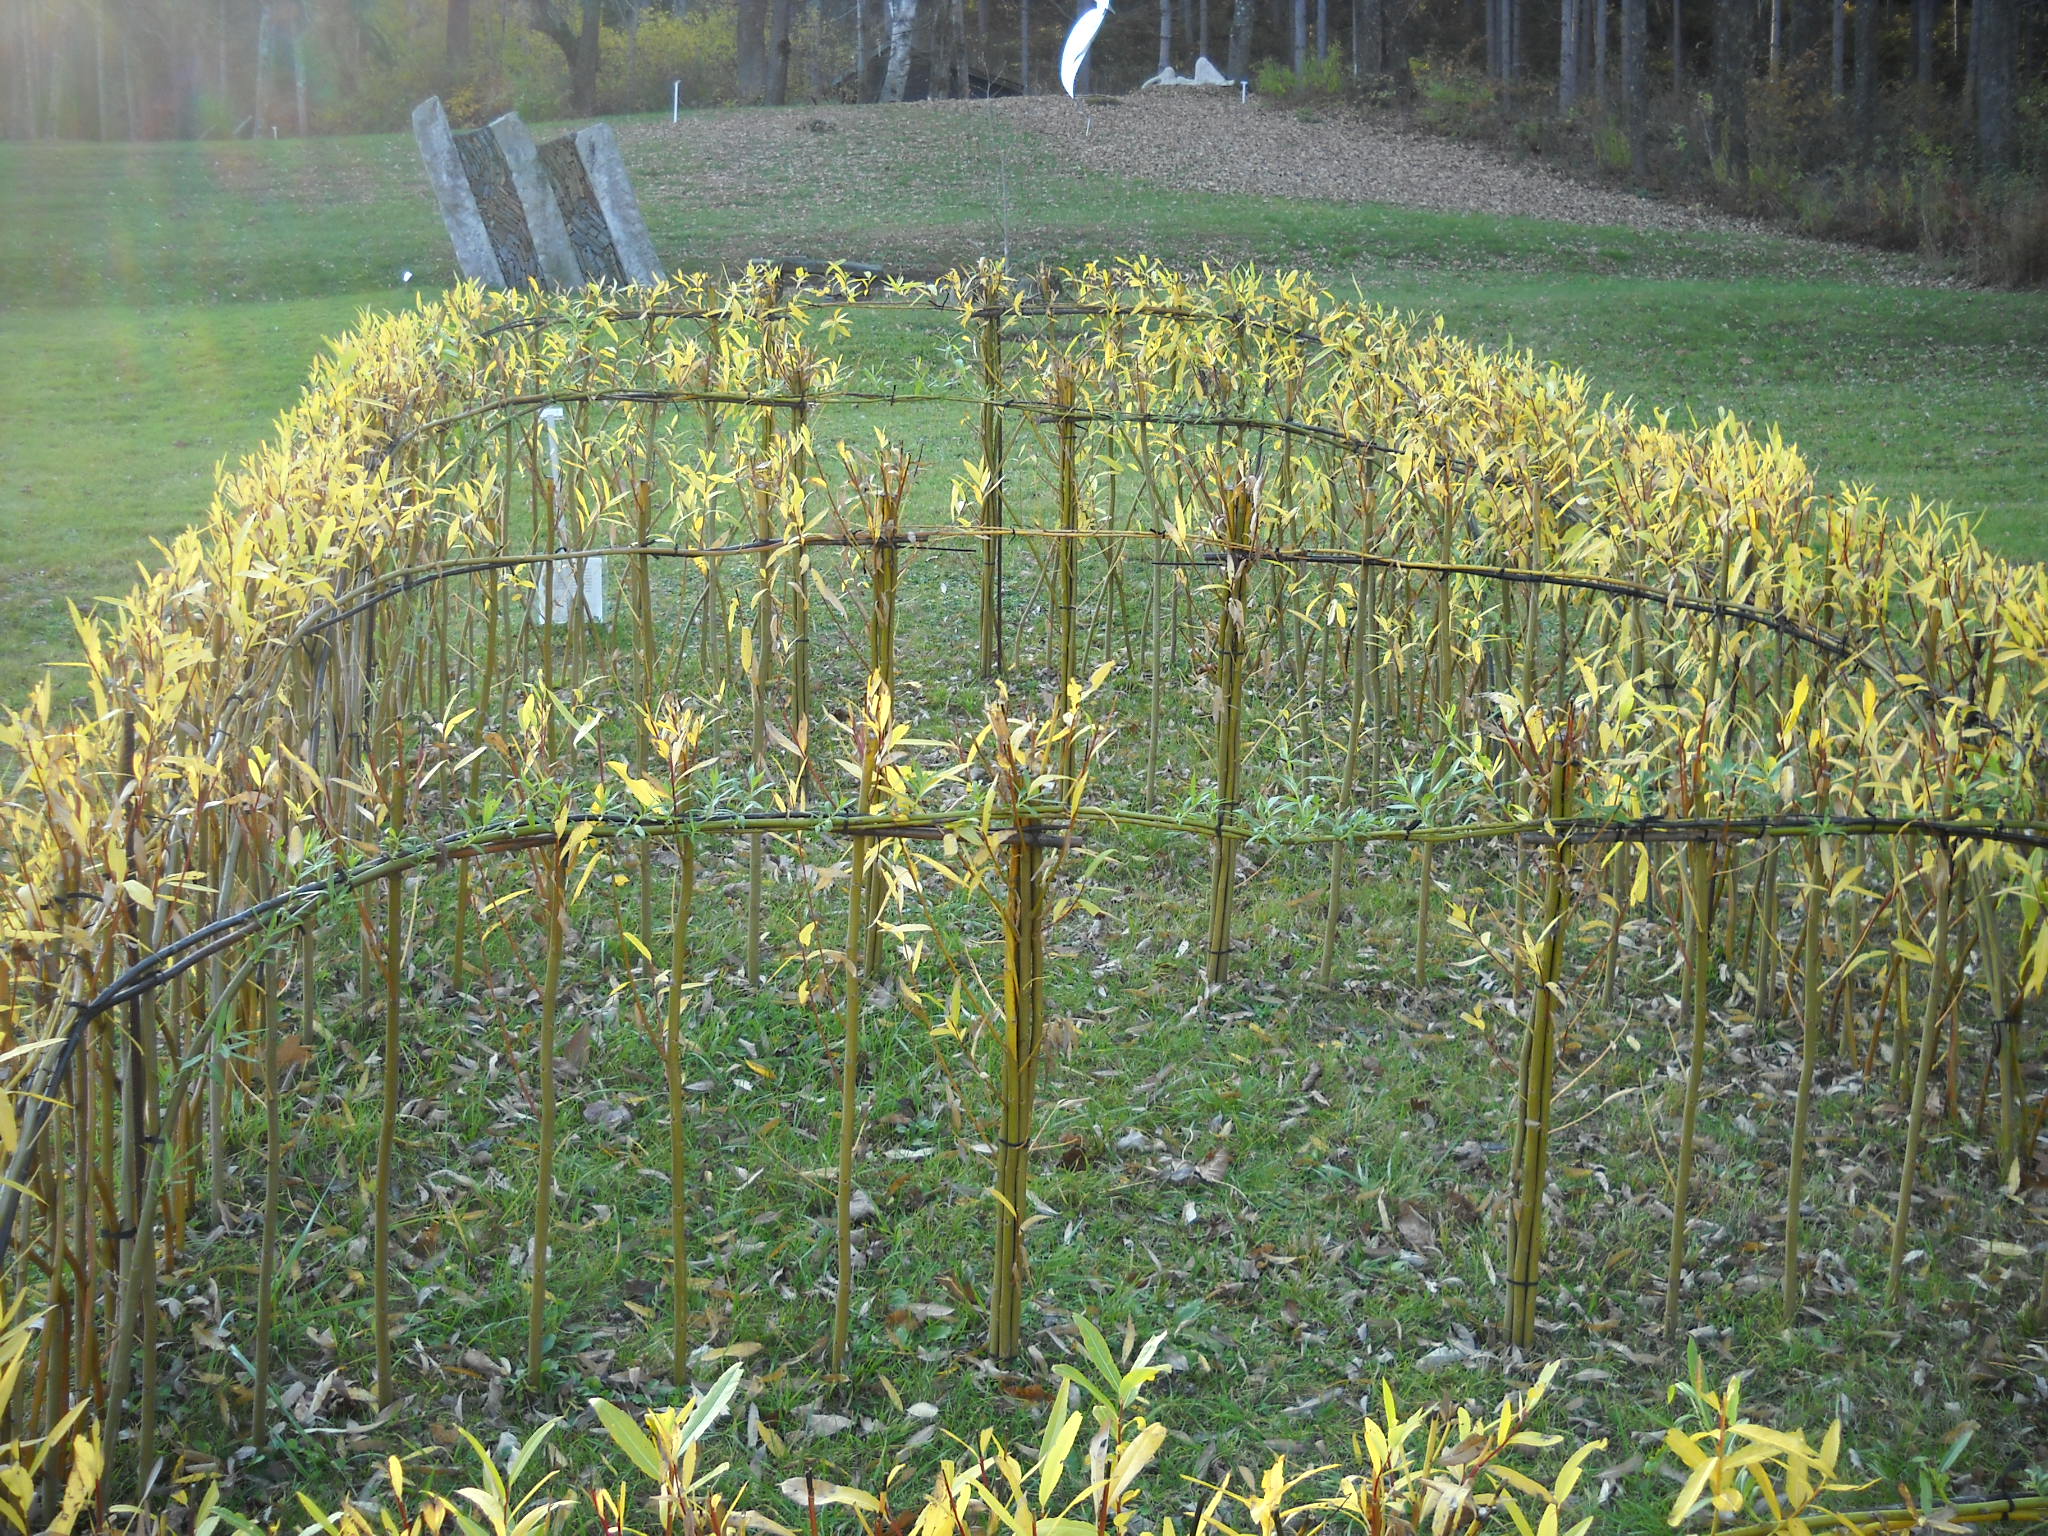
Because pussy willow is so easy to root, you can easily make a living wall or windbreak. I worked on a willow farm in France a few years ago. The farmers grew willow for basket making, but also created living sculpture. Young willows – two to 3 years old – are so flexible you can braid or weave them if they are planted close enough together. You can also tie stems together to create a tunnel for kids to play in.

Living willow sculpture at SculptureFest 2012
Charlet Davenport of Woodstock, Vermont, commissioned a work of art using living willow for her Sculpturefest that is held each year in August (www.sculpturefest.org). Early spring is best time to root willows, but the artist who made the sculpture for Sculpturefest keeps willow stems in big coolers so that she always has dormant willows to root for art projects.
You don’t have to depend on nurseries and greenhouses for all your plants. If you want to pick some willow stems and plant them, they will probably grow – for free. You just need a little patience for them to reach full size.
Henry Homeyer can be reached by e-mail at henry.homeyer@comcast.net or by mail at P.O. Box 364, Cornish Flat, NH 03746. He is a UNH master Gardener and the author of 4 gardening books. His Web site is www.Gardening-Guy.com.
The Spring Bulb Flowers
Posted on Wednesday, April 16, 2014 · Leave a Comment
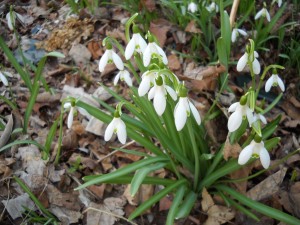
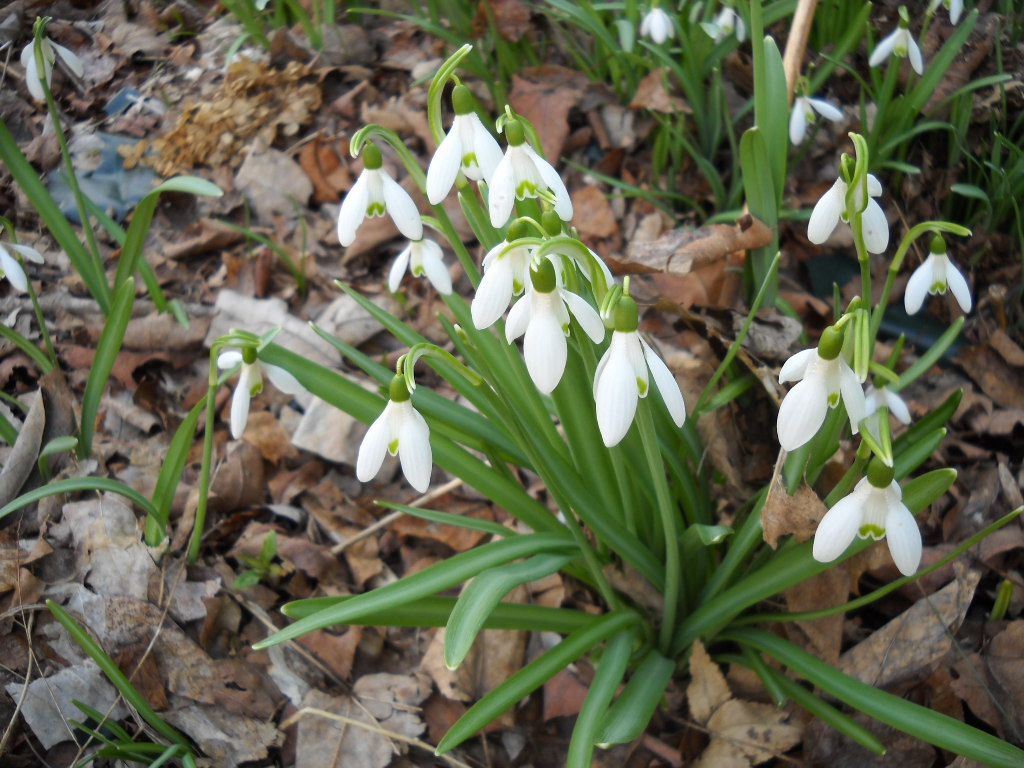
Snow drops in April
I’ve been paying attention to snowdrops and crocus since I was 9 years old – I recently found entries in my diary that tell me so. My entry for March 7, 1956, in its entirety was this: “Spring is getting here at last the snow drops are in bud + will bloom in a few days.” Then on April 5 I wrote,” Today our first crocus was in bloom it is very pretty.” I still pay attention to them, and generally note when they come into bloom. Now is the time to decide where you should plant bulbs next fall.
Here’s what I do. I wander around my property each year in the spring to see what spots are bare of bulb flowers. I bring along those white plastic markers used for labeling, and write “add crocus here”, for example. Then in the fall, when it’s time to plant more bulbs I don’t have to rely on my memory.
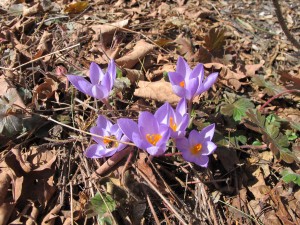
Early crocus
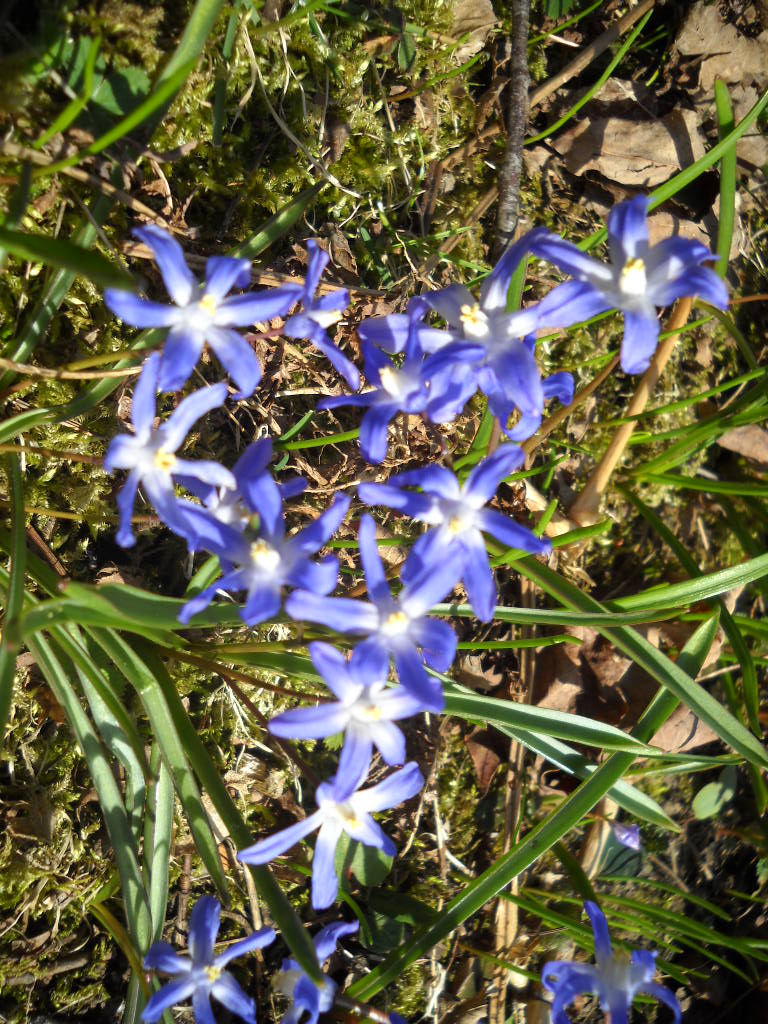
When planting bulbs, I label what I‘ve planted. That way I’ll see what has performed well, and be able to buy more of the same. For example, I’m always eager to get color in the garden at the same time that the snowdrops bloom. Glory –of-the-snow is one plant that overlaps with snowdrops, but is a bit later, as is scilla. This spring I saw that a crocus I planted last fall, ‘Blue Pearl, is blooming with my snowdrops – and before those other two. So I’ll buy 100 of those for fall planting. I bought them at Brent and Becky’s Bulbs– I know because they include tags with each bag of bulbs.
Writing this in early April, I haven’t seen any of my winter aconite appear, though I would have thought they would be up by now. It is a very early bright yellow flower that has one-inch wide, six-petaled flowers. I’ve grown it before but lost it to cold or rodents or poor drainage. I’m still optimistic that it will show up.
I tend to blame bulb failure on drainage problems even though I mix in lots of compost at planting time and favor hillsides. South facing hillsides are great for early bulbs as the snow melts off weeks earlier than north-facing plots. But rodents might be the culprits, too.
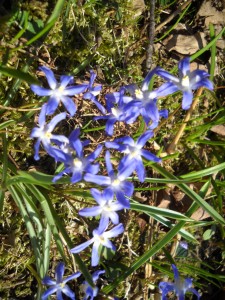
Glory of the Snow early April 005
A bulb plant that I’ve considered fussy is a low-growing iris, Iris reticulata. It is a lovely iris that blooms near the ground level and has medium-sized blue, purple or (sometimes) yellow flowers. Doing some research I found out why I thought they are fussy: after they bloom, the bulbs divide, producing several little bulblets. These won’t bloom for a few years. So I need to plant some every year until I have a mature colony of them. I also read that they like soil that dries out well in summer, such as in a rock garden or sandy hillside.
My lawn is full of snowdrops that have planted themselves. I assume that they produce seeds that wash into the lawn with early summer rains. The bulk of my snowdrops are planted on a hillside above the lawn. But you can plant early spring bulbs in the lawn, too. Just don’t plant daffodils or anything with large leaves because you won’t be able to mow the lawn where they are growing until the leaves yellow and dry off – around July 4th. Bulb plants need to re-charge their batteries, if you will, by getting sunshine and storing energy.
Little bulbs like snowdrops, crocus and grape hyacinths have short leaves that disappear early and won’t disrupt your early mowing. You can always set the lawn mower blades high to protect the leaves if they are still green when you need to cut the lawn.
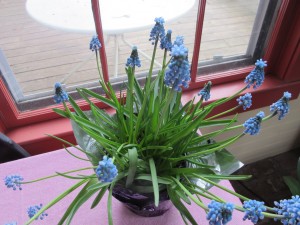
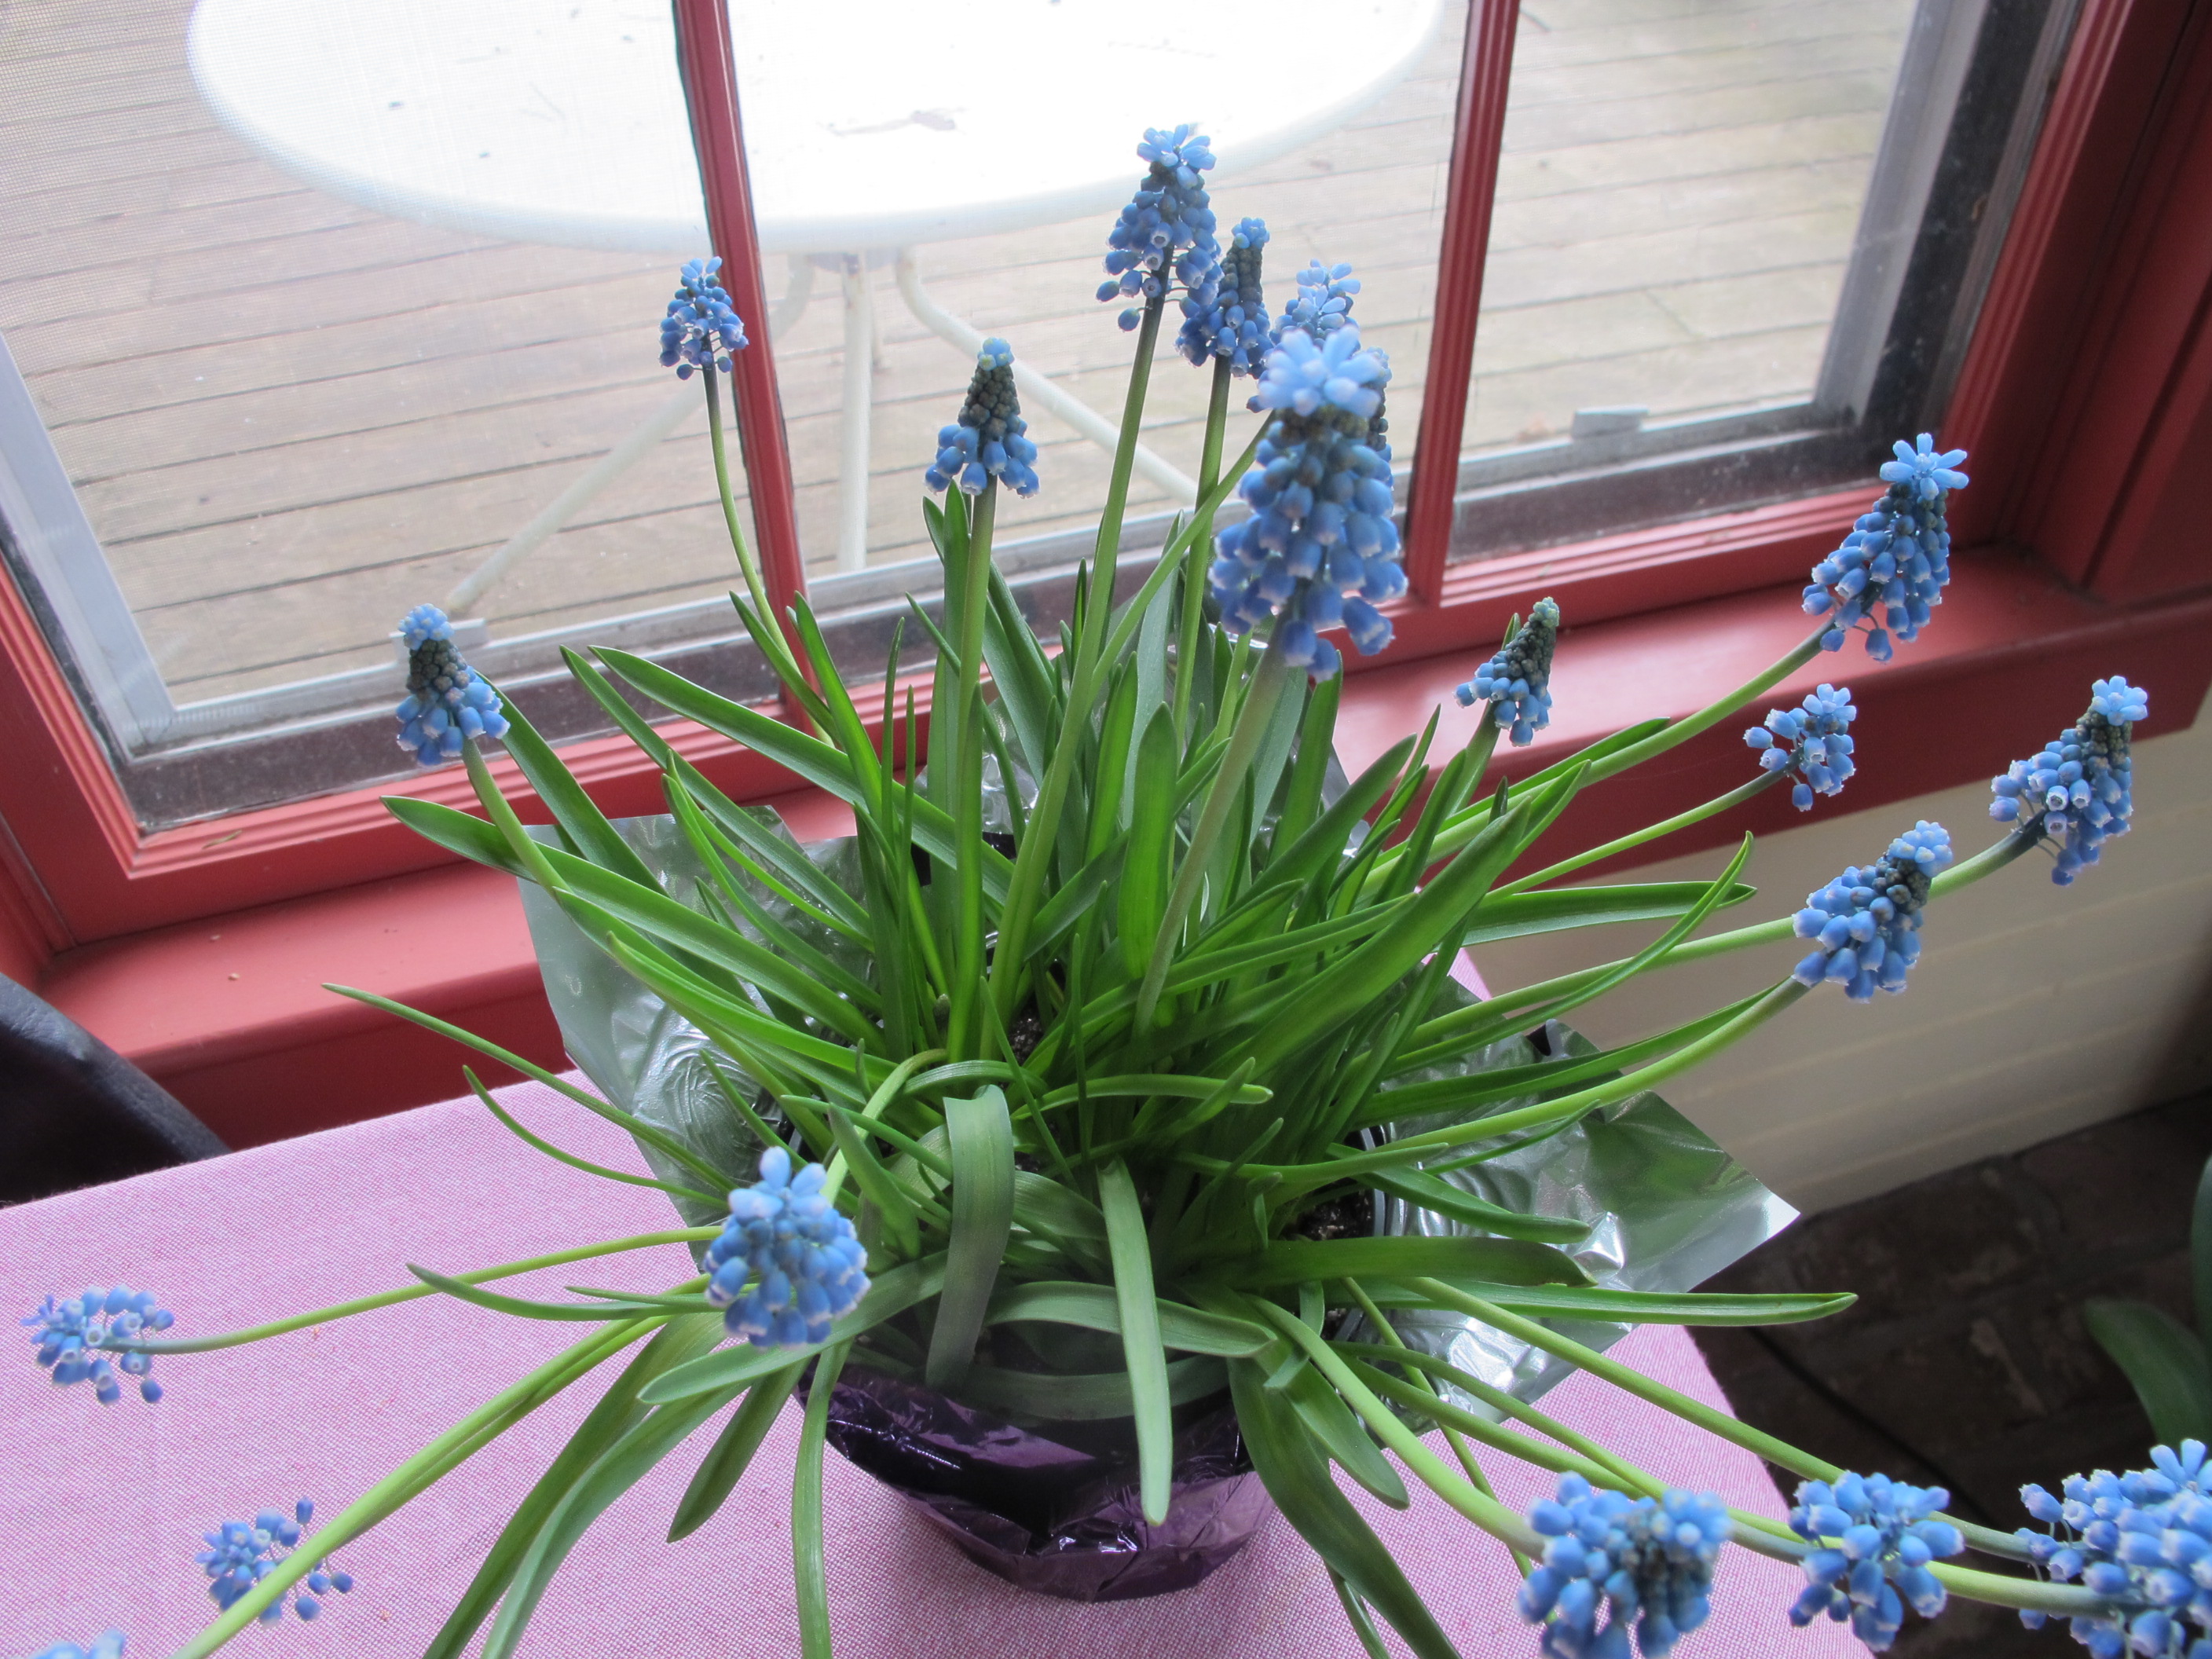
Grape hyacinths
Grape hyacinths (Muscari spp.) are great little flowers that come in many different shades of blue and purple. I’ve planted many dozens in my day, but find they tend to lose vigor and disappear with time. So I plant them again. This spring I bought a pot of them at a garden center and have been enjoying them immensely in the house. Later, when the soil is thawed, I’ll plant them outside. I keep the pot in a cool space indoors, as if they get too warm, they flop over.
Tulips I treat like annuals. I plant 100 most years in a bed that I reserve for them – and later zinnias. If I had depended on bulbs planted in 2012 for this year, the number of blooms might be just 50, and maybe 25 the following spring. So I don’t bother to coddle them. In fact, I often pull the flower stem instead of cutting it, as I can get an extra 2-3 inches of stem for my vase, and I love tall tulips. I compost the spent bulbs. I find that adding a few pennies to the water in the vase helps the tulips to last longer before losing their petals, or opening if picked in bud.
Daffodils are slightly poisonous to deer and rodents, so they aren’t eaten – and can bloom for years. You can plant them in open woodlands and they will do fine. I grew up with daffodils planted along paths in our woods, and I still delight in the memory of them. By the way, if you forced paperwhites this winter, don’t bother planting them outdoors – they’re not hardy here.
Bulbs are a great investment. Most come back year after year, bringing me pleasure each year before the garden gets going.
Henry Homeyer is a gardening coach living in Cornish Flat, NH. His Web site is www.Gardening-Guy.com.
Early Spring Chores
Posted on Wednesday, April 9, 2014 · Leave a Comment
Spring finally seems to be coming to Cornish Flat – about a month late, this year. My snowdrops are just starting to bloom and large patches of snow are still on the lawn and garden – though there are bare spots. I really want to get outside and start cleaning up the yard and garden beds, but will try to hold myself back until things have dried out.
Why is it important to wait before doing much gardening? It’s all about soil structure. Soil is made up of ground rock, organic matter and air spaces. The mineral component is about 45%, organic matter can be from 1% to 10% or more, and the rest consists of air spaces. That last component is as important as the first two.
Plant roots that we can see when we dig up a weed or plant a shrub are only a part of the entire root. The parts of the root that absorbs water, oxygen and minerals are so fine that we cannot see them. They are called root hairs, but they are even finer than human hair, microscopically fine. And there are lots of them. Most plants have branch roots that spread out and branch again and again. Root hairs are short protuberances attached to those branching roots. But fine roots cannot push through packed soil as easily as through fluffy soil. The total length of root tissues in a single rye plant is around 380 miles.
As you know, if you walk on soggy lawn you leave foot prints. That means that you have squeezed air out of the soil and compacted it – making it all the harder for roots and root hairs to extend and thrive. Not only that, green plants get their oxygen from the soil via their roots. If the oxygen is squeezed out, plants can’t get it.
So what can a gardener do? Wait. Don’t walk on your lawn if you see footprints or hear a squish. Don’t rake winter debris from the lawn while the lawn is still dormant. If you do, you risk pulling up the grass, roots and all. And stay out of flower beds even later into the spring – they are more susceptible to compaction than your lawn.
So what can you do in early April? Clean and sharpen your tools, including the handles. I have a potato hoe, a 5-tined rake-like tool that has been in my family for over 50 years. It has its original wood handle, which is still in perfect condition – even though I use it for weeding and soil prep every week, often every day, all summer. How is that possible? I try to oil the handle every year either in the fall or the early spring. And I don’t leave the tool outside in the sun or rain. No matter how tired I am at the end of the day I walk the potato hoe back to the barn before I go to the house.
To clean up a wooden handle, first I use fine steel wool (or a green scrubbie) to polish up the handle and remove any rough spots. Then I apply a coat of boiled linseed oil with a brush or rag. I let it soak in for a few hours, then rub off any excess. Or if the oil soaks right in, I might even apply a second coat. The steel tines I clean with steel wool and apply a light coat of sewing machine oil.
This year I need to oil the wood on my wooden wheel barrow and tighten up all the bolts. One of my first memories in my life is of my Grampy picking me up, plunking me down in his wooden wheelbarrow on a pile of weeds, and racing us back to the barn ahead of a fast-approaching thunderstorm. I might have been just two years old. The ride was bumpy – there was a steel-rimmed wooden wheel – but it was exciting!
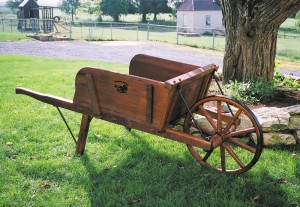
Wooden wheelbarrow
Photo Credit: Spring Valley Woodworking
Unfortunately that wooden wheelbarrow disappeared after Grampy went off to the great garden in the sky. But many years later I tracked down an Amish woodworker in Pennsylvania, Ike Lapp, who still makes wooden wheelbarrows and got myself one. It’s pretty much the same wheelbarrow I remember my grandfather using. When I finished assembling it I pushed it across the lawn for a test drive and it made the same squeak that my grandfather’s wheelbarrow did.
I called Ike Lapp at his home in Gordonville, PA recently. He is old order Amish, so does not have a phone in his house or workshop. Instead he has a phone and answering machine in a separate 4-foot square building in a field. (He checks messages once a day and calls customers back. He’s at 717-355-9366 717-355-9366). He told me he is still making the wheelbarrows and in addition to mine, a large premium grade wheelbarrow for around $300, he has smaller ones, and some in “rustic grade”. He does not have a web site, but you can see his wheelbarrows at www.lehmans.com.
Later, when your ground has dried out and you are raking and weeding flower beds, try to reach in with your rake, keeping your feet out of the beds. If you must walk in flower beds, bring along a couple of short planks. Place them in the flower bed and step on the boards to distribute your weight. Or if you are not worried about what the neighbors will say, you could wear your snowshoes. After the winter we’ve had, that seems appropriate!
Henry Homeyer is a gardening consultant and the author of 4 gardening books. His web site is www.Gardening-Guy.com.
Spring Pruning
Posted on Wednesday, April 2, 2014 · Leave a Comment
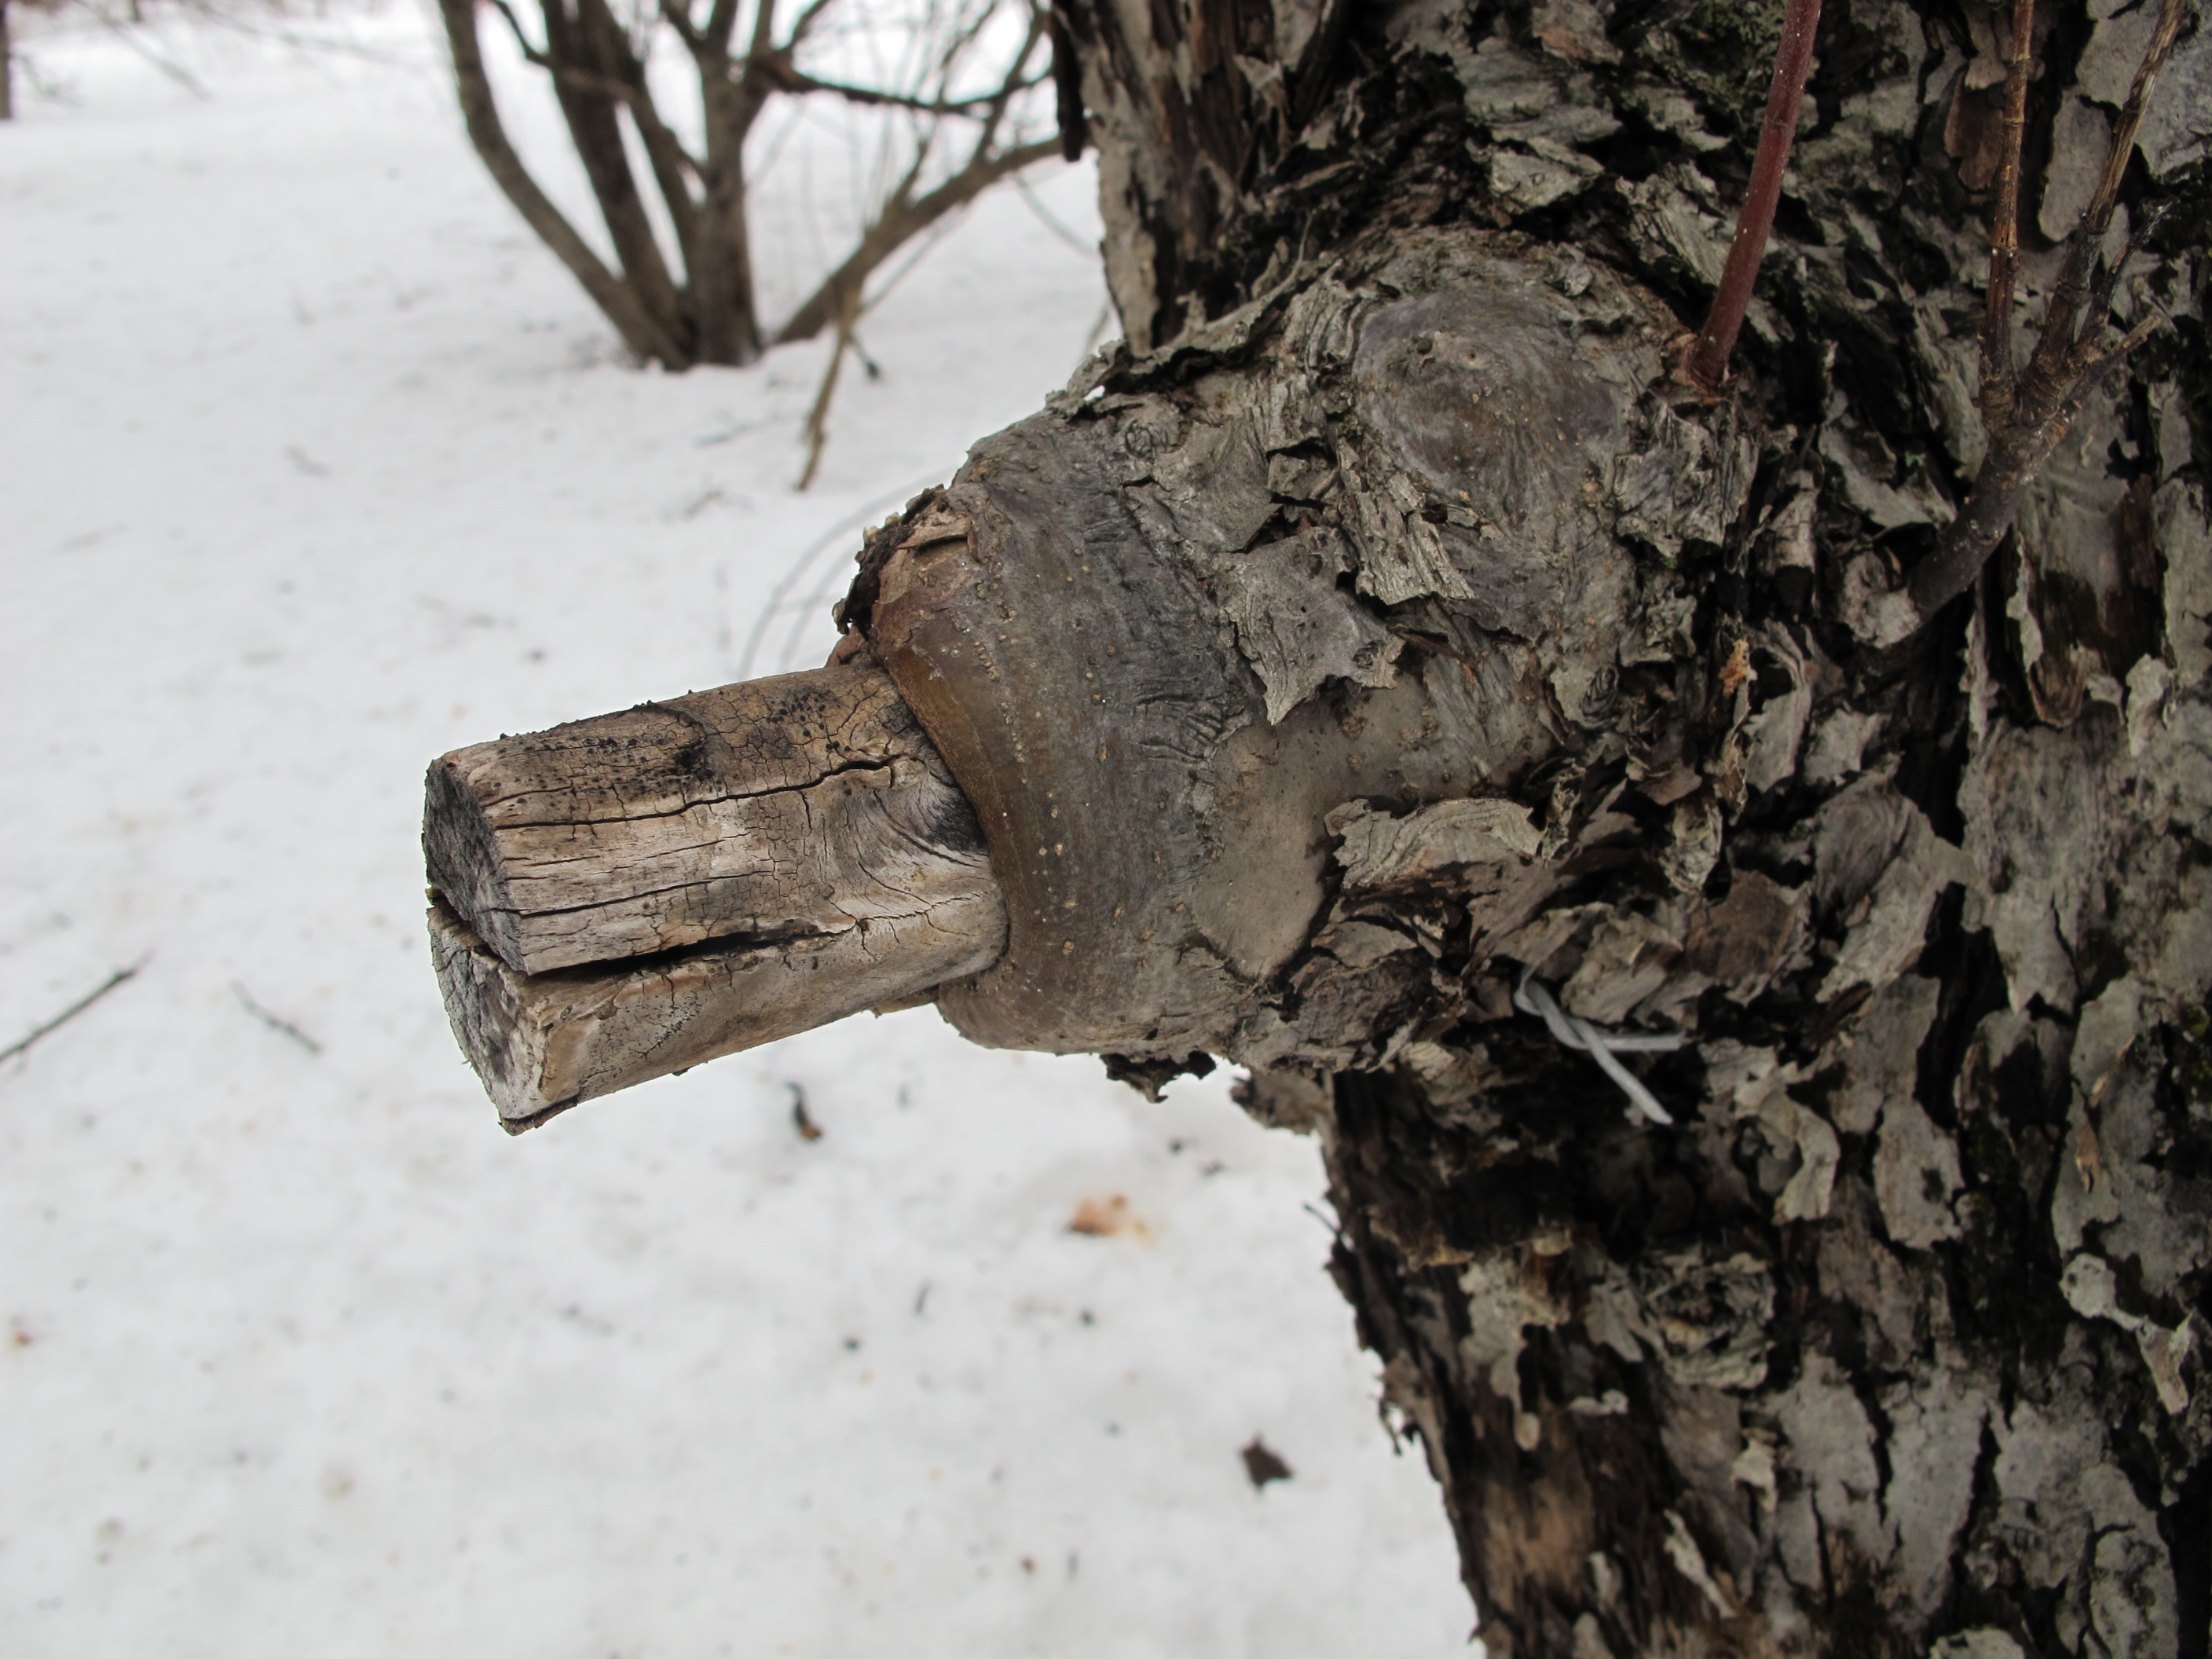
Conventional wisdom has it that fruit trees should be pruned in March, but don’t worry if you haven’t even started yet. I haven’t. There’s no harm in pruning in April, or anytime, really. After the buds on fruit trees open, they are more prone to being knocked off while we work on the trees. But you probably don’t care if you get a few less apples or pears. The snow has been so deep this year that it has been difficult to move ladders around, keeping most of us from starting early.
Pruning is best done with clean, sharp equipment. You’ll need a pair of by-pass hand pruners and a sharp tri-cut pruning saw. Bow saws, once popular, are tough to get in tight places, so the folding saw has taken over. A nice pair of loppers will save time sawing medium-sized branches.
Before beginning, check your pruners to see if they are sharp. I do that with the backside of a fingernail, which I drag lightly across the cutting blade. It should shave off a little of the nail. (If yours are not sharp, read my description of how to sharpen pruners in my book, Organic Gardening (not just) in the Northeast: A Hands-On, Week-by Week Guide. Your library should have it).
Next I clean off any gunk on the blades. I use a special solution called Sap-X with an old green scrubby, but you could use a little sewing machine oil or even kerosene. The blades should open and close easily.
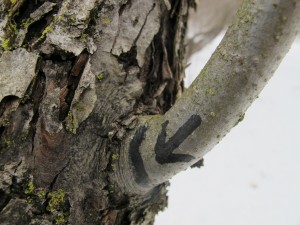
Branch collar and line to show where to cut
Start working on a tree by studying it for a few minutes. Apples do best with a single leader in the middle and the longest branches near the base, getting shorter going up the trunk. If you have two competing leaders, it would be good to remove one, though in an old tree that might not be practical due to the size.
As you look at the tree, ask yourself which larger branches should be removed. Are there any dead branches? They must be removed, so start by taking them out. Are there branches that are rubbing others, or crossing through the middle of the tree? They can go next. Lastly, remove any watersprouts – those smaller branches shooting straight up.
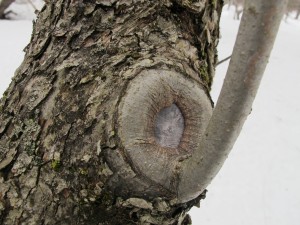
Healed cut and new water sprout
Some fruit trees produce dozens – or even hundreds – of water sprouts each year. Although some varieties seem more prone to producing them than others, you can minimize their presence by pruning to create a well-balanced tree that allows sunshine to get to each leaf of the tree. Watersprouts are the tree’s effort to produce more leaves to create more food.
Even though it might seem scary, it is better to remove large branches than to nip away at a tree, taking tiny branches. It is more efficient, and makes for a better looking, healthier tree. In any given year you can remove up to a quarter of the tree. That means a quarter of the branches that produce leaves – and hence food for the tree. Taking out a big dead branch doesn’t count at all. A healthy tree allows each leaf to get sunshine. If there are too many branches, they will shade each other out.

Stub healing back to branch collar
Where you make your cuts is important, too. Don’t cut off branches flush with the trunk, nor leave long stubs. Branches should be pruned just outside (away from) the wrinkly flare that starts at the trunk or a larger branch. That area you should leave is called the trunk collar. It is the site where healing takes places fastest. Years ago arborists recommended painting tar over a cut, but that is no longer thought to be a good practice.
If you have an empty place in your tree and wish you had a branch there, sometimes you can bend down a branch and keep it in place until it will stay put – generally around July 4th. But don’t do that until after the leaves appear. You can attach a weight to a small branch. A plastic soda bottle is good: you can add water until it is just the right weight. Or you can tie a bigger branch down to a stake in the ground.
Apples generally are produced on short spurs that occur on scaffold branches that are at a 45 degree angle from the main trunk (or even more horizontal). Branches going straight up are less likely to produce fruit. But don’t be impatient with young trees: they won’t produce fruit until they are good and ready.
Pruning on a warm spring day is great fun, and a good excuse to be outside. And remember, trees are not like people: they benefit by having their limbs removed.
Henry Homeyer lives in Cornish Flat, NH. His Web site is www.Gardening-Guy.com.
A Winter Meal from the Garden
Posted on Wednesday, March 26, 2014 · Leave a Comment
Technically, spring arrived on March 20. Most years I have snowdrops blooming on a south-facing hillside by early March, and some Glory-of-the-Snow in blossom by now. Not this year. Snow is still deep on my property, and nights with temperatures near zero have been common. Sigh. But I have a few plants started by seed growing under lights, to keep me chipper.
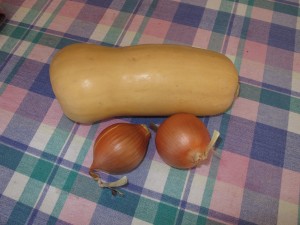
Butternut Squash
I also continue to eat from my garden. Yes, all those frozen and stored veggies keep me well fed and looking forward to this year’s vegetable garden. One of the best vegetables I grow is the butternut squash, specifically one called ‘Waltham’. It stores well in a cool, dry spot and is full of vitamins and energy. I recently made a butternut and apple soup with one, and it was fabulous. I got the idea from Anne Yates of Anne’s Country Store in Plainfield, NH, which has a great deli. She told me what she did (without any measurements), and I created my own version of it while also trying to use just home-grown veggies.
Usually I steam squash to cook it, but Anne said she roasted hers, so I tried that approach. I cut a large butternut in half lengthwise, cleaned out the seeds and lightly oiled the cut surface. I placed it face down on a cookie sheet and roasted at 350 degrees for an hour or more. This caramelized the sugars and made the squash even sweeter than it was. I scooped out the meat from the skin; it yielded about 3 cups of meat.
From my freezer I took out a jug of frozen apple cider. I bring apples to my local orchard in the fall, and have them press my apples (for a price) and put the cider in plastic half gallon jugs, which I freeze. I added cider (a quart in total) to the squash meat in my food processor and pureed it in a few batches.
Although I do grow fresh ginger in pots, and have some I could have harvested, I had some grocery store ginger that I peeled and chopped for this soup. I prepared a quarter cup of chopped ginger, which I then sautéed with 2 cups of chopped onions at low heat until the onions were clear and somewhat caramelized. After cooking the onions and ginger, I blended them in the processor, and added it to the squash and cider which was simmering on low heat.
Next, I cleaned up the last of my carrots from the garden that were starting to look wrinkly and bedraggled in my vegetable drawer. I had about 2 cups of carrots, so that is what I used. Of those, some I added to the soup as rounds, some I blended briefly in the processor. I added a cup of chicken broth at this time, though vegetarians could omit this.
Last fall was great for apples, so I froze lots of sliced apples. For this soup I used 4 cups of frozen apple slices with the skins on. I cooked them with a little water in a saucepan until soft, and then blended them into an applesauce-like mixture in the food processor. That produced about 2 cups of applesauce – which you could substitute here if you didn’t have fresh or frozen apples.
After I added the applesauce to the soup, I added a light sprinkle of nutmeg and some salt and pepper. And no, I don’t produce or collect the nutmeg, salt or pepper. There is just so much one can do to eat locally.
When it comes to growing butternut squash, I like to start seeds in the house a month before it is time to put them in the garden. I say a month because conventional wisdom is that squash family plants (including cukes, pumpkins, and melons) don’t like to have their roots disturbed. An 8-week old squash plant has a big root system and might be stunted or slowed in growth when transplanted into the garden. I plant in June after the soil is plenty warm.
The main reason I start squash indoors instead of planting seeds directly in the garden is this: there is a terrible insect pest, the striped cucumber beetle, that loves the tender first leaves of any squash-family plant. They are active at night, and will eat off the first 2 leaves of a young plant, killing it. But a 4-week old plant will have enough leaves to survive being chewed on by a few beetles.
You can also cover your seedlings with something called row cover or Reemay. It is a breathable fabric that physically keeps the beetles off the seedlings – unless they come up under it (they live in the soil). But I remove the row cover when the vines blossom – they need insects for pollination.
So try making this soup. The ginger gives it quite a kick, but next time I might add some of the hot pepper powder I make each year. And think about growing Waltham butternuts. They take some garden space (I allocate a 5-by 5-ft space for 3 plants) but are very productive – and tasty, too!
Henry’s Web site is www.Gardening-Guy.com. He is the author of 4 gardening books and a children’s fantasy-adventure about a boy with a mustache and his sidekick, a cougar.
Vegetables as Art
Posted on Wednesday, March 19, 2014 · Leave a Comment
I would hazard a guess that if you toured an art museum, the artwork depicting flowers would outnumber the art showing vegetables by ten to one. Or maybe a hundred to one. Flowers? Georgia O’Keefe and her poppies spring to my mind, Monet had his famous paintings of Giverny with its water lilies. Van Gogh had his sunflowers. And so on. But few painters have focused on kohlrabi or lettuce. And why is that? Vegetables are as beautiful as flowers if properly grown and displayed.

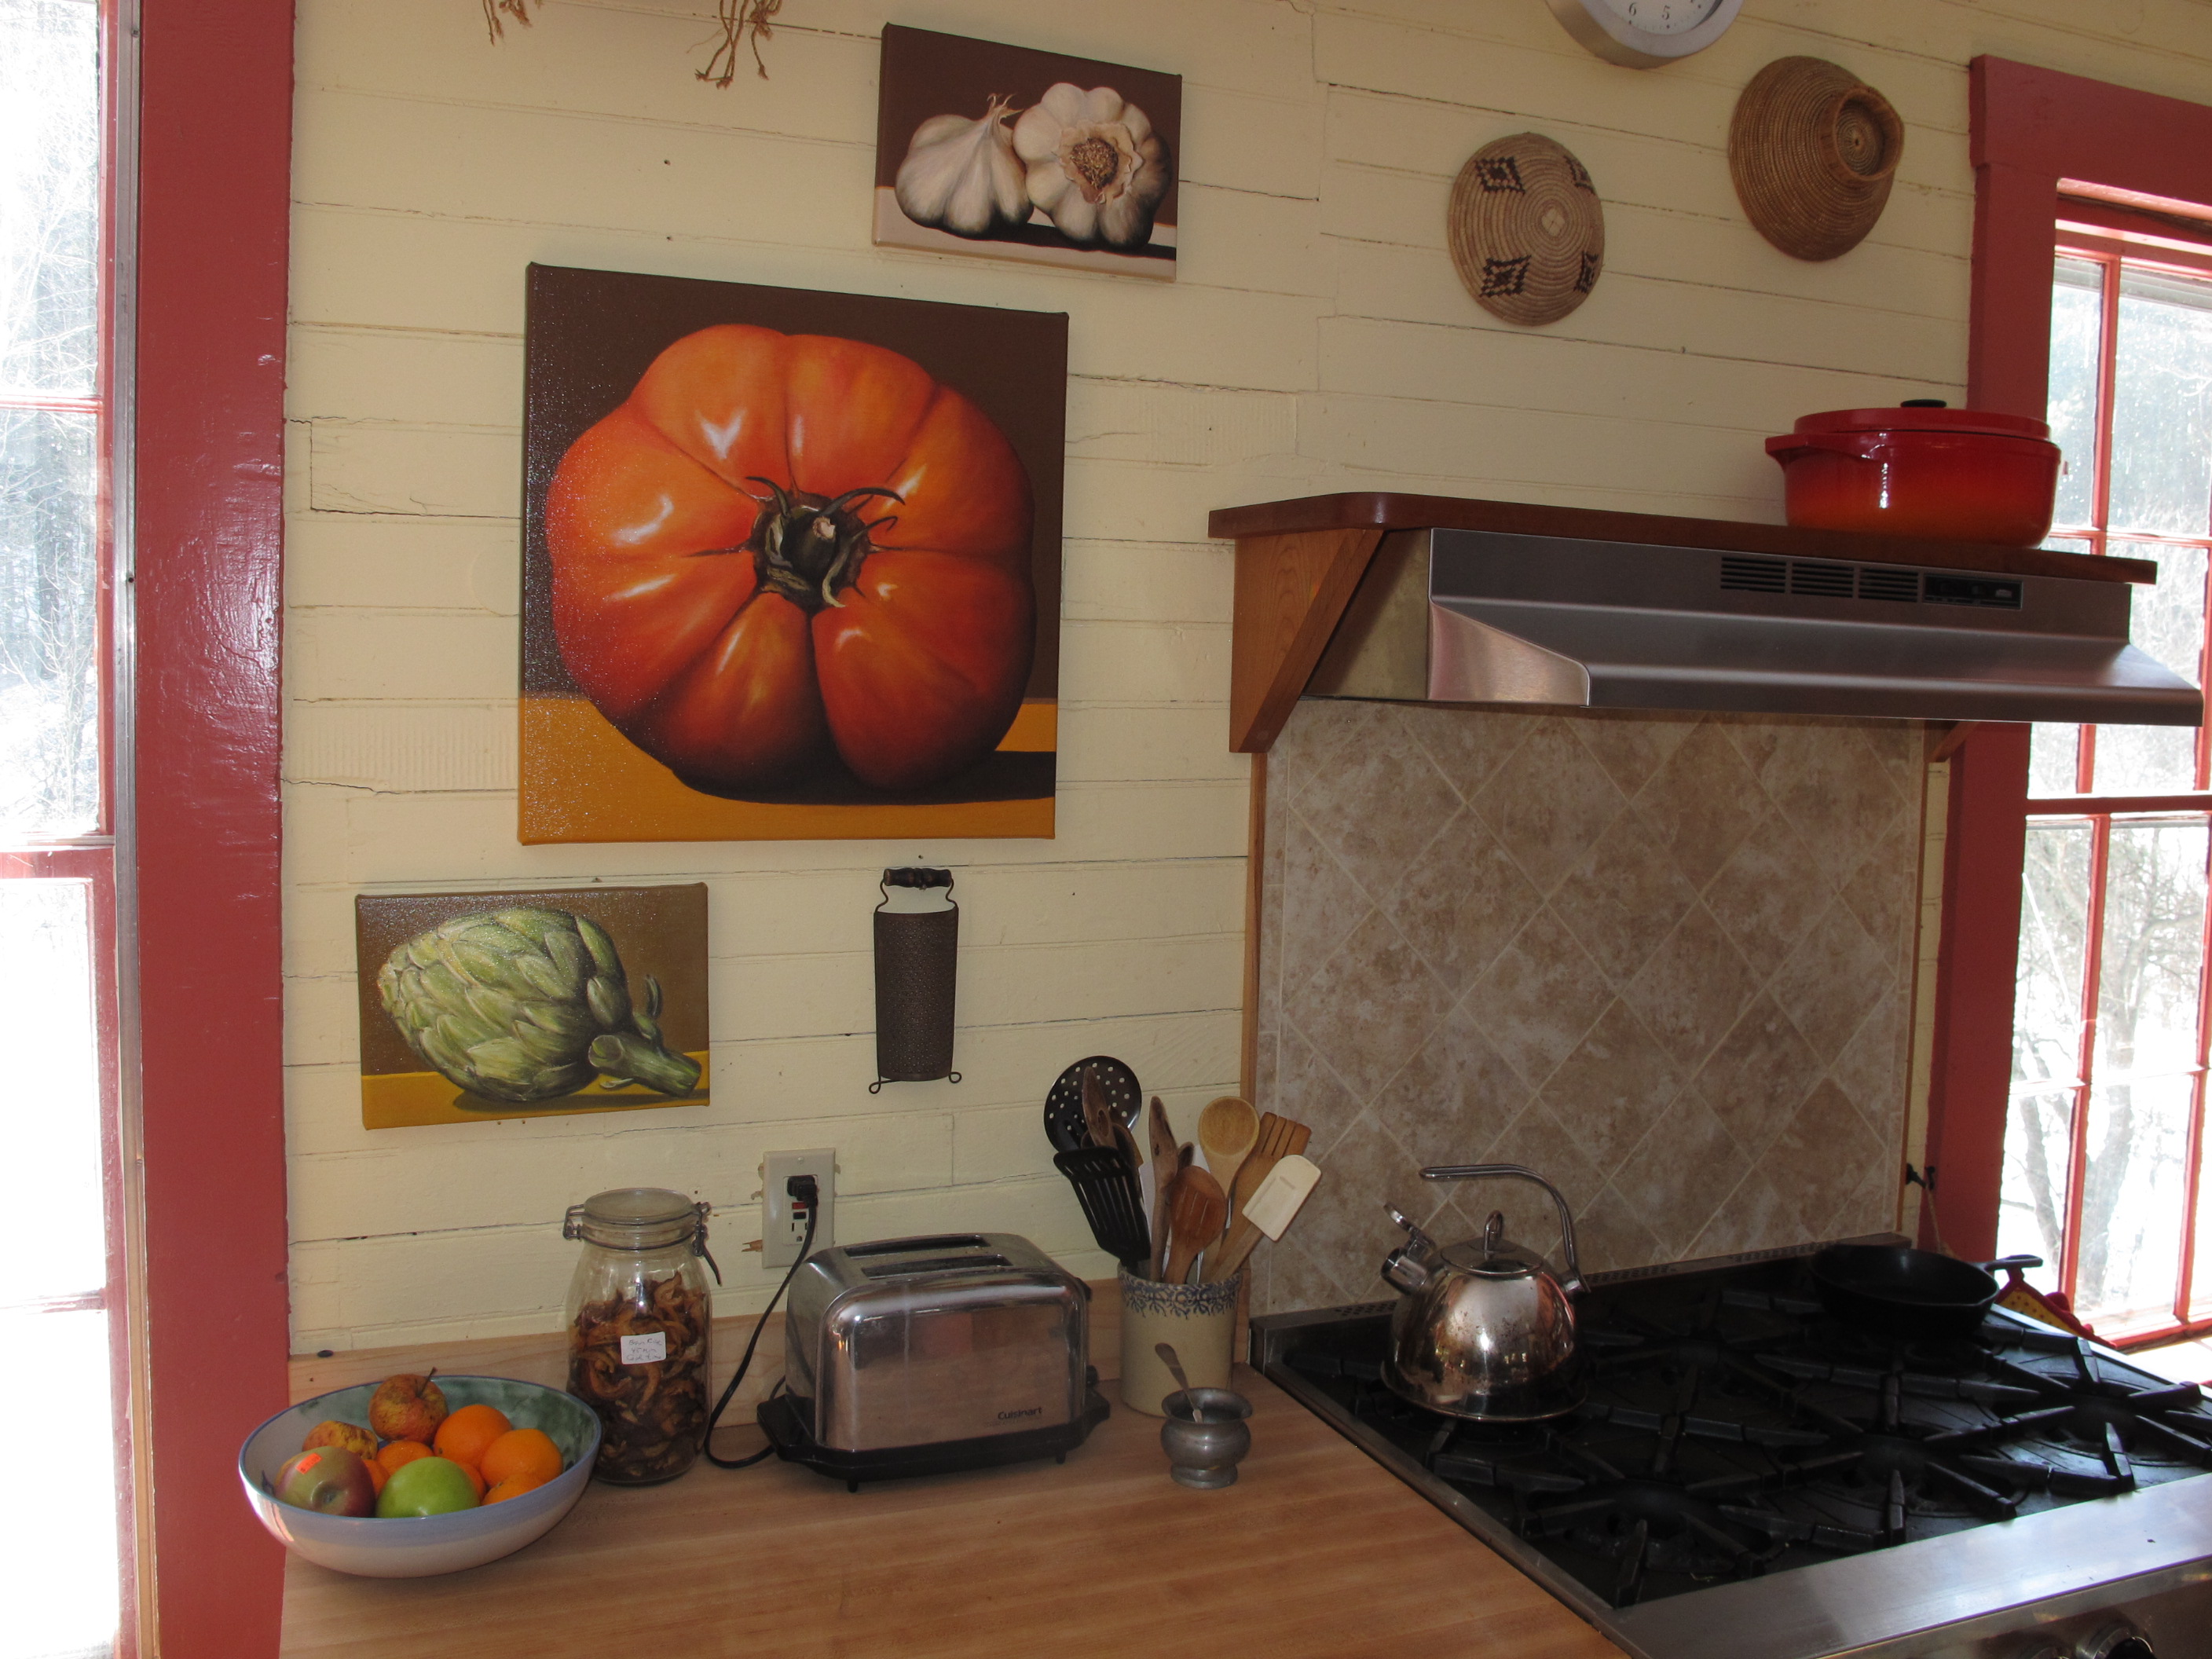
Bill Chisholm art
I was recently at the Rhode Island Flower Show and was struck by the artwork of Bill Chisholm of Somerville, Massachusetts (www.billchisholm.com). He had big, bold paintings for sale of vegetables and fruits. I bought a big tomato, a smaller artichoke and a delightful clove of garlic. I hung them in my kitchen, next to the stove. He paints in oil, and then has reproductions printed on canvas using a technique called giclée. The canvas is stretched on wood frames, just like an original, but at a small fraction of the price.
Much of my life is devoted to my vegetable gardens in the spring, summer and fall. I start seeds now, indoors. I baby the infants outdoors in May and June. I harvest and process the food much of the summer and all of the fall. So now, in winter, it’s nice to see veggies on the wall – in addition to those in the freezer. My new art got me thinking about the veggies we will plant this summer.
As you plan your garden this year, think about planting veggies in artistic ways. Choose cultivars for color and leaf texture, and plant them as you would if you were planting a flower garden – or creating a painting. Here are some of my favorites;
I love lettuces. They come in so many colors and leaf textures. I start lettuce in the house in April and May in 6-packs, each week starting a couple of different varieties. I plant green leaf lettuce, red lettuce, lettuce of multiple hues. In the garden I like to space lettuce six inches apart so that each head reaches full size, and is not crowded. But I like to interplant reds with greens, frilly lettuces with shiny leafed-lettuce. Arugula with Romaine or Oakleaf – and so forth.
I get seeds from numerous sources. Renee’s Seeds (www.reneesgarden.com) packages lettuces in pairs or trios of colors. This allows you to create a colorful array of leaf colors with just a package or two. Johnny’s Selected Seeds has an amazing array of lettuce seeds aimed not only at the homeowner, but also the CSA manager and farmer. In their catalog are a few pages showing the diversity of leafs you can work with.
Of the purple-leafed veggies, one of my favorites is orach. This is not a lettuce at all, but a relative of the amaranths, and is sometimes called “summer spinach”. It doesn’t bolt the way spinach does, and can get to be 3-4 feet tall. It will self sow if you let it – I allow a few plants to get big and make seeds, and it comes back each year in my garden. I use if in salads, but I’ve read that it is also good as a cooked green. Available from Johnny’s Seeds.
Other gorgeous vegetables include purple kohlrabi, eggplants, artichokes, and cauliflower. Visitors to my garden look at kohlrabi and seem to ask the same question: “What is that? A space alien?” The plant is fat globe that sits on the soil surface and sends up “arms” from the bulb, with leaves on top the arms.
For sheer production value, you can’t beat a variety of kohlrabi called ‘Kossak’ from Johnny’s Seeds, which produces globes bigger than softballs. But the purple-skinned ones, while smaller, are my favorites for their beauty. Renee’s Seeds sells a package of mixed purple and green varieties. I chop up kohlrabi and use it is salads and stir fries. It’s crisp and mild flavored, with a bit of a cabbage taste. They are fast-growing and should be started by seed in the garden.
Cauliflowers can be gorgeous, too. I have grown a purple cauliflower variety but have to admit that, like most cauliflowers, it is awfully fussy. If the soil is too wet or too dry, the plants get big but don’t produce anything but little buttons – not the big heads you see in the grocery store – or want to eat. And the purple color fades away on cooking.

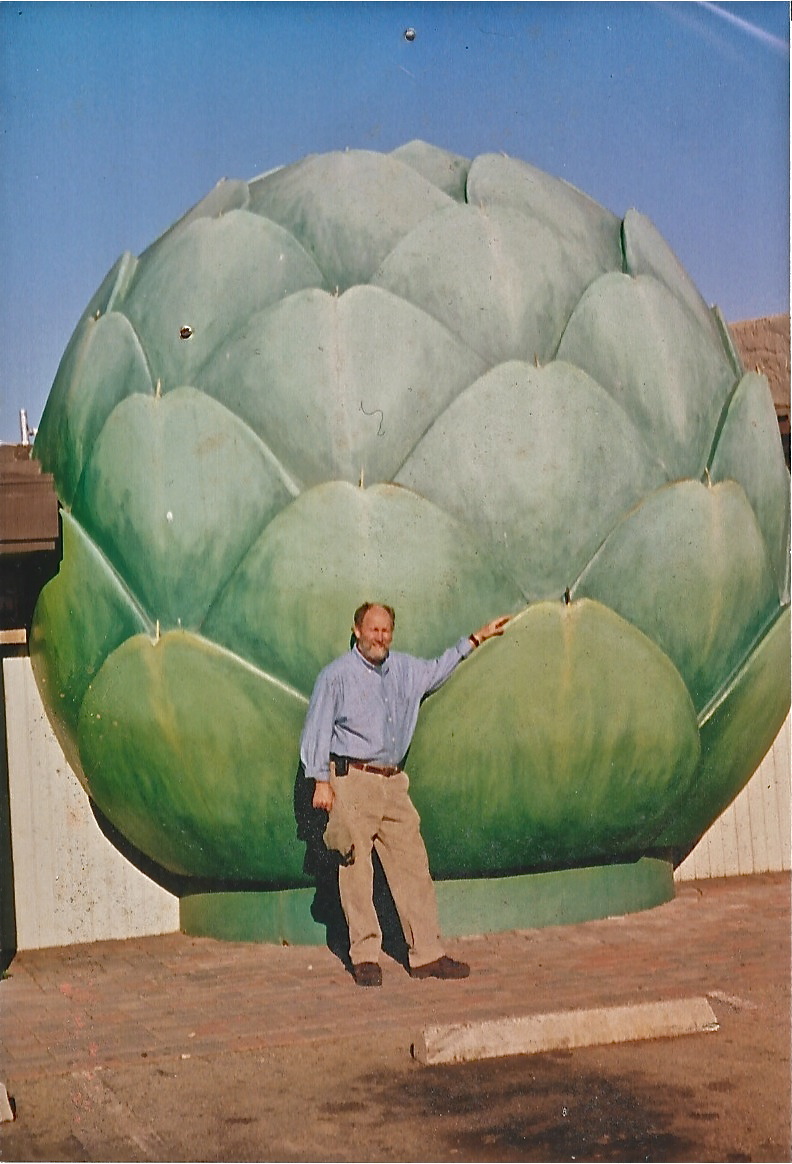
Artichoke Sculpture
Artichokes are beautiful plants, but take a long time to grow. In California they are perennials, but not here. This year I started a few seeds in January, but little plants are sometimes sold at good garden centers if you haven’t started any yet. I grow a couple of plants each year mainly for their looks and get a few artichokes to eat, but they are quite small. Some years ago I visited the Giant Artichoke Restaurant in Castroville, CA. It had a sculpture of an artichoke that towered over me that I remember fondly – too bad I can’t have one like it in my garden.
So as we move towards spring, think about the art value of your veggies and create your own living artwork. Tasty can be tasteful and pretty, too.
In addition to writing, Henry Homeyer teaches pruning to homeowners. He can be reached at henry.homeyer@comcast.net. He lives in Cornish Flat, NH.
The Irish Gardener
Posted on Wednesday, March 12, 2014 · Leave a Comment
My great-grandmother took the boat from Ireland to Boston in the latter part of the 1800’s. Dobbie, as we called her, got a job as a cook at Wellesley College. That was a bit ironic because she was, in my memory, a wonderful person but a horrible cook. She never made me anything that I can recall eating with pleasure. Even her boiled eggs – usually a favorite of mine- were runny and disgusting.
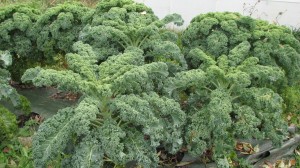
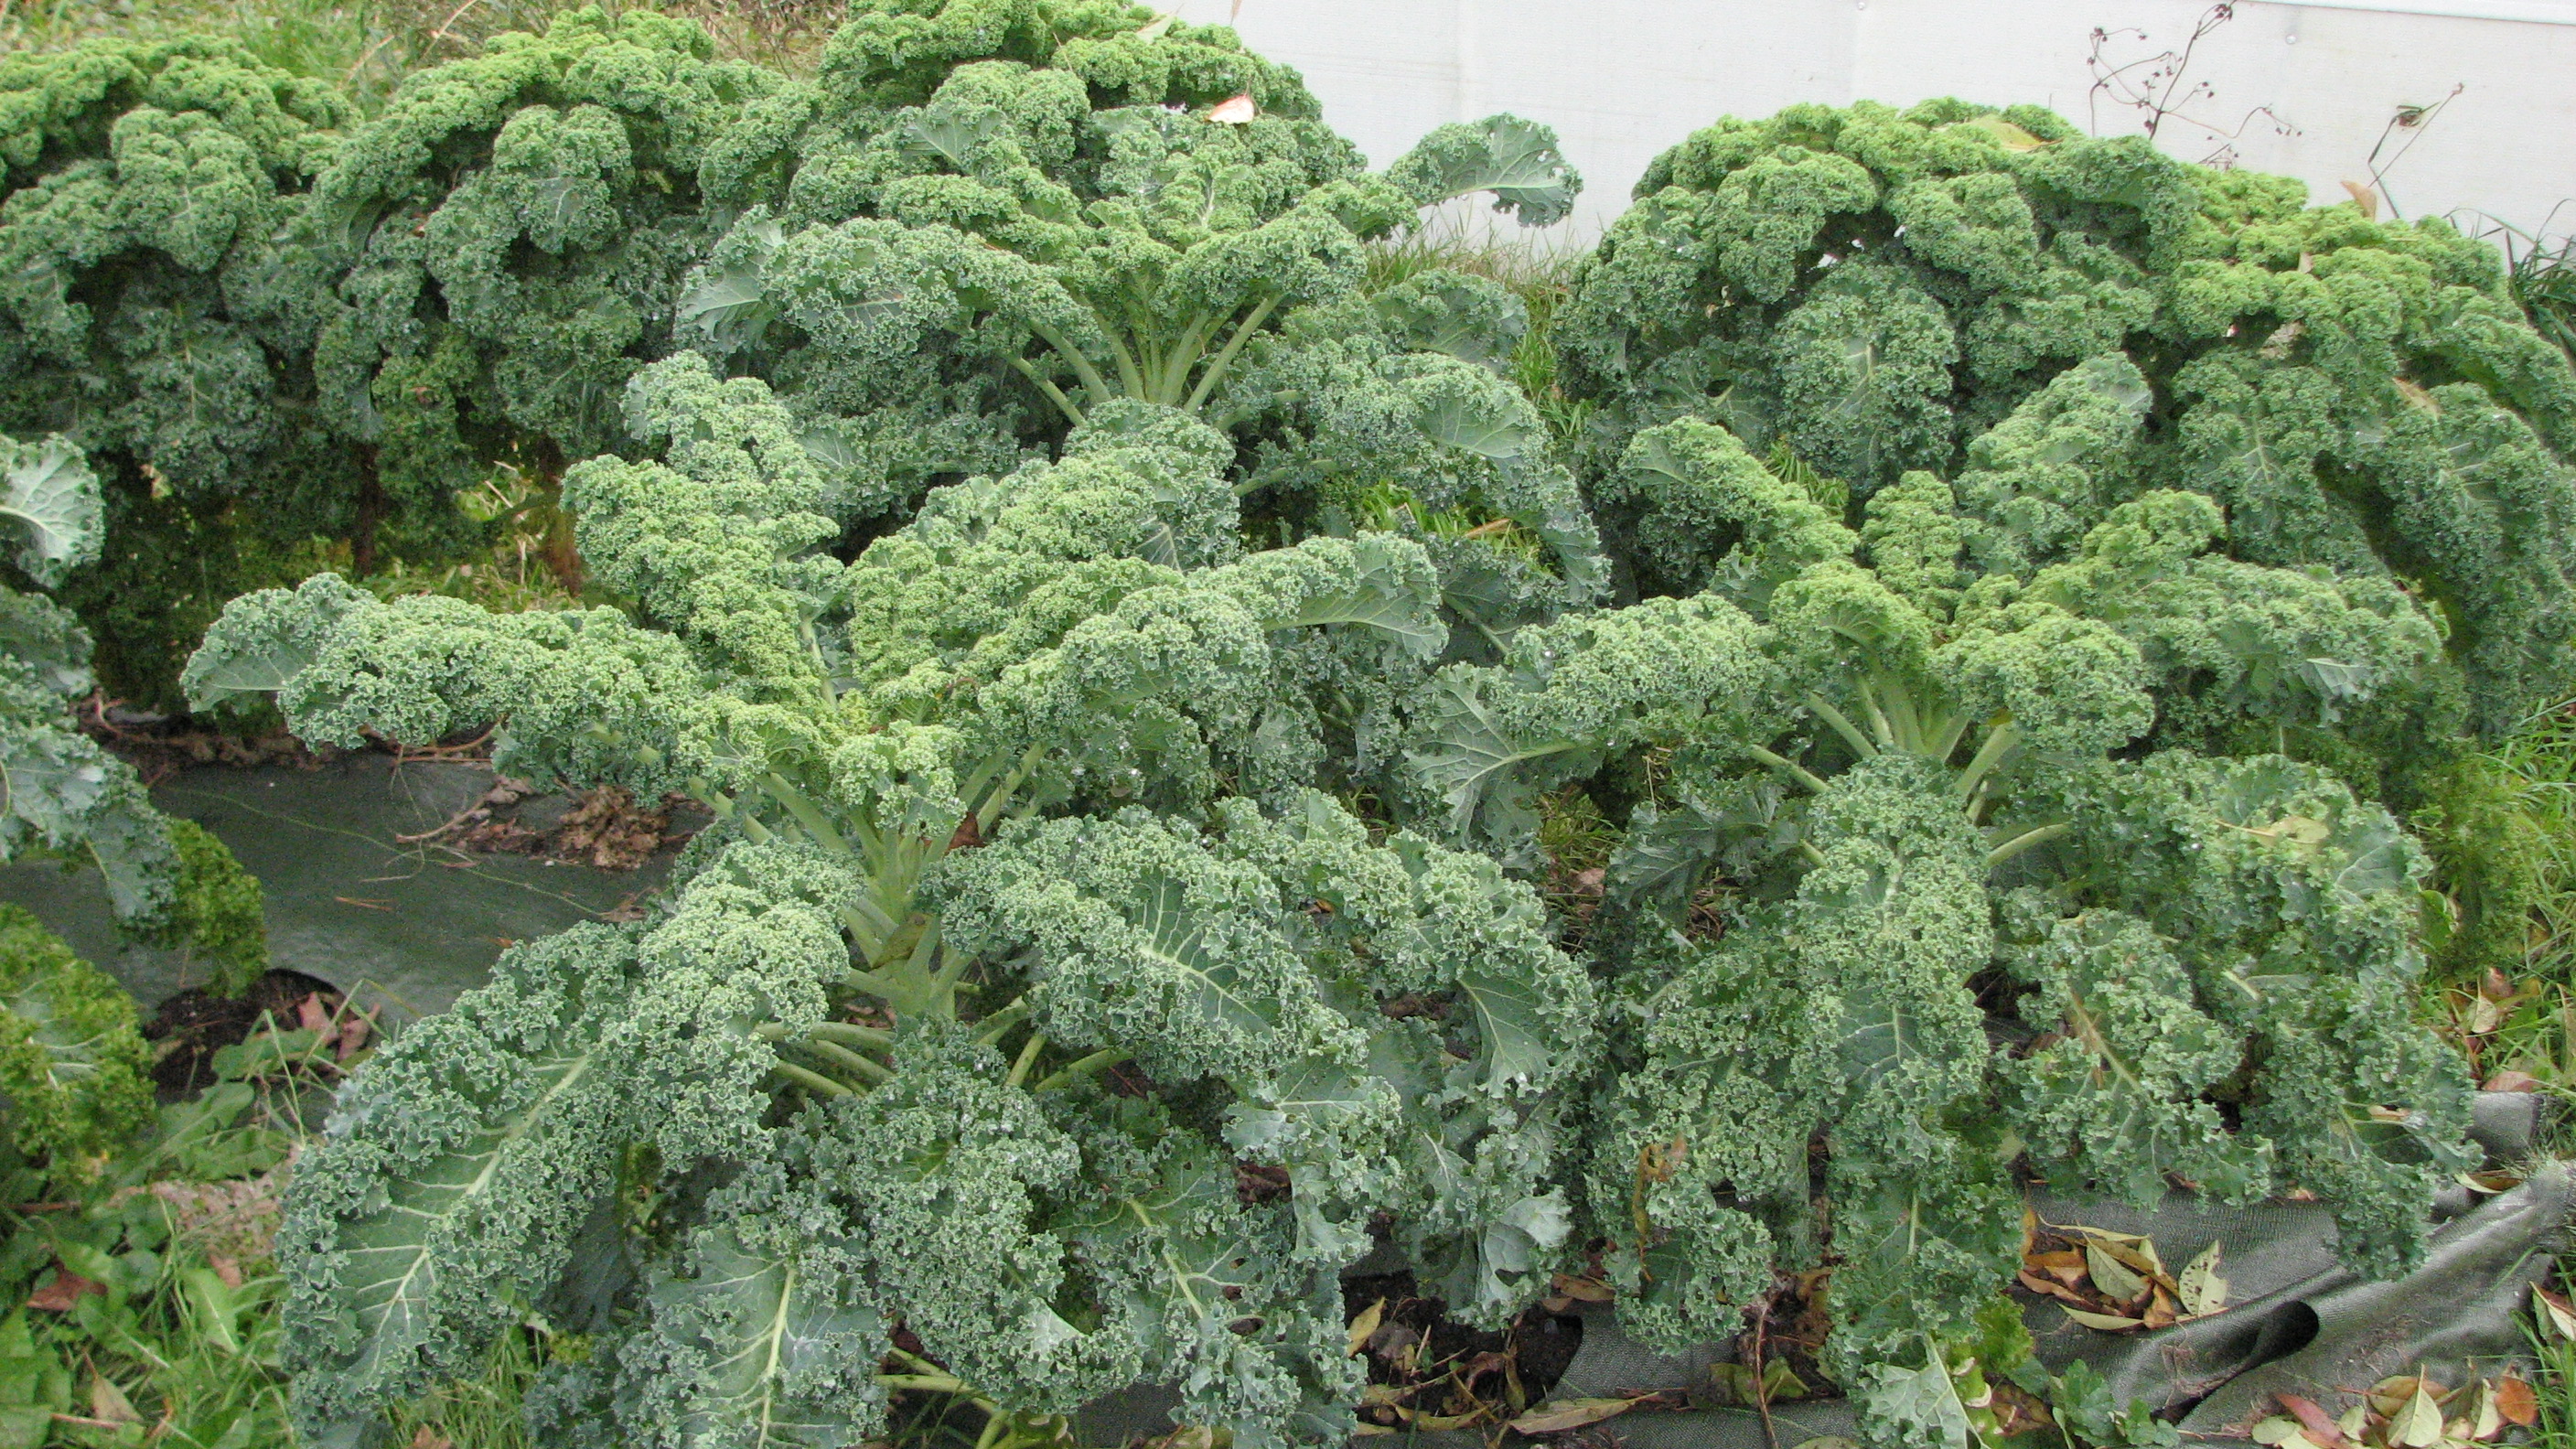
Kale
So, despite the fact that I am one quarter Irish, for a long time I never paid much attention to Irish food. Not so any more. With St Paddy’s day just around the corner, I will soon be cooking up a big pot of colcannon, one of the great comfort foods of all time. It’s a wonderful combination of potatoes and kale – foods that I still have from last summer’s garden.
As a gardener and a chef I appreciate the value of potatoes, especially potatoes from my own garden. Potatoes come in as many colors and flavors as tomatoes. I grow potatoes with flesh that is white, yellow, pink and purple. I store and save potatoes, and once I went about 20 years without buying a potato to eat or plant. I just started this year’s planting with last year’s potatoes and I stopped eating potatoes when I ran out – until the next crop came in.
But back to colcannon. It is a potato dish I always eat on St. Patrick’s Day. It is easy to make and tasty to eat. I generally use a white potato such as the Kennebec, which is also my most productive variety. One chunk of potato planted can yield up to 5 pounds of potatoes.! They grow big and are great for mashing. The other main vegetable in colcannon is kale, which I grow in quantity and freeze for winter use. I like a variety called Winterbor which is readily available by seed or as seedlings at your local garden center. Here’s how to make a nice Irish side dish:
Ingredients:
2-3lbs of white potatoes
5-6 Tablespoons butter
3 cups kale, fresh or frozen, chopped finely & lightly packed in a measuring cup
½ cup onion finely chopped, or 3 green onions (including the greens)
1 cup whole milk or light cream
Method:
- Peel and boil the potatoes until they will fall apart when poked with a fork.
Drain.
- Sauté onions and kale in the butter in a heavy pot on medium heat for 3 to 5 minutes.
- Add potatoes, stir.
- Add the milk (or cream for sheer decadence) and mash well using an old fashioned potato masher, not an electric mixer.
- Add salt and pepper as desired.
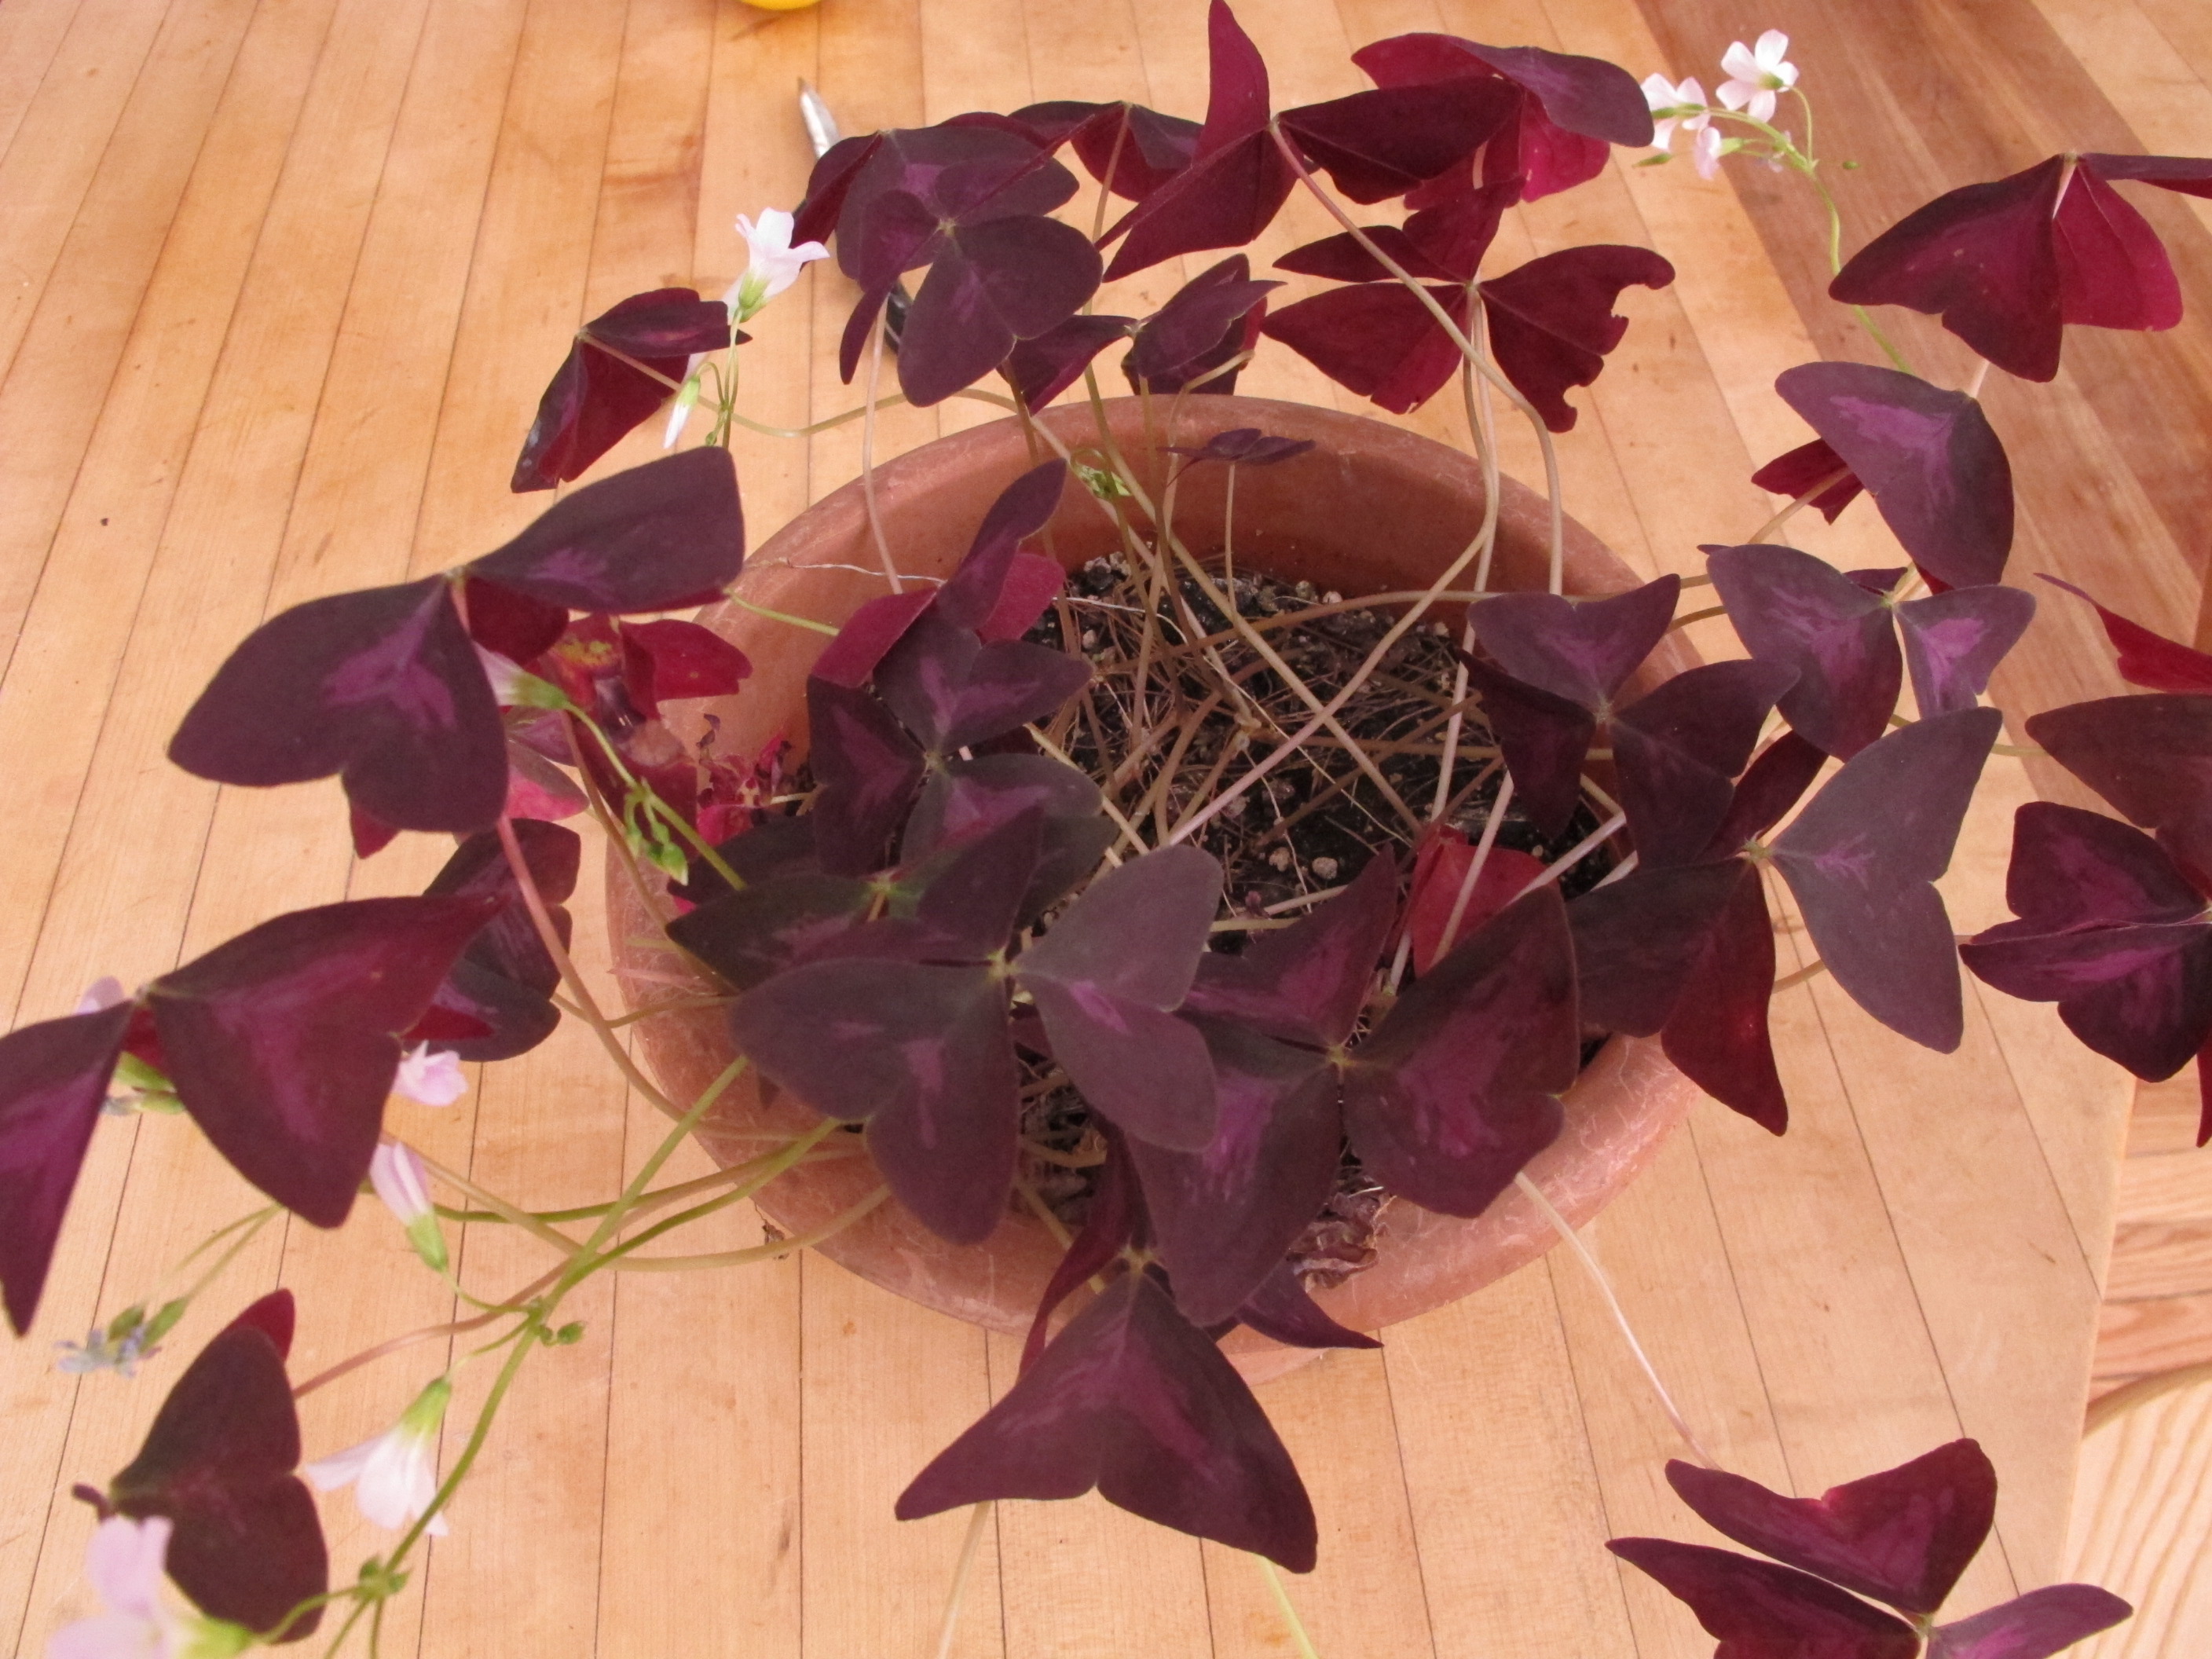
But on with the Irish theme. The rest of the meal should be Guinness stew, but that’s not from my garden, so you’re on your own for that. But as a centerpiece on St Patrick’s Day there should be a plant that screams “Irish”. The shamrock? The true Irish shamrock is a type of clover (Trifolium dubium) that is very hard to grow indoors and is rarely available even from florists and nurseries. What you can grow as a house plant is a type of wood sorrel commonly called oxalis. It looks like the Hallmark version of a shamrock.

Oxalis with flowers
Oxalis is a nice house plant that comes in green and maroon-leafed varieties – though for St Patrick’s Day green is the proper selection. There are some 300 species of oxalis. Mine do well in a bright window – I have 2 of the maroon-leafed ones in bloom right now. In the summer they thrive on my somewhat shady deck. The light pink flowers are small and reach up above the leaves on thin stems. The leaves fold up at night time.
One of the great things about oxalis is that it is nearly impossible to kill by under-watering it. The leaves may shrivel up and die off, but if this happens, just give it a rest –which I have read it likes – and it will bounce back when you start watering it a few weeks later.
If you have an oxalis, you can divide it easily by separating the corms (the thickened roots) and planting pieces of them in new pots with fresh planting medium. Like most houseplants, oxalis does not do well if the roots stay constantly wet. I have planted mine in potting soil enriched with compost. I find a 50-50 mix is good. I have learned to judge dryness of the soil by lifting the pot. The surface may look dry, but if the pot is heavy there is still plenty of moisture down below.
Whether you have some Irish in you or not, grow potatoes and kale this year. Both are supremely easy. But it’s too cold to think about that now – except as ingredients in colcannon. Bon appétit!
Henry Homeyer is the author of 4 gardening books and a children’s fantasy-adventure about a boy and a cougar. His Web site is www.Gardening-guy.com.
Growing Your Own Fruit
Posted on Wednesday, March 5, 2014 · Leave a Comment
Most mornings in winter I start my day with a bowl of oatmeal. That can get pretty dull, so I liven it up with a variety of fruits, most of which I grew myself and preserved either dried or frozen. Add some cinnamon or cardamom and a few nuts, and bland becomes bodacious. In my freezer I have blueberries, elderberries, blackberries, plums, apples, raspberries and a few peaches that I got by trading some apples with a friend. So if you’re bored with breakfast, do some studying now about the various fruits you might grow, and plant them this summer.
Much of what I know about gardening comes from practical experience: ask a good gardener, for example, what kind of peach tree she grows, plant one, and see how it does. Try again if the first one dies. But I also depend on reading good books on gardening, and now, while there is still snow on the ground, I spend considerable time reading.
I have two books on fruit growing that I like a lot. The first, written in 1992 by Lewis Hill of Greensboro, Vermont, is a classic: Fruits and Berries for the Home Garden. Lewis was a friend of mine (he passed away in 2008) and a Vermonter to the core: quick –witted, hardworking, and curious. He grew up on a dairy farm and only had a high school education, but with his wife Nancy, he wrote 16 excellent gardening books. His book on fruits and berries is full of good information but also entertaining. It has recently been updated, I just learned, by University of Vermont professor Len Perry as The Fruit Grower’s Bible.
The other fruit book I like is Lee Reich’s Grow Fruit Naturally: A Hands-On Guide to Luscious, Homegrown Fruit, which came out in 2012 and is full of color illustrations and good drawings. Like Hill, Lee Reich is opinionated, thorough, and has many years of experience. Lee has a PhD in horticulture and lives in upstate New York.
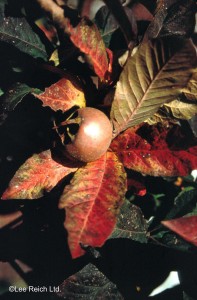
Medlar
Reich’s book introduced me to two fruits hardy for Zone 5 (possibly even Zone 4) that I have never grown or tasted: the medlar and the shipova. The medlar is a small tree that is self-fruitful, meaning that one tree is all that is needed for pollination. According to Reich’s book, the medlar blossoms open late enough to almost never be bothered by spring frosts. The fruit keeps well and is very tasty. So why have I never heard of one? Reich writes, “The flesh, when ready for eating, is brown and mushy and lacking visual appeal.” It also needs “bletting” or ripening on a shelf in a cool room, the cooler the better.

Shipova
The Shipova is actually a hybrid made from two different species, a type of mountain ash (Sorbus aria) and the European pear. Reich lists it as a Zone 4 plant, so it is hardier than the medlar and should survive my New Hampshire winters easily. It produces pear-like fruit on a tree that can grow to 20 feet, or if grafted on a suitable rootstock, only 8 feet tall. He says that are ready for harvest in mid-summer. Unlike the medlar, the fruit does not keep well – but it is attractive to the eye and tasty, too. I called Lee, and he said the fruit tastes similar to a pear.
Reich made it clear that fruits like the medlar and shipova are not often sold at our local nurseries, so I went on-line to see where they are available. Raintree Nursery in Morton, Washington (http://www.raintreenursery.com) had both for sale. In the back of Reich’s book there is a list of nurseries that sell fruit trees, including St Lawrence Nurseries in Potsdam, NY which has lots of cold hardy trees that can be ordered bare root until April 10.
Lee Reich’s book is just chockfull of tidbits that are useful. He explains, for example, labels on pesticides: ‘caution’ means the material is slightly toxic or relatively nontoxic. ‘Warning’ means moderate toxicity, and material marked ‘danger’ might kill you – even in small quantities. Lee is a proponent of organic techniques, but points out that even pesticides approved for organic growers can have severe side effects. He notes that nicotine sulfate is an extract of tobacco that is “organic” but has a danger label. It’s important to pay attention to warning labels whether you are using organic pesticides or not.
I also like the fact that Reich’s Grow Fruit Naturally has specific cultivars named for the fruits it describes, and offers useful tips such as whether a variety is self-fruitful or not. There is a nice section on pruning and another on proper planting techniques.
Call me a skeptic, but I like to buy trees from local nurseries as it means that the owners probably have grown what they are selling. Still … I love to experiment with new plants, and usually try something new every year. This just might be the year for a shipova or a medlar. I wonder how they are on breakfast cereal?
Henry Homeyer can be reached at henry.homeyer@comcast.net or by writing him at P.O. Box 364, Cornish Flat, NH 03746.


 Click Here to buy from Cobrahead