Pruning Maples, Birches and More
Posted on Wednesday, October 30, 2013 · Leave a Comment
Now, as the leaves are disappearing (or accumulating on the lawn, demanding in a whiney voice to be raked up and used for mulch) I am pruning hardwoods like maples, birches and other deciduous trees and shrubs. For me, happiness on a sunny fall day is improving the looks and long-term health of trees by pruning – so I’m out doing some now most nice days.
It’s easier to see the form and structure of trees and shrubs at this time of year because the leaves are mostly gone. I know that some gardeners prefer to prune in the spring – I do fruit trees then – but not all trees can be pruned then. Maples and birches, among others, bleed lots of sap if pruned in March. So I do them now.
Before pruning a young tree, take some time to look at mature trees in your neighborhood. The best ones have open arms: their branches are well spaced and have branches angling off at a 45 degree angle from the trunk. Often these are trees that grow along a fence line or a dirt road so that they had sunshine coming from all sides as they grew.

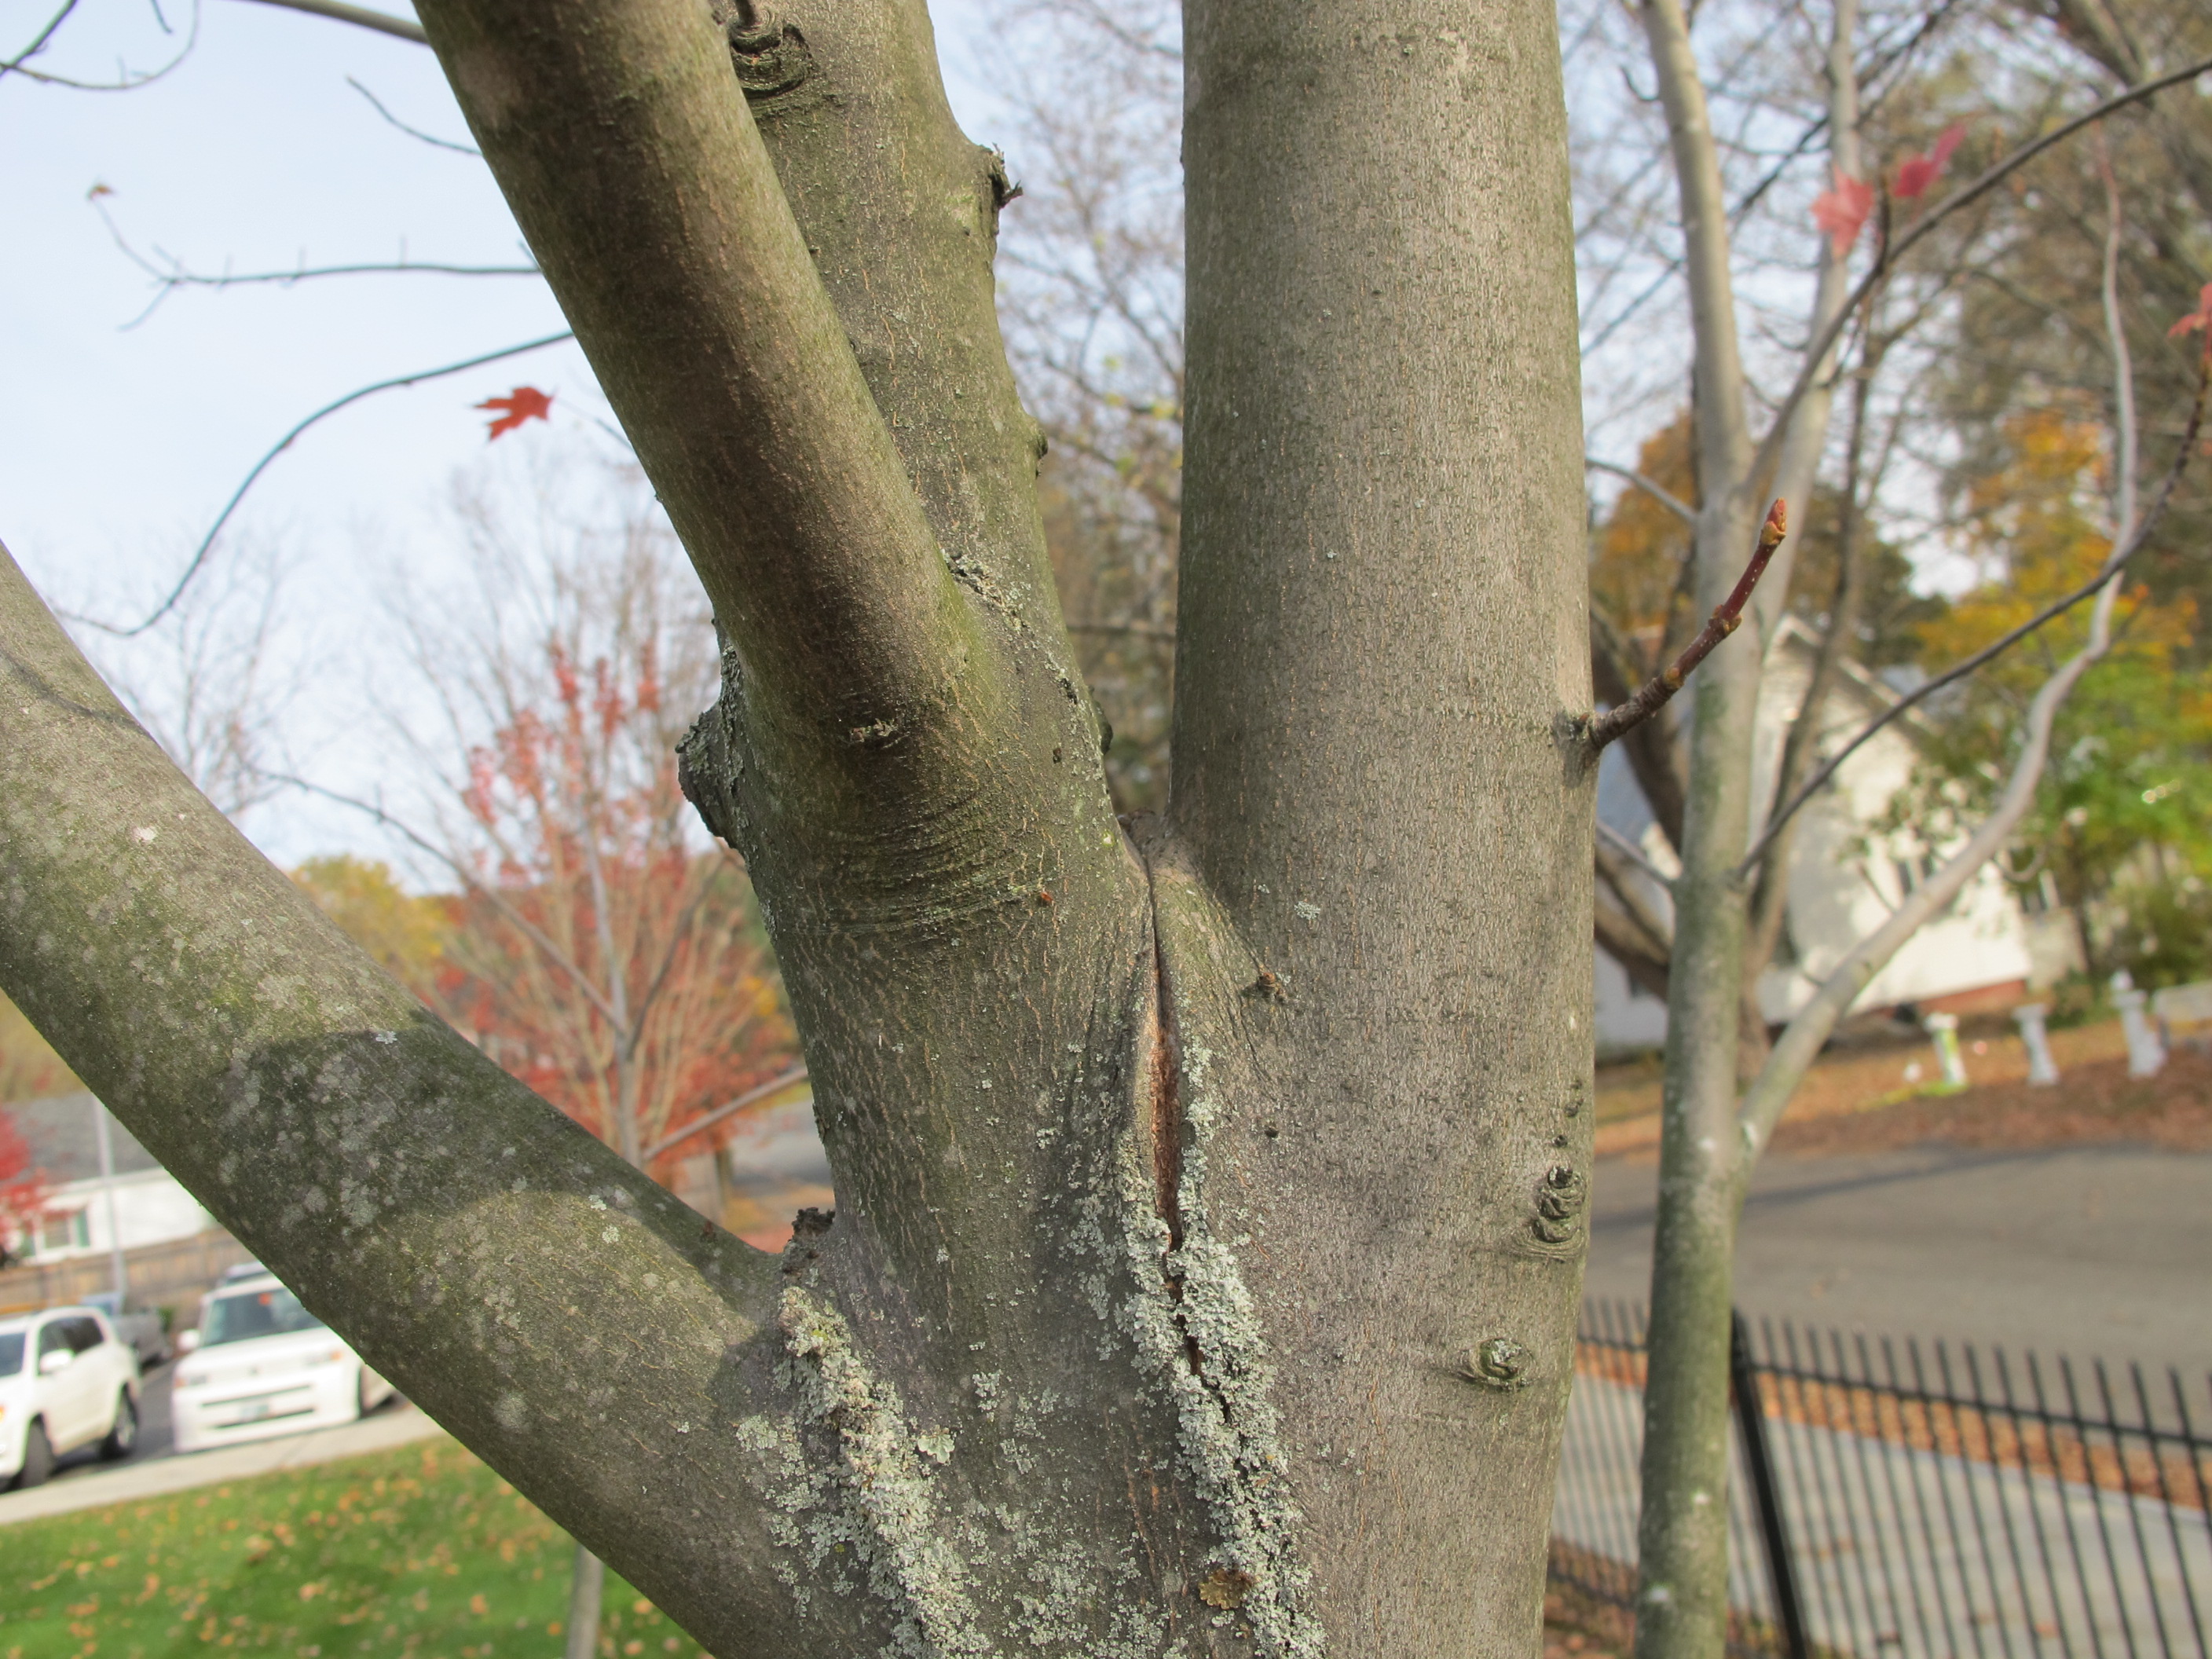
Trunks too close together
You may also see some trees that have several fat trunks or stems growing almost parallel, reaching for the sky. These are the trees that split and break off in wind or ice storms. Why? An arborist might use the words “included bark.” This refers to bark that gets engulfed by the growth of 2 trunks that grow too close together. As the trunks grow fatter, bark between them is swallowed up by the two competing trunks, and creates a weak spot that can more easily split.
Recently I saw a large native cherry tree that had split in half. It was, according to my count of the rings, 65-75 years old and it was more than 50 feet tall. Sadly, it had twin trunks and one half split off and fell during a wind storm. I could see that fungus had weakened the wood – the seam between the two trunks was not a tight seal, allowing water and the fungus to enter. And now the remaining trunk is open to the elements and will not survive as long as it might otherwise.
If you have a young tree that has branches or trunks that are growing together and have a tight angle between them, you should act. You will need to remove one of the competing stems. This may seem drastic, and is best done before the stems are more than 2 or 3 inches in diameter. I removed a few recently while working at the Kilton Library in West Lebanon, NH.
Of course, removing a 2-inch stem also means you will lose all the side branches that are growing on it, too. Before unsheathing my big pruning saw I walked around each tree for several minutes. I looked at the two competing stems and tried to mentally erase one from the picture I was looking at. Would there be a big gap in the canopy? Would there be small branches that could fill in after surgery? Yes, there are always small branches that will fill in.
There are also “dormant buds” on trees that can produce branches if the tree “senses” a gap in the canopy. Trees, obviously, don’t have brains that tell them when to send out new branches. But there are stimuli such as sunshine coming through an empty spot in the canopy that will “tell” the tree to set out new growth.
At Kilton Library (where all the trees were planted in 2010) I studied the trees that I had pruned last year. I had removed some two-inch diameter stems that were growing together too tightly. I was pleased to see that the trees looked full. No big gaps. In general, removing a big stems or branch does not seem so drastic after it’s gone – even though it seems scary when it’s time to cut. And removing a big branch helps the tree to be more open, thus allowing every leaf to get some direct sunshine, which is good.
Cherry tree split due to included bark
At the back of the property there is a maple that “wanted” to send branches over the fence and reach out for sunshine on the neighbor’s property. I noticed that one branch I had removed last year – only an inch in diameter or so – had sent a new branch back over the fence. Amazingly, it had grown 5 feet in one year! Interestingly, the leaves on it were nearly twice the size of the leaves on the rest of the tree. So trees will keep on producing branches to take advantage of sunshine, no matter what we do.
So if you haven’t taken a good look at the arrangement of trunks and larger branches on your trees, this is a good time to do so. You might be able to prune them yourself, but you might have to call an arborist who can take out a large branch or trunk if need be. It would be money well spent – 50 years from now you just might lose a tree, or half a tree, if you don’t do so.
Henry Homeyer is the author of 4 gardening book, and a children’s chapter book, a fantasy-adventure about a boy and a cougar. His web sites are www.gardening-guy.com and www.henryhomeyer.com.
What’s Blooming Now in the Garden
Posted on Wednesday, October 23, 2013 · Leave a Comment
By mid to late October, many gardens are looking quite drab. That need not be the case, and this week I’d like to mention a few of the flowering plants that are cheering up my gardens now.

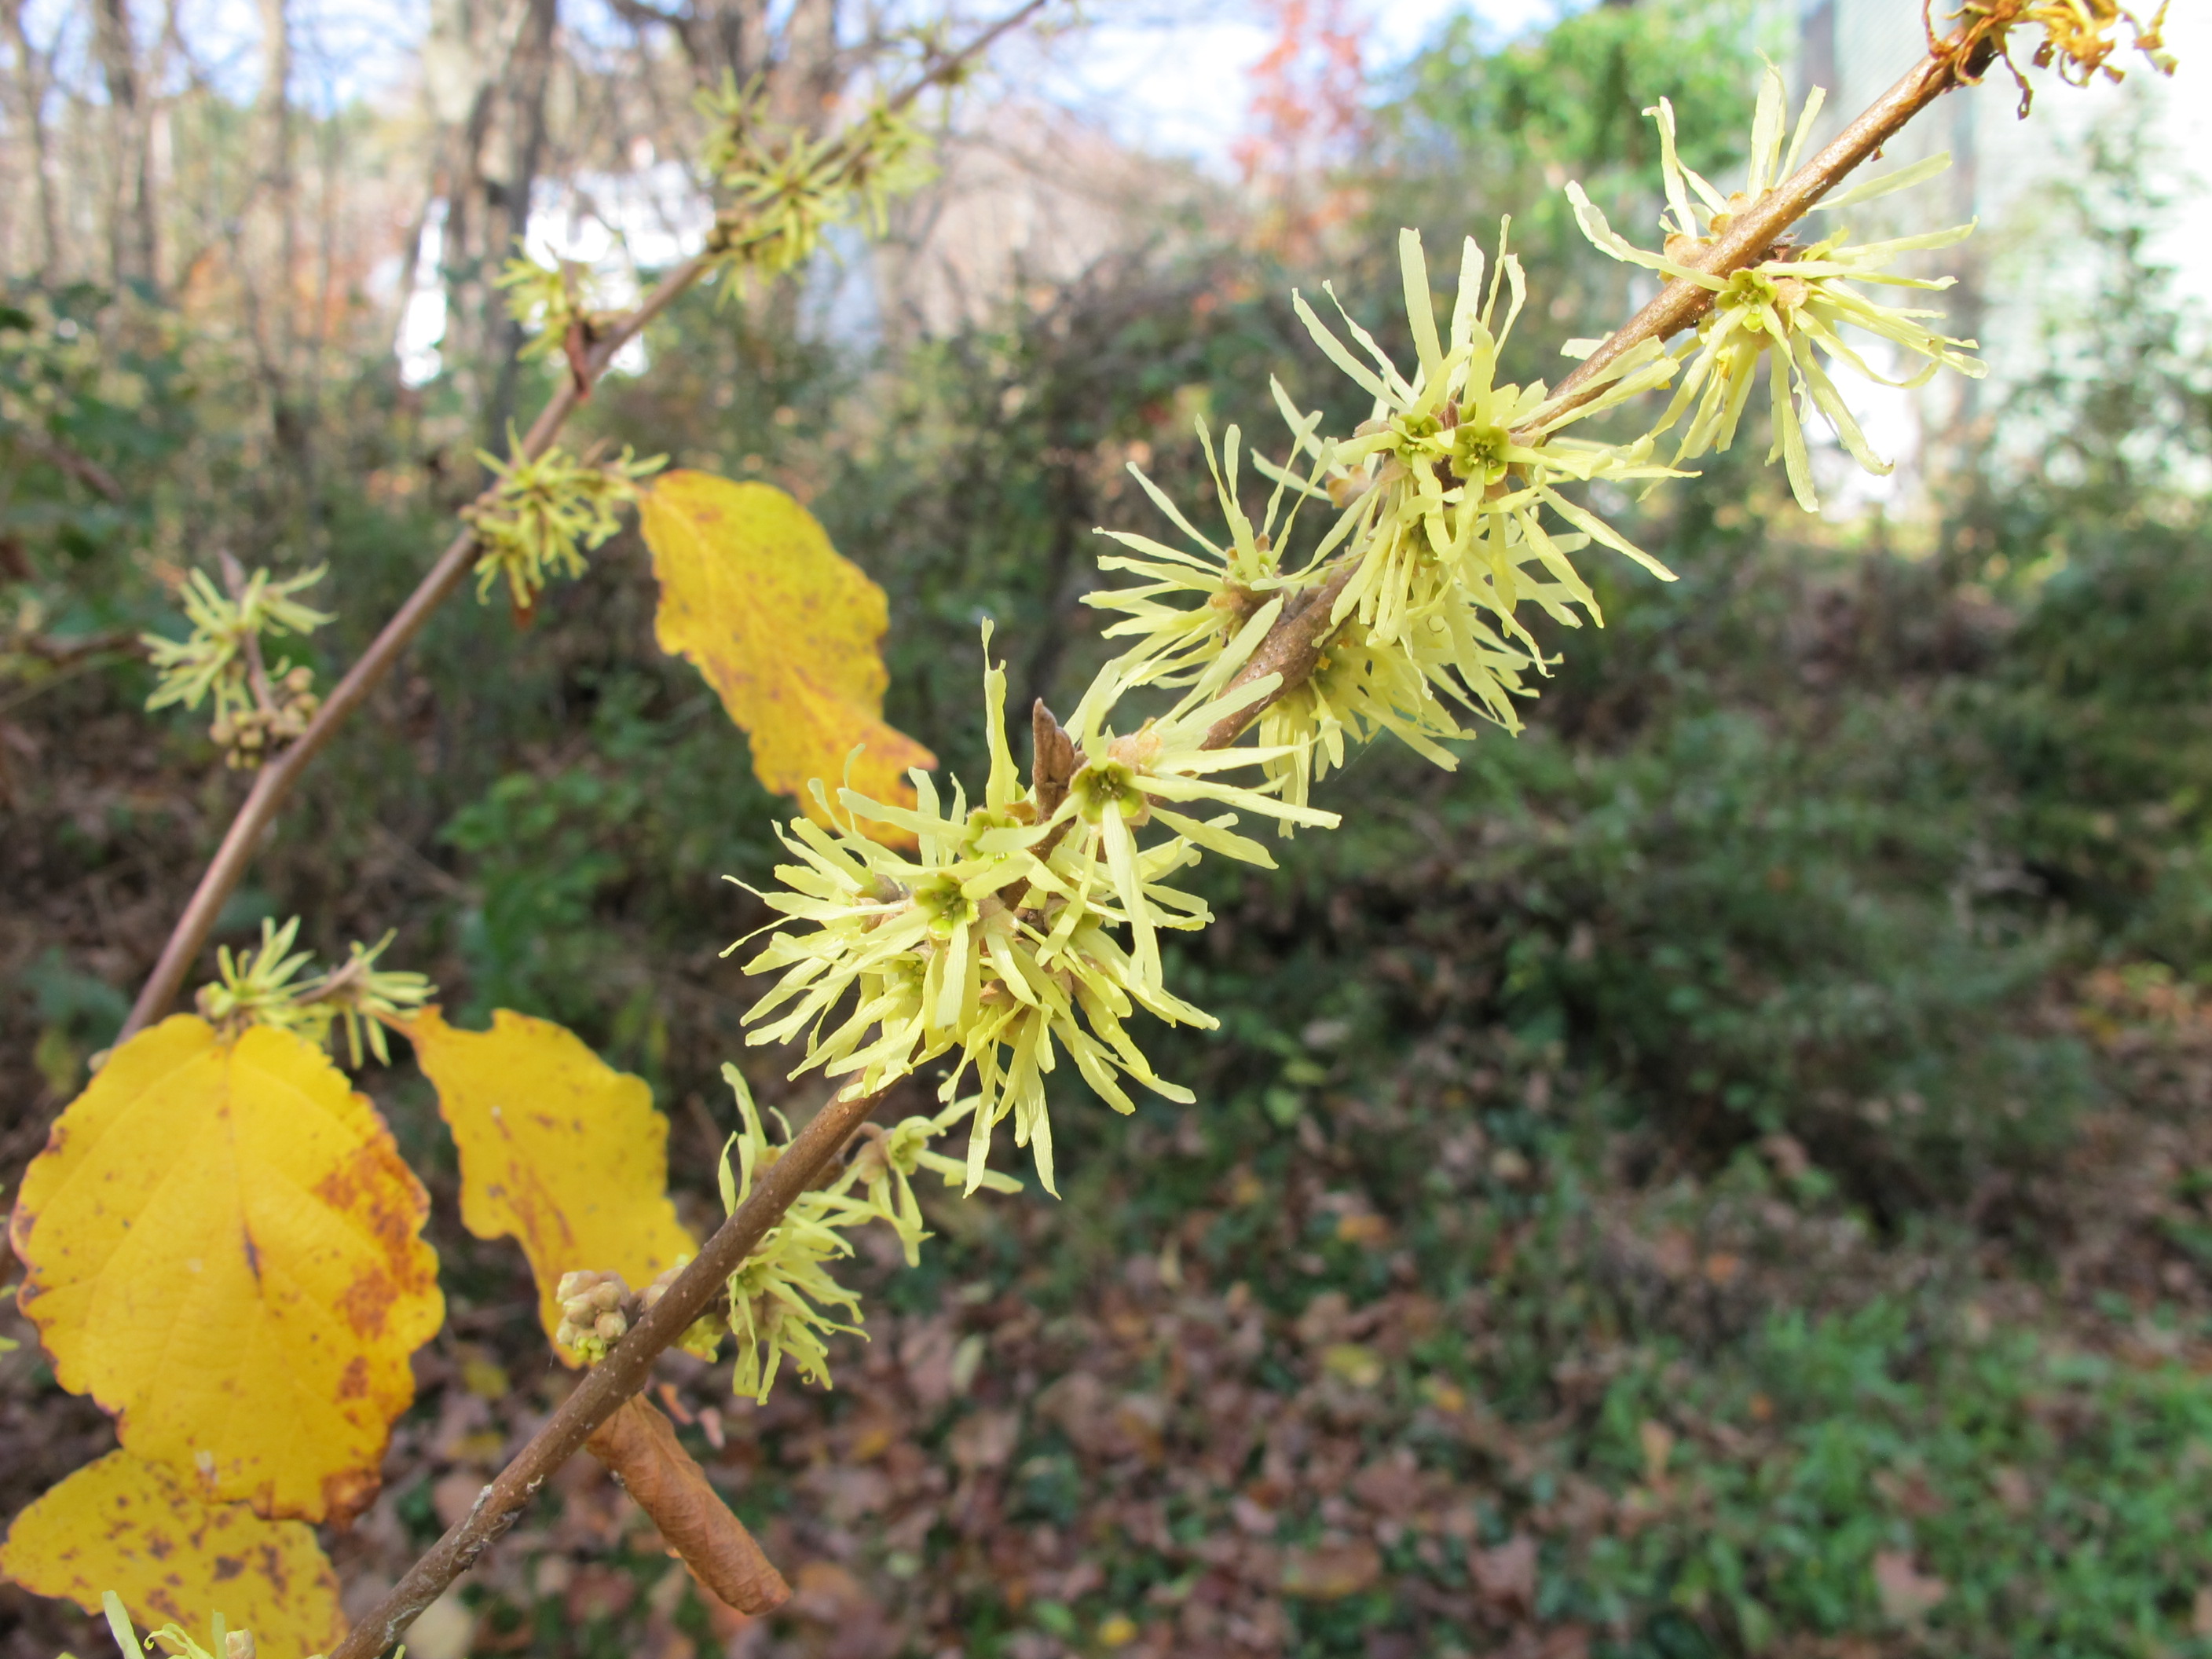
Witch Hazel blossoms
Witch hazel (Hamamelis virginiana) is a native shrub that grows in the understory and blooms now (or in the early spring, for Hamamelis x intermedia). The flowers are not dramatic on most varieties– they are less than in inch in diameter, and are arranged close to the stem. Although I’ve seen witch hazel in a public garden that had red blossoms, the native species that I grow is a pure yellow and the petals are very frilly – you could say “spider-like”. The look best after leaf drop.
As a kid I went to a barber who used a witch hazel tonic as an astringent after shaving men. To make us kids feel more grown up, perhaps, he applied some on the back of our necks when he was done with us. It is a very fresh scent that is made from the bark of young stems and roots of the shrub. The leaves, when crushed, also have a nice smell.
My Seven-Sons Flower Tree (Heptacodium miconioides) is still blooming now. This is a smallish tree (under 30 feet tall), but one that grows extraordinarily fast. It is not unusual for new stems to grow 3 to 5 feet in a season. I love the bark, which is exfoliating (shaggy). Its flowers are small and white, and appear in panicles (clustsers).
I am experimenting with mine to see how it does as a pollarded tree. Pollarding is a process of cutting off most new branches back to major branches every few years, keeping the size in check and crating large knobs where new growth originates. It’s a very popular pruning technique in Europe. Last year I cut off all the smaller branches, leaving a trunk and three major branches. This year I got dense clusters of branches growing from the ends of those major branches. Interestingly enough, many of the new stems are growing out and down, almost like a weeping tree.
Chrysanthemums great fall flowers that I buy in pots each year around Labor Day. I treat mums as annuals, even though some varieties will overwinter. Why? Because to get a dense, compact plant, one must pinch back the growing stems two or more times during the summer, and I have too much going on to remember to do so most years. There are people who do this for a living, and I am happy to let them do it. I like mums in window boxes (the smaller ones) and the big, dramatic ones in pots on my front steps. When they come in peat or cardboard pots I transplant them into plastic pots as the former dry out too quickly.
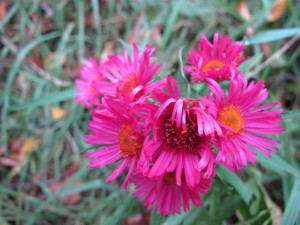
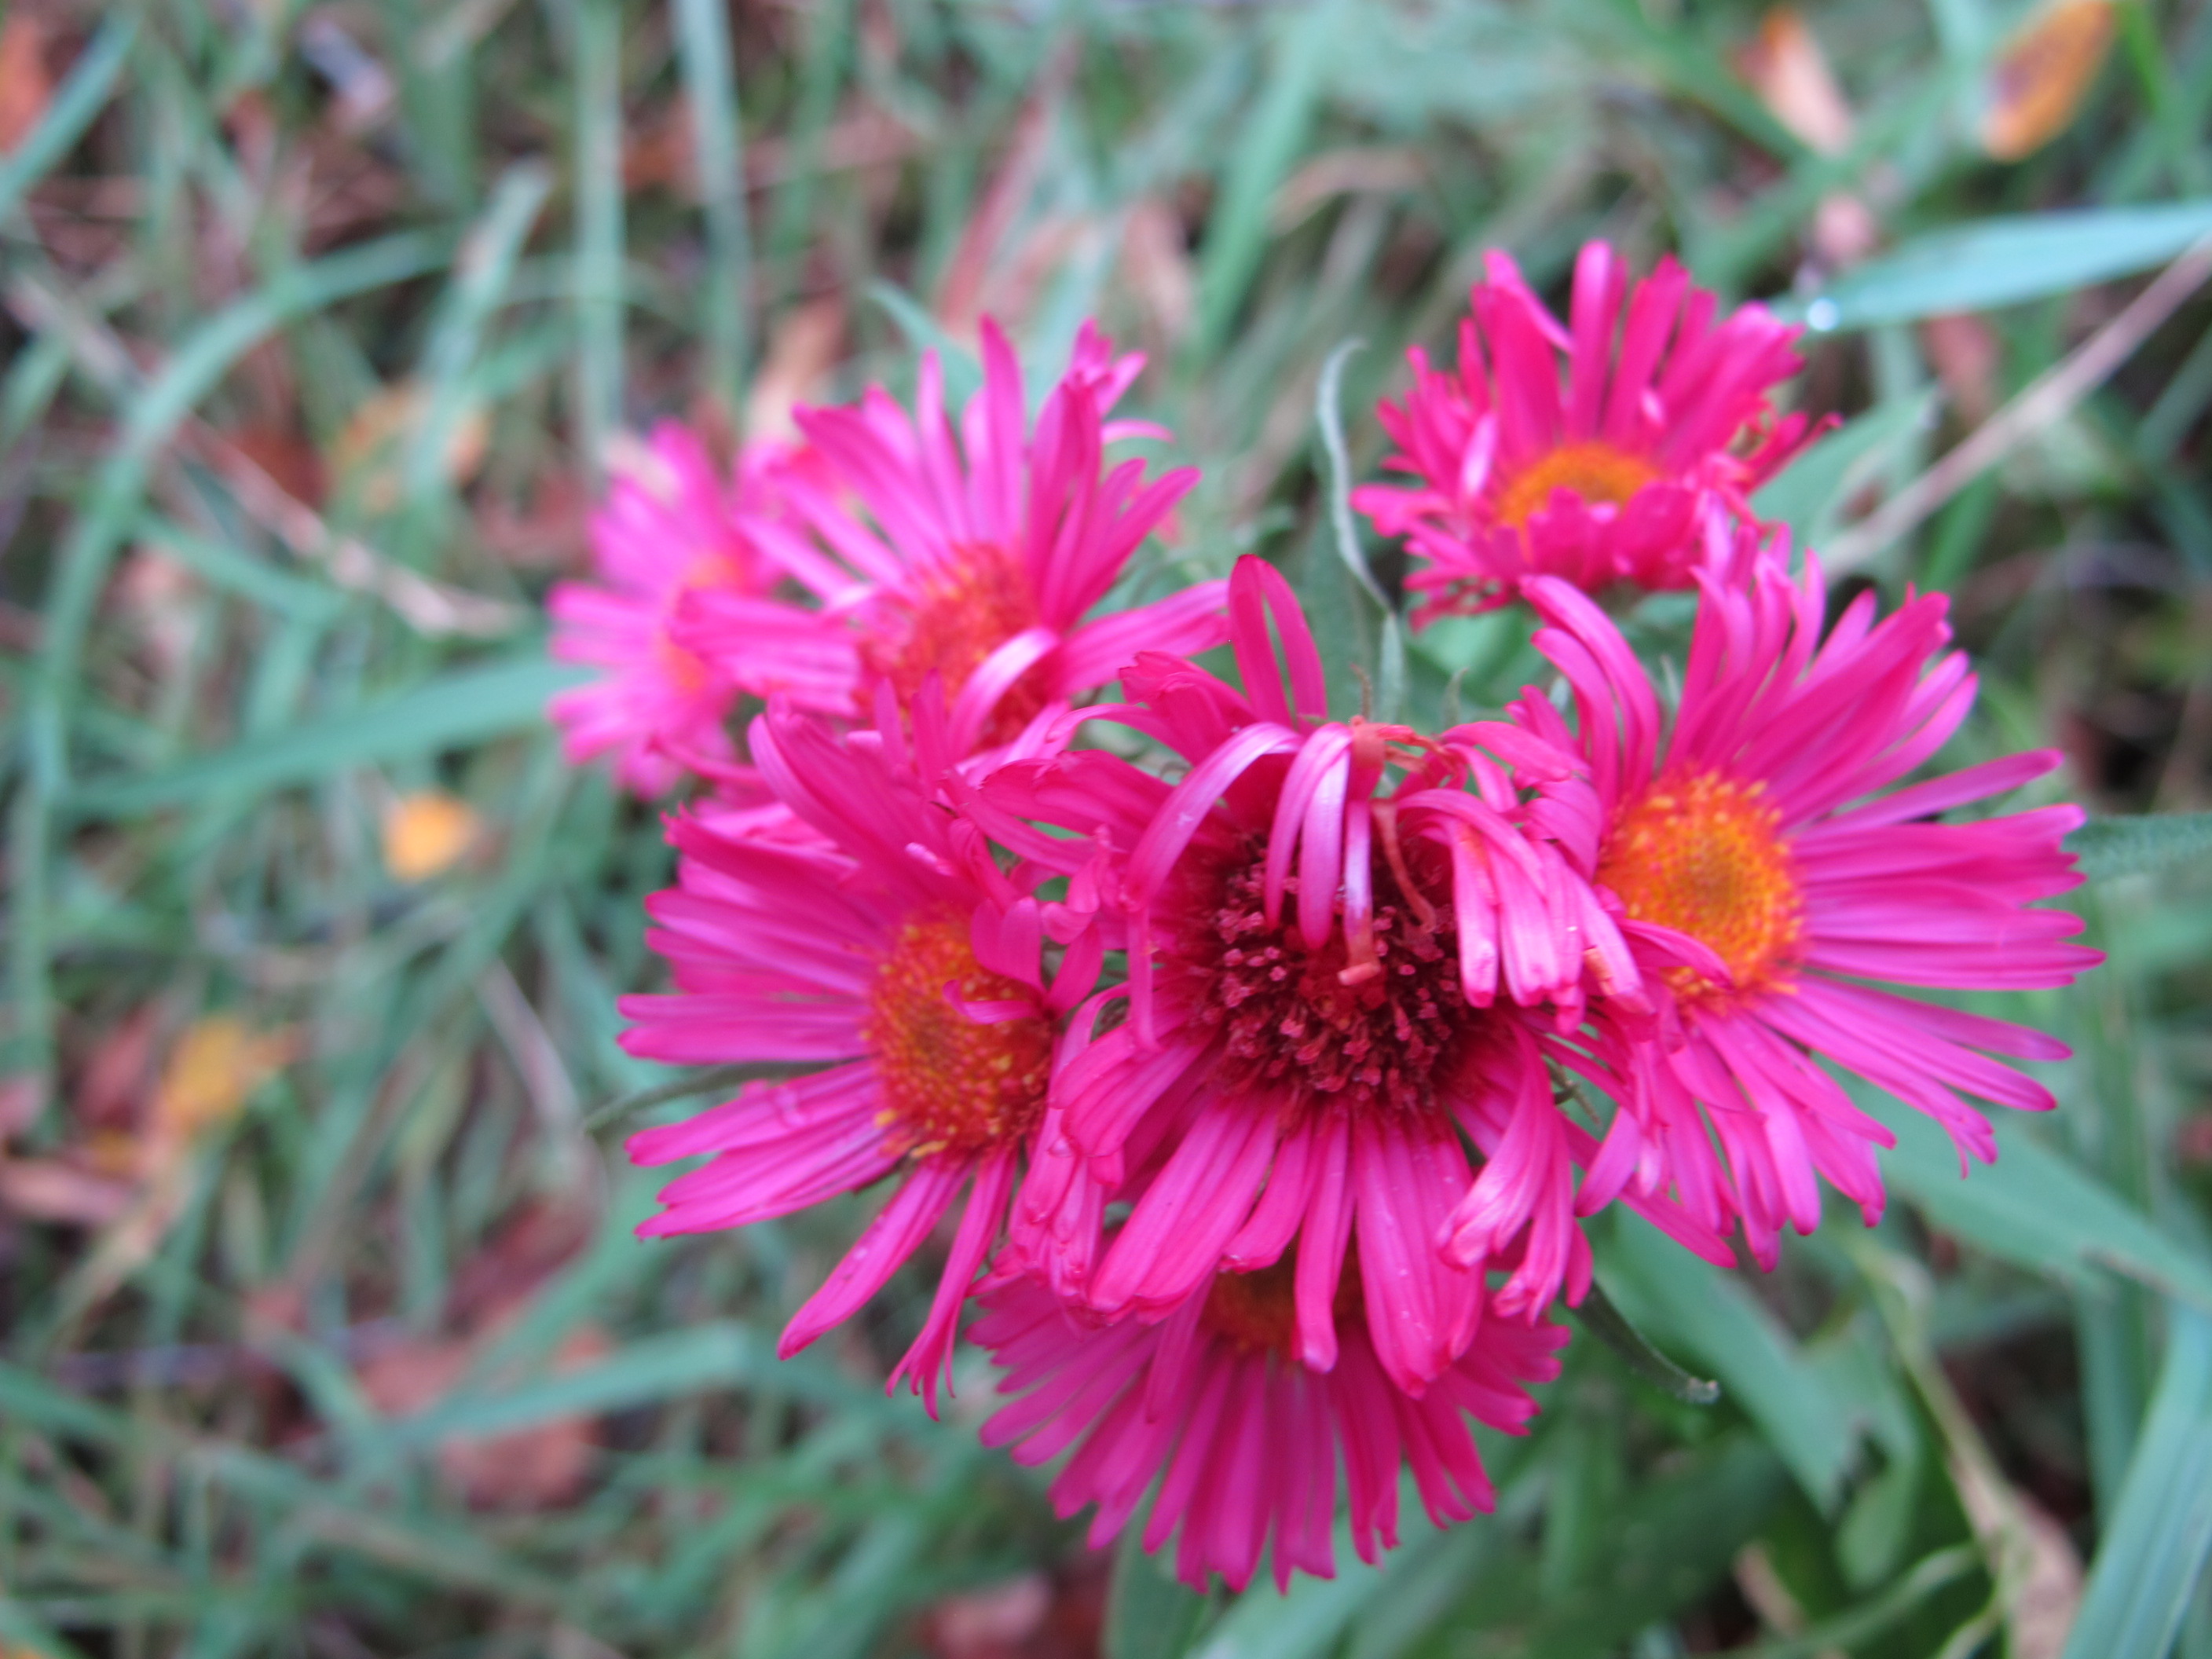
Aster ‘Alma Plotschke’
Fall asters have been splendid this year, both those that I planted and those growing along the roadside or edges of fields. The wild ones are mostly blues and purples. I purchased a pink aster that is in bloom right now, a variety called ‘Alma Plotschke’. She is an intense, deep rose pink and not nearly as tall as the wild ones.
Some smaller wild asters(12 to 24 inches tall are blooming at the edge of my lawn. My reference text on native flowers (The Illustrated Book of Wildflowers and Shrubs by William Carey Grimm) lists 29 species of wild asters. These short ones have bluish-white blossoms. I believe mine are the common blue wood aster (Aster cordifolius), which is usually a light blue or lavender. The differences between wild asters can be minute and there is much variety within a species, so they could be the white wood aster (Aster divaricatus), which is also common in New England. It doesn’t matter, they’re all lovely.
Fall crocus are wonderful! True fall crocus (Crocus sativus) are not fully hardy in my cold Zone 4 garden. Various vendors list them as hardy to Zone 4 or 5 or 6. I have had them winter over, and have a client nearby who has had them blooming each fall for years – in a Zone 4 garden. These crocus are the source of saffron, but I’ve read that it takes 10,000 flowers to make an ounce of saffron!

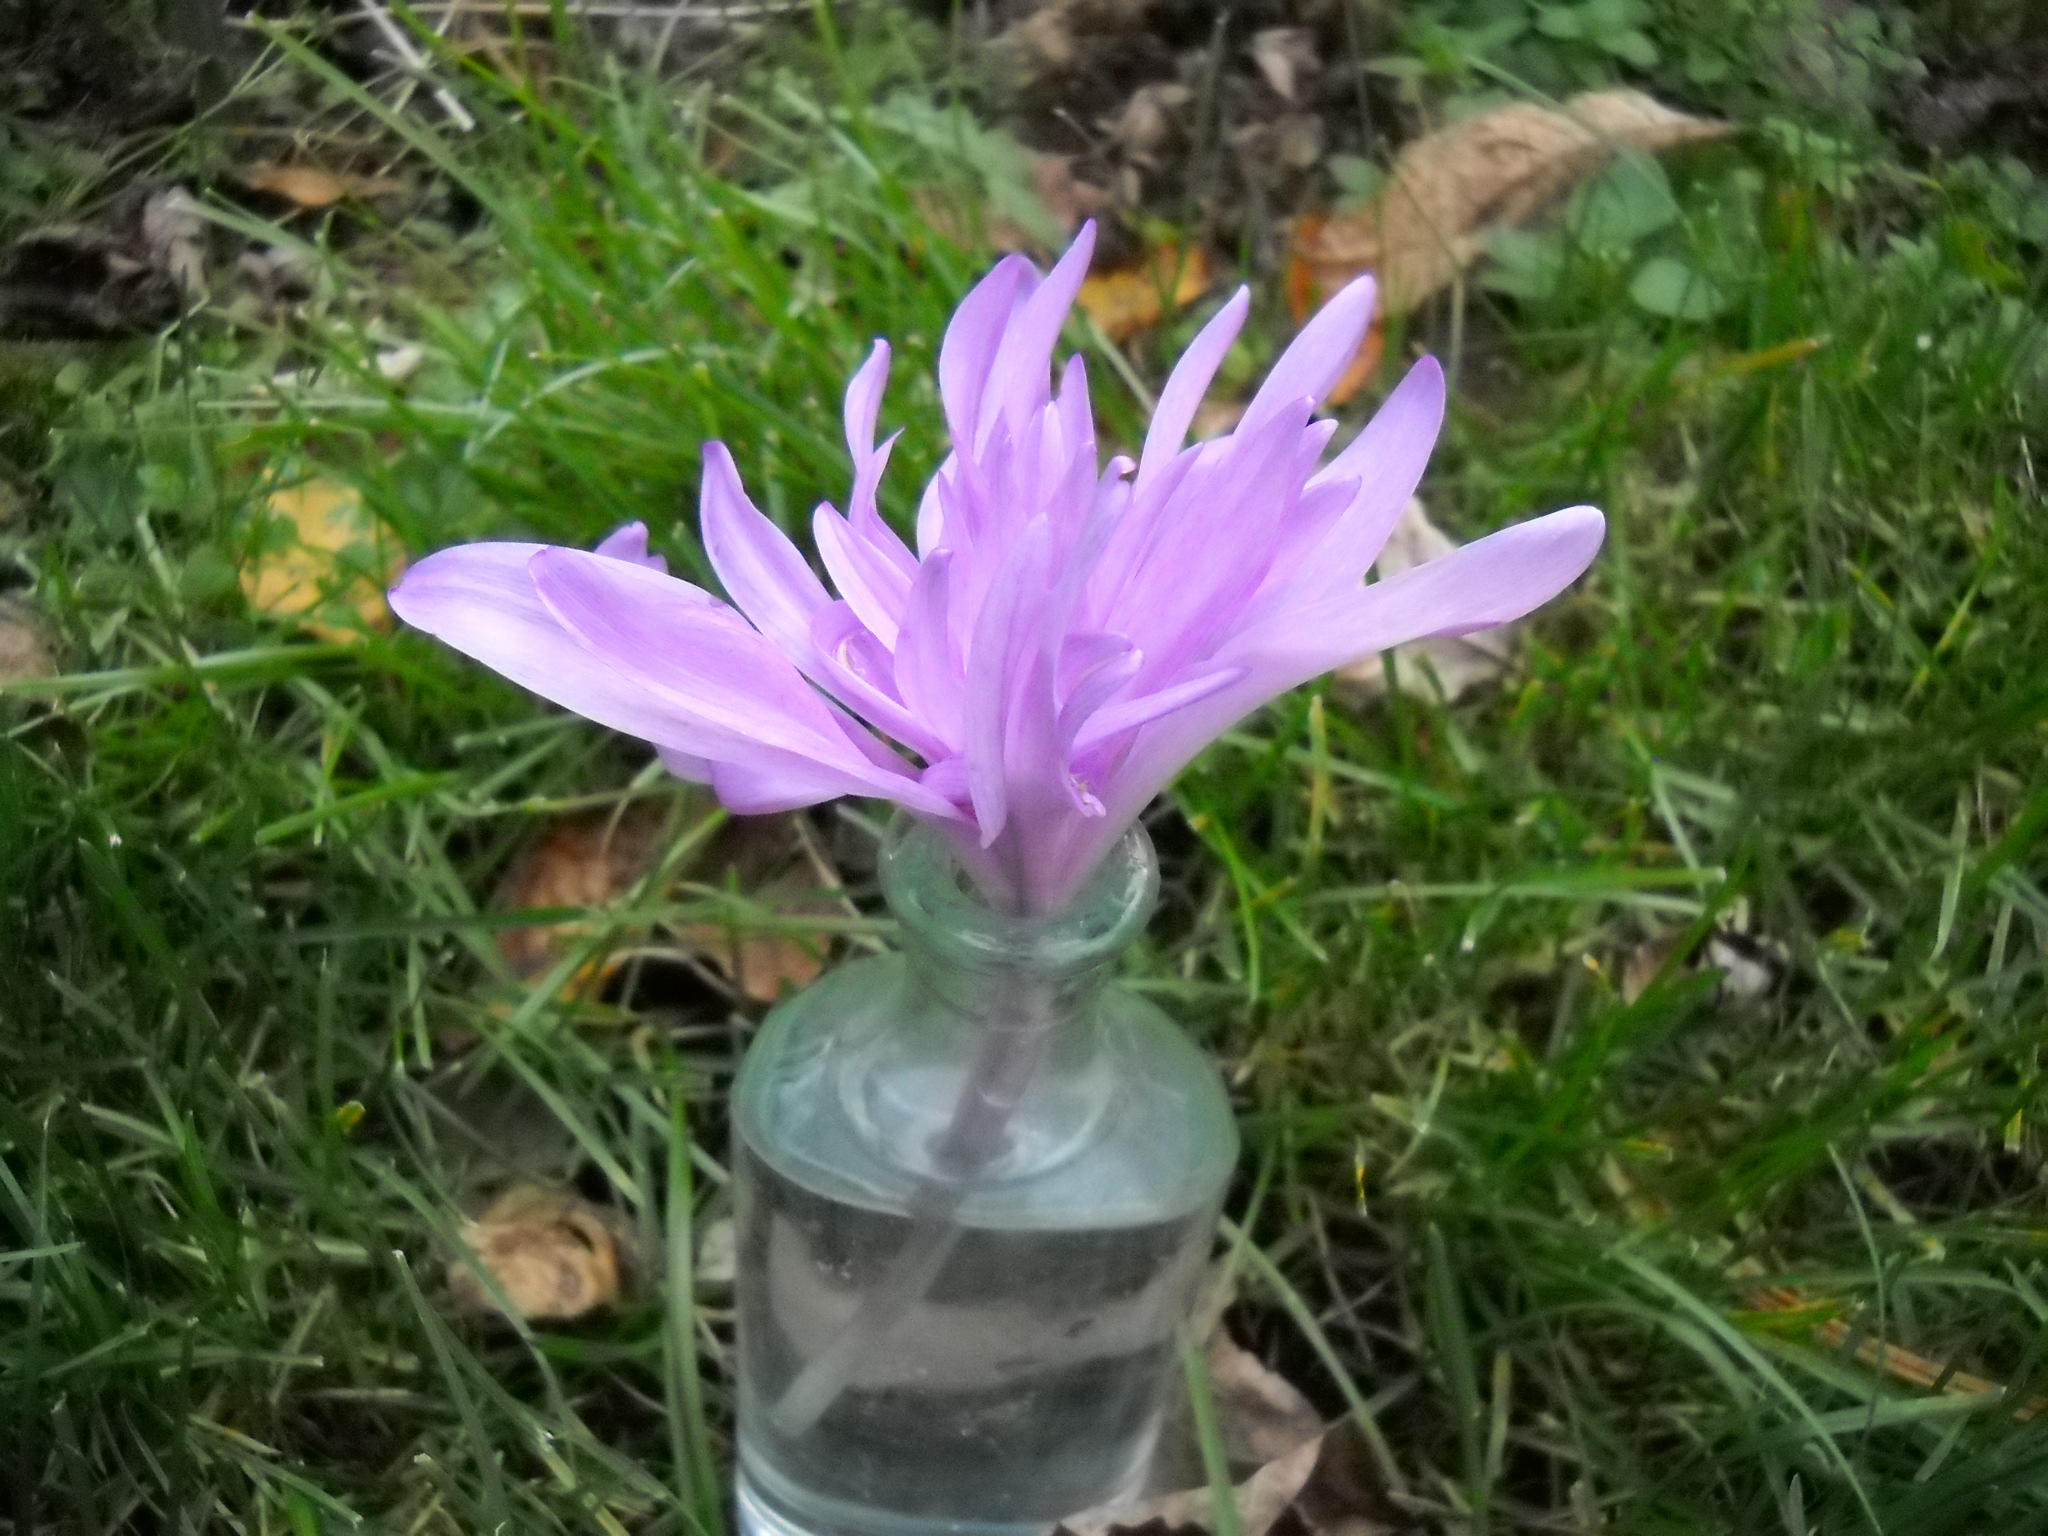
Colchicum in a small vase
Colchicums are also called fall crocus, but are not true crocus. They look like crocus on steroids – they are commonly 6 inches tall! I planted a lot 10 years ago, but each year I have a few less. Unfortunately their stems do not usually support the flowers, so they flop. To avoid this I have planted them in amongst a ground cover like myrtle (Vinca minor) that helps to hold them up. Mine are mainly pink, but also have a few white, both as singles and doubles.
Some annual flowers hold up against frost for awhile, too. My favorite right now is Brazilian verbena (Verbena bonariensis), which is hardy down into the 20’. It grows three feet tall on thin, stiff stems with little clusters of purple-blue flowers. The flowers seem to float above shorter things. Look for it next summer.
Fall flowers are a gift. Even when I’m thinking about woodpiles and snow shovels, a few hardy plants keep on bringing me joy.
Henry is the author of 4 gardening books and a children’s book about a boy and a cougar. His Web sites are www.Gardening-guy.com and www.henryhomeyer.com.
Planting Shrubs
Posted on Wednesday, October 16, 2013 · Leave a Comment
Irish writer Thomas Moore (1779-1852) once wrote, “A piece of the sky and a chunk of the earth is lodged in the heart of every human being.” I would like to add “And hopes for a seed waiting to be planted”. It’s why we garden – or I do, anyway – planting, watering, tending and harvesting make me feel alive, keep my temperament balanced and give me joy.
It’s mid-October and there aren’t any seeds to be planted just now (unless you count garlic cloves as seeds). But this is a good time to plant trees and shrubs. Plants store energy from photosynthesis all summer in their roots, and then in the fall the roots use that energy to extend their range – even after leaf drop. Roots grow, apparently, until the ground freezes. Roots start growing again in the spring, and do much of their root growth in early summer.
For me, the hardest part of planting a tree or shrub is finding the proper place to plant it. I have a couple of acres, but I’ve been planting things here for over 40 years and I’m running out of space. Not only that, each tree or shrub has specific needs for sunlight exposure, moisture and soil type.
Soil is the easiest to “customize”. I can change the pH and texture or tilth pretty easily. But my back field is pretty wet, and many woody plants don’t like their roots sitting in soggy soil. With a high water table, I have to limit what I plant there. (Willows love it, and my magnolia , too.)
Sunlight is also hard to adjust. Yes, I have a chain saw, but nice trees keep on getting nicer as they grow – but creating more shade. Many nice flowering plants like full sun, which is defined as 6 hours or more of summer sun per day.
After removing a pear tree earlier this year, I had space to plant a blue hydrangea (A ‘Twist and Shout’ variety of the Endless Summer series) that had been growing in a big pot near my front door all summer. I cleared out the weeds and loosened the soil in a 5-foot circle. Then I modified the soil to meet the needs of this particular shrub: I added peat moss and garden sulfur to acidify the soil, stirring it in with my CobraHead weeder.

Measuring depth of a planting hole
It’s important to get the depth of the planting hole right for trees and shrubs, much more so than for vegetables or flowers. Trees (and to a lesser degree, shrubs) can be damaged if planted too deeply, as the bark on the trunk is very susceptible to fungal rot if covered with soil or mulch. Vegetables such as tomatoes and broccoli can be planted a little deep in order to stimulate new root growth along the buried stem.
It is good to dig the hole for a tree or shrub just the depth of the root ball. After I removed my hydrangea from the pot I measured the root ball and found it to be 8 inches from surface to bottom. I dug a hole and measured the depth of it by placing the handle of a rake across the hole, and then checking it with a measuring tape. It was 6 inches at first, so I carefully scraped out 2 more inches. That allowed me to set the root ball on unexcavated soil; soil that has been dug out and replaced tends to settle – which you don’t want to happen. Sometimes, if the soil is really awful, I will dig down deeper, and then add improved soil and pack it down afterwards with my foot.
The shape of a planting hole for a tree or shrub is important. It should be flat on the bottom, and gently slope upwards toward the surface of the soil. It should be wide, not deep. A minimum width should be three times the size of your rootball, and five times is even better. Roots of most trees and shrubs go wide, not deep. Roots go out beyond the ”drip line” – the area directly under their leaves. So it is good to have nice loose soil around your tree or shrub to facilitate root growth.
Winter is not so far away. In order to allow roots to grow and develop for as long as possible, it is good to place a two-inch layer of mulch over the root zone – but no more than 2 inches. The mulch will keep the soil warm later into the fall and keep lawn mowers and those string trimmers at bay.
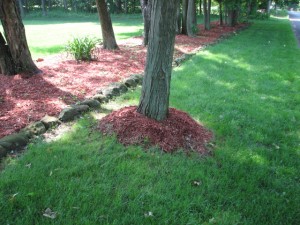
Mulch Volcano
I’ve seen trees with what I call “mulch volcanoes” – mulch piled up deeply against the trunk of a tree. That can be a death sentence, as most bark mulch or ground branches will retain moisture and microbes that will eventually rot the cambium layer of a tree. It takes years to kill a tree with bark mulch, so many people don’t attribute the layer of mulch to the death of their tree six to ten years later. Leave a “donut hole” free of mulch around your tree to avoid that.
So go to your local garden center and buy yourself a nice tree or shrub. There is still plenty of time to plant. And I think you’ll feel a great sense of accomplishment if you do.
Henry Homeyer is a gardening teacher, coach and public speaker. Reach him at henry.homeyer@comcast.net or P.O. Box 364, Cornish Flat, NH 03746. He is happy to answer gardening questions, but please include a stamped envelope if sending a real letter.
Garlic and Carrots and Leeks, Oh My!
Posted on Wednesday, October 2, 2013 · Leave a Comment
Some vegetables are as reliable as a sturdy shovel. Others – we all know – please us some years, disappoint us others. We grow tomatoes never knowing if the harvest will be bountiful or meager. But garlic and carrots and leeks, for me at least, are totally reliable. Year after year I know that I’ll harvest a good crop.
Now is the time to plant garlic. If you haven’t bought any garlic for planting, you’d better hustle to get some before your local farm stand closes for the season. It is, after all, officially fall. Avoid buying grocery store garlic as it is often treated with a chemical to keep it from sprouting – and is probably the wrong kind. But your local farm stand or farmers market should have garlic that will work just fine. Some garden centers will have seed garlic for sale, too.

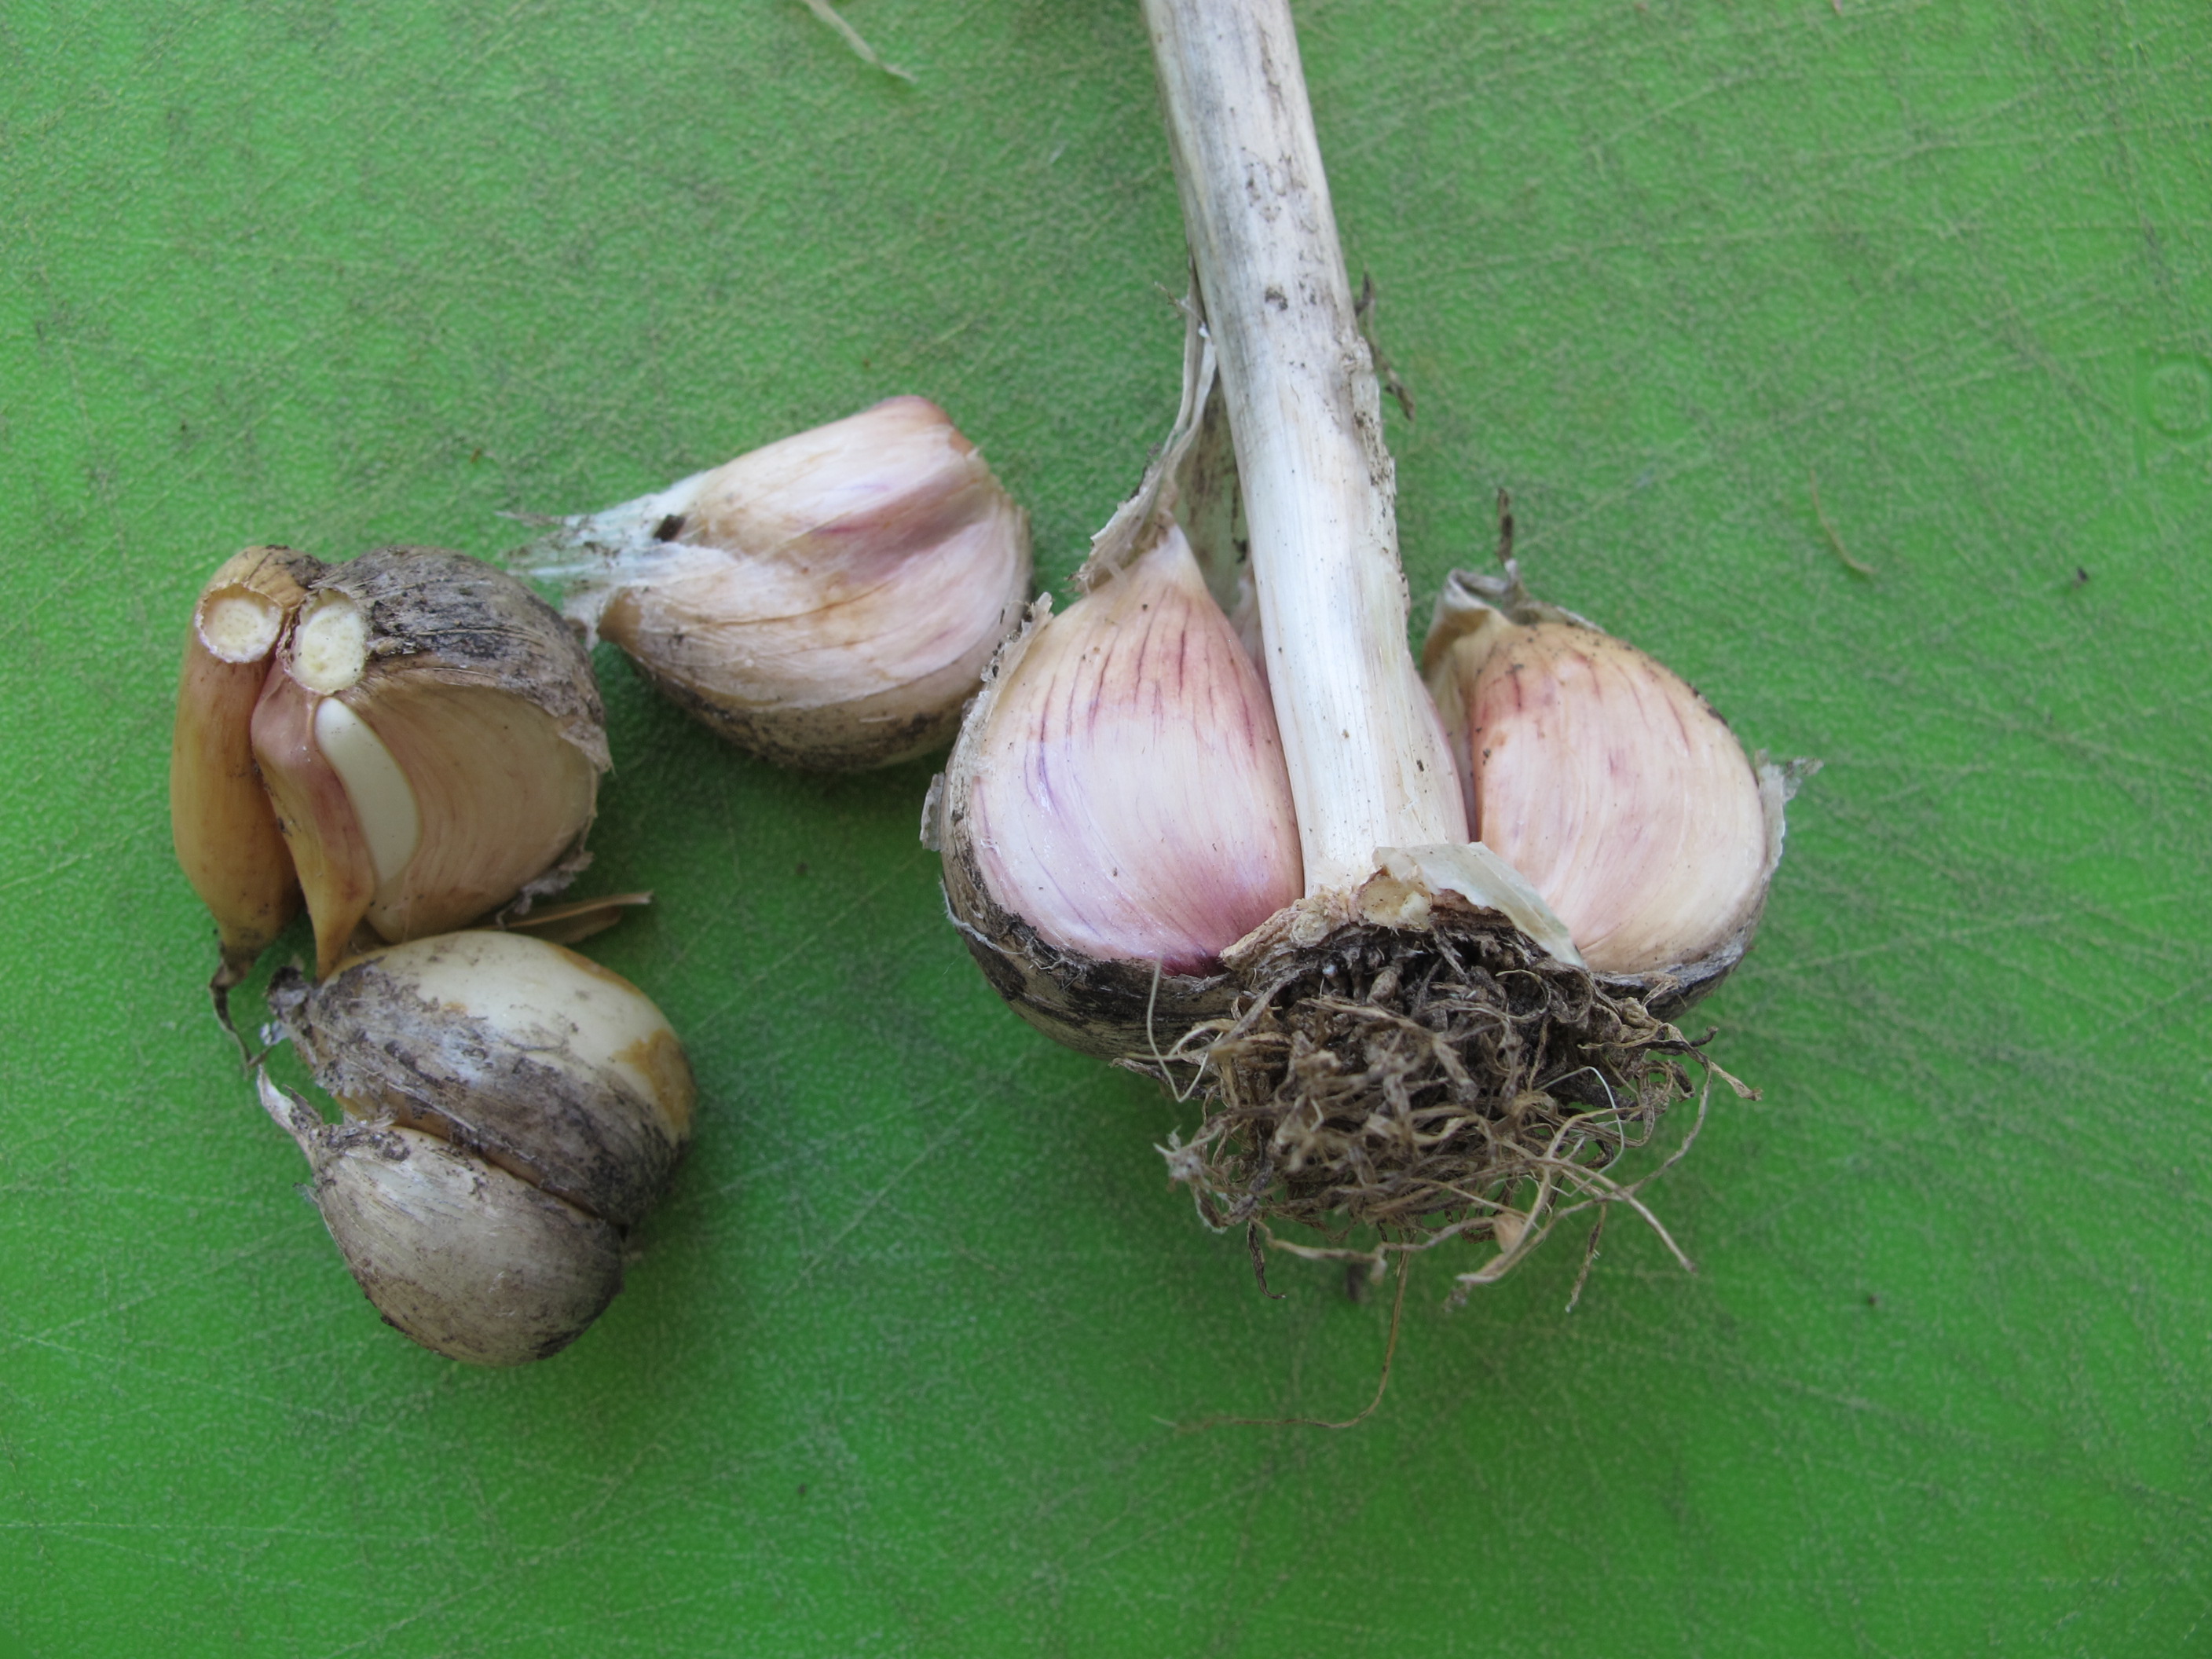
Harneck garlic showing central neck or stalk
A few words about types of garlic: there are two basic categories and many different varieties, each with a distinct flavor and “bite”. What we grow in New England is hard-neck garlic, which has a stiff woody stalk around which the individual cloves (sections) grow. Soft-neck garlic is generally from California, and is the kind that is braided and hung on restaurant walls – or found in grocery stores. Soft neck garlic is less hardy and may not overwinter.
I plant my garlic in mid-October. This allows the plants to establish roots, and then go dormant. If you plant in spring, you may find the garlic bolts and does not grow big cloves.
If you are using your own garlic that you harvested in August, pick your finest heads (or bulbs) to use for planting. In my experience, small heads will produce small heads next year. And for cooking, big heads are easier to work with.
Prepare a bed by digging in compost to enrich the soil and to provide good drainage. I create raised beds that are 30 inches wide and 6 inches above the walkways. I rake the bed smooth and create furrows 6 to 8 inches apart across the row. I then sprinkle organic fertilizer in the furrows and scratch it in. Next I separate the cloves and plant them about 4 inches apart and 2 inches deep. I cover the cloves and pat down the soil.
Finally I cover everything with a thick layer of straw or mulch hay. I spread the hay 8 to 12 inches deep (and fluffy), but by spring it has packed down and is more like 4 or 5 inches of cover. This mulch keeps most weeds at bay, but the garlic grows right through it.

Yellow Sunshine carrots (L), Leeks, Yaya carrots (R)
Most of my carrots are still in the ground – they tolerate frost and cold, and get sweeter after a good chilling – some of the starches turn to sugars. I generally store carrots for winter in a spare fridge in the basement, but you can also store them in a bucket of damp sand in the garage, mudroom or bulkhead. Mice love carrots, so I recommend covering the bucket of carrots with quarter-inch wire mesh.
Another way to store carrots is to leave them in the ground. You can keep the ground from freezing by covering them with a thick layer of mulch hay that is then covered with a layer of leaves. I put a pole at each end of the row so that I can find it under a deep January snow. This method works fine, though I have suffered some rodent damage on occasion. If you find any chewed carrots now, harvest and store inside.
Leeks are another friend of mine that always produce well. I love leek and potato soup in the winter so I store most of mine, though I keep some for fresh use as a substitute for onion when my onions (fickle, some years) are less than bountiful. In my experience, leeks stored in the fridge or cold cellar lose their appeal quite quickly, so I freeze them. I clean and chop them up, then freeze in freezer-grade zipper bags. I do not blanch them.
Here is my version of leek and potato soup:
3 strips lean thick-cut bacon
2-3 cups chopped leeks
2 -3 cups diced potatoes
½ cup flour
2 chopped tomatoes
2 cups milk
1 handful chopped fresh parsley
1 bay leaf
¼ teaspoon nutmeg
½ teaspoon cinnamon
1 teaspoon Herbes de Provence
Lightly brown bacon in a heavy soup pot, then add leeks and potatoes, stirring constantly to brown. Add 4-6 cups water. In a dish stir water into the flour to get a thick but lump-free mixture. Add to soup pot and stir well. Add spices and tomatoes and simmer for half an hour. Just before serving add milk but do not boil the milk. You can make this vegetarian by avoiding the bacon and substituting butter or olive oil.
I have a vegetable garden, in part, because I love to cook. Eating my own vegetables give me great pleasure, particularly in winter – which is just around the corner.
Contact Henry by email at henry.homeyer@comcast.net or write him at PO box 364, Cornish Flat, NH 03746. Visit his Web site at www.Gardening-Guy.com.
Gardening with Aches and Pains
Posted on Wednesday, September 25, 2013 · Leave a Comment
As we get older, most of us develop aches and pains. As gardeners, we need to learn how to move and use our bodies so that we don’t end up feeling like a quarterback after a sacking. I love working as a garden coach, partly because I am, at heart, a school teacher; I also like finding solutions to almost anything. One of my clients, a woman with a bad shoulder, got me thinking about all the tricks I have learned over the years to minimize pain caused by gardening.
My client and I were planting some pretty big hostas. They were in large plastic pots and probably weighed about 15 pounds each. I showed her how to hold the pot upside down in one hand, and smack the bottom of the pot with the other so that the roots and soil would slide out of the pot. But with her bad shoulder, she couldn’t do that.
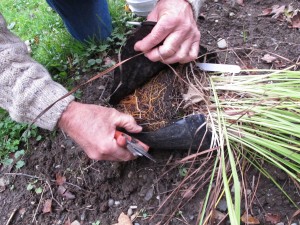
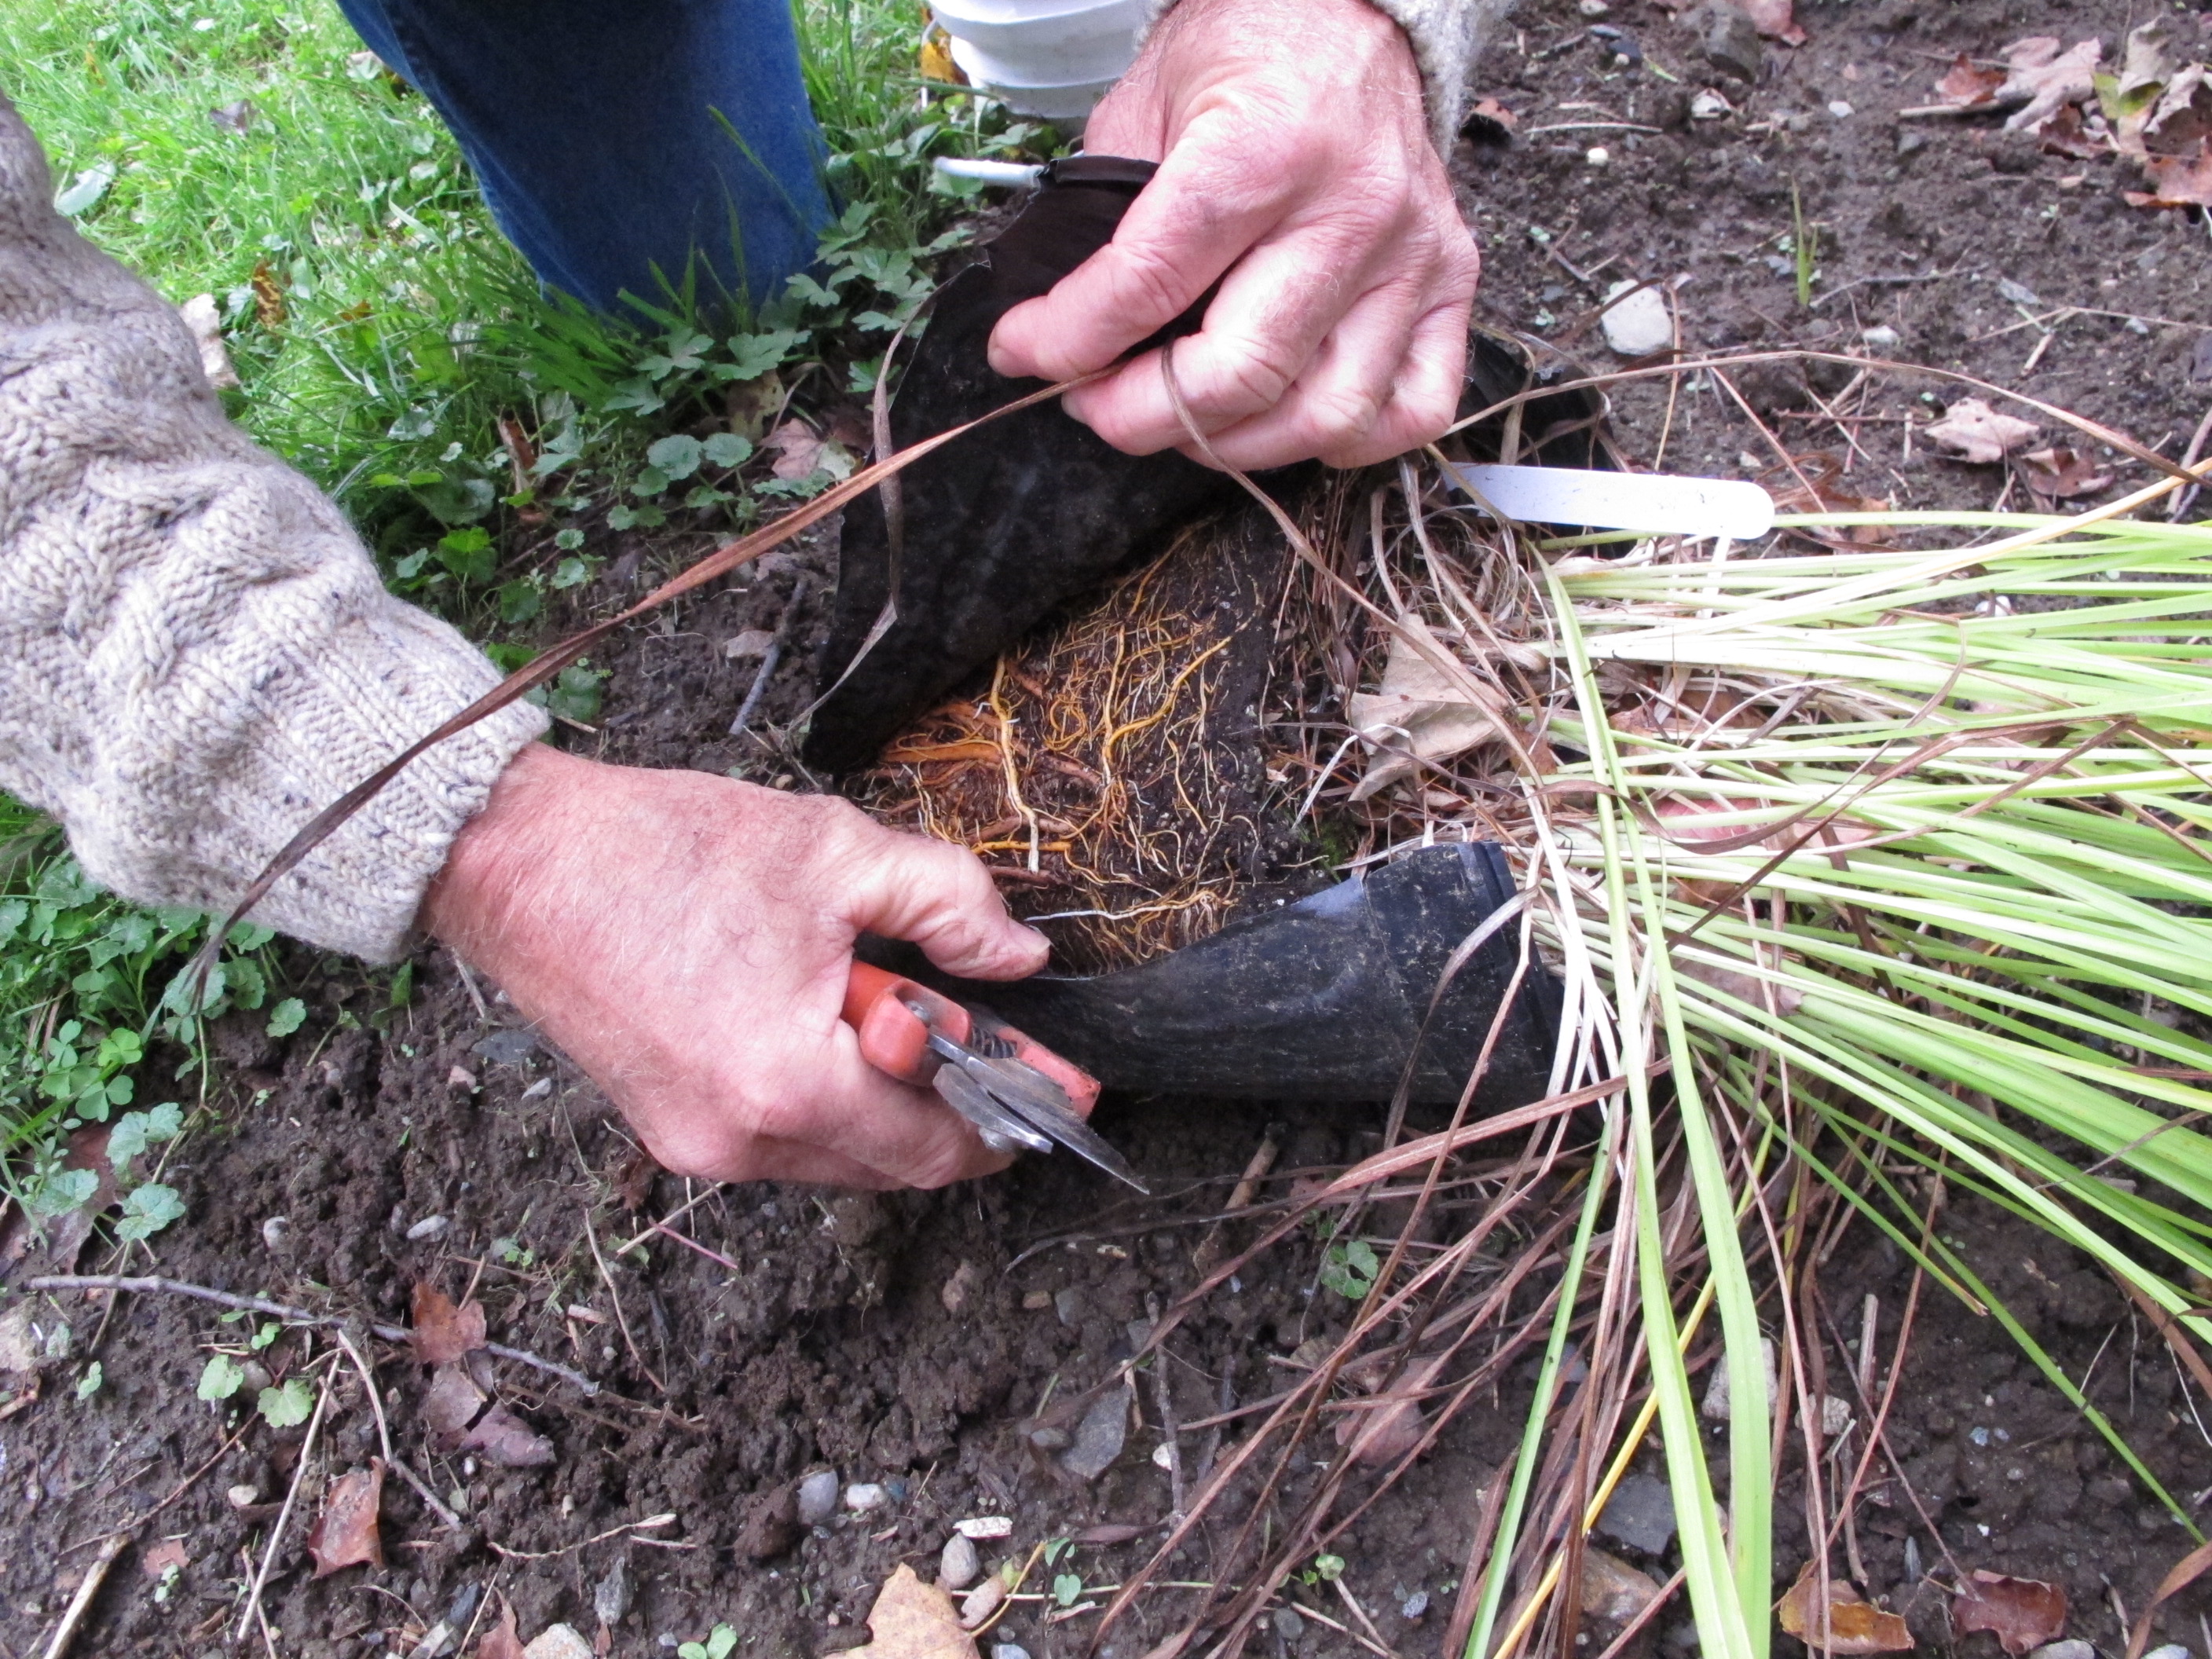
Slice open a pot to get out the plant
I taught her to cut open the pot instead. It’s a technique I use when working with trees in pots. I placed the pot on the ground and inserted the blade of my ever-present pruners into one of the drain holes at the bottom of the black plastic pot. I slit up the side to the top, and then sliced again across the bottom. Then I rolled the rootball free of the pot. Finally, I tickled the roots to loosen them up – so they will be ready to explore their new environment.
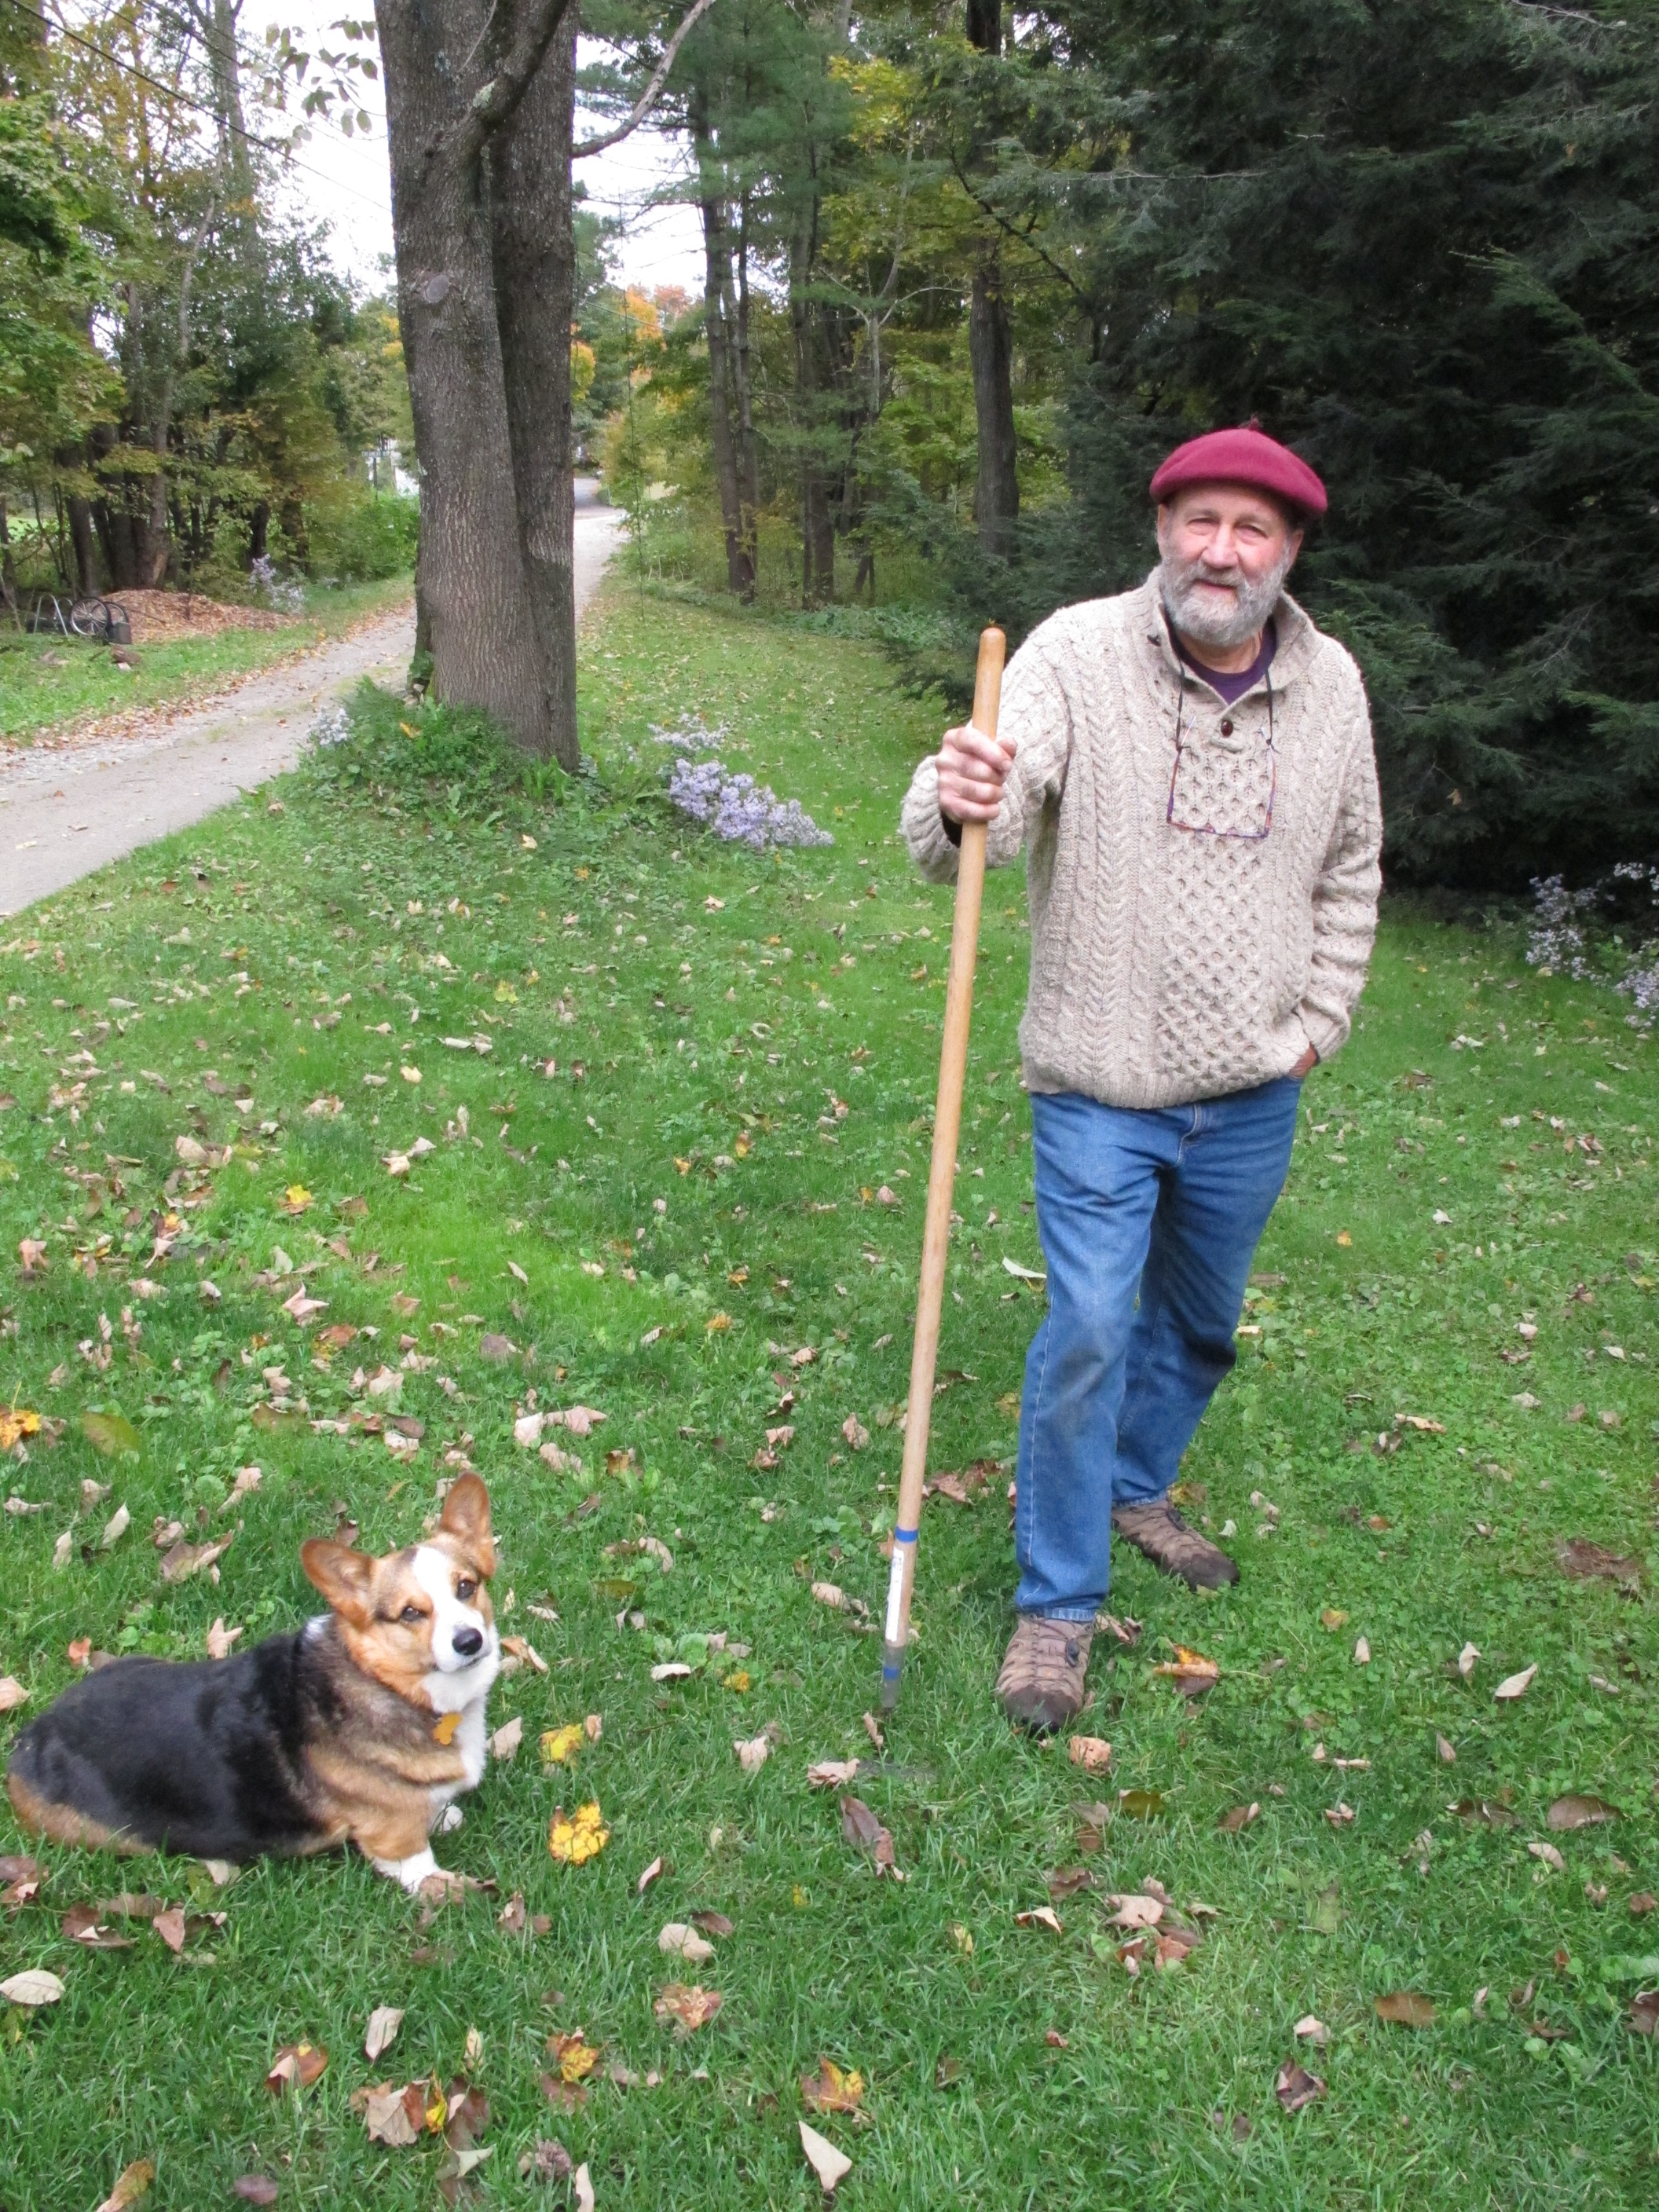
Getting down on your knees to plant anything (or to pull weeds) is tough if you have arthritic knees or hips. I can recommend a couple of ways to deal with it. My late friend Marguerite Tewksbury, a lifelong organic gardener who lived in Windsor, VT, started carrying a hoe in the garden in her late eighties. She used it not only like a walking stick, it helped her getting down – or up. By leaning on a hoe, you can distribute your weight and make a more stable, 3-point stance.
Of course I am young and healthy at 67, so I don’t need any aids getting down to weed. But sometimes at the end of the day, it’s nice to have something to lean on when on getting up. I like a 5-gallon pail for that, I can push up on it and get up more easily, with less strain on my back. Or sometimes I use my CobraHead weeder to help push me up a little.
Picking beans recently I found bending over tiresome for the length of time I needed to pick all my beans. So I used a 5-gallon pail to sit on. Gardener’s Supply (www.gardeners.com) makes something that looks very good, their “garden kneeler”; it has hand rails at the sides for getting up when kneeling or that allow you to convert it into a seat.
If you suffer from carpal tunnel, pruning may be painful for you. Most manufacturers now make hand pruners with a rotating grip that allegedly minimizes the problem. The Fiskars company has come out with a series of pruners and lopers that offer a different technology – gears to reduce the amount of pressure it takes to make a cut. I have a pair of their biggest loppers, and find them fabulous. The gears really do reduce the work of cutting larger diameter hardwood branches.
One of the most ingenious tools I ever saw used was a homemade corn planter used – and made – by a man in his 90’s. I saw him using it as I drove down the road, and I stopped to talk. He could no longer bend down to plant the seeds, so after his garden was rototilled by his son-in-law, he used a hoe to make a furrow for the seeds. Then he planted using a 30-inch piece of garden hose to get the seeds from his hand to the ground.
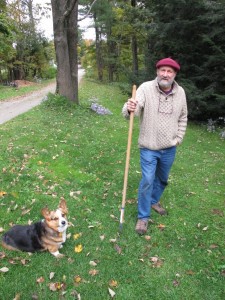
A common hoe works like a cane and helps getting up
The hose poked up through a wide tin can (perhaps a fruit cake or cookie tin). He put all his corn seeds in the can, and then picked them up one at a time and dropped them into the hose (which poked a couple of inches into the can). Then he moved on a few inches and did it again. I’m sure that corn tasted mighty good to him, in part, because he had figured out how to keep on gardening.
Some of my friends who have moved to retirement communities keep their hand in gardening by planting in pots on a deck. Instead of 20 tomato plants, one or two in self-watering containers is what they manage. A pot roughly the size of a 5-gallon pail will do nicely for a tomato – and not have much room for weeds. Smaller pots sitting on railings can handle lettuce or basil very nicely.
If your back bothers you, be careful when hoeing or raking. Don’t lean forward. Keep your back straight. And if you need to pick up a bucket of weeds, place one foot forward and as you bend, tighten your tummy muscles.
None of us is getting any younger. But if you like gardening, you should be able to garden forever. I intend to. Please write or e-mail me if you have a good tip or trick. I’ll post them on my Web site, www.Gardening-Guy.com. Thanks.
Contact Henry at P.O. Box 364 Cornish Flat, NH 03746 or e-mailing him at henry.homeyer@comcast.net. He is the author of 4 gardening books and a recent children’s book about a boy and a cougar, Wobar and the Quest for the Magic Calumet.
Putting the Garden to Bed
Posted on Tuesday, September 17, 2013 · Leave a Comment

Cutting Back Perennials
When you think of the weeks ahead, do you think that putting the garden to bed means simply raking the leaves and cutting back a few perennial flowers? Or maybe just putting the lawnmower in the garage and the tomato plants on the compost pile? Then you are a minimalist. To have maximum success in the garden, there are many tasks to do between now and the time when snow flies.
If you moved your houseplants plants outside for the summer, begin bringing them in now. Many don’t tolerate even a taste of frost. Wash the leaves on both sides and rinse the surface of the potting mix it’s growing in, too. That will help to wash off aphids and aphid eggs. Inside there are no good bugs to keep the ever-present aphids under control.
If you have an amaryllis that you put outside (either in a pot or in the soil), and want to make it bloom again this winter, bring it inside now. Let it rest un-watered in a dark, dry place for 45 days, then re-pot it (if it was in the ground) and put it on a windowsill. If re-potting, use a fluffy potting mix with lots of peat moss. Garden soil will rot the bulb.
If you grew dahlias and gladiolas, the bulbs will need to be pulled and stored in a paper bag in a cool, dark place until spring. Wait until the tops die back after the first frost – but don’t wait until the ground is near freezing. In the bag with bulbs you can put some slightly damp cedar gerbil bedding. That will help to keep them from drying out over the winter.
Fall is the time to get ahead on next summer’s weeds in garden. Do this by getting rid of all weeds in the flower beds (hopefully before they drop seeds) and in the vegetable garden, which should be clean and weed-free before snow flies. As you harvest vegetables, also weed and clean up. Getting rid of the dead plants in the vegetable garden will minimize the overwintering of things like beetles and fungi.
Lawn Needing Re-Seeding
Now is the time to improve your lawn. Got dead spots, worn out spots? Re-seed in the fall, earlier rather than later. You want to get the new grass plants well established before the soil gets too cold. Germination is quicker now than in the spring – August’s warmth is still held in the soil. Just be sure to keep the soil lightly moist. I usually cover grass seed with a light layer of mulch hay or straw to provide shade on the hot Indian summer days.
Fall is also a good time to give your lawn a dose of limestone and organic fertilizer. It will slowly be incorporated into the soil over the months ahead. You can have the lawn soil tested by your Cooperative Extension, or just Google “soil testing” and learn how to take a sample and where to send it. Most lawns will benefit from some compost. Just fling it with a shovel, and spread it around with the back side of a lawn rake (with the tines in the air).
At some point before winter, prepare your beds for planting next year’s vegetable garden. That will allow you to plant early crops like spinach and peas much earlier if we have, as we usually do, a wet spring. It’s never good to work in wet soil. And rototilling should be avoided until the soil dries out (though I personally don’t till anymore). Later, after I’ve raked up my leaves, I’ll spread them over my mounded, raised beds. Raised beds dry out and warm up faster than beds that are flat.
Flower beds get better each year. Or they do if you pay attention to your soil by adding organic matter. If you have mulch on your beds, rake it off and spread some compost or sheep manure over the surface. Then scratch it in a little and put back the mulch. Sheep, goat, llama and rabbit manure is all relatively free of weed seeds and adds organic matter and minerals to the soil. A top dressing of organic fertilizer will improve the soil, too. Unlike many chemical fertilizers, most components of organic fertilizer are not water soluble.
You can divide big clumps of purple cone flowers, black-eyed Susan, phlox, asters, hostas, iris, daylilies and most other perennials either now or in the spring. The more you do now, the less you will have to do in spring. Moving or dividing peonies is generally recommended for the fall, after the plants have begun to go dormant.
There’s plenty more to do before the snow flies, and I will nag you again later to do more including cleaning up your berry patch and cutting back this years’ fruiting canes, pruning hardwood trees and deciduous shrubs after leaf drop, planting bulbs and more. Meanwhile, enjoy the crisp days of fall and find time to watch the butterflies feeding on our last flowers of summer.
Henry Homeyer is the author of 4 gardening books and a Wobar, a fantasy-adventure book for children. His Web site is www.Gardening-guy.com.
Designing a Garden, and Expanding Your Plant Palette
Posted on Wednesday, September 11, 2013 · Leave a Comment
Want to have a spectacular flower garden? Nothing beats visiting a good garden when it comes to learning how to make your own better. I recently visited Kirkwood Garden on Rte 3 in Holderness, NH. I had visited it last spring when I was invited to speak at the Squam Lakes Natural Science Center. I was bowled over by the plant diversity, the beauty of the layout, and the tranquility of the garden. But I didn’t have my camera and notebook, so I went back in August and was once again delighted – and instructed – by the garden.
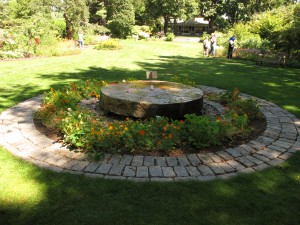
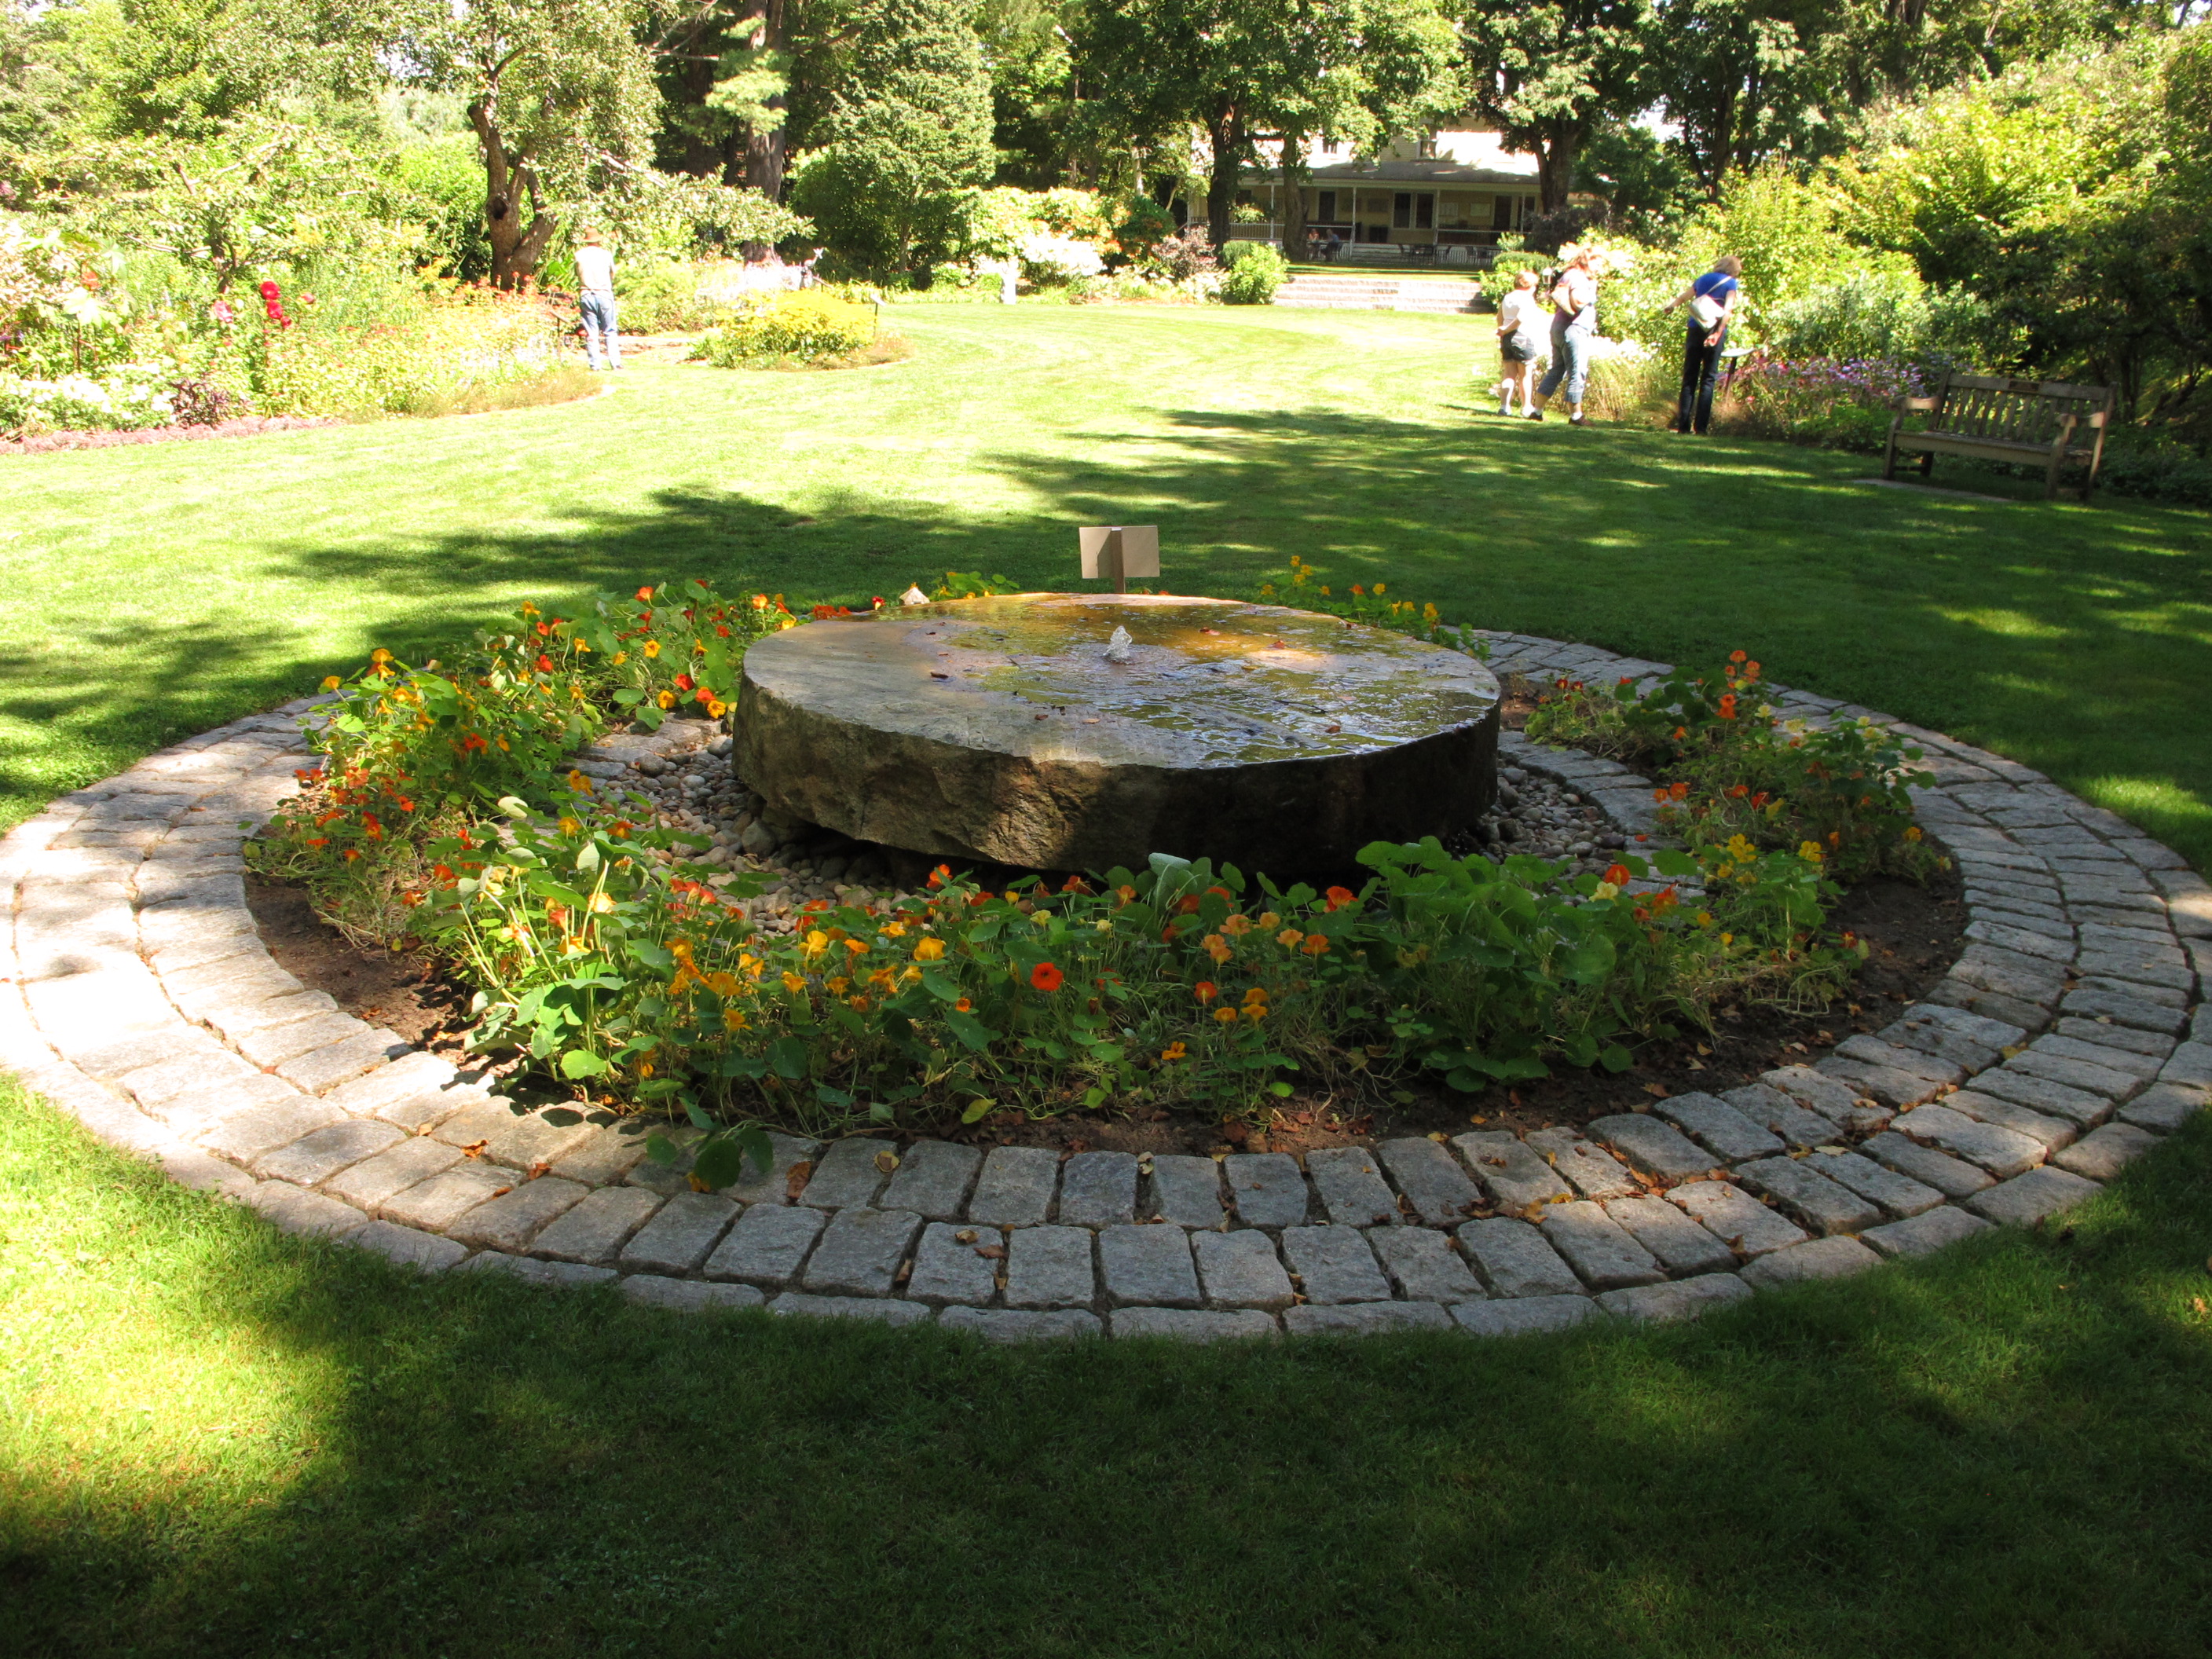
Broad view of Kirkwood
It is easy to look at a professionally designed and maintained garden and say, “I could never do that.” And for many gardens that’s true. Longwood Gardens in Pennsylvania or the Brooklyn Botanical Gardens encompass dozens of acres and are maintained by teams of workers year round. But Kirkwood Garden is less than an acre (in my estimation) and I’m told it is maintained by a single gardener. And it has not been around for decades. It was installed in 1996 – largely by volunteers, and with many donated plants.
So what pleases me so much about this garden? First is the overall design and layout. If you walk down three broad stone steps, you are on a large central lawn – but one that is carved up and delineated by curved flower beds, islands and walkways that head off to shady nooks. No straight lines here. I like that. And there are places to sit, with nice 2-foot square flagstones laid out in front, so that dozens of daily feet will not create bare spots. And there are shady places as well as sunny places to sit.
Each bed is backed by shrubbery, with the tallest plants towards the back. When I visited in spring, the rhododendrons, azaleas and mountain laurels were in bloom. Many different varieties, each with a different color and slightly different bloom time. Now there is summersweet clethra (Clethra alternifolia) with its intense sweet blossoms, and a lovely viburnum (Viburnum sieboldii) loaded with red berries held upright on bright yellow stems.
Also in the back of the beds – and blooming now – are many tall perennials. I grow and love snakeroot (also called bugbane, but technically Cimicifuga racemosa). But instead of a couple of plants, someone has planted many, or allowed them to spread over the 17-year life of the garden. I tend to have many varieties of plants inter mingled. They have many large stands of a single species, which makes a bold design statement.
A tall fall plant I have only tried once, and not found to be worth keeping, is Boltonia (Boltonia asteroides). They selected a variety called ‘Snowbank’, which my reference text tells me is unlike most boltonias, in that it is self supporting. It is 3-5 feet tall at Kirkwood and stands up without support, while the generic boltonia I tried was 5-6 feet tall and flopped over. At Kirkwood it has formed a cluster about 8 feet wide and 5 feet across and each stem supports a very small white daisy-like blossom. I shall try again.
Speaking of flopping, some annuals (purple cone flower, for one) were supported by horizontal grids of wire. Green wire mesh with 2 inch openings was supported on bamboo stakes about 18 inches off the ground (parallel to the ground) allowing stems to grow through the wire,. The wire was unobtrusive and kept the tall flowers from flopping. Very clever – but will I remember to do that next spring? And will you?
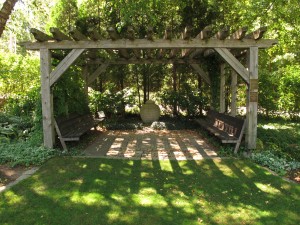
A shady nook at Kirkwood
An unusual fall bloomer at Kirkwood, which I have only rarely seen used, is yellow waxbells (Kirengeshoma palmata). This is a shade loving perennial with large maple-looking leaves and large yellow flowers. I have to admit it is slug bait, for me, but on a good year it can be a wonderful addition to a shady garden in the autumn. It is technically only hardy to Zone 5 (minus 20 in winter) but it has survived colder temperatures in my garden.
I learned there that the gorgeous bright red cardinal flower (Lobelia cardinalis) will survive in ordinary garden soil – not just in wet places (which is where it grows in the wild, and where I have it in my garden). Just plant in with some afternoon shade. I shall try that, too.
What else did I like about Kirkwood Gardens? It has maps everywhere, which although initially difficult to figure out, actually work quite well. You can learn the names of lots of different plants, annuals, perennials and woodies. And the garden is open year round and free to all. Donations are gratefully accepted. So you can visit often and see how special plants look in the different seasons.
Last of all, I agree with Barbara Gillan of Stillwater, N.J, who I met while admiring the garden. She and her family visit every year and remarked, “It’s a great place to go when you want to daydream.”
Henry’s web site is www.Gardening-guy.com. His newest book is a fantasy-adventure for children, Wobar and the Quest for the Magic Calumet.
To Cut Down or Not?
Posted on Wednesday, September 4, 2013 · Leave a Comment
Twenty-five years ago or more I planted a couple of little pear trees behind my house. It was actually quite a big project, as fruit trees do not like growing in areas that are continually wet, and I didn’t have a good dry spot for them. Much of my full-sun property is near a stream where the water table is very high, especially in winter and spring. So I had to build a terrace first, buying soil and building an 80-foot long retaining wall. That provided a great place to grow fruit trees.
One of the pear trees, however, has always been a problem. It didn’t blossom for many years. And it wanted to reach for the sky, sending many competing leaders straight up. No matter how much pruning I did, the tree was never a handsome tree. The fruit was mealy and unpleasant. Finally this summer I cranked up my chain saw and cut it down.
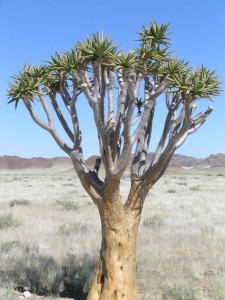
Namibian aloe tree
I tell you this because I am, in general, a tree hugger. Sometimes literally. When I traveled in the Namibian desert some years ago my guide knew I was interested in all growing things, especially trees, so he took me way off the beaten track to see a tree growing all by itself. It was related to the aloe I grow as a houseplant, but this 25-foot tall tree had a reddish bark that was smooth and beautiful. I got out of the Land Rover, went over to it, and threw my arms around it. I couldn’t help myself.
I am prepared to get hate mail from tree huggers about cutting down that pear tree, but I think I did the right thing. Most of us have limited space. We tend our plants, we plant trees for our enjoyment, and to provide us with beauty (and sometimes fruit). So if a tree does not please us, I say, get out the chain saw and cut it down. I am a firm believer in the principle of “It’s my garden and I can do whatever I darn well please.”
But, as you may know, it is not always as easy as that. In some planned communities, one must get permission from a committee to take down a tree. And some trees, when cut down, send up many root suckers. Instead of one tree, you end up with dozens. I have a solution to the second problem, but not the first.
Common buckthorn and glossy buckthorn (Rhamnus spp.) are two species of small tree that have become real pests in many areas. They were probably introduced as fast –growing shrubs or small trees good at preventing soil erosion, and because they will grow in any type of soil. But they produce lots of berries liked by birds, so the seeds quickly become introduced everywhere near a planting. If you cut one down, more pop up. And pulling them out by the roots is not easy, especially for bigger specimens.
But I’ve learned that you can kill them off by double girdling the bark. Take a pruning saw and slice through the bark and the green cambium layer beneath it, going all the way around the trunk. But don’t cut into the hard wood below that green layer of cambium. The two cuts should be about a foot apart. If done this year, next year the tree will grow normally, but the following year it will not leaf out. It will be dead. And there should be no new sprouts that arise.
Last year I double girdled a staghorn sumac (Rhus typina) to see if the same technique would work on it. Sumac suckers readily, roots traveling long distances and sending up new shoots. In this case, the tree died in less than a year – and no new shoots have grown.
Once I was sitting with an acquaintance, admiring her landscape. But the view was largely blocked by some full-sized white pines. She turned to me and said, “Henry, I think I have to move those pines.” I was incredulous. Yes, I allowed, one can move a full sized tree – if you have the money. But a chain saw makes more sense. Roots extend farther from a tree than you might think – well beyond the drip line. Moving a tree with a trunk more than about 6 inches in diameter is risky because you will lose a lot of roots no matter how careful you are.
If you really want to move a full-sized tree, there is something called a tree spade and a few are made big enough to move most trees. These are huge machines that can encircle a tree and send down – by hydraulic pressure – 6 large blades that cut through soil and roots and scoop out a huge root ball. The machine then lifts the tree out and it is transported to a new site that awaits it with a hole of exactly the same size and shape created earlier by the same machine. The larger models will dig out a hole 8 feet wide and nearly as deep. You can see this done on the Web by Googling “How to Move a Full Size Tree”. There are several good examples to watch.
So I won’t say that a chain saw is my best friend, but I do think that removing certain trees can make sense. After all, if we allow every feral tree grow, soon we would all be living in a green jungle.
Contact Henry at P.O. Box 364, Cornish Flat, NH 03746 or henry.homeyer@comcast.net. Henry’s Web site is www.Gardening-Guy.com.
Keeping a Taste of the Garden to Eat This Winter
Posted on Wednesday, August 28, 2013 · Leave a Comment
Every year the vegetable garden produces food for me. Some years I have enough to eat and to share – with plenty left to put up for the winter. But every year is different and this year my garden is a bit of a disappointment. Here it is the end of August and I’m not able to gorge on tomatoes the way I usually do. And although I only planted one zucchini plant this year, so far I’ve only harvested just one zucchini. Still, I will put some produce in the freezer, just not as much as I’d like.
For those gardeners with plenty, let’s take a look at some easy ways to put produce aside for use this winter. First, tomatoes: freeze them whole. Just put clean, dry tomatoes into freezer bags and suck the air out with a straw after closing the bag 99% of the way. Use them this winter in soups and stews the way you would canned tomatoes. Knowing that they are your own makes them even better. You can use them with the skins on, if you wish, but running hot tap water over the frozen tomatoes and rubbing gently will remove them.
In past years I have always dehydrated cherry tomatoes in my Garden Master Pro dehydrator after cutting them in half. The result is a “sun dried” tomato that is sweet and wonderful for stir fries and soups. But last summer I tried putting some in the freezer whole and liked them for cooking. I just throw the whole frozen cherry tomatoes in soups and they are great – and much less work than drying them.
Tomatoes
Each year I use imperfect tomatoes to make paste. I cut out the bad parts, throw them in the food processor, and puree them. Then I boil down the resulting slurry in a heavy cast iron enameled pot until I can literally stand up a spoon in it. That takes all evening at low heat. I leave it overnight, cover off, and in the morning I spoon the paste into ice cube trays and freeze it. Later I put the cubes in freezer-grade zipper bags.
Many people don’t bother freezing summer squash and greens – or even green beans and broccoli because they’ve had bad luck with the results: mushy, overcooked veggies. But there are a few simple steps you can take to have wonderful, fresh-tasting crunchy vegetables in mid-winter – that were grown in your own garden.
Many vegetables taste better, mid-winter, if they have been blanched –briefly boiled – before freezing. Blanching is way of killing aging enzymes in veggies so that the produce put in the freezer does not get woody, old and tasteless. But many “experts” suggest blanching fresh veggies for 3 minutes, or even more. In my book, that is fully cooking them. And when you cook them again before eating,the result is mush.
The solution? Blanch for just 60 seconds or so. Depending on your stove, that may mean not even getting the water back up to a full boil. The trick is to have lots of water at a rolling boil, and not too many veggies. I watch the color of my vegetables as I blanch them. Kale, for example, will turn a brighter green – telling me that it’s ready to take off the heat.
It’s important to cool your blanched vegetables as soon as they come out of the pot. Some experts recommend dropping them in a big bowl of water with ice cubes. Me? I’m too cheap to buy ice cubes in the quantity I would need. I just fill the sink with cold tap water, and it works just fine. Next I spin dry the veggies in a salad spinner with a string-pull (Zyliss brand in one) and blot dry with tea towels before bagging and putting in the fridge.
My exceptions to blanching include tomatoes, peppers and all berries. Everything else gets a quick swim in boiling water. Last year a kind reader suggested that kale need not be blanched, so I tried freezing some without blanching. It was fine, but less kales fit into each bag.
Dehydrating fruits and vegetables is another good way to store food, particularly if you don’t have much freezer space. Apples and pears dry nicely and make for good winter snackage. Even if you don’t grow your own, you can buy/pick fresh apples cheaper than buying dried fruit. I dry apples and pears until they are dry, but not brittle. I store them in freezer grade bags in the pantry.
Peppers and tomatoes, sliced, dry well and are great in winter soups and stews. I dry most of my hot peppers until brittle and then grind them in my coffee grinder. That allows me to add just a smidgeon of hotness if having company – or a lot if it’s just for me. I have read that the seeds and the white fibers inside the pepper contain a lot of capsaicin, the chemical that gives hot peppers their heat, so I dry those, too.
I’ve gotten a lot of e-mail from discouraged gardeners this year. It wasn’t a great year for many of us. But there are still farm stands selling fresh produce, and often they will sell cheaply by the bushel if you want to store food for the winter. I may end up doing so myself.
Send questions, suggestions and laments to Henry by e-mail at henry.homeyer@comcast.net or by mail at P.O. Box 364, Cornish Flat, NH 03746. Please include a stamped envelope if you wish an answer by mail.
Dealing with Invasives
Posted on Wednesday, August 21, 2013 · Leave a Comment

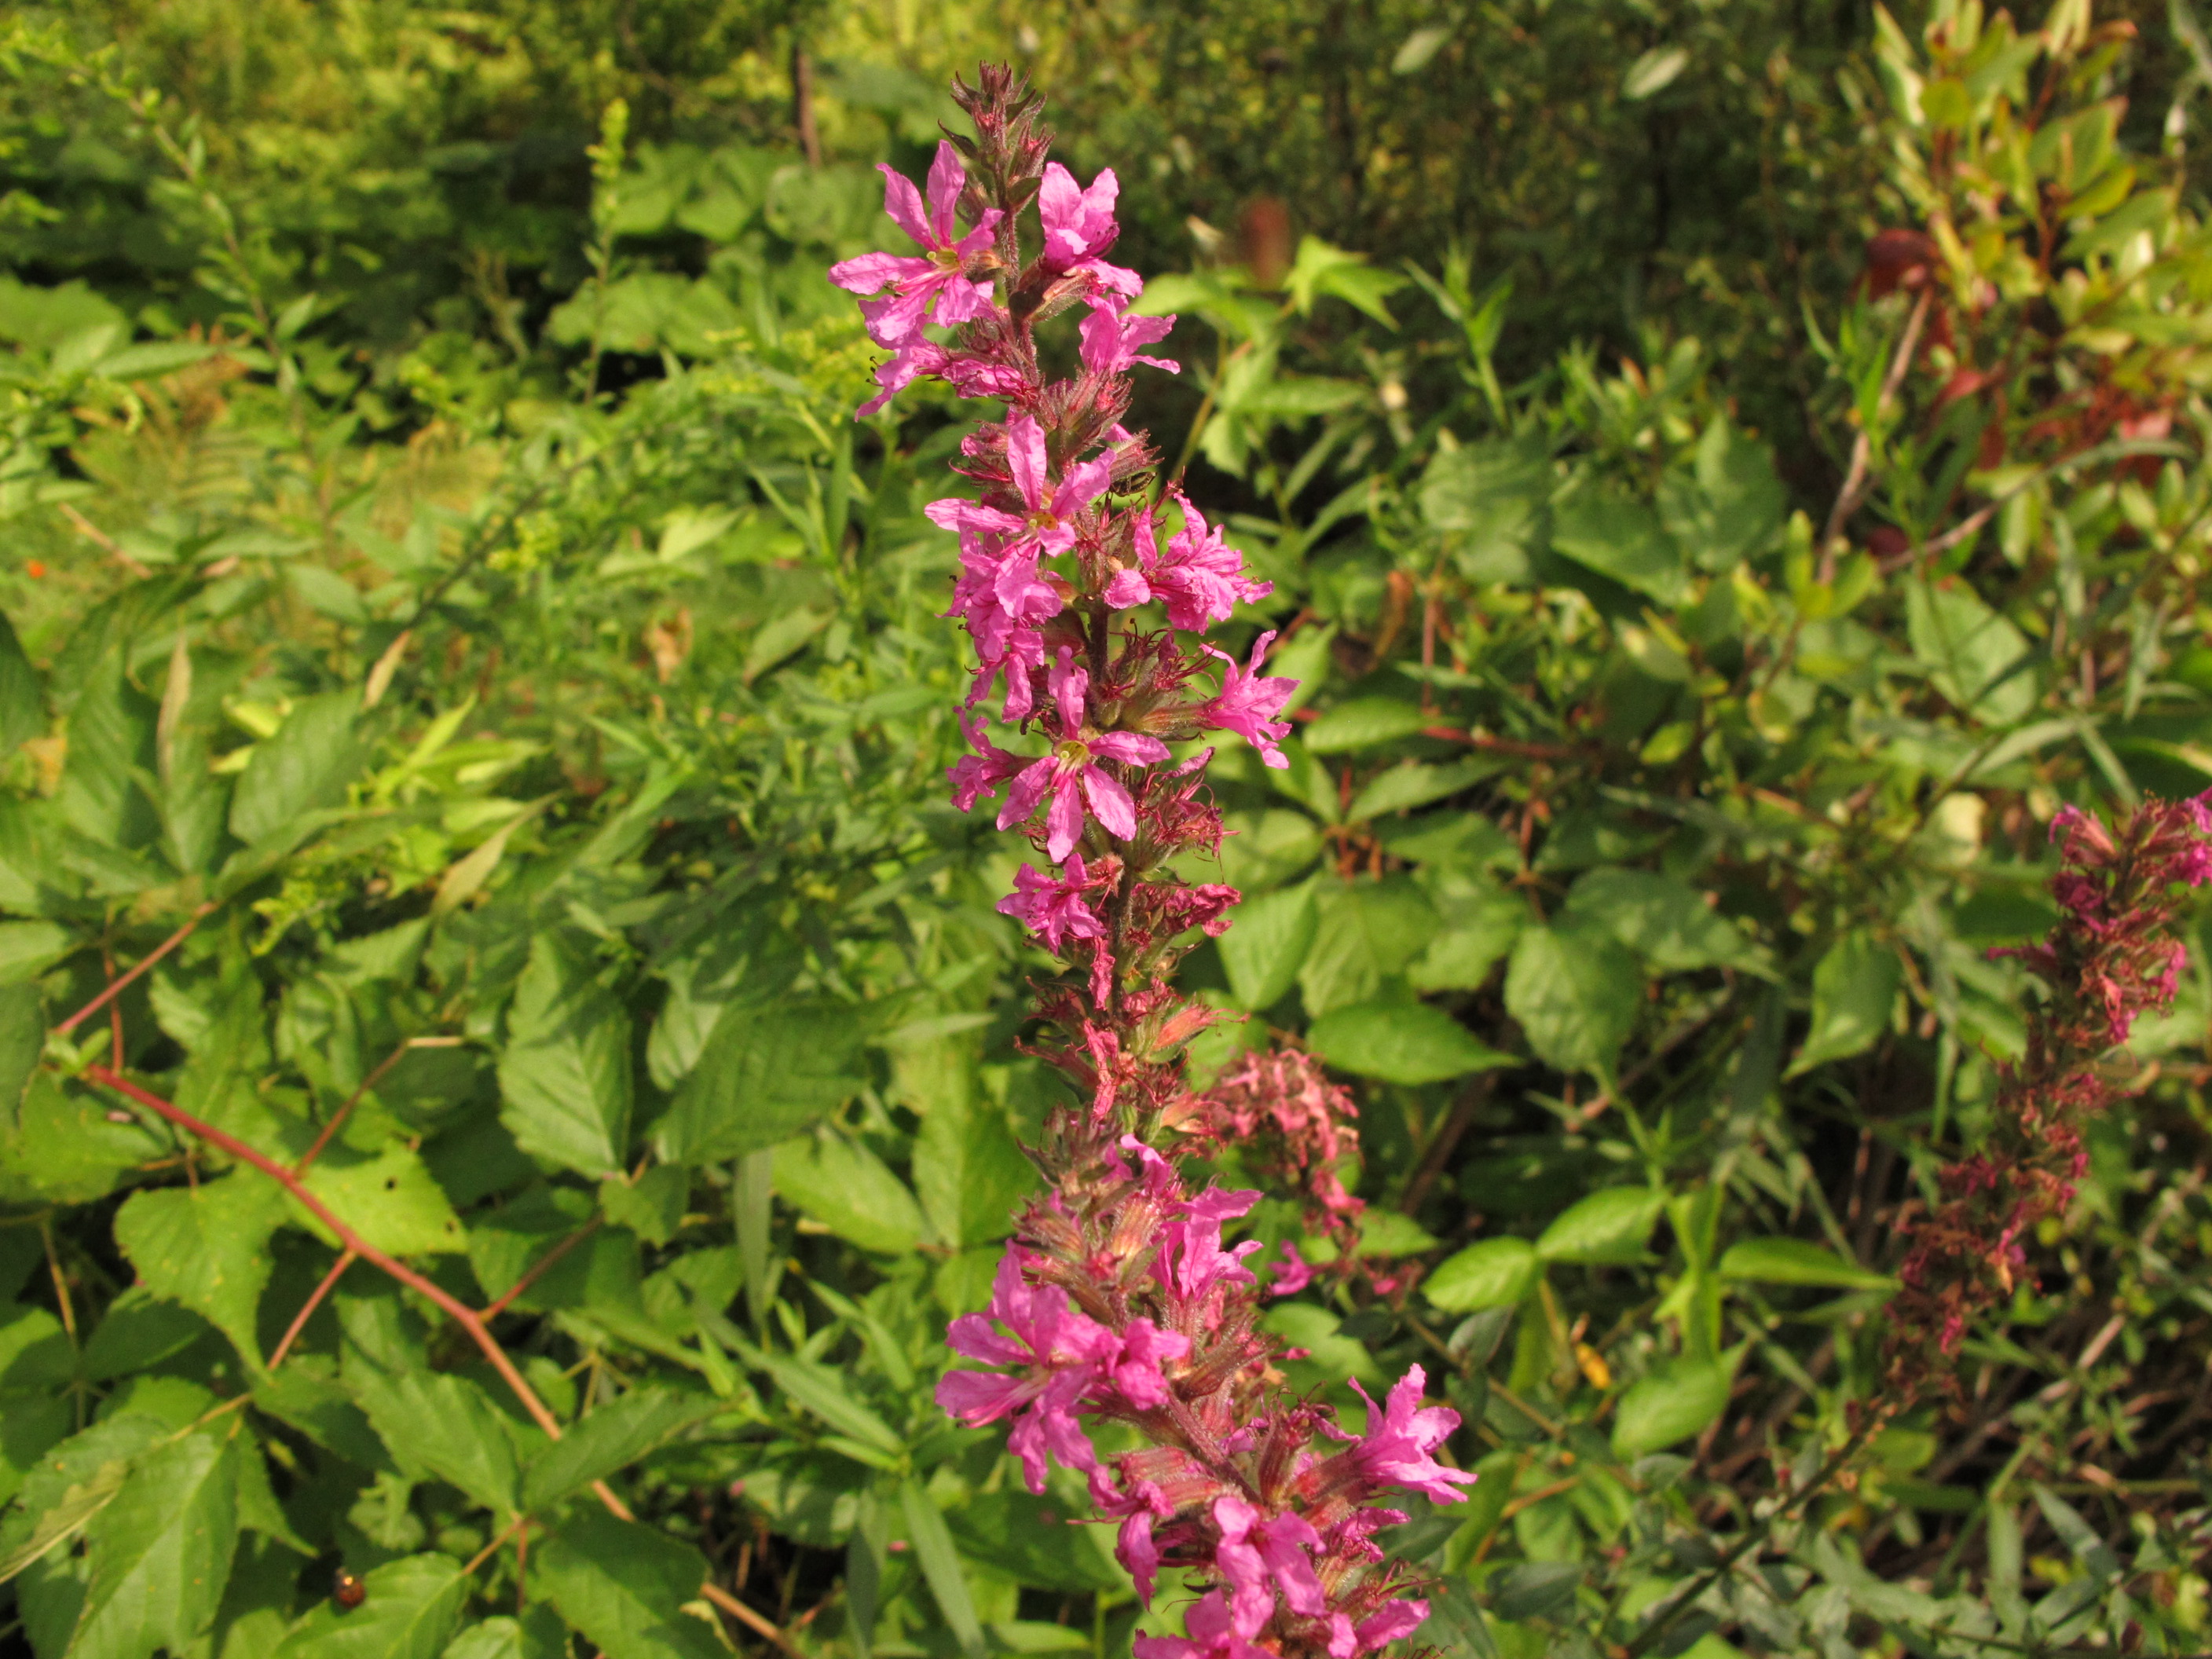
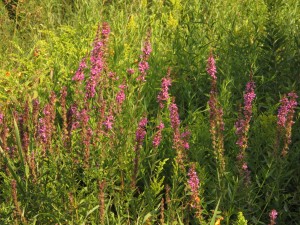
Purple loosestrife closeup
I’m sure you know purple loosestrife, even if you don’t know its name. It’s a big, tall clumping plant bearing bright pinkish-purple flowers and it’s appearing now in your neighborhood, especially in wet areas. What you may not know is that it’s an aggressive foreign invader that can out-compete many of our native species. It has been around for a couple of centuries – it came over, allegedly, in soil used as ballast in sailing vessels in the late 1700’s.
But if it grows well and it’s pretty, what’s the problem, you may wonder? A number of things. It’s a big plant that can dominate the landscape and shade out smaller, less vigorous native plants. A mature loosestrife can produce up to a million seeds, seeds that can be carried by streams to new locations. Wildlife can be negatively impacted. Many insects and birds depend on native plants for food and nesting materials- native plants that evolved with them. Invasives like purple loosestrife often do not meet their needs.
According to Barbara McIlroy of Etna, NH, who has been active in the movement to control invasive species, the number of bird and butterfly species present on properties that grow native species is much, much higher. “I’m converted,” she told me. “Grow natives. Period. The positive effect on the wildlife is dramatic.”
Unfortunately, it’s almost impossible to rid your property of purple loosestrife. These plants have amazingly tenacious roots. Before I knew better I tried digging out some large plants from a swampy area on my property. Yes, I got the plants out – but some of the roots broke off and re-sprouted. And by clearing out a space, I also opened up a new site for seeds to grow. If you have had purple loosestrife in the past, there are seeds waiting for a chance to germinate – like little time bombs.
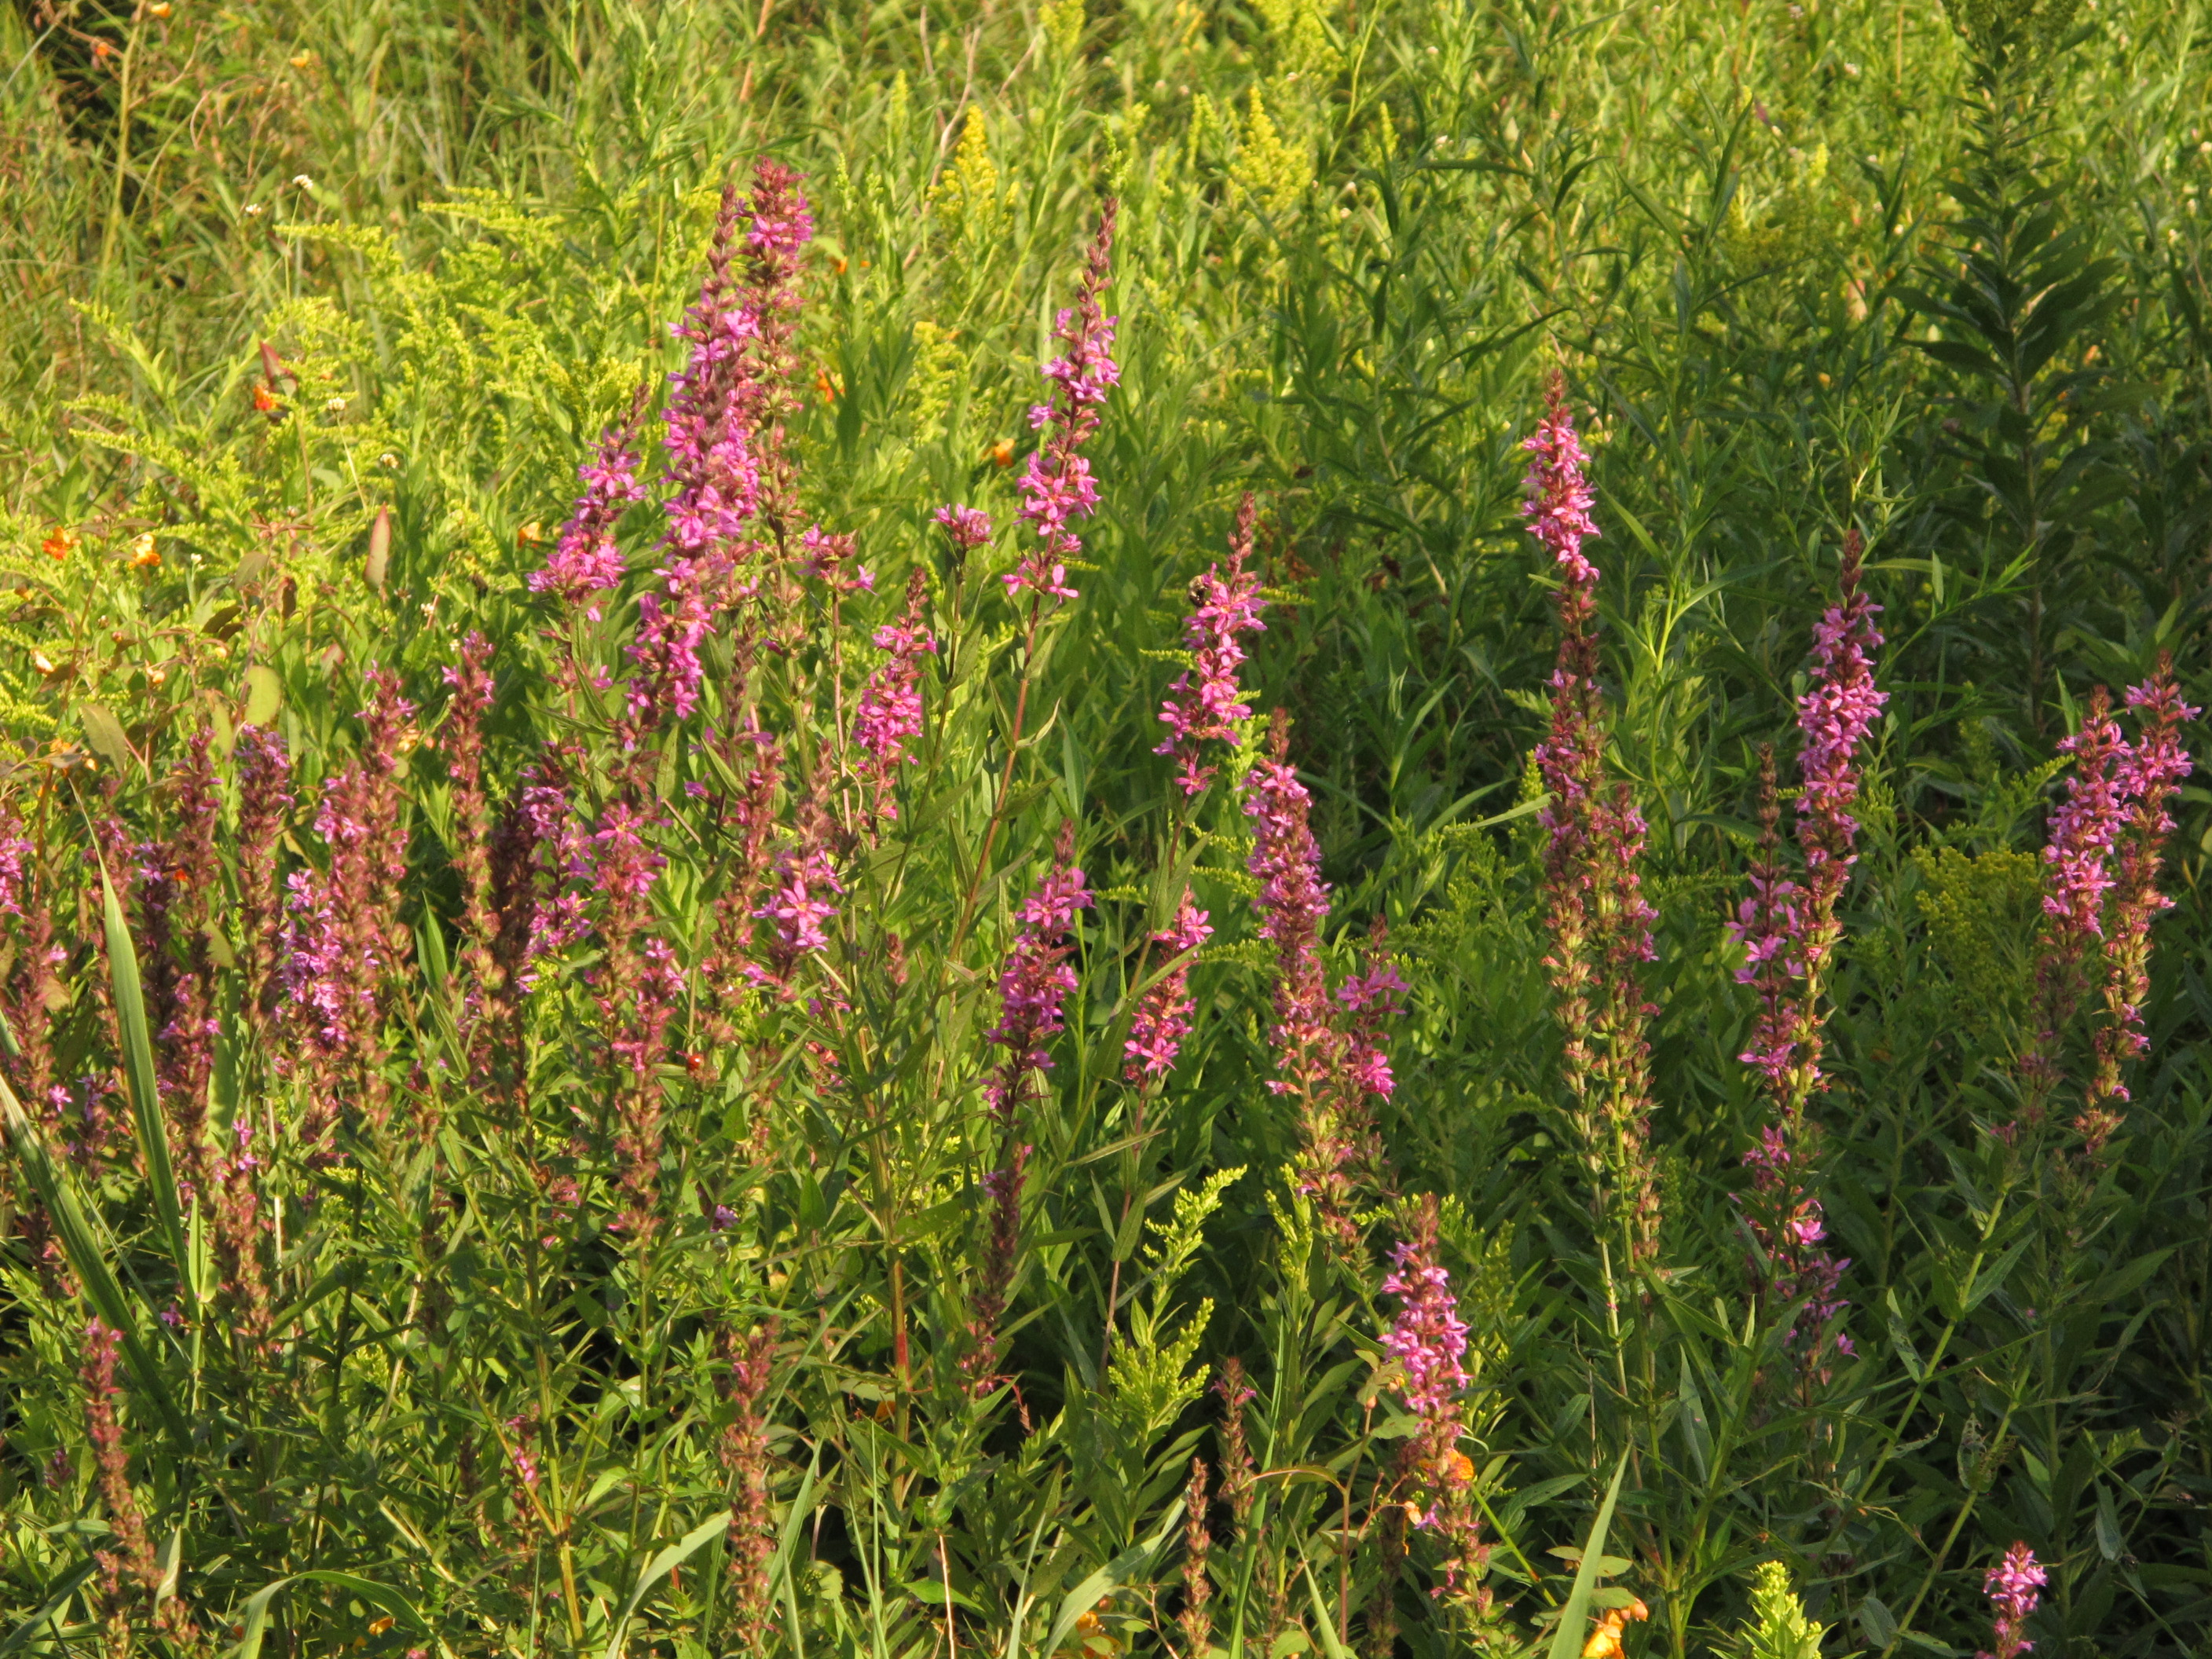
Loosestrife
But there is good news: two species of beetle (Galerucella calmariensis and G. pusilla) have been approved for and found effective in controlling purple loosestrife. These beetles cannot eliminate the loosestrife, but can reduce the numbers dramatically. Loosestrife is not a problem in Europe the way it is here, in part because it has natural enemies – the beetles. By introducing the beetles, an effort has been made to help Mother Nature keep loosestrife under control. Once established, they eat enough of the leaves and stems that the plants do not bloom. And theses beetles have been well tested: they will not eat your garden plants or valuable crops.
In 2001 Saint-Gaudens National Historic Site in Cornish, NH released two species of beetles to see if they could control the purple loosestrife that was taking over the wetlands at Blow-Me-Down pond. I met recently with Steve Walasewcz, who monitored the effort from 2001 to 2008. He explained that the beetles did not have an immediate effect. In fact, from 5.75 stems per square meter in 2001, the numbers increased to 10.5 by 2003. But then they declined each year until reaching only 1.05 in 2008 – a tenth the number of stems.
I went to the area where the beetles were released in 2001 and although there were a few blooming stems of purple loosestrife, there were very few. According to a report done for Saint-Gaudens NHS, it is believed that even low numbers of beetles prevent flowering; at higher numbers, “the beetles can strip the plants of its photosynthetic layer, resulting in high mortality in the winter due to a depleted starch reserve.”
Unfortunately, the beetles are not readily available for purchase. But for several years I have been experimenting with my own way of controlling the problem near my brook. Each year in early July I take pruners and cut back the plants to the ground. I identify them by their square stems that have a reddish color near the ground, and of course their leaves. Then a month later, I do it again – in essence, acting like a beetle. By cutting back the plants, few are able to bloom, greatly reducing the number of seeds spilling into my environment.
As a second step, I planted some big, tall native plants that I hoped would compete with the purple loosestrife: Joe Pye weed (Eupatorium purpureum) and Canadian burnet (Sanguisorba canadensis). I also added marsh marigold (Caltha palustris), which though not tall, is tough. These natives have given purple loosestrife a run for its money. Instead of filling 3 wheelbarrows with cut loosestrife in early July, I was able to get it all in one.
Purple loosestrife is just one of many invasive plants. If you see a new, vigorous plant show up on your property, try to learn its name and find out if it’s a problem elsewhere. Meanwhile, there is good news: scientists are working on biological controls for both Japanese knotweed (commonly called bamboo) and garlic mustard. In England, certain beetles are now well established to reduce the vigor of Japanese knotweed.
Henry Homeyer is the author of 4 gardening books and a new children’s fantasy-adventure about a boy and a cougar. His web site is www.Gardening-guy.com.


 Click Here to buy from Cobrahead