Apples!
Posted on Wednesday, September 26, 2012 · Leave a Comment
I read my first piece of propaganda when I was eight, maybe nine years old. It was a biography of Johnny Appleseed. It was one of a series of library books, all with orange covers, large print, and just a few simple drawings. They were fascinating, every one of them. Johnny, I learned, was a happy-go-lucky sort who walked around America giving away apple seeds. Not so. Johnny was a businessman who sold apple seeds and seedlings so frontier folk could make hard cider and its distilled companion, applejack. Most of the apple trees back then were what we would call wild apples – those that we wouldn’t consider good eating apples.
Here’s my quick course on apples: any named apple variey today is genetically identical to all others of the same name. That’s right. All Macs or Cortlands are the same, genetically, as all other Macs and Cortlands. Before you buy a tree, someone has grafted scions (living twigs) onto root stock to produce a tree that will give you tasty apples of a named variety. Some nurseries even sell trees with 3 or 4 different varieties grafted onto one tree.
The roots affect whether your tree is full sized, mid-sized or dwarf. Most new apple varieties – Macouns, for example – are hybrids developed by apple researchers, tested and then propagated by grafting – not by seed. So don’t plant seeds from your favorite apple thinking the tree will be like the mother apple.
Apple trees are easy to grow – you should have one, or perhaps more. Not only that, one can grow good eating apples without using toxic chemicals, although most orchards use some chemicals to control apple scab and sometimes insect pests. Americans have grown very fussy about their food, demanding perfect fruit, unblemished by even a spot of blight, which makes the orchards spray. The home grower can eat organic fruit with a few small brown spots, or cut them out.
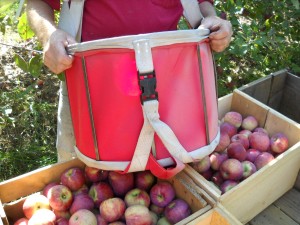
Apple Picking Basket
I recently visited Paul Franklin at his farm, Riverview Orchard, in Plainfield, NH; he has been growing apples for sale for over 25 years, and is a wealth of knowledge. One of my first questions to Paul was this: how do you know when an apple tree is ready to pick? It’s easy, he said. Just cut open an apple and look at the seeds. If they are tan to dark brown, the apple is ready. Paul added that some apples resist coming off the tree, even when they are fully ripe while others are easy to pick even when still green.
What about that film often seen on apples? It’s not a pesticide, Paul said, but Mother Nature at her best. It is a thin film of wax, which protects the apple. Polish it a bit, and the apple shines. Some apples have more wax than others.
This past spring many apple blossoms were damaged by a period of unusual warmth that was followed by a hard frost. The frost damaged the opening buds, so many of us lost all or most of our apples. I live in a cold spot and lost all mine. Paul Franklin’s orchard is near the Connecticut River, so the little bit of heat released by the water minimized his losses. If you are choosing a site to plant apples, remember that near the top a hillside is a good spot. Cold air is dense, and tends to slide down hill. Often only a degree or two can make the difference between success and failure.
I asked Paul about his favorite apples. He said that Cortland and Honey Crisps are two of his favorites. Honey Crisp is tasty and somewhat resistant to apple scab. Cortlands are great apples for both eating and making pies. Honey Crisp are great keepers – a customer of his picks a bushel of them, then stores them in a spare fridge for up to a year. If you do that, don’t store other vegetables in the fridge because apples give off ethylene gas, which prompts other veggies to age and go past their prime.
If you planted an apple tree recently be sure to protect the bark with a collar of quarter-inch hardware cloth (metal screening). An 18 inch square can be used to wrap around the base to keep meadow voles (voracious mouse-like creatures) from nibbling the bark in winter. If a vole eats bark all the way around a trunk it will kill the tree. Dig the screen in an inch to keep them from going under it. After 5-7 years the bark is thick enough that the hardware cloth is not needed.
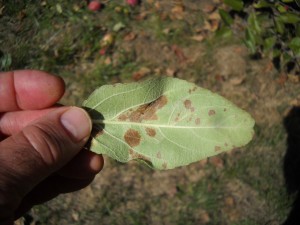
Apple Scab
What else can you do for your apple trees now? In order to minimize apple scab and other diseases, rake up the leaves under your trees. Scab overwinters on leaves. Mowing under trees helps, too – chopping up the leaves and helping them to break down. Young trees benefit by a little slow release organic fertilizer in the fall, but older trees do not need it.
So go pick some apples on a warm sunny fall day. Eat plenty, make a pie, save some for winter. And thank Johnny Appleseed – if you believe in the propaganda.
Henry Homeyer’s Web site is www.Gardening-guy.com. Henry’s upcoming kid’s fictional chapter book, Wobar and the Quest for the Magic Calumet, is just out. Check for Wobar at your local bookstore or go to henryhomeyer.com to learn more.
Filed under Article · Tagged with apple genetics, apples, cortland apples, grafting apple trees, Henry Homeyer, honey crisp apples, macoun apples, Paul Franklin, picking apples, plainfield nh, Riverview Farm
Putting The Garden To Bed
Posted on Wednesday, September 19, 2012 · Leave a Comment
Just last week that I was planting tomato and pepper seedlings – or so it seems. But now the big yellow buses are out there each morning, delivering the next generation of gardeners to school, and there is a definite nip to the air when I go to get my newspaper out of the box in the morning. Where has the summer gone? It’s time to start thinking about putting the garden to bed.
This is the time of year that weeds take advantage of us. Most of us tend to be lackadaisical about weeds now that our vegetables have produced, our flowers have bloomed, and our attention has turned elsewhere (school, football, presidential debates). But if you want to reduce your work next year, pay attention to those weeds that have snuck into the garden: they are producing seeds that will lie in wait for the spring, ready to grow before we get the good plants established.
I hereby resolve to spend a minimum of 20 minutes every day weeding for the rest of September. If I do that, I shall save myself much aggravation next spring. Here are a few things to consider when you weed. First, weed when the soil is moist – you are much more likely to get out the entire root system. That is very important for perennials weeds like dandelions or witch grass because a scrap of their roots will regenerate new weeds.
Annual weeds pull more easily, and it’s less important to get the entire root. They reproduce by seed, and often produce hundreds, even thousands of seeds per plant – and those seeds can stay viable for years. When weeding things loaded with seeds, be careful not to shake off the seeds when you pull the weeds. It means that you can’t shake off all the topsoil that comes out with the roots, but I’d rather avoid dumping seeds into my garden soil- even if I lose some.
I also try to place seed-bearing weeds in a compost pile that I will not use any time soon. In fact, I have compost piles where I dumped problem weeds decades ago. I let it turn into soil and use it for fill dirt– but not in my vegetable garden. After all, I heard that King Tut’s tomb had weed seeds that were still able to germinate, though that may be just a myth.
I am also conscious of erosion when weeding and removing annual plants in the fall. I think it’s better to cut off the stem of big zinnias, for example, than yank them now. That way I am not opening up the soil, making it vulnerable to erosion or providing a nice resting spot for air-borne weed seeds. Many weed seeds are tiny and can blow in from your lazy next-door neighbor’s garden. I can always dig out roots in the spring when I plant something else, and they may decay and add some organic matter to the soil in the meantime.
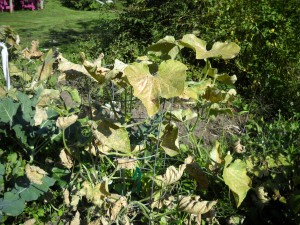
Get rid of diseased leaves
In the vegetable garden it is important to get rid of diseased or insect-infested plants. You shouldn’t put them in the compost, either. Put them on the burn pile if you’ll be burning brush this winter, in the household trash, or in a pile far from the vegetable garden. This will help to minimize the recurrence of problems. That goes for moldy phlox or other flowers that get diseases, too.
If you have an asparagus patch, look to see if your plant are loaded with those little “berries”, their seeds. If you see seeds, cut down the stems before winter. Some of those seeds will settle in and start more asparagus plants, but you really don’t want more plants – they will fight for moisture and minerals just as weeds do. Most asparagus plants sold now are in the “Jersey” series and are all male, so they bloom but do not produce seeds. But one of the 25 plants I put in this year was a female, so take a look at yours now and cut down any with berries. And for best production, get out any weeds this fall.
I like to prepare my vegetable beds in the fall. After weeding them, I re-shape my mounded raised beds and add some compost or aged manure. Then I cover them with chopped fall leaves and grass that I rake up after mowing. This stuff does not blow away as you might imagine – one good rain storm and it settles down for a long winter’s nap.
Fall is a good time to spread some limestone on the lawn, or to your vegetable and flower gardens if your soil pH is acidic. Most things grow best at a relatively neutral pH, say 6.2 to 6.8, but what with acid rain, many of us have soil that is pretty acidic. This is a good time to get a soil test done and make adjustments as needed. It takes time to adjust soil pH, so working on that now will make the soil better next spring.
There is so much to do in the garden, week after week. It’s important not to just throw up your hands and say, “I’m done!” Yes, fall is here. But don’t stop gardening – everything you do now will help make next year’s garden even better.
Henry Homeyer is the author of four gardening books and a new children’s book just out called “Wobar and the Quest for the Magic Calumet”. Check for Wobar in your local bookstore or go online to henryhomeyer.com to learn more about the book.
Garlic
Posted on Wednesday, August 15, 2012 · Leave a Comment
Everything has its season; for me, this is garlic season. In early to mid-August each year I harvest 60-100 garlic plants, each bulb or head with 6 to 8 cloves. I tie them in bundles of 10 and hang them in a cool dry location, whole plants including the tops. A month later I trim off the tops, but I’ve been told that curing them with their tops on allows certain nutrients to flow back into the cloves from the foliage. If you haven’t picked your garlic, you should. If you wait too late the outer skin of the garlic will break down and the garlic will not store as well.
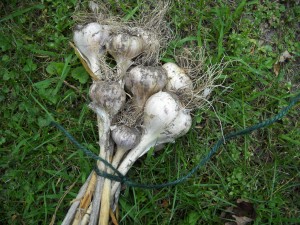
Garlic ready to cure
And what, you might fairly ask, does one do with 100 heads of garlic? For starters, I will save the best 15 heads or more for re-planting. I don’t buy seed garlic, I use my own, year after year. Planting time is not until October, but I select the best garlic and set it aside for planting. That means, over time, that I am developing strains that are best for my soil and climate. Now, after 25 generations of doing so, I grow garlic that is well adapted to my specific conditions.
Then there is pesto. I planted a bed of basil about 4 feet square this spring from plants I started indoors. Recently I cut most of that basil about 8 inches from the soil line and processed it all at once for pesto – the plants will grow new leaves for other uses later. I’ve tried a lot of recipes, and have decided this one, below, is the best. I used pine nuts for it, instead of walnuts or almonds, even though those nuts cost me $22/pound. But 6 batches of pesto only used 3 cups of pine nuts, which translates to about $8 for the nuts. This is a treat, and will last for months if spaced out between meals and not consumed on toast with tomatoes for breakfast, which is what I did the day after making pesto.
Henry’s Pesto Supremo
2 cups basil, well packed down in the measuring cup
1/3 cup pine nuts, roasted
3-6 large cloves of garlic according to your taste
1/3 to ½ cup olive oil
½ cup grated Romano cheese (or Parmesan if you prefer)
salt and pepper to taste
I began by browning the raw pine nuts in a cast iron fry pan at medium heat. The pan had been oiled and then wiped with a paper towel to remove the excess. I find roasting improves the flavor considerably.
Remove basil from stems, wash, spin dry and then pat the leaves dry with a cloth towel. You need enough basil to fill a 2 cup measuring cup with leaves packed down firmly, which is a lot of leaves.
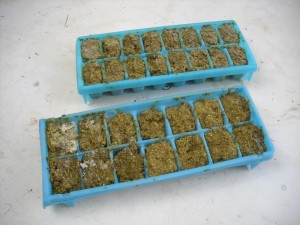
Pesto Frozen in Ice Cube Trays
Place leaves in a food processor and add 1/3 cup of pine nuts and pulse a few times. Mince the garlic in a garlic press, add to blender and then pulse. Add oil slowly with the processor running. Finally add the cheese and pulse a few times. Taste immediately on toast!
Looking for other ideas I called Bill Howard, Executive chef at Three Tomatoes Trattoria (my favorite Italian restaurant) which is located in downtown Lebanon. He started by reminding me that different strains of garlic have different flavors, some with lots of “bite”, others quite mild.
Bill likes a mild strain called “Music.” He roasts it in a 350 degree oven for an hour or so, caramelizing the sugars in it and making it suitable for spreading on toast. I’ve done this in the past by putting whole heads of garlic (skins on) in a small, oven-safe baking dish with a little olive oil. When the garlic is roasted I let it cool, take scissors to snip off the tops, and then squeeze out the soft inner mush onto toasted bread. Sometimes I first lather the toast with a soft goat cheese and then spread the roasted garlic and top with a slice of fresh tomato. Oh boy!
Bill Howard also told me that sometimes when using garlic that has a lot of bite he slices it, and then poaches it in milk, which mellows it out. That seems truly bizarre to me, but I’ve never eaten one of his dishes I didn’t like. Not only does he use the garlic, he makes a garlic-infused béchamel (white sauce) sauce using the milk, butter and flour.
Garlic keeps best in a cool location with low humidity. I keep garlic on an “orchard rack” in the mudroom, a place that stays cool. I got the rack a few years ago from Gardeners Supply (www.gardeners.com) and use it for winter squash and onions, too. It is made from hardwood slats, so there is good air circulation. If you just have a few heads of garlic I suppose you could keep it in a basket in the kitchen, or perhaps in the fridge.
Garlic is believed to cure or prevent all manner of ailments. I learned from herbalist Nancy Phillips (author of The Village Herbalist) that one should mince or chop garlic and then let it sit for 10 minutes before cooking with it. She says this allows certain anti-cancer compounds to develop full potency before use. I have been doing it for years – it can’t hurt.
I do know that garlic adds great flavor to almost any dish. And who knows, I might poach some in milk and use the milk on my cereal. That would be an interesting way to start the day!
Henry Homeyer’s new children’s book will be available in September. Look for Wobar and the Quest for the Magic Calumet from Bunker Hill Publishing.
Filed under Article, Uncategorized · Tagged with best pesto recipe, Chef Bill Howard, freezing pesto, garlic, growing garlic, growing great garlic, Henry Homeyer, nancy philips, the village herbalist, Three Tomatoes Restaurant
What to do in Hot, Dry Weather
Posted on Wednesday, July 25, 2012 · Leave a Comment
We New Englanders are pretty lucky. Much of the country is saddled with a hot dry spell reminiscent of the dust bowl era of the 1930’s. I’ve seen pictures in the paper of wizened corn and unhappy farmers scratching their heads and looking up at a cloudless, unforgiving sky. We’ve had more than our fair share of hot days – in the high nineties, even – but so far I’ve had at least a thunderstorm once a week. Each week vegetables (and many flowers) need one inch of water –either from the sky, or from your watering can – but we don’t always get that.
Recently I went to water the garden of a friend who was away for a week. The soil was as dry as powder. She had planted pole beans before she left, and they should have sprouted, but had not. I watered the bean plot, but water from the hose wouldn’t penetrate the soil. It just ran off. So I scratched the surface to loosen up the crust on top, and re-watered a few times using a watering can, giving it a slow sprinkle. Finally it worked: when I poked a finger into the soil it was dark and moist for at least 2 inches. Then I spread a light layer of straw over the soil to shade it.
Imagine yourself marooned on a desert island. No shade? You bake. Add a palm tree or two, and you survive nicely. Same for your lettuce and tomatoes. The plants love the sun, but their roots need some shade in hot, dry times.
In the vegetable garden I favor a layer of newspapers – 4 to 6 sheets thick – covered with straw, hay or leaves. I keep the newspapers away a little from the stem of each plant, as I want moisture from light rains to reach the soil. Straw comes from grain crops that have been threshed, so it is not supposed to have seeds (though it always has a few). Mulch hay always has seeds; it is grass grown for fodder for cows and sometimes it gets spoiled as feed (by rain) and sold cheaply to gardeners. The price difference is considerable – $3 for hay versus $10 or more for straw, so I generally use hay. The newspapers help to keep seeds out of the soil.
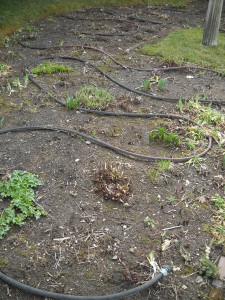
Soaker hose in flower garden in fall after clean up
What kind of watering device is best? I’ve tried plenty of them, most recently soaker hoses. Soaker hoses are designed to leak. They are a rubber-like substance that is somewhat porous. They ooze water their entire length, and that water spreads out for about 6 inches around each hose. I installed a pressure regulator and a filter to keep particles from the water source (a pond) from clogging the pores of the soaker hose. Still, some rows – or sections of a row- got more water than others – and not in a predictable way. So some plants got little or no water, some got too much; a few rows had perfectly even distribution.
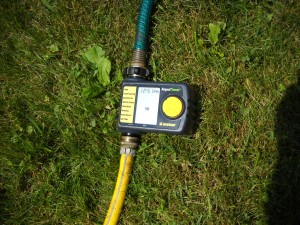
I also installed a timer, which allowed my client to go away and know her beets or tomatoes were being watered in her absence. Timers work, but get the simplest kind possible. I have installed some that you have to program, and find those can be aggravating. I like a simple one that comes on every day at the same time, but allows you to set how long the hose will run. Test it well – before you go on vacation.
While working as a WWOOFer on a willow farm in France a few years ago I set up an emitter watering system; it worked a lot better than the soaker hoses. (WWOOF stands for Willing Workers on Organic Farms; see www.WWOOF.org for details). The system ran three quarter-inch plastic feeder lines down the rows of plants. I used a special tool to punch holes in the feeder line and inserted barbed connectors that attached to quarter-inch lines. Each small line went to an emitter that delivered a measured amount of water per hour, depending on plant needs. Some emitters just oozed water, other types sent out a spray to cover 2 square feet or so.
 One nice thing about an emitter system is that you don’t end up watering the weeds: if you put an emitter at each tomato plant, for example, the space between plants is not watered the way it is with a soaker hose. And you can see (and replace) an emitter that gets clogged and does not deliver water. I can’t figure out why most garden centers on the East coast don’t sell these systems –every hardware store in California does.
Lawns in August can look pretty brown if a watering ban is put in place – especially if you only use chemicals on your lawn. Lawns that are given compost every year and have biologically active soil seem to do much better at staying green in dry times. It also helps to keep the grass longer in August – taller grass helps to shade the soil, like those palm trees mentioned above.
We’re all largely dependent on the heavens to provide our lawns and gardens with rain. But if we treat our soil well and provide plenty of organic matter, everything does better in times of stress – including the gardener.
Henry Homeyer is a garden designer and the author of 4 gardening books. His Web site is www.Gardening-guy.com.
Mid-Summer in the Vegetable Garden
Posted on Wednesday, July 18, 2012 · Leave a Comment
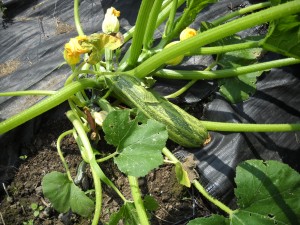
Romanesco Zucchini
Summer squash of all sorts are ripening up nicely, so I know it’s mid-summer in the vegetable garden. Soon gardeners will be dropping off bags of squash in unlocked cars, on porches, and, occasionally, on seats of buses and in public libraries. When you’re not distributing the booty in creative ways, here are some suggestions for tasks in your vegetable garden now.
If you see lower leaves of tomato plants browning up, snip them off with a sharp pair of scissors and dispose of them in your trash, not the compost. It’s a good year for tomatoes, so far. No late blight, not much early blight for most of us. On a recent tour of my 32 tomato plants, I only found a few that had any discolored leaves at all. This may be due to the fact that when I installed tomato cages in June, I cut off lower leaves that might touch the ground. Most leaf diseases are soil-borne and spread by splash-up. So removing lower leaves, even now, is a good practice. Mulching with leaves, straw, hay, pine needles or grass clippings helps prevent disease, too.
I’m eating edible-pod peas and freezing some for the winter. I blanch them briefly – about 60 seconds- and drop them into cold water before patting them dry on cotton towels, and then freezing them in zipper bags. Once the crop is finished I’ll have a nice 10-foot section of wide raised garden bed for planting late season veggies. Here are some possibilities of ways to use that bed:
1. Fall radishes. I buy seeds for one called ‘Red Meat’ in the Johnny’s Seeds catalog that I love. It only works if you plant it in mid-to late-summer. It is very mild, and pretty on a plate. Pink centers are surrounded with a band of white, then green – just like a watermelon. It is tasty even if grown 3 to 4 inches in diameter. I serve it with a vinaigrette sauce. At the Cornish General Store I found seeds by Agway for a fall radish called Chinese White Winter; the packet says to plant after August 15. It grows to 5 inches long or more, stores well, and is mild. I shall try it.
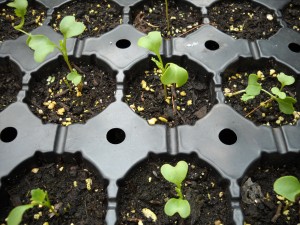
Broccoli Starts
2. Late season broccoli. Start some by seed now in cell packs, transplant into the garden when they are 2-3 inches tall. You’ll have full sized heads in 55-65 days. Or buy seedlings now if you can find them. Broccoli produces well into the fall as it is very frost hardy.
3. Bush Beans. I have 2 plantings already, but I could do a third planting for the freezer. ‘Provider’, a reliable variety, takes just 50 days from planting to harvest, and will produce for 3 weeks or more. If you plant today, you should be able to harvest plenty before frost.
4. Lettuce. Fall lettuce is crisp and tasty. Plant directly in the soil, or if you have no space now, plant in cell-packs, and plant when you have space.
Other tasks now? Scratch in a little rock powder or wood ashes around pepper plants. Peppers produce late in the summer, and can be stimulated to be more fruitful, sooner, with a dose of rock powder now – a quarter cup per plant. For more information on rock powders, see my latest book (Organic Gardening (not just) in the Northeast: A Hands-On, Month-by-Month Guide), which should be available at your local library or bookstore. Azomite is the name of one commercially available rock powder.
Your asparagus patch should not be ignored, just because the season is over. Make sure grasses and weeds don’t take over the bed, and water weekly in dry times. I mulched mine with ground branches I got from a local arborist. The chips keep down weeds and hold in moisture.
Make pesto. Basil is more productive if you keep picking leaves or even cutting off the top third of the plant. There is only so much basil you can put in a salad or on a sandwich, so make some pesto and freeze it for the winter when we all crave green things from the garden. The basic recipe contains basil, garlic (lots), parmesan cheese, olive oil and pine nuts. In recent years, pine nut prices have peaked over $20/pound, so I have been using walnuts or hazel nuts, both of which taste just fine.
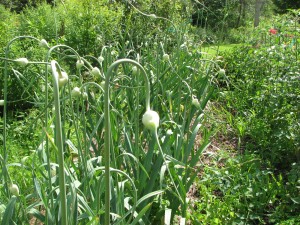
Garlic Scapes
My garlic is getting mature earlier than usual this year. When the tops, called scapes, curl around in loops it is time to harvest those scapes and use in stir fries. Chop and sauté in olive oil to add to other vegetable dishes. The heads, or bulbs, will continue getting bigger for a few more weeks- but I have already nabbed a couple to use now. When you do harvest your garlic, it is best to let it cure for a couple of weeks in a shady, breezy location before you cut off the tops.
It’s easy to get lackadaisical in the heat of the summer, but weeding is still important if you want your best production. It is also important to keep weed seeds out of the soil to minimize your work next year. So keep weeding, but at the end of the day settle into an Adirondack chair near the garden and admire your handiwork as the sun goes down.
Henry Homeyer is a garden consultant, teacher, coach and the author of 4 gardening books. His web site is www.Gardening-Guy.com.
Mid-summer in the Flower Garden
Posted on Wednesday, July 11, 2012 · Leave a Comment
I love George Gershwin’s Porgy and Bess, particularly that song about summertime, when the living is allegedly easy. Fish are jumpin’ and the cotton is high, and all that. Well, it’s mid-summer and the gardening is just as busy as ever, the weeds are high and who has time for fishing? But I’m not complaining. I love the garden and the weeds give me an excuse to avoid cleaning the basement. Here are some of the mid-summer tasks I’ve been working on.
Watering: Pots and planters need daily attention. I poke a finger in pots to verify that the soil mix is still lightly moist. I bought a hanging basket full of supertunias at a fundraiser, and it needs watering every day. The basket is filled with a peat-based potting mix, which loses moisture fast. So the leaves shrivel and it looks awful by the end of the day unless I water daily. I give it some liquid fish fertilizer a couple of times a week, as the potting mix is devoid of much in the way of minerals.
New plantings in the ground that are still establishing themselves also need water every day or two, depending on the weather. But mature flowers rarely need watering if they are planted in the right place. I only water if they go limp.
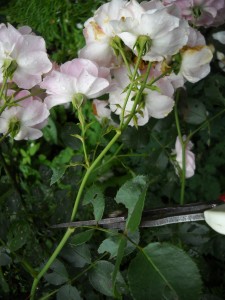
Deadheading roses
Cutting back, pruning. Now is the time to cut off spent flowers. This has been a splendid year for roses, perhaps to compensate for the poor lilac show. Some roses re-bloom, some do not, but cleaning off the dead flowers will improve the looks of the plant. Cut back not just the dead blossom, but all the way back to the next stem that has 5 leaves.
Other plants such as peonies will look better if you cut off the spent flowers, and some (such as and perennial bachelor buttons) will re-bloom. Cut off the flowers and stems of delphinium right to the ground after blooming is done, scratch in some fertilizer, and you should get another stem with blossoms in the fall.
Spring and early-summer blooming shrubs need to have their blossoms cut off now. I recently have worked on forsythia, common ninebark, lilac and spirea. If you cut these back in the fall, you will lose blossoms. Forsythia and ninebark can really grow fast, up to 3 to 4 feet in a season if you let them go at their natural pace, so cut them back before they are totally unmanageable.
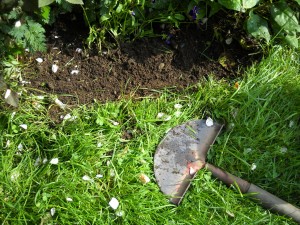
After edging
Weeding. Weeds, those sneaky rascals, get discouraged if you keep pulling them out. But left alone now, midsummer? They grow like crazy. Grasses are trying to sneak in to the garden, too. Keep the grasses at bay by digging a trench at the edge of the lawn. Use a shovel or an edging tool to dig a 4-inch deep, V-shaped trench between the lawn and garden beds. Grasses grow to the edge of the trench and don’t know if it is the Grand Canyon or something smaller, so they stay back.
If you see weeds blooming, stop whatever you are doing and pull the weeds. Or, as the Red Queen would say, “Off with their heads!’Snip off the weed flowers before they can set seeds and sprinkle them into your soil. Then deal with the weed when you have time. Don’t throw weeds with flowers into the compost. Some (most?) can morph from flower to seed even after being pulled, and those weed seeds in the compost can come back to trouble you later.
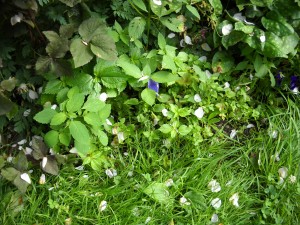
Weeding before edging
Use a good weeding tool when you weed, so that you can get all (or most of) the roots of weeds and grasses. You probably know that my favorite is the CobraHead weeder (www.CobraHead.com). I like the fact that it is so easy to get its single tine under a weed, loosening the soil so that when I tug the weed, it comes out, roots and all.
Mulching. Mulching really reduces weed problems if you weed carefully, and then apply mulch. What to use for mulch? That depends on your budget and your aesthetic sense. Most gardeners use bark mulch of some sort, though many use “color enhanced” wood-based mulch. Not me. I am skeptical of what companies use to enhance the color of their mulch, so I only buy natural, organic mulch.
I also like to use chopped leaves as mulch. Leaves are fantastic sources of organic matter and nutrients that microorganisms can break down and share with our plants. Pine needles, too, are excellent mulch. I know that many gardeners think that pine needles are too acidic to use, but I have never had a problem with them.
Last but not least, this is the time to plant some new daylilies. These are workhorses in the garden. Bugs don’t eat them and they don’t get mildew or blight. They come in different colors, blossom shape, and bloom time. Go to a family-owned garden center or nursery to see what’s in bloom. You just might be amazed.
Henry Homeyer can be reached at P. O. Box 364, Cornish Flat, NH 037476 or by e-mail him at henry.homeyer@comcast.net. His Web site is www.Gardening-Guy.com; you can find his past articles there (including the one you missed because someone wrapped up the fish remains in it).
Filed under Article · Tagged with deadheading roses, edging, fish fertilizer, Henry Homeyer, mid-summer garden tasks, mulching plants, peat moss, porgie and bess, pruning roses, watering flowers, weeding, when to plant daylilies
Saving Money in the Flower Garden
Posted on Wednesday, July 4, 2012 · Leave a Comment
My house sits on a couple of acres, most of which is growing something. There is a big vegetable garden, some trees, berry bushes and decorative shrubs, a little lawn and lots of flowers. I could spend a fortune, I suppose, if I bought flowers for every square foot of flowerbed that I have. Over the years, however, I have learned how to transplant small plants that started on their own from seed – “volunteers” – and how to divide existing perennials.
Let’s start with the volunteer plants. The first thing one must do is learn to recognize the young seedlings – and not pull them as weeds. I do this mainly by the color and texture of the leaves, but shape is important, too. And of course, you can’t use bark mulch in the flower beds if you want volunteers. I grow perennials close together so that they shade out weeds, and try to pull any weeds that do grow before the go to seed.
Twenty years ago a neighbor pulled up in front of my house and handed me a cardboard box with 8 candelabra primroses (Primula japonica). I accepted them with pleasure, and went directly to a good reference book to find out what they needed: rich soil, light shade, consistent moisture. I had those conditions under a small grove of wild apple trees, and planted them there.
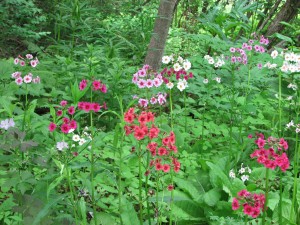
Primula japonica
Now I have hundreds of candelabra primroses and many other kinds. Once I realized that one primrose would grow there, I tried other species, and all but one (P. vialii) have done well there – and spread. Most spread by seed, and one (P. kisona) by root, like a groundcover. I regularly dig primroses and move them or give them to friends.
Giving excess plants to friends, especially lesser known varieties, is a great way to save money. I find that if you give a person a nice clump of flowers, you are most certainly going to go home with 2 or 3 new plants for your own garden.
Dividing plants is easy, once you get the hang of it. But you have to know what kind of root each perennial has, and that generally means some experimentation. The only book I have found that describes dividing for most common perennials is The Well-Tended Perennial Garden: Planting & Pruning Techniques by Tracy DiSabato-Aust. That’s a book that should be in every gardener’s library because it tells you how to prune, deadhead, get to re-bloom, divide and more. It’s in hardback at $34.95 (Timber Press, 2006) and worth every penny.
It is best to divide most perennials in the spring when the foliage is just 3-6 inches tall. Tough characters like hostas and daylilies can be done anytime, though preferably on a cool cloudy day if doing so now. I recently divided a few hostas and took off a section from a large bugbane or snakeroot (Cimicifuga ramosa), and none showed signs of stress.
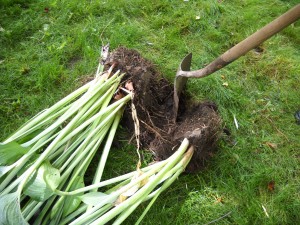
Dividing hostas
You can cut out a section of a large hosta or daylily by cutting out a wedge with a spade or even a long knife. I sometimes use a serrated root knife I got from Lee Valley Tools. Tracy DiSabato-Aust prefers a non-serrated knife, so I guess either will work just fine. Get down on your hands and knees and try to see natural division points before you cut.
Alternatively, you can dig up a plant, place it on the ground and then use 2 spading forks to separate it. Just insert them into the middle of the clump, back-to-back, and work the forks back and forth. It’s a lot of work for a big clump of daylilies. I prefer just to cut up a clump with a sharp spade. The spade lets me stand on it with all my weight to slice through the tough roots. I once divided a 4-foot wide clump of Joe Pye weed (Eupatorium maculatum) and ended up using a pick ax to whack it apart. Not a pretty sight, but I was determined to remove and divide it.
Groundcovers send out roots and can be divided anytime. Just dig up a plant, sever the root from the mother plant, and move it to a new location. Easy.
Some plants have fleshy taproots that are easily broken, and these are not good candidates for division. Peonies, Oriental poppies, bleeding heart and pink mallow fit in that category. They should be divided in the fall –though little seedlings move easily, spring or fall. Siberian iris should be divided in fall.
Some plants go downhill and become less vigorous if they are not divided on a regular basis. Have you lost a nice Shasta daisy? If so, please try again – but divide it every 3 years. That allows you to add compost and slow-release organic fertilizer to the soil, which rejuvenates the plants.
The easiest, least expensive method for getting more flowers is just to save seeds and plant them. I plant when the seeds are ripe, just scratching them in where I want more plants next year. I do this with Jack-in-the-pulpit, annual poppies, foxgloves and rose campion, and they generally reward me handsomely.
So don’t spend a fortune. Divide, trade with friends, start things by seed. In no time you’ll have all the plants you need – even if not all the plants you want.
Henry Homeyer is the author of 4 gardening books. His Web site is www.Gardening-Guy.com.
Berries
Posted on Monday, June 25, 2012 · Leave a Comment
By now my vegetable gardens is all planted, annual flowers are in, the weeds are pretty much under control. Time to relax and smell the roses? Well, maybe not. There are always tasks for the gardener. This is a good time to plant some berry bushes.
The first thing to do, if you want a good berry patch, is to test the soil to find out if you need to add specific nutrients. Go to your university extension Web site, or Google “soil testing”. You should be able to download a form and get instructions on how to collect a soil sample, and where to send it. All berry patches will also need some added organic matter such as compost, aged manure, or leaf mold.
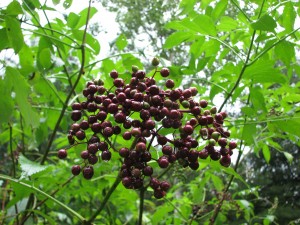
Elderberries
Competition from weeds is an important issue for berries. You can’t just use a rototiller to chew up a patch of field or lawn to plant your berries. You really need to dig out the sod – or smother it this year to plant next year. A layer of 4-mil black plastic spread out over a lawn that has been cut short will kill the grass, roots and all, by the end of the summer. Landscape fabric will do the same, but is more expensive. Next spring the dead grass will add organic matter when you mix it in.
If you want to plant this year you have two choices: dig out the sod by hand, or rent a sod lifter – I reject the idea of using chemicals to nuke the grass. The sod lifter is powered by a gas engine; it sends a blade under the sod and along the edges to slice it loose. You still have to pick up the sod and lug it away. And you can’t roll it up like a rug – it’s too heavy. I slice the long strip of sod into 1- or 2-foot sections. Or, for small areas, you can just use a shovel to slice sod into one foot squares to pry out by hand, which is very labor intensive. Ugh.
All berries like sunshine. Six hours per day is the minimum for a good crop. More is always better. Berries do not like root competition, so keep your berry patch away from trees. I planted a rose recently that was more than 50 feet from a Norway maple, and found the soil full of tree roots coming from the maple. So pick a site far from trees if possible.
Raspberries are a great choice for the home gardener: they are expensive at the store and do not keep well. Better to grow your own and eat some every day in season. What are the best varieties? I asked Alicia Jenks, the owner of Green Dragon Farm, a pick-your-own blueberry and raspberry farm in Weathersfield, Vermont. She suggested getting ‘Prelude’ or ‘Killarney’ for an early crop. Then ‘Encore’ or ‘Latham’ for mid-season berries and ‘Heritage’ for late-season berries.
Alicia Jenks suggested planting raspberries 3 feet apart in a staggered double row in a 5 or 6-foot wide bed. Add plenty of compost to the soil and work it in well – a 4-inch layer is a good. She adds Pro-Gro, an organic, slow-release fertilizer to the soil at planting time in each hole. Although you can buy bare root plants early in the spring, most sellers of them are sold out by now. Potted bushes are still readily available at garden centers.
Blueberries are another good choice for every home gardener. The soil requirements for blueberries are very different than for raspberries, however. Paul Franklin of Riverview Farm, a pick-your-own apple, pumpkin
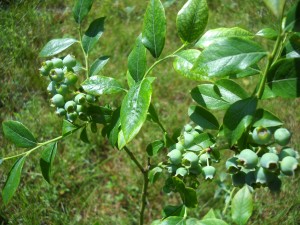
Blueberries
and berry farm in Plainfield, NH, told me that there are just three important things to get right in order to have a good crop: proper pH, proper pH and proper pH. He went on to explain that the soil must be very acidic in order to get a good crop – in the range of 4.0 to 5.5. So get your soil tested and add a soil acidifier such as elemental sulfur to get the soil pH right. Pro-Holly or Holly-Tone (organic acidic fertilizers) are good for blueberries, too, and can be added around existing bushes now.
Blueberries should be spaced about 5 feet apart in rows that are far enough apart to allow mowing. Most commercial growers mulch with woodchips to keep down weeds. The roots grow close to the surface, so you can’t dig out weeds willy-nilly – you may damage roots. So get grasses and weeds out in a 5-foot circle before you plant, and mulch well to keep them out. Weeds will steal the water and nutrients your blueberries need.

Elderberries
Elderberries are an easy crop if you have a moist location on your property. I grow 3 varieties on the bank of a little stream, and they do well. Pollination is better if you have 2 or more different varieties. The white, fragrant flowers form big clusters at the top of the bushes and are decorative right now. In the late summer I harvest elderberries by sniping off clusters of berries; later, in the house, I pull the berries off their stems and freeze them. I like to sprinkle them on hot oatmeal in winter and I also make an elderberry syrup to ward off colds.
So go plant some berries, or more berries, or different kinds of berries. You’ll be glad you did.
Henry Homeyer is a gardening consultant and Master Gardener living in Cornish Flat, NH. Contact him at henry.homeyer@comcast.net. His Web site is www.Gardening-Guy.com.
Gardening in the Rain
Posted on Wednesday, June 20, 2012 · Leave a Comment
I’ve always preferred sunny days, both as a boy and now, as a quasi-geezer. I remember reciting this ditty as a small boy, “Rain, rain, go away, come back some other day!” And it did, eventually – but usually not as quickly as I wanted. Now as a gardener I appreciate the rain for what it does for my plants, but I still think to myself, after a few hours of rain, “Rain, rain, go away …”
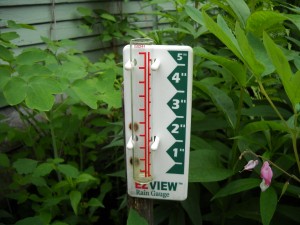
Rain Gauge
If you don’t have a rain gauge, you should. It doesn’t have to be one of those fancy electronic ones that sends signals to you from outdoors. A simple $5 device that consists of a cylinder with marks on the side to show each quarter inch of rain is just fine. And, if you really want to be frugal, an empty cat food or tuna can will work. Most of our plants need an inch of rain – or water from your hose – each week.
Plants are generally the most susceptible to death by dehydration right after planting. Their roots have been disturbed and frequently delicate root tips have been broken off. A hot, dry day can wreak havoc on a newly planted seedling. If your plants are growing in potting mix, it is best to submerse the plants in a bucket of water before nestling them into their growing holes. Hold the plants under the water until they stop bubbling. It can be hard to saturate a large root ball by top watering.
Rainy days are much better than sunny days for transplanting. You can minimize shock by preparing the new hole before you dig up the plant so that it can go right to its new home. My grandfather liked to say that you should move enough soil with a transplant that “it will remember where it came from.” Modern soil scientists would probably agree, saying that the soil microbes you move with a plant are important to its future health. After moving a plant, create a ring of soil around your transplant to hold water. Then, using a watering can, gently fill the ring and let water seep in. Repeat several times.
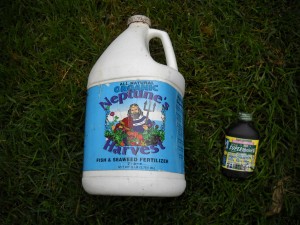
Soil Additive - Fish Fertilizer & SUPERthrive
I add two solutions to my watering can that help to minimize transplant shock. The first is called SUPERthrive. It comes in a little 4oz container but it only takes a quarter of a teaspoon of the solution for a gallon of water to treat plants against transplant shock. It contains vitamins and minerals; in my experience it reduces transplant shock and helps stressed plants (like those 6-packs of annuals I forgot to water on a hot day).
The other solution I use is a liquid fish and seaweed fertilizer. Neptune’s Harvest makes a very nice product, though there are plenty of others. The fish “juice” gives new plants nitrogen, phosphorous, potassium and trace minerals at a time when they need a quick burst of soluble fertilizer.
But back to those rainy days: if you don’t mind working a warm rain, go outside and weed. Weeds pull much more easily when the soil is wet. But avoid a lot of digging in wet soil. I like my CobraHead weeder (www.CobraHead.com), in part, because it is a low-impact tool. I can use its single tine to stir up the soil enough to plant a small lettuce plant or make a furrow for carrot seeds without making a big mess of the soil on a rainy day.
I never walk on beds when they are wet. Wet soil compacts easily, especially soils with a high clay content. Clay that is compacted and then allowed to dry out can be as hard as concrete. And don’t even think of rototilling wet soil. You can ruin the soil texture by doing so.
Most of us have plants in pots on the front stoop or on the deck. Be attentive to them when it rains. If they have drainage holes (as they should), they will collect water in their saucers below. Roots can rot if left sitting in water for days on end. So remove the plants from their saucers in a deluge, or shortly thereafter. If you notice that the runoff is brown, you are probably losing good nutrients. Pour that water in a bucket to use on a dry day to water your plants.
Want an indoor planting project on a rainy day? Get out your potting soil and a few leftover 6-packs from spring planting. Plant some lettuce seeds in those 6-packs for use in the garden once they get to be an inch or two tall. I find that starting lettuce in 6-packs and growing them on the deck is better than direct seeding in the garden – no weeds, and they are easier to monitor for water. I try to remember to plant lettuce every 2 weeks for a good supply all summer. And you can start fall broccoli by seed in mid-July- so mark your calendar today, and do so on a rainy day.
There are times in early summer when I get bone tired from doing so much gardening, day after day. I can’t seem to get it through my thick skull that I’m not a kid anymore. So a rainy day is a good thing. It usually forces me slow down a little. And my plants love them – in moderation.
Henry Homeyer is a life-long organic gardener, a UNH Extension Master Gardener, and a gardening coach. Contact him at henry.homeyer@comcast.net or P.O. Box 364, Cornish Flat, NH 03746.
Attention Lazy Gardeners: Asparagus is a (Nearly) Free Ride
Posted on Wednesday, May 30, 2012 · Leave a Comment
As I am sure you know, once upon a time there were three little pigs. One built his house of bricks, one of sticks, and the lazy one built a house of straw. I forget the details, but I think the lazy one got eaten by the wolf – a moral for all kids and gardeners. Work hard, survive. But one exception to that rule is the asparagus patch. Each year you can have delicious food relatively work-free.
Okay, I exaggerate. There is considerable work in starting an asparagus patch, and a certain amount of work in keeping it weed-free. But it should come back reliably, year after year. So plant it well and keep it mulched to hold down weeds, and you can garner rewards year after year.
Twenty-five plants is a reasonable number of plants for a family of four, or for two people with my appetite for those sumptuous green spears. Asparagus needs rich soil with lots of nutrients, so have a good supply of compost or aged manure and some slow release organic fertilizer at planting time.
Get a soil test done before you plant, or get at least get a kit that will tell you the pH. Asparagus does best with a near neutral pH, in the range of 6.5 to 7.5. If your pH is less than 6.5 you will need to add limestone to “sweeten” the soil. The test kit will tell you how much limestone you need.
Before planting, dig out all weeds and especially grasses. Rototilling does not kill weeds and grasses, it just hides them. And they will come back to plague you for years. So weed well.
Because asparagus lasts for many years, it is important to enrich the soil more than you would for annual veggies like tomatoes or lettuce. In the old days –back when I was a kid – asparagus beds were dug deep, and manure was worked into the soil down to a depth of 18 inches. Asparagus roots were planted in a trench with the crown (where the roots originate) planted a foot deep and 18 inches apart.
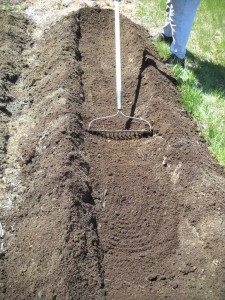
Preparing Asparagus bed
Current thinking is that asparagus still needs good loose soil, but that the crown only need be planted 6 inches below the soil line. Using a hoe or shovel, create a trench 9 to 12 inches deep and 12 to 18 inches wide. Then loosen the soil in the bottom of the trench with a spading fork. Space rows 2 feet or more apart.
Plan on working in 4-6 inches of aged compost into the soil down at the depth where the roots will be, and in the soil you will use for backfilling the trench. Don’t skimp, even if you have good soil. Work the compost in with a spading fork or shovel. A rototiller would also do the job, but can adversely affect soil tilth or texture if done when the soil is too moist. And rototilling disturbs microorganisms and earthworms in the soil.
I also like to broadcast a generous dose of Pro-Gro or other slow-release organic fertilizer everywhere in the planting trench and mix it in. A quart yogurt container of organic fertilizer is fine for a dozen plants. Azomite, a mineral mix that provides micronutrients is a good additive, too. Green sand is an organic source of potassium and micronutrients from the sea. All of the above should be available at your local feed-and-grain store or garden center.
Asparagus roots are now sold that are all male – generally anything that has the word ‘Jersey’ in the name is all male (Is New Jersey a macho state?). ‘Martha Washington’ is the classic asparagus variety, but it has male and female plants, so they produce seeds – and little seedlings. This is not good. You don’t want extra seedlings growing in your patch, as they will compete with your plants for water and nutrients, just like weeds. Of course, you can pull the seedlings growing under Martha, and re-plant them elsewhere, but that sounds like work to me.
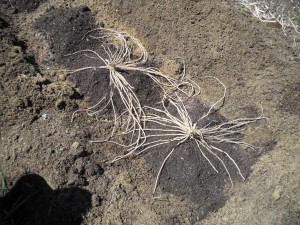
Asparagus planting
In the bottom of your trench build mounds of soil/compost mix. Drape the roots over the mounds with the crown sitting on top the mound. If the roots are longer than your trench is wide, swirl the roots around the mound a little. Then gently backfill your trench (or hole, if you did individual holes instead of a trench). Just an inch or two of soil is all that is required at the start. As the season progresses and the sprouts grow, add more soil/compost mix. By the end of the summer your plants should have 6 inches of soil over the crown.
A few recommendations: Have patience. Don’t pick any spears this year. Next year, just take one or two stalks per plant. Each year, take more – but never pick for more than 4 weeks. Taking too many spears will draw down their reserves and weaken the plants.
Keeping your asparagus patch well-weeded is important. Wood sides to an asparagus bed can help keep out creeping grasses, or you can dig a little moat around the bed to keep grasses from creeping in. Mulching with 6 pages of newspaper and 4 inches of straw will help keep down weeds and will hold in moisture.
Even if you are the quintessential third pig when it comes to gardening, don’t be lazy when planting asparagus. A little extra work now getting out weeds and working in healthy soil additives will pay you back many times over. Bon Appétit!
Henry Homeyer is a gardening consultant and author living in Cornish Flat, NH. His Web site is www.Gardening-guy.com.
 One nice thing about an emitter system is that you don’t end up watering the weeds: if you put an emitter at each tomato plant, for example, the space between plants is not watered the way it is with a soaker hose. And you can see (and replace) an emitter that gets clogged and does not deliver water. I can’t figure out why most garden centers on the East coast don’t sell these systems –every hardware store in California does.


