This Is a Good Time to Do Soil Testing and Soil Improvement
Posted on Tuesday, March 22, 2022 · Leave a Comment
This is a good time to beat the rush and get your soil tested so that you can improve your soil before you begin planting.

A simple pH test kit costs under $10 and do fine
Most New England states have soil testing labs available to gardeners. Finding one is as simple as searching for “Soil testing lab near me” in your browser. Your first choice should probably be one run by the state university Extension Service. Most offer a variety of options as to what is tested, and their websites will explain your options, what each costs, and how to collect a sample. Most tests require one or two cups of air-dried soil free of roots and rocks.
Most State labs are very busy in spring, and a 14 to 21 day wait is typical. If you are in a rush to get your soil test results, you might try Logan Labs, a commercial lab in Ohio. They can usually e-mail test results in a few days and also have a soil scientist available to talk to you (for a fee) to make recommendations.
Unless you live where there are natural limestone or marble deposits – parts of Vermont, for example – your soil is probably acidic. Why? Coal fired power plants send sulfur into the air, and it reacts with water to form sulfuric acid that is dropped by the rain. Most plants do best with a soil pH between 6.0 and 6.8. A pH of 7.0 is neutral, and above that is alkaline. Soils rich in organic matter and microorganisms tend to buffer the soil pH, making it less acidic.

Organic fertilizers generally are slow-release fertilizers
Soils are composed of three things, basically: ground up rock is about 45%, air is about 50% and organic matter about 5%. The particle size of the rock component is what determines soil texture: big particles are in sand, medium particles in silt, and very fine particles make up clay. A good soil has particles of all 3 sizes, but is mostly silt.
You can see what is in your soil by filling a quart jar half full of water, and adding a couple of cups of soil, and then shaking it well. Sand will drop to the bottom pretty much immediately, and silt will drop next. Finally, after 24 hours or so, your clay will form a layer. Each will probably be a different color, and quite obvious. Organic matter often floats on the surface, but generally mixes with the silt layer.
Clay holds onto soil minerals and moisture the best, but it can stay soggy and also get compacted. Sand particles are not electrically charged, so they don’t hold onto minerals like clay or silty soils – but the sand helps with drainage. You can get a feel for your soil by rubbing it between your thumb and a finger after wetting it. Clay soil is sticky. You can feel the grains in a sandy soil.
If your soil has a pH of 6.0 or less, you should add some garden lime or wood ashes to “sweeten it”. If you get a soil test, it should tell you how many pounds of lime to add as expressed in pounds per 100 square feet – a 10 ft. by 10ft. area. I weighed a quart of garden lime in a yogurt container and it weighs a little over 3 pounds. Wood ashes are about equivalent in what they do. But this isn’t rocket science – you don’t have to be precise.
Lime is ground limestone, and is sold in bags at the garden center. It comes as powdered lime or pelletized lime, which is less messy. If you buy powdered lime, wear a mask when spreading it so you don’t inhale it.
All fertilizers add nitrogen (N), phosphorous (P) and potassium (K). The amount of each is expressed as a number that is the percentage of the active ingredient by weight. A 10-10-10 fertilizer has 10 % of each, and 70% filler. The minerals in chemical fertilizers are in the form of salts, and using too much can damage roots. The salts in chemical fertilizer are water soluble and can be dissolved and washed away in heavy rains.
Organic fertilizers, on the other hand, are made from natural ingredients and minerals from ground rocks. My favorite organic fertilizer, Pro-Gro, is made in Vermont and has things such as peanut meal, cotton seed meal, ground oyster shells, feather meal, crab meal, dried blood (for nitrogen) and rock phosphate. I like to compare it to a 7-course meal for plants.

Add fertilizer and compost to hole and stir in before planting scaled
The ingredients of an organic fertilizer mostly need to be digested by microorganisms found in the soil, and then shared with green plants. They are gentler, and slow to release their goodies. The mineral content of Pro-Gro is listed as 5-3-4, which is lower than most chemical fertilizer, but offers all those micronutrients not found in chemical fertilizers.
Of course you can go the old fashioned way and add animal manures to improve your soil. They work, but some may also introduce weed seeds. I don’t recommend using fresh horse or cow manure because of that, but manure that is a year or two old has fewer seeds. Rabbit, sheep and goat manure has fewer weed seeds, and they add plenty of organic matter that helps with texture and tilth.
If you add compost to your garden and work it in, it will become more biologically active – full of beneficial microorganisms. It will drain much better, but hold moisture better, too.
Having good soil is one of the keys to being a good gardener. Perhaps testing and improving your soil will help you to have that elusive green thumb. It’s worth trying.
March Is a Good Time for Pruning – and More!
Posted on Tuesday, March 15, 2022 · Leave a Comment
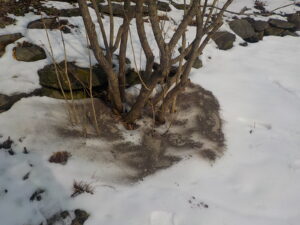
Wood ash can be sprinkled right on the snow or soil
Traditionally farmers pruned their fruit trees and put wood ashes around their lilacs in March. And although this is a good time for both, you can do either earlier or later. I believe that because farmers couldn’t plant or work the soil in March, they did other tasks to fill up their days – such as pruning.
If you plan on pruning now, please be aware of the danger of compacting the soil. Compacted soil has few air spaces – and plants get their oxygen from their roots, not their leaves. Roots from trees can extend well beyond their dripline, and can be damaged by your footsteps if the soil is soggy.
If the soil is still thawing and is wet, it’s better to stay off it for now. If you have light, sandy soil that drains well, then you are fine. Clay soils are most at risk for compaction. Once you compact the soil, it is less able to drain away excess water, too. Just remember that the soil can freeze deeply – two feet or more, depending on snow cover – and a layer of frozen soil is like a layer of concrete. If you leave foot prints in the soil, don’t walk on it.
Don’t be afraid to prune, even if you have never done it before. Fruit trees grow vigorously when pruned, and even if you remove a branch and then wish you hadn’t, other branches will grow and fill in the space. You won’t kill your tree by pruning. But don’t remove too much: You can safely remove about 25% of your branches and leaves; your tree will still have plenty left to grow fruit and feed the roots.
Use a sharp pruning saw, not a rusty old saw you had when a Scout. You will rarely have to remove anything more than a 2- or 3-inch branch, so a folding ‘tri-cut” saw will be fine and can be purchased for around $25. Bow saws are not able to get in tight places, so are not recommended. A chain saw is rarely needed, and can easily remove too much wood too fast!
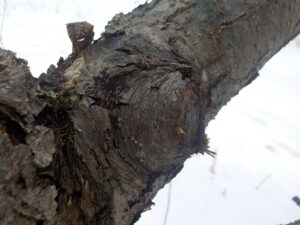
A branch was cut here last year, leaving the swollen branch collar to heal
What should you remove? First, remove any dead branches. How do you know if the branch is dead, since there are no leaves? The bark will be flakey and a different color from healthy branches. For smaller branches, scrape the bark with your thumbnail. If it does not show green, it is dead. Broken branches should be removed, too.
Ideally, sunshine can reach every leaf of the tree. Leaves that are shaded by others do little to feed the tree. So if you have branches layered closely, one above the other, the lower branch is being shaded. Either remove it, or remove the one above it.
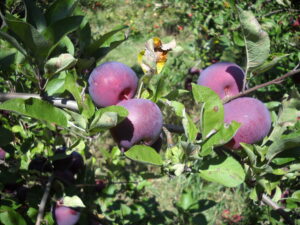
Apples are worth pruning and do not need pesticides to grow well. 012
Often branches grow back towards the middle of the tree. These will create problems as they get larger, often rubbing existing branches and shading out others. So follow them back to their point of origin to remove them. Remove any branches that are rubbing or touching. Decide which is the better branch, and leave it.
Where should you make your cuts when removing a branch? Look carefully and you will see the “branch collar”. You will want to leave the collar as this is where the cut will heal. It is a swollen area where the branch and the trunk or a larger branch are joined. Often the collar has wrinkles in it. Cut just past the swollen, wrinkled area and remove the offending branch where it is circular in cross section.
Many fruit trees send up water sprouts – vigorous new shoots. In their first year they grow straight up and are the thickness of pencils. They should be removed every year. If you cut a bigger branch, you might get several water sprouts surrounding the cut that year – but remove them all next year. Water sprouts are a tree’s attempt to increase food production by making more leaves. Some trees do it vigorously each year, others respond to heavy pruning this spring by growing many this summer. Water sprouts rarely produce fruit – ever.
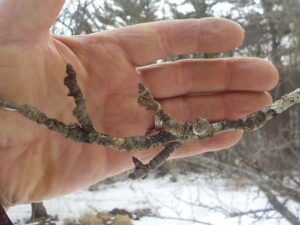
Fruit spurs are short and wrinkled, with buds visible on their tips
When I prune fruit trees, I pay attention to the fruit spurs that actually produce the fruit. When choosing which of two branches to remove, I leave the one that will be producing the most fruit. Fruit spurs are two- to five-inch branches that have buds on them. Fruit spurs produce both leaves and flowers, and need to be at least two years old to on apples and pear trees to produce fruit, sometimes longer.
I often get complaints from readers about the fact that their young apple tree has not produced any fruit. Be patient, I say. Each variety of tree has its own schedule– dwarf or semi-dwarf trees produce fruit sooner than full sized trees. A newly planted tree can take two to six years before the first fruits grow. I once had a plum tree that took 20 years to flower and produce fruit, and only did so when I threatened to cut it down if it didn’t produce fruit the next year!
Lastly, know that pruning your tree well will increase the size and improve the flavor of the fruit. It takes a lot of energy to produce fruit, so a tree that only grows 100 apples is better able to feed the fruit and grow the sugars that make it tasty than a tree that grows 1,000 apples. And really, how many apples can you eat?
As to that other March chore, improving the pH of the soil around your lilacs? Two dry quarts of wood ashes or garden lime will sweeten the soil if spread around your lilac. Lilacs do not flower as well in acidic soil, which is what most New Englanders have. It won’t affect this year’s blossoming, but should by next year.
So get outside on a sunny day and get to work. I always find something to do, and pruning is one of my favorite March activities.
Henry is the author of 4 gardening books. He lives and gardens in Cornish Flat, NH. Reach him by e-mail at
henry.homeyer@comcast.net.
Getting Your Tools Ready for Spring
Posted on Tuesday, March 1, 2022 · Leave a Comment
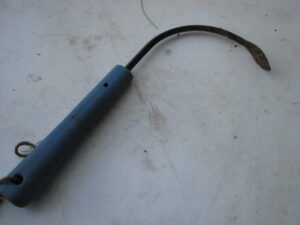
The CobraHead weeder is my favorite weeding tool
Everyone I know is thinking about spring – despite the fact that we could still see snow and sub-zero temperatures before we see tulips. This might be a good time to take an inventory of your tools to see if you have everything you need, and buy the ones you need. This is also a good time to clean up, sharpen and oil the tools you have.
First, a list of the basic tools all gardeners need:
- Garden fork. This is a straight-handled tool with 4 flat tines that can be used to loosen the soil for planting, or to dig out things like a clump of daylilies. These come with either fiberglass or wood handles, and I always choose wood. Both handles can splinter over time, but an oiled and well-maintained wood handle will out-last fiberglass. I have some wood-handled tools still in great shape after over 50 years of regular use.
- Pointed shovel. I like the short D-handle shovel better than those with a long straight handle, but that is for you to decide. The short handle model is lighter weight, and has a nice grip. A pointed shovel digs into the soil more easily than a straight-blade spade.
- Garden rake. This is the rake that has short tines space an inch or so apart. It is good for smoothing the soil or forming raised beds.
- Lawn rake. There are a dozen different styles, and all will do the job. The old fashioned bamboo rake is nice, but the tines do break after a while. Plastic rakes are light-weight, but also break after a few years. I prefer those with metal tines.
- Drain spade. This is a shovel that has a blade that is long and narrow (16 inches long, 5 inches wide). Great for transplanting, it can get all the way under a plant to help you pop it out of the ground.
- Hand tool for weeding. There are plenty, but I like the CobraHead Weeder best. It is a hand tool shaped like a curved finger, and can loosen roots from below while you give a gentle tug from above. I use it to loosen the soil for planting, too. Available at garden centers or www.CobraHead.com.
Sharpen the inside edge of your shovel
Tools require some maintenance, and this is the time to sharpen, clean and oil them if you didn’t do it last fall. Fiberglass handles generally require no maintenance, though I suppose you could take off any rough spots with steel wool or sandpaper.
Wood-handled tools should never be left outdoors, but most of us forget occasionally; strong sun or rain will damage them and give them a rough surface. If the handle is very rough, use a piece of sandpaper and lightly sand the handle, tip to stern. Wipe it well with a rag before applying oil. For less damaged handles, rub with fine steel wool. Don’t sand a handle that has a urethane finish unless you intend to take it all off – but you can use steel wool on it.
Next apply a coat of boiled linseed oil. I like to heat the oil until hot before applying, as this is a fairly thick oil, and heating it will help it to penetrate the wood. I use a paint brush or a rag to apply the oil.
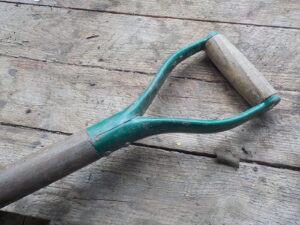
I like shovels with a D-handle for a good grip
Let the oil sink into the wood, which might take overnight or just a few minutes, depending on the grain and how dry the wood is. Never try to oil a wet handle. Apply a second coat and let dry. Then rub it down with a fine steel wool, labeled 000 or 0000. This will take off any bits that are raised up by oiling and burnish the wood.
Next look at the steel of your tool. If it has crusted soil on it, clean it first with a stiff brush – either a wire brush or even a stiff bristle brush. If it is rusty, clean off the rust with your steel wool.
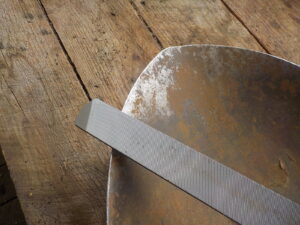
If you have a well-used shovel, it is probably dull. It is easy to sharpen it, but you will need a good 8- to12-inch file, either a rough or medium file, often called a mill bastard. Be sure to get one with a handle, as some only come with a short pointy part and require you to add a handle.
Shovels should only be sharpened on one side, the side that faces into the hole as you dig. The back side will stay flat. Push your file across the shovel blade in only one direction, away from you. You may wish to clamp the shovel to a saw horse or bench so it stays in place as you work, or push it down on the bench and file with one hand.

This file is a double-cut file, called a mill bastard
Go from the edge of the curve to the middle in one long stroke of your file, and repeat, keeping count of your strokes. Turn the shovel around and do the opposing edge, using the same number of strokes. Keep your file at the angle set by the manufacturer if that is evident. If not, an angle of about 45 degrees is good. That will make a sharp cutting edge, but not be so thin that it will get dull quickly. You don’t need to sharpen the sides. And don’t worry: You can’t ruin your shovel even if you have never done this before. Just keep at it, and stay consistent.
When you have the shovel sharp, turn it over and you probably will be able to feel burrs on the back side – little bits of sharp metal. Clean those off with a few flat strokes of your file.
Finally I take a rag with linseed oil and wipe the shovel blade. Some people use machine oil to oil their tools, but I don’t want petroleum products in my soil, even a little bit.
Every gardener has her own favorite tools. If you’re a rooky, visit a good gardener and ask for a tour of tools. Then go buy what you need. And remember: sharp tools work better than dull ones.
Early Harbingers of Spring
Posted on Monday, February 28, 2022 · Leave a Comment
Here in Cornish Flat, New Hampshire, we recently had our first day that shouted “SPRING IS HERE!” After a night of cool rain, the sun came out and temperatures climbed into the 50’s. Now all we need are spring flowers. Me? I solved that problem by potting up bulbs last November and storing them in my cool basement. They rested, grew roots, and now my windowsills are crammed with pots of daffodils and crocus, some blooming, others on the way. They will help to keep my spirits up when we get, as I know we will, day after day of gray drizzle before summer gets here.
Of the outdoor bulbs, the first to bloom are snowdrops. They push up through frozen earth on south-facing hillsides starting in late February. I imagine they can do this by the process of “thermogenesis”. That’s a process whereby a plant can produce a chemical reaction that produces heat. Few can do it, but those that do can get pollinated before anything else.
The poster child for thermogenesis is skunk cabbage. This is a plant I remember well from my boyhood home in Woodbridge, CT. We had a small brook behind the house, and some wet areas along the banks in a woody area. Aside from being the first green plant to sprout, skunk cabbage had the ability to produce a noxious odor that was endlessly fascinating to young boys. I discovered that if I disturbed them, they produced a skunky odor that my sister did not like.
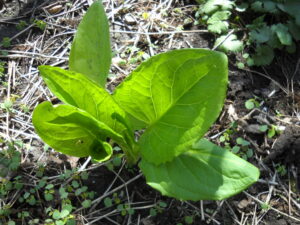
Skunk cabbage has big leaves and grows in moist shade
Skunk cabbage (Symplocarpus foetidus) is related to the common Jack-in-the-pulpit we all know and love. Like Jack, its flower is hidden inside a spathe, or outer leafy jacket. I bought a skunk cabbage plant at Garden in the Woods, a native plant sanctuary in Framingham, MA about 25 years ago.
What I did not know was that skunk cabbage is very slow growing, and does not spread at all quickly, at least this far north. Only in recent years has it bloomed, though every year the leaves have gotten bigger. Now I know when buying plants to buy at least three in order to make a statement in a reasonable amount of time. Skunk cabbage produces big green leaves and a barely noticeable flower.
Of the native woody plants, spring witch hazel (Hamamelis vernalis) is the earliest that I know. In southern New England it can bloom in January, and here in New Hampshire it can bloom in March. I bought one last summer, and look forward to seeing the blossoms soon. I have several fall witch hazel that bloom in October and November. The blossoms vary from yellow to brownish red and are spidery in form. Small, but plentiful right near the stems.
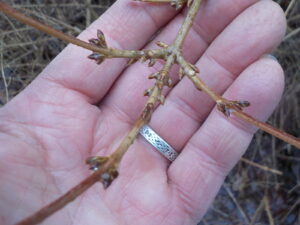
Forsythia flower buds are pointy
Forsythia is a nice yellow-blossomed shrub originally from Asia and eastern Europe. Michael Dirr, my woody plant guru, describes it this way: “Rank-growing, deciduous shrub, differentially developing upright and arching canes which give it the appearance that the roots were stuck in an electric socket; always needs grooming, one of the most over-rated and over-used shrubs; will sucker (slowly) to form large colonies.” That from his “Manual of Woody Landscape Plants”, my favorite text on trees and shrubs.
His remarks notwithstanding, I grew up with it and like it. It is a burst of yellow at a time of the year –April, here – when not much else has bloomed or even leafed out. My gardening Grampy had a large patch of it that had suckered and created a bed 10 feet wide, 50 feet long and 8 feet high or more. My sister Ruth Anne and I would crawl inside the patch of forsythia in the heat of summer for a cool respite – and to hide from grownups.
The trick to managing forsythia is to prune it hard and often. Keep the tips of branches off the ground as they will root in if touching the soil. One can keep it as a nice vase-shaped shrub, and it really does not take much work to do so. Cold hardy varieties that will bloom in Zone 4 include New Hampshire Gold, Vermont Sun and Meadowlark, among others. Ask at your local independent nursery.
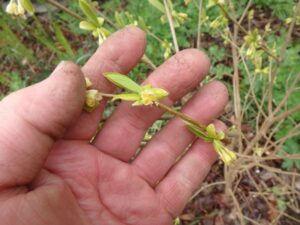
Forsythia forces easily. Cut some stems with flower buds now and place them in a vase, and place it in a sunny window. I shall cut some today and get them blooming in a couple of weeks or less. The key is to recognize the flower buds: they are pointy and often appear on cluster without stalks, right on the stems. Straight young stems that grew last year rarely have flower buds.
Leatherwood blossom close up
In contrast to the flamboyant forsythia is a nice native, leatherwood (Dirca palustris). This understated plant blooms just as it leafs out in March, April or early May, depending on where you are. It does best in full shade. Although Dirr’s book says it prefers a moist, dark soil, I have it in a dry location and it does just fine. The blossoms are pale to bright yellow, small, but plentiful. The bark is a handsome gray. But it is hard to find in a plant nursery. I bought one several years ago and have looked for others, but have not found another nicely shaped specimen. Look for it. Slow growing, it requires little or no care.
T.S. Elliot wrote in his poem The Wasteland that “April is the cruelest month”. I disagree, I think March is. Muddy roads and gray skies predominate. Flowers are scarce. We have April to look forward to, but if you pot up some daffodils next November for forcing, you can at least have some indoor blossoms now, in March.
Henry Homeyer writes and gardens in Cornish Flat, NH.
Starting Seeds Indoors for a Head Start on the Season
Posted on Tuesday, February 22, 2022 · Leave a Comment
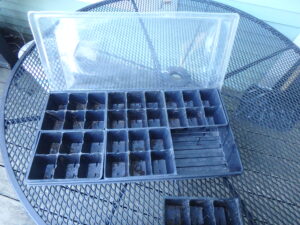
A flat with 6 packs for starting seeds and a plastic cover to contain moisture
By now many gardeners are fed up with winter: icy sidewalks, misplaced mittens, and dogs that need to go out at 5 below zero. But it will soon be time to start planting seeds indoors, so you might want to start getting ready now.
It’s true that greenhouses and garden centers do a nice job of starting plants if you are not interested in babying seedlings along for 8 to 12 weeks. I do let them start some for me, but find that there are plenty of things I want to grow that are not available. So I do both. I start some now, and buy others later.
In order to be successful with your seed-starting efforts, you will need supplemental lights. If you try to save money and just start a few seedlings on a sunny windowsill, you will most likely be disappointed. Even under the best conditions, direct sun only reaches your seedlings about six hours a day, much less than they need.
Fluorescent light are the least expensive solution to the need for supplemental light. My fixtures are 4-feet long and use two T-8 tubes each. The fixtures are available at hardware and big box stores, and cost from $16 to $40 each, depending where you buy them.

A simple homemade plant stand
T-8 tubes use 32 watts of energy per hour, while older model T-12 tubes use 40 watts. This year I bought some LED bulbs that fit my 4-foot fluorescent fixtures but use only half the electricity. I’m switching over to LED for the sake of the environment, but as the tubes cost about $8 each, I am spreading out my purchases over a few years. If you want to make the switch, make sure the package says they do not require any re-wiring of the fixtures (older models did require that). One nice thing about the LED lights are that they don’t break if you bump them hard or drop them. Select lights that are 4000 K or 5000K color spectrum, which are close to daylight color.
I use a biodynamic calendar called Stella Natura to help decide on planting dates. It uses the sun, moon and stars to determine the best time and day to plant four categories of plants: flowers, fruit, leaf and root. It also has “blackout” days when nothing should be done. I am not 100% convinced that this calendar really works, but have done some informal experiments planting seeds on their suggested days, and on blackout days, and it seemed to make a difference.
Read the seed packages carefully if you are new to starting indoors. Onion-family plants and peppers take a long time to develop, so most people start them in early March, though I started my onions and scallions on February 20 this year. Tomatoes I start around April 10 – I don’t want them to get root-bound or too tall before I put them out on June 10. If you plant outside earlier, start seeds earlier.
My motto
Not everything needs to be started indoors. Most root crops are direct seeded in the garden, though you can start beets indoors. Some flowers hate to be transplanted – larkspur, for example, which also needs cold temperatures after planting. Lettuce can be planted indoors or out, or both. I like to get some started early indoors. All the cucumber family plants I start indoors 4-5 weeks before planting outside as this protects them from striped cucumber beetles when they first germinate.
An important key to success with your seedlings is to water properly. If seeds dry out before they germinate, or when they are tiny, they are likely to fail. On the other hand, keeping seeds soggy all the time can lead to root rot. Check them every day. If you see the planting mix turn a lighter color or if it feels dry to the touch, water. I water with a dilute solution of fish or seaweed fertilizer once a week.
To get seedlings to wake up and start to grow, I use heat mats sold for that purpose. They plug in and gently warm the seed flats. But I only use them until most seeds have germinated as too much heat for seedlings is bad. For one thing, the “soil” dries out fast with extra heat. I prevent that by using clear plastic covers sold to fit over the flats, creating a mini-greenhouses that hold in the moisture.
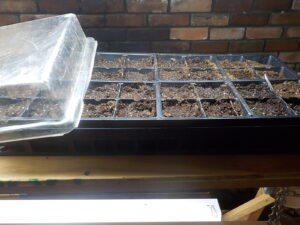
32-cell planting flat with plastic lid
I mostly use flats with 32-cells per trays that are roughly 9 by 18 inches, although others are sold with up to 108 cells per flat. I want plenty of room for roots to grow, so I buy cells that are as deep as I can find. I plant two or more seeds in each cell, just in case one seed does not germinate. For onions, I plant 3 or 4 seeds per cell, as they don’t mind a little crowding.
Most seeds germinate about 90% of the time. For tomatoes I sometimes snip off one plant when young, other times I let both grow, and separate them and re-plant both in bigger pots when they are 4 to 6 inches tall. For me, it’s hard to kill seedlings by snipping them off and I can always share seedlings with others.
Garden centers and catalogs sell a variety of stands with lights for growing seedlings. Most are quite expensive. You can also go to my web site,
www.Gardening-Guy.com and search for “Building a Plant Stand”. That will give step-by-step directions for building an inexpensive A-frame plant stand that will hold 6 flats, and have room below it for 4 to 6 more flats on the floor.
Starting seedlings is not rocket science. It involves some investment, but the lights and plant stands last nearly forever. And, as the bumper sticker says, “Growing Tomatoes Is Cheaper than Therapy – and You Get Tomatoes!”
Henry is the author of 4 gardening books and a long time UNH master Gardener. You may reach him by e-mail at
henry.homeyer@comcast.net. He lives and gardens in Cornish Flat, NH.
It’s Time to Order Seeds
Posted on Wednesday, February 16, 2022 · Leave a Comment
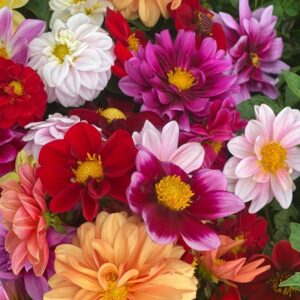
Hope is a Verb dahlia
When I was a young man my mailbox was often blessed with seed catalogs at this time of year. Now? Not so much. Back then I poured over them. I drooled over the listings. I wrote checks for small amounts and mailed them off to the companies offering the best sounding varieties.
Now? Most seeds are sold on-line. Yes, my favorite feed-and-grain store, some hardware stores and the local food coop still sell seeds over the counter. And I do get a few catalogs in the mail. But seeds are largely sold through the internet.
One company that still sends me a catalog in the mail is called “Seeds from Italy” (also at
www.GrowItalian.com). Based in Lawrence, Kansas, I’ve been following this company since a friend of mine bought it in 2011. His son, Will Nagengast, just took over and I called him to chat a bit after I got his catalog.
According to Will, the American palate is just discovering bitter vegetables. Italians, however, have been eating and enjoying those distinct flavors for a long time. So they feature many vegetables that are not commonly sold by other seed companies; they market seeds from Italy.
One I have tried is Cima di Rapa or broccoli raab, which I often see in cooking magazines, but not at the grocery store. It is unpleasant unless cooked, but cooked it is much like broccoli. It does not form a big head like broccoli, however –it’s all side shoots.
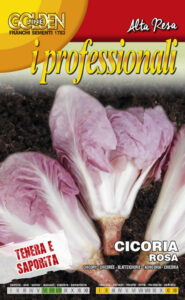
Radicchio Rosa is good raw or cooked
Do you like arugula? They sell 5 kinds, including a wild arugula (which can seed in if you let it). Then there are a dozen kinds of radicchio, including a pink-leafed one (Radicchio del Veneto) that Will says is very popular. Never grown radicchio? It can be eaten raw in a salad, or fried with bacon and shrimp, or put in a stir fry or soup. Grilling or cooking it makes the flavor sweeter. Most varieties are red-leafed and round, but some are elongated like romaine lettuce.
I’m ordering seeds for a winter squash Will recommended: Butternut Rugosa. He says it is much larger than the Waltham butternut I normally grow: up to 30 or 40 pounds! He said it keeps for up to 4 months in a cool, dry place. He oven-roasts them and then freeze most of these big squash. Will uses the sweet, creamy meat for making homemade ravioli.
Fruition Seeds in the Finger Lake Region of New York State was started in 2012 by Petra Page-Mann and Michael Goldfarb. They are fully organic farmers, and most of what they grow are heirloom seeds, but they have developed a few varieties themselves though their breeding program. They encourage their customers to save seeds and use their own. I called Petra recently to see they have added to their seed line.
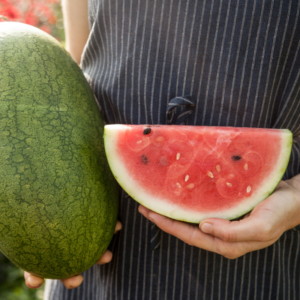
August ambrosia is fast growing and sweet
August Ambrosia is a short-season watermelon that Fruition developed over a six-year period in collaboration with Cornell University. They tested it each year with visitors to the farm to get just what people wanted: sweet, juicy melons that, even if planted in June, will produce ripe melons in August. The rinds are thin and the seeds are small. Petra told me on the phone that you can eat the seeds – or have fun spitting them!
“Food is so social. Growing and sharing food is how we remember to be human,” Petra told me. So she welcomes visitors to the farm, and shares her food – and her fantastic enthusiasm – with her visitors. And she learns what appeals to her customers, which is good business.
Fruition sells seed for two interesting cabbages: Kalibos is a deep purple cabbage, cone shaped, with big hips. According to the website, it is best as a fall cabbage; sow in early or mid-July for best results. You can seed them in 6-packs in early July, and transplant them into the garden in early August at two-foot spacing. Harvest them in October and November to get heads of optimal size and sweetness.
Mermaid’s Tale cabbage
Mermaid’s Tale is a cross between Kalibos and early green cone-headed cabbage. Each one is unique in color, shape and flavor: lime green to emerald with lavender to burgundy veining. Sharp or subtle flavor.
Another specialty of Fruition Seeds is their “Hope is a Verb” dahlia. Each seed is unique and each flower is different, made from innumerable crosses of dwarf and semi-dwarf collarette-style dahlias. Petra explained to me that dahlias have 8 sets of chromosomes, and consequently have many ways of expressing their genes. The plants are two-feet tall or less, with blooms one to three inches across. She said they are fabulous for short-seasons and lower light conditions. I shall start some.
Lastly I shall order Spotlight Snow Peas from Fruition Seeds. Some will be green, some purple, some mixed colors. They are very early (or late if planted in early August for a fall crop), very sweet, and 3-feet tall or less. Petra says they taste great and only take 52 days to harvest!
Every company has something unique and wonderful. Buy your seeds now, as some seed companies will sell out their seeds before summer. And if you haven’t tried starting seeds indoors, I’ll tell you about that next week.
Henry can be reached by e-mail at
henry.homeyere@comcast.net or at PO Box 364, Cornish Flat, NH 03746. He invites your comments and suggestions. He is the author of 4 gardening books.
Winter Thoughts about Having a Great Garden
Posted on Tuesday, February 8, 2022 · Leave a Comment
This is a good time for all of us to stop and reflect on how we garden. Are we creating lovely-looking spaces, but failing to support pollinators, birds and wildlife? What about the environment? Can we do more? If so, how can we improve? Here are a few of my thoughts.
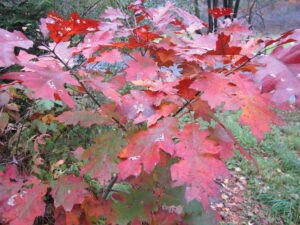
Oaks are pretty for us and food for caterpillars and wildlife
First, I would recommend that native plants dominate our gardens. I’d say 80% of our plants (or more) should be native, especially trees. Why? Because they do the best, by far, of supporting wildlife – feeding birds and providing food and shelter for animals. Oaks, the best tree of all for wildlife, support nearly 1,000 species of butterflies and moths. But many species of landscape trees and shrubs are from China or Japan, and many only support a handful of species. All plants are not created equal.
Caterpillars of moths and butterflies feed on the leaves of our native trees and shrubs and are what are fed to baby birds. That’s right, even seed eaters feed caterpillars to their young because they are full of protein and fat that baby birds need to thrive.
I think we all should avoid chemicals in the garden – and not just the vegetable garden. Rachel Carson taught the world that DDT, a powerful insecticide widely used in the 1950’s, was killing off our eagles. But all chemicals used in the garden disrupt natural growth processes – and can adversely affect us, too. Even something as seemingly bland as 10-10-10 fertilizer is only 30% fertilizer – the makeup of the rest is deemed “proprietary information”. So we don’t know what chemicals are used in it. And the salts in fertilizer are lethal to many microorganisms.
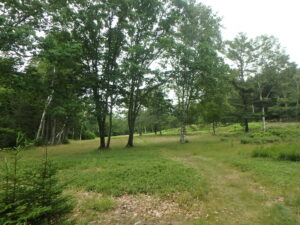
Oaks and birches growing in a meadow can feed pollinators and help birds and can be a substitute for a lawn
Even pesticides that are derived from plants would be banned, if I ran the world. Yes, they are listed for use by organic growers, but many of them are non-specific killers. Both rotenone and pyrethrins are “organic”, but very toxic to bees, others to fish and toads. I guess I would make you pass a test about the pro and cons of any pesticide before you could buy it! Go to https://www.thespruce.com/common-organic-garden-pesticides-1402497 for a nice on-line evaluation of organic pesticides.
Sure, the Japanese beetles can be pesky. But do you really want your kids and dogs playing on a lawn with pesticide residue on it? I don’t. Plants do fine with organic techniques. Pick off those dang beetles and drown them in soapy water.
Want to make your gardening easier? Don’t let your weeds make seeds. Seeds can last years, waiting patiently for you decide to go to the beach for a week in August. Then they will germinate and grow like crazy, making you go crazy when you come back and see the gardens full of weeds.
The real solution is to learn to weed properly, have a tool that works well for you, and spend time doing it every day from April to October. We brush our hair and teeth every day, why can’t we do a little weeding every day? Even 20 minutes six days a week will make a huge difference. The CobraHead weeder is the best tool I know for getting roots out and removing weeds.
What else? Know your own capacity. Don’t have the local farmer plow up your entire back lawn to make your first vegetable garden. Start small, enjoy what you have, don’t work until your back hurts and your hands have blisters. If possible, garden with a loved one or friend. For me, gardening with another is always enjoyable.
And then this: Create biodiversity in the landscape. Put some flowers in with your veggies and veggies in with the flowers. Artichokes or purple kale will look great in your flower bed. Marigolds in the vegetable garden are thought by some to repel certain pests. An acre of cabbage will attract loopers that might not find one or two plants. A biodiverse garden supports more creatures of all sorts, including beneficials.
Build a compost pile. You don’t have to obsess about the carbon/nitrogen ratio or take its temperature weekly with a long compost thermometer the way some gardeners do. Just add green and brown materials to it in layers. Add some grass clippings to get it heating up and breaking down leaves and dead weeds.
Never add invasive weeds to your compost pile. Things like goutweed or Japanese knotweed, or anything with seeds. Turning a compost pile does add oxygen, which will help the breakdown of materials, but I rarely have time to do so. Don’t be afraid to buy good compost if you don’t have enough.

This is the time to create some winter whimsy in the garden
Think about the size of your lawn. Does it need to be so big? Could you plant some native trees or shrubs? Once established, trees are very little work. They provide shade and cool the air in summer, and fix carbon in the soil – carbon that otherwise would be contributing to global warming.
Add some hardscape to your property: stone walls, a birdbath, some sculpture or a few places to sit and relax. Add things that can stay out all winter and look good against the snow are nice – after all, winter is long here in New England.
Grow enough food that you can share some. Go meet your new neighbors across the street or the elderly widow that no longer grows veggies. But don’t just give away zucchini. Grow enough tomatoes, potatoes and garlic to share with others.
Lastly, take a few moments every day to walk through the garden, pausing to look at the beauty, not just the weeds. Find time to sit and reflect on how lucky you are to have a nice garden.
You may reach Henry by email at
henry.homeyer@comcast.net or by USPS at P.O. Box 364, Cornish flat, NH 03746. Please include a SASE if you wish a reply by mail.
The Flower Shows, 2022
Posted on Thursday, February 3, 2022 · Leave a Comment
Usually at this time of year I am planning my travel to the various flower shows around New England: Boston, Connecticut or Vermont. Perhaps Maine. Not this year. Most of the show have been put off due to Covid, including the Boston Show, which cancelled recently. The Connecticut Flower Show website says it will be the only major flower show in New England.

A garden at a past Hartford, CT Show
The Connecticut Flower Show will take place February 24 to 27 at the Connecticut Convention Center in Hartford, CTR. Tickets costs $20 for adults on the day of the event, or $16 if purchased in advance (which will avoid the wait in line). Children ages 5 to 12 are $5, and children under 5 are free. The Convention Center has been upgraded to minimize risk of Covid transmission and state and local regulations will be followed.
The show is always known for having lots of educational workshops. This year is no exception: there are some 80 presentations including organic lawn care, container gardening, floral arranging and pollinator gardens, among others.
One talk that caught my eye is by a friend of mine, Len Giddix. It’s Rain Gutter Gardening: Sprouts, Herbs and Greens without Draining Your Wallet. I called Len who explained that he uses four-inch pots in a 10-foot section of gutter partially filled with potting mix. It’s tidy, and can produce a lot of greens. And no, the gutter is not up high, it’s along the edge of a walkway. Sounds slick! He’ll repeat his demo every day.
The show will have all the usual vendors selling seeds, plants, cut flowers, air plants, tick protection products, beekeeping supplies, garden tools and more. Organizations like the Rose Society will be there, and other non-profits.
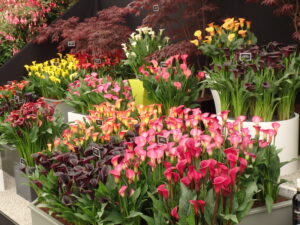
Calla lilies at the Chelsea Flower Show in London
Next there is the Chelsea Flower Show in London from May 24 to 28. This show has always been held outdoors and is known for the lavish gardens built by world-famous designers, often using mature trees and shrubs. There are, of course, tents, one of which would easily accommodate Barnum and Bailey at its heyday. My wife and I attended in 2017.
The magnificence of the show is startling: hundreds of fresh blossoms in perfect form in many of the booths. New introductions of named varieties are on display. Actress Judi Dench got a lovely apricot-colored rose named after her by David Austin the year I attended, and as press, I got to see her accept the honor. The chief executive of Burpee Seeds, George Ball, was in the Burpee booth, greeting us and answering questions. There was even a cute little robot cutting the lawn in one booth. The show covers many acres.
If you decide to go, I recommend joining the Royal Horticultural Society for 50 pounds ($67.50 at current exchange rate). The membership gets you into the show for 2 days before it opens to all, a 10% discount on all tickets, and other benefits including their quarterly magazine. I went on the first membership day and it was quite crowded, so I can’t imagine what it is like when the show is open to the public. I recommend attending at least 2 days to see it all, which is what we did.
Daily tickets for adults cost about $55, with Saturday at about $116. But if you can afford it, go! It’s a once in a lifetime experience. And women: bring your most colorful garden hat and a flowered dress as the British women love to dress up for the show – and you don’t want to appear like the poor “country cousin.”

Philadelphia Flower was also outdoors in 2021
Then there is the Philadelphia Flower Show which will be held outdoors from June 11 to 19 at South Philadelphia’s Franklin Delano Roosevelt Park. The show, which was first organized by the Pennsylvania Horticultural Society in 1829, will include 15 acres of this large park with majestic trees and views of the waterfront. By holding the show outdoors in early summer, exhibitors will be able to include larger landscape material than an indoor event, much as the Chelsea Flower Show does.
I have attended the Philly show in the past, and always was thoroughly “wowed”. One aspect of the show that I love is the competitions that allows ordinary gardeners to strut their stuff, competing for ribbons for best house plants, flower arrangements, specialty plants and more. Then of course there are the displays made by professional landscapers, stone workers and designers. And more garden geegaws than you can imagine are for sale.
Bring an umbrella or rain coat, just in case of shower. There are tents, but much is outdoors. The large venue outdoor should keep attendees well socially distanced.
For non-members of the Pennsylvania Horticultural Society (PHS) admission is $45 for adults, $30 for young adults (18 to 29), and $20 for kids 5 to 17. Members of the PHS can get 10% discounts. Go to the website to read more about gala events and early morning tours:
https://phsonline.org/the-flower-show
Covid has limited what we can do and see, but there are still a few places to go if you hanker for a good garden show. And maybe next year they will all be back to normal.
The Bane of Many Gardeners: Japanese Knotweed
Posted on Tuesday, January 25, 2022 · Leave a Comment
I’m a lucky guy: for one thing, I have no Japanese knotweed. Many is the gardener who has e-mailed me asking, “What can I do to get rid of Japanese knotweed?” My usual answer? Sell the house.
Japanese knotweed is an attractive plant, but nearly impossible to get rid of
Japanese knotweed, commonly called bamboo because of its hollow, segmented stems, goes by a number of scientific names, most commonly Polygonum cuspidatum. The leaves are heart-shaped and alternate on the stems, which can reach up to 10 or even 15 feet tall. It was introduced from Japan as a landscape plant in the late 1880’s, and was sometimes planted for erosion control, but quickly proved invasive.
Japanese knotweed spreads easily: its rhizomes (roots) can go 90 feet or more – even popping up through asphalt or pushing through house foundations. I talked to someone who tried to dig out a patch that had been growing for decades by using with a backhoe; he quit after digging down eight feet because he saw roots going even deeper!
Japanese knotweed blooms in early fall with white blossoms that attract bees and other pollinators. The small seeds are carried by wind, water or animals, though research shows that seeds are not usually how it propagates. It spreads by root – even a small bit of root can create a new patch of knotweed, so it is a problem along streams and rivers because flooding can send its invasive roots to new sites miles away. Sometimes highway departments move soil with roots, and it spreads.
Invasive plants (like knotweed) are defined as those coming from a different continent with few or no natural predators here. The bugs that eat purple loosestrife or Japanese knotweed did not come with them when they first made it to our shores. Invasives spread rapidly and can outcompete our native plants for sun, moisture and soil nutrients.
Most invasives can grow in sun or shade in wet or dry soil. They do not need that dark, organic matter-rich soils that we offer our peonies. Invasives, generally, can grow in your gravel driveway if given half a chance.
Most invasives are hard to control for several reasons. Most have extensive root systems that spread far and wide, and are often brittle. Trying to dig out the roots generally results in new plants from scraps of root that broke off, and that is certainly the case for knotweed.
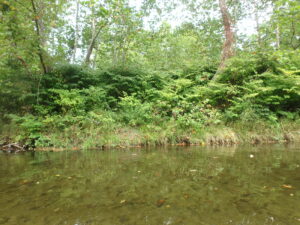
I recently called Pete Butler, an arborist living in Stockbridge, Vermont to talk about Japanese knotweed. Last summer I had visited one of his projects, a public park along the Ottauquechee River in Woodstock, VT, to look at his efforts controlling knotweed.
Pete said that the best time to attack a patch of knotweed is in the fall, when the plants are less vigorous and new shoots are less likely to grow after the roots are disturbed. Dig out root masses to get as much root as possible. The roots show bright orange if scraped with your shovel. They are woody and large in a well-established patch. “You’re not going to dig it all out successfully. But taking away a lot of the root mass is like a good punch in the nose,” according to Pete.
He emphasized that you should never get rid of your excavated knotweed roots by taking them away. Destroy them on site by burning them. He takes dead trees, branches from pruning and other wood products to start a hot bonfire that will destroy the knotweed. If you truck it away, it will start growing elsewhere, spreading the problem.
After digging, he said, add some competition. He uses winter rye, planting in the fall. It scavenges nitrogen and starts rebuilding soil that the knotweed has depleted. He also adds fertilizer to improve the soil. In spring the winter rye starts growing early, as does the knotweed. The grass stabilizes the soil and helps re-introduce microbial life, he said.
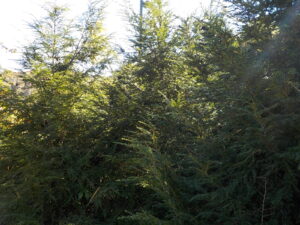
Hemlocks have out-competed knotweed in this site
Getting a soil test will help you determine how badly your soil has been degraded by the knotweed so you can improve it. In the spring he likes to add more grass seeds, particularly sheep fescue and hard fescue. These grasses compete with the little sprouts of knotweed from root scraps that evaded your digging. He does not mow the grasses, which are relatively short.
Pete Butler explained that he uses an IPM or Integrated Pest Management approach to controlling knotweed, including micro-doses of herbicides, just “ounces per acre”. He is a licensed to apply pesticides, to help in the process, but cautions that homeowners should not attempt using herbicides. Even herbicides like Round-Up, widely touted as safe, can have negative impacts on beneficial plants and soil fungi.
Get control of a knotweed infestation will take at least three years, Pete said, and each year he uses less herbicide. The “shelf life” of the roots is about 9 years he said, after which they will no longer be viable. Until that time, a site needs to be carefully monitored and appropriate steps taken each year.
When I visited his knotweed control site last summer Pete showed me how competition can help control knotweed. He planted a clump of hemlocks about six-feet tall, shoulder-to-shoulder after removing knotweed roots. They effectively outcompeted the knotweed, even if not completely eliminating the few new shoots that appear each year. He applies micro-doses of herbicide to finish it off.
Knotweed does best in full sun and moist soil, so creating shade near a site will slow it down some. And human activity can discourage it, too. High foot traffic will slow it down.
So maybe you don’t have to sell your house just because you have knotweed. But be prepared to battle it for years. And for those of us committed to organics, we may have to live with a little knotweed.
Henry lives And
gardens in Cornish Flat, NH. E-mail him at
henry.homeyer@comast.net. He is the author of 4
gardening books.
Learning from a Good Book
Posted on Tuesday, January 18, 2022 · Leave a Comment
Here in New England winter is long, especially for gardeners. We want to be outside in the garden but most days we can’t really do much. I compensate by learning about gardening from books. I recently finished a good one, Hummelo: A Journey Through a Plantsman’s Life by Piet Oudolf and Noel Kingsbury.
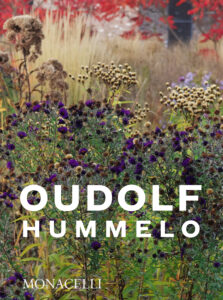
Oudolf Hummelo
At over 400 pages it might seem daunting, but I’d estimate that nearly half of those pages are color photos of the gardens Piet Oudlof designed, with plenty from his home in Hummelo, Holland. It is written by Noel Kingsbury, a well-known British garden writer, and by Oudlof himself.
Piet (which is pronounced Pete) Oudolf was the primary designer of the High Line Gardens in New York City, a garden planted on a section of an abandoned elevated railway line in mid-town Manhattan. This 1.45-mile planting is consistently rated in the top ten most visited places in New York City.
The book follows Oudolf’s life as a garden designer and plantsman. In addition to the High Line, he designed garden in Chicago, Detroit, and many in Europe. The book follows his professional life and illustrates the changes nicely. Many plants in the photos are not labeled, but more advanced gardeners will recognize them, and many are mentioned in the text. And although some common names are used, most are identified by the scientific names with the genus, species and cultivar, which I find helpful when studying the plants and finding out if the plants are hardy in my zone.
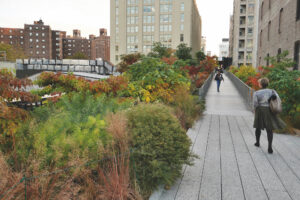
High Line NY, NY
So what makes Piet Oudolf one of the most famous garden designers ever? First, he is a highly accomplished plantsman. When he specifies plants for a garden, he knows what they need to do well. He started out with his wife, Anja, growing most of the plants he used in his designs, often growing and selecting plants for years before using them.
He knows each plant including its root system and its capability to fill in spaces by seeding in or spreading by rhizomes. He grew and used plants that were largely disease resistant. His gardens rarely need to be re-planted because the plants seldom fail. I should note that now he does not grow his own plants, he just specifies them and has others grow them for him, often from stock he perfected.
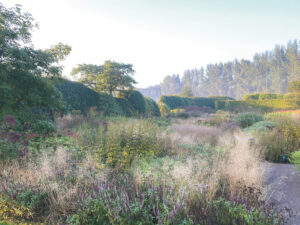
Voortuin September
Piet Oudolf uses many tall grasses in his designs. He loves the way they provide structure and form to a design, and that they last well into winter. He is less interested in color than many designers. He loves the look of seed heads and stems after the (relatively short) bloom period is over. He is quoted in the book as saying, “A plant is only worth growing if it also looks good when it is dead.” Since he bred plants for toughness, I assume he means dormant, not dead.
Oudolf is a rule breaker. He tried things that others had not. He is quoted as saying in the book, “I discover beauty in things that on first sight are not beautiful. It is a journey in life to find out what real beauty is – and to notice that it is everywhere.|”
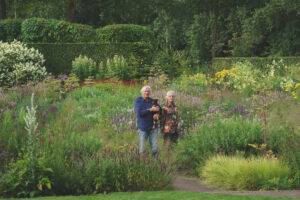
Piet and Anja at Hummelo
Early on in his career, Piet Oudolf used large blocks of a single species of a plant. But as he refined his designs, he started intermingling a few large, tall plants inside a block. He planted them repeatedly, as repetition adds a sense of unity and coherence to a garden. Unlike many designers, he actually lays out his gardens himself instead of drawing a plan and handing it off to gardeners. Oudolf is first and foremost a gardener. He loves plants, and knows them like his ever-present dogs.
What did I learn from this book? Given a large space to design, like Oudolf, I would use largely native plants. They are tough and if properly sited, will last well. I like his philosophy that plant diversity is good, but that too much diversity can overwhelm our ability to appreciate the whole.
I am, by temperament, a plant collector – I want to try lots of plants. But seeing the photos of Oudlof gardens, I recognize that buying – or growing – several plants instead of just three (my usual purchase), I can create a more powerful display.
Reading this book I made notes of plants I want to try. Among these is Eryngium giganteum, a sea holly that gets to be 3 to 4 feet tall with spiny egg-shaped blossoms and white bracts. Miss Willmott’s Ghost is readily available on line, though I have never seen it for sale in a nursery.
Another plant that looks great is Agastache nepetoides, yellow giant hyssop. It is deer resistant and big: it grows to six feet tall with flower spikes up to 16-inches long. In fall and winter the dry seed heads are fabulous, particularly in counterpoint to dry grasses.
I feel blessed that I was able to meet Piet Oudolf and interview him at his home in Hummelo, Holland in 2007. He was very generous with his time and his knowledge.
This wonderful book was produced by Monacelli Press (all photos are theirs), and is available in paperback for $40. To me, or any serious gardener or designer, it is a treasure. You might like to thumb through it before you decide if it is for you, especially if you are a beginning gardener. If you have big spaces to fill, you will get many ideas.
Henry is the author of 4 gardening books. Send questions to him at
henry.homeyer@comcast.net or by mail at PO Box 364, Cornish Flat, NH 03746. Please include a SASE if you wish a response by USP mail.


 Click Here to buy from Cobrahead