Perennial Flowers That Like Moist Places
Posted on Tuesday, July 28, 2020 · Leave a Comment
I’m lucky. Even though my property is relatively small – just over 2 acres – I have all the possible growing conditions a plant could want: wet, dry, sunny and shady. And I’m willing to try almost anything that will survive 20 or 25 below in winter.
That said, there are some challenges. There is a small stream behind my house, and my water table is high: dig down a couple of feet in spring, and much of my land will have standing water. It stays a bit wet, summer and winter – even now, in the heat and dryness of summer. But here are some wonderful plants that love moisture.
Each spring I write about my Japanese or candelabra primroses (Primula japonica). They bloom for 6 weeks or so in magenta, pink and white with a yellow eye. They love moisture. During their “show”, I try to get friends who are gardeners to come visit, and we sit in the late afternoon, watching their display under a group of ancient wild apple trees.
This spring I added another species of primrose, Primula sieboldii, which I got at EC Brown Nursery in Thetford, Vermont. I was told that, like the Japanese primrose, it seeds freely and spreads easily. It is an ephemeral, meaning that after blossoming the leaves disappear until next spring. It forms clumps up to 12 inches across, and blooms in pure white, blue, purple and pinkish. I can’t wait to see if I get any new plants – and colors – next spring.
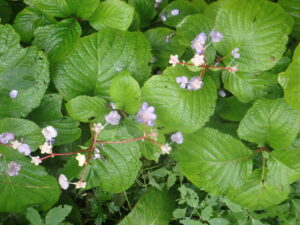
False hydrangea comes in blue or white blossoms
This year I have some new plants in my primrose garden given to me by a new friend and fellow garden writer, Judith Irven of Goshen,Vermont (https://northcountryreflections.com). It is called false hydrangea (Dienanathe spp.) and comes in 2 colors, blue (D. caerulea) and creamy white and (D. bifida). I planted them in the primrose garden last fall, and both survived and thrived. They have been blooming now for a few weeks.
I had never heard of or seen the false hydrangea until visiting Judith last fall. The leaves are a bit like some hydrangeas, but the flowers are not. But these beauties are quite an addition to my moist shade garden.
Another genus (botanical category) of plants that like moist soil are the burnets (Sanguisorba spp.). I have several species, starting with our native wildflower, Canadian burnet (Sanguisorba canadensis). This is a fall bloomer that produces flower stems 4 to 6 feet tall with white bottlebrush flowers. It starts to bloom in late August, and some years bloom into November. I have it growing in a marshy area near my stream.
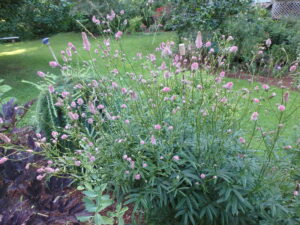
This sanguisorba tends to flop unless tied up
I have at least 4 other kinds of burnet, starting with a little one with variegated green and white leaves and deep maroon flowers (Sanguisorba officinalis var. microcephala ‘Little Angel’). I have others that grow 2-feet tall, and one that is 4 feet tall, both probably varieties of S. officianalis. The taller ones I tie up with stakes and strings by mid-July to keep them from flopping. A single plant will grow to be a big clump, taking a space four feet wide.
I am still looking for a burnet called ‘Lilac Squirrel’, a variety of S. hakusenensis. The name, and blossoms that resemble pink boas, are too outrageous not to want one. If you have one, please email a photo. Like all burnets, it likes moist soil and sunshine, from what I have read. It is hardy to Zone 5 – minus 20 in winter.

Giant fleece flower Persicaria is a dramatic addition to the garden
Another interesting genus is Persicaria, the fleece flowers. I have two species, P. polymorha or giant fleece flower and red bistort or mountain fleece (S. amplexicaulis). Giant fleeceflower makes a clump 6 to 8-feet tall and wide, with white blossoms a bit like astillbe blossoms – on steroids. The stems are an inch wide or more, but hollow like Japanese knotweed. The nice thing about it is that the flowers look good even after they have gone by, so 2 months of beauty is a given. Moving one is hard work, so plant it where you have plenty of space for it.
I have mountain fleece under the apple trees in my primrose garden, and the red bottle-brush flowers are just coming into bloom on 3- to 4-foot stems. The leaves are large, pointy and heart-shaped. Like its cousin, the bloom time is long: from now through much of the fall.
There are plenty of wildflowers that do well in moist shade. Prime among them are Jack-in-the-pulpit, red baneberry, trillium, and ramps. I grew up in Connecticut where there was skunk cabbage growing by our stream, and I bought a small clump some 25 years ago at The Garden in the Woods in Framingham, Mass. What a difference a couple of hundred miles makes. This early-spring bloomer has only recently achieved full size! I attribute that to the climate.
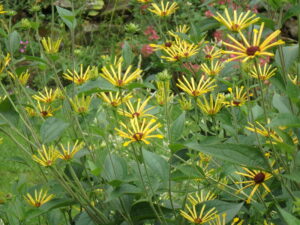
Henry Eiler rudbeckia does well in moist sunny locations
Many plants that grow well in ordinary garden soil will thrive in moist soil, too. I have Black-Eyed Susans (Rudbeckia spp.) that love my moist, sunny gardens but would be equally at home in drier soil. My favorite is Henry Eiler, one that blooms late and has very distinctive blossoms with the petals unnaturally far apart.
If you want to grow a shade-loving plant in a sunny location, you will have a better chance of success if the soil is also moist. Even then, not all succeed. But if you have space, and a willingness to experiment, your flowers may surprise you.
Henry lives in Cornish Flat, NH. His e-mail is henry.homeyer@comcast.net.
Beyond Perennials: Making Your Garden a Very Special Place.
Posted on Tuesday, July 21, 2020 · Leave a Comment
This Doric column was a good get by the side of the road – not sure of final placement
My garden is the place I go in times of sadness, worry or stress. It makes me feel better. I took a few moments one morning recently to really look at what was in my garden to see what made it so special. I saw that in addition to the plants (and who cannot be happy snacking on red raspberries or Sun Gold cherry tomatoes?), I have many things that remind me of friends, and of good times. Let’s take a look at my garden, and perhaps you’ll get some inspirations for what to do in yours.
I’ve been working on my gardens for about 40 years, and have created some nice stone projects. As a young man I built a low 80-foot stone retaining wall to create a terrace that would allow me to plant some fruit trees – most of my full sun space was near a small stream with a high water table, which is not good for fruit trees.
I worked with my stepson, Josh Yunger, who was a young teenager at the time. It was fun working with him, finding stones on the property and from a tumbledown wall a neighbor, George Edson, had allowed me to pick through. I knew little about walls, but had the basics. One stone over two. We mostly found stones with rounded shapes, not flat stones.
And I didn’t know to use crushed stone, not round pebbles to act as drainage and support for the wall. So those round stones sitting on round pebbles, over time, moved and wall has slipped and fallen in places. But now it is mostly hidden by plants, and its ramshackle appearance doesn’t bother me. And I feel good when thinking about the work Josh and I did.
If building a stone wall is too much for you, how about placing a long, thin stone standing vertically as an accent in the garden? If have a few of those, and they look great – all year round. Just stand up a 36 to 60 inch long pillar of a stone in a hole 18- to 24-inches deep. Add some loaf-of-bread sized stones in the bottom, and dump in a bag of dry concrete mix. Fill in the rest with soil, and pack it well.
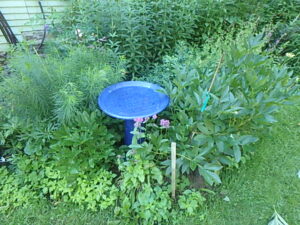
A simple bird bath can add color and interest with little work
I have three nice Japanese red maples that bring fond memories. Two came from my parent’s home in Connecticut, another from a friend. I dug 2 them as foot-tall saplings, one bigger. The one I planted in the early 1970’s and it is now 10 feet tall and wide with a 6-inch diameter trunk at the base. I see it and often think of the 60-foot tall “mother plant” I climbed as a boy.
Other things are easier than stone projects. I have two nice blue ceramic bird baths. They contrast nicely with the flowers around them, even though no birds ever bathe there. But I love the water in them, and that my wife Cindy Heath floats cut flowers in them. (Yes, my longtime partner and I finally got married July 1 in a Zoom wedding attended by loved ones all over.)
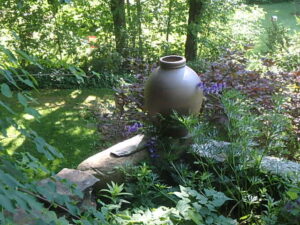
This urn gives me pleasure every time I walk past it
I have a lovely high-temperature fired urn in the garden, a birthday present from Cindy this year. It makes me happy every time I see it. It has a drainage hole and the potter, Stephen Proctor of Brattleboro, Vermont, tells us that it can stay outside all year. Always a bit of a worrier. I will bring it inside before Christmas. It’s too nice to risk having it crack.
A new garden this year is just on oval 7 by 10 feet. I put in a “Y” shaped path, so it looks like a peace sign from the 1960’s. One section is dedicated to milkweed plants for the monarch butterflies. The milkweed will, I suspect, eventually take over the entire garden. But for now? I love seeing the peace symbol – it reminds me of my activist youth.
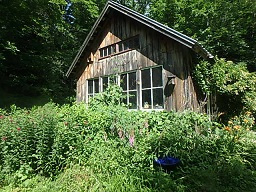
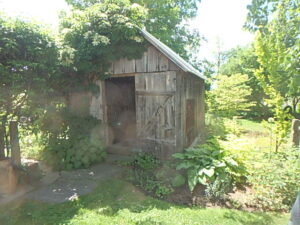
This barn was largely built in a day as a barn raising
Then there is my 16- by 20-foot barn. I had a barn raising event in the late 1990’s and had more than 30 friends show up. My late friend Bernice Johnson, then in her eighties, showed up with a little hammer in her hand. It makes me happy when I think of that day, and that we got the walls up and rafters on in one day. And now Cindy keeps it tidy inside – something I never managed to do.
Speaking of Cindy, this year she decided to build a gravel walkway down that 80-foot terrace I built for fruit trees in the 90’s. She did an amazing job, lining the path with old bricks I had salvaged from chimneys I removed. The path has a crushed stone base, landscape fabric and then a pea stone layer on top. And of course, Cindy has removed the weeds along the sides, and mulched the beds nicely. It makes me happy to walk along it.
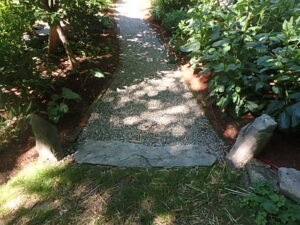
This pea stone pathway starts with two standing stones
I love the perennials I have gotten from friends and from gardeners I have interviewed. I remember every plant given to me, who gave it to me, and often when I got it. It’s part of what makes my garden so special to me. Now I tend to add little white plastic tags labeled with that information so it will be available even if I am not always around to provide that information.
I recently saw two Doric-style white wood columns free by the side of the road. I stopped. Garden art? Sure. I was in my old green truck, so I loaded them in, and now I have a new project. Not sure how I’ll use them, or where. But they’ll make me happy and remind me of traveling through Europe back when I was a young man. Gardens are good that way. Mine provide plenty of happy memories.
Right Plant, Right Place: Tips for Growing Great Mid-Summer Flowers
Posted on Wednesday, July 8, 2020 · Leave a Comment
It is mid-summer now, and my garden is full of gorgeous flowers, some finishing up their display, others just beginning. Here are some I love, and what I do to make them happy.
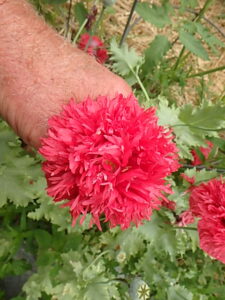
This double poppy comes back every year in my vegetable garden
The first flowers I see when I walk out my front door are poppies. Annual poppies ( Papaver somniferum). I didn’t plant most of them, or not this year. Each year I let them bloom and drop seeds after they’re done. They reward me with dozens of blossoms the following year. Sometimes I pick the pods and save to sprinkle seeds on the snow, an easy way to plant them in the dead of winter.
My poppies are in full sun and soil that is not particularly rich. I like these poppies because they ask nothing of me and each year the palette is a little different as they hybridize, offering some new colors and sizes. I have a nice deep red double annual poppy that blooms every year in one row of my vegetable garden. This year it is with the tomatoes.
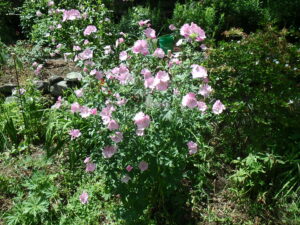
Pink mallow is an enthusiastic plant showing up everywhere
Another favorite of mine is pink mallow (Malva alcea). This is a big, often floppy perennial with lots of pink blossoms that resemble those of a hollyhock. In my garden it pops up anywhere and everywhere. I have to treat it a bit like a weed to keep it in control. It does best in full sun and rich soil that stays lightly moist.
Pink mallow has a tap root and does not transplant easily, unless you do so when small. I often stake mine to keep them upright – it can grow to be 2- to 5-feet tall. Not often seen in garden centers, get a seedling from a fellow gardener, and let it go to seed so you’ll get more plants.
Another flower that moves around the garden, appearing by
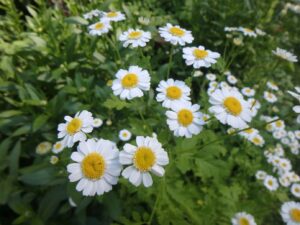
Feverfew volunteers to grow everywhere
whim, is feverfew ( Tanacetum parthenium). Feverfew has white daisy-like flowers with a yellow center, each blossom just three-quarters of an inch across, but appearing in vast numbers. It is a short-lived perennial that sows seeds freely, so if you don’t want more plants, cut off the flowers before the seeds are dropped.
Feverfew will grow in average soil, but prefers moist, rich soil. It’s blooming for me now, and will continue for the rest of the summer, or nearly. The flowers do well in a vase.
My beebalm ( Monarda didyma ) is just coming into full bloom now, and is deliciously fragrant. It is in the mint family, with a square stem that is relatively fragile. But they make great cut flowers, in part, because of their fragrance. Bees love them (hence the name), but hummingbirds do, too. Mine grow to 5 feet tall.

Bee balm does best in part sun and rich, moist soil
Many books claim beebalm is a full sun plant, but I disagree. It does best in morning sun or partial shade in rich, moist soil. It goes by quickly in hot, dry areas. The best blossom colors are red and purple, though cultivars in white and bluish are sold. Recently short varieties have appeared in the marketplace, but I have not found that they are very hardy. Beebalm spreads by root, but pulls easily if it gets too rambunctious.
Daylilies ( Hemerocallis spp.) are in bloom now, too. The common orange daylily is the friend of anyone who thinks they can’t grow flowers. You cannot kill a common orange daylily. I have dug them out, placed them on the lawn without any soil preparation, and they have thrived where placed.
Each blossom of a daylily blooms for just one day, but each scape, or flower stalk, has several buds that bloom in succession. The buds will open in a vase, too, so don’t be afraid to use them in flower arrangements. Unlike true lilies, these beauties are not eaten by lily-leaf beetles. They come in many colors from deep red to light yellow. I have tiny daylilies, and one variety that blooms on scapes as tall as me.
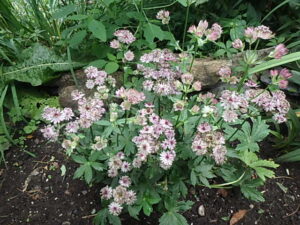
Astrantia does well in part sun
Great masterwort is an awkward name, so I prefer the scientific epithet, Astrantia major. This is a medium-height flower in the carrot family, along with Queen Anne’s lace, a wildflower or weed I love, too. The flowers range from white to purple-white, and bloom in great profusion. It is good cut flower, too. Each blossom is just an inch across, and resembles scabiosa.
Astrantia does well in part shade, but will grow in full sun if adequate moisture is present. The foliage is attractive even when the plant is not in bloom, and it is very well behaved – it stays as a nice clump and does not take over the garden.
I love knautia ( Knautia macedonia) both for the smallish (3/4-inch) purple-red, domed blossoms, and for its willingness to keep on blooming from now until fall. Most perennials have much shorter bloom periods, but knautia is a real trooper.
It has thin stems and delicate leaves, so is hard to display in a vase, but it is worth mixing with daisies or something else that will hold the blossoms up in a vase. I grow it in full sun with average soil, and it does well – and will occasionally provide volunteers from seed.
Each garden has its own winners and losers. Good gardeners try a lot of plants to find those that do best for them. So go buy some or trade with a friend.
Henry is a long time UNH Extension Service Master Gardener and the author of 4 gardening books. He is available for consultations near his home in Cornish Flat, NH.
Watering in Dry Times
Posted on Tuesday, July 7, 2020 · Leave a Comment
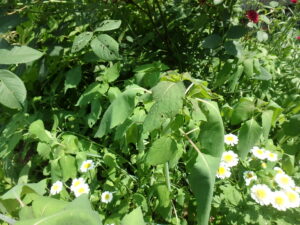
These limp leaves tell me it is time to water
June, for most of us, was a very dry time. When weeds and established perennials started to droop, I knew it was time to water, and I did. But watering done well takes time and, done poorly, wastes a lot of water – or doesn’t do the job. I have no crystal ball to know what the rest of the summer will be like – July started well with plenty of rain – but it’s good to plan ahead
First, how much rain do we need each week to be able to avoid watering? About an inch. If you have sandy soil, water runs right through it, so you need more. Clay soil has tiny soil particles and holds onto moisture nicely. But if clay goes bone dry, it can turn into something like cement that will let water run off the surface and downhill instead of soaking in.
In either case, you can make watering easier and your plants more vigorous by adding compost to your soil. That is easiest to do before planting, of course, but you can top dress the soil with compost and let earthworms, roots and rain work it into the soil over time. Half an inch of compost on the lawn each spring and fall will help a lot. And mulching with compost, an inch or so, will help your flowers and veggies considerably.
In general, I don’t like overhead watering systems. Yes, they do mimic a rain storm, but they waste a lot of water, and water the walkways and weeds as well as the plants. So long as the soil is not parched, I like to water plants using a watering wand.
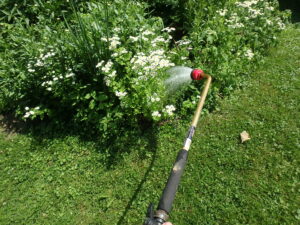
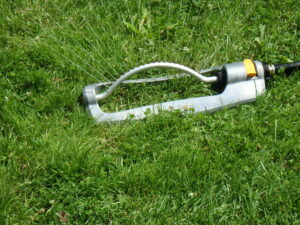
A watering wand directs a soft spray just where you want it
My watering wand is a 30-inch long aluminum tube with a watering rose on the end and a shut-off valve that allows me to increase or decrease the flow of water. I like those made by Dramm, a company that specializes in watering devices and has figured out how to deliver lots of water while not disturbing young plants.
In the vegetable garden, I walk up the rows directing the water around my tomatoes or irrigating the lettuce. The wand allows me to spray water close to the ground level – it’s not falling from waist high, the way a nozzle on the end of a hose would. I place hardwood grade stakes at the end of each row to guide the hose and keep it from damaging plants
But during an extended period of hot and dry weather, I know I need to water each bed entirely, from side to side, but not the walkways. If I just water right around the tomatoes, for example, the surrounding soil will wick away the moisture that you gave to your plants. So you need to soak the soil around your plants, not just at the stem.
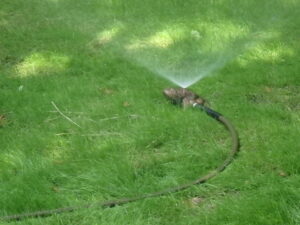
This simple, stationary watering frog waters a circle 20 feet across
When watering newly planted trees, or those planted last year, water in a circle around the tree or shrub that extends at least to the drip line. Later on, when a tree is mature, the roots can go far beyond that. If the soil is dry, you might be surprised how long you need to water around a tree in order to get water to get down 6 or 12 inches – which is where the roots are.
Another way to keep your plants happy in dry times is to mulch them well. This will keep the soil moisture from evaporating and will minimize those thirsty, greedy weeds.
In the vegetable garden I put down 4 to 6 layers of newspapers or a single layer of cardboard or large brown paper bags, and then cover that with straw. To make sure a light rain gets to my plants, I don’t mulch right up to the plants. Or I’ll mulch with chopped fall leaves or grass clippings right next to the plants. Leaves or grass let rain pass through more easily than paper and straw, but keep down weeds.
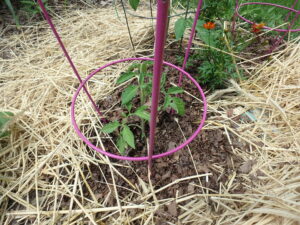
This young tomato is mulched with a circle of chopped leaves, paper, and straw
Why use straw instead of hay? Straw generally costs more than straw – $10 a bale or more versus $5 or less. Mulch hay has seeds, that’s why. Straw is not supposed to have seeds, though occasionally it does. I was told that even if you see seeds in straw, they are immature and won’t germinate.
I don’t like to use black plastic in the garden. It does keep down weeds and holds in moisture, but it ends up in the landfill a year later. And it may interfere with the beneficial microorganisms in the soil – it gets pretty hot under the plastic. It can also create pools of water, a good breeding place for mosquitoes. So I avoid it.
In flower beds I prefer to grow plants so close together that few weeds grow there. But in new beds I use finely ground bark mulch. Never the colored kind, orange or black, as they have chemicals I don’t want.
A flip flop watering device can cover a lot of space
For big areas of new plants or lawn, a sprinkler of some kind is good. I like a Melnor brand flip-flop sprinkler, model XT360 M. It is easy to use, and comes with a lifetime warranty. For small areas, I like a fixed sprinkler like my brass frog that waters calmly in a 20-foot circle.
Plants will usually recover from getting dehydrated, but it takes a week or more, so you lose valuable growing time. I want my tomatoes sooner, not later. So I make sure they don’t dry out too badly in dry times.
If you pay attention to your plant, if you really look at them, you will see when they start to wilt. That’s the time to water. So get a good watering device, and be ready!
Henry can be reached at
henry.homeyer@comcast.net. He is the author of 4 gardening books, and can make house calls to offer advice about your garden if you live nearby. He lives in Cornish Flat, NH.
Roses 101: They Are Easier to Grow Than You Might Think
Posted on Tuesday, June 30, 2020 · Leave a Comment
I love roses, but avoided planting any for a long time. They had a reputation for being fussy. I thought they would attract Japanese beetles, and carry black spot and other diseases. In recent years I have been enjoying growing roses and find that modern breeders have come up with many fine roses that are easy to grow, and not fussy.
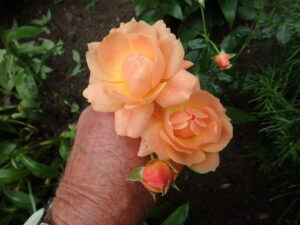
At Last is a re-blooming hybrid developed by Proven Winners. It’s a Zone 5 plant that I’ve had for 4 years in Zone 4
So what have I learned? First, roses love full sun, but will grow in part shade. But the more sun they get, the better they do. Six hours of sunshine is considered full sun by most authorities. Afternoon sun is more potent than morning sun, so the west side of the house is better than the east.
Second, roses need good, rich soil. If you have sandy soil or a heavy clay, you will need to improve it in order to succeed. What does that mean? Dig a hole that is at least 3 times as wide as the pot it was in when you purchased it. If your rose came in an 8-inch pot, a 24-inch hole should be the minimum you dig.
The late Mike Lowe, a rosarian who grew 2,000 kinds of roses in Nashua, NH, told me to dig a hole 36 inches wide and 24 inches deep – if possible. If you have heavy clay, he said, put a couple of inches of pea stone in the bottom of the hole for drainage. The fill it with an equal mix of topsoil and compost.
When planting a tree, it is important to dig a hole shallow enough so that the tree does not get its trunk flare buried. The trunk flare is the portion of the tree that was above ground when it was growing before it was potted up for sale. Often that trunk flare is covered with soil when you buy it, and needs to be exposed.
Not so, for roses.
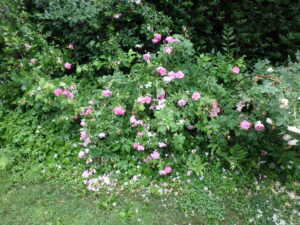
This old fashioned fragrant rose blooms but once but it is lovely
Many roses are grafted onto rootstock. The bud union – a scar – should be buried in the soil. The colder the climate, the deeper that graft line or bud union should be. For Zone 4, it should be about 4 inches below the final soil line. Zone 5? 3 inches. Zone 6? 2 inches.
Third, roses like soil that is just slightly acidic – pH 6.0 to 6.8. If you have acidic soil, say somewhere in the 5.0 to 6.0 range, you should add limestone to bring up the soil pH and make it less acidic. Mike Lowe suggested burying a 3-inch square of gypsum wallboard directly below each rose to provide limestone over the long haul. I’m not sure just how effective that is.
Don’t know your soil pH? You can get an inexpensive pH testing kit at your local garden center. Or you can send a sample to your State University Extension Service.
Roses need more water than most other things, but do not want to sit in soggy soil. They should get an inch of water per week from rain, or a couple of watering cans of water applied slowly so it can soak in. A deep watering once a week is better than a little sprinkle every day.
I called Mike and Angie Chute of East Providence, Rhode Island to pick their brains about roses. They have been growing roses for 25 years, and are the authors of
Roses for New England: A Guide to Sustainable Rose Gardening. They are well known speakers at the spring flower shows. Their web site is www.rosesolutions.net , and it’s worth visiting.
I asked them what they thought of the new roses that have been developed in the last 25 years, and how they rate them against the old heritage roses. Mike explained that the trademarked “Knock Out” roses have become immensely popular. I have some, and agree that they are wonderful. They bloom most of the summer and well into the fall, seem to get no diseases and do not attract pests.
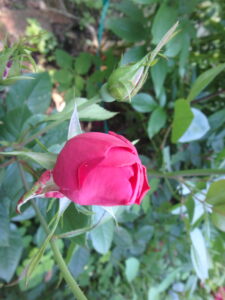
This Knockout rose blooms all summer
On the other hand, most of the Knock Out roses have no fragrance, and do not have the long stems that lovers want to present to their sweeties. Mike and Angie grow them, along with 150 other kinds of roses, and said that the “Easy Elegance” series of roses is at least as good, and maybe better.
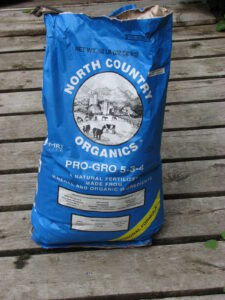
Want more blossoms? Mike said that roses do better if they get some fertilizer a few times during the course of the summer. They use chemical fertilizer, a 10-10-10 for a “kick in the pants”, and mulch with chopped seaweed. They like an organic, slow-release bagged fertilizer called Rose Tone, and sometimes use liquid fish and seaweed fertilizers made by Neptune’s Harvest.
My roses grow in good soil, and I have been neglectful of them – I rarely fertilize. But I understand that a dose of liquid fish and seaweed fertilizer 2 or 3 times in the summer might help. I’ll do it this weekend.
Want to learn more? The Chute’s book, mentioned above, is excellent, and worth reading. I also like one published by Rodale Press in 2002, Growing Roses Organically: Your Guide to Creating an Easy-Care Garden Full of Fragrance and Beauty by Barbara Wilde. It has a half-page description with a photo of each of 100 roses that will do well with organic care.
June is over, but roses are not. Now days, many roses will re-bloom every 45 days or so, and some bloom almost constantly. Just be sure to cut off spent blossoms, and down to another shoot with 5 leaves or more.
Henry is the author of 4 gardening books and is a veteran of the UNH Master Gardener program. His email is
henry.homeyer@comcast.net.
Where to Begin: How to Design a Garden
Posted on Tuesday, June 23, 2020 · Leave a Comment
Let’s say you have recently purchased a house and want to create beautiful gardens. How should you begin? I recently visited Gordon and Mary Hayward, both garden designers, at their home in Westminster West, Vermont. Their gardens are as nice as any private gardens I have seen, and I wanted to understand their thought process.
It’s important to have views of the garden from the windows
The Haywards bought a 1790’s farmhouse 36 years ago that needed a lot of work. The landscape was full of brush and abandoned cars. But they were undaunted. They explained that they wanted a house in a garden, not a house with gardens you walk by. They wanted to be surrounded by gorgeous flowers and trees, with sculpture and walkways. They wanted gardens all around them.
The first thing they did was establish the central axis of the gardens. They did this by tying a string to the front door plate and running it straight out to the trunk of a mature apple tree, thereby creating a focal point. All the main beds are either parallel or perpendicular to that string. I’d estimate that the pathway along the central axis extends from the house for a couple of hundred feet.
This old apple tree served to establish an axis from the front door of the house
At the end of that central path is a magnificent old apple tree, surrounded by an 80-foot circle of lawn, because the drip line of the apple tree is circular. Flowers in curved beds surround the lawn. As Mary Hayward said, “Curves need to make sense.” Most of the paths and lines in their garden beds are straight, only occasionally curving or meandering to go around a fixed feature.
“Pay attention to views from the doors and windows because they’ll suggest garden placement,” said Gordon. Look out them, make sure what you see pleases you. Not only that, he said you gain confidence in your design if you pay attention to the house. There needs to be a relationship between the house and the garden spaces. “The garden is an extension of the house and the people in it,” he said.
Garden paths should be the same width for their entire length
What else should one consider? The north-south orientation is important, Gordon said. You can grow roses on the south side of a barn, for example, but not on the north side, as there is much less sun. Where is sunset? Most of us like to rest at the end of a day in the garden to watch the sun go down. You can design that – and maybe steal a view of distant hills owned by others. You may need a chain saw to accomplish that.
Mary Hayward grew up near Hidcote Manor Garden, one of England’s finest old gardens, and visited often when growing up. Those visits shaped her view of how a garden should look: a series of connected rooms. Gordon Hayward grew up on apple orchard, and so he wanted apple trees on his landscape as an adult. It makes sense to have elements of a garden that resonate with each person, based on personal history.
Sculpture adds beauty and interest to a garden
“Every decorative element in a garden should have a story, a reason,” Gordon said. “Don’t go buy a cute elephant. Consider what your grandmother or grandfather had.” In the long run, that will resonate with you better.
When Gordon designs a garden for someone, he always asks what their parents or grandparents had for gardens. Are there special plants that bring back memories of simpler times? So, for example, I have a piece of a peony my grandmother (who passed away in 1952) grew called “Festiva Maxima”, and I would hate to be without it. It’s my favorite flower.
Mary and Gordon spent time researching the farm they bought, learning about how it operated and where long-gone outbuildings were located. They have three old milk can where the milking parlor once stood, and other features that remind them of the farm’s history. They unearthed granite fence posts and old bricks, and put them all to good use.
This old shed adds interest to the garden
There is an old tobacco-drying shed in the gardens, and they used the proportions of that to determine the size of beds near it. The door of the shed is eight feet tall, so they used multiples or fractions of 8 for beds around it. The barn itself is 16 feet long – the same measure as the dirt road in front of the property, an old unit of measurement called a rod.
Gordon pointed out that for five months of the year there are no perennials visible in their garden. It is thus very important to have stone walls, trees, sculpture, pottery and outbuildings that are handsome and clearly visible from key windows of the house all year long. Designed properly, a garden can be as beautiful in winter as it is in summer. And since trees and shrubs take time to reach maturity, they are a logical early step when designing your garden.
This old apple tree served to establish an axis from the front door of the house
I bought my house fifty years ago this August. It’s an old creamery, a butter factory built in 1888. It came with an acre of land, though I have since added more land. It had no perennials or shrubs, just a big native cherry tree, a few sugar maples and two huge elms, now long gone. Lawn surrounded the house.
If I were starting all over again, I would begin by designing a garden layout. To help me in that endeavor, I would study good gardens in glossy books and by visiting as many fine gardens as I could. I would take classes and go to arboretums to learn about trees and shrubs that might be used to improve the landscape. I would join a garden club and go on garden tours. And I would certainly want to read all of Gordon Hayward’s wonderful gardening books.
Henry is the author of 4 gardening books. He is now offering Zoom presentations to garden clubs and library groups. E-mail him at
henry.homeyer@comcast.net for more information.
Dealing with Pests and Diseases
Posted on Tuesday, June 16, 2020 · Leave a Comment
My gardening grandfather came over from Germany around 1910. He was an organic gardener, perhaps because there were few chemicals sold to kill bugs and diseases back then. He gardened the old fashioned way: hen manure for fertilizer, hand picking to keep potato beetles under control, and a good compost pile to nurture the soil.
When Organic Farming and Gardening Magazine started up in the 1940’s, Grampy was an early subscriber – and a believer in organic gardening. He grew great vegetables and prize-winning flowers. I grew up spending time on his small farm every summer, and helping in the garden. I’ve always believed in organic gardening: gardening without chemicals.
That said, I understand why many gardeners use chemicals: something is threatening their roses or their broccoli. Flea beetles are making holes in their cabbage. And what about chemicals to make the tomatoes grow faster and bigger? I get the urge, too. But there are alternatives.
Row cover with hoops helps to keep insects off and keep plants warm
First, I want to explain that chemical fertilizers are generally salts of nitrogen, phosphorus and potassium. They are water soluble and can be taken up fast by plants, pushing fast growth. But fast growth is not always good: stems are often weaker, and excess nitrogen in plants attracts insect pests. Bugs need it to form proteins needed to grow and have babies. Not only that, a few days of heavy rain can dissolve your fertilizer and wash it away.
But if you are used to using bagged fertilizers, you can use bagged organic fertilizers. They are made from things like seaweed and ground oyster shells, cottonseed meal or ground peanut shells. They are broken down by microorganisms in the soil and made available over a much longer period of time. Unlike chemical fertilizers, they can’t burn root hairs if too much is applied.
Then there is compost. Compost improves soil qualities as well as adding needed minerals to the soil. It makes heavy soils fluffier, and it makes sandy soils better able to hold water. Make your own, or buy it bags or by the truckload. You can use it as mulch, and let the earthworms carry it down into the soil.
What about bugs? First, please understand that not all bugs are bad. There are many beneficial insects, bugs that eat the bad boys. I have few insect pests, but never spray anything to kill bugs. If you spray your roses to kill the Japanese beetles, you may be killing beneficial parasitic wasp larvae that are on the roses but unseen.
My first line of defense is always to hand-pick problem bugs. I get to recognize them, and then pick them and drop them in soapy water. If you don’t like handling Japanese beetles, get a gallon milk jug and cut away part of the top, leaving the handle. Add soapy water and hold the jug under the leaf and tap it until the culprit falls in. Or you can just crush them with your fingers, as many gardeners do. They are easy to catch early in the morning, before they have had their coffee (or perhaps warm up in the sun).
Gardening practices can help, too. For example, I plant my potatoes in June, long after most books say to. I find that I get fewer potato beetles that way. And once the leaves are up, I check for beetles often. I look under the leaves for orange egg masses, and scrape them into a jar of soapy water. I drown the larvae and beetles if I see them.
I have read that the life cycle of a Colorado potato beetle from egg to adult is 35 to 40 days. Plant in early April, and each potato beetle can start another generation 4 or 5 times or so before harvest. Break the cycle early to keep numbers down, as each momma beetle lays many eggs.
I have had trouble with a beetle eating my cucumbers and squash plants, defoliating them when they are small. The beetles are fast and hard to catch. So what do I do?

Row cover with hoops helps to keep insects off and keep plants warm
I drape a light-weight gauzy film of agricultural fabric over plants to keep bugs from physically getting to my plants. This cloth allows sun and rain to pass through, but not bugs. It’s called row cover or by trade names like Reemay and Agribon. There are other brand names, too.
Sometimes I use wire hoops to keep the row cover off the plants, other times I just lay it over them. I pin the cloth down with earth staples to keep it from blowing off. Since vine crops are insect pollinated, I need to take it off once the plants start to bloom.
Row cover is not perfect: striped cucumber beetles live in the soil, and sometimes will appear under the row cover, but mostly it prevents them from getting to the plants. To be on the safe side, I start cukes and squash inside the house 3 weeks or more before planting time (or buy a 6-pack of starts). That gives me good-sized plants that can survive some beetle munching.
As an organic gardener I accept that sometimes bugs or diseases win. But my garden always feeds me, and I love working in it.
You can e-mail questions to Henry at
henry.homeyer@comcast.net. But be patient! Henry is outdoors most of the time at this season.
How to Prepare for a Garden Party
Posted on Tuesday, June 9, 2020 · Leave a Comment
In these times, garden parties are few and far between. But if you practice social distancing (tea at ten feet) and wear masks as needed, you can still share your garden with others. And despite all the hoopla about how people are gardening more, we all still have weeds. But don’t let that daunt you. Here are some tips for making the garden look great, weeds and all – and sharing it with others.
Lyme, New Hampshire has an informal group of gardeners that associate in a “not-quite-a-garden-club”. No dues, no meetings – except a mid-winter potluck. Someone manages a list serve with good info, links to articles, questions, offers of free plants, and more.
Each summer members take turns hosting a weekly “Pardon-My-Garden” event. All members are invited to pop by a garden, tour around, share libations and snacks, pull weeds, offer suggestions. These are wonderful. But this year some are hesitant to attend, or to host. Here are a few ways brave souls have reduced risks:
1) Instead of having a garden open for 2 hours in the evening, some are saying, “come anytime between 1pm and 7pm”. That makes the population density at any time lower.
2) Attendees are invited to bring their own glasses, if they want to enjoy a drink. Or hosts serve drinks in single-serving cans or bottles. At one event, box wine was served – no need to touch a cork or bottle. For snacks, there were little zipper bags full of nuts, presumably prepared wearing gloves and a mask.
3) Everyone is very respectful of interpersonal space. Hard not to hug friends after weeks of isolation, but we all just have to wave.
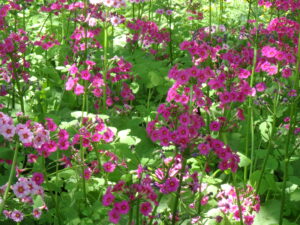
Moist rich shady soil is good for Primula japonica
June is the best time in my garden. I have a primrose garden in the shade of old apple trees with many hundreds of candelabra or Japanese primroses ( Primula japonica) in full bloom. So I want to share this with friends, and recently invited 2 other couples to join Cindy and me for a tour and a chat.
So how did I get the garden ready? First, I mowed the lawn the day before the event. I also have a nice battery-powered string trimmer that I used to tidy up those corners and edges the mower doesn’t get. A nice lawn sets a good first impression.
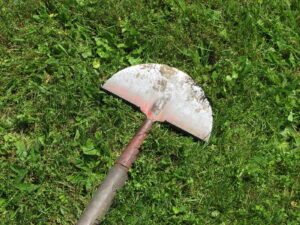
An edging tool helps cut nice edges, but a shovel will work
My partner, Cindy, loves cutting sharp edges around flower beds. She uses an edging tool that looks like a half moon on a long handle to shape nice curves to beds. She also uses a tool that you could make: 30 feet of strong masons twine wrapped around 2 nice wooden pegs with points. She pushes a peg into the ground, unwinds some string, and pulls the string tight from the other end. She then pops the second peg into the ground. That gives her a perfectly straight edge if she needs one. Great in the vegetable garden.
Next, I look for tall weeds, things that tower over our tidy flowers. Got a clump of tall timothy grass that came, via seed, from last year’s mulch hay? Dig it out. And any weed that is blooming should be pulled before it goes to seed and creates more work later on. Don’t worry about weeds in beds with nothing blooming – no one will pay attention.
Look for empty spaces. After getting the most obvious weeds, there will be spaces. You can cover these with mulch, if you wish. Or you can divide a large clump of perennials and put a few in the space. Of course, you can also go to the garden center and spend your Covid-19 relief check on new plants, too. Annuals are easy fillers – and many bloom all summer.
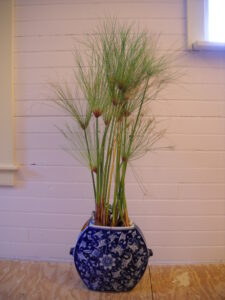
This Papyrus will spice up a garden if moved outdoors
Plants in pots are good fillers, too. I have a large blue and white Chinese vase with papyrus growing in it. It has been wintering over in the house for several years, and is a big, handsome plant. I am not above moving it from the deck to the garden to fill in somewhere, or to add interest to a place with no blossoms.
So far, most things aren’t tall enough to flop, but peonies are about to bloom for me, and a hard rain will knock many of them to the ground unless they are surrounded by peony cages or tied up with stakes. Best to support them now, before they flop. The same goes for delphinium, those lovely tall flowers that are famous for flopping and breaking in a hard rain. Like weeding, staking takes time and patience, but makes for a much better experience, over all.
Lastly, clean up the front of beds. Weed, and if you like mulch, add some. I mulched the first 4 feet of my huge primrose garden, and a friend thought I’d done the whole thing!
Some feel that gardening is a solitary venture. Not me. Yes, working alone, or with Cindy, is fun. But sharing the garden with others is even better. And when I do invite people over, I generally have some “spare” plants potted up to send home with my guests. And the great thing is, I know when I visit their gardens, I will go home with something I love.
Henry lives and gardens in Cornish Flat, NH. Write him at PO Box 364, Cornish Flat, NH 037476. Please include a SASE if you wish a response by mail. Better yet, e-mail Henry at
henry.homeyer@comcast.net. He is the author of 4 gardening books.
How to Have a Better Lawn in Summer
Posted on Tuesday, June 2, 2020 · Leave a Comment
Let’s face it: most of us do not have a lawn that looks like the grass on a major league infield. And I for one, don’t want one that does. Most professional ball fields are doctored weekly with chemicals: fungicides, herbicides, fertilizers, insecticides. They are cut very short, and look “perfect”. Yes, I want a lawn that is green, but also full of diversity – clover, different kinds of grass, and (I can see some of you shuddering) even a few dandelions.
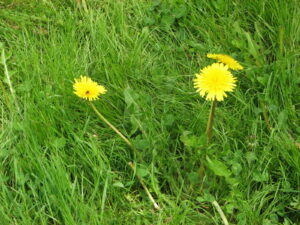
Dandelions and clover in the lawn are not bad
The turf grass industry decided long ago that clover is a weed. Why is that? Because the herbicides they promote to control weeds like dandelions and plantain also kill clover – but not grasses. But clover is not a weed. It is a nitrogen-fixing legume that actually adds nitrogen to the soil. It is a friend to your lawn – and your children, who delight in finding good luck with a rare 4-leafed clover. Add Weed-n-Feed and the clover is gone.
So what can you do to have a better lawn when the heat of summer arrives? I talked to Paul Sachs, of North Country Organics, an organic fertilizer company in Bradford, Vermont. Paul has written books about lawn care and soil biology, and really is a very knowledgeable lawn guy. He mentioned several things you can do, first among them: adjust your mower blades up high.
Paul Sachs explained that cutting the lawn at 3 to 4-inches will help to shade the crown of the grass and keep it cooler, which is good. Hot weather stresses most grasses. Taller grass will also develop a deeper root system because the longer blades will produce more food to nurture the roots.
I don’t recommend that you bag the clippings when you mow the lawn. If you are tending your lawn organically (avoiding all chemicals), the clippings will break down, creating a thin layer of compost. Earthworms will turn that organic matter into the soil, too, like little rototillers. The chopped grass will serve to shade the soil a little, helping to reduce heat stress.
The only time I collect the grass clippings is when we get a week or more of hot, rainy weather and I can’t or don’t mow. When there are big lumps of grass, it can smother the grass and turn it yellow, eventually killing it. Fresh grass clippings, added to a compost pile, will add lots of nitrogen and heat up the compost quickly, and helping it to break down the carbon-based brown matter.
If you have bare spots in the lawn, now is the time to plant some grass seed. Do that as soon as you can, as the hot weather ahead will make it harder for new lawn to establish itself. You want to get new grass established before annual crabgrass takes over. The best choice for that is a perennial rye grass, according to Paul Sachs. It germinates quickly – in 5-to7-days.
Start by loosening the soil in the bare spots with a short-tine garden rake. Scratch it back and forth to loosen the soil, and to remove any rocks. Scatter a layer of seed, then use a lawn rake to work it into the loose soil. I turn the lawn rake upside down, so I can drag the back of the tines across the seed. This will cover most of the seed.

Cover seeded areas with straw and water often scaled
You can help your new planting by shaking out some straw over the area, providing a thin layer to shade the soil. It is important that the seed not dry out once it has begun to grow. So if the weather is hot and dry, check the soil every day, and water as needed.
Paul Sachs told me that if you have an irrigation system for your lawn, you can help your lawn by giving it a tenth of an inch of water every day at the heat of the day. That light watering evaporates, cooling the soil and your grass. It’s similar to what we do when we sweat to cool down. Then once a week, he said, give your lawn an inch of water for a deep watering – if we have not gotten that moisture from the sky.
Another way you can help your lawn to grow better and avoid heat stress is to add mycorrhizal fungi to your soil. These fungi work with plant roots in a symbiotic relationship – one in which both organisms benefit. According to Paul Sachs, these are best added at planting time when preparing the soil.
The mycorrhizal fungi coat plant roots and benefit from sugars produced and exuded by the roots. In turn the mycorrhizal fungi breakdown soil minerals and provide needed nutrients to the green plants in a form they can use. Not only grasses benefit from mycorrhizal fungi, most green plants do. Learn more at
https://mycorrhizae.com/. A number of commercial products are available to provide these beneficial organisms, and many are present without treatment.
One last thought: if we could purchase daffodils that would grow in the lawn and re-bloom after mowing, we would pay big bucks for them, right? Especially if they would send out seeds and show up even where we have not planted them. But call them dandelions, and some people declare war. Me? I love those bright harbingers of spring and summer and don’t mind them in my lawn. A diverse lawn is a healthy lawn. I like to say, if it’s green and I can mow it, it’s a lawn!
Henry is now offering workshops on-line using Zoom to garden clubs and library groups. Contact him at
henry.homeyer@comcast.net. He is the author of 4 gardening books.
How to Divide Flowers to Get More Plants – for Free!
Posted on Tuesday, May 26, 2020 · Leave a Comment
I spend a lot in plant nurseries. At $10 or more a pop, it is easy to spend a hundred dollars quick as a blink. But I’m also a firm believer in dividing my perennials so that I don’t have to spend so much. Once you have established a good plant palette, you can increase numbers by dividing plants. Don’t be afraid to give it a try.
You need to learn a little about each plant in order to know if the roots can easily be separated, allowing you to divide plants. And although horticulturists may tell you that the time of year is important, in my experience you can divide most things anytime. Peonies are supposed to be moved or divided only in the fall after they have gone dormant, but I once moved 50 peonies for a client in June and they thrived.
One way to learn about propagation is by using a good text. My bible is Manual of Herbaceous Ornamental Plants by Steven M. Stills (Stipes Press, paperback, 814 pages). Although the publisher sells new copies at $58.80, used copies are readily available for a fraction of the price.
The book tells when to divide (spring or fall) and whether plants spread easily by seed. It also gives cultural tips about where and how to plant each flower. Most common and many unusual plants are included, one or two pages on each. There are drawings for each, with a few color photos in the back.
Don’t be afraid to cut through leaves or roots when dividing a big patch of daylilies
Another way to learn about dividing plants is to just do it. Dig up a plant and examine the roots. I use a drain spade to do this. A drain spade is a pointed shovel with a long, narrow blade (commonly 6 inches wide and 16 inches long). I plunge it into the soil and pry back a little. Then I repeat the procedure on all sides. When the plant is loose, I lift it out.
Some plants have long, deep roots. Others, such as peonies, have roots that look like tubers. Most have lots of string-like roots going in all directions. If the bed you are working in is full of weeds, it is important to distinguish between grass or weed roots and those of your plant. Observe the color and texture of the plant roots and remove any roots that are different. Daylily roots, for example are very distinctive in both color and shape.
Barerooting with a hose will ensure you have no weed roots
When dividing a plant, you may wish to actually bare-root it. Do this by shaking off any soil attached, or washing the root system with a hose to remove the soil. Weed or grass roots will be obvious when you do that. I normally do that for any gifted plants because I want to avoid getting any invasive weeds that might come with it. I learned that lesson the hard way, having accepted some nice iris plants that had goutweed roots embedded that then have plagued me for 30 years.
If all the roots are attached to a single stem, you cannot divide the plant. But most plants are not like that. You can usually tease the roots apart, taking sections of the clump apart. Each chunk will give you a nice plant.
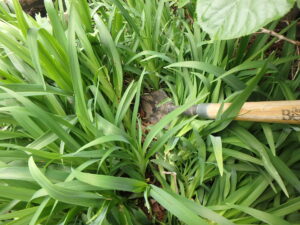
Hostas are common shade plants with lovely foliage. They do produce white flowers in mid-summer, but most people grow them for the foliage. Big clumps commonly are created as the plant expands, roots sending up new plants. Dig up a big clump, and you might get a dozen plants – or more.
Dividing hostas roots with a serrated knife is easy
I was dividing some hostas recently, and found some clumps hard to pull apart. So I used a curved, serrated knife to cut through some roots, allowing me to separate them. If you don’t have a garden knife, buy a steak knife at a yard sale or junk shop – on sneak one out of the kitchen – and it will work just fine.
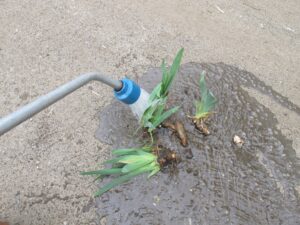
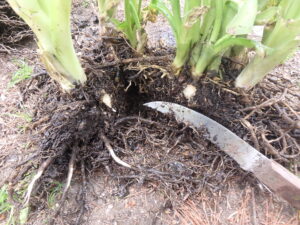
And then I wanted to move some common orange daylilies. These send out long roots, which then send up new plants, so one plant can become many just in the time it takes to get a bottle of orange pop from the kitchen. Or a year to two.
With the daylilies, I used a shovel to cut through the roots between plants to get them into clumps of a manageable size. Don’t worry about damaging roots or leaves, these puppies are indestructible. Just dig up, cut apart and move.
For spring blooming plants, digging now may hinder flowering this year. For fall blooming plants, that is less of a problem. Some plants benefit by digging, dividing and fertilizing. Steven Stills’ book mentions how often to do that: for purple cone flower, for example, it is every 4 years. For Shasta daisies, every other spring is best. And so on.
Always choose a cool, cloudy day for dividing plants. Even a drizzly day. Plants can go into shock if divided at noon on a hot day. I like to do it in the evening when rain is in the forecast.
The great thing about digging up a big perennial is not only that you have more plants: your friends will, too. I often put a blurb in my town list serve offering free plants. I’ve made some very nice friends that way!
Henry is now teaching Zoom classes to gardening clubs and libraries. Contact him at
henry.homeyer@comcast.net. He is the author of 4 gardening books.


 Click Here to buy from Cobrahead