Get Out of the House and Go to One of This Year’s Flower Shows!
Posted on Saturday, February 2, 2019 · Leave a Comment
I am always perked up when the spring flower shows arrive, and I always try to get to a couple of them. If you’re feeling the mid-winter blues, I highly recommend attending one – or more. Here’s this year’s lineup.
The first major show is the Connecticut Flower and Garden Show at the Convention Center in Hartford. It opens on Thursday, February 21 and runs until Sunday the 24th. This is a big show, with some 300 booths. I like to go down on opening day, or Friday to avoid the crowds. It used to compete with the show in Providence, but that show dissolved some years ago so the crowds in Hartford are even bigger.
As with most shows, the Connecticut show has educational seminars, always a big plus for me. I like to take an hour or two out of a long day of looking at displays to sit down in an auditorium and listen to a speaker talking knowledgeably about a topic they care about.
There are some 80 hours of seminars over the 4 days of the Connecticut Show. Topics like “5 Keys to Prevent Tomato Disease” by Petra Page-Mann, the owner of Fruition Seed Company, or “Benefits of Bio-Char Soil” by Pat White sound good to me.

Vermont Flower Show 2017
Next comes the Vermont Flower Show March 1 to 3 at the Champlain Valley Expo Center in Essex Junction. This is a nice small show that is a cooperative venture put on by the Vermont Nursery and Landscape Association every two years. It has one large central garden display, and many booths with vendors. I love the model train display that delights small children (and me).
Tickets to Vermont Show are $20, but discounted to $15 for seniors and $10 for students 13 to 17 if you buy them in advance. Kids 5 to 12 are just $5. There is plenty to do for kids, including a show each day at 11 and 2, (magic, song, or marionettes) and lots of arts and crafts activities.
The Philadelphia Flower Show is huge and runs for over a week, starting March 2 and running to March 10 at the Pennsylvania Convention Center. This show has been around since 1829, so they know what they are doing. I went last year and was amazed at the number of displays. I loved talking to exhibitors about their favorite house plant or cactus on display. Many were there to answer questions. This year the theme is “Flower Power”. The entrance display alone has 8,000 fresh flowers in it, of 85 varieties. You get the idea. More is better seems to their mantra.

Philadelphia Show 2018
Tickets can bought in advance on-line for a saving. Day of the event? $35 to $42 for adults, no senior discounts. Students $21 to $26, kids ages 2 to 16 are $17 to $20. Week days are cheaper than weekends.
The Boston Flower Show runs from March 13 to 17 at the Seaport World Trade Center. Tickets are only about half the price of the Philly Show. I haven’t been in a few years, but checked with a few folks who went last year. The consensus? It’s a pretty commercial show. I checked the floor map, and less than a quarter of the space appears to be dedicated to gardens. Still, for many of us, buying things – plants, seeds, tools and other garden gee-gaws is fun, so maybe there is nothing wrong with that.
The following weekend, March 22 to 24 is the Capital District Garden and Flower Show in Troy, NY at the Hudson Valley Community College. I’ve never been, but hope to this year. It’s outside of Albany, NY. It appears to have about a dozen gardens, a dozen classes of flower competition, and nearly 150 vendors. Tickets are $14 and children under 12 are free.
Then March 28 to 31 is the Portland, Maine Flower Show at Thompson’s Point on the waterfront in Portland. The theme this year is “A Walk in Maine”. There are 4 or 5 lectures each day, display gardens, vendors.
The Rhode Island Spring Flower and Garden Show is a primarily a home show sponsored by the RI Builders Association on April 4 to 7 at the Convention Center in Providence. I called them and learned that 10,000 feet of floor space will be allocated to the Flower Show (out of 120,000). This is a new show, not the same as the RI Flower Show that took over the entire RI Convention Center up until 2016. Still, admission is just $10 and kids are free, so it would be worth a visit if you are nearby.
That same weekend The Seacoast Home and Garden show will be at the Whittemore Center at UNH in Durham, NH on April 6 and 7. Like the Rhode Island Show, this is primarily a home show, but some garden features are included.
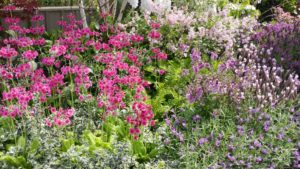
Primroses at Chelsea Flower Show
The last, and most impressive show each year is the Chelsea Flower Show in London, England. This year it’s on May 21 to 25. I went a few years ago and was totally awestruck. The show has a big tent, but much of it is outdoors so many of the gardens include full-sized trees. Join the Royal Horticultural Society so you can get in the first 2 days of the show, and also get a discount on tickets. Still, a ticket costs between $70 and $85 for a day. Well worth it, if you can afford it. In any case, do try to get to a show somewhere.
Henry is a UNH Master Gardener, the author of 4 gardening books and a lifelong organic gardener. You may reach him at henry.homeyer@comcast.net.
To have Henry’s articles land directly in your inbox, please send an email to henry.homeyer@comcast.net.
Staying Busy in the Garden’s Slow Time
Posted on Tuesday, January 29, 2019 · Leave a Comment
Winter is our slow season, and many gardeners begin to languish as January finishes and spring is still far away. It is important to keep busy. For me, this means reading gardening books and magazines, and working on small tasks that can be done indoors now. Preparing plant labels is one of many tasks that can be tedious in summer, but pleasant in winter.

Blue Balloon Flower or Platycodon
First, you might wonder, why bother with plant labels? There are several reasons. First, labels show you exactly where a plant will appear, come spring or summer. Blue balloon flower (Platycodon grandiflora), for example, stays dormant weeks past other perennials in the spring. It would be easy to disturb the roots of this plant in spring by digging a spot for a new perennial that needs a home. A label will prevent that.
Second, we forget names. I like to use the Latin or scientific name for plants with labels because if I have that, I will probably remember the common name. I like to include the cultivar or variety name, too, as visitors to the garden often ask me things like “So which aster is that?” If my tag includes ‘Alma Potschke’ or ‘Barr’s Pink’, I can help a fellow gardener find the variety they saw in my garden.
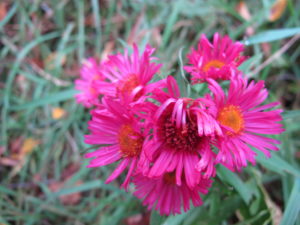
Aster Alma Plotschke
Labels can include lots of information. I generally include the year that I planted a perennial, and the source. The year will allow me to see how long a plant has survived in my garden, and how long it takes to reach a mature size. That will inform decisions I will make about planting others of the same species.
Many perennials die out after a period of time – perhaps 3 years, or perhaps 10. Please don’t assume it’s your fault if a perennial dies,. Most perennials, like people and pets, have a lifespan. Your labels will remind you how long your plants have been around.
That said, I have a peony that is the descendant of one my grandmother grew, and she died in 1953. My mom grew it, then I got a division. I don’t have a tag on it, but wish I did. I suspect I planted it at my house in the early 1980’s. Peonies are essentially forever, so plant them well.
Plant labels can be distracting, of course. The most common labels are made of white plastic about half an inch wide and 4 to 6 inches long. I prefer the longer ones, as there is more room for information. One side is usually slicker, one more grainy. I use the rough side with a #2 pencil for best results. Pencil, outdoors, lasts longer than pen or even a Sharpie. Both of those fade in sun.

Plant tags
If you are using many labels, your garden bed can start to look like a mouse graveyard with its little white markers. To avoid this I push the plant tag deep into the soil, leaving just an inch or less above ground. When I want the info, I pull the tag. And I always place the tag in the same relative position to the plant. I place them behind the plant and a little to the right of center. That way if it gets covered with soil or mulch, I can dig around with my fingers and find it.
Also available are bigger metal tags that are attached to 2 wire legs. Some of these come with a marker that is filled with paint that is said to last well outdoors. Others are soft metal like copper that can be permanently engraved with a nail or awl that either scratches the surface, or dents it.
Most perennials purchased from a nursery will come with a pre-printed plastic tag that will tell you everything you need to know except the year you bought it. Those tags, if left out to the elements, will start to break down in five years or so. Again, burying 90% of the tag will help it last longer.
If you are an “artsy” sort of person, this would be a good time to make some hand-painted plant labels for your garden. Use outdoor grade plywood or perhaps cedar for the markers. Vegetable gardens, where seeds are planted, are commonly adorned with nice custom-made labels. If you paint the tags, you might them coat them with a layer of marine varnish or the like.
Trees and shrubs often arrive with a tag that is looped around the trunk or a branch. Beware of these: some are attached with wire, or a wire coated with something. I once lost a rare tree, a dawn redwood, to strangulation. The tag looped around the base of the tree, and the tree eventually strangled as the wire cut into the cambium layer of the bark.
So how can you remember the plants in your garden, now, in winter? Most of us take pictures with a digital camera, and store them on the computer. Take some time to enjoy looking at your garden photos now. Not only that, if you took the pictures when you first planted things, the date will be on the photo.
I’ll have to admit I haven’t gotten around to making any plant labels right now, in winter. I got distracted looking at my gardens on my computer and admiring my flowers. Going through my photos month-by-month has helped me to see what flowers I need to purchase this spring, replacing those that have disappeared with time.
Henry is the author of 4 gardening books. He lives in Cornish Flat, NH. You may reach him at henry.homeyer@comcast.net.
Picking Flowers in Winter
Posted on Monday, January 21, 2019 · Leave a Comment
I’m planning to go pick some flowers today. Yes, we got a foot of snow recently and the temperature as write this is well below zero with the wind chill. And no, I am not crazy. I’m going to go pick them out at my local florist, food coop and grocery stores. I will cruise the flowers, picking out things that will brighten the house – and my spirits. Buying flowers does not have to cost a fortune.
Cut flowers are among modern America’s true bargains. For the price of a bottle of wine – or a couple of cups of fancy coffee – you can buy a bouquet of flowers that will grace your table for up to three weeks. But there are some things you should know about getting good table-life for your investment.
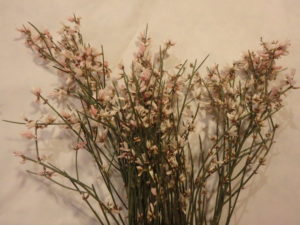
Two stems of Ginestra
There are advantages to buying flowers from a florist. Cut flowers need to take up water to stay fresh and healthy. Stems tend to scab over after a day or two, which means they cannot take up replacement water, or not much, so they suffer. A floral shop has trained personnel who trim each stem in the store every other day. And someone who regularly changes the water to keep to keep it fresh. Chain grocery stores probably count on you buying their flowers before the flowers need to be trimmed or their water changed, but that depends on the store.
And keep your arrangement cool if you can. Putting it near a radiator or wood stove will shorten its life. If you have invested in roses or tulips, you may wish to move the vase to the entryway or mudroom at bedtime to keep the flowers extra cool during the night.
Some flowers are better picks than others if you’re on a budget and can’t afford to buy new flowers every week. Here are my recommendations for pleasing, long-lasting cut flowers:
- Miniature carnations: Each stem has 2-4 blossoms. They come in a variety of colors. Mix dark red “minis” with red roses to make a bouquet of roses look fuller. And even after the roses go to Valhalla, the carnations will still be good!
- Chrysanthemums: These come in a variety of sizes and colors, from the huge spider mums to little guys. I love the scent of the flowers –it’s not overpowering, but it’s there if you sniff them.
-
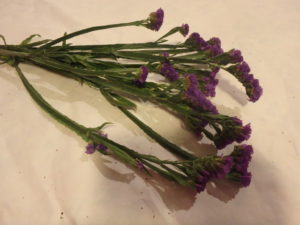
Statice
Statice: I grow these for use as dry flowers, which tells you that they really do last forever – even out of water. They come in blue, purple, pink and white.
- Ginestra: Less commonly known, this fragrant flower has tiny blossoms in white, yellow or light pink that are a little like forsythia blossoms. Good as filler.
- Spray roses: Instead of a single blossom per stem, these have 2-5 blossoms, giving you more bang for your buck. Will last about a week with proper care
- Alstromeria: Each long stem has clusters of 2-inch lily-like blossoms in pinks and reds, with yellow throats. Very long-lived. Great value.
- Orchids: While not cheap, orchids can last up to a month. I love dendrobiums, though they are not common, even in floral shops. Cymbidiums have bigger blossoms but also last extremely well. And you can buy a Phalaenopsis orchid in a pot that will keep blooming for a couple of months if you pick one with lots of buds.
- Kangaroo paws: These Australian natives are fuzzy and cute. They come in pinks, reds and browns, and last very well. Not every florist will have them.
-
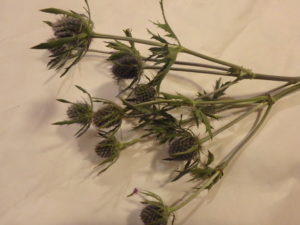
Sea Holly
Sea holly or Eryngium: Light purple or green, these look a bit like thistles. They can be dried or used fresh.
- Baby’s breath: A single stem can have up to a hundred tiny white pompoms. Great for contrast with other flowers.
So what else do you need to know? Get the store to wrap up your flowers in paper or cellophane. Some are quite fragile when it comes to cold temperatures, so don’t shock them if you can avoid it. And if you have lots of errands to run, buy your flowers last so they spend less time in a cold car.
What about those little packets of powder they give away with flowers? Are they worth the bother? Absolutely, especially if you lead a busy life and don’t change the water every few days. The powder kills mold or fungus that can grow in the water, and clogs up the stems. A teaspoon of bleach in a quart of water will do the same thing.
Cut off three quarters an inch of stem before placing your flowers in a clean, washed vase. And cut back the stems a little every couple of days. Also important is this: pick leaves off the lower stems. Leaves will rot in the water, clogging up the stems.
So yes, cut flowers are an extravagance, but can last well if handled properly. And you’re worth it. It’s still a long time till flowers bloom in our gardens, so treat yourself.
Henry is a Lifetime Master Gardener and a lifelong organic gardener. You may reach him at henry.homeyer@comcast.net.
It’s Time to Think about Hot Peppers
Posted on Monday, January 14, 2019 · Leave a Comment
I love hot and spicy peppers. As a young man I lived in West Africa for nearly 10 years, first as a traveler, then as a Peace Corps volunteer and Peace Corps Country Director. I lived in Cameroon and Mali where hot peppers were an integral part of the diet. If peppers are hot enough, they make you sweat – which cools you down. That’s good, as most African villages didn’t have electricity back then for fans or air conditioning.
Hot peppers are rated in Scoville Units to give you an idea of how hot they are. They are named after Wilbur Scoville, an Englishman who tested peppers in the early 1900s. In my first book, Notes from the Garden, I wrote, ”I like to imagine him serving little tea sandwiches to proper English lords and ladies, but with peppers beneath the watercress. Did he measure heat by face color or expletives?” I imagine he actually measured capsaicin content as it is the compound that gives peppers their kick.
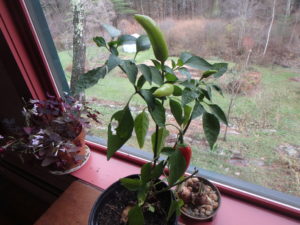
Hungarian wax pepper indoors
Hungarian wax peppers, my mildest hot peppers, are rated for 300-700 Scoville units. Jalapenos and Cayennes run 3,500 to 6,000 units, while Habaneros can reach 200,000 to350,000 units. Be sure to wear glove if you handle very hot peppers – a little of the oil or a speck of dust in the eye (or another sensitive area) can be very painful. I’ve read that the more stressed a pepper is, the hotter it is – hence the range for any variety – I find they vary considerably from year to year.
I dry most of my hot peppers in a food dehydrator so that I can grind them into a powder to add just a little bit to a dish. I use my coffee grinder to do that, after I have dried them until they are brittle. That makes for an interesting cup of java, too, after I’ve ground the peppers.
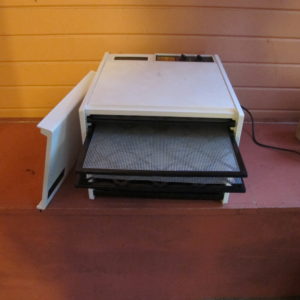
Excalibur dryer does a good job drying hot peppers
Most hot peppers would rather be growing in Mexico or southwest France than in New England. They like plenty of sunshine and consistently hot temperatures. They don’t like heavy wet clay soils – so when planting, amend the soil, if necessary, with compost to lighten it up. But never add fertilizer to peppers. If you do, you will get big leafy plants, but few peppers. That’s true for sweet peppers, too.
I have a friend, Brian Steinwand, whose mouth must be made of leather. He can eat habanero peppers (one of the hottest kinds) like they are candy. He touts their fabulous flavor, but for most of us that flavor comes with too much heat to be pleasant.
This year I discovered a habanero that allegedly comes with all the flavor, but much less heat. It’s called “Roulette” by Johnny’s Selected Seeds, and is touted to have “a sweet, floral flavor without the traditional fire we expect from a habanero.” Of course that name makes me wonder if a few of the fruits will have the bite of a real habanero.
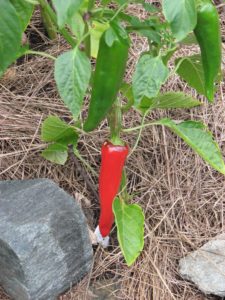
Espelette peppers
My favorite hot pepper is the “Espellette” pepper from southwest France. Like champagne, the name is controlled by the French government, and these peppers are only supposed to be grown in 11 specific villages. But the peppers are readily available in the Bordeaux region, and I’ve discovered that seeds saved from them can produce great peppers even in New England. Last year mine did not produce well as I started the seeds too late, I think. Or perhaps the weather was wrong.
Each year I like to try new varieties of the vegetables I like. Along with Roulette, a pepper I shall try this year is called “Amazing 2”, also from Johnny’s Seeds. According to the description in their catalog, this is a thick walled pepper, and needs a dehydrator to dry it. It is a traditional Korean drying pepper, and is said to be good for making kimchi, but has a lower heat rating than most. It’s said to be warm, not hot.
Like Roulette, Amazing 2 is a hybrid pepper, so I will not be able to save seeds. Hybrids are created by crossing 2 parents of different genetic makeup. But their seeds don’t breed true, so you have to buy new seeds when you use them up. But even a small packet of seeds will produce plants for 2 or 3 years if you only want a few plants. I find most seeds are viable for 3 years.
One nice thing about growing peppers is that they are sociable. By that I mean, they like to hang out together. Most peppers like to actually touch leaves with other peppers when the plants are mature, so I plant them just a foot apart – so they don’t take up much garden space. Of course if you plant 2 or more varieties, they will hybridize, so I don’t save seeds – who know what I would get. In years when I grow Espellette peppers and want to save seeds, I grow no other peppers anywhere in my garden, hot or sweet, to keep the seed line pure.
January is too early to plant any seeds, but I enjoy reading the seed catalogs or web sites, and ordering early. And before too long, it will be time to start them indoors. Meanwhile, I think I’ll go make a hot winter stew. Hot with peppers, that is!
Henry can be reached at henry.homeyer@comcast.net.
Stealing Ideas from a Chinese Garden
Posted on Wednesday, January 9, 2019 · Leave a Comment
Winter is a time for gardeners to rest. No weeding, no mowing, no moving plants from one bed to another. But now is a good time for planning what changes one can make in the garden, come spring and summer. I like to reflect on gardens I have visited, and see what ideas I can steal.
I recently visited the Chinese Garden in Portland, Oregon. At first I looked at the garden and thought to myself, “There really is nothing here that would work in Cornish Flat, NH. Or Providence, or Rutland or Brattleboro – or any of the places my column appears.” But then I realized there were good things to learn from this very formal garden that depends so much on architecture and pools of water.

Memorial Chinese Garden by Evan G. Schneider
The Chinese Garden has a formal family shrine in an ornate building with 3 sides and opening to the garden. Inside it has a mahogany sideboard with pictures of ancestors, a bowl of fruit, and tea cups. There were chairs there for family members to repose and think about those who gone on. It’s not the sort of space I could envision for myself – or for most of my readers.
However, the idea of a place in the garden where one can sit and think about loved ones who have passed away is nice. It need not be anything like what I saw in Portland. In fact, I did something back in 2009 after my dear sister, Ruth Anne, passed away. I built a bench using a slab of marble I had bought at a yard sale. I sat the marble on 2 stout cherry logs standing upright. I planted two wild azaleas behind the bench to give the space a sense of enclosure. Then, to one side, I buried some of Ruth Anne’s ashes. Over that spot I planted an umbrella plant (Darmera peltata). I go there and sit on the bench and think of her from time to time, especially when the flowers are blooming in the spring.
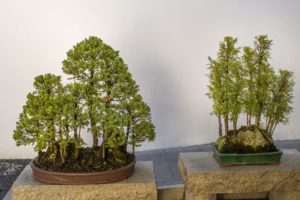
Bonsai trees in Chinese Garden by Evan G. Schneider
The Chinese Garden displays a nice collection of bonsai trees. These are miniatures that are pruned and trained into special forms, and are beautiful – but very labor intensive. To show them off, they are set in place in front of a plain wall so their silhouettes stand out. I have no desire to own a bonsai tree (which may need watering every day, or twice a day in the heat of summer) but I can see using a plain backdrop to show off a potted plant. The house, a stone wall, even a hedge can be brightened up and enhanced with a potted plant.
There was a fragrance garden in the Chinese Garden. Again, I would consider taking this idea and making it my own. Instead of spreading out fragrant plants around my garden as I do now, I could cluster several together and create a place to attract butterflies – and children.
I remember visiting a rose garden in Paris that had a competition each June. One of the categories was “Best Fragrance as Judged by a Child”. I liked that idea, and introduced it as a category in the Cornish, NH annual agricultural fair. You might like to create a fragrance garden this summer in your own garden.
Another feature of the Chinese Garden were spaces enclosed by 3 walls. Although this might have been done for a variety of reasons unknown to me, I saw the spaces as good for delicate plants. Our winter winds are tough on trees and shrubs, particularly those that are marginal in our climatic zone.
If, for example, I wanted to grow a Franklinia tree, I would consider protecting it on 3 sides. Perhaps the house could be one wall, with bamboo fences on the sides. Or perhaps I could enclose it on 3 sides with a living hedge. It is a small tree that is only hardy to Zone 5. It has beautiful bark and white flowers in late summer. This winter I shall ponder where I might put one.
The Chinese Garden used vertical stones as accents. I have been placing vertical stones for decades, though the stones they used were taller and smaller in girth than the ones I use. I like the permanence of stone, and stones show off well in winter against the snow. I plant one third of a stone in the ground for stability, and usually surround the bottom portion with Portland cement – one bag, added dry to the “planting hole”, will harden and serve as an anchor.
Another feature of the Chinese Garden was the use of trees planted and growing at an angle. Most of us are very careful when planting a tree to guarantee that it is vertical – straight up in all directions. But planting a tree at a 45 degree angle can be alluring, too. Both Chinese and Japanese gardens use trees planted on angles. Such a tree does make one stop and look a little longer, just as it would if the leaves were pink or blue, or a color one is not expecting.
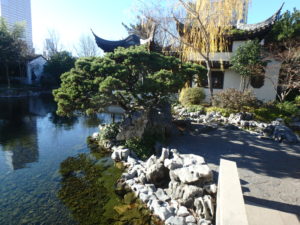
Chinese garden uses water architecture and trees. Homeyer photo.
The last feature I remarked on at the Chinese Garden were all the pools for fish. Water is very soothing and adds tranquility to a garden. The fish at this garden were koi, a goldfish relative, and quite large. I won’t be adding that feature anywhere in my garden, but I did appreciate them. Perhaps you’ll try one, and invite me to see it.
I’m off soon to see friends in North Carolina and Florida, and hope to see some good gardens. Winter is a good time to get away, and to see new ways to use plants.
Write Henry at PO Box 364, Cornish Flat, NH 03746 or by email at henry.homeyer@comcasst.net Please include a SASE if asking for a response by letter.
To Eat Better, Eat from the Garden
Posted on Wednesday, January 2, 2019 · Leave a Comment
As we go through the holidays, we tend to relax our vigilance about eating. Or at least I do. Like a woodchuck bulking up for hibernation, I find myself enjoying comfort foods during the long winter nights – and days. It is easy to gain a few pounds, even with the best of intentions, so I was attracted to Michael Pollan’s 2009 book, Food Rules: An Eater’s Manual. It does not attempt to prescribe a diet that will help me to lose weight after the holidays, but I know if I follow it, it will help.
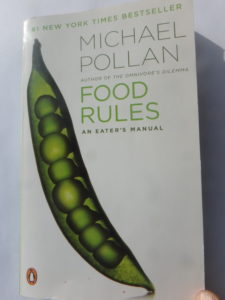
Pollan book cover
I liked the book a lot, in part, because it is a quick and easy read. I read it all in 2 or 3 hours. And it is mostly common sense, but a good reminder about things I know instinctively, but may have ignored over the holidays. As a gardening guy I put up a lot of food I grow, and sometimes it languishes in the freezer, on the pantry shelves, or in my spare fridge. The book motivated me to dig out the frozen kale and use it! Eating from my own garden is always healthy.
Pollan starts by acknowledging that it is difficult to sort through mountains of conflicting advice. Should we all be avoiding fats, or is it the carbohydrates? Is gluten bad for all of us? Should we be drinking red wine for the polyphenols? What are omega-3 fatty acids, and are they worth fussing over?
His main premise is one he elaborated on in earlier book, In Defense of Food: “Eat real food. Not too much. Mostly plants”. By real food, he means food that comes from plants or animals, not factories. What is in a Twinkie? Can you imagine the products that make one coming from natural substances that you could grow yourself? I can’t.
Pollan explains that people who eat the so called “Western diet” are generally less healthy than people who eat a traditional diet, whatever that may be (Japanese, Mediterranean, even Eskimo diets are healthier than ours). The Western diet contains “lots of processed foods and meat, lots of added fat and sugar, lots of refined grains, lots of everything except vegetables.” So Pollan put together a short book of rules to follow. Many of the 64 so called rules are catchy.
For example, #7: “Avoid food products containing ingredients that a third-grader cannot pronounce”.
#13: “Eat only Foods that will eventually rot”. I’m not interested in eating anything with a long shelf life because I know it’s probably full of chemicals.
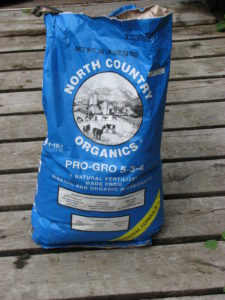
Organic fertilizers contain more healthy minerals than chemical fertilizers 002
#30: “Eat well-grown food from healthy soil”. I couldn’t agree more. Chemical fertilizers aren’t necessarily bad, they are just limited. A bag of 10-10-10 contains 10 percent by weight of nitrogen, phosphorous and potassium, with 70 percent filler that is never specified (trade secrets).
Fertilizer will make plants grow, for sure. But a dose of compost contains 15 or more kinds of minerals needed by plants and by us, and lots of beneficial bacteria and fungi that evolved with green plants and support them. My tomatoes not only taste better than those that come in cellophane 4-packs, I believe they have more healthy ingredients.
#36: “Don’t eat breakfast cereals that change the color of the milk”.
#39: “Eat all the junk food you want – as long as you cook it yourself”. French fries are America’s favorite vegetable, but if we had to wash, peel, cut and fry them ourselves, we’d probably eat them about as often as we roast a turkey. I do eat a lot of potatoes because I grow them and love them. But I almost never fry them. And mine are cooked in healthy oil, and have little salt.
#63: “Cook”. If you buy frozen pizzas or even fancy frozen meals, you are allowing someone else to decide what goes on your dinner plate. They add the salt, the sugar, and the preservatives. Why is cancer so common now? My personal theory is that all those chemicals we eat affect our bodies over time.

Veggies fresh from the garden are healthy and safe
I’m lucky: I not only have the time to cook, I love cooking. I sometimes wake up in the morning thinking about what I will cook for dinner. I think about what is in my fridge or freezer, and how I can combine it with good ingredients to make something I want to eat today, and look forward to having leftovers tomorrow.
I plan to live well and be healthy until I am in my 90’s because I grow – and eat – lots of vegetables and fruits, many that I grow myself. What I buy is mostly organic, even when it’s expensive to buy. Heart attacks, Type II diabetes and many kinds of cancers are probably linked to the foods we eat, how much we eat, and the amount of exercise we get.
Gardening is good for us. It gets us outdoors, away from a desk or a TV. We get exercise and produce healthy food. Get your kids to help to grow the veggies this year, and they will be pretty enthusiastic about raw vegetables. Ask your children to pull a few carrots, rinse them with the hose and take a bite. You’ll see a big grin, and they’ll want another bite. Same for cherry tomatoes. I even know one boy that will eat raw onions straight from the row. So make 2019 and the year of the vegetable. We could all benefit.
You may reach Henry at henry.homeyer@comcast.net or PO Box 364, Cornish Flat, NH 03746. He is the author of 4 gardening books.
Holiday Reflections
Posted on Thursday, December 27, 2018 · Leave a Comment
At this time of year I like to look back on the past year – in the garden, and in my life – to reflect on all the wonderful events of the year. I take time to count my blessings, look at my mistakes, and make plans for the future.
It was a good year in the garden. It started off hot and sunny, perfect for growing vegetables. Later in the summer we got a bit too much rain, which can encourage fungal diseases. But overall my tomatoes did well and produced plenty, as did my leafy greens and squashes.
My potatoes, on the other hand, were miserable. I planted them on the south side of my garden where there is a big magnolia that shades the garden during the afternoon, when the sun is strongest. Perhaps the magnolia roots were competing with the potatoes, too. No potato bugs, but still, very few spuds. And most were small. I am already buying potatoes, which is unheard of at this time of year.
Last year I harvested 100 pounds of potatoes and had plenty to give away. This year? Maybe 10 pounds. Lesson learned? Plant leafy greens, not potatoes, tomatoes or squash family veggies on the shady side of the garden. Lettuce, kale, spinach and such need less sun, but I knew that. My bad.
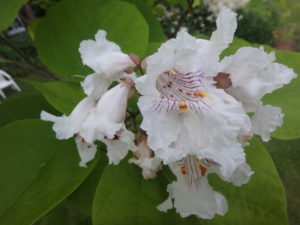
Catalpa blossoms
In 2017 I planted a nice 10-foot tall catalpa tree, and it over-wintered nicely. It bloomed this year, and I loved the sight and fragrance of the blossoms. It had some good growth, and I look forward to an even better display of blossoms next year. And I learned not to worry if it doesn’t leaf out early in the spring. It is one of the last to open up its leaves.
I have always loved the eastern redbud tree (Cercis canadensis). Unlike anything else I grow, it does not set flower buds on twigs. The blossoms pop out of the bark of the tree or the branches. And they are a bright magenta color. There is also a white variety, but I got the pink one.
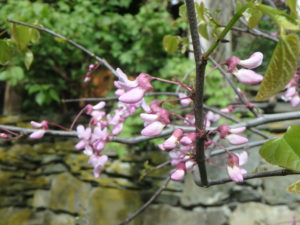
Redbud
I had tried growing a redbud 25 years ago, but it died back to the ground each winter, and never blossomed, so I eventually gave up on it and dug it out. But our climate has warmed some, and I placed this one in a protected spot near a tall stone wall that will radiate some heat and break the winds of winter. It bloomed nicely for me this year, and I have great hope that it will winter well.
I have noticed that I am getting more adventurous as I age. I am more willing to try plants that are marginal in our climatic zone. Now I am also spending more and getting bigger trees, despite the increased costs. Knowing that I have a finite time on this earth, and that I’m past 70 years young, I want to see my trees come to maturity – and soon.
I remember helping artist and author Tasha Tudor some years ago to find some uncommon crab apple varieties when she was in her nineties, and being amazed that someone of that age was still planting trees. I use her as my role model as I age.
I am grateful to have had a young person helping me in my garden again this year. Celia is a high school student that loves working in the garden and has high energy, literally skipping from job to job. I resolve to never become a curmudgeon who says all kids are lazy or addicted to their cellphones. Many want to learn and are willing to work hard, and having a helper even 4 hours a week is a big help.
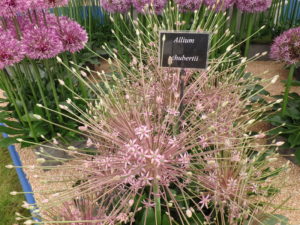
Allium schubertii
In the fall of 2017 I ordered allium bulbs because I had seen some amazing varieties at the Chelsea Flower Show in London. The Brits use alliums much more than we do, and I fell in love with them. One of those I loved the most, Allium schubertii, is not hardy in my climatic zone, but I ordered them anyway and planted them in pots. I kept them in a cold basement, and brought them into the warmth of the house in March. They bloomed fabulously.
My thanks to you, my readers, for asking me questions and keeping learning. My best wishes for 2019.
Henry can be reached at PO Box 364, Cornish Flat, NH 03746 or henry.homeyer@comcast.net.
The Japanese Garden of Portland, Oregon
Posted on Thursday, December 20, 2018 · Leave a Comment
Visiting a garden in winter allows me to see the bones of a garden, the internal structure which supports and enhances the flowers and leaves of the other three seasons. I like to go slowly through a winter garden to allow the spirit and essence of the garden to sink in. I recently visited the Japanese Garden of Portland, Oregon on a sunny, cold day. I left feeling calm and rejuvenated.
There are three main elements of a Japanese Garden. The first is stone, which provides a link to the mountains of Japan and provides a feeling of stability. The second is water, the life-giving force. For me, running water provides the music of a garden, which encourages tranquility. Quiet pools reflect sky and trees. Lastly, the plants of the garden provide the color and patterns that make each garden special. And of course, the trees in winter provide bones for the garden, along with the stone.
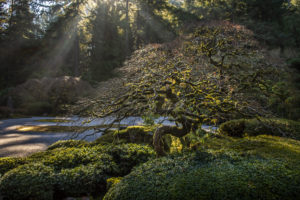
Japanese red maple in winter (Schneider photo)
The Japanese Garden of Portland was conceived in 1961 as a way to promote cross-cultural understanding; it was first open to the public in 1967. It is one of the best examples of a Japanese garden outside of Japan, and is fully mature now, more than 50 years after the first plantings.
Of those original plantings, some of the most impressive are the Japanese red maples (Acer palmatum). These trees are planted throughout the garden, and many have been pruned to encourage lateral growth and are often in an umbrella shape.
Now is the best time to see those maples if you want to see their form, though the leaves are wonderful in spring, summer and fall. There are many with finely cut leaves in the garden, the ‘dissectum’ varieties. Unfortunately for me, the dissectum varieties are generally less hardy; many just to zone 6 (minus 10 degrees F in winter). The standard Japanese red maple is good to Zone 4 (minus 25 or 30), and the variety ‘Bloodgood’ is the hardiest of all. I have two, and I think every garden should have at least one.
Japanese Garden (Schneider photo)
Other trees at the Japanese Garden include Japanese red pine, Japanese black pine, azalea, rhododendron, ginkgo and various large firs, cedars and hemlock. There is an advantage to having evergreens in the garden, as they provide color – green – all winter.
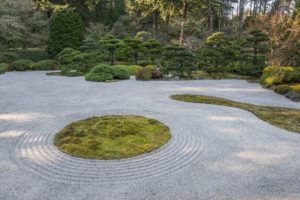
There are two stone or gravel gardens in the Japanese Garden of Portland. In each of these there is a “sea” of gravel. That gravel is raked to create parallel ridges around the stones, mimicking waves in the sea. One has several large stones, representing mountains – but little else. In the main stone garden near the tea house there are also moss-covered islands and peninsulas in the gravel sea. I was told that the gravel in the bigger stone garden space was shipped from Japan.Stone lanterns are commonly placed on peninsulas in Japanese gravel gardens serving as lighthouses.
Waterfall and koi pond
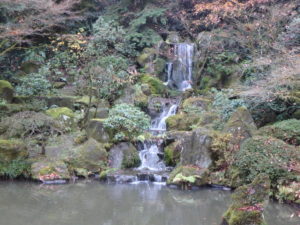
The Japanese Garden of Portland has streams, ponds and pools, all important elements for a Japanese garden. There is a wonderful hillside with a waterfall and a stream that feeds a pond. In the pond are koi; these resemble goldfish and can get to be quite large. Some are orange, others white, some spotted. Koi are the Labrador retrievers of the water: good looking and always looking for a handout.
I called senior gardener Adam Hart after I returned to New Hampshire to ask about flowers that bloom in the gardens in the warmer seasons. I was surprised that the gardens really do not have herbaceous perennials as part of the plant palette, with the exception of Japanese iris (Iris ensata).
Mr. Hart explained that although some of the trees bloom with colorful flowers, the plants installed should generally have 4 season interest – hence no primroses, peonies or other Japanese flowers. Just the iris, which are similar to our bearded iris, but the falls (outer petals) lie flat out, horizontally. The blossoms can be quite large, up to 6 inches across. I grow them, they are hardy to Zone 4,minus 30 in winter. They like wet soils, and will even grow in standing water. Fabulous plants. The iris are in bloom in June and July, so that would be an excellent time to visit.
For me, it is important that a Japanese garden is sparse, simple, and quiet. It should encourage a person to be reflective and have seating so one can relax and enjoy what the garden has to offer. It should have open spaces and lots of stone and gravel.
The Japanese Garden of Portland is open all year, so if you plan to go to Portland, schedule a visit. There is a discount for tickets purchased in advance, and for seniors or children. Visit the website, https://japanesegarden.org for more information.
Henry’s web site is www.Gardening-Guy.com. He is the author of 4 gardening books. You may reach him at henry.homeyer@comcast.net.
Magnificent Trees for the Winter Landscape
Posted on Thursday, December 13, 2018 · Leave a Comment
This is not the time for planting trees in New England. But it is a good time for looking at them and deciding what to plant, come spring and summer. Since we have 5 months or so without flowers growing in our gardens, look at the silhouettes of trees, decide what pleases you, and read up on them.
Most gardeners plant some flowers, a few veggies and perhaps some nice decorative shrubs. Fine. But what about maples, oaks and beeches? Should we allow the squirrels to decide where these majestic trees grow on our property? No, we should plant them if we like them – and have space for them.
My property is relatively small, just a couple of acres, so I have been judicious in selecting trees to add to the landscape. My property came with a few big sugar maples and oaks, two American elms, one huge wild cherry and too many poplars for my liking. The elms died and had to be cut down, but the rest of the big trees continue to get even bigger, cooling the house in summer and providing food and homes for birds and small mammals.
My Merrill magnolia is gorgeous with a light coat of snow
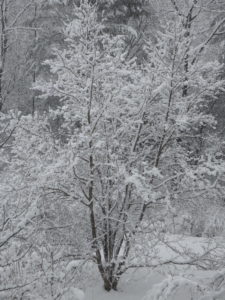
One of my favorite big trees is a hybrid magnolia, the “Merrill”. I planted it about 20 years ago, and is near mature size now – at least 30 feet tall and wide. It blooms with big white fragrant blossoms every year in late April. It has glossy green leaves all summer, and fabulous fuzzy buds similar to pussy willows all winter. It was just 4 feet tall when I planted it.
I planted it in the middle of a lawn where it would get full sun. It is near my little stream and I worried that the high water table would lead to root rot, but it has thrived with plenty of water. Unfortunately it does spill some shade onto a vegetable plot in late afternoon. But I love it, and am glad I can see it from my windows.
I have planted several fruit trees, both apples and pears, and have several wild apples that blossom nicely but do not produce edible fruit. I think every gardener should have at least one apple tree. Books will tell you that you need 2 or more apples to get good pollination, but there are always wild apples, or apples at your neighbor’s house to provide good pollination if you have room for only one.
There are many disease-resistant apple varieties to choose from if you don’t want to spray chemicals. ‘Liberty’, ‘Freedom’, ‘MacFree’ and others are less likely to get apple scab, powdery mildew, cedar apple rust and fire blight. That said, be sure to pick an apple you have tasted and like. You can prune any apple tree to look good.

Snow covered sugar maple
Sugar maples mature more quickly than you might think. A tree with a 2-inch diameter stem can become a handsome shade tree in 20 years – they can average a foot a year or so. They don’t tolerate road salt or compacted soils, but otherwise are easy to grow. They can benefit from occasional doses of limestone for their roots, as acid rain washes calcium out of the soil, and they need it to stay healthy. Maples are, to me, the quintessential New England tree with the classic red, orange and yellows of our fall.
If you want a big oak in your yard, consider playing squirrel. A friend of mine did this, gathering acorns locally and planting a dozen or more. Some germinated, others did not, and some he had to thin out. Remember that a mature oak can reach 60 feet tall or more. Width can vary from 25 to 60 feet wide, depending on the species. One of the fastest growing oaks in the pin oak, which can reach 12 to 15 feet in 5 to 7 years.
Hemlock hedge in winter
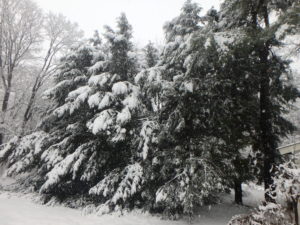
In 1972 I planted a row of hemlocks to create a privacy screen for the back yard. I dug them up from a field when they were 3 to 6 feet tall and planted them 10 to 20 feet apart. Now, nearly 50 years later, those hemlocks are feet 50 tall and do, indeed, create a nice living hedge.
I have to admit I did no research before planting the hemlocks. I didn’t know how tall they would get, nor how far apart I should plant them. But hemlocks are very adaptable and will grow in sun or shade, and in almost any kind of soil. They have done just fine.
Today I might not choose hemlocks for a screen because the wooly adelgid, a pest that thrives in southern New England, is moving north and may eventually decimate the hemlocks. White pine might be suitable for a hedge, but it, too, is facing diseases and is intolerant of air pollution and road salt. It is not a good tree near the road.
White birch (Betula papyrifera) is also a nice, easy tree to grow, and very handsome. The young stems are reddish brown when young, but turning chalky white after age 7 or so. I think the nicest way to plant them is in groups of 3, planted a couple of feet apart, or even in one big planting hole.
White birches will grow anywhere, but do especially well in sandy or rocky soils. I planted two near my stream in moist soil, and one died, the other thrived. Go figure.
Winter is the time to dream. Ask Santa for a good book on trees with lots of pictures. Anything by Michael Dirr would be good. Dream, read and plan!
Henry is away this week, and not answering e-mail. He is the author of 4 gardening books. His web site is www.Gardening-Guy.com.
Houseplants: How to Keep Them Happy and Healthy
Posted on Thursday, December 6, 2018 · Leave a Comment
I recently visited my friend Alicia Jenks of Green Dragon Farm in Weathersfield, Vermont, to take a look at her houseplants – some 50 or more of them. Alicia considers them her “indoor garden’, her plant friends that keep her gardening all winter. She doesn’t think houseplants are hard to maintain, but asserts, “You have to pay attention to them. They can’t take care of themselves.” Good point.
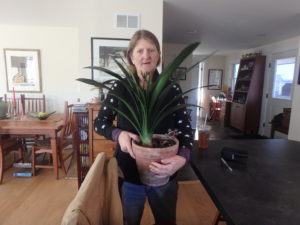
Alicia Jenks with a clivia descended from one her mother grew
Alicia does not put her houseplants outside in the summer. Instead she keeps them on a covered screen porch. This allows her to regulate how much water they get, keeps them away from pests like earwigs, and keeps them from getting sun scald.
Before she brings them into the house in September, Alicia gives her houseplants a good gentle shower – outdoors, with a hose. Aphids and other pests can often be knocked off with a stream of water, avoiding the need to use a soap solution to kill them later. Of course you must get the underside of leaves, too, and rinse the surface of the potting soil, too.
Alicia keeps her best, most luscious houseplants in the living-dining area. Her Junior Varsity team she keeps upstairs in a spare room. The rest, the Club Squad, stay in the basement under lights. She gives each the same care, and any plant can get upgraded to the living room. All it needs to do is bloom.
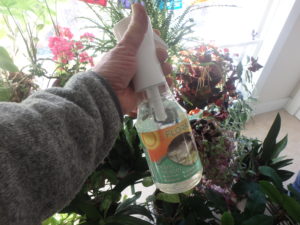
Misting plants helps them in winter
Water, too much or too little, is what kills most houseplants. Alicia does not follow a set schedule such as watering every Sunday, though that works for many people. Instead she regularly checks her plants by placing a finger on the soil surface. If it is lightly moist, she does not water. If it is dry, or if the leaves are losing some of their turgidity and wilting, she waters.
Alicia gives a deep watering each time she waters, enough so that a little water will seep through the pot’s holes in the bottom and into the saucer it sits on. In the summer when it is hot, she might have to water some plants every 2 to 3 days. In winter once a week may be enough.
What about fertilizer? Alicia gives some liquid fish emulsion fertilizer once a month from April to September. Fish or seaweed fertilizers are good for houseplants because they have a wide variety of nutrients, including many micronutrients that are not found in chemical fertilizers. During the winter? Most plants are not doing much growth then and should not be fertilized, she told me.
Most houseplants do not need much direct sunshine. Before you buy a houseplant, read the tag to see what it needs. Bright indoor sunlight is fine for most plants. Cyclamen, begonias, Christmas cactus, poinsettias, oxalis and many others will do well in a brightly lit room, without direct sunshine.
I have read that the direct sunshine diminishes exponentially with the distance from the glass. That means that sunshine two feet from the glass is 4 times weaker than sunshine a foot from the window, and at 3 feet away, it is 9 times weaker. Keep that in mind when you place a plant. Rosemary, which appreciates strong sun, should be as near the window as possible – without touching it. No plant leaves should touch the glass in winter.
Books and websites are full of advice. Still, I find the very best information about houseplants is found in my 1969 edition of Thalassa Cruso’s book, Making Things Grow: A Practical Guide for the Indoor Gardener. Although this book was written nearly 50 years ago and is long out of print, I have never visited a used bookstore that didn’t have it. And it is available on-line.
What I like about Ms. Cruso’s book is the practical nature of it. It covers pretty much any houseplant you can buy. She has grown it, figured out what makes it happy, and will save you the trouble of experimenting – and killing- houseplants yourself. Plus, her writing is easy to follow – and sweet.
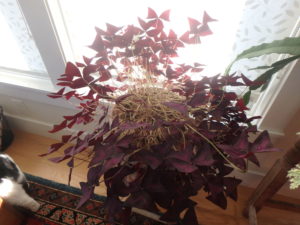
This oxalis gets afternoon sunshine filtered through a white window shade
Success is often in the details. Take those bright red zonal geraniums we often grow in pots in summer to adorn a sunny location. Did you know that they do best when their potting mixture is well patted down in the pot, compressing it? I didn’t. Or that geraniums can be made to flower beautifully indoors in winter by pinching them back regularly in summer, frustrating their attempts to blossom until winter? Ms. Cruso taught me that.
Alicia Jenks does not re-pot her plants very often. She believes that many bloom better if the roots are a little crowded, but if the roots are pushing out the top or through the drainage hole, it might be necessary.
Thalassa Cruso warns against “potting on’ a root-bound plant into a much larger pot. She explains that using a pot more than an inch in diameter larger than the pot a plant is growing in can cause root rot. Why? The excess soil material will not easily dry out – because the roots will not reach it.
I never think of myself as a houseplant kind of guy, though when I counted up my houseplants for this article I saw I had 43 plants, including a Crown of Thorns that is over 100 years old, a banana tree, a fig, an 8-foot hibiscus and an even bigger frangipane tree that bloomed all last winter!
Henry is away, and will not be answering e-mail this week. His website is Gardening-Guy.com. He is the author of 4 gardening books.


