Feeding the Birds – Without Buying Seeds
Posted on Monday, November 26, 2018 · Leave a Comment
This year, given the plethora of squirrels in the universe, I feel that I should just buy a dump truck-load of black oil sunflower seeds and drop it on the lawn in front of the deck. Then maybe the squirrels would let my timid titmice get to the feeder. Maybe not. But there are other ways to ensure our feathered friends get lunch.
Long before farmers of the mid-West began cultivating sunflowers in mile-long fields, birds survived our winters here. How? They ate the seeds of our native flowers and shrubs, and the little bugs that lived on them. Let’s look at a few trees that birds depend on – not just now, but throughout the year.
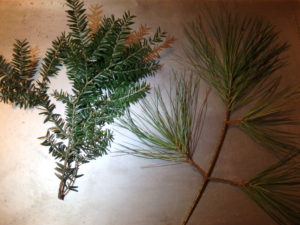
Hemlock left, white pine right
Two of the best trees for birds are white pine and Canadian hemlock. Each is used by 25 to 40 species of birds. Some birds eat the seeds. Some use them for shelter, getting out of the winter wind or spending the night nestled safely in the branches. Others build their nests in them. Birds need places for all those things in order to survive.
Unfortunately, both pines and hemlocks grow to be taller than your home, given a couple of decades. White pine (Pinus strobus) grows an average of 2 feet per year, so you shouldn’t plant one near the house. But if you want to block the view of the neighbor’s rusty cars lurking by your property line, several white pines can be nice. They get to be 20 to 40 feet wide, so if you plant them 10 to 15 feet apart, they will fill in the gap nicely.
Canadian hemlock (Tsuga canadensis) will grow in full sun or deep shade, but does not do well in wet, soggy soils. It grows fast, especially in sunny locations. I’ve read that it takes 20 years before the trees start to produce cones – hence food – and then it only does so in 2 or 3 year intervals, not every year. Still, it is great for nesting and protection.
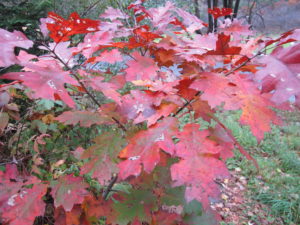
Red oaks are pretty for us, food for birds
Nut trees of any sort are loved by our birds. You might wonder how acorns can be opened and eaten by small birds like the Carolina wren or white-breasted nuthatch. Think of acorns like money in the bank. No, most birds can’t crack them open when they fall. But a few months on the ground will soften the outer shell. And squirrels are messy eaters. They’ll open a nut, eat some, drop it and go on to the next – leaving plenty of nut meat for an industrious bird. Of course, nut trees take time to reach maturity, but plan now for your grandchildren’s enjoyment when adults.
Berries of any sort are great for birds. Wild grapes, for example, may be a pain if they grow up your favorite decorative tree, but in the woods they are fine. More than 50 species of birds eat the fruit, though that is mainly in the fall. They are beloved by birds we all love – cardinals, orioles and scarlet tanagers, along with the more common woodpeckers, warblers and thrushes.
Wild brambles grow freely along the edges of fields and gardens. Most gardeners think of them as pests and pull them out, but many birds like the fruit – even if it is not as sweet as our cultivated raspberries and blackberries. So let those brambles grow. Since they are thorny, cats are less likely to prowl in brambles, giving protection for nesting birds such as catbirds and vireos, which find them attractive.
Native shrubs are generally better for feeding birds than shrubs imported from Europe or the Far East. Why? Because our birds and our native shrubs evolved together, one adapting to the other. Birds that eat berries from native shrubs such as elderberries, viburnums and native willows and dogwoods produce better food for birds than non-native shrubs.
I don’t cut down all my perennial flowers in the fall. Not because I am lazy or behind on my work (though there is some of that). I leave things like purple coneflower and black-eyed Susans for the finches. Those flower heads are fully of little seeds. My sunflower seeds get eaten by birds in late summer or early fall, so there are none left for winter – except in 20 pound bags.
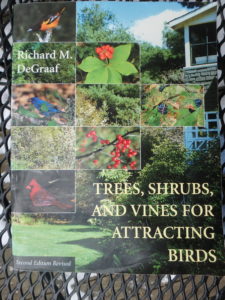
DeGraf Book
Winter is a good time for planning. If you like the idea of planting for birds, you should try to locate a copy of Richard DeGraf’s book, Trees, Shrubs and Vines for Attracting Birds. I think it’s out of print, but readily available. This book lists most common native species of trees, shrubs and vines and then specifically lists the birds that use them for food, nesting or cover. Thus if you want to attract cardinals or bluebirds, for example, study the book to see which plants are used by them.
As you reflect on what trees and shrubs to plant, remember that birds need more than food. They need nesting sites, protection from the wind and those sneaky neighborhood cats. There are plenty of native plants that will look good in your landscape, and support our feathered friends, too.
Henry is the author of 4 gardening books. He lives and gardens in Cornish Flat, NH.
Eating From the Garden Every Day of the Year
Posted on Tuesday, November 20, 2018 · Leave a Comment
For breakfast I often drink a green smoothie that includes a banana, kale, some OJ, half a lime, fresh ginger, fresh mint if I have it, and water. It’s healthy, tasty, and uses kale I grew. I usually pick fresh ‘Winterbor’ kale from my garden until mid-December as even temperatures in the 20’s don’t seem to bother it. But all winter I have bags of frozen kale I can chop and add to my morning drinks – and winter stews.
Having a spare freezer – or more than one – is a wonderful way to keep eating from the garden all year. Here’s what I have in mine right now: tomatoes, peppers, green beans, broccoli, kale, strawberries, blueberries, leeks, apples for pies, peaches, applesauce and plum puree.
Tomatoes dominate the freezer. I freeze them whole, skins on, and make sauce or use them the way I would canned tomatoes. The skins come off easily – I just drop them into a pan of hot tap water for a couple of minutes, then rub the skins off. Of course you can leave the skins on, if you want.
I also have homemade tomato sauce in the freezer, complete with onions, garlic, basil, oregano and other herbs. And then there are the bags of tomato paste I cook down from tomatoes that I cut up, puree in a blender, and boil down till very thick. I freeze the paste in ice cube trays, then transfer the cubes to zipper bags when frozen.
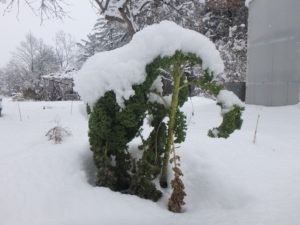
Kale is a good winter veggie
Freezing does take some work. I blanch kale, beets, broccoli, squash and green beans before I freeze them. That means I drop them in boiling water for a minute or so, put them in cold water, and then dry them well before freezing. The quick boiling kills the enzymes that cause aging, making for a better product. I don’t blanch tomatoes, peppers, fruit or leeks. But for best results it is good to eat those in year one, not year four or five.
The easiest way to keep food for eating all winter is to store it in a cool location. I have a cold basement and a cool area in the entry area of my house. Potatoes, carrots, kohlrabi and rutabagas store well in the basement with high humidity and temperatures in the 33 to 50 degree range.
When I have lots of root crops I store them in a cement block bin with a plywood lid. The bin is big enough for six 5-gallon pails. It keeps out the mice, holds in the humidity, and keeps the vegetables at a relatively constant temperature. I keep an indoor-outdoor thermometer sensor in it, so I can monitor the temperature from upstairs. If it gets too cold, I plug in an electric heat mat I also use for starting seedlings. I put a little moist sand in the bottom of each bucket to help with the humidity.
Other veggies need low humidity and cool temperatures. Those include onions, shallots, garlic and winter squash. I keep them on a wooden rack I got from Gardeners Supply, their “orchard rack”. I have that in the main part of the house where I have a woodstove – hence low humidity. But I keep them near the mudroom, which is unheated, so they stay cool. You can also keep squash under the bed upstairs in a spare bedroom with the heat off and the door closed.

Excalibur dryer does a good job on cherry tomatoes and more
Lastly, I dehydrate cherry tomatoes, hot peppers and apples. I find the drying process tends to concentrate flavors. I cut the cherry tomatoes in half, set the thermostat at 130 degrees, and bag them up when dry, but not brittle. Hot peppers I dry till brittle, and then grind them in my coffee grinder. That way I can add just a little zing to a dish, and avoid hot chunks. I grind the pepper seeds, too.
So here is a good winter stew made from my own veggies. You can add a pound of sausage or stew beef to this or leave it as a vegetarian dish. I do it both ways. If you use meat, brown it first in oil, then drain any excess oil and add the veggies.
Chop 2 yellow onions coarsely and brown in a cast iron pot. Then add the root vegetables according to what you have and what you like: 5 medium carrots cut in rounds (about 2 cups), 1 cup rutabaga cut in ½ inch cubes, 1 cup kohlrabi peeled and cut in ½ inch cubes, ½ to 1 cup celeriac, finely chopped. If you have no celeriac, substitute celery, they are relatives with the same flavor. Potatoes will go in the stew at the end, as they tend to fall apart if cooked too long.
Next add 5 frozen tomatoes, skinned and coarsely chopped. If you don’t have your own, add a 28 oz. can of crushed tomatoes, preferably organic. Add 3 to 4 cups water or broth, and perhaps a cup of apple cider. Add 1 to 2 cups chopped kale if you like kale. Simmer.
Garlic tends to burn easily if added with the onions, so add it after the liquid to avoid that. Use 1 to 3 cloves garlic, crushed or chopped fine.
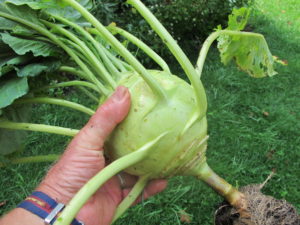
Kohlrabi is a good winter keeper
Next add herbs, according to your supply – and your taste. I have frozen parsley, and chop a couple of tablespoons of it. I add fresh rosemary from a plant on the window sill, a nice sprig chopped fine. A tablespoon of Herbs de Provence from the Coop is good, too. Then I add some ground hot pepper to add some zing. Simmer.
Lastly I add 2 cups potatoes cut in ½ inch cubes that have been boiled for 10 minutes in a separate pot. Drain, and add to the stew. Simmer another 10 minutes and serve. Enjoy!
Henry is the author of 4 gardening books and has been a UNH Master Gardener for over 20 years.
Holiday Gifts for the Gardener
Posted on Wednesday, November 14, 2018 · Leave a Comment
“Jingle Bells” and “Grandma Got Run Over by a Reindeer” are already blaring in stores in an attempt to get us in the mood to buy holiday gifts. Good grief, Halloween is barely over. Still … here are some thoughts for all you eager beavers who now wish to buy gifts for your beloved gardeners.

Posy pin
Let’s start with inexpensive gifts. Paper whites are good. Half a dozen of these bulbs used for indoor blooming are a nice stocking stuffer at about a dollar each at the garden center or grocery store. Or if you want, fill a low bowl with marble chips and place these daffodil-relatives in it so that your loved one need only add water.
Weeding tools are always useful as we lose them, from time to time. The best of all hand tools is the CobraHead weeder, an indestructible single-tine weeder that I use for everything from teasing out long grass roots to planting crocus one at a time or stirring up the soil to plant tomatoes. Available in garden centers or from www.CobraHead.com. About $25.
If your loved one has a brick or cobble walkway, a paving or patio weeder is helpful. This “L” shaped tool has a thin flat blade that gets between bricks and gets out weeds. I bought one years ago from the Kinsman Company (https://www.kinsmangarden.com). I see they are still available for under $10. They also sell a little glass vase on a stick pin for wearing a single blossom on your blouse. Their “Posy Pin” is just $8.50, a nice stocking-stuffer from a family-run business.
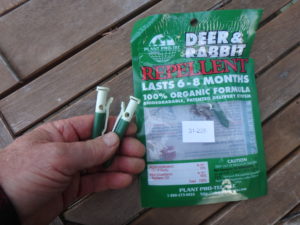
Garlic spikes
Deer repellents, particularly for shrubs, are important in many areas. There are sprays, but I have little experience with them. What I like are garlic spikes, little canisters on clothespin-like attachments. These contain garlic oil and seem to work all winter for me. You just puncture the seal with the little tool (provided) and place 2 or 3 on a medium-sized shrub to release the odors. I found them at Gardeners Supply (www.gardeners.com), about $20 for 25 clips.
Seeds are always useful. Hudson Valley Seed Company (https://hudsonvalleyseed.com/) is a relatively new company with lots of seeds great for New England, and a variety of nice garden accessories. They have some seeds in “art packs” which feature artist-designed packets that are beautiful and would be great stocking stuffers. I like their selection of tools for sale, including pruners and knives made by the Opinel Company, an old French company that makes fine tools I have used and like.
Also available from Hudson Valley are planting bags: non-woven, recycled plastic bags in bright colors in 3, 5 and 10 gallon sizes. I’ve heard about planting bags, but never tried them as an alternative to pots. At $4 to $10 they sound good and I intend to try them.
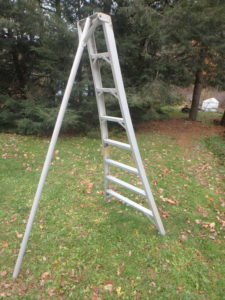
Orchard ladder
But on to the more expensive things. If you have a home orchard, or trees and large shrubs like lilacs that you regularly prune, consider a pruning ladder. A good source for these is OESCO Inc. in Conway, Mass. Orchard ladders are aluminum ladders with a wide, stable base and a pole that is hinged to the ladder and can go out in a range of angles to provide stability on hillsides that a regular stepladder cannot provide. And you can poke that back leg into a thicket of shrubbery and get up to the height you need to prune a runaway lilac back into shape.
OESCO sells Marchand brand orchard ladders, and has an 8-footer for $207 or a 10-footer for S259. These are good, sturdy ladders and are similar to an older style that I often use. The next step up is the Hasegawa brand, which has a telescoping support leg, and wider steps. These cost $359 for the 8-footer, and $399 for the 10-foot ladder.
Every gardener wants more perennials, annuals, trees and shrubs. We need tools and fertilizer and compost. So why not give your loved one a gift certificate at your local garden center? Then, in the spring, she can pick out what she wants or needs. We all like to try new plants, even some that might not survive. A gift certificate allows us to try those things – at essentially no risk.
Garden books are great presents, too. For someone just starting a vegetable garden, I’d suggest The Vegetable Gardener’s Bible by Ed Smith. For an experienced perennial gardener I’d suggest Tracy DiSabato-Aust’s The Well-Tended Perennial Garden: Planting and Pruning Techniques. For someone developing a landscape with trees and shrubs, I like Dirr’s Hardy Trees and Shrubs: An Illustrated Encyclopedia by Michael Dirr. Or anything by Gordon Hayward, Lewis Hill – or me.
Probably the nicest present you can give a loved gardener is your time in their garden, working with them. I know that gift certificates are often not redeemed – it’s why stores love selling them. But if you are serious about giving the gift of gardening, you will have to remember to call the recipient next spring and ask, when can I come help you? Do you need help weeding? Thinning carrots?
So don’t wait for the last minute to buy holiday gifts. Plan ahead before the rush!
Henry is a lifelong organic gardener living in Cornish Flat, NH. He is the author of 4 gardening books.
Fall Pruning: Who, What, Where and How?
Posted on Wednesday, November 7, 2018 · Leave a Comment
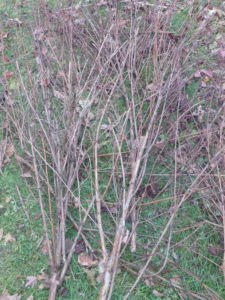
If you have cut back your perennials, cleaned up the vegetable garden and raked the leaves, you have good reason to be a tad smug. You’re ahead of me. But don’t be too proud – there is still plenty to do outside. It’s time for some fall pruning.
First you need to know who gets a haircut, and who does not. Let me preface this by saying that, with a few exceptions, you can prune anything at any time and not hurt the plant. Yes, you will reduce bloom count if you prune spring bloomers now. And maples and birch will bleed like crazy if you prune them when the sap is running. But you can prune anything now, in the spring, or in August without damaging your plants.
Plants that already have their flower buds will bloom earlier than those like hydrangeas or fall blooming clematis that bloom later on new growth. Early bloomers include forsythia, lilac, magnolia, fothergilla, viburnums, rhododendrons and azaleas. Right now you can see big fat buds on most of those – just waiting for spring and the right time to bloom. Yes, you can prune them now, but you lose flowers later on. So you may want to just do a little pruning on these, and wait to do heavier pruning after they bloom in the spring.
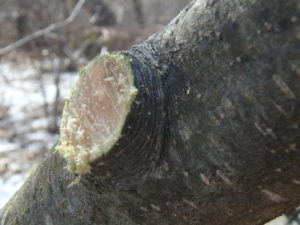
Cut just outside the branch collar leaving the wrinkle bar
Hardwood trees like maples, beech, oak, magnolia and linden can be pruned now. Roses I usually prune in the spring, after I see how much the winter has killed off, if anything. Evergreens like pine and hemlock I usually prune right after the new growth has occurred in summer.
Fruit trees are traditionally pruned in late winter or early spring, but you can prune apples and other fruits now, and I often do. There is no snow to wade through the way there often is in March. For home gardeners losing a few blossoms – and hence some apples – really is not a loss. In a good year I grow many more apples than I can eat, store, or process. I want my trees to be handsome all winter, not cluttered with too many branches. I want my trees to be sculpture on the landscape.
Don’t be a timid pruner. A few bold cuts (removing large stems) can transform a tree in just a few minutes. Nibbling away at the edges, taking off pencil-thick branches is slow, tedious work.
Big stems removed from my ninebark
How much wood can you remove in a single season? The old rule of thumb was a third of the leaf-producing branches. Now experts advise just 20 to 25%. Remember, the leaves are the engine of the tree. They produce the sugars that feed the roots and produce the fruit.If you cut off too many branches (with their leaves), your tree may respond by producing lots of new growth next year in the form of water sprouts or suckers you don’t want.
Aside from the beauty of a well-pruned tree, pruning should open up the canopy so that sunshine can get to every leaf. If a shrub is too crowded with branches, the interior of the tree is a mess, and many leaves do not benefit from the sun. I like to say that a bird should be able to fly through a well-pruned apple tree without getting hurt.
Where should you make your cuts? At the origin of the branch, either on a bigger branch, the trunk, or at ground level. Don’t cut off a branch flush to the trunk as it will open up a big wound. Instead, look at the branch and see where the “branch collar” is, and cut just beyond it. The collar is slightly swollen area at the base of a branch, and its bark is often wrinkled.
My late sister, Ruth Anne, loved to prune. She always started pruning by sitting on the ground near the base of a shrub and looking up through the branches. She would decide which bigger branches should be removed, and cut them off near the soil surface.
Or start by taking out any dead branches first. Dead branches have dry, flakey bark. If you rub the bark of a small branch, you should see a green layer. Dead branches don’t count when you are calculating how many branches you can remove.
Here are the cuts I make when pruning a tree, in the order I take them out: 1. Dead wood. 2. Damaged or cracked limbs. 3. Crossing or rubbing branches. 4. Branches that are growing toward others, or toward the center of the tree. 5. Branches that are paralleling others. I remove the weaker of the two.

Common ninebark in need of pruning. The interior is very crowded
I recently gave my common ninebark (Physocarpus opulifolius) ‘Diablo’ a heavy pruning, even though it means I won’t see many flowers in the spring. It was just so big and messy, it was driving me crazy. I cut a few large stems right out, and a few others I removed half way down. The shrub is much less cluttered, and considerably shorter. It will look good with a dusting of snow – which is one the way.
So get out there and do some fall pruning. Your trees and shrubs will look better all winter, and healthier next summer.
Henry gardens in Cornish Flat, NH. You can reach him at henry.homeyer@comcast.net. He is the author of 4 gardening books, and blogs regularly at www.dailyuv.com.
Tips for Forcing Spring Bulbs Indoors
Posted on Sunday, November 4, 2018 · Leave a Comment
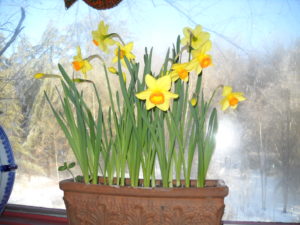
Forced daffodils
One of the easiest, and most satisfying, gardening activities I do each year is to plant tulips, daffodils, hyacinths and crocus in containers each fall. I keep them in a place that is cold, but not freezing, for 3 or 4 months, then bring them into the warmth of the house where I get gorgeous blossoms when snow may still be on the ground. I recently potted up a dozen containers with spring-blooming bulbs.
There are a few things you should know about forcing bulbs. First, you will need a cold dark place where you can store your bulbs after planting them in containers. Thirty-five to fifty degrees Fahrenheit is best, though if the temps go down below freezing for a while, that’s all right, too.
Second, it is important to select bulbs that are labeled “early” or “mid-season”, not “late-season”. It is important label each pot with the date you planted it so you can decide when to bring it into the warmth of the house. If you bring in tulips too early you will get leaves, but not blossoms. Always wait 4 months for tulips to be ready.
Daffodils only need to rest for 3 months before you bring them into the house. The smaller bulbs will do fine with even less. You will see the noses of snowdrops or crocus pop up out of the planting mix, begging for some sunshine so they can bloom.
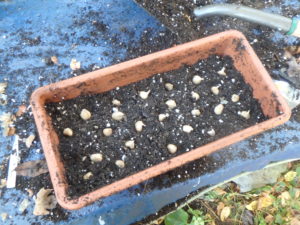
Small bulbs can be planted close together
Planting bulbs for forcing is easier than planting them outdoors. All you need are a few appropriate containers and some potting mix. I use my window box each year, forcing 25 daffodils in a box roughly 36 inches long, 7 inches deep and 7 inches from front to back. It has holes drilled in the bottom for drainage, which is important – no bulb likes soggy, poorly drained soil.
When preparing any container for planting, fill it about half way up with a good potting soil. Or you can mix the potting soil with compost to make a 50-50 mix. Or you can make your own potting mix using peat moss, compost and perlite or vermiculite.
Perlite is the white stuff you often see in commercial potting mixes – it looks like Styrofoam. But it is actually an expanded mineral that has been heated until the moisture inside it makes it pop like popcorn. It is great for keeping soil mixes lightweight and holds air, which is important for roots. Vermiculite is another expanded mineral – this one from mica. It is lightweight, but holds water.
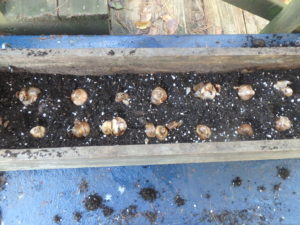
Daffodils planted in a window box for forcing
The soil mix you use should never be allowed to dry out completely when forcing bulbs. This means you need to check on the pots once a month. If the soil mix is dry, you need to water lightly. I like to start with a mix that is quite moist when I plant the bulbs. If you use bagged peat moss in making a mix, be sure to moisten it a few days in advance. Peat moss does not quickly absorb water when it is fully dry.
So you have your pot half full of potting mix. How many bulbs can you fit into the pots? I often use rectangular clay pots that are a foot long and 5 inches deep and from front to back. If using small bulbs like crocus, I plant 20 or 25. For larger bulbs like daffodils or tulips I plant 10 or 12 in the same size pot. In a round 8-inch pot I planted 3 hyacinths this year. I plant bulbs closer in a pot than I would outdoors.
Once planted, cover the bulbs with your potting mix and pat the soil with your hands to firm it up around the bulbs. Then give the pots a light watering and place in a cool place, as described above.
If you don’t have a cold basement, you might place them in a garage or even on the steps coming up outdoors from your basement. Just remember that they must develop roots and start growing in a cold, not freezing location.
Depending where you store your bulbs, mice or squirrels will eat tulips and other bulbs indoors just as greedily indoors as out. And I’ve even had them dig daffodils out of pots and leave them in disgust –they must wonder who would want to eat them.
The easiest solution to the rodent problem is to cover each container with a piece of plywood cut to the size of the container. Just be sure to check the containers often, come spring. I’ve had bulbs start growing, hit the plywood and get all bent over.
To maximize the number of blooms you get, you can plant two layers of bulbs. Plant crocus or other small bulbs over daffodils or tulips. Just cover the bigger bulbs with soil mix, then add the small bulbs and cover them. It can be quite dramatic. I have done this outside, too.
By mid-winter I am aching to see blossoms. Since I won’t be seeing them outside, I love to have them inside. If you have had trouble with animals eating your tulips, forcing bulbs indoors is a good way to enjoy them – without fear of squirrels digging them up or deer eating the flowers. Plant them now, or certainly by mid-December, and enjoy them in early spring.
Henry can be reached at henry.homeyer@comcast.net. He is the author of 4 gardening books.
What Does a Gardener Do When the Rodents Are Out to Get Us?
Posted on Wednesday, October 24, 2018 · Leave a Comment
Like the Joad family in Steinbeck’s Grapes of Wrath, countless squirrels are on the move. Heedless of traffic, they cross the road in search of new sources of food. Steely-eyed gardeners bear down on them, thinking revenge for the destruction of their crops, particularly tomatoes, apples and pumpkins.
Last year was a “mast” year, meaning that our oaks produced a huge crop of acorns. This fed our squirrels, allowing them to produce more babies. We also had good snow cover last winter, which meant that rodents could hide from owls and hawks.
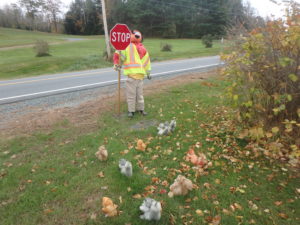
Squirrels need a crossing guard
Voles and mice are not often seen squished on the road, but other signs are evident to me: when I harvested my carrots and potatoes, for example, many had been chewed. And a grand influx of mice into homes has been reported this fall. What can you do to protect your plants and your harvest from all these rodents?
First, if you have fruit trees that are young, you should protect their trunks against rodent damage. Voles, those stocky, short-tailed mouse relatives are the worst culprits. They can reach sexual maturity in just 5 weeks after birth, so they can increase in numbers exponentially, given the right conditions. If hungry enough, they will chew the bark off young fruit trees, killing them by damaging the tender cambium layer all around a tree, girdling it.
To prevent that from happening, you can physically keep the voles away with fine-mesh screening called quarter-inch hardware cloth. It comes in 18- and 24-inch rolls, and I recommend the wider roll. A single layer of mesh screen around the base of the tree will keep the voles a bay. Remove the wire next spring to keep it from getting swallowed up by the bark as the tree grows (that would take a few years, but I’ve seen it happen).
Also available are plastic protectors. Some are tubes slit up the side, others are rolls of plastic to wrap around young trees to protect them from rodents. If your young tree has branches in its lower 2 feet of trunk, you will have to prune off those lower branches to fit the protectors. Mature trees have bark thick enough to deter the rodents.
A few words of warning: do not leave those plastic protectors in place forever. I’ve seen trees damaged by them when left on for a few years – the bark can rot, just as it will if buried in mulch.
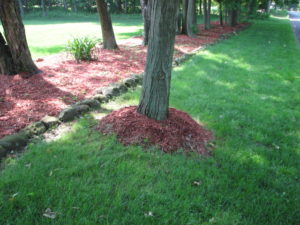
Don’t create mulch volcanoes like this
As you get ready for winter, check the mulch you may have placed around trees to keep the grass from growing up around them. “Volcanoes” of mulch around trees can be lethal. Mulch holds moisture and often harbors fungal pathogens that will destroy the bark your trees. Instead of a volcano of mulch, create a “donut” of mulch. Leave a few inches of free space around your trees.
While checking the mulch around your trees, also look for the trunk flare. At the ground level you should see trees widen and “flare out”. In mature trees in the forest you will see what appear to be fat roots appear at the foot of the tree, roots that disappear into the soil.
If the flare in a tree you planted is covered with soil, it will damage the bark – and in 6 to 10 years it can kill the tree. You can save your trees from a slow death by pulling back the soil from the base of the tree, exposing the trunk flare.
Moles are commonly blamed for all kinds of atrocities, but they do not eat your plants. They are carnivores that eat grubs and earthworms. If you have a Japanese beetle problem, they will help you by eating the beetle grubs. But in winter or spring moles often cause problems by digging up soil and leaving mounds on the lawn. There are castor oil-based repellents that will discourage them. I do not recommend poisoning them as pets and wildlife can be injured or killed.
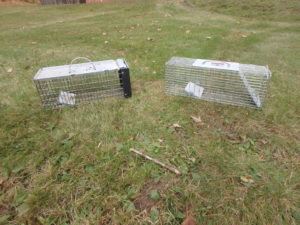
Humane traps are not always humane
Given the high squirrel population you may wonder if you should deport some before winter by trapping them with Hav-a-Heart type humane traps. Probably not, if you care about their well-being. According to what I have read, relocating rodents is not really humane. In a new location they are not likely to survive very long. They will either be eaten by predators or die of starvation.
As to the influx of mice in your house, there really is little you can do besides set traps – either humane ones, or snap traps. But if you store potatoes and carrots in a cool cellar, as I usually do, protect your food from mice and rats. The easiest way to do that is to store them in a second fridge. To keep them from drying out, put them in an open plastic bag with holes punched in it. Potatoes and carrots need to breath in storage. Check them from time to time, and eat them up before they go bad.
We share this planet with our little rodent friends, and I do brake for squirrels. Still, I do all I can to keep them from sharing my harvest or eating my plants.
You may reach Henry at henry.homeyer@comcast.net or by mail at PO Box 364, Cornish Flat, NH 03746. Please include a SASE if you write Henry and want a response by US Mail.
It’s Time to Plant Bulbs for Spring Flowers
Posted on Thursday, October 18, 2018 · Leave a Comment
For decades I’ve been planting spring-flowering bulbs. Some come back every year, some disappear after a few years, and some I treat as annuals. The result? Just when mud season is about to swallow me whole, I am rewarded with flowers to enjoy outdoors – and indoors in a vase. Now is the time to plant bulbs.
First, some basics: All bulbs should bloom fine the first year. To come back, most need sunshine and well-drained soil. Most little bulbs will do fine in part shade.
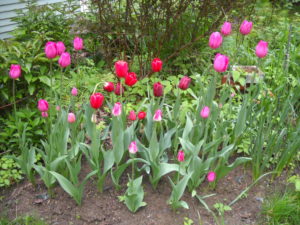
Tulips are ephemeral, but worth trying
I treat tulips as annuals, even in the best of circumstances. Not only that, squirrels will watch you plant them, and then get right to work digging them up as soon as you settle into a chair with a cup of tea. Deer will eat the blossoms, come spring. Daffodils are a better bet.
At the end of Bill Clinton’s term I got to interview the White House gardener, Dale Haney. He told me that they plant thousands of tulips each year on the White House grounds. I noticed lots of big, fat gray squirrels that seemed quite fearless, so I asked him how they kept them from eating the tulips.
The trick he said, is to plant masses together, and then spread chicken wire over the bed before you finish filling the hole with soil. Lay out the wire mesh an inch or two beneath the soil. That way a pesky squirrel will run into a barrier. And somehow, the tulip buds will find their way through the holes.
If you do that, and I have, make rectangular beds roughly the width of your chicken wire. I first tried a circular planting, and cut the chicken wire – which turns into something like razor wire when you cut it. I should have worn elbow-high leather gloves! I have decided it’s not worth the bother.
The other remedy Mr. Haney suggested, is to feed the squirrels. A fat squirrel is a lazy squirrel, he said, so feed them lots of corn. Your tax dollars do that at the White House. Huh.
Daffodils are generally long-lived. They are mildly poisonous, so rodents don’t eat them. And although daffodils will bloom in shady or half-shade places, they really do a whole lot better in full sun, with good drainage. No bulbs want to grow under pine trees or other evergreens.
The best way to plant bulbs is to dig a big hole and plant a lot of bulbs all at once. For daffodils or tulips, dig a hole 6 to 8 inches deep, 24 inches wide to 36 inches long. Have a wheelbarrow or tarp to place the soil on, so you don’t make a mess on the lawn to clean up.
The long handled CobraHead weeder makes nice furrows without having to bend over
Add an inch or more of compost, and then sprinkle some bulb booster or organic fertilizer in the bottom of the hole. Loosen the soil in the bottom of the hole with a hand tool, mixing the fertilizer and compost with the soil. Next, arrange the bulbs in the hole. Plant them pointy end up.
I like a mass of blossoms, so I plant bulbs close together. I read the directions for the bulb variety I am planting, and then plant them a little closer together. Pay attention to planting depth, too. Smaller bulbs like crocus need much less depth than big fat daffodils.

Check the depth of your hole before planting
Most bulb plants reproduce by growing offsets, or little bulbs that develop alongside the mother bulb. After a year or two, the offsets will bloom, too, and you can dig up the bulbs and divide them after blooming if you want. I never have done that, but I remember my parents did when I was a boy.
What else should you try planting? Snowdrops bloom in early March for me, and are a must. Start with 50 bulbs – they are not very dramatic in a small clump. They do drop seeds and will show up downhill from where you plant them in a few years.
Glory-of-the-snow is nearly as early as snowdrops, but instead of white, these are purple or blue or even pink. And they look up, not down like snowdrops, so you can see their petals and interior better. Scilla, another favorite of mine, are a deep purple, and look down. Small, but intense.
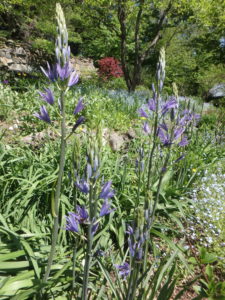
Camassia
Last year I planted several Camassia, a late-spring or early summer blooming bulb plant. They were wonderful! Each plant produces a few flower spikes that are 2 or 3 feet tall, and are covered with blue or purple florets. Very dramatic! They are hardy to Zone 4. Unlike most bulb plants, they do well in wet or moist soils in winter.
Alliums are in the onion family, are wonderful, and are not bothered by rodents. Some are huge, with balls nearly a foot wide that are airy and open, filled with little florets. The big ones can be expensive ($4 a bulb or more) but last a long time and are very dramatic. Even a half a dozen big ones will make a statement.
So get off the couch, get outside and plant some bulbs. Do so, and come spring you’ll be sending me an e-mail saying how glad you are that you did!
You may reach Henry by e-mail at henry.homeyer@comcast.net. He is the author of 4 gardening books and is a lifetime UNH Master Gardener.
Tips for Growing Great Garlic
Posted on Tuesday, October 9, 2018 · Leave a Comment
Now is the time to buy garlic for planting – unless you have some from your own garden that you saved for that purpose, as I do. You’ll want to get your garlic planted a month before the ground freezes, so depending on where you live, you may want to plant some soon. Garlic needs to establish roots now, and is not generally planted in the spring.
Of all the veggies I plant, garlic is the easiest to grow, and a good harvest is guaranteed if follow my instructions. But please don’t sue me if something goes wrong with yours. I’ve never had a bad year in the past 25 years or so of growing garlic.
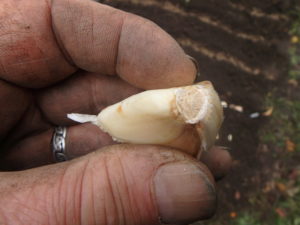
Garlic clove
There are two categories of garlic: hard neck and soft neck. Both will grow in New England, but hard neck is the type grown by most farmers, and the most cold-hardy. It produces a stiff scape or stem each summer that is edible. Soft neck garden generally comes from California, and is good in the kitchen; it is also the type braided and hung from the ceiling in Italian restaurants as decoration. Hard neck garlic generally has more flavor, and a wide variety of flavors are possible, depending on the type you grow.
Garlic does best in rich soil that drains well. If you have a heavy clay soil (one that is sticky when wet), you will want to add plenty of compost to your soil. Adding sand will not help, as sand added to heavy clay produces something like concrete that hardens up in dry times.
If you have poor soil, you may want to build a wood-sided raised bed, and add plenty of compost and topsoil that you purchase in bulk or in bags. I find Moo-Doo brand composted cow manure and topsoil are a good soil additives that are sold in bags in many garden centers.
When making a wood-sided bed, do not use treated lumber. Even though most treated lumber is safe to handle and much less toxic than 20 years ago, I don’t want any chemicals leaching into my soil. I use rough-sawn lumber from a local sawmill, preferably hemlock. It generally lasts about 10 years. Eight-inch wide planks are wide enough to make a nice box.
Plain pine boards will work, too, and metal corners are readily available at garden centers or from catalogs like Gardeners Supply and Lee Valley Tools. The corners make constructing a garden box easy even for non-carpenters. All you need is a cordless drill to drive the screws. Carrots and other root crops do well in garden boxes, so you can alternate them with garlic in subsequent years if you build 2 or more boxes.
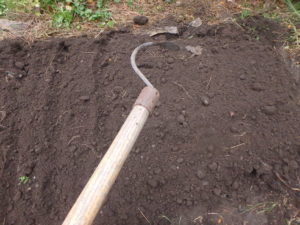
The long handled CobraHead weeder makes nice furrows without having to bend over
Once the soil is loose and weed-free, I plant. I take my long-handled CobraHead weeder, a nice single-tined weeder, and make furrows in the soil of my raised bed. I keep the furrows about 8 inches apart. I sprinkle some organic bagged fertilizer into each row, and stir it in.
I generally use my own garlic for planting, as it has adapted to my soil and climate over the years. But if I see big, fat bulbs of garlic at a farmers market, I sometimes buy some. I don’t recommend buying garlic for planting at the grocery store as most has been treated to prevent it from germinating, and so it will last longer.
Where can you get garlic for planting? If there is none at your local farmers market, you can get organic garlic from Johnny’s Selected Seeds in Maine (877-564-6697 or www.johnnyseeds.com). But don’t wait too long – they sell out most years.
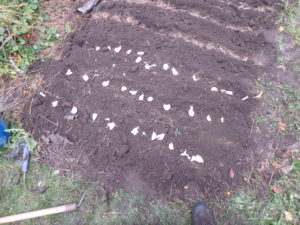
Place your garlic cloves on the soil to establish spacing before planting
I break the garlic bulbs apart, separating the cloves – there are usually 5 to 10 cloves per head. I push the cloves into the loose soil, pointy end up, about 3 inches deep, and 4 inches apart. I cover with soil, and then pat it gently.
The last step is key if you want a weed-free garlic bed: put a foot of fluffy mulch hay or straw over the planted garlic. The straw will pack down over the winter and make a nice mulch that will keep most weeds from growing, but the garlic will push through it. It will be ready to harvest next July.
Depending on when you plant, the soil temperature, and when real cold weather comes, your garlic may send up a few green shoots this fall. Don’t panic! It won’t hurt your garlic. When cold weather comes, it will go dormant and do just fine next spring.
I believe that garlic is a healthy and tasty addition to my diet. It may even be medicinal – it has been used that way for centuries. Some believe that if you crush your garlic and then wait 10 minutes before cooking, it will generate cancer-fighting compounds. Who knows? Certainly it can’t hurt.
And this winter if you chew on a clove of garlic before going to the store, you’ll never get a cold – because people will stand back from you if they cough!
Henry lives in Cornish Flat, NH. He is the author of 4 gardening books and is a UNH Master Gardener. His e-mail is henry.homeyer@comcast.net.
Seven Fall Gardening Chores
Posted on Tuesday, October 2, 2018 · Leave a Comment
For many years I was in denial. Yes, I refused to accept that fall and winter were on the way by October. I didn’t start fall clean up until November, and by then it was cold, raw, often wet and unpleasant out. Now, having reached a certain age, I prefer to work when it is warm and sunny – so I start fall clean up in September, and try hard to finish by the end of October. I recommend you do so, too. Here’s my list:
- Clean up the vegetable garden. This means pulling plants – and weeds – and covering the bare soil with mulch. I put things that might harbor disease or insect pests on my burn pile, everything else goes in the compost. So tomato and potato plants and all vine crops go on the burn pile.
As to mulching the soil, I do this for two reasons: First, I don’t want hard rains to wash away my topsoil. That is true everywhere on my property – bare soil invites erosion. Second, bare soil is open to receive wind-blown weed seeds. They would germinate next spring before I plant my tomatoes, if I let them.
What do I use for mulch? In the vegetable garden, I use fall leaves that I have chopped up with my lawnmower. They are great for improving the soil, too. I rarely have bare soil in my flower beds – they are full of perennials.
- Cut back perennials. Cleaning up the beds now, and doing a good weeding, will save me a lot of time in the spring – when I am busy with other spring tasks like planting my vegetables. I don’t cut back everything. I leave flowers with seeds that the finches and other seed-eaters will enjoy. Black-eyed Susans and purple coneflower are two they love. Sunflowers will get eaten in place, and most have already been eaten; if so, I cut down the stalks.
- Blackberries and raspberry plants need to be cut back now. Cut off the stems that produced berries this year and leave the new growth. These berries produce on second year growth.
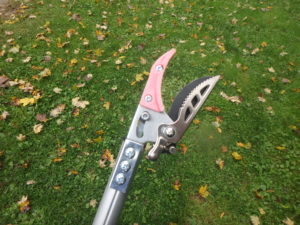
This 5 foot pole pruner will cut and grab
I have a cut-and-grab pole pruner which helps me to avoid getting scraped by thorns. I just cut the plants at ground-level and the tool grabs on to the cut stem, allowing me to pull it out and place it in the wheelbarrow without getting bitten by the thorns. It is available from The Wildflower Seed & Tool Company (www.wildflower-seed.com or 800-456-3359). These tools come in various telescoping lengths.
- Add fuel stabilizer to your gas can now, so that your lawnmower and other power tools will go into winter with gas that will not go flat. Chain saws, rototillers and such need it too, and you may need to drain out the existing fuel, re-fill and run them for 10 minutes to avoid having gunky gas in the machines in spring. Ask at your local garage or auto part store.
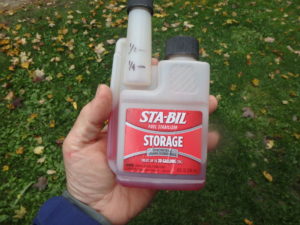
Fuel stabilizer will help your small engines start in the spring
After you have tended to your power tools, take a few minutes to clean up and oil your hand tools, too. Before you put away your shovels and rakes, wipe the metal clean of soil and apply a little light machine oil to prevent rusting. Wooden handles benefit from an application of boiled linseed oil. I have one tool with a wood handle that has been in my family for over 60 years. I don’t leave it outside in the rain, and I oil it once a year. It’s as good as new – and has a lovely patina.
- Divide daylilies, iris, phlox, asters and other large clumps of perennials now. Cut the stalks to the ground, and then lift the clump with a garden fork by going around the clump and loosening the soil on all sides. Then pry it out and divide into 2, 3 or 4 pieces with a shovel or a hand tool. Don’t worry about cutting the roots, they will not be damaged. You can do this in the spring if you prefer. This is also the time to move peonies, if you must.
- Feed your soil and lawn. Fall is a good time to add compost, fertilizer and limestone to your soil and lawn. I test my soil pH with a little kit that costs just about $5. I aim to have my soil pH between 6.2 and 6.8, which is just slightly acidic. If the pH in your soil is lower than 6.0, you should add limestone to raise the pH (except for blueberries, hollies and rhododendrons, which like acidic soil).
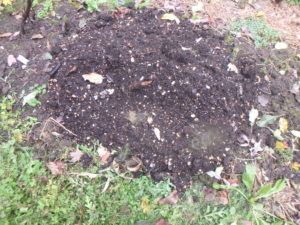
Add compost now and work it into the soil
Adding compost will improve almost any soil. I added it to my vegetable garden for 30 years, and now have a soil so rich and black I need not add any more. Fertilizer? I only add organic fertilizers as they add all the micronutrients plants need, but that are not in chemical fertilizers. And organic fertilizers are slow-release.
- Lastly, mow your lawn before the snow flies. Bring the blades down lower, as a shorter cut will help to minimize risk of fungal diseases. Rake it if need be, so there are not clumps of grass left on the lawn.
Getting ready for winter is satisfying for me. It’s like tucking a child into bed. And I like looking out the windows and seeing a tidy garden, all ready for spring. Have at it!
Send comments or questions to Henry at henry.homeyer@comcast.net. Henry is a UNH lifetime Master Gardener, and the author of 4 gardening books.
Fall Mums and Asters: Joys of the Season
Posted on Tuesday, September 25, 2018 · Leave a Comment
Summer is over, officially, and the garden knows it. Tomatoes exist only in the kitchen, many flowers are looking lackluster, and trees are losing their leaves. What’s a gardener to do? I buy color in the form of chrysanthemums and fall asters. And I also enjoy wild asters that appear along the roadside and the edge of my woods.
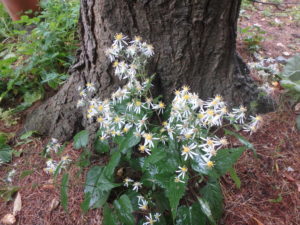
Wild woodland aster
Let’s start with asters. My most comprehensive wildflower reference, The Illustrated Books of Wildflowers and Shrubs by William Carey Grimm, lists 29 native species of wild asters. Walking along a country road recently I spotted at least 5 of them. Some were tall and white or purple, others shorter and pink, purple or mauve. Some had wide rays in their flowers, others had delicate rays close together. And I wouldn’t begin to try to assign names to them. They were all lumped together in my mind as just asters. I like them all.
At garden centers there are nice purple asters for sale, short ones, either bright purple or pink. Their tags will say they are perennials, and they are. What the tags do not say is that yours won’t have a hundred blossoms or more next year and hug the ground. They will be taller, probably much taller, and have fewer blossoms.
The asters you buy that have been cut back repeatedly in the early summer so that the stems will fork, making them bushier, wider and shorter. Each little stem is capable of producing a blossom. If you want to get something next fall that resembles this year’s purchase, you will need to cut back the plants at least twice in early summer. Me? I leave that to the professionals.
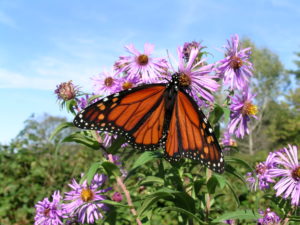
Monarch on New England Aster
Of the tall perennial asters, I have some that are 5 to 6 feet tall and produce huge numbers of flowers. These are New England asters, a native species. They produce large amounts of pollen and nectar and are important to our butterflies and bees. Monarch butterflies often feed on mine.
In recent times those people who provide us with the botanical names of plants have changed the genus name of asters from Aster to Symphyotrichum . The species name of the common New England aster still remains novae-angliae. Why do they do that? I suppose because they can, and to show that they know a lot more than we do about certain things. Huh.
Another aster I love is the bushy or rice-button aster (Symphyotrichum dumosus). Its lower leaves don’t seem to be affected by the fungal disease that so often turn New England aster stems brown. Its leaves and stems are shiny and a very dark green. It is usually the last aster to bloom for me, only starting in late September or early October. The variety I purchased is known as ‘Wesley Williams’. It is 4-6 feet tall, with intensely purple-blue flowers about an inch across. Like many tall things, it needs to be staked to prevent flopping, particularly in rich soils where it grows tallest.
Each fall I treat myself to some chrysanthemums. The genus name of mums, by the way, has now changed to Dendranthema. I don’t buy them at the grocery store in an effort to get the cheapest price. I go to my local farm stand and buy the biggest, most beautiful pots of mums I can. I like to support local farmers and garden centers – and I believe I get better quality flowers from them. Mums that have traveled on a truck from New Jersey aren’t necessarily of bad quality, but those that were grown near home are less likely to have been stressed or damaged by too little (or too much) water.
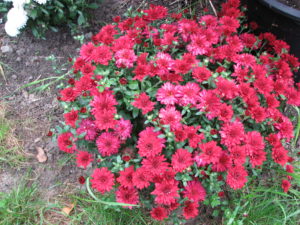
Chrysanthemums
Sometimes I just plunk those mums down, pots and all, on the front steps. Doing so means I will have to water them every hot sunny afternoon, particularly if the mums are growing in peat pots instead of plastic ones. I like peat pots – they don’t use any petroleum products – but they do dry out more quickly than plastic. This is true even if you plant the pots in the ground. The lip of a peat pot will let moisture evaporate and dry out the roots unless the ground is pretty wet. So tear off the lip of the peat pot, or remove it entirely if popping them in the ground.
Mums, like the asters, are sold after extensive grooming and pruning throughout the summer. I once estimated that there were 300 blossoms on one 8-inch wide pot of mums. Left to come back next year, you might get a tenth as many blossoms. What you see when you buy your mums is what you’ll get: they will not grow anymore blossoms, but the buds should all open.
Other fall perennials currently in bloom for me include various black-eyed Susans, turtlehead, fall anemones and snakeroot (Cimicifuga ramosa). So I shouldn’t be lamenting the lack of color – besides, it won’t be long before the maples and other trees start their annual show.
Henry is the author of 4 gardening books, and a regular blogger at www.dailyUV.com. He lives and gardens in Cornish Flat, NH. Reach him at henry.homeyer@comcast.net or PO Box 364, Cornish Flat, NH 03746. If you want a letter response, please include a SASE.


 Click Here to buy from Cobrahead