Hedges: Great Windbreaks for Winter
Posted on Monday, February 20, 2017 · Leave a Comment
Although I’ve never read a scientific paper on the value of hedges for garden plants, my personal theory is that they are beneficial, particularly in winter. They break the cold winter winds that damage flower buds on trees and shrubs in cold times and can help keep soil from drying out from hot, dry winds in summer. Easier to install and less expensive than wood fences or stone walls, this is a good time to think about planting a hedge, come summer.
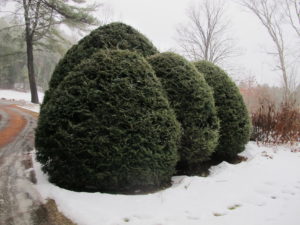
Carefully sculpted Hemlock hedge
Hedges can be grown using almost any plant material that survives our winters – or even those that die back to the ground each winter. For most of us, the important thing is that they look good, be affordable and grow relatively quickly.
If you want a tall hedge to screen an eyesore or provide privacy, you should select a woody evergreen hedge. Canadian hemlock if good for that – it grows fast and will grow close together. For a 6-foot hedge, plant hemlocks 6 feet apart. For an 8-foot hedge, 8 feet apart, and so on. Yew is also good, but generally is pruned to stay lower and deer love to eat it. Boxwood and privet are traditional hedges, but privet (a deciduous shrub) is now considered an invasive plant in many places and discouraged or prohibited.
In order to keep an evergreen hedge looking good, you need to taper it so that the bottom has longer branches than those on top. That allows the lower branches to get more sunlight.
When planting a shrub or tree for hedging you should start with small plants, plant them close together, prune early on, and prune hard. By pruning early and hard you encourage good branching down low, so you don’t end up with a gawky hedge with little greenery near the bottom.
It’s best to prune your hedge one to three times each summer, even when they are small – to encourage branching and maintain a thick hedge. If you don’t prune every year, your hedge will have thick, stubby branches when you cut it back instead of small, feathery branches. And it can get too tall.
Cost is an issue when selecting plants for hedges, as they require many plants. Ideally you can use plant material that you own and can divide and use for free. I’ve rooted willow twigs to create a small wall. Lilacs often send out root suckers that can be dug up and moved. According to what I’ve read, other good candidates for rooting include elder, flowering quince, forsythia, mock orange, rugosa rose, spirea, viburnums and witch hazel.
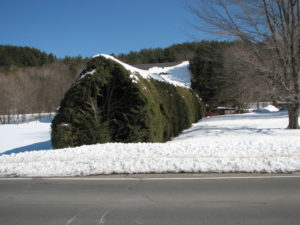
This hedge tapers to let lower branches get sunshine
Creative pruning of hedges can create dramatic results. There is no reason why a flat and “boring” hedge cannot be pruned to different heights to create a wave of green mimicking a distant view, or shaped to have a pointy top or be shaped like a dome. And you can trim a hedge to different heights at different places to open up a view – or hide the abandoned car on your neighbor’s property.
In addition to the usual hedge plants, edible hedges can be made using gooseberries, currants or blueberries. Decorative grasses can be used, or even golden rod (if you dare risk the scorn of your neighbors). I once divided and moved several large peonies for a client who was re-doing a garden. I divided them into 50 plants and spaced them so that, when mature, the foliage would mingle and create a single row of plants. By now it must be drop-dead gorgeous in June. It’s not a hedge that provides privacy, but it is wonderful in bloom and it sets off their lawn from the neighbor’s lawn.
Lastly, you can make a hedge by installing (or utilizing an existing fence) and growing vines on it. Evergreen euonymus (Euonymus fortunei) is an evergreen variegated-leafed vine that will grow in shade and is quite vigorous. And most vines will start easily from cuttings. English ivy, Virginia creeper, or even grapes can be used. When they mature, the fence disappears, and you have a wall of green. Climbing hydrangea will not attach to a wooden fence, but it can be attached to one, and will grow in full shade and flowers magnificently.
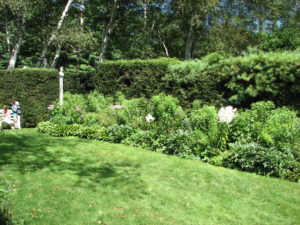
Hedge used as backdrop for flowers
A word of caution: if you are using a hedge as a separation of your property from a neighbor’s, remember that the neighbor should be consulted, as they will have to trim their side of the hedge. Or plant it far enough back from the property line that you can trim both sides, without stepping off your own property.
Your hedge probably won’t serve to keep out hungry animals. Deer are really the only ones you have to worry about in most neighborhoods, and anything less than 8 feet is just an easy leap for all but oldest, most arthritic deer. Still, it will keep out young neighborhood ruffians, particularly if the plants have thorns.
See Henry’s blog at https://dailyuv.com/gardeningguy. His website is www.Gardening-Guy.com.
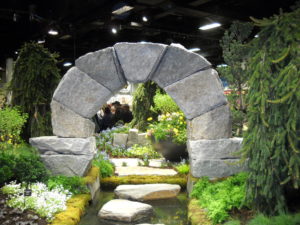
Flower Shows
Posted on Monday, February 13, 2017 · Leave a Comment
Spring arrives every year, but never soon enough for most of us gardeners. The first real sign of spring for me is always the arrival of my snowdrops: those tiny white bulb flowers that come up, no matter what, by early March – and sometimes earlier. Even under a thick blanket of snow and sub-freezing temperatures, the snow drops pop up. I’ve been known to shovel off the snow to find them.
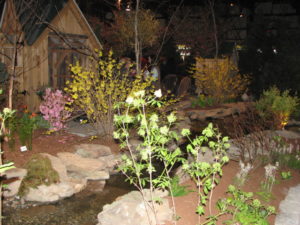
Vermont Flower Show
At the same time come the spring flower shows. These extravaganzas offer the blossoms and fragrances of spring – but months early. Intrepid nursery-people force trees to bloom, along with hundreds of tulips and daffodils. Seed companies are there, showing their wares, and garden experts spout knowledge to interested gardeners in dozens of workshops over the weekend-long events.
The Providence Flower Show was, for the last 20 years, one of the first each year. It was a great show and I attended often. Unfortunately, it saw declining revenues and has given up. Apparently the competition with the Connecticut Flower Show in Hartford and bad winter weather did it in. The Rhode Island Home Show, produced by the Rhode Island Builders Association will have a flower component in their annual show march 30 to April 2.
So this year the first weekend of flower shows is February 23 to 26 at the Hartford Convention Center – and the Connecticut Flower Show reigns by itself. The Hartford Show’s theme this year is “Woodland Enchantment”. There will be over 50 workshops over the course of the weekend, so there is much to learn from their speakers. And of course, there are flowers galore and much to buy if so inclined.
Next comes the Vermont Flower Show on March 3 and 4 at the Champlain Valley Fairgrounds. This is a nice small show. Instead of many small displays of flowers, members of the Vermont Nursery and Landscape Association work together to create one larger area that includes many blooming trees and forced bulbs that is always nice. There is a large model train area that appeals to kids, along with children’s craft opportunities to keep the little ones busy. The vendors of garden-related stuff are numerous.
The “grande dame” of American flower shows, the Philadelphia Flower Show comes next and lasts from March 11 to 19. It is truly huge, and worth visiting at least once. Held in the Pennsylvania Convention Center, it covers about 6 city blocks and will be attended by over a quarter of a million people over a nine-day period. The displays range from the grandiose and outrageously expensive to entries of African violets by little old ladies. It is best to go on a weekday when the crowds are smaller. This show has been annual since 1829, so they know what they are doing!
Boston Flower Show
Then comes the Boston Flower Show, another extravaganza. It will be held March 22 to 26 at the Seaport World Trade Center on the waterfront of Boston. Like the Philly show, it is a good idea to visit on a weekday. This year’s theme is “Superheroes of the Garden”. Their publicity touts it as “honoring the crusaders, innovative tools and legendary plants helping to make us all champions in the battle for garden supremacy!”
Want smaller crowds? Go to the Bangor, Maine Flower Show which will be held that same weekend, March 24 to 26. It will be held in the Cross Insurance Center and will include flower displays, speakers, food and more.
The Maine Flower Show at Thompson’s Point in Portland will be held March 29 to April 2. This is a new venue to me and will certainly be an improvement over the old warehouse that housed it when I last visited this show. According to their promotion, it will feature 16 display gardens and “will have 100 exhibits of plants, hardscape, arbor and garden supplies, and all things relative to outdoor yardscaping and living.”
Portland Flower Show
That same weekend is the New Hampshire Seacoast Home and Garden Show in Durham, NH. Held in the Whittemore Center Arena on April 1 and 2. As the show name indicates, this is not just about flowers, but includes displays and workshops on a variety of home improvement topics.
But for me, the flower show season will wrap up with the biggest and the best, from all I have heard. My partner, Cindy, and I have bought our plane tickets to London to attend the Chelsea Flower Show held this year May 23 to 27. This is a fund raiser for the Royal Hospital Chelsea.
The show is run by the Royal Horticultural Society, and the first 2 days of the show admission is restricted to members only. Membership costs $55 and a ticket for the first day costs $90. The second day the price drops a bit and by the Thursday, the first day open to the public, tickets are a mere $61. Prices go up after April 10. But airfare to London is down this year, which helps.
Unlike American flower shows, the Chelsea flower show includes much that is planted outdoors – which allows garden displays to be even more spectacular. I was told by a friend to take my umbrella! For me, this show is one more item to check off my “bucket list.”
You may reach Henry at henry.homeyer@comcast.net or at P.O. Box 364, Cornish Flat, NH 03746. His web site is www.Gardening-Guy.com.
Four Great Plants to Brighten Up Your House
Posted on Sunday, February 5, 2017 · Leave a Comment
Winter is tough on many gardeners, myself included. We need flowers blooming and plants to tend. But many of us are not enthralled with standard houseplants because they are often fussy and, if over-watered, too easy to kill. Let me suggest some nice easy, disposable flowers you can get at your local nursery or food coop.
I recently bought 3 blooming primroses for a total of $11.85. One is purple, the others shades of pink. They will bloom for a couple of weeks – or perhaps more. The tags only said ”Primula” (its scientific genus) and “Plant in part shade 8” apart”. The tag did not say, however, if these primroses would survive a New England winter. I suspect not, having babied other grocery store primroses along until the ground thawed and planted them outside. But I don’t care. These lovely plants will provide color and life indoors at a drab time of the year. And for less than $4 each, they don’t have to last forever.
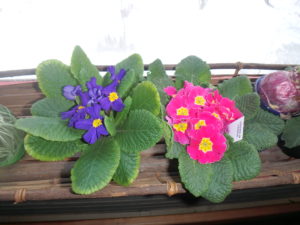
Primrose
What the tag should have said, however, is “Do not keep this primrose in a hot, sunny window unless you are willing to water regularly.” The soil they are in dries out fast, and you can cook a primrose – and most other grocery store plants – in just a day or two of inattention. I did that recently, but I placed the abused primrose in a deep dish and filled it with water, allowing it to suck up plenty. And it recovered in just a few hours.
I usually add a few drops of a product called “Superthrive” to the water when I have a plant that is suffering from neglect. This liquid contains plant hormones and seaweed extracts, and is very good for helping plants recover from environmental stress. It is expensive if calculated by the ounce, but so little is needed that it is not expensive. And it works. A 4 ounce bottle costs around $10-12.
I also bought a cyclamen in my effort to brighten up the house and do some attitude adjustment. Cyclamen definitely do not want to be in a sunny window. Bright indirect light is best. They come in a range of pinks, reds, magentas and white. I tell when they need watering by lifting the pot. If it feels very light, it’s time to give it water.
Cyclamen keep on blooming for much longer than primroses, and can last for years, getting bigger and better each year. If you want to learn about getting them to re-bloom, find a copy of Thalassa Cruso’s wonderful book, Making Things Grow: A Practical Guide for the Indoor Gardener. It’s out of print, but readily available. Every used bookstore has copies, and it’s a gem. Ms. Cruso was a TV personality, I gather, and her books read the way she must have presented herself – as a friendly, knowledgeable auntie.

Cyclamen
Thalassa Cruso was, of course, a plant fanatic. I’m not sure that following every bit of her advice is worth the trouble. She notes that cyclamen come originally from Iran where they bloom in winter. She claimed to move hers every evening to a cool spot such as a mudroom where the temperature is below 60 degrees. My goodness, it’s enough for me to turn off all the lights, feed the woodstove and the cat, take out the dog and brush my teeth before going to bed. Now I learn I should be moving the cyclamen, too!
Cineria is another gem available at this time of year. It has the added advantage of a lovely fragrance, too. It appears as a mound of daisy-like flowers that stand up a good 10 inches. It wants bright light, but no direct sunshine (they will finish up too quickly in the sun). Its soil needs to be kept moist, but not soggy.
Cineria are true annuals. That means that once the 6-weeks of blooming is over, the plant is done. You cannot get it to survive, year after year, returning to bloom again. That’s a blessing. You can feel fine about throwing it in the compost. It’s a no-guilt plant.
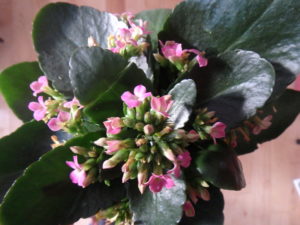
Kalanchoe
The last of my recent investments was a kalanchoe. This is a succulent and does will in warm, dry conditions. It comes in a variety of colors. In Thalassa Cruso’s book it was described in the chapter “Neglectable Plants”. That means, I suppose, it is hard to kill them. This one will, apparently, re-bloom if you cut it back after blooming, and reduce the light for a month, and don’t water it then, either.
So go get some plants in bloom for the house. No matter what you do, they should last longer than the same money invested in cut flowers, so they are a good investment. Just don’t think of them as a lifetime investment and you’ll be happy. Let them bloom, and toss them if you wish. I often do.
Read Henry’s blog twice a week at https://dailyuv.com/gardeningguy His email is henry.homeyer@comcast.net, and he can be reached my snail mail at P.O. Box 364, Cornish Flat, NH 03746.
Two Trees Your Birds Need
Posted on Monday, January 30, 2017 · Leave a Comment
Recently a blue jay turned to me and said, “Thanks, Henry, for planting those hemlocks and pine trees back in 1972!” Well, perhaps I’m presenting alternative facts here, but I know that the birds really do appreciate those trees. Particularly now, in the cold of winter.
Most of us feed the birds– not only to help them, but also to enjoy watching them all winter. The food we provide is helpful, but most would survive just fine without out it. But helping birds by providing shelter out of the wind and safety (away from cats and other predators), and nesting places is equally important. Forty-five years ago I planted a row of evergreens as screening for my back yard and it has been a real haven for birds.
According to a wonderful book called, Trees, Shrubs and Vines for Attracting Birds by Richard M. DeGraaf (University Press of New England, $24.95 in paper), 46 species of birds use the eastern white pine for either food, cover or nesting – and is one of the most beneficial trees for birds.
I dug up half a dozen small evergreens including a 5-foot tall white pine seedling in the summer of 1972. All were “volunteers” growing in a meadow near my house. They have done well, growing to mature size and blocking the view of my back yard from the road.
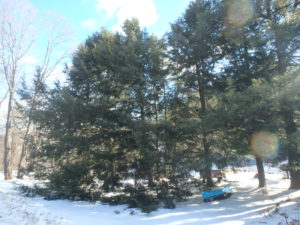
Hemlock and Pine Screening
According to the list of birds using white pine, the seeds are the favorite food of the northern bobwhite, red-bellied woodpecker, and spruce grouse – none of which I have seen in it. But it is also a favorite for some of my good bird buddies – black-capped chickadee, nuthatches, northern cardinal and juncoes. They go from the bird feeder on my deck to the pine and back, and enjoy resting out of the wind and away from Winnie and Sammy, my two resident cats.
Here are a few tips for growing white pines. First, don’t plant them near a paved road, as road salt is very injurious for them. I’d guess that if you are 20 feet or more back from the road with your planting, you should be all right, though even farther away would be better, especially if downhill from the road.
Next, remember that white pine trees get to be big, particularly if they are planted away from competing trees. They will grow 10 feet in 10 years, though under ideal conditions they will grow twice that or more. A mature white pine can reach 100 feet in size, though mine are about half that; their width can reach 20 to 40 feet. They have long needles, 5 to a cluster.
In recent years I’ve had many questions about white pine trees with needles that brown and drop off. It is normal for the trees to replace some needles every year, and every 4 to 6 years to lose quite a few in the autumn. But if you are seeing widespread needle browning at other times of the year, you may have a problem.
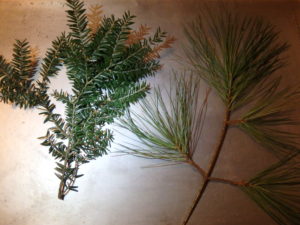
Hemlock (left) Whitepine (right)
Pines grow best in rich soil that drains well and is not generally soggy. Soils that are compacted by cars parked near them will suffer root damage. White pines prefer acidic soils with a pH of around 5.2. So you may be able to help your pine trees by applying some agricultural sulfur around them, just as you do your blueberries.
Leaving the dropped needles under the trees will help, too. The needles will serve as a mulch, preventing the soil from drying out too much in dry times and will help to acidify the soil as they decompose.
Eastern hemlock is another great plant for birds. De Graf lists 26 birds that use hemlock on a regular basis. It is an easy tree to grow as it will do so in full sun or full shade, and everything in between. It is fast growing, in most conditions other than heavy clay. It can grow a foot or more per year. It is easy to identify as it has soft, short needles –just half an inch long.
One worry I’d have about buying a Canadian hemlock is an insect pest that can devastate them: the wooly adelgid. This mite is an aphid-like insect that can kill a mature hemlock in 4 to 10 years. A native of Asia, it has no native controls. It covers itself with waxy filaments, the wool, which tends to keep off predatory insects. They are being monitored closely throughout New England, and few outbreaks have been recorded in Vermont, New Hampshire and Maine – though it is working its way north.
If planting hemlocks, choose well-drained acid soils. It is susceptible to drought, particularly in the first few years after planting. But generally it is an easy tree to grow.
Obviously now is not the time to plant trees, but it’s a good time to imagine what they might add to your landscape after 10 or 20 years. Don’t make the mistake of planting either of these trees too close to the house – 25 feet from the house would be a minimum for either. And if you want a hedge, hemlocks can be pruned into a hedge quite nicely – though if you miss a few years of pruning they will get too tall. And that almost always happens!
You can read Henry’s blog at https://dailyuv.com/gardeningguy or write him at P.O. Box 364, Cornish Flat, NH 03746.
Is it Time to Starting Seedlings?
Posted on Monday, January 23, 2017 · Leave a Comment
A reader, Vicki, wrote recently asking if it’s time to start Brussels sprouts indoors, and if so, how? No, it’s not time for them yet. But I will start a few things soon. Here are some tips.
First, know that most vegetables and flowers only need to be planted 8 to 12 weeks before you put them out. For me, frost sensitive vegetable starts go outdoors in early to mid-June. Counting back 8 weeks means planting in April, not January.
But look at your seed catalogs – or go online – to see how long a particular plant takes to germinate and get ready to plant outdoors. I find that the Johnny’s Selected Seeds catalog is one of the best source of growing tips. Go to www.johnnyseeds.com and click on grower’s library, then on vegetable library. This will give you the chance to click on a vegetable and get 2 pages of good information – most of which is also in their print catalog. For another good source of information go to the Gardeners Supply Company’s vegetable encyclopedia: http://www.gardeners.com/gardening-encyclopedia and you will be able to get great information for about 40 kinds of vegetables. I helped write that years ago.
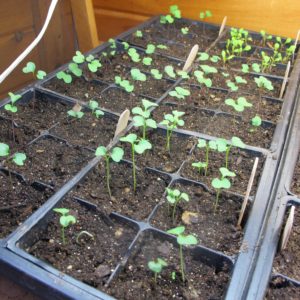
A Flat of Seedlings
Professional growers don’t want to spend a lot of time babying seedlings – time is money – and recognize that smaller seedlings generally transplant better than large ones. Roots of small plants are not bound up, even in a small cell, so they transplant better. Some gardeners like to start tomatoes 16 weeks ahead of planting, and then transplant seedlings from starter 6-packs to individual 4-inch pots, allowing them to plant large tomatoes in the ground. But that’s a lot of time tending and watering. Those same gardeners often try to get seedlings into the ground in May – even if the ground is chilly. I like to put mine out when the soil is 60 degrees or warmer. Then the plants take right off and are not stressed. Warm weather plants like tomatoes and peppers tend to sulk when put in cold, wet soil.
The reader, Vicki, asked if I thought she needed a heat mat for her Brussels sprouts. Not necessarily. Heat mats are good for impatient gardeners who want to get things growing fast. Soil temperature is a safety feature for plants: cold soil means more cold weather is still coming. If the soil is truly warm, it’s safe for tender plants to germinate. So it may take 2 weeks or more for Brussel sprouts to germinate at 50 degrees, but only 5 to 8 days at 75 to 85 degrees. Soil mats should be turned off once the plants have germinated.
Vicki was planning on growing her Brussels sprouts on a south-facing windowsill. Don’t do it, Vicki. Invest in some lights. Seedlings need intense light in order to develop strong bodies and thick stems. If there is not enough light, plants get tall fast and lean toward the source of light. They are flimsy and more prone to disease.
I tell wanna-be gardeners that they need to have 6 hours of direct sunshine outdoors to grow good tomatoes and other fruits, but that lettuces and kale – leafy greens- can get by with 4 hours of direct sun. It’s hard to get 6 hours of sun indoors at this time of year, especially since the sunshine is so often filtered through clouds. And in modern windows, much of the sun’s strength is filtered out so that it won’t bleach out your rugs and curtains. What kind of lights are best? I recommend fluorescent lights using T-8 bulbs. Those are tubes that are narrower in diameter than the old T-12 bulbs, but more energy efficient. Shop lights are relatively inexpensive, though special “Gro-Light” fluorescent tubes can be pricey. I use ordinary shop lights with no-frill tubes.
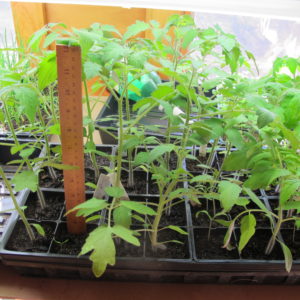
Tomato Seedlings Ready for Bigger Pots
I built an A-frame plant stand that is perfect for shop lights and flats of seedlings. You can see the directions to build it at https://dailyuv.com/gardeningguy It will hold 6 flats of seedling, and for around $50 you can get everything you need including the light fixtures (depending where you get them). The height of the lights above the flats of seedlings needs to be adjustable so that the lights are always about 6 inches above the tops of the plants. I use jack chain, a lightweight chain available at hardware stores, and a hook at each end. As the plants grow, I shorten the chain.
Vicki asked me about fertilizing her Brussels sprouts seedlings. It depends on the soil mix you use. If you buy a commercial seed-starting mix, it is light and fluffy and good for developing roots, but it has little in the way of nutrients, and those present will wash away in a couple of weeks. Me? I make a 50-50 mix of seed starting mix and good compost. The minerals in the compost will not be so quickly depleted. In either case, a regular light dose of an organic liquid fertilizer such as Neptune’s Harvest fish and seaweed will keep your plants from suffering from lack of minerals. But don’t overdo it. More is not better.
So, Vicki, don’t start your Brussels sprouts until April, or even May. Onions and peppers and artichokes are things I start in late January, or even as late as mid-February. That keeps me busy and thinking of Spring, but doesn’t overwhelm me.
You may reach Henry at henry.homeyer@comcast.net or at P.O. Box 364, Cornish Flat, NH 03746. Please include a SASE if you want a mailed response. Henry’s web site is www.Gardening-Guy.com.
Twelve Rules for Gardeners
Posted on Monday, January 16, 2017 · Leave a Comment
I do a lot of public speaking, and was recently asked to give a talk that put forth a list of “Commandments” for gardeners. Not wanting to sound pretentious, I decided that 12 rules sounded better than 10 commandments. Here they are:
- Do not use chemicals in the garden. Not insecticides, not weed killers, not chemical fertilizers. Why? Because it’s not only better for the environment, it’s better for your plants. And you, especially if you plan to eat your veggies.

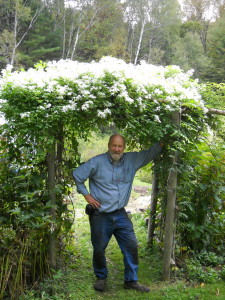
Just say no to pesticides! My dog Daphne
Mother Nature has been growing green plants for a long time – and she never fertilized with tree spikes or used Roundup to kill weeds, or Sevin to kill bugs. And she did just fine. Sure, the Japanese beetles can be pesky. But do you really want your kids and dogs playing on a lawn with pesticide residue on it? I don’t. Plants do fine with organic techniques. Pick off those dang beetles and drown them in soapy water.
- Don’t let your weeds make seeds. Seeds can last years, waiting patiently for you decide to go to the beach for a week in August. Then they will germinate and grow like crazy. Making you go crazy when you come back and see the gardens full of weeds.
What to do? Learn to love weeding. It’s an excuse to be outdoors in the garden and to ignore other deadlines. Say to your loved ones, “Gotta go weed! Weeds are blooming! Sorry, can’t help with that!” And mean it. Weed every day for at least a few minutes. Make it a ritual like brushing your teeth or making the bed.
- Treat your soil as you would a puppy: give it good nutrients but not too much of anything. Don’t give it big doses of fertilizer. Some compost and a little slow-release organic fertilizer will help, but too much fertilizer will encourage fast, weak growth that is attractive to insect pests and fungal diseases.
- Create biodiversity in the landscape. Put some flowers in with your veggies and veggies in with the flowers. Artichokes or purple kale will look great in your flower bed. Marigolds in the vegetable garden are thought by some to repel certain pests. An acre of cabbage will attract loopers that might not find one or two plants.
Not only that, flowers in the vegetable garden feed pollinators needed by your cukes. And insects like ladybugs, which eat aphids, also depend on pollen when insect prey is not available.
- Create hardscape so that you have beauty even in winter. When I bought my house in 1970 I started by vegetable gardening. Later I planted perennials. It wasn’t until much later that I discovered the joys of shrubs and trees.
Clematis in the fall
Woody plants take a lot more time to grow and become mature than perennials. So start with them. In 15 or 20 years most trees start to look great, even maples and oaks. Add stone walls or a bentwood or cedar archway, or even a barn if you can. All look great in winter – and can support blooming vines.
- Learn to store, dehydrate and freeze garden produce so you can eat something from the garden throughout the year, not just in summer. This is one of my great joys in life. Even a clove of garlic added to a salad or a winter squash put in a soup in January brings me pleasure. I spend a lot of time in late summer into the fall preparing food for storage, but it is worth every minute I spend, and more.
- Prune your trees so they are beautiful. Most people look forward to pruning as much as they enjoy getting a root canal. Think of pruning as creating living sculpture. But the nice thing is, if you inadvertently lop off a branch that you regret removing, others will fill in the space.
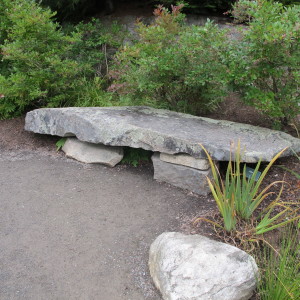
Stone bench
Yes, there are rules about pruning. But if you know enough not to leave ugly stubs, and cut just outside the “branch collar”, that swollen area where branches meet the trunk, you will be fine. Clear out clutter.
- Keep a compost pile, but don’t be afraid to buy compost, too. Don’t worry if your kitchen scraps don’t turn into “black gold” overnight. Buy compost as needed – we never have too much.
- Cut fresh flowers whenever some are in bloom and keep them on the table. Plant early bulbs and late fall flowers to extend the season. And then support your florist. Fresh flowers are a basic human right.
- Keep a few easy houseplants to keep your green thumb active, even in winter. Don’t be afraid to throw them out if they disappoint you – or you, them!
11. Learn from other gardeners. Visit other gardens. Take classes.
12. Take a few moments every day to walk through the garden, pausing to look at the beauty, not just the weeds or the projects on your list.
Read Henry’s blog posts at https://dailyuv.com/gardeningguy You can sign up to get an e-mail alert every time he posts. You can reach Henry at henry.homeyer@comcast.net or P.O. Box 364, Cornish Flat, NH 03746.
Michelle Obama and the White House Garden
Posted on Monday, January 9, 2017 · Leave a Comment
I recently was re-organizing my gardening books and came across a great book by Michelle Obama: American Grown: The Story of the White House Kitchen Garden and Gardens Across America (Crown Publishers, 2012, $30 in hardback). I must have gotten it when it came out, but never read it until now. It’s a wonderful book, and every library should own it. Not only is it a good gardening book, it is a look into the life and character of Michelle Obama.
Michelle Obama grew up in Chicago and never had the chance to garden as a child or young adult. But as a mom, she knew she wanted her children to eat fresh organic food whenever possible. When she and the family moved into the White House she had the opportunity to have a garden.
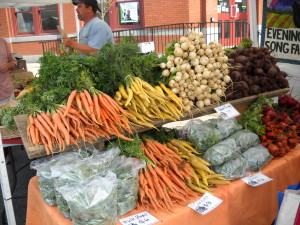
Rutland, VT Farmers Market
With the help from fifth graders at nearby Bancroft Elementary School, Michelle Obama created a vegetable and herb garden. They also got help from National Park Service staff, a professional farmer, and the staff of the White House, especially the cooks. Their garden thrived and the food was not only eaten by the Obamas, but shared with the children who helped plant it, and with a local homeless shelter called Miriam’s Kitchen.
This book is more than a feel-good story. Yes, a third of the food went to the homeless shelter. And yes, low-income children got to work in the garden and eat the results of their labor. But it also tells the story of how to create a garden, starting with removing the sod. It’s full of useful gardening information.
It is full of spectacular photos showing the gardens every step of the way, from planting to harvest. It has diagrams and layouts of the gardens. It explains the importance of getting a soil test before planting. And it has recipes for using (and knowing when to pick and how to store) things like bok choi or cauliflower, which most of the Bancroft Elementary students had never encountered.
Like most beginning gardeners, Michelle Obama had doubts: “What if the seeds or seedlings were not set in correctly and we ended up with empty beds? What if we couldn’t control the weeds? I worried about the weather … What if the plants didn’t grow? And what if, after all this effort, the food that did grow didn’t taste good?” But her fears were unfounded, and the garden was a huge success.
The book includes profiles of others who worked in the garden with her and really gave full credit to everyone who helped, taking none for herself. And the book includes vignettes and photos of many community gardens around the country.
I particularly liked a section on a container garden in Houston, Texas. The Houston Parks Department donated 34 huge planting containers that were installed on a stone patio in front of a high-rise office building. Each floor got one or more of these waist-high containers and a choice of vegetables to plant. Office workers took turns watering and weeding – and taking home the lettuce, okra, tomatoes and more.
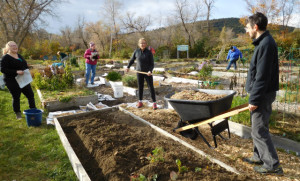
Canillas Garden
As most of you know, Michelle Obama has been a supporter of healthy eating and active lifestyles for children as a way to be healthy and reduce obesity. This garden, which she calls a community garden, is part of that effort. The book also profiles others – some well-known athletes, some ordinary citizens – who are doing things that support her goals. I loved a picture of 400 kids in purple tee-shirts doing jumping jacks on the South Lawn with her in an effort to break a Guinness Book of Records record. And they did, over 300,000 people participated at the same time around the country.
Not everyone can have a garden, or even pots on a patio. Mrs. Obama spent time in the book lauding farmers markets, too. Fresh, local food is good food. She pointed out that Thomas Jefferson had started the first farmers market in Washington, D.C. (and that he also had a kitchen garden at the White House). So she lobbied city officials and got approval for a farmers market near the White House.
I haven’t tried any of the recipes in this book, but they look very good. Her corn soup made with fresh corn and thyme looks great, I shall try it next summer. And the spinach pie seems like a winner.
So as I bundle up to go outside on a cold January day, I like to think back to summer and my own vegetable garden. I like going to my freezer to extract bags of kale and squash for making my own soup. And I enjoy sitting by the fires and reading about other fine gardens. I think you would like Mrs. Obama’s book. I did.
Read Henry’s blog, and get an email alert every times he posts, by going to https://dailyuv.com/gardeningguy. His e-mail address is henry.homeyer@comcast.net. You may reach him by writing to him at P.O. Box 364, Cornish Flat, NH 03746. If you want a reply, please include a self adressed stamped envelope.
A Garden Year in Review
Posted on Wednesday, December 28, 2016 · Leave a Comment
I had a great gardening year in 2016. Of course, I’m a mad-dog gardener, so that means I was born optimistic and wired to remember success, not failure. So I suppose I had some of both. But the weather was largely sunny and I got a great yield from most of my vegetables, especially my precious tomatoes. I have enough food put away that if all my newspapers fired me tomorrow, I could probably survive just eating out of my freezers and cold cellar all winter.
Tomatoes are bothered by early blight and late blight. Late blight is the bad one, the one with spores that float in on the wind, killing everything and turning fruit into mush. When it comes early, we don’t get tomatoes, but I dodged it this year. I did have some early blight, but less than most years, probably because of the dry weather.
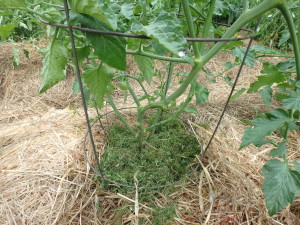
Mulched Tomato Plant
I also mulched my tomatoes with hay early on, and cut off any diseased branches once or twice a week, reducing the spread of late blight. My Sun Gold cherry tomatoes produced hundreds of tomatoes each, I dehydrated them using my Excalibur brand dehydrator, and will enjoy them in soups and stews all winter.
I had great success with the one tomato plant in a raised bed made by Gardeners Supply, something they call a “VegTrug”. The tomato I planted in it was virtually disease free, and what’s more, the green tomatoes I picked from it before frost ripened perfectly and did not rot. I ate a few good tomatoes each week until Thanksgiving. The tomato was one called, “Summer Sunrise” and I got the seeds from Hudson Valley Seed Library. I shall grow it again, for sure. It had good flavor, right up to the end.
Kale is always a winner in the garden. It is easy to grow and this year I used a lot of it in green smoothies made with fresh mint, lettuce, a banana, blueberries, some juice and/or water, fresh ginger and half a lime. I’m still picking kale for smoothies, even though the greens are frozen when I pick them.
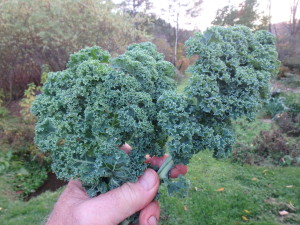
Winterbor Kale
I grew 4 kinds of kale this year as I wanted to see if I liked anything as well as Winterbor and Ripbor, the two curly kale varieties I usually grow. No. Next year I will just grow one or the other of those two – they are tasty and so long-lasting in the garden. They are easy to store in the freezer – while keeping their character and flavor.
I grew 2 non-heading broccoli relatives this year, Happy Rich from Johnny’s Selected Seeds, and Piricicaba from Hudson Valley Seed Library. Both produce earlier than broccoli and continue-producing little shoots well past frost. They produced so much food that I will plant fewer, just 2 or 3 plants of each, not 6.
My potato harvest was ho-hum this year, but my grandkids had great production in their little 4-foot by 4-foot raised beds on my lawn. The difference? I tried to squeeze in too many plants in my rows, crowding them. The kids only planted 2 seed potatoes each, well apart. Even though they planted later than I did, their spuds were bigger.
I had no potato beetles at all this year, even though I looked for them every day for a while. I plant my potatoes in June, and believe (without real proof) that late planting helps to avoid the beetles.
New this year: I planted a second crop of potatoes in August from some seed potatoes that had been languishing in my cool dark cellar. I planted them in my garlic bed, after harvest. A third of those late-planted potatoes did not grow, but those that did grow produced full-sized potatoes by October.
I planted late lettuce, too. I got some 3-inch lettuce starts from a friend in early September, and planted them 6 inches apart. These did very well, and in November I moved my Gardeners Supply cold frame over the plants. They were good though November. They were helped by a layer of Reemay or row-cover over the leaves inside the cold frame.
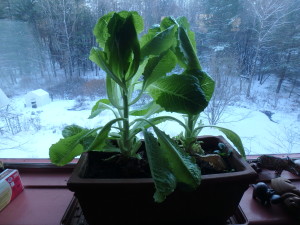
Lettuce Indoors
New this year: In mid-October I dug two nice lettuce plants and moved them into an unglazed clay planter about 6- by 12-inches and 6-inches deep. I placed a layer of fluffy compost in the bottom as planting material, and filled in around the plants with pure compost. Then I moved them into the house, sitting in an east-facing window. Great success! I have eaten 2 or 3 leaves almost every day since sometime in November. Fresh greens for my sandwich at lunch. I had to water every other day. I will finish them off by New Years.
I grew flint corn this year for the first time ever. Flint corn is dried and ground to make corn flour or meal. The corn plants were huge, but the ears were relatively small. And while I was drying them some mice got in with the ears, so I didn’t want to use them. So I am feeding the corn to the blue jays and squirrels. I used some of the stalks for Halloween decorations and gave some stalks away.
The raccoons ate all my sweet corn but for half a dozen ears. Oh well. I am enjoying frozen tomatoes, summer squash and kale. I have plenty of winter squash, garlic and onions stored in a cool dry location. And root crops galore in an old fridge in the basement. It was a great gardening year, despite a few setbacks that I had already almost forgotten about.
Read my blog posts at https://dailyuv.com/gardeningguy You can sign up to get a link by email every time I post.
Nine Root Crop Stew
Posted on Wednesday, December 21, 2016 · Leave a Comment
Rutabagas? Kohlrabi? Celeriac? What does one do with these lesser known root crops? I make stew. You just need to get past the idea that they are food for “old folks” or “poor people”. There were good reasons that these vegetables – and other root crops – were the backbone of the diet in tough times. These vegetables are easy to grow, store well, and are very tasty.
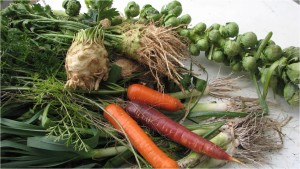
Celeriac With Carrots Leeks and Brussels Sprouts
I recently made a pot of winter stew that used the three veggies mentioned above, along with potatoes, onions, parsnips, garlic, leeks and carrots. Oh my! It was delicious. But first, let’s look at what all these root crops need in order to produce well and fill your root cellar or spare fridge.
All root crops need soil that is essentially rock-free. They need to be able to grow to size without bumping into a boulder, or even a rock the size of a golf ball. So if you have rocky soil, you need to work on it, come spring.
I find a potato fork is good for finding stones. This is a tool similar to a garden fork or spading fork, but the handle is at a right angle to the metal tines. I have one that has been in my family for at least 50 years.
To get stones out of the soil, I sink the tool into the soil and pull it toward me. It acts like a big rake, loosening the soil and dragging stones to the surface. I have seen smaller ones in hardware stores, but the kind I like has tines at least 8-inches long.
I have bought the modern equivalent of my potato fork from a tool company, Howland Tools (www.farmandgardentools.com), that imports them from an Italian maker, Falci. They sell two varieties, the 4-tine hook fork and the 4-tine hook weeding fork. I have the first, but not the second, which has broader tines, like a standard fork. At about $50 each, these tools are well worth the price. Good steel, good beech handles.
What else do root crops need? Most need fluffy, well-drained soil that stays moderately moist all summer. Their requirements vary for the three main minerals, nitrogen (N), phosphorus (P), and potassium (K). Click this link for a summary of what each requires.
Kohlrabi Gigante
What does all that tell you? Root crops are fairly moderate in their needs. Potatoes require yearly addition of a balanced fertilizer. Only garlic does best with fairly dry soil, so planting it in raised beds and adding some extra compost to the soil will help. Add some blood meal to the soil for parsnips as it will provide plenty of nitrogen (13%) but little P or K.
Now the stew, (click here for the recipe) which can be vegetarian or not, depending on your preference. I’m an omnivore, and find that some beef adds flavor and depth to the stew, but you can omit it if you prefer. I use 1 to 2 cups of each of the vegetables, according to my supply and mood.
I start by selecting the vegetables and getting off all soil. Then I peel any that need peeling (potatoes, for example, don’t have to be peeled –the skins may add extra color and vitamins). In a large cast iron enameled pot I start by browning the onions and leeks in olive oil on low heat while I cut up a pound of stew beef into tiny cubes – half inch or so. I add them to the pot and add a little more oil, as the onions tend to suck up the oil fast.
When the meat is browned, I add some liquid to prevent the leeks and onions from burning. Two cups of apple cider is my preference, but either water or broth is fine, too. Then I chop up and add to the mix 3 large tomatoes from my freezer- I freeze them whole. I also add 4 ounces or so of tomato paste I made and froze last summer, and a handful or more of dehydrated Sun Gold cherry tomatoes (optional). If you don’t have frozen tomatoes, use a 28 ounce can of diced tomatoes or sauce.
Next? I cut into small cubes the carrots, celeriac, kohlrabi and rutabagas. These can simmer quite a while without getting mushy. Next the garlic goes in the pot, chopped fine, 2 to 3 cloves. Or more, depending on my whim. Potatoes I cut in bigger pieces and boil separately for 5 minutes, then add to the stew near the end. I want them firm, not mushy.
To achieve the perfect juiciness of the stew, add more liquid at this time. For spicing, I add Herbs de Provence, a tasty mixture of rosemary, thyme, basil and other spices I get at my Coop. A tablespoon is about right for me. And most importantly, I add lots of fresh ginger. I peel and grate a piece nearly the size of my thumb. And although I know people who grow ginger in the Northeast, I’ve tried and not had success, so I buy it.
I garden, in part, because I love to eat –and cook. I don’t mind spending an hour making a meal like this stew, because it will feed me for days. Oh, and by the way, you can make this stew and leave out any of the root crops you don’t have except the carrots, potatoes, onions and ginger, which are essential. Bon appetit!
Read Henry’s twice-weekly blogs about gardening, travel and more at https://dailyuv.com/gardeningguyYou can sign up for an e-mail alert every time he blogs.
Indoor Plants for the Holidays
Posted on Tuesday, December 13, 2016 · Leave a Comment
Florists, garden centers and grocery stores are loaded with color right now – plants that are bright, cheery, and hard to kill. They are just what we need in these dark, dreary days of early winter when the sun goes down before 5pm. Christmas cactus and poinsettias are great plants that are affordable and easy. I recommend them highly.

Poinsettias Come in Many Colors
You may think that poinsettias have big red flowers atop handsome green foliage. Wrong! The colorful parts (they now come in white, pink, plum, burgundy, cinnamon and lemon) are actually bracts, or modified leaves. The flowers are actually just pea-sized yellow blossoms in the middle of the bracts.
Poinsettias were introduced here in 1828 by President Andrew Jackson’s ambassador to Mexico, but only became popular holiday flowers in the 1960’s. A grower in California promoted them heavily on TV, giving plants to the likes of Johnny Carson who kept them on his desk during the Tonight Show.
If you buy a poinsettia, start it off right: be sure it is enclosed in a sleeve or a bag on the way home – they hate the cold. But don’t place it near a wood stove or radiator, either. The ideal temperature is 68 to 72 degrees, but my house is rarely that warm, and they do fine with daytime temps in the sixties and night-time temps a little cooler. Anything below 50 degrees is fatal – but we wouldn’t be happy then, either.

Poinsettia Flowers are Just the Center of These Colorful Cracts
Poinsettias do not require direct sunshine. In fact, bright indirect light is best; six hours is all that is required. And don’t over-water them. Root rot results from keeping roots constantly soggy. Water once a week but check the soil first by probing the top inch with your finger. If it feels moist, you can wait. Experts say it is best to water by placing the pot in a saucer or water and letting it soak up for 15 minutes, but I never do that. I water from the top and it works just fine. I often judge dryness by the weight of the pot, too. The heavier it is, the more water is in the pot. Fertilization is not recommended when they are in their bloom cycle.
Although I don’t usually do it, you can keep your poinsettia over the summer and hope to get it to produce colorful bracts next winter. These plants are photoperiodic, which means they are sensitive to daylight length. They need 14 hours of darkness each night in the fall if they are to “bloom”. Even electric lights on in their room can interfere with the coloring-up process, I’ve read.
Christmas cactus often bloom for Christmas, though if you keep them for years they may bloom at other times. Buy one now, and you’re pretty much guaranteed blossoms through the holidays. Properly cared for, a Christmas cactus can be handed down to your kids … and later, their kids.
Like poinsettias, a Christmas cactus needs bright, indirect light and moderate temperatures. Over-watering can be lethal, so if you are starting a new plant from a cutting, add some sand to the potting mix for increased drainage. One part sand to three parts potting mix is about right.
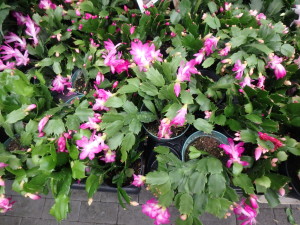
Christmas Cactus
Christmas cacti are not true cacti – they wouldn’t survive in a desert – so you shouldn’t let them get too dry, either. Feel the soil weekly – when the soil is dry an inch below the surface, it’s time to water. If you water too much or too little you will notice flower buds falling off.
A Christmas cactus does best with humidity in the 50 to 60% range. If you have a wood stove, chances are your house is drier than that in the winter. You can remedy the situation by filling a wide saucer with small stones, add water, and placing the potted plant on the stones. As the water evaporates, it adds humidity to the air around the plant.
Aside from these colorful plants, I like to add some greenery around the house in winter. I have a number of foliage plants, but also like to pick some pachysandra outdoors to keep in vases, or to fill out bouquets of flowers I buy.
Pachysandra is a shade-loving vine with year-round glossy leaves. Even with snow on the ground you can pick stems and place them in a vase of water, where they will thrive all winter. The leaves stay glossy and green and will develop good roots in a vase. In the spring I plant them outdoors in shady places as a ground cover. Right now I have a vase full of pachysandra stems with a few twigs of red winterberries, which is quite festive.
Despite my careful attention to my outdoor plants – both vegetables and flowers – I have never paid near as much attention to indoor plants. Perhaps I need a break in winter, when they are needing my care the most. So it is important to me that house plants be relatively undemanding. Poinsettias and Christmas cactus fill the bill.
Read Henry’s twice-weekly blog at https://dailyuv.com/gardeningguy. You can sign up for an e-mail link to the blog every time he posts. His e-mail is henry.homeyer@comcast.net.


 Click Here to buy from Cobrahead