The Wild Wisdom of Weeds
Posted on Wednesday, January 7, 2015 · Leave a Comment
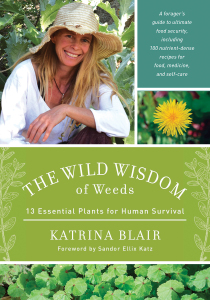
This is the time of year when I find the time to read gardening books. I recently settled in by the woodstove with The Wild Wisdom of Weeds: 13 Essential Plants for Human Survival by Katrina Blair (Chelsea Green, 2014, $29.95 in paper). I was intrigued when I read, in the Forward by Sandor Katz, that “Most of us can identify many more corporate logos than plants.” Huh. That’s not true for you and me – as gardeners we know many plants. But overall? It probably is true. Katrina Blair wants all of us to recognize and use a few common weeds in our daily life.
Katrina Blair book
Katrina Blair has selected 13 weeds that are found pretty much everywhere in the world, including some that grow in Antarctica. These weeds follow humans, growing in disturbed areas and surviving even where our domesticated plants will not. She selected these weeds because they can be used as food and medicine. She notes that “The wild greens outside are still vibrating with the life force and are at their peak nutritional potency.”
Of the thirteen, everyone knows dandelions, clover, thistle and grass. Others like chickweed, lambsquarter and mustard you have certainly seen, but may not know by name. A few of the others are common, but less well recognized. Most of us do not think of weeds as food or medicine. Maybe it’s time to expand our view of them.
Why eat weeds? Blair states that weeds are very nutrient-rich. She points out that they require no fertilizer or pesticides to thrive. Weeds are available locally and are very good at picking up a wide range of minerals from out soil – whereas crops that are grown year after year in commercial agriculture plots may lack trace minerals.
Blair states that grasses can pick up 92 minerals out of the 102 available in healthy soils. Getting as many vitamins and minerals from fresh plants as possible makes sense to me. Weeds can provide a good source of minerals.
Where to harvest, when to harvest and how to use weeds are important questions that Blair answers in her book. She explains that picking wild greens from areas where chemicals have been applied is not a good policy. That includes commercial agriculture fields. But your own gardens? No problem. And she noted that picking in spring and early summer is best, when leaves and stems are less tough and bitter. She dries fresh weeds to use later in powders she uses in green drinks.
How to use these weeds is a major focus of the book, which supplies recipes such as dock mustard pretzels, spouted lambsquarter tabouli and mallow milk shakes. Many of the recipes take considerable time to prepare (and to harvest). Blair is a fanatic about eating weeds, so she doesn’t mind spending the time to collect seeds from wild plants, and then grinding them, and finally away winnowing the chaff before using.
The wild ingredients, the weeds, are just one component of most of the recipes provided. So, for example, she will eat a healthy breakfast cereal (presumably from her local health food store) that she supplements with weed seeds she harvested. Or she will make bread using wheat flower but add some ground weed seeds.
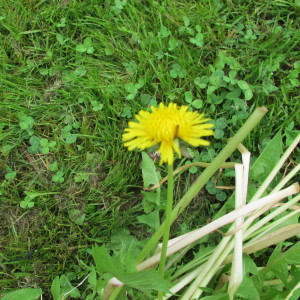
Clover and Dandelions are full lof healthy minerals
Katrina Blair is also happy to sit on the ground and pick and eat wild grasses and clover flowers. She notes that our digestive system cannot breakdown cellulose. But grass stalks, when young, are edible. Just chew the stems for a long time to break the cell walls and then savor the fresh juices and chlorophyll. She spits out the indigestible fibers.
I recently became a fan of “green smoothies” and often prepare one for my breakfast. In a good high-speed blender I mix leafy greens, fruit, ginger, freshly squeezed lime juice and water or green tea. I like the idea of adding some wild weed leaves to the blender (in season). Dandelion leaves, for example, are pretty bitter unless picked before the plants have blossomed in the early spring. But mixed into a smoothie with a banana and some apple probably would enrich my diet without offending my tender tongue.
It is important to note that not all weeds are edible. Before ingesting weeds in quantity, she recommends eating a little bit, and listening to your body’s response. She says her body will tell her not to eat many leaves from even her favorite weeds if they are too high in oxalic acid, for example. She notes that juicers can concentrate and extract things like oxalic acid, giving you too high a dose if you drink too much, particularly late in the season when levels are high in leaves.
I recommend only eating weeds that you have positively identified. Her book has plenty of photographs, but nothing beats a good plant book with a botanic key for identifying them. There may be a forager in your neighborhood, too. Many emigrants have learned to identify and use wild plants in their native lands, and find them here, too. If you see someone foraging, introduce yourself and start learning.
Although Kristina Blair feels confident to set off on a 3-day hike without food, I am not. Foraging can be a nice supplement to my diet, but I will never depend on weeds as a major component of my diet. But if you need weeds for your diet, my garden usually has plenty!
Henry Homeyer’s web site is www.Gardening-Guy.com. He lives in Cornish Flat, NH and is the author or 4 gardening books.
One Gardener’s Plans for the New Year
Posted on Wednesday, December 31, 2014 · Leave a Comment
Each year after the winter solstice I take some time to think about my garden of the past year and to make plans for the upcoming garden season. What worked? What didn’t? It’s good to think about such. I won’t say I’m making any gardening resolutions this year, but I’ll share with you my aspirations. But I won’t feel bad if I don’t accomplish exactly what I hope to do. Each year life has a way of getting in the way of best made plans.
Garden arbor needs some work
The past year was a good one for me. In past years my vegetable garden has been getting shadier – trees have a way of getting bigger, and even relatively distant trees have been cutting down on the hours of sunshine in the garden. This past year I was lent a nice plot in full sun, a plot with good soil that belongs to a friend and that had been farmed organically. It was bigger than I needed, but a farmer agreed to till it and get it ready for planting. So my partner Cindy Heath and I planted all kinds of veggies including sweet corn and dry beans – crops I hadn’t had room for in past years. And we planted extra food to give away.
Our vegetables did well. There was sufficient rain and perhaps because the land had been fallow for a year or more, pests and disease problems were minimal. Even the potato bugs were few. We fenced off the beans (both dry and green, both loved by deer), and the raccoons didn’t do much damage to the corn. We had plenty for us, our friends, and the coons. (Maybe the coyote urine I put out in little Airwick containers helped keep the coons away).
So will I plant the “farmette” (as we called it) again this year? You betcha. It was a lot of work, but I really enjoyed having as much space as I wanted in full sun. I love having excess vegetables to share, and my little farmette allows me to do that.
My grandfather, John Lenat (1885-1967), had a regular vegetable route in his later years. He drove around his town (Spencer, Massachusetts) in his bright red Nash Rambler giving tomatoes, lettuce and cucumbers to his friends. He’d never accept a nickel for his produce. I remember being amused that he even brought tomatoes to give the checkout clerk at the A&P Grocery store. In those days there were no soup kitchens or homeless shelters, but there are now, and they are happy to accept what any of us can contribute.
This year I’ll also plant some flowers at the farmette. A dear friend gave me a gallon Ziploc bag of dried zinnia seed heads from her garden. She tills a patch of soil that is about 4 feet wide and 50 feet long each year just for zinnias. Big, tall, brightly colored zinnias. And each year she harvests enough seeds in the fall to plant it again – and to give away plenty, too. So I shall try the same.
I looked in my Johnny’s Selected Seeds catalog to see what zinnias might cost in bulk, for those of you who want to try a similar effort. A thousand seeds of the ‘Benary’s Giant Series’, costs $29.30, but the ‘Giant Dahlia Flowered Series’ costs just $12.15 for an ounce that has 3,200 seeds. Since I have never tried a mass planting like that before, I can’t advise you as to how many seeds you might need for a mass planting. I plan to scatter seeds on tilled soil, rake them in, and hope for the best.
Our farmette is about 6 miles from my house. I’ll plant most of our veggies for canning, freezing and dehydrating over there. But I’ll also continue to grow some veggies at my home garden, focusing on things that do well with less than full sun: lettuce, kale, herbs, leeks, carrots, and Brussels sprouts. I’ll also plant a few tomatoes and summer squash at my home garden for the convenience of being able to pick them for dinner.
This year I’ll try to slow down a little, too. By the time planting season comes I’ll be 69 years young. And although I’ve been gardening for others for a long time, I think I’ll try to minimize the time I spend in other people’s gardens this coming year. Become more of an advisor, and less of a digger, weeder and wheelbarrow pusher. I’ll try to focus on my own gardens, given that I have expanded them.
What else will I do in 2015? I’ll work hard at controlling the invasive plants that are always trying to get a foothold. Just cutting back purple loosestrife 3 times in the summer will do much to keep it from expanding its territory. And I’ll keep an eye out for garlic mustard, which so far has not made it on to my property, but is within a mile of my house.
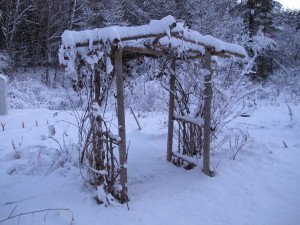
The list could go on and on. Re-build the garden arbor that has started to fall apart. Dig out some of the biggest goldenrod that I (foolishly) have allowed to get too rambunctious. Try new kinds of flowers. Plant some early-season raspberries that will be done by the time that new kind of fruit fly arrives in late summer. And so on.
So take some time in your easy chair and make your own plans. And feel free to share them with me if you like, I’m always happy to get mail or e-mail. Maybe you’ll inspire me to try something new. My best to you all for 2015.
Contact Henry by e-mail at henry.homeyer@comcast.net or write the old fashioned way to P.O. Box 364, Cornish Flat, NH 03746. Please include a self-addressed stamped envelope if you have a question you want answered.
Eating from the Garden
Posted on Wednesday, December 24, 2014 · Leave a Comment
Here it is, officially winter, and I’m still eating from my garden. I recently made what I call a winter salad: grated carrot and celery root (also known as celeriac) with a vinaigrette sauce. Sometimes my winter salad also gets grated or chopped apple, or some dried cherry tomatoes. Only the ingredients for dressing are bought – vinegar and oil – though I have been known to even make my own vinegar some years. Of course dried currants or raisins are also nice in that salad, but I don’t grow those. I could put in dried blueberries, as I do dry a few each year, but haven’t tried them in the salad yet.
Celeriac
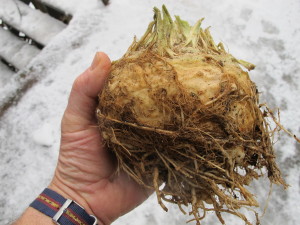
Celeriac is an unsung hero. Most gardeners don’t grow it. Most gardeners should. It’s a root crop related to celery, has a similar flavor, and the leaves are nearly identical. Unlike most root crops, the bulk of this root sits up above the ground level. The meat of this vegetable has the consistency of a carrot, but it is white and round. Mine grow to be 3 to 6 inches in diameter.
Celeriac stores well and stays tasty for months. In the fall I cut off the tops, cut back most of the roots, and wash out the dirt from the thick mass of roots. Then it will store for 3 to 4 months in a cool place with high humidity. You could do this by putting the celeriac in a plastic bin or bucket and storing it a cool place that stays in the 33 to 50 degree range. To keep the humidity high you can put an inch of moist sand in the bottom of the bucket.
Another way to store celeriac, carrots, potatoes, kohlrabi and rutabagas is to get an old fridge. Often older model fridges are available free from on-line list serves – or even in your daily newspaper. That’s how I got a 1946 GE model that still works fine, and it does not have the undesirable “frost free” feature. Modern refrigerators remove the humidity from all but the vegetable drawers. But many older ones do not, and thus are great for filling up with storage vegetables. Or, one can store veggies in modern fridges in plastic bags that have been punched with many holes using a paper punch.
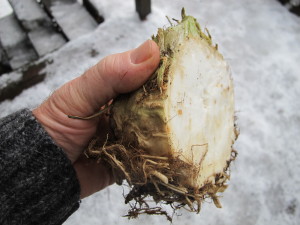
View of interior of celeriac
Unfortunately, many garden centers do not sell celeriac seedlings in the spring. So if you want to grow celeriac, you may want to order seeds this winter when you put together you seed order. I start them indoors, starting in early- to mid- March. They are a bit slow to germinate, and need consistent moisture from planting to harvest. They don’t like cold weather or soil in the spring, so I transplant them into the ground in June.
Celeriac needs soil that doesn’t dry out. Sandy soils do not hold moisture well, while heavier, clay-based soils do. If you have a light, sandy soil, do not grow celeriac in raised beds, as raised beds tend to drain off and dry out more quickly. And add lots of compost to the soil before planting, as compost tends to act a bit like a sponge, holding water.
In addition to using celeriac in my winter salad, I use celeriac in stir fries, soups and stews. It adds a celery flavor – and a richness – that I like. And I haven’t had much luck growing celery. When I’ve tried in the past, I had trouble with slugs, the stems have been spindly, and celery in general does not store as well as celeriac.
My friend Ed Smith of Cabot, Vermont, is the author of a number of excellent gardening books, including The Vegetable Gardener’s Container Bible. I called him recently to see how he grows celery, as I recalled that he does well with it. He told me that new no longer grows celery in the ground. He only grows it in self-watering containers.
Ed told me that he gets containers from Gardeners Supply (www.gardeners.com) that are roughly 3-feet square and 12 inches deep. At the bottom of each container is a reservoir that holds a couple of inches of water separated from the soil mix by a plastic barrier; it has a wicking system that keeps the soil consistently moist, but not soggy. In his big container he plants 18 to 20 plants, and puts it in full sun.
For a soil mix Ed uses a 50-50 mix of compost and peat moss, and he adds a cup of organic fertilizer and usually some Azomite. Azomite is a rock powder sold in 50-lb bags that has trace minerals not found in fertilizers.
The key to success with celery, according to Ed, is to keep it consistently moist and pick it small. Don’t wait until your celery looks like the stuff from the grocery store, pick it when the stalks are small, say half an inch in diameter. He doesn’t usually start his own plants as they take a long time to grow, but buys plants from a greenhouse. Ed told me that he chops up his celery and freezes it in pint zipper bags. Then he uses is all year in soups and stews. He does not blanch it before freezing.
It is winter now, but not too early to start planning your garden for 2015. Read the seed catalogs, dream, and before you know it, it will be time to start next year’s seedlings.
Henry Homeyer is the author of 4 gardening books. His web site is www.Gardening-Guy.com.
Poinsettias
Posted on Wednesday, December 17, 2014 · Leave a Comment
I like poinsettias and buy one every year. And every year the poinsettia industry produces new colors and shapes for the “flowers”. Standard red has given way to pink, maroon, white and red, pink and red; simple bracts are now double, double with ruffles. There is always a call for the new and different. Me? I’m a simple gardening guy who likes the simple old fashioned kind.
Botanically speaking, those red parts of a poinsettia are actually called bracts. The flowers are the tiny yellow center of each “flower”, and the red bracts are leaves purely for decoration – and an advertisement to any stray pollinator (or shopper) that might be around.
Poinsettias are native to Mexico, and were first introduced to the United States in 1828 by President Andrew Jackson’s ambassador to Mexico, Joel Poinsett. But they have traveled the world. When I was working in Bamako, Mali, West Africa, in the early 1980’s, I had hedges of poinsettias that were five feet tall. But it took a long time for poinsettias to become popular.
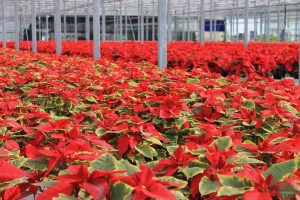
Poinsettia Open House Photo by D.S. Cole Growers
In 1923 a grower named Paul Ecke started growing them in quantity in California, selling plants wholesale and shipping them by rail all over the country. He worked on growing good, durable plants that he sent to growers so that they could start cuttings and make more plants. He was a trained horticulturist, but also a good marketer. He gave free plants to TV hosts like Johnny Carson and Bob Hope for his Christmas Special every year. Through the magic of TV he got Americans to associate the idea of Christmas with poinsettias.
One reason that poinsettias are so popular is that they are easy to keep looking nice – even those folks with “brown thumbs” can keep them going for a couple of weeks or more. They are almost like plastic plants. And most of us feel no guilt about throwing them out when they start to look ratty.
If you’ve never offered a home to a poinsettia, here’s what you need to do: Water it once a week, give it some indirect light, and avoid placing it in a cold or drafty place. Temperatures of 68 to 72 are recommended, but my house is rarely that warm, and they do fine for me. And don’t put it on top of a radiator or anywhere where it will get too hot and dry out too quickly.
The worst thing you can do for a poinsettia is to overwater it. Too much water will rot the roots, and your holiday plant will go into a decline and die. I lift the pot and can tell by its weight whether it needs water or not. But you can stick your finger in the soil, too. If it is wrapped in foil, make a hole in the bottom so that excess water can drain into the saucer.
Getting poinsettias to bloom in their second year is complicated, and not worth the effort for most of us. One must give them bright light during the day, and no light at all for 12 hours or more – which means moving them into a closet or basement, and remembering not to turn on the light. I have read figures citing 5 days of dark treatment as adequate, but also up to 10 weeks of dark from 5pm to 8am. Who knows? I once read read that a big grower had trouble getting his plants to develop their red leaves simply because he had a night watchman who liked plants and shined his flashlight around the greenhouse on his nightly rounds.
My mother, may she rest in peace, never had poinsettias because she believed, mistakenly, that they were poisonous. She feared that her cat would eat a leaf and die. I told her that was not the case, but she was a worrier, and wouldn’t take a chance with her dear cat, Bella (may she, too, rest in peace).
Ohio State University in cooperation with the Society of American Florists did a study that proved that poinsettias are not the threat my mom believed they were. Yes, they are in the genus Euphorbia, a group of plants that have alkaloids in their white sap. But the sap is not very toxic. According to the Mayo Clinic web site, poinsettias are not good to eat, and might cause a tummy ache or a rash, but unless you are allergic to them, nothing serious is likely to happen if you make them part of your lunch. Or your cat’s lunch.
From a Darwinian point of view, it might make sense for a plant to make itself poisonous, or at least unpleasant to eat. After all, plants want to reach maturity and produce seeds, allowing their genetic material to be passed on to the next generation. They don’t want all their leaves to be eaten before maturity. But the bottom line is, feed your cat well, and she probably won’t even get a tummy ache from nibbling your poinsettia.
So get yourself a poinsettia. They will provide some nice color on your table for the holidays. Just don’t water it too much.
Henry Homeyer is the author of 4 gardening books. His Web site is www.Gardening-Guy.com.
Kissing Balls
Posted on Wednesday, December 10, 2014 · Leave a Comment
At this time of year I need all the help I can get. Cloudy gray days do not make me cheerful. Days that end at 4pm do not please me. I counteract the dark with lights, flowers on the table, greenery (and maybe a little chocolate). This year I decided to make a kissing ball to hang from my chandelier in the living/dining area.

Kissing Ball
Kissing balls have a long history. During the Middle Ages villagers would hang balls of evergreens with a clay figure representing the Baby Jesus inside. Later, during the Victorian era, people would poke greens, particularly sweet-smelling greens, into apples or a potatoes and them and hang them in the house.
But they fell into disfavor, and mistletoe remained as the primary green hung in the house during much of the 1900’s. Mistletoe, of course allowed high-spirited youth to steal a kiss if a maiden was “accidentally” standing under the mistletoe. In this day of lawyers, no one wants to sell mistletoe because the berries are quite poisonous. But now decorated evergreen balls are back, being sold as kissing balls. I recently made one.
When I made my plans I didn’t think of an apple or a potato as the center of the ball. I bought a grapefruit and a large orange. But ultimately I decided I needed something longer lasting, and went to my local garden center to see if I could buy a ball of “Oasis”. Florists use Oasis to hold flowers and greens in place in arrangements while allowing them to absorb water. No one had balls of Oasis for sale, so I bought a 3 by 9-inch block.
I started the project by getting a variety of greens. I bought a small bundle of boxwood and cut branches of balsam fir, white pine, evergreen azalea and rhododendron.
Boxwood is loved by many gardeners: it is well behaved, slow-growing and has very small evergreen leaves that are a shiny green all year. They make great miniature hedges. I have avoided it because in the old days it was marginally hardy here. Now we have varieties that sneer at temperatures of 25 below and colder. Korean boxwood varieties such as Green Gem, Green Velvet and Green Mountain shouldn’t suffer winter burn or winter kill.
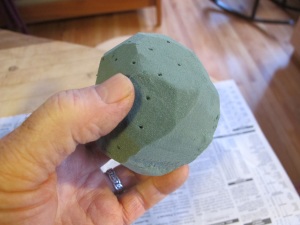
Oasis ball doesn’t have to be perfect
Oasis is very easy to cut. I used a long serrated bread knife, but you could use any knife. I soaked the sphere in water for 15 minutes or so, rotating it a few times and holding it under water so the entire thing would be well soaked. Then I took an old fashioned wire coat hanger and cut out a section. I kept the top hook portion, one angled side and the bottom wire. I straightened it out with a pair of needle nose pliers, and pushed it through the globe. I then twisted the bottom inch of wire to a right angle, and slipped a big fender washer on it to help support the sphere once I hung it, and to keep the delicate Oasis from being damaged by the wire.
I hung the ball from my chandelier and began the easy part: decorating it. I cut pieces of greenery into roughly 6-inch pieces, and gently poked them into the Oasis. I started at the top, creating concentric circles of white pine, then boxwood, balsam fir, another layer of boxwood, then azalea and rhododendron, and finally finishing up with more boxwood. Once I passed the “equator” I turned the leaves so that the shiny side would be facing down.
I used my pocket knife to shave off needles of the fir (which did not pull off easily), and to remove any lumps in the stems. On thicker branches, I shaved of a little wood to make a thinner branch to poke into the Oasis.
At the very bottom I attached a bow made of red ribbon, wiring it onto the hook at bottom after removing the washer. That insured that the wire would not pull though the Oasis, which is very delicate.
It was gorgeous. A globe of green with a nice variety of textures and colors of green. All it needed was some red berries. So my dog Daphne and I jumped in the car and drove to the nearest swamp. I had put on my tall boots, just in case some wading was required. Little did I know.
Our native holly, which loses its leaves, is called winterberry (Ilex verticillata). In the wild it lives in swamps, but is also a good landscape plant with loads of bright red berries. It is dioecious, meaning it has male and female plants; if you want berries, buy a male to go with your females (one male can service several females).
I cut some branches for my kissing ball and was leaving the swamp when, with a crack, I fell through the ice and water filled my boots. If I’d been captured on camera I might have started a new trend –icy water in boots instead of a bucket of ice water on the head. I laughed. Later, I poked stems of red berries into the kissing ball. It certainly brightens up the room, and I grin when I remember getting those red berries.
Henry Homeyer lives in Cornish Flat, NH. His books are available from his web site, www.Gardening-Guy.com. Contact him at henry.homeyer@comcast.net or P.O. Box 364, Cornish Flat, NH 03746.
Living Christmas Trees: Good Idea or Bad?
Posted on Thursday, December 4, 2014 · Leave a Comment
I know people who say we shouldn’t be cutting down trees just to brighten our houses for the holidays. Trees are, after all, sequestering carbon and making our environment cleaner, greener, and all that. I say “Bah Humbug!” and will cut a fresh tree from my neighborhood tree farmer. But if you want to be a Greenie, here is what you need to know about using a live tree with the idea of then planting it outside after the holidays.
First know that chances of survival are only 50-50 or thereabouts. Planting a tree in New England in January is not easy. For starters, the ground may be frozen. And keeping a tree hydrated and happy in the house is a challenge, even for an attentive tree steward. But let’s see how you can improve your odds. I’ve never had a live tree in the house, so I spoke with Norm Longacre, of Longacre’s Nursery in Lebanon, NH for some helpful hints.
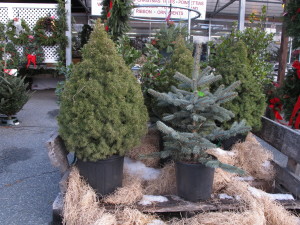
Potted Christmas trees looking for a new home
Norm said that you should think small. A six-foot tree will have a big, heavy rootball, and will be harder to move and harder to plant. Think three to four feet tall, maximum, and even smaller if you can. The best? A tabletop tree.
He said to buy a fir or spruce that has been grown in a plastic container, not one that is recently dug up or wrapped in burlap. Place the tree in the coolest part of the house – and never near a radiator or woodstove.
I suggest that you think where the tree will be planted after the holidays before you buy one. Too many times I’ve seen a huge blue spruce towering over a nice little ranch house, blocking out the sun from the big picture window. Why? Because the tree was small and cute when the owner of the house bought it, and he never thought about its ultimate size.
Balsam fir (Abies balsamea) is one of the classic Christmas trees. In the wild it will grow to be 45 to 75 feet tall with a spread of 20 to 25 feet. This is not the tree to place close to the house. There are a few cultivars that are supposed to stay small, but mostly such trees just grow slower than the standard varieties. In 40 years, a dwarf may no longer be a dwarf.
Blue spruce (Picea pungens) is another good-sized tree in the wild, 30 to 60 feet tall with a spread of 20 to 30 feet. There are spruce that stay small, I have read. ‘Blue Kiss’ is one that, after 40 years growing in Ohio, is reported to be only 8 feet tall and 10 feet wide. But that’s still enough to block most windows. So choose the location well.
I would buy a bale of hay or straw now and spread a thick layer of it over the soil at the site where you will plant your tree to serve as insulation. Between now and January it is likely we will have some very cold days. And unless we have a thick layer of snow, the top few inches of soil can be frozen solid by the time you want to plant your tree outdoors. Yes, you can break up frozen soil with a pick ax, but do you want to?
I would also buy a few bags of topsoil now and store them in a warm basement. Then if the soil is frozen when it’s time to plant, and you hack it out, you can backfill the hole with soil that is not in frozen chunks. You will want some bark mulch or wood chips to spread over the soil once the tree is planted, too.
Instead of keeping a live tree in the house for a month, the way many of us do with cut trees, think about having it indoors for just a week or 10 days. That will reduce the stress on the tree considerably. Keep the soil lightly moist, but not soggy.
When the time comes to plant your tree, be sure that you dig the hole the appropriate depth. Never plant a tree in a hole that is deeper than necessary. Look for the trunk flare, that part of the tree that would be above ground if growing in the wild. Keep that flare above ground and do not cover it with bark mulch. To do so is to consign your tree to an early death. The bark will rot if covered with soil or mulch, and the tree will decline in 6 to 10 years. Many trees come in the pot with the trunk flare covered with soil, so you may have to expose it when you plant. And don’t forget to water your tree after you plant it!
And what about all those cut trees we see for sale on empty lots, selling to people like me? They are a crop, like corn or beans. They provide a livelihood for tree farmers and are great for boon to our environment. I buy one every year and feel not an iota of guilt.
One nice thing about buying a cut tree that reaches the 10-foot ceiling in my house is this: after the holidays I will cut off all the branches and use them to provide some protection for less hardy plants that might be harmed by cold winter winds. I will layer them over perennials that are “iffy” in my climate, or use them to protect roses or other shrubs that might be damaged by the cold.
So go ahead and buy a live tree for the house if you wish, but please remember the words of Norm Longacre. “Don’t hold your nurseryman responsible if your tree doesn’t survive.”
Henry Homeyer is a UNH Master Gardener and the author of 4 gardening books. His Web site is www.Gardening-Guy.com.
Holiday Gifts for the Gardener
Posted on Saturday, November 29, 2014 · Leave a Comment
It’s that time of year again: time to find the perfect present for Aunt Edna, Uncle Bob and everyone else we love. Gardeners on my list are pretty easy to buy for because there are so many wonderful gifts to choose from, including selections under $10 (Atlas nitrile gardening gloves, packets of my favorite seeds) to expensive coffee table books and wheelbarrows that cost $300 or more. Let me offer a few suggestions.
Let’s start at the high end. One of my coaching clients this summer wanted some raised beds that were actually tall enough so that she wouldn’t have to bend over. She ordered some ‘VegTrugs’ from Gardener’s Supply (www.gardeners.com or 802-660-3500). These are wood growing containers made of fir that are about 6 feet long, 30 inches wide and 32 inches tall – about the same height as your kitchen table.
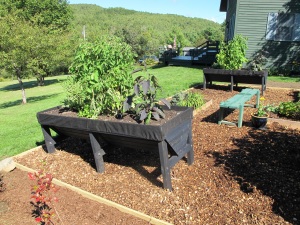
VegTrug
The VegTrug is V-shaped in cross-section and lined with a fabric that keeps soil from washing through between the slats. This container is deep and hold 380 quarts of soil mix – about 10 bags. We filled it with a 50-50 mix of compost and topsoil bought in bulk, and added some perlite and peat moss to keep the soil fluffy. It performed very well, growing tomatoes and eggplants in the middle, and shallow rooted things like lettuce and basil along the edges. At $249, it’s an investment, but well designed and it should last for years. Gardener’s Supply has a number of other kinds of raised beds. My client assembled her VegTrug in about an hour, and some of the others are even simpler.
Weeding is the least fun part of gardening for many, and anything that helps to reduce weed numbers is a good gift. A few years ago I got some rolls of weed mat that came with pre-punched holes spaced appropriately for growing tomatoes, or lettuce – or you name it. This is a woven polypropylene mat that the maker claims will last 10 years.
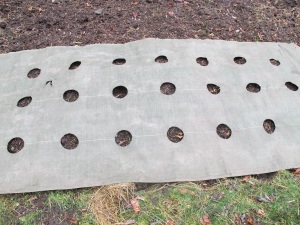
Garden weed mat
The mats come in 4-foot wide strips with evenly spaced holes in 8 different sizes and spacings. They block out light, keeping weeds from growing, while also moderating temperature and water loss. From 10.99 for a 6-foot piece to $30.99 for an 18-foot length. Made in Vermont, available from www.GardenMats.com or by calling 802-498-3314.
Each year I remind readers that in my opinion the best weeding tool made is the CobraHead weeder (www.CobraHead.com or 866-962-6272). This is a single steel finger, curved and sharp, that will get under weeds and lift them out, tease out grass roots or prepare the soil for planting. It is $24.95, including shipping. Made in America, too.
Watering well is important in dry times. Plants need gentle streams of water that can best be delivered by a watering wand. These devices have long metal handles with a rose (water sprayer) on the end. The best wands are made by Dramm, but many knock-offs are sold, too. Go for the best. Why? They have figured out how to aerate the water so that lots of water can come out, fast, but gently. My wand allows me to walk along and get water where I want it: on the ground, near the plants, but not on the foliage. Available at good garden centers everywhere. About $20.
Books are loved by gardeners. Designing flower gardens? An excellent book is by Julie Moir Messervy, Landscaping Ideas that Work (Taunton Press, $21.95). This is a good overview and introduction to the basics of landscape design, starting with a checklist of the atmosphere, activities and features you would like. It is simple and straightforward with lots of color pictures. Granted, the pictures are mostly of expensive houses and projects, but she gives readers an idea of relative cost of various options (brick walkways, or stone, or packed earth) by using 1 to 4 dollar signs next to each.
The New Vegetable Growers Handbook: A users manual for the organic vegetable garden by Frank Tozer (distributed by Chelsea Green Publishing, $27.95) is an excellent reference text for anyone who grows veggies. It has detailed growing information on nearly 100 different veggies and has great tips on practical matters such as how to avoid getting bitter-tasting cucumbers or how day length affects the size of your onions, and why you should plant them early in spring. Want to try new greens? Tozer tells you how to grow Komatsuna and Mizuna and Mibuna and more. By the way, Chelsea Green Publishing (www.chelseagreen.com) has lots of other good gardening and permaculture books worth looking at.
Record keeping is important if you want to improve your gardening skills and to learn from past years. The Moleskine Company (www.moleskine.com) makes many journals, including a gardening journal that offers 240 pages, including space to record your efforts and useful information such as hardiness zones. It has design grids for planning and adhesive labels for personalizing sections. It’s $19.95 and found at many bookstores.
Santa Claus, if you’re listening, what I really want this year is another load of manure. Just have your reindeer drop a load of black garden gold anywhere near my vegetable garden. A pick-up truck load would be great or, if you think I’ve been a very good boy a dump-truck load!
Henry Homeyer has his own gardening books, signed, available from his web site, www.Gardening-Guy.com.
Forcing Bulbs
Posted on Wednesday, November 19, 2014 · Leave a Comment
I love to ski and snowshoe. I don’t mind shoveling snow and lugging in firewood for the woodstove the chugs along day and night now. But there are limits to my patience, and by March I’ll ready for green growing things and some fresh flowers. So I start lots of veggies and flowers by seed, starting in March and April. But I also force bulbs to bloom indoors in March. Now is the time to do so.
Most bulbs are described on their packages as early, mid-season or late. Go to your local garden center and ask for bulbs that are early bloomers because they are the best for forcing. Buy daffodils, some tulips and maybe some small bulbs like crocus or snowdrops. You can plant these bulbs in large pots or even in your window box that is, by now, cleaned out and stored in the garage or barn.
You will also need some potting soil and compost. I make a mix that is half compost, half potting soil for forcing bulbs. I don’t use garden soil because it can be heavy and often stays wet. Bulbs can rot if they are left in wet soil for too long.
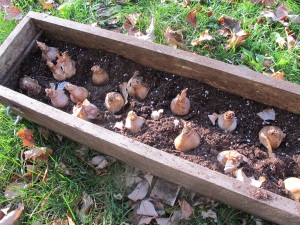
daffodils being planted for forcing
I recently planted 25 daffodils in a window box that is about 30 inches long, 6 inches wide and deep. It was a mix of different kinds of daffodils. I prefer to get all of one kind so that they all bloom at once, but the mixed bag was what was available (and on sale).
I filled the window box a little more than half full with my mixture of compost and potting soil and placed the bulbs, pointy end up, in the soil. Once I had them all in place I pushed them down more and filled up the box with more potting soil-compost mixture. Bulbs for forcing can be planted shoulder to shoulder, or nearly so.
In order to prepare bulbs for early blooming indoors, you will need a place to store them that is cold, but not as cold as the outdoors. Despite global warming, I still see minus 20 every winter, even if for only a few days. Bulbs planted in the ground have some protection against the cold, but if you were to plant bulbs in pots and leave them outside, the extreme temperatures would kill most. Bulbs left in a cool basement or garage will do just fine. Inside the bulkhead to your cellar might be the right temperature, too.
Ideally temperatures for bulbs used for forcing will be between 25 and 50 degrees, though colder temperatures should not be a problem (my basement often goes below freezing). Left in a warm location, the bulbs will grow green tops – but not blossoms.
You need to be aware that rodents like eating bulbs (indoors or out) – especially tulips. My basement has, most years, harbored mice and even sometimes red squirrels. In fact, I have learned the hard way that indoor rodents can – and will – dig up and eat tulips. So now I keep my pots of tulips covered with hardware cloth (a fine-mesh metal screening available at hardware stores). But wear gloves if you cut hardware cloth to size – the edges are as sharp as razor wire. Daffodils, on the other hand are not of interest to rodents as they are mildly poisonous.
You can double your production of blooms by planting two layers of bulbs in a container. Plant big bulbs deep in the pots, add soil, and then plant a layer of crocus or other small bulbs above them. To avoid planting the little guys right over the big boys, you can mark the location of the deeper bulbs with straw from a broom. That way they won’t get pushed over as the daffodils come up. Or you can just take your chances.
Don’t wait until mid-December to start your bulbs, get on this project now. Daffodils take about 12 weeks of dormancy before they should be brought into the warmth of the house, and tulips do better with 4 full months. Planted now, they would be ready in mid-March. Little things like crocus can be forced in 8 to 10 weeks.
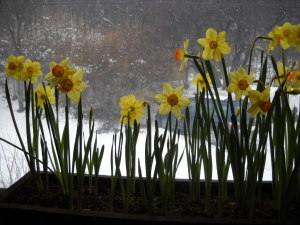
Forced flowers
It is important to check on the bulbs you are forcing at least once a month, particularly if you have put wire rodent-proofing over the containers. I’ve had shoots get damaged by trying to grow through the hardware cloth. If the bulbs are sending up shoots, remove the wire mesh. I also don’t want the soil mix to get bone dry, so I check it and water a little if it is too dry. The bulbs will grow roots when first planted, and then go dormant if kept in a dark, cold location.
When it is time to bring up your potted bulbs into a warm place, let them wake up gently. My mudroom is good for starting them: there is some sunshine but it is cool. Then, once the shoots are up and green, I place the containers on my sunniest window sills – either east or west facing.
I was a Peace Corps volunteer in Cameroon, West Africa many years ago. There I could have flowers blooming outside every day of the year. It spoiled me, perhaps, because I still want flowers every day. Forcing bulbs is one way to have lots of blossoms when there is still snow on the ground.
Henry Homeyer is the author of 4 gardening books. His Web site is www.Gardening-Guy.com. You may also reach him by e-mail at henry.homeyer@comcast.net.
Putting Away Garden Tools for Winter
Posted on Friday, November 14, 2014 · Leave a Comment
By now most of us have put our gardens to bed. I’ve yanked the vegetable carcasses from my garden and piled the decaying bodies on the burn pile. I’ve cut down some of my perennial flowers, although I’ve left others to stand proud in winter and offer seeds to the finches and chickadees. I’ve pulled some of the weeds in my flower beds, and pretty much gotten them out of the vegetable garden. I’m in the process of chopping up the leaves on the lawn, and hope to rake them onto a big blue tarp on the next sunny day and use them as a winter blanket in the vegetable garden.
What I have not done, and am betting you have not done either, is to get my tools ready for winter. It’s always one of the last thing I do before my annual hibernation. This is a good time to work on your tools.
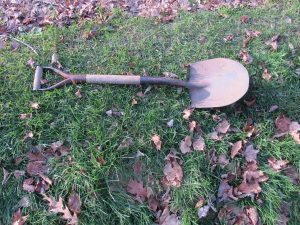
60-year old shovel ready for annual linseed oil treatment
As a man of certain age – past 60 that is – most of my tools have wooden handles. Yes, I have a few new fiberglass-handled tools, but many of my tools were used by my grandfather and/or my parents before me. I treasure them knowing that 3 generations of sweat has seeped into the wood, giving the tools a nice dark polished look. That patina is enhanced by an annual application of boiled linseed oil.
Late each fall I take some time to polish the wooden handles of my hand tools and sharpen the blades, where appropriate. Using medium to fine grit sandpaper I rub out any rough spots or potential splinters on the wooden handles. Then I polish the handles a little more with some fine steel wool and wipe them clean. Lastly, I use a paintbrush to apply several coats of linseed oil and let it soak in. That keeps the handles from drying out – and a well oiled handle rarely breaks or gives splinters.
My father always painted some red “Rustoleum” paint on the metal parts of garden tools to make them easier to find and to identify them as his. I found one of his old shovels in the back of the barn this year and saw that the handle was dry and cracked – I had not used it or maintained it in years. I sandpapered the many rough spots before polishing with steel wool and the applying 3 coats of linseed oil. I just kept reapplying the oil until it stopped soaking in.
Hoes and shovels work best when kept sharp. You can sharpen them on a bench grinder or with a rough file or a whetstone. I have a grinder with a stone wheel, but rarely use it – it’s too easy to take off too much metal. Before sharpening a tool, study the angle of the blade – hoes and shovels are only sharpened on one side (the inside) and all you need to do is mimic the original angle, drawing the stone or file over the blade in consistent, even strokes.
A wire brush is a good tool for cleaning up the metal blades of tools – I use it to get off rust. I like to use a rag with a little linseed oil on it to oil the metal. Something like WD-40 would work, too, and even get off some rust, but I don’t particularly want to introduce chemicals and petroleum products to my soil next spring – even in small quantities.
Most hand tools nowadays have plastic handles that require no maintenance, and edges of steel so tough that sharpening is not required. But it makes sense to wipe off accumulated grime with a moist cloth and get any dirt of the blades.
Lawnmowers, chain saws and string trimmers can use a little maintenance at this time of the year, too. Even though gas stabilizers are sold, most small engine mechanics I have spoken to suggest just running your machines until all the gas is used up rather than introducing an additive. That requires some planning, especially for riding mowers that can hold lots of gas. But gas loses some of its oomph over the winter – the volatile elements evaporate and escape, so it is best of empty the tank.
If you can tip your mower on its side to clean out the accumulated grass that is attached to the mower deck, great. I know that some mowers also have ports where you can attach a hose to blast the grass off (my riding mower came with one) but I find they don’t really do the job – especially if you don’t do it every time you use the machine. Even reaching under the mower when it is off and cold and pulling out the grass helps, or scraping with a putty knife. What you don’t want is accumulated gunk that holds moisture, causing your mower to rust.
Cleaning up my machines and tools is not very high on my list of fun things to do on a Saturday morning. But I recognize that doing so will extend their lives and, for wood-handled tools, add to my enjoyment of them next spring. So have at it. Your grandchildren may use some of your tools one day – if you keep them well maintained.
Henry Homeyer is the author of 4 gardening books. His web site is www.Gardening-Guy.com. He lives in Cornish Flat, NH.
The Under Appreciated Yellows and Browns of Fall
Posted on Wednesday, October 29, 2014 · Leave a Comment
I took a walk this week along a country road and was delighted by the colors of the fall leaves. The reds –maples, largely – have fallen, but the yellows and browns are still on some trees and lovely. And once you develop an appetite for the less flashy leaves, you may want to plant a tree that will do”the late show” in years to come.
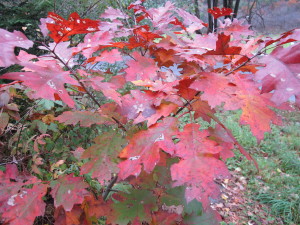
Red oak
The oaks and beeches are particularly nice right now. Oaks hold onto to their leaves much later than the maples, developing a more subtle coloration: browns mixed with russet or carmine or maroon. Perhaps burnt umber. Worldwide there are some 500 species of oaks, but here in the wild forest, just a few. Seven are listed by Cooperative Extension as native to New Hampshire, but only two are common: northern red oak (Quercus rubra) and white oak (Q. alba). Additionally there are many pin oaks (Q. palustris) that have been introduced and used as good tough street trees. In fact, I’ve read that pin oak is the most commonly planted tree in America.
Oaks generally fall into two categories. Red oaks have leaves with pointed tips on their lobes; those with rounded leaf edges without any sharp points are considered white oaks. Red oaks produce acorns that only germinate after a cold period of 30 to 60 days in a process called stratification, while white oaks can germinate right away. The Washington oak, a white oak in Princeton, NJ, is over 275 years old.
Oaks, and nut trees in general, have tap roots that go down deep in the soil. White oaks really are best started by planting acorns, or getting a small tree at a nursery. By the time a white oak has a trunk that is two and a half inches in diameter, it’s too big to move. Pin oaks, one of the red oaks, have fibrous roots that are near the soil surface and can be planted or moved more easily.
Acorns have always fascinated little children (and me). They are shiny, smooth and shapely. They feel good when in your pocket. They have a little hat that stays on while on the tree, but falls off once ready to be planted. Acorns that are fertile always lose their caps, so don’t plant one wearing a cap.
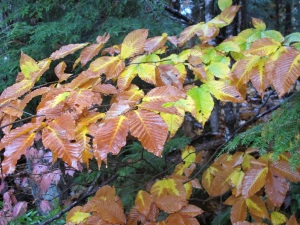
Beech leaves
Beeches (Fagus grandifolia) are also wonderful at this time of year. Like the oaks, beeches hang on to their leaves – some of the young trees keep their leaves until May, when new leaves push them off the branches. And although the fall color is yellow, never red, some will display stripes of green in leaves while the yellows develop. Eventually, they all turn brown and produce a nice sound as the dry leaves are teased by winter breezes.
Beeches have smooth gray bark that is splendid in winter. But many beeches suffer from a fungal disease which mars the bark and kills off older specimens. The trees are attacked by a scale insect that damages the bark, allowing a fungal disease called Nectria to infect the trees. According to a US Forest Service pamphlet, the scale insect arrived from Europe in the 1890’s and, like many foreign pests, had few enemies here in North America (it first appeared in Nova Scotia). These is no easy remedy if your beech trees are infected.
Another great tree for yellow leaves in the fall is the bottle brush buckeye (Aeseculus parviflora), a member of the horsechestnut family. I just planted one this fall because it has great spring flowers, will blossom nicely in the shade or part shade, and tolerates moist soil. I had just the right spot. The brilliant yellow fall leaves were a bonus.
My hybrid ‘Merrill’ magnolia has great yellow fall color, too. And if you get up close to the tree, you can see that it is loaded with small, bright red berries nestled in their pods. The buds for next year’s flowers are on the tree, too, and will become more noticeable once the leaves and seeds have dropped. The buds look like pussywillow buds on steroids.
At this time of year the weather tends to be a bit gloomy. Rainy cold weather is not much fun, and the sun sets by supper time. So what can a gardener do? Plant some acorns. My friend Joe Monninger of Plymouth, NH went out one fall about 10 years ago and planted a bunch of acorns. I called him this week to see how they did.
Ten years later- despite squirrels, lawn mowers and weed whackers – four of Joe’s acorns have grown to stand waist high. Not bad. He hadn’t done anything to improve the soil, he hadn’t fenced them to keep away deer. He just poked some holes in the ground and planted acorns. Even if he planted 25, he has four nice trees – and that’s not a bad return on his labor, if you ask me. If you plant some acorns, put one of those little white plant labels near each one so you will be careful to avoid stepping on them when young – or mowing them down. And in 300 years they might still be alive and producing acorns.
I believe in enjoying what I have. Take time, I say, to slow down and really look at the subtleties of nature and the garden. Red is not the only good fall color.
Henry is the author of 5 books. His web site is www.Gardening-Guy.com. You may send questions to him at henry.homeyer@comcast.net.


