Controlling Invasive Woody Plants
Posted on Wednesday, March 13, 2013 · Leave a Comment
We’ve had a few days of spring-like weather and I’m champing at the bit, ready to start gardening as soon as the snow disappears. There’s not too much we can do as yet. One thing I’ve been doing recently is trying to get rid of invasive trees, specifically the common buckthorn. That’s a long process, so it’s a good thing to work on now, before planting season.
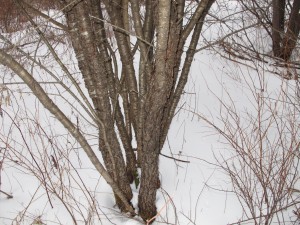
Common Buckthorn
Common buckthorn and glossy buckthorn are two species of small trees that arrived here from Europe or Asia, where they are native, and that have found the new world (more than) suitable for their needs. They are understory plants that will grow in sun or shade, wet or dry, good soil or bad. And they are very hard to get rid of. Like many invasives, if you cut down one, many new shoots will sprout up.
I don’t use herbicides, but there is a way to kill buckthorns without using herbicides. Several years ago I was told about “double girdling” them as way to slowly kill them – without generating root sprouts. Now, while they are dormant, is a good time to begin.
Take a pruning saw and cut through the outer bark and the green cambium layer, but do not cut into the hard core of the trunk. Go all the way around the tree, so that you have girdled the tree. Be sure to connect the beginning and end of your cut (which requires that you keep your saw blade level as you cut). Then do it again 12 inches above the initial cut.
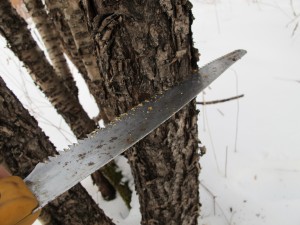
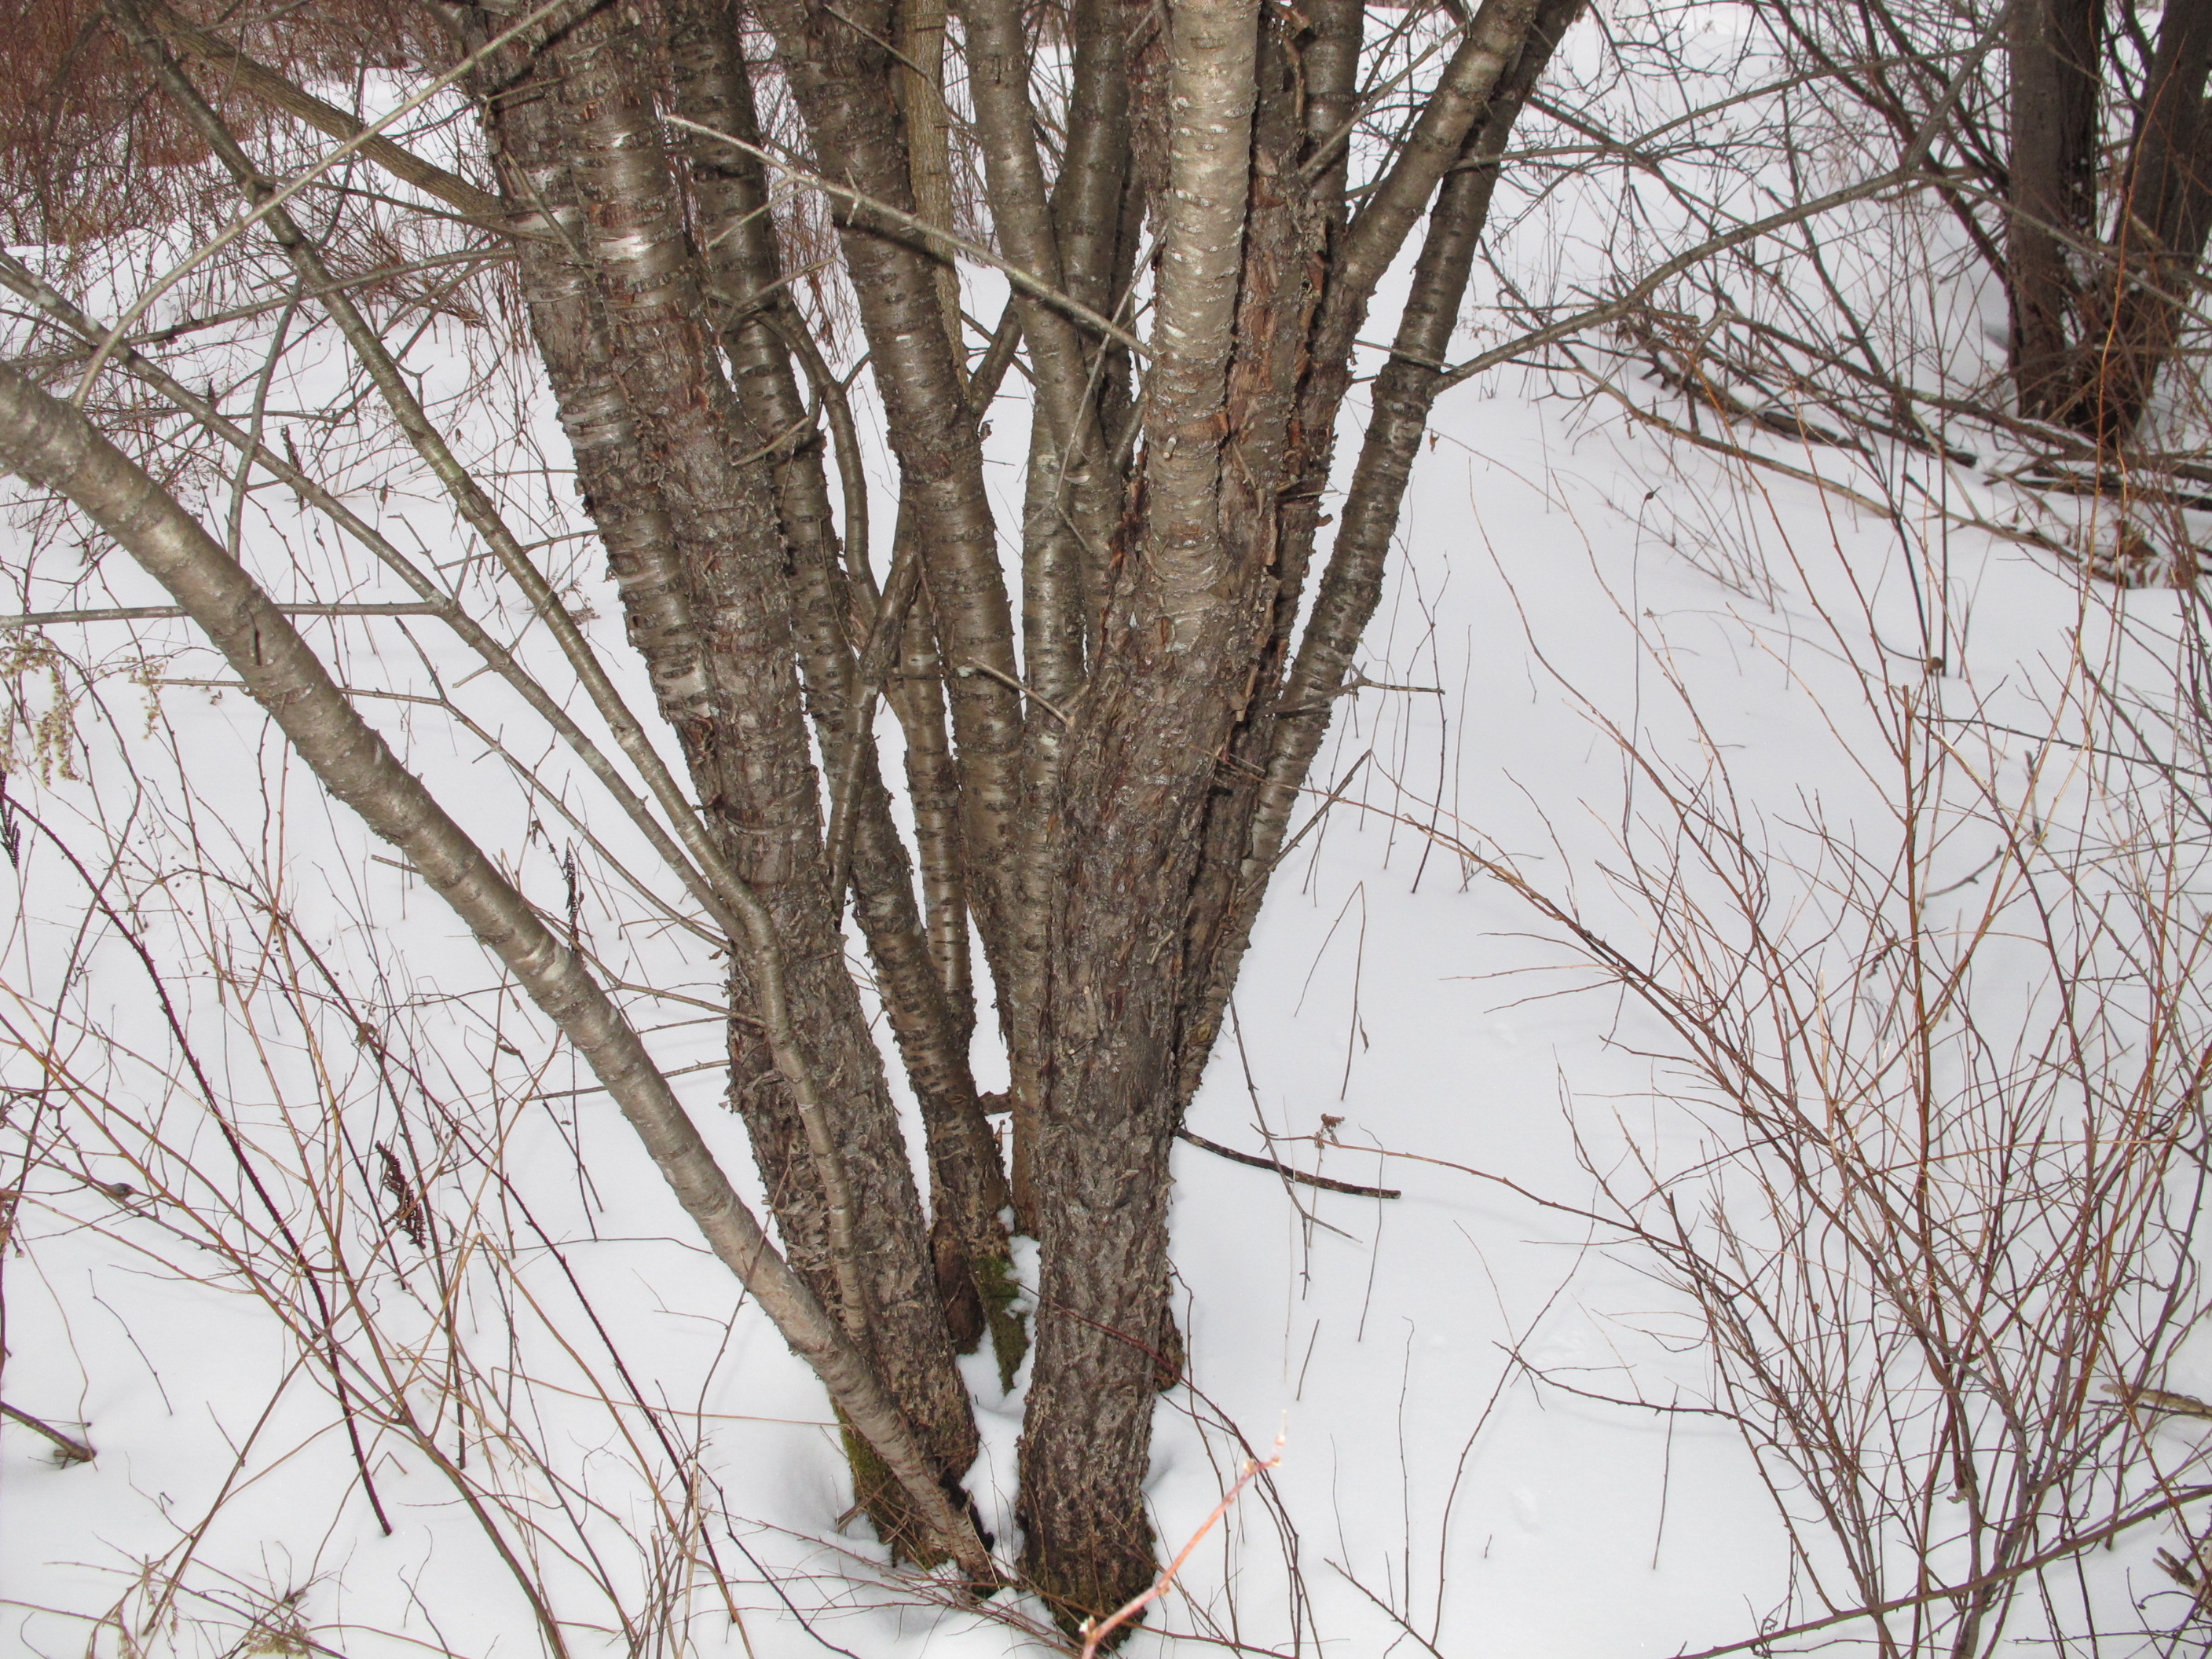
Girdling Buckthorn
If you girdle the tree this year, it will leaf out and act as if nothing bad had occurred. Next year, it will leaf out, but may start to show signs of decline. In the third year, the tree will die. And best of all, no root sprouts will pop up. (Or they didn’t for me, anyhow, when I tried it a few years ago).
One problem: common buckthorn’s growth habit is to start off as a single trunk, and then immediately split off into 6-12 smaller trunks. Since I couldn’t double girdle the tree down low, I had to do so on each of the many upward-growing shoots. And another thing: buckthorns commonly have depressions or dimples in their stems. So when cutting through the bark, it is easy to miss a section because your saw can go over a dimple and leave the job incomplete.
Norway maples (Acer platanoides) are on the list of invasive species in most New England states, and also need to be weeded out. They are on the list because they can out-compete our native maples (and other trees) for water, sunlight and nutrients, and because they seed into the woods whenever present. I have not tried the double girdling technique on them because I have none on my property. But if you have some, I suggest you try it – and then please email me in 3 years if the technique works.
‘Crimson King’ is a cultivar of Norway maple that is very attractive, with nice dark purple leaves. It was sold in huge numbers up until recently. It is a hybrid, and the numerous seedlings it produces are mostly green-leaved – which means that most gardeners just assume that the maple seedlings they see in their woods are native maples. There is a way to test a maple to see if it is a Norway. Once summer comes, snap off a leaf and look at the base of the petiole (leaf stem). If it oozes white sap, it’s a Norway maple.
Other trees and shrubs that can be invasive include bush honeysuckle, tree of heaven, barberry , Russian olive, autumn olive, burning bush, border privet, princess tree (Powlownia tomentosa), and multiflora rose. Most share these characteristics: they are tough trees, produce lots of seeds, and will out-compete native species – they have been introduced from abroad.
I recently spoke to Blaine Moore of Maverick Farm in Sharon, VT about a technique he has used on invasives. He cuts them off close to ground level, and then covers the cut stem with a tin can so that no light gets to the stem – light can stimulate cut stems to grow or to send up root sprouts. He told me he has used this technique successfully for a number of years on a variety of types of invasives and he swears by it. I have not tried this yet, but I have lots of honeysuckle, and I will try it this spring – it’s much less work than digging them out. He sometimes uses tuna cans and nails the can onto a stump to keep it in place.
I have written in the past about a nifty tool for pulling young woody invasives, the weed wrench (www.weedwrench.com). This is a very sturdy hand tool that allows you to grab onto a tree or shrub with a self-tightening jaw, and pull them out with the leverage of a steel arm. They come in four sizes and are a good investment for garden clubs. Of course you will have to wait until the soil thaws to start pulling out culprits. Meanwhile, go try some double-girdling.
Henry Homeyer can be reached by email at henry.homeyer@comcast.net. His Web site is www.Gardening-Guy.com.
Getting Ready for Spring and Worrying About Tomatoes
Posted on Wednesday, March 6, 2013 · Leave a Comment
I know that most of you have probably already ordered your seeds, but I just did so on the day I wrote this column in the last week of February. I spent a recent Sunday afternoon going through my seeds and throwing out any seeds that were older than those packaged for the 2010 growing season. Almost any seed is viable for 3 years, and some are good even longer. Of course storing seeds in a cool dark place helps prolong viability, too. It hurts me to throw out seeds, but I don’t want to plant and then find that I my seeds didn’t germinate well – or at all.
Many people have e-mailed me with questions about the various blights that have plagued our tomatoes in recent years. What can we do? Well, I hedge my bets. I buy both heirloom seeds (which generally have little resistance to blights and diseases but taste great) and modern hybrids that have been bred to resist diseases. Of the first generation hybrids (called F-1 hybrids in the catalogs) I have had good results with Sungold cherry tomatoes, Defiant, and Mountain Magic. The latter two are available from Johnny’s Selected Seeds. Sungold is available everywhere. All are tasty, but nothing beats the flavor of an heirloom Brandywine.
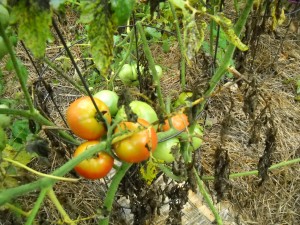
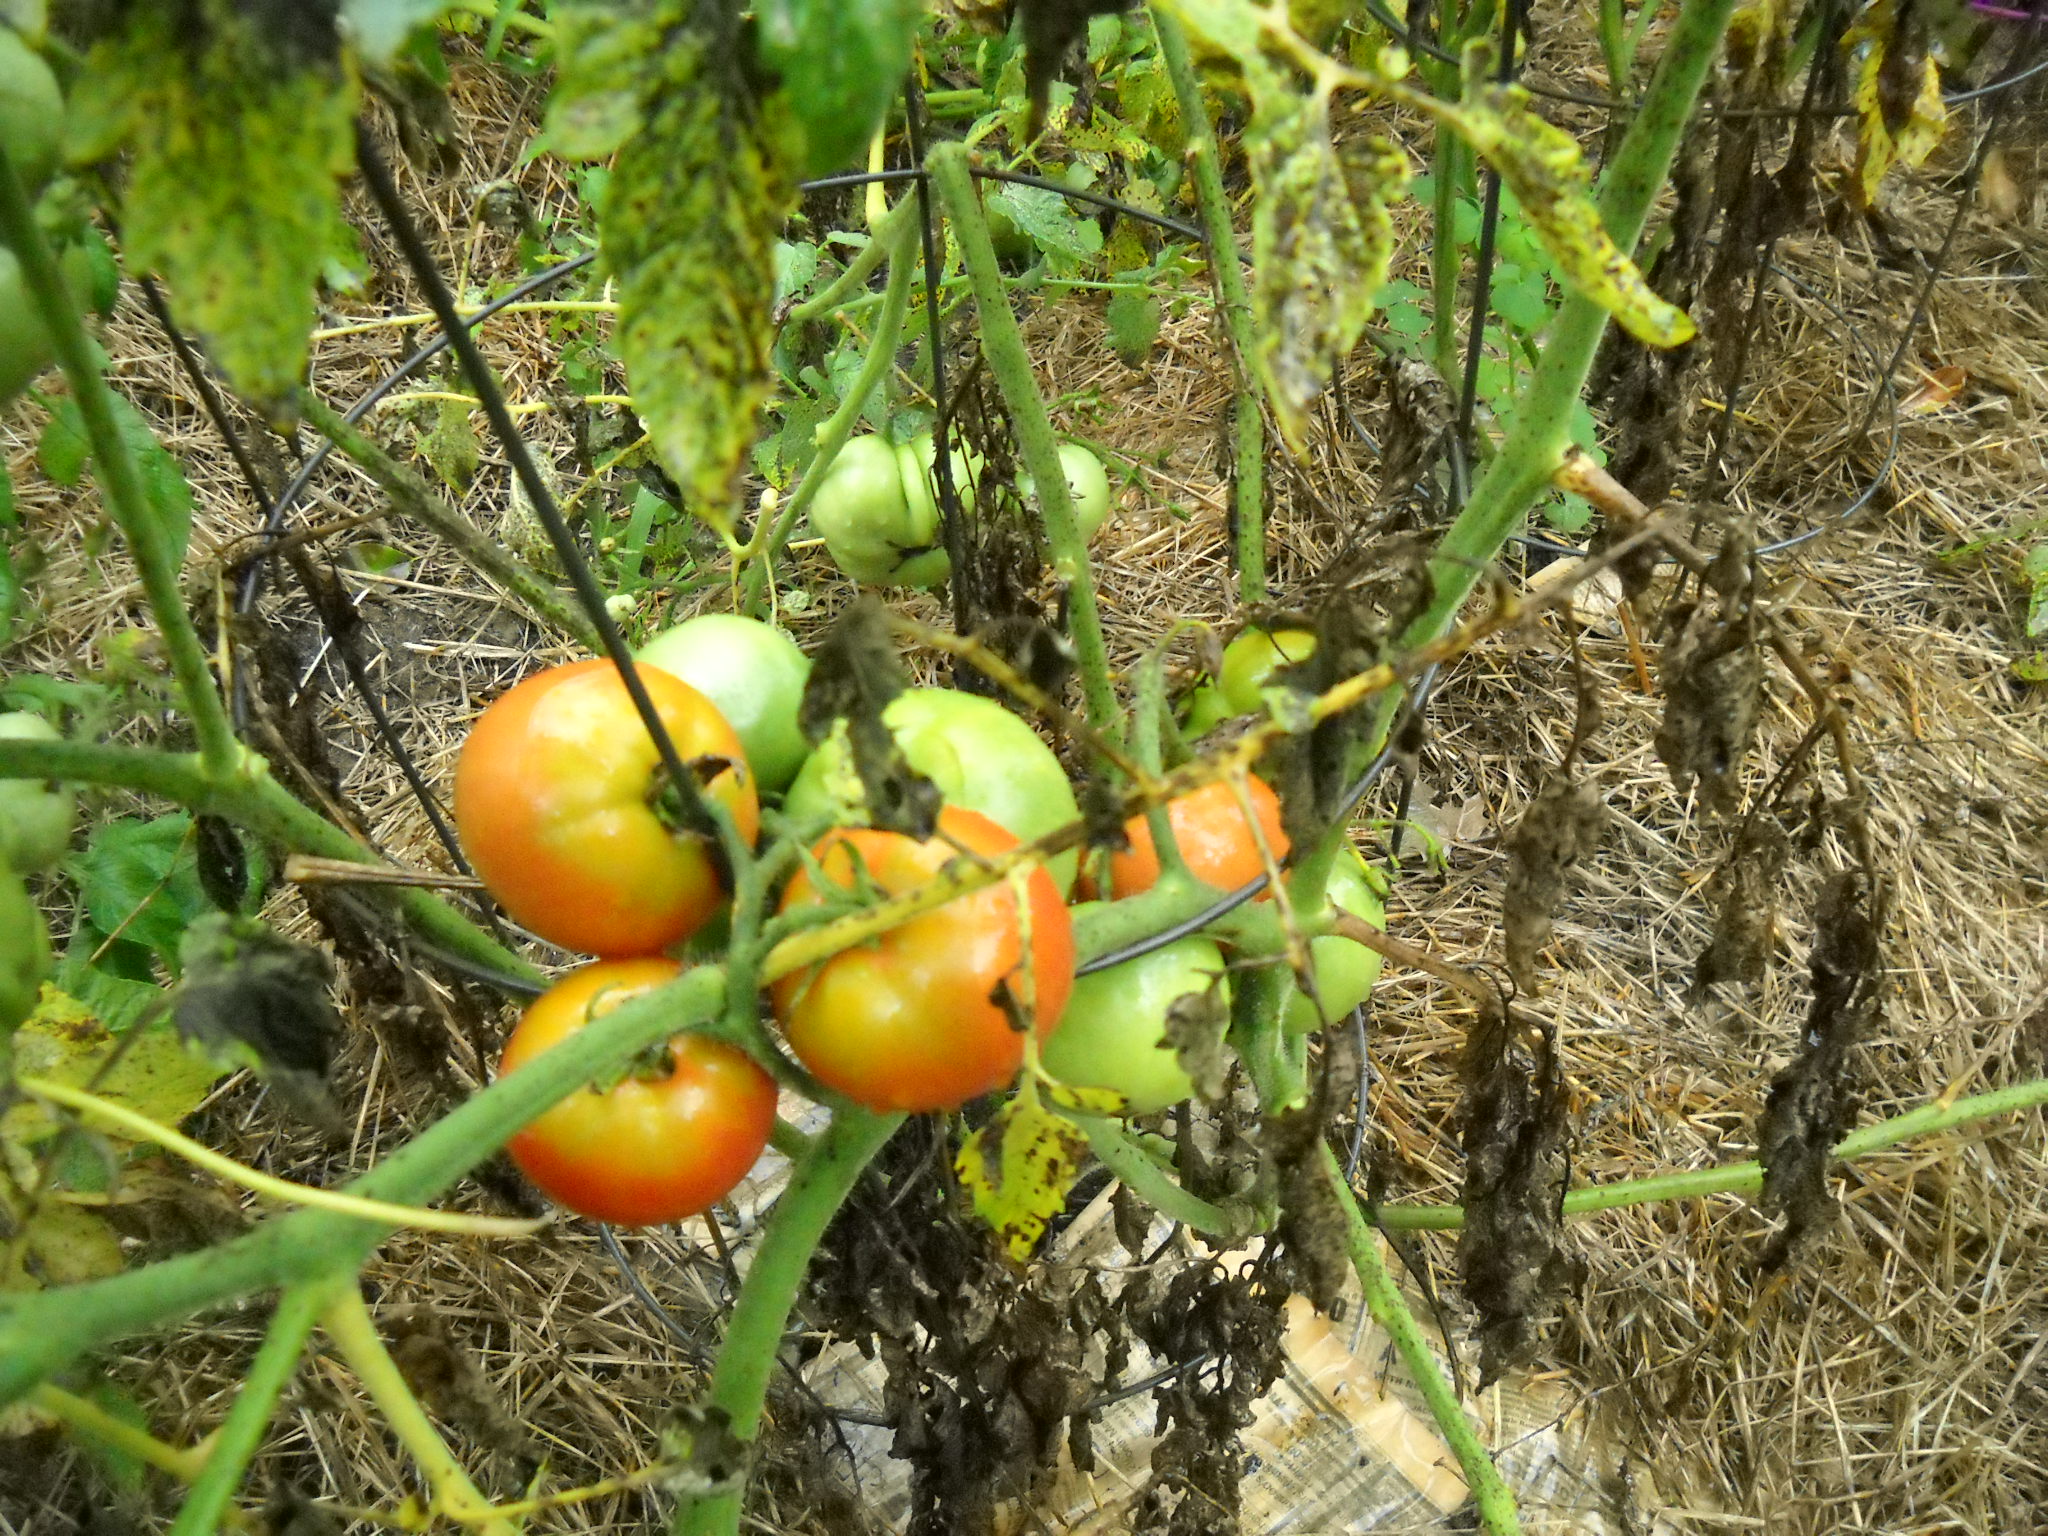
Tomatoe Plant With Early Blight
I also order some seeds for tomatoes that are early to produce. A 60-day tomato is much more likely to survive long enough to produce a good batch of fruit than one that takes 78 days or longer. Those days on the seed packages, by the way, refer to how many days under ideal conditions it should take to get fruit after transplanting seedlings into the ground. If we have a cold, rainy summer a 60-day tomato can take a week longer – or even more.
In responding to a reader who asked about blights, I came up with a plan I shall try myself: creating a simple plastic-covered hoop house for some of my tomatoes. Some diseases have spores that live in the soil, and get on the lower stems and branches by splash-up. If I keep the plants protected from the rain and I water carefully, I should have few of those diseases. Mulching helps, too.
Other diseases are air-borne. Late blight, one of the most virulent diseases, is air-borne. Depending on the prevailing winds and the presence of diseased plants in your neighborhood, you might get it – or you might not. A greenhouse would be a big help keeping out those spores, but greenhouses are expensive. A simple open-ended hoop house should help some, and not cost much. It will be most protective if the open ends are not facing the prevailing winds. So that is what I shall do.
I’ve built hoop greenhouses with windows and doors, and it’s quite a bit of work. So this year I shall try something easier. I will make a 10 ft by 10 ft hoop house big enough to walk through, but without all the carpentry of a door and a window. It should hold 10-12 tomato plants, maybe more.
Here is what is needed: Twelve 10-foot pieces of ¾ inch PVC electrical conduit and some PVC glue. A piece of greenhouse plastic roughly 20 feet by 12 feet. Enough row cover or “Reemay” to drape over the ends, maybe 12 feet by 8 ft (I’m hoping this breathable fabric will keep out spores but allow breezes to pass through). Some carpenter’s spring clamps to hold the plastic and Reemay in place. And two 10-foot pieces of wood strapping that I will screw into the ribs of the hoop house to keep the hoops from moving.
I will pull a string tight between 2 sticks to define one side, and then measure over 10 feet and do it again. My soil is soft, so after I have glued 2 pieces of conduit together, I shall just push the ends in the ground, creating a hoop (the conduit is flexible but sturdy). Measure over 2 feet, repeat. And so on. I will try to buy my greenhouse plastic from a local greenhouse, or see if I can get a used piece they have taken down. Worst case scenario? I’ll buy 4-mil plastic that is not UV protected –but it will only work one year before it decays in the sun.
Once the cover is on, you could use a screw gun to screw right though some strips of wood strapping into the ribs with sheet rock screws to stabilize the structure and help hold the plastic in place. I’ll do it 3 feet off the ground on each side of the hoop house. Carpenter’s spring clamps can be bought for $2 each, and could be used to clamp the Reemay over the ends.
I reckon I can build that hoop house in an afternoon. If you want to have something even smaller, use just 10 feet or 15 feet of conduit per hoop over a 3 or 4 foot wide bed. You won’t be able to walk in it, but it will be even cheaper and easier to build. You’ll have to remove the plastic each time you want to weed, pick or water, of course.
Gardening is a constant challenge. If the blight doesn’t attack, maybe the hornworms will. But I’ll try not to worry too much, and try to figure out what I can do cheaply and efficiently to get the best production possible. Wish me luck!
Henry Homeyer’s Web sites are www.Gardening-Guy.com and www.henryhomeyer.com
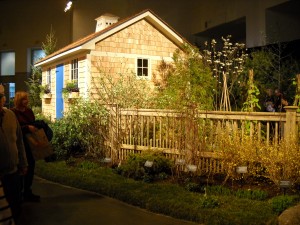
Visiting Longwood Gardens in Winter
Posted on Wednesday, February 27, 2013 · Leave a Comment
I recently traveled to Pennsylvania to visit family, and while there I visited Longwood Gardens in Kennett Square, PA (about 30 miles west of Philadelphia). It was a fabulous break from winter and a good chance to see flowers in bloom before the flower show season gets into full swing. From now through March 24 their 4 acres of glass conservatory are displaying more than 5,000 orchids – and much more.

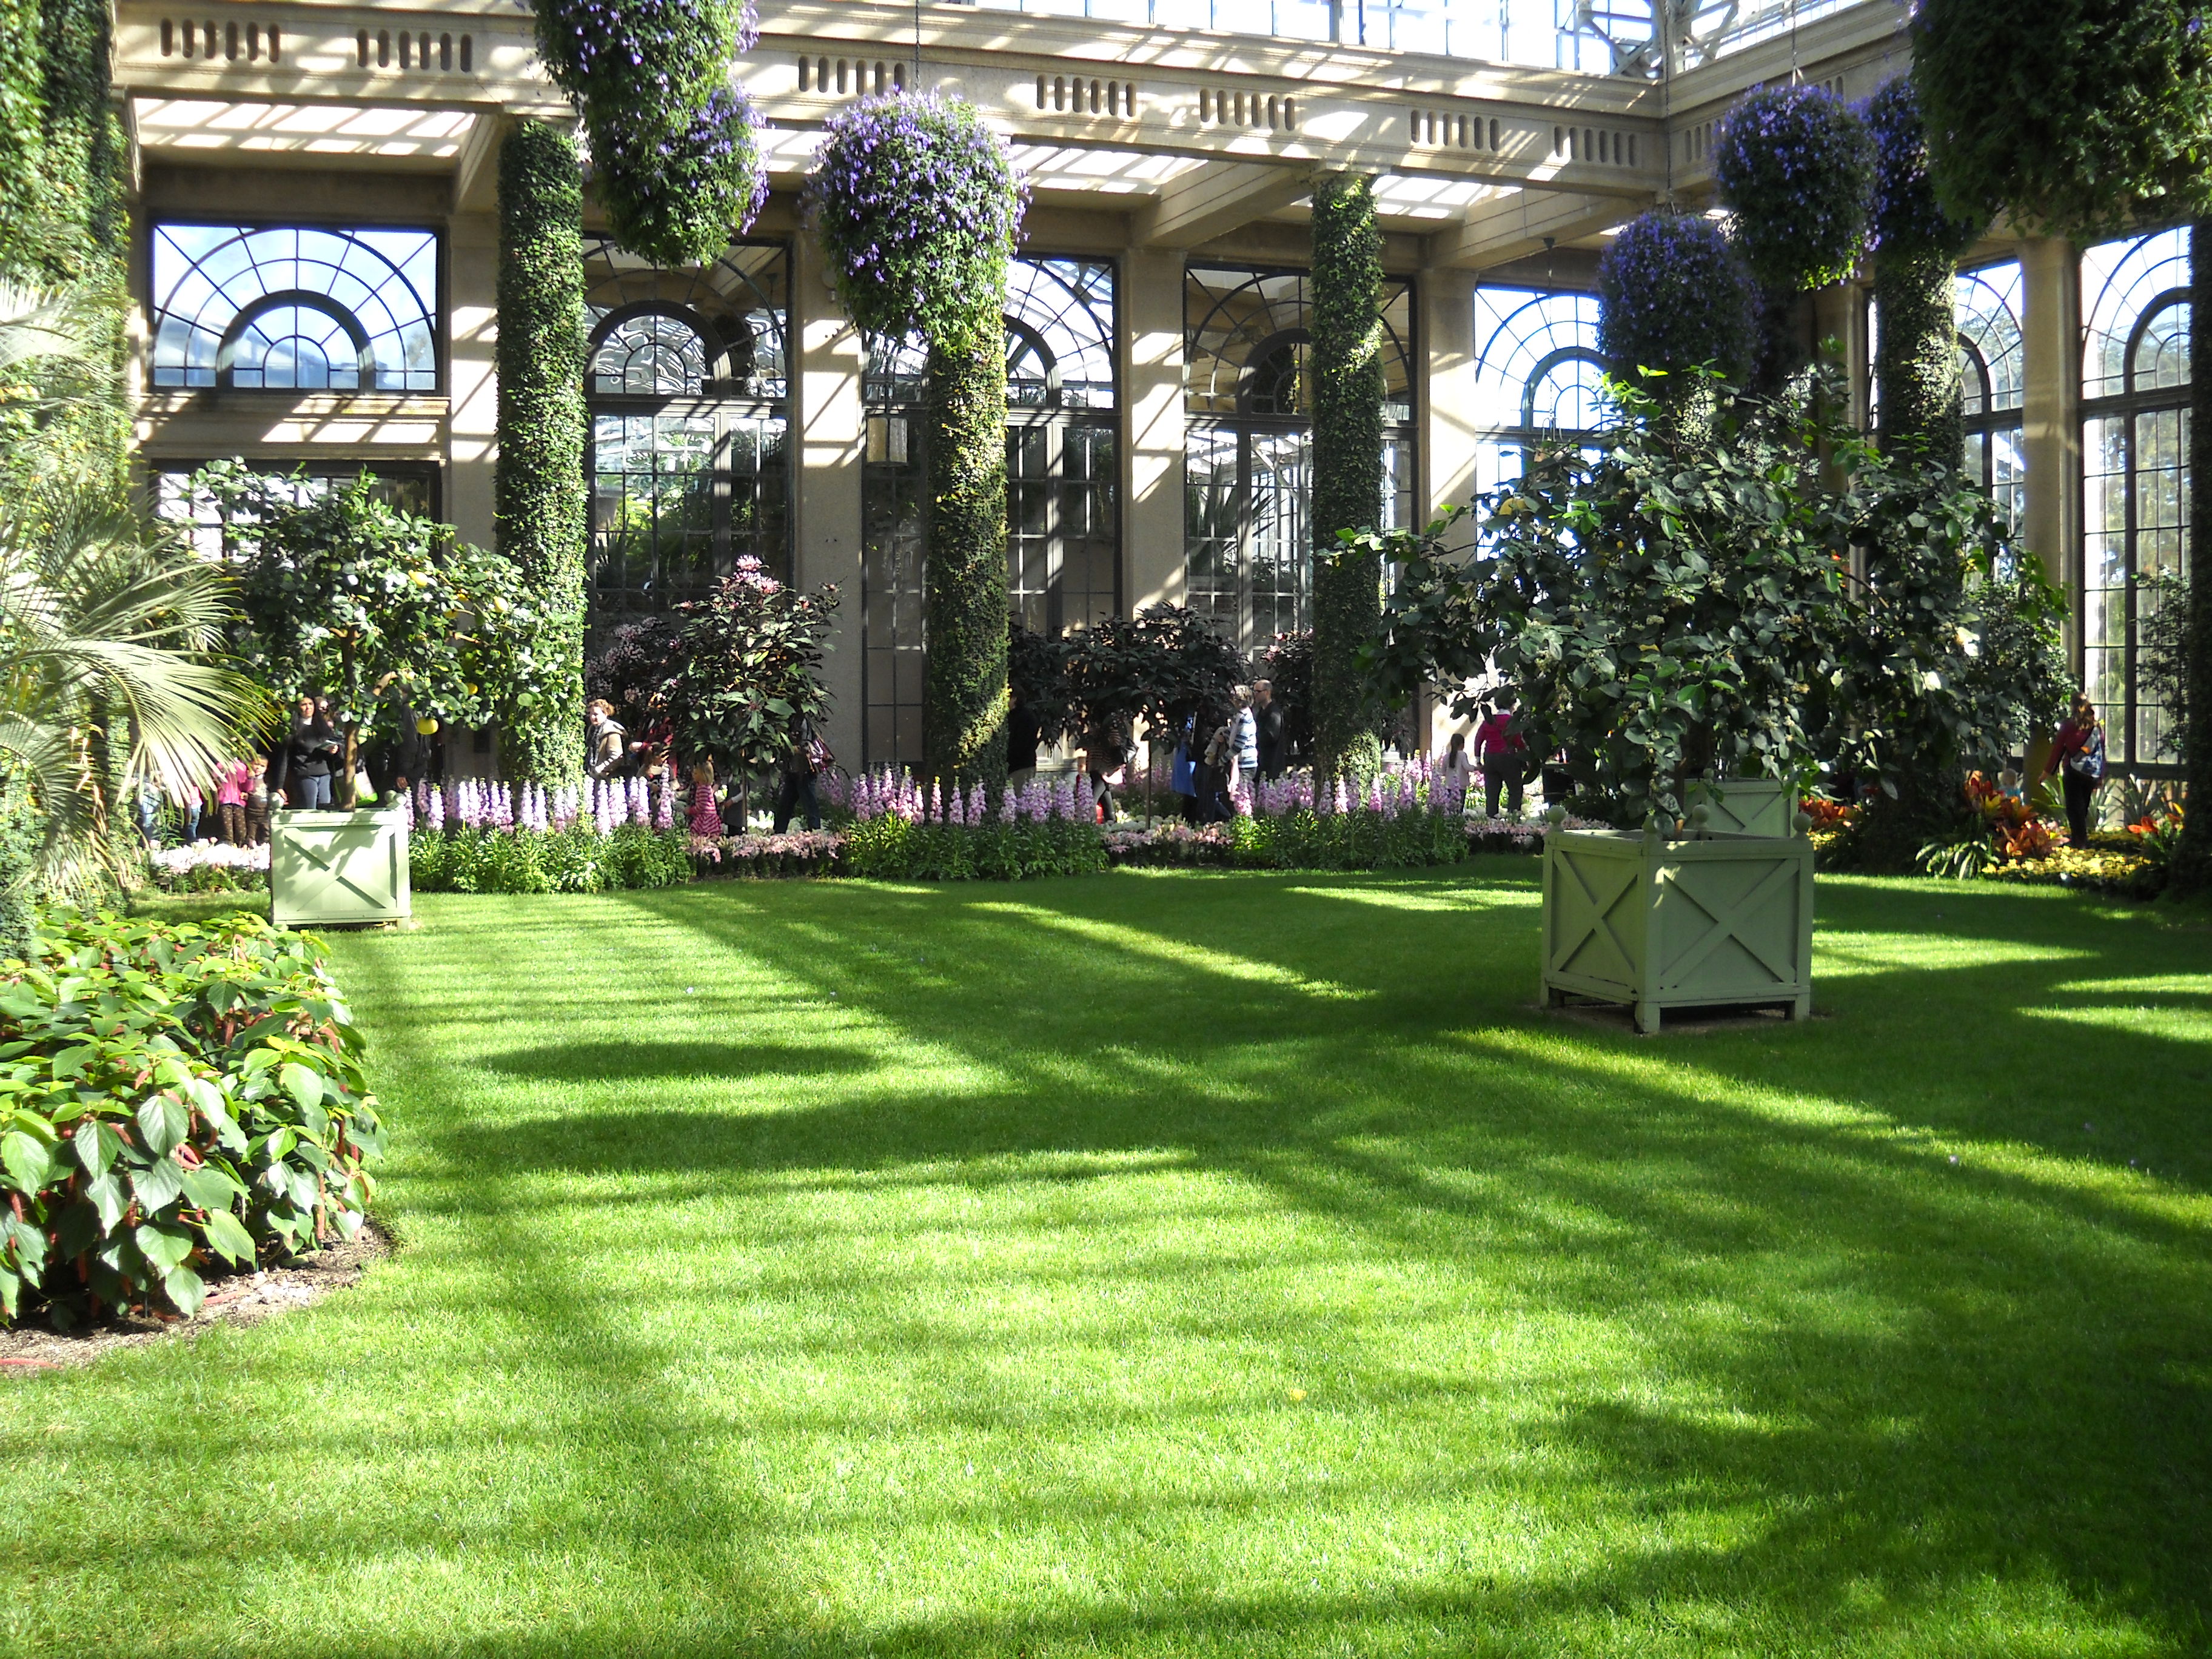
Longwood Gardens
I’ve been to many greenhouses over the past few decades, both here in the States and in Europe. Often I find them too hot and too humid, particularly if dressed in winter clothing. The Longwood Garden conservatory seems to have figured out how to do it right. The greenhouses were built in the 1920’s for Pierre du Pont (1870-1954), who, it would appear, had more money than he knew what to do with. So these greenhouses have very high ceilings, about 50 feet in places. That means that hot sticky air can accumulate near the ceiling, leaving us mortals on the ground with warm, pleasant air.
Walking into the main halls of the conservatory one is greeted with a massive arrangement of potted orchids made to look like cut orchids in a huge vase. It was an arrangement of whites and yellows, two different kinds, standing in a shallow pool of water. Light poured in everywhere through the ceiling and walls. To your left, a lawn! That’s right, a perfectly manicured lawn big enough to host a generous game of croquet! In this season, it was a refreshing sight.
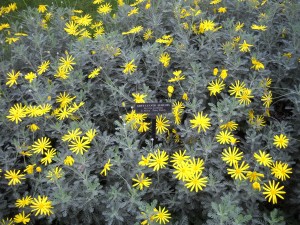
Grey Leafed Euryops
I like the fact that all the plants are labeled (which is mostly true, outside the conservatory, too). I carry a notebook so that I can research plants I like – not all are suitable for New England. I loved a yellow daisy-like plant with blue gray foliage, called Grey-leafed Euryops (Euryops pectinatus). Unfortunately, it is a South African shrub suited for California, or indoors, but not my garden.
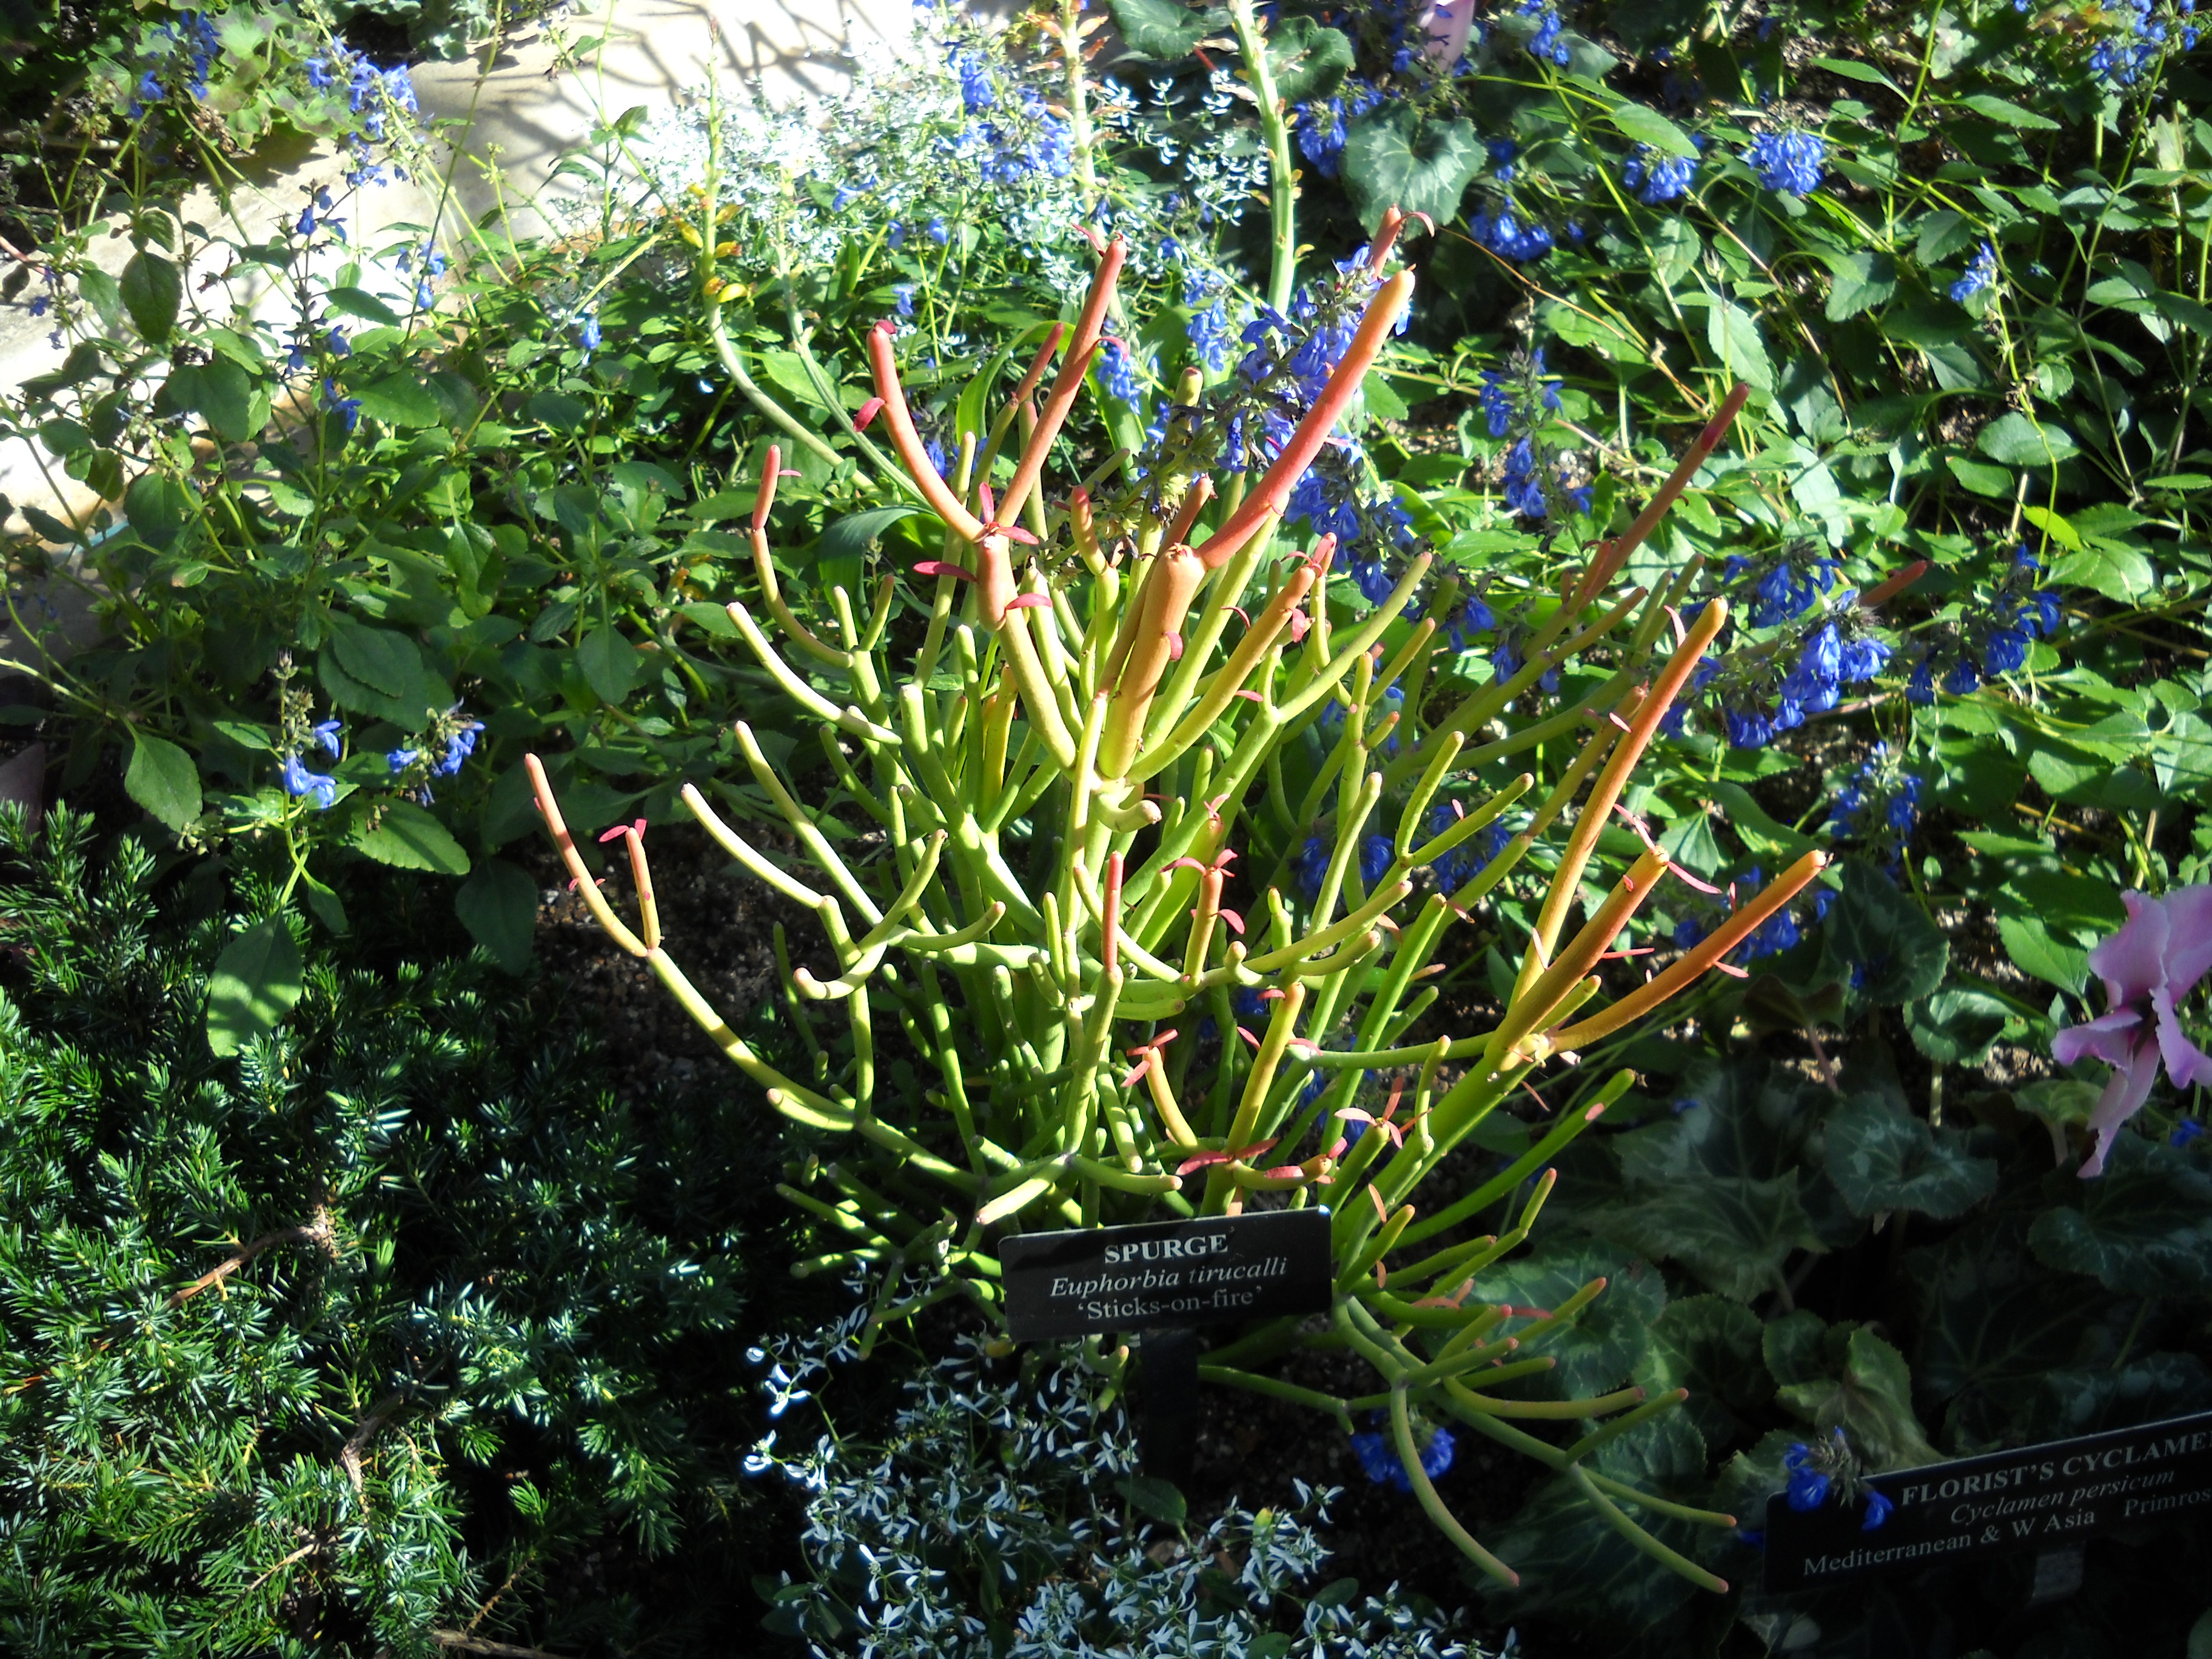
I observed a euphorbia (Euphorbia tirucalli) ‘Sticks on Fire’ that I simply must find, and accept that it must stay in a pot that will allow me to bring it in during the winter. It has miniscule leaves, but the stems are yellow, progressing to red toward the tips of the plant. It is very dramatic, and would be a nice houseplant. My nine-year old grandson, George, collects succulents, and this would be a great addition to his collection.
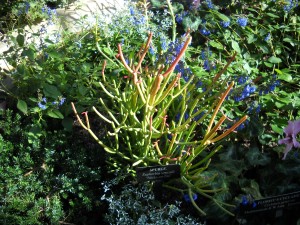
Euphorbia ‘Sticks on Fire’
Speaking of kids, Longwood Gardens is definitely child-friendly. In one section docents were handing out plastic-coated cards with plant pictures for a scavenger hunt for kids, and there is a nice water feature that will allow kids to get a little wet, but not soaked. And the moving squirts of water are definitely exciting. Docents are everywhere, and very helpful. One was showing children vanilla pods that were picked from a very long viney vanilla orchid (Vanilla plainifolia), and allowing them to sniff the vanilla scent. The plant fascinated me – nearly 25 feet tall with fleshy green leaves, it had been in the conservatory only since 2010.
In that same room with the vanilla plant were examples of orchids of every hue, from bright red to purple to orange and yellow to white. I was amazed to see each in perfect condition, no spent blossoms or droopy leaves. Then I learned from the docent in the room that these potted orchids are changed out 2 to 3 times a week. Only perfection is on display!

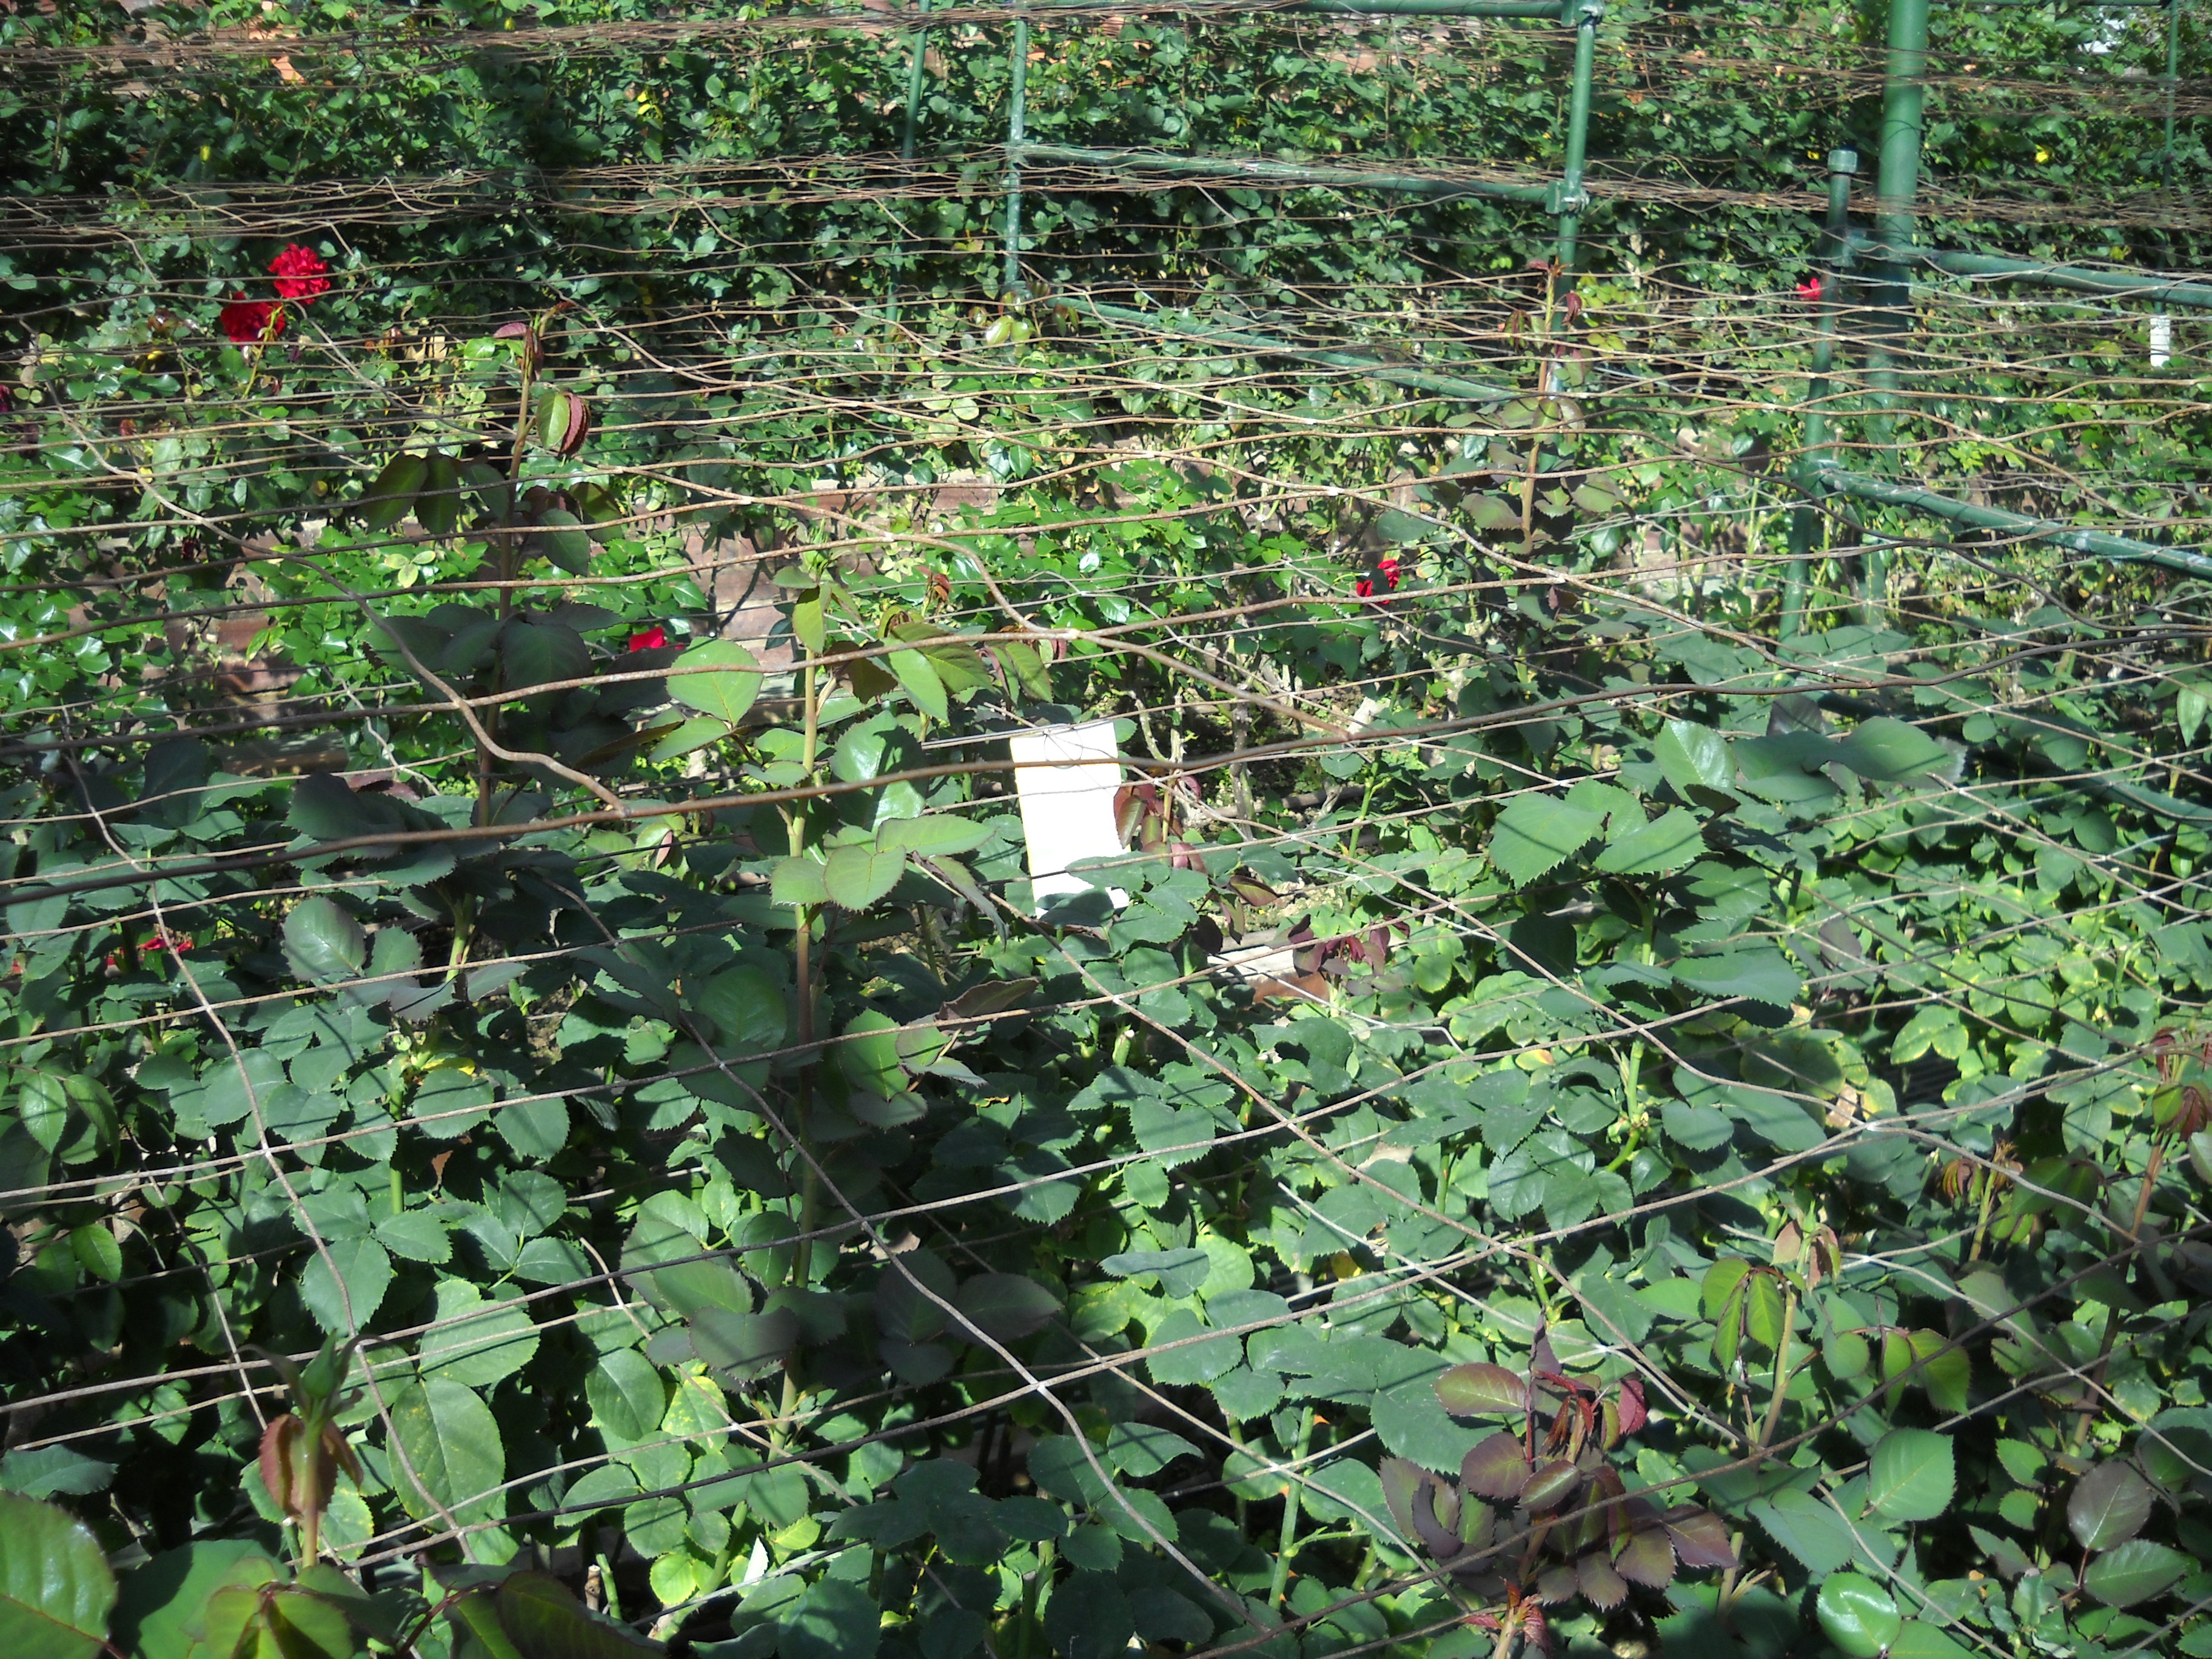
Rose Supports
I like to learn from each garden I visit. One new growing trick that I liked involved using standard sheep fence to hold up flowers. But instead of running the fencing vertically, as is standard, three layers of fencing were stretched between cross bars horizontally. The first bar was about 2 feet off the ground, the next at 3 feet, and a top layer at 4 feet. Those supports were about 15 feet apart. This support system allowed floppy roses to grow through the 6-inch openings of the fencing, and to lean on the wires as needed – without being tied up. This would work well for any type of tall flower outdoors that might get beaten down by the rain.
Also of interest to me was a rose variety called ‘Pink Cherokee’ that was planted in the conservatory in the 1920’s when it was first built. The rose is a simple single rose that has climbed more than 20 feet up and blooms (in the greenhouse) in spring, summer and winter.

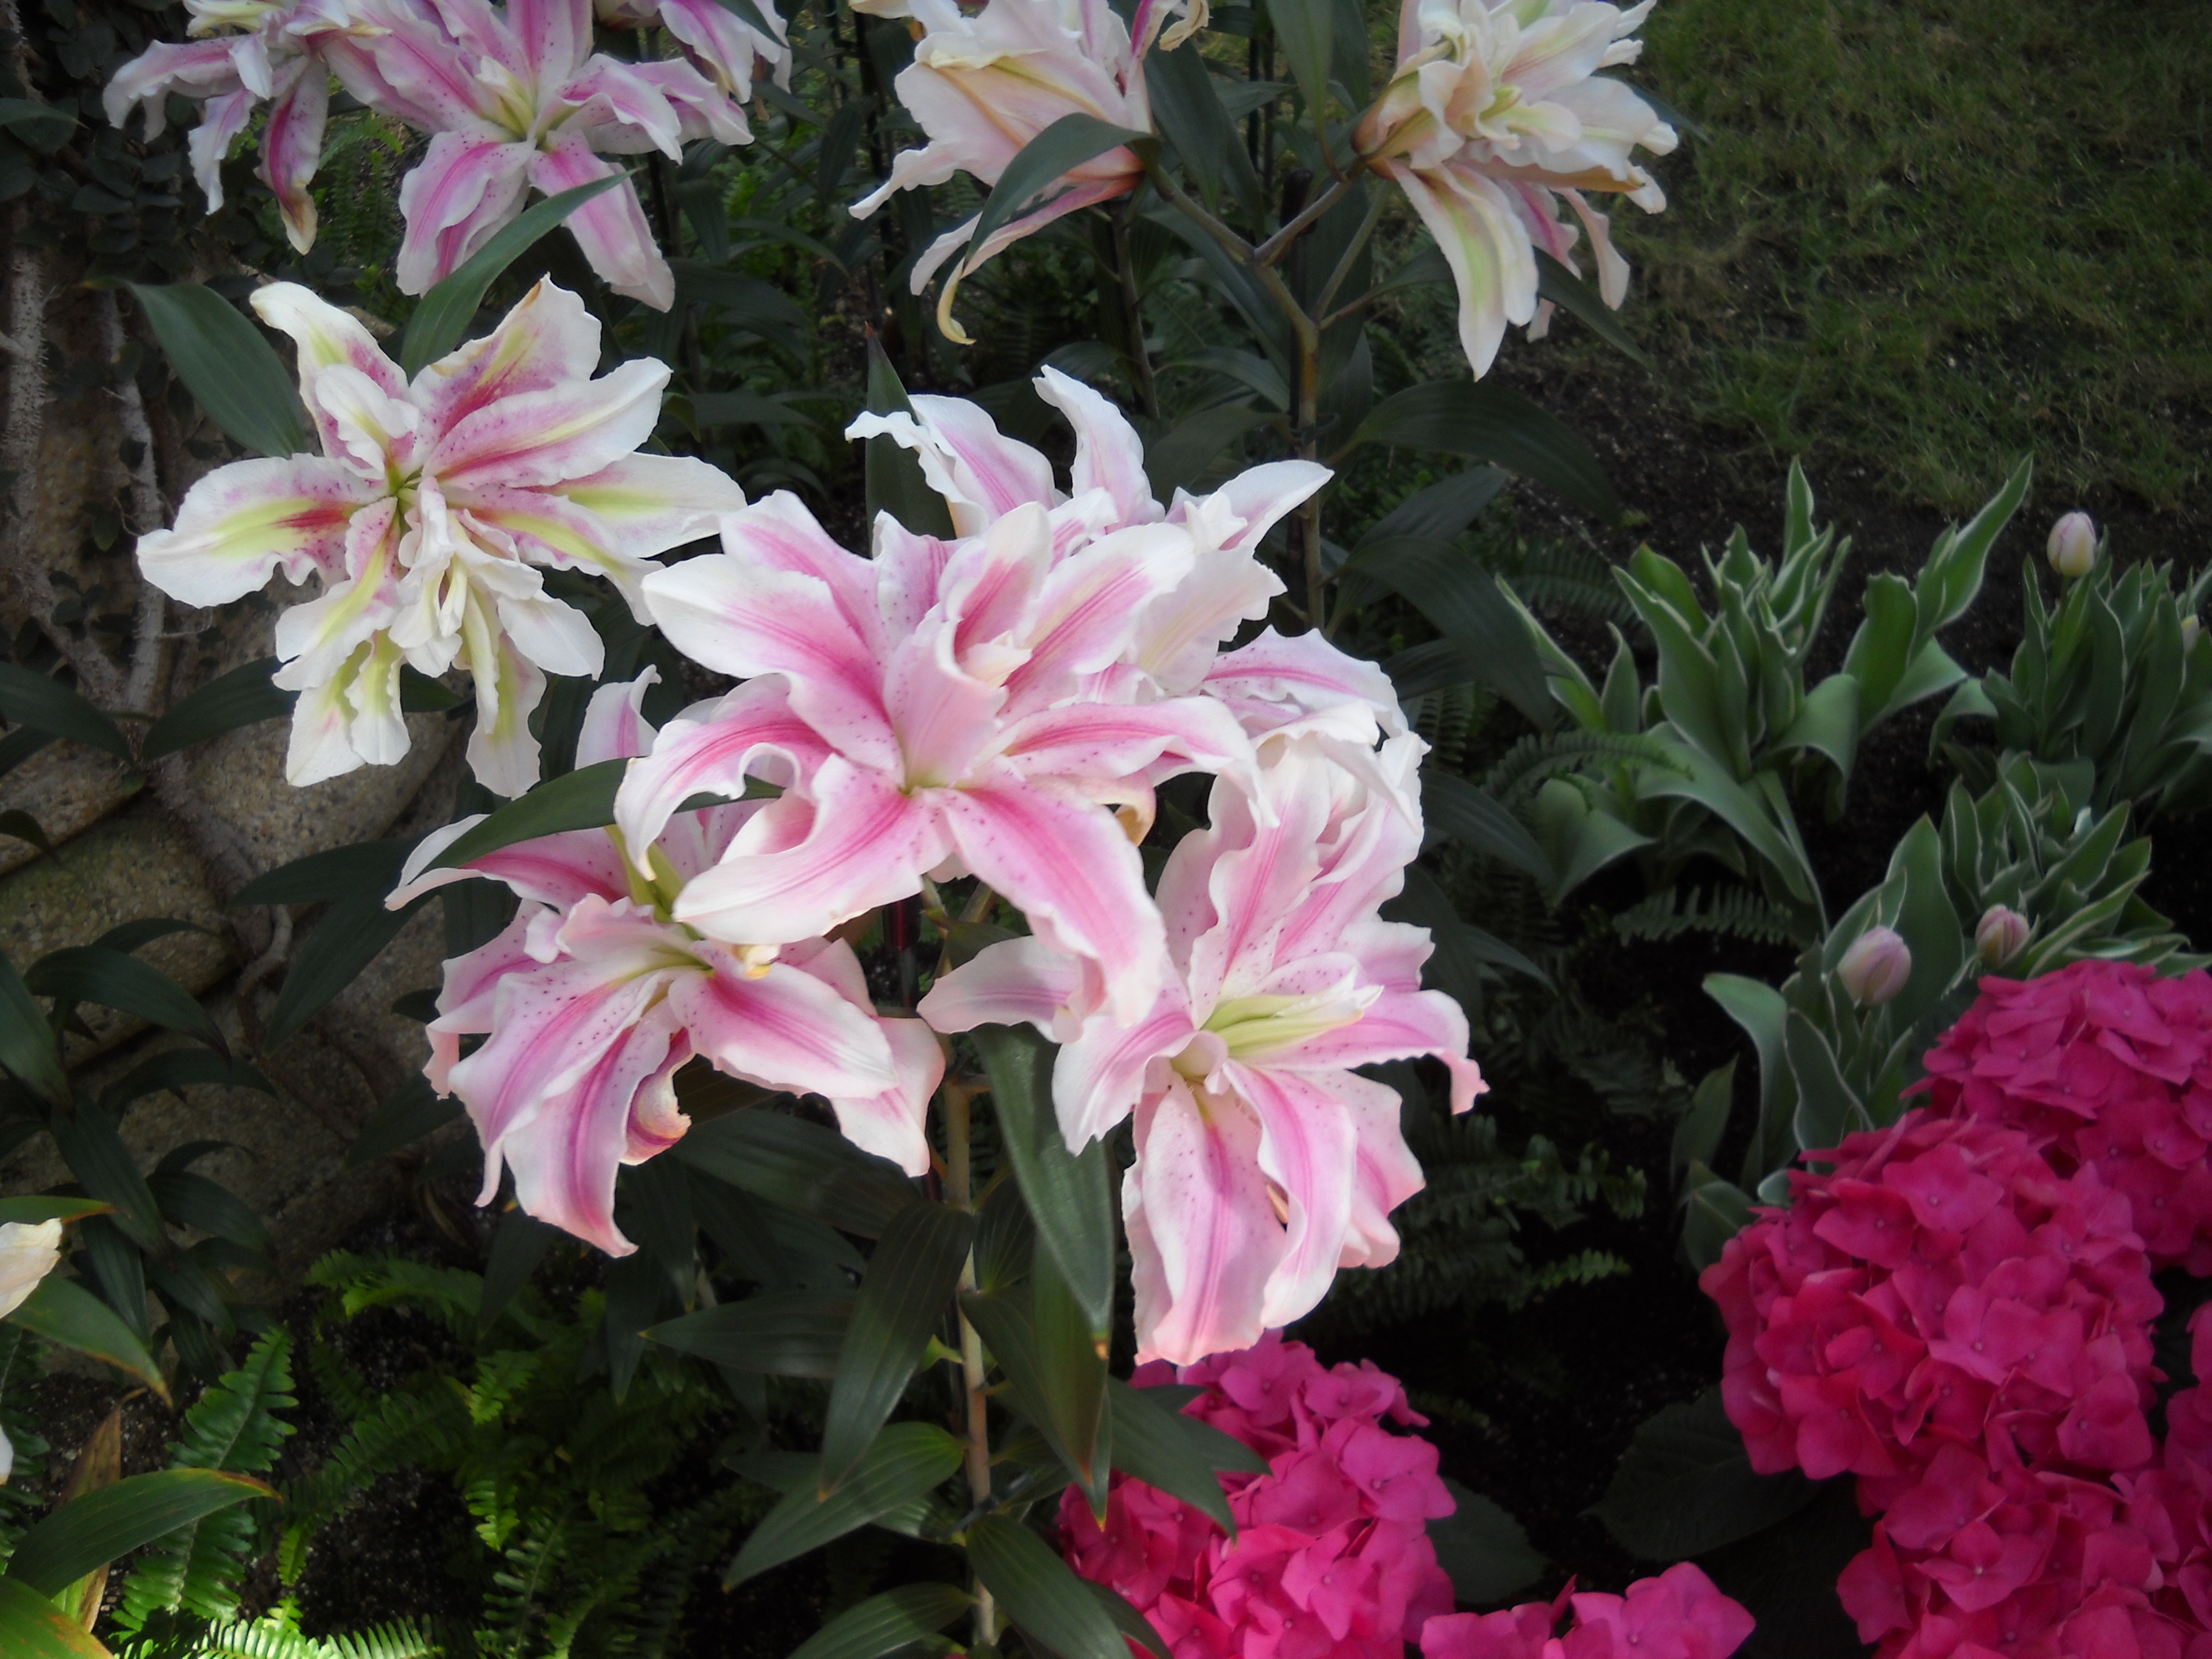
Double Star Lily
The greenhouses included many standard flowers besides the orchids: daffodils, tulips, freesias, oriental lilies (including a double one, ‘Double Star’, with twice the number of petals). I loved seeing some rare yellow clivia – I grow the standard orange one, a real work horse of a house plant with glossy long strap-like leaves. The yellow one I had heard of, but never seen.
For more information on the Longwood Gardens, go to their web site, www.longwoodgardens.org. Admission is $18for adults, $15 for seniors (62+), and $8 for students 5-18. If you are in Pennsylvania, the gardens are worthy of a visit in any season – the outdoor gardens in summer are fantastic!
Henry Homeyer can be reached at henry.homeyer@comcast.net or PO Box 364, Cornish Flat, NH 03746. Visit his web site at www.Gardening-guy.com.
Native Pollinators
Posted on Wednesday, February 20, 2013 · Leave a Comment
Most gardeners know that our native bumblebees are good pollinators: reliable workhorses that pollinate even when honeybees stay in the hive and complain that it’s too chilly, or that they don’t like the rain. But you may not know that there are many other native pollinators, some very specialized, and that they can help us get good harvests. There are things we can do to support our unsung helpers including some that we can do now, in the dead of winter.
I called my friend Jim Kennedy who is a Landscape Architect/Wetland Scientist living in Etna, NH. He manages his large tract of land with a priority for nurturing wildlife of all sorts – from planting buckwheat along the edge of the forest to feed the deer, to creating meadows for woodcocks. He is a beekeeper, but also takes steps to provide food for native pollinators.
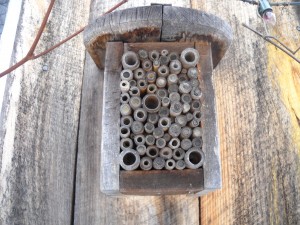
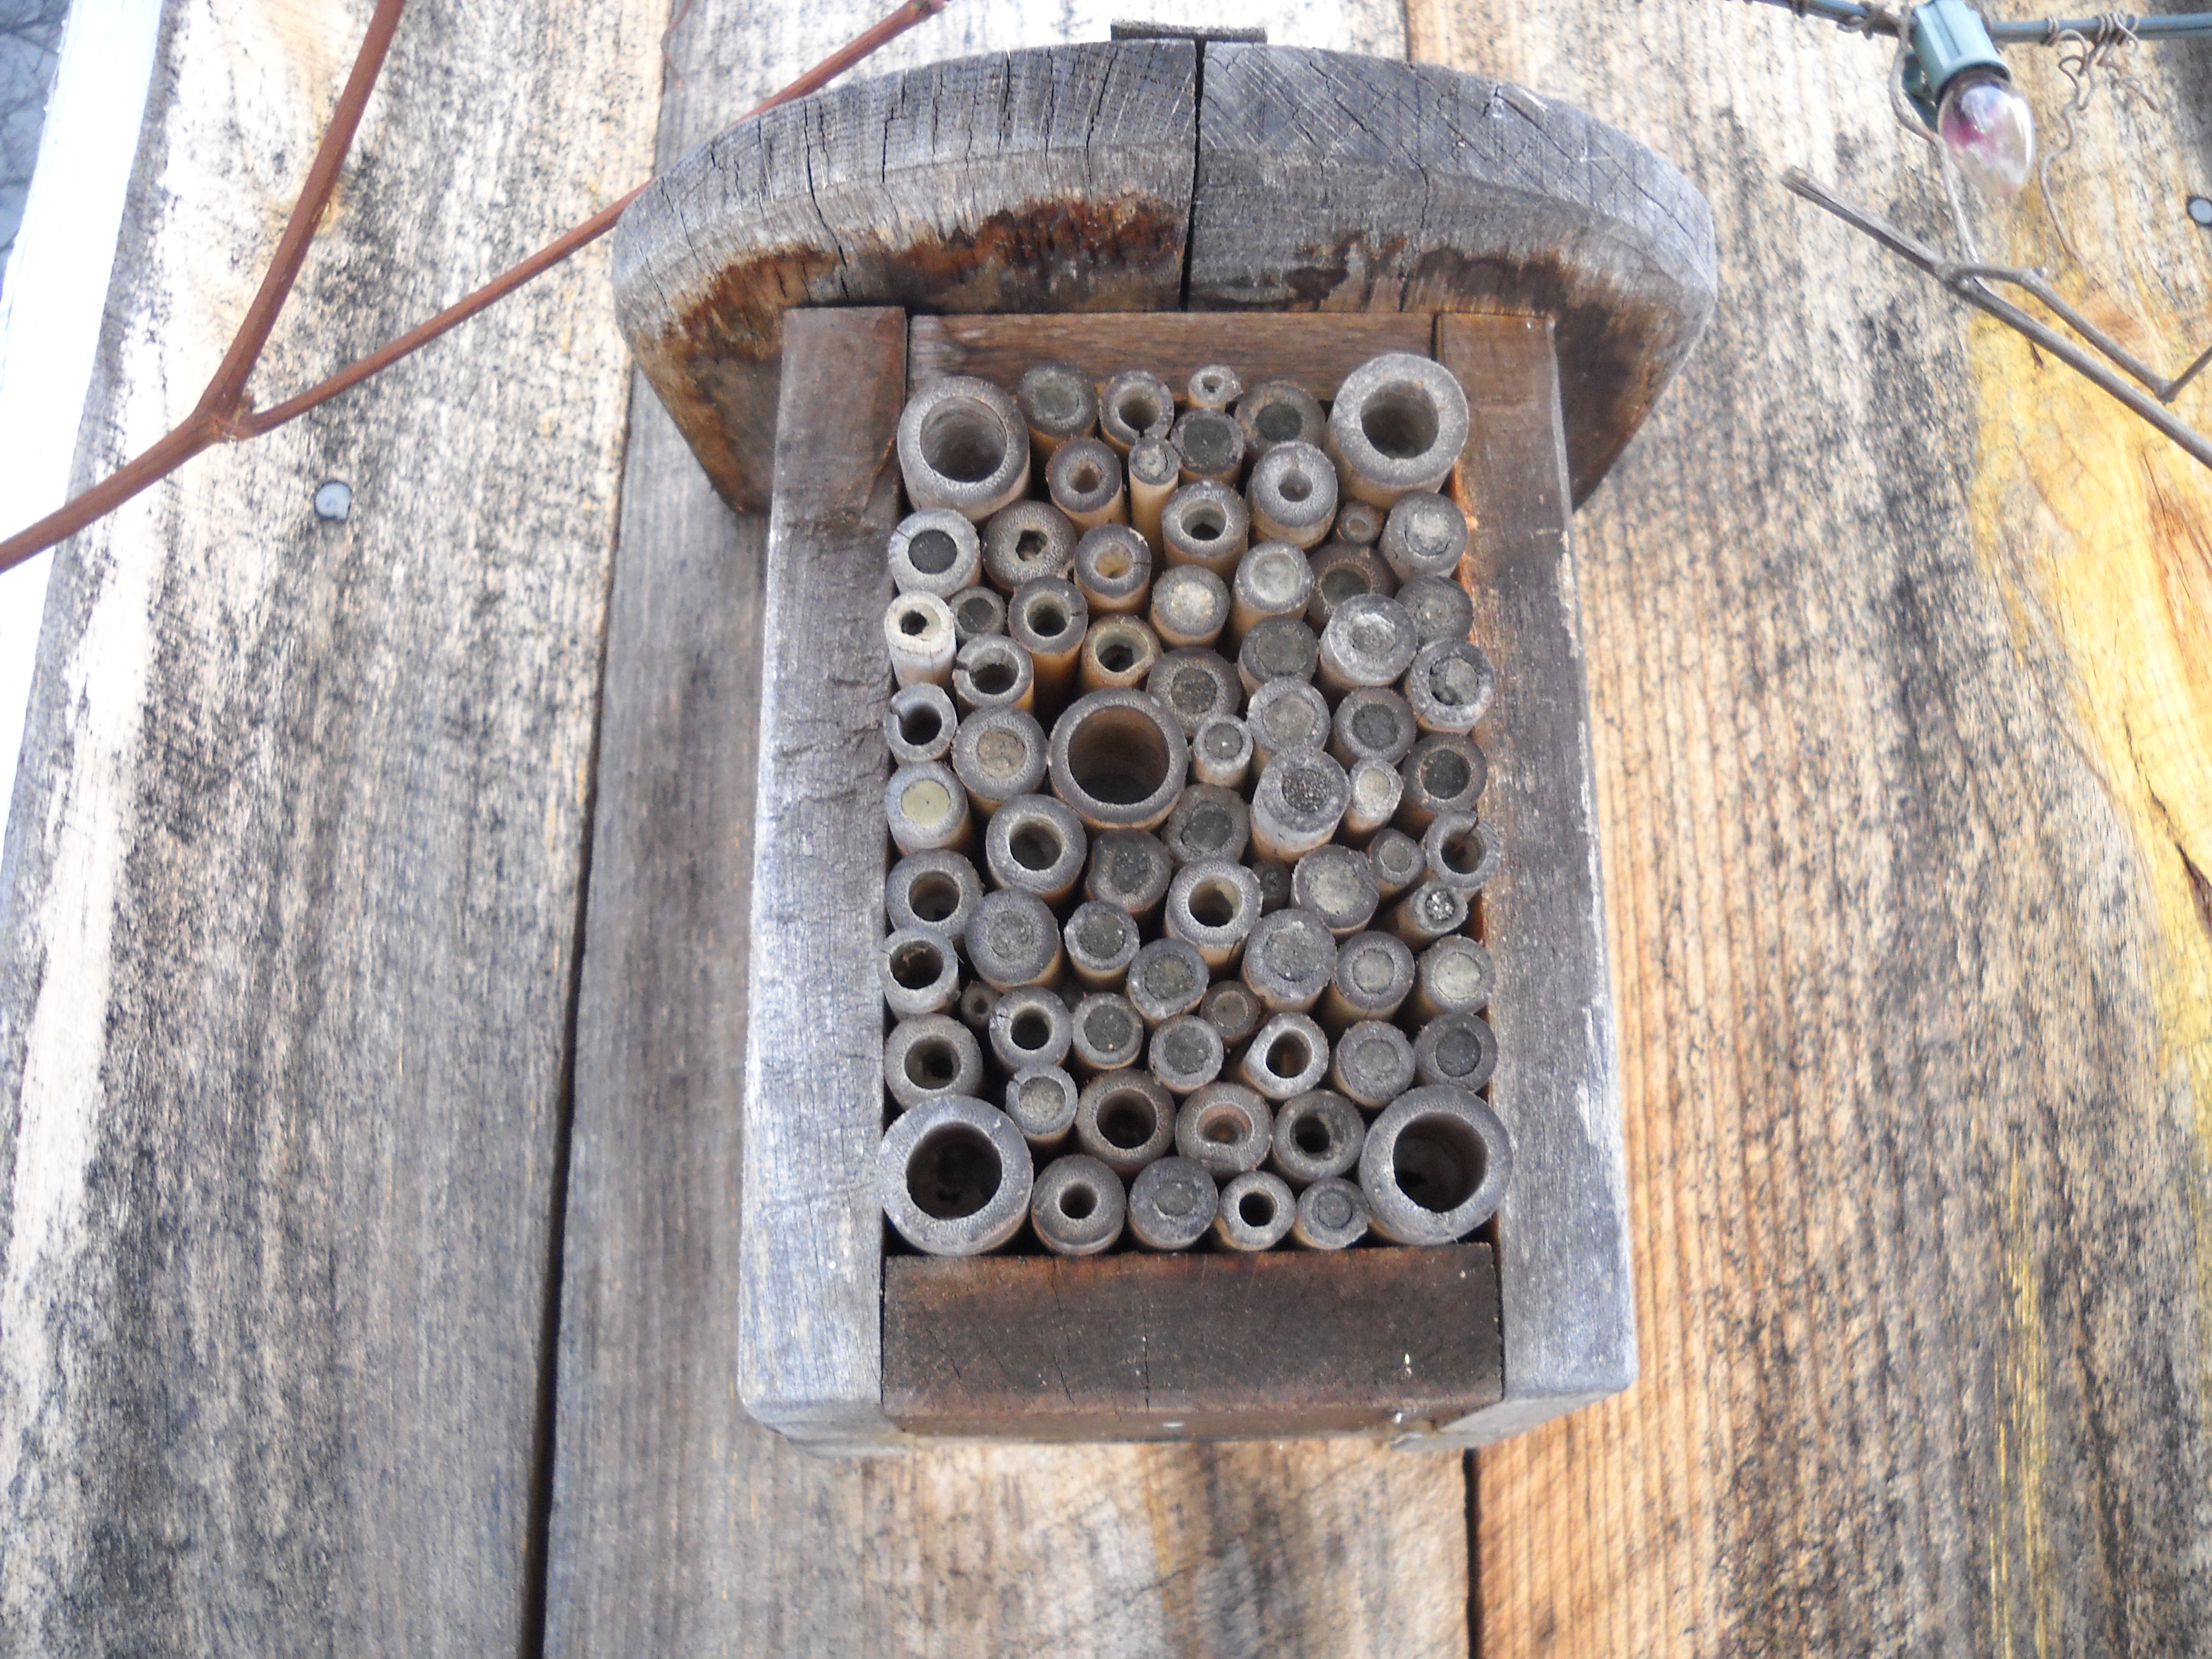
Solitary Bee Nesting Box
Native pollinators include about 4,000 species of bees and wasps. Unlike honeybees, most native pollinators are solitary – they do not live in a hive with other bees and wasps. Jim directed me to the Xerces Society (www. xerces.org) which is a group for“Invertebrate Conservation” in North America.
Native pollinators need three things to be successful: adequate food, generally in the form of native flowers; a suitable place to lay eggs and shelter their brood; and lastly, protection from pesticides.
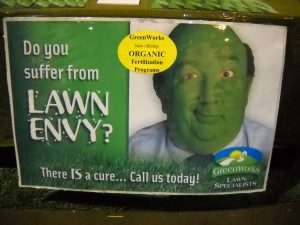
Jim Kennedy does what I do: he avoids cutting down stands of milkweed that grow on his property. Monarch butterflies like them, but they also provide nectar for other pollinators. He encourages dandelions because they are one of the first food sources for bees in the spring. (Tell that to the lawn dudes that want to ‘nuke’ your dandelions. And he waits until late in the fall to cut down goldenrod in his meadows. Yes, a field may look a little messy if you leave stands of goldenrod or milkweed, but who cares what the neighbors think?
Garden flowers can provide food for bees, too. But flowers that are from Europe or the Far East may not attract our native bees the way native flowers do, or feed them as well. Flowers that are good for native pollinators include asters, black-eyed Susans, elderberries, Joe Pye weed, purple coneflowers, salvias, sedums and willows.
This is a time of year when you could build some nesting sites for native solitary bees. I have a simple nesting box on the side of my barn, and I occasionally see little bees or wasps coming and going in summer. It looks like a bird house, but the front side is open and it is filled with 6-inch lengths of bamboo of different diameters stacked up from wall to wall and top to bottom. Each piece of bamboo is open on the end facing out, and closed off at the other end. Here is how to make one:
What you are trying to create is an open-faced box with a slanted roof. I recommend using“five quarter” cedar because it is a full inch thick, and less likely to split when you nail or screw the box together. You should probably pre-drill your holes before screwing the pieces together. The opening of the box should be 4 inches by 6 inches, and the side pieces need to be cut on a slant (from back to front) to create a sloping roof when you put the top on (water will drip off the front, so create an overhang). The bamboo (or even dry stems of Japanese knotweed) should be stacked into the little building you have created, filling it up completely. Opening diameters should range from 1/8” to 3/8”.
Another way to create a nesting site for native pollinators is to use a 6-inch diameter block of wood that is 12-18 inches long and drill it full of holes ranging in diameter from 1/8 inch to 3/8 inch. Space the holes about ¾ inches apart in rows. For holes up to ¼ of an inch, the holes can be 3-4 inches deep; for those ¼ inch or larger, 5-6 deep inches is recommended. Hang this – or your bee box – on your barn or in a tree with the drilled holes facing east to get morning sun.
The majority of native bees actually nest in the ground. Jim Kennedy leaves bare soil around his pond to make it easy for the bees to find good nesting sites. And most bees, yellow jackets excepted, have no interest in stinging you. Yellow jackets can be aggressive, but the nests do not survive the winter, so when I get one near my garden, I just avoid it and the next year it is gone.
I do not use pesticides, but be informed that if you do, you can be killing bees along with the pests. The neonicotinoids are a class of chemicals that are called “systemic poisons”. That means that they are absorbed by the plants, and the chemical is present throughout the plant, including the pollen and nectar, so it will kill bees that feed on them. So your Oriental lilies, if sprayed to keep the lily leaf beetles at bay, can do a lot of damage. Some trade names of systemic pesticides include Rose Defense, Marathon, Merit and Bayer Advanced – and lots more. Any pesticide can kill beneficial insects by drift or overspray.
It will be awhile before we see bees, but it is good to think about them while it is still cold and snowy.
Henry Homeyer has a new book, a fantasy-adventure chapter book for kids. It is Wobar and the Quest for the Magic Calumet and is about a boy and a cougar. His website is www.henryhomeyer.com.
Cut Flowers
Posted on Wednesday, February 13, 2013 · Leave a Comment
Conventional wisdom has it that most cut flowers come from Central or South America, many grown using underpaid, poorly treated laborers and toxic chemicals that are banned in the United States. I decided to look into the cut flower industry, and started by reading Amy Stewart’s book, Flower Confidential. It’s a good read and very informative. I also spoke to the head of the Sun Valley Group, the number one producer of cut flowers in America.
Unlike consumers in Europe, Americans apparently don’t really care where their cut flowers were grown – or how. We care about how they look, how long they last in a vase, but mostly we care about the cost. Overall, we are cheap when it comes to buying flowers. We may pay extra for organic coffee or fair trade bananas, but flowers? Nope. We just don’t seem to care.
I spoke to retired florist Lynn Schad, who told me that when she prepared roses for bouquets she sensed that she was being exposed to toxins, and worried about it. There was nothing she could prove, but the way her hands and breathing felt after handling roses told her that there were chemicals on the roses. Strong chemicals.
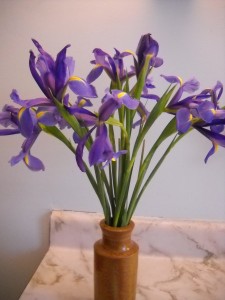
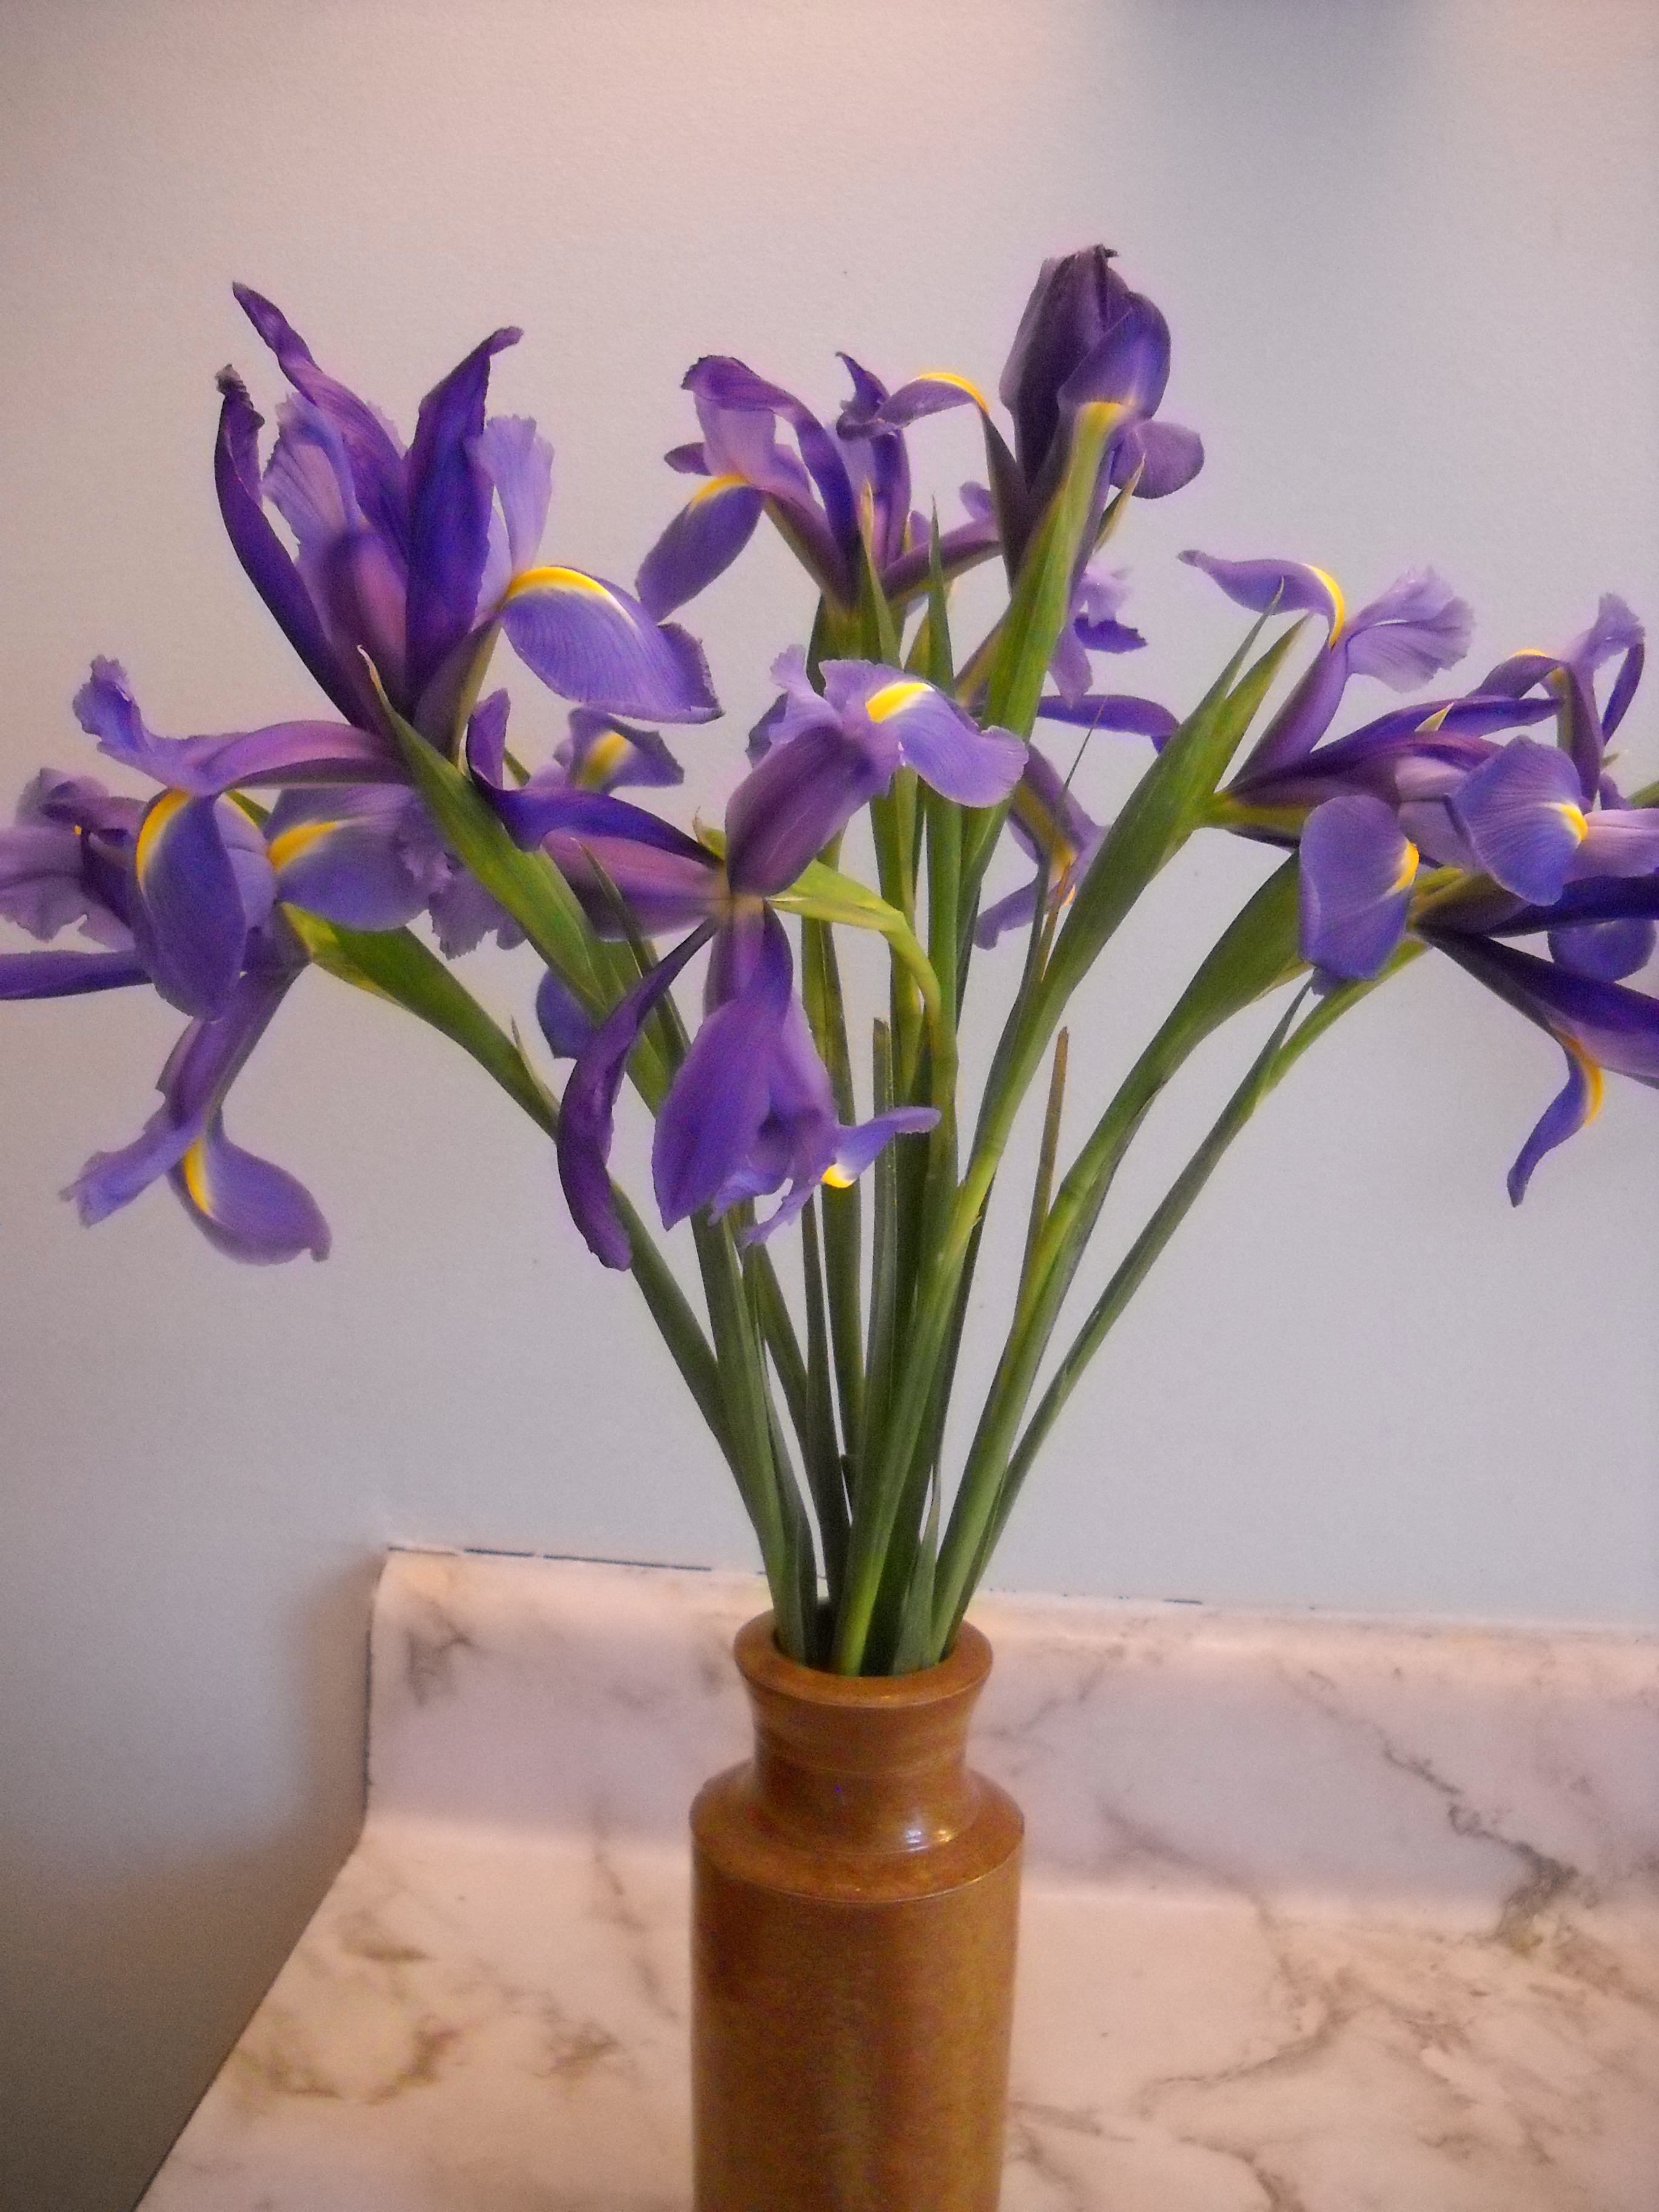
Iris After 8 Days
Flower Confidential confirmed Lynn’s perceptions. According to the book, more than 90% of roses sold in America are grown in Ecuador or Columbia and most are dipped in fungicide, top to bottom, before they are shipped. If a fungus shows up on a rose during inspection in Miami, the entire shipment must be fumigated, destroyed, or returned to the producer. All options are costly.
But not all flowers arrive with their own coating of toxic chemicals. The florist at my local food coop is making a real effort to buy local flowers – even now, in the dead of winter. Some local growers are using greenhouses to produce lilies, tulips and other flowers, and some of them use all organic or low-toxin methods.
I phoned Lane DeVries, the President of Sun Valley Group which is based in California. They grow at least 100 million stems of cut flowers every year including iris, lilies, tulips, freesias, Gerbera daisies and others. Mr. Devries explained that his farms have taken steps to produce flowers that are grown using sustainable methods, that they use the least toxic methods to control insect and fungal problems, and that workers are being treated fairly. He believes that consumers, given a choice, will buy American flowers – and get a better product.
Mr. Devries told me that his growers are always looking for ways to reduce chemical use. They steam the soil in their greenhouses to kill fungi instead of using fungicides, for example. They recently started introducing garlic juice in the drip irrigation system in certain greenhouses to repel thrips and spider mites. Using smaller quantities of chemicals saves money, and using water more efficiently is not only ecologically sound, it’s also a cost saver.
A few other bit of information from Flower Confidential that may interest you: most commercially grown flowers have no scent, roses in particular. Breeders have created flowers that are good looking, have a long vase life and travel well – and in the process most have lost that special gift created to attract the bees (and make our hearts throb): a tantalizing scent.
Gerbera daisies, I learned, should be kept in just an inch or two of water. They absorb too much water through their stems if kept in more, and that shortens their vase life. And the book says that you can extend vase life of your roses by 2 days if you submerse them in a bathtub of cold water for 3 hours before putting them in a vase (though that may introduce chemicals into your next bath, I fear).
You probably know to cut an inch off the stems when you put them in a vase. But remember to keep doing this – regularly changing the water and cutting off a bit more stem prolongs vase life. Bacteria grow in vases, clogging stems – particularly if you don’t strip off lower leaves. Flower Confidential confirms that those packets of powder given with your flowers do help to keep flowers fresh. But, the book explains, so will a pinch of sugar and a drop of bleach.
If some flowers in a bouquet get wilted, remove them as they give off ethylene gas that will make other flowers age more quickly. And always keep flowers away from heat (the wood stove and the top of the TV), out of direct sunshine and far from any fresh apples – they emit ethylene, too.
So if you want eco-friendly flowers, ask your local florist for them. Ask for local flowers. Ask for American grown flowers – they are restricted in chemical use more than South American growers. Don’t just buy by price – low prices often mean low quality. I got some Sun Valley iris that lasted over a week – in part because they were a variety grown for long vase life, but also because they only traveled from California, not from overseas.
Lastly, think outside the box. Don’t just buy roses for special occasions. Go see a real florist and ask questions about other nice flowers. You’ll be pleased with what you can get and how long they last.
Visit Henry’s new website, www.henryhomeyer.com to learn about his new kid’s book, Wobar and the Quest for the Magic Calumet or his gardening web site, www.Gardening-Guy.com.
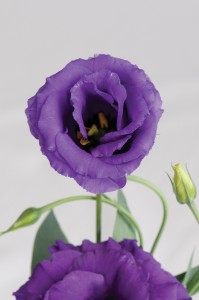
Starting Lisanthus And Other Flowers
Posted on Wednesday, February 6, 2013 · Leave a Comment
Here it is early February, and many of us are itching to start some seedlings. Well don’t. Or at least don’t start your tomatoes – they only require 6 to 8 weeks and would be ready to go in the soil by April if you started them now. That’s way too early. But if you really want to get your fingers dirty and are willing to baby along plants for 4 months, there are things you can start.
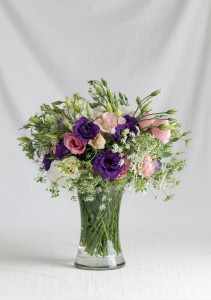
Lisianthus Cinderella Echo
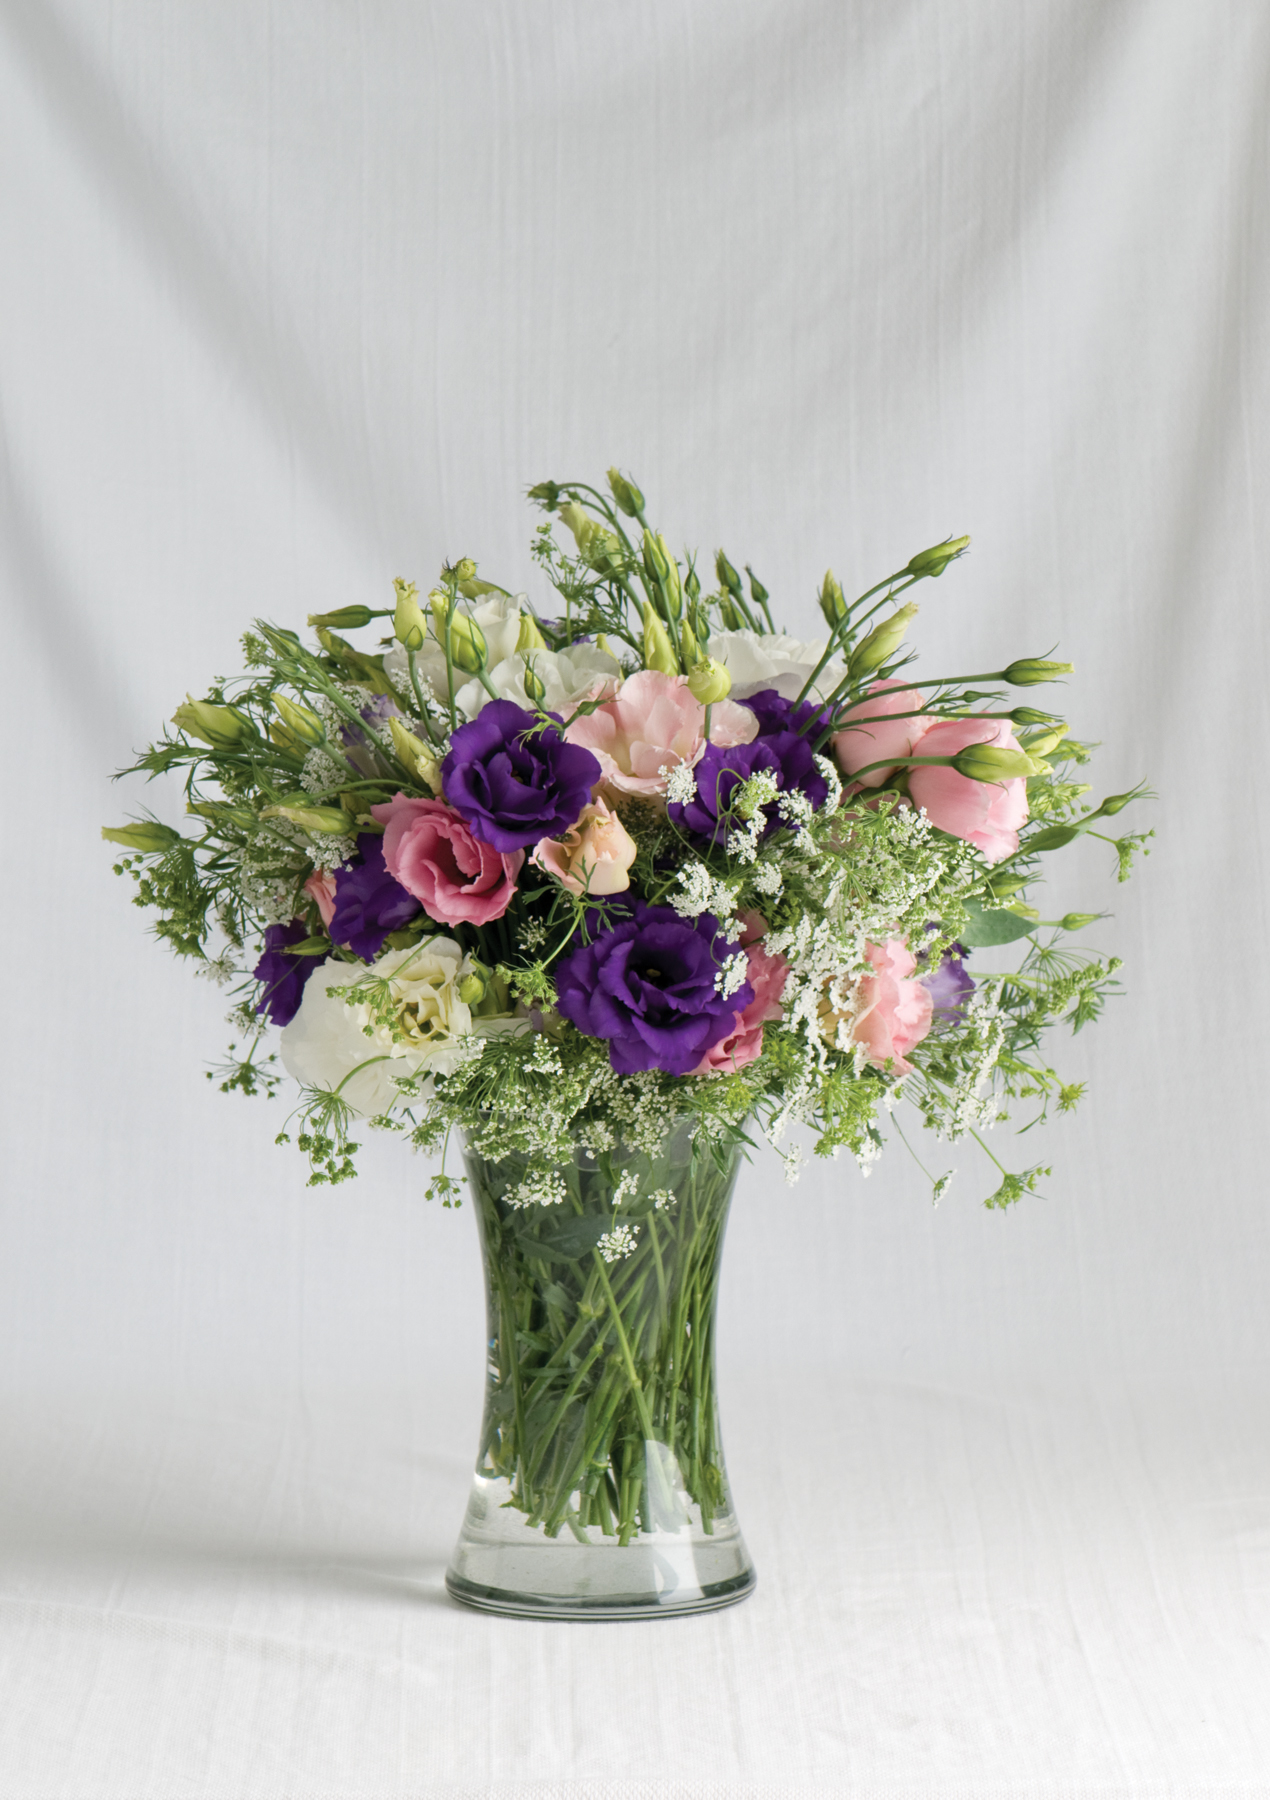
Many years ago I commented to a professional grower that I loved lisianthus, a flower that is often sold by florists and occasionally sold by nurseries selling starts of annual flowers. In addition to looking gorgeous in an arrangement, it lasts forever in a vase. I’ve had them look good for 3 weeks or more. But she told me they were fussy. Difficult to get started. She told me I wouldn’t be able to start them myself, but should just buy seedlings (from her, presumably). That sounded like a challenge to me, so I decided to start some.
I did a little research and discovered that there are at least three sizes, or heights of lisianthus. I bought a packet of seeds of each. And they come in 3 colors: white, pink and purple/lavender. I learned that germination is slow: it takes 10 – 18 days at a constant temperature of 72 degrees. Like any seedling, they require good light, not just the sun of a south-facing window. I set up a light stand with fluorescent lights and set the thermostat in the bathroom where they were at 72 degrees. These babies were gonna be happy!
My lisianthus germinated in 18 days. Oh boy! I had a hundred or more seedlings! I adjusted the lights so they were just 6-8 inches above their tiny leaves. Every day I checked them, watered a little if need be, made encouraging murmurs. But nothing much happened. Those tiny green leaves just sat there, glaring at me. They refused to grow. One week, nothing. Two weeks, no change. And on and on. After several weeks they were the size of week-old radish leaves.
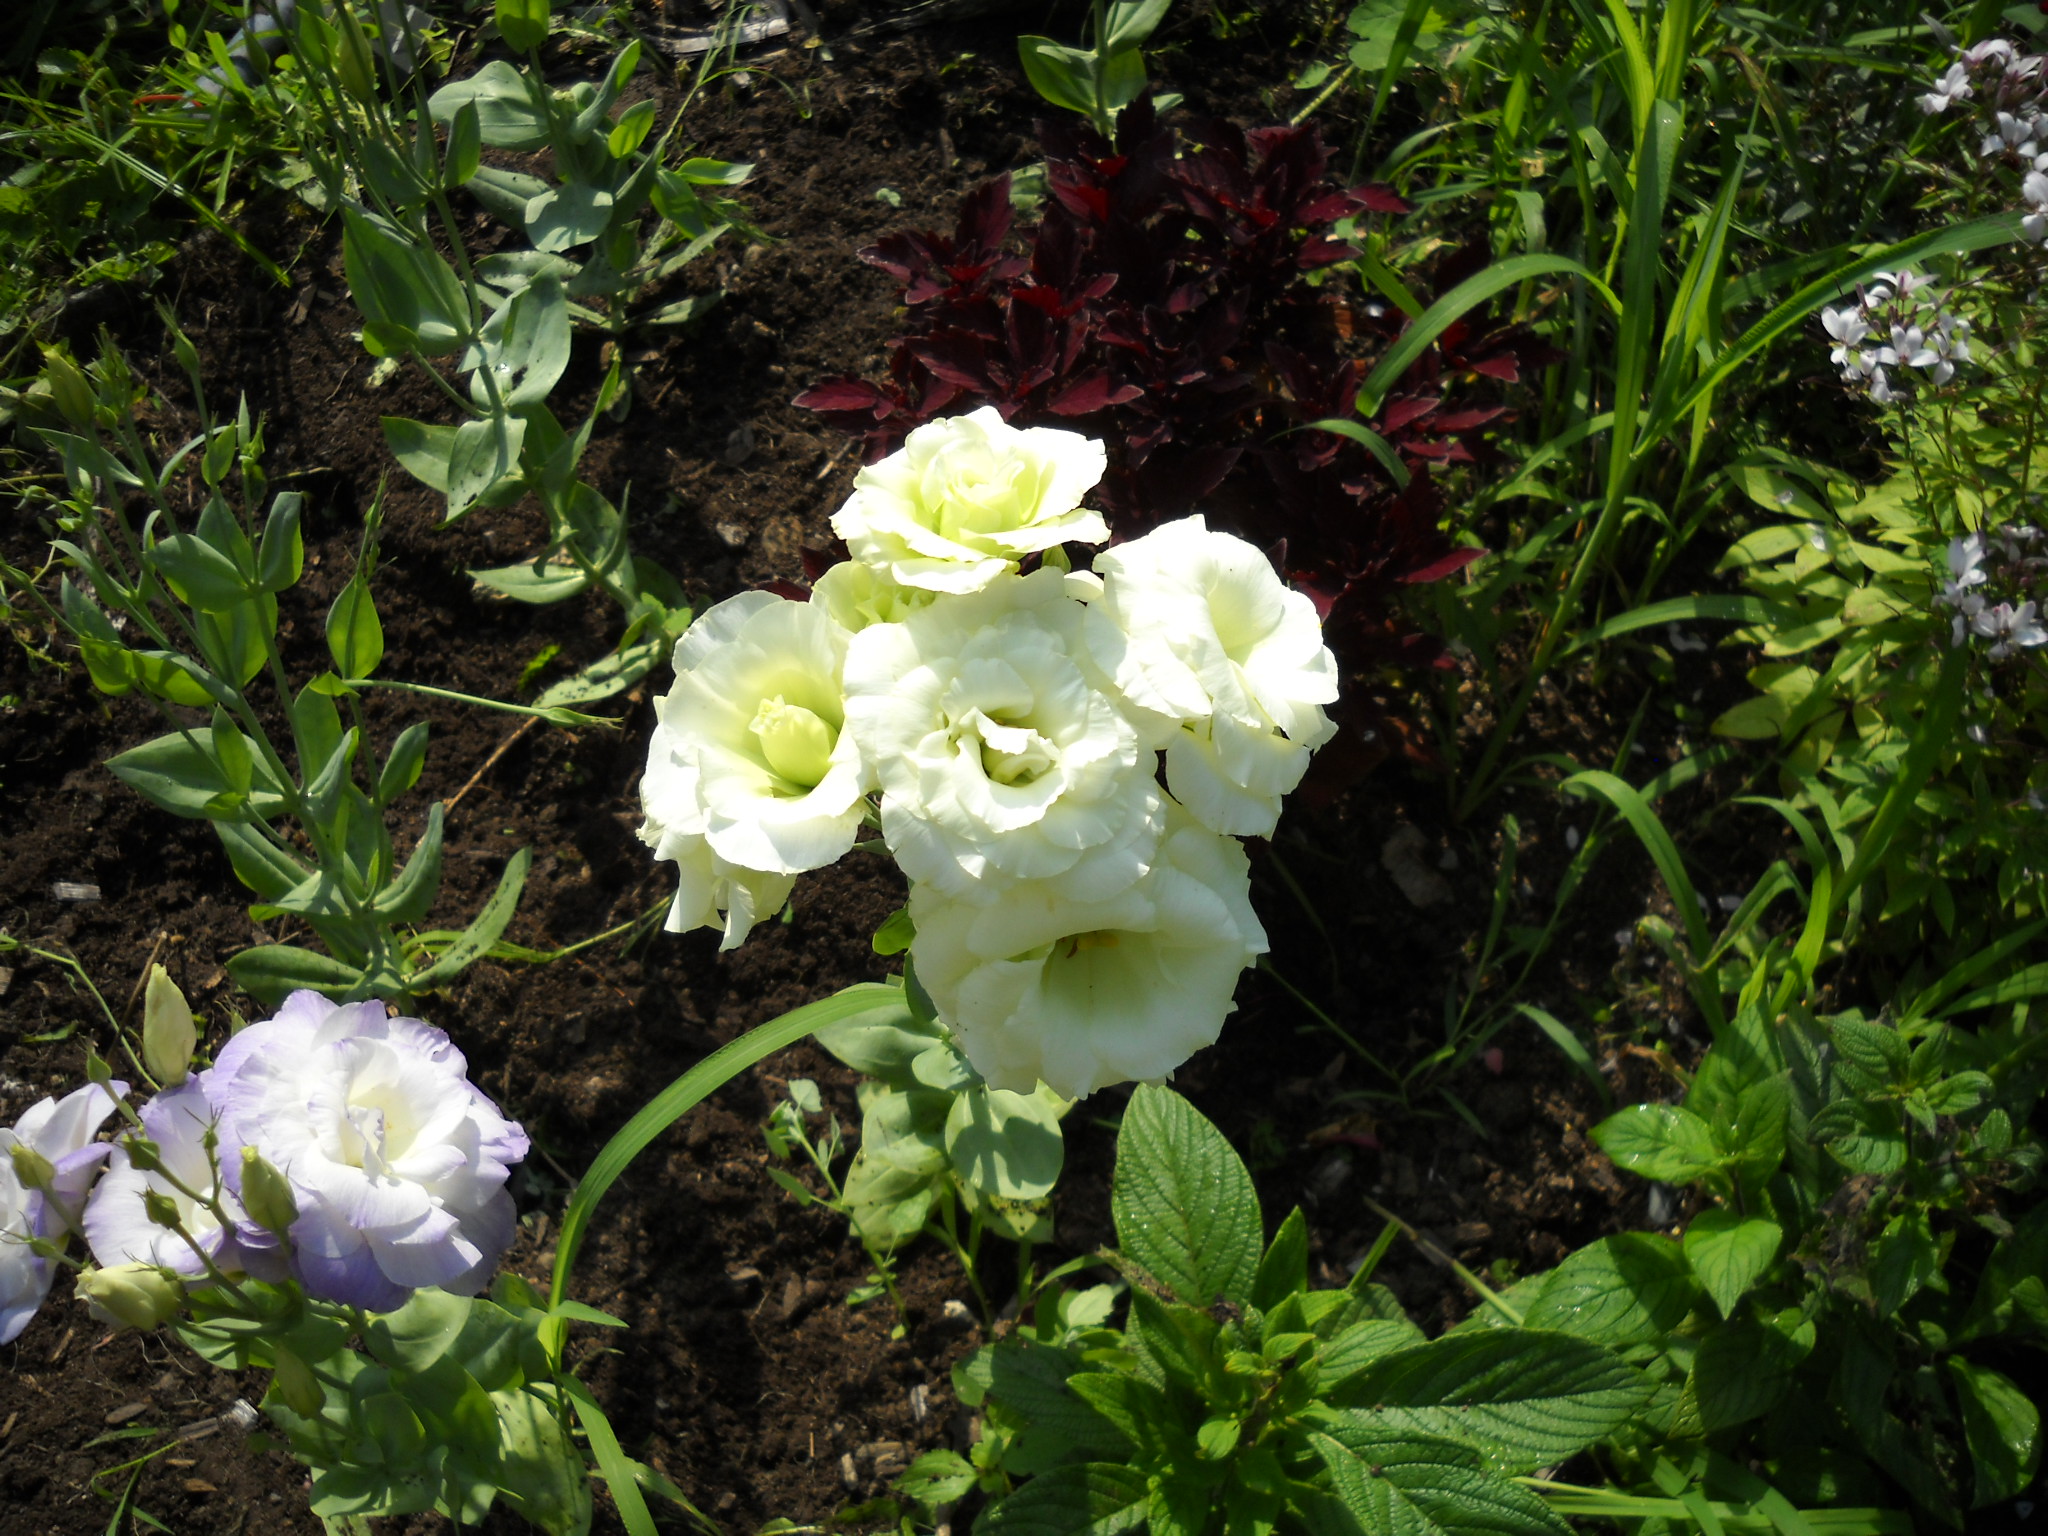
Eventually they started to grow, and when they went outside in full sun and got into the soil they took off like foxes in front of
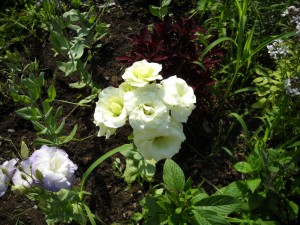
Lisianthus
hounds. They grew and bloomed in prodigious quantities. When frost came I dug up big clumps of them and brought them into the house as I couldn’t bear to see them succumb to the cold. In the house they finished up their life cycle after Halloween, if memory serves me well.
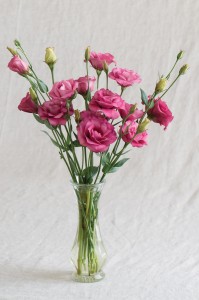
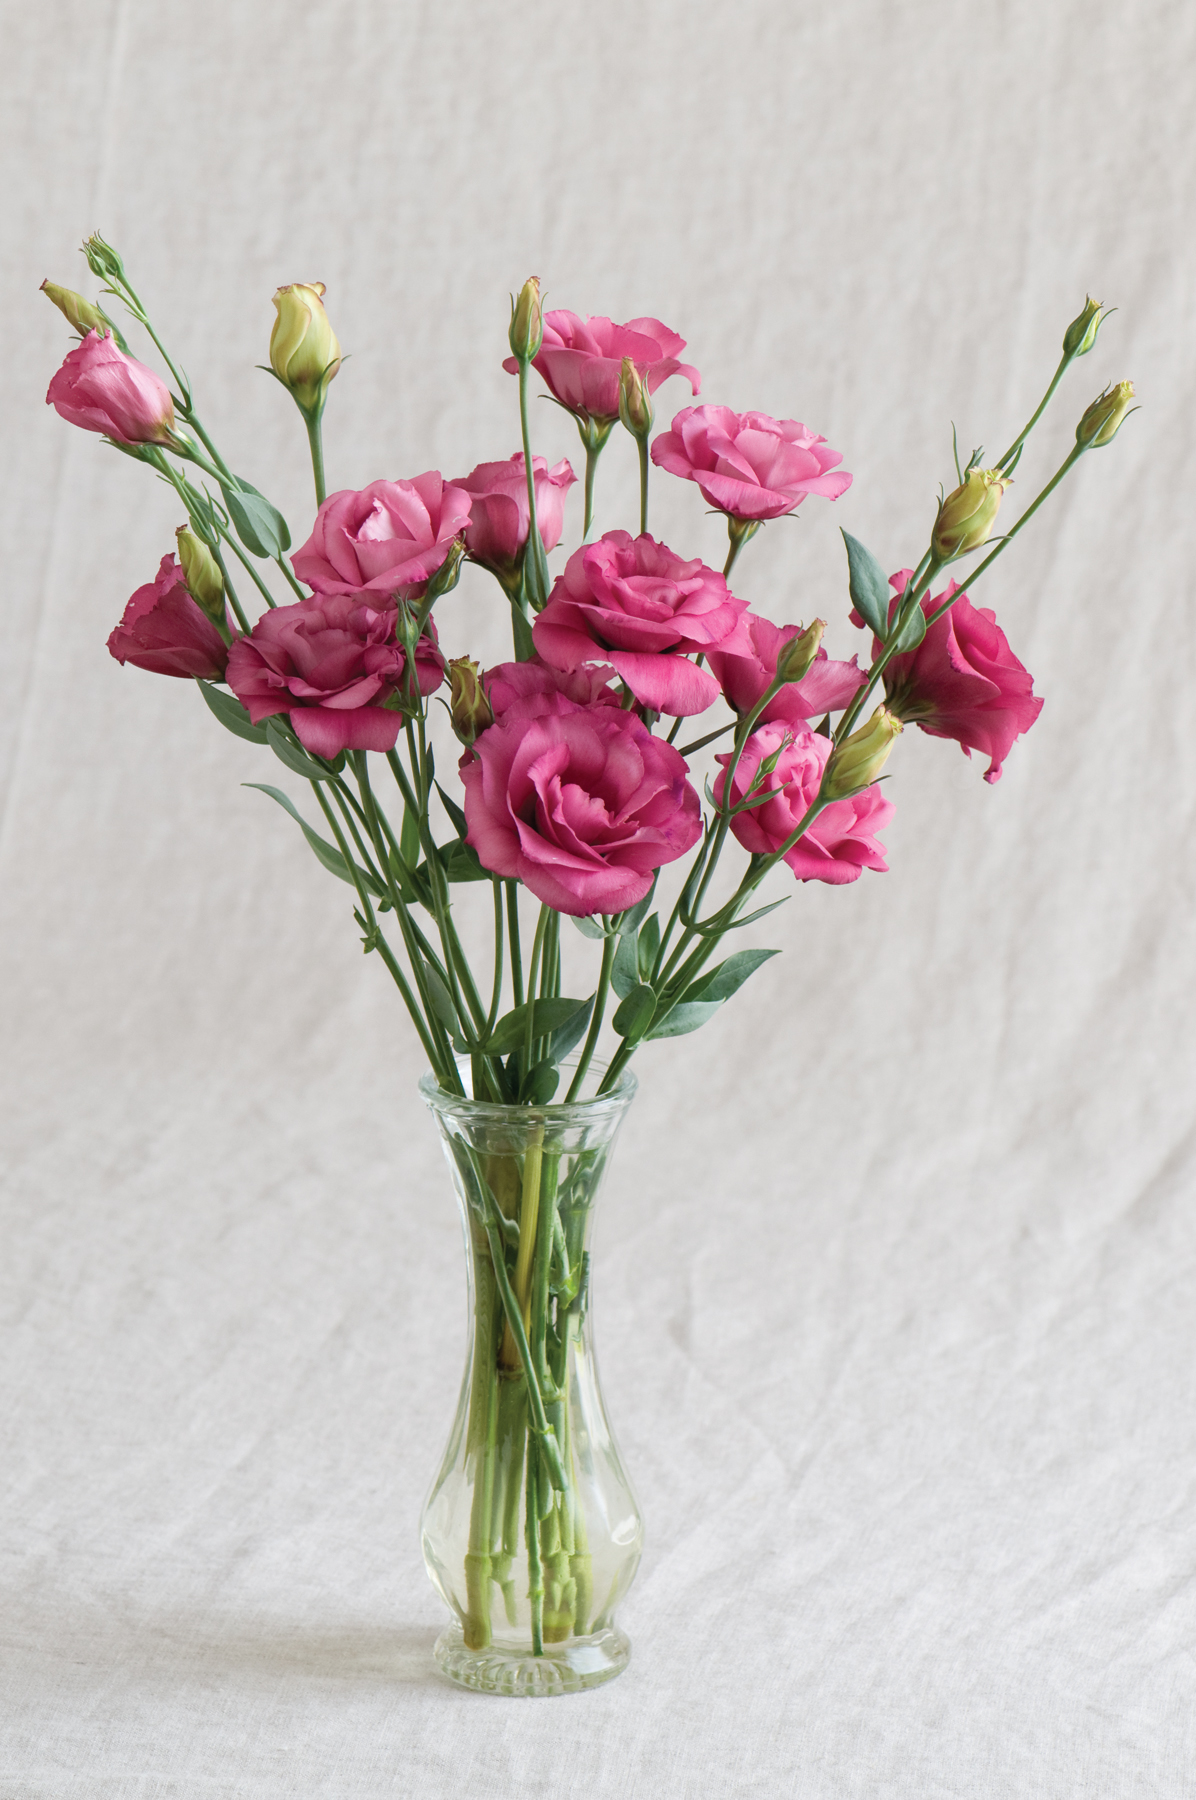
Lisianthus Arena Red
But most flowers are easier to start than lisianthus. The advantage to starting by seed is simple: a $4 package of seeds will provide dozens, even hundreds of plants. If you want to overwhelm guests at an August event with bushels of blossoms, you can. And many flowers you can start later, right in the ground. Some flowers that are relatively easy to start outdoors by seed include: bachelor buttons, calendula, California poppies, cosmos, marigolds, morning glories, nasturtiums, scarlet runner beans, sunflowers and zinnias.
On the other hand, starting flowers indoors means getting blossoms earlier. Most seed catalogs are primarily interested in selling you the seeds, so they tell you all about a flower’s wonderful characteristics or history – but not necessarily much about germination time, or how many weeks from seed to flower. One exception to that is Johnny’s Select Seeds (www.johnnyseeds.com or 877-564-6697). They sell to commercial growers and home gardeners and really tell you everything you need to know.
If you are looking for truly rare and wonderful seeds to start, you might want to check out a British company, Chiltern Seeds (www.chilternseeds.co.uk) . The late Tasha Tudor introduced me to their catalog years ago when I visited her at her home in southern Vermont. Chiltern Seeds is the exact opposite of Johnny’s Seeds: they provide no growing information at all, not even hardiness zones for perennials. Of course most of the United Kingdom has a mild climate so cold hardiness is not something they focus on.
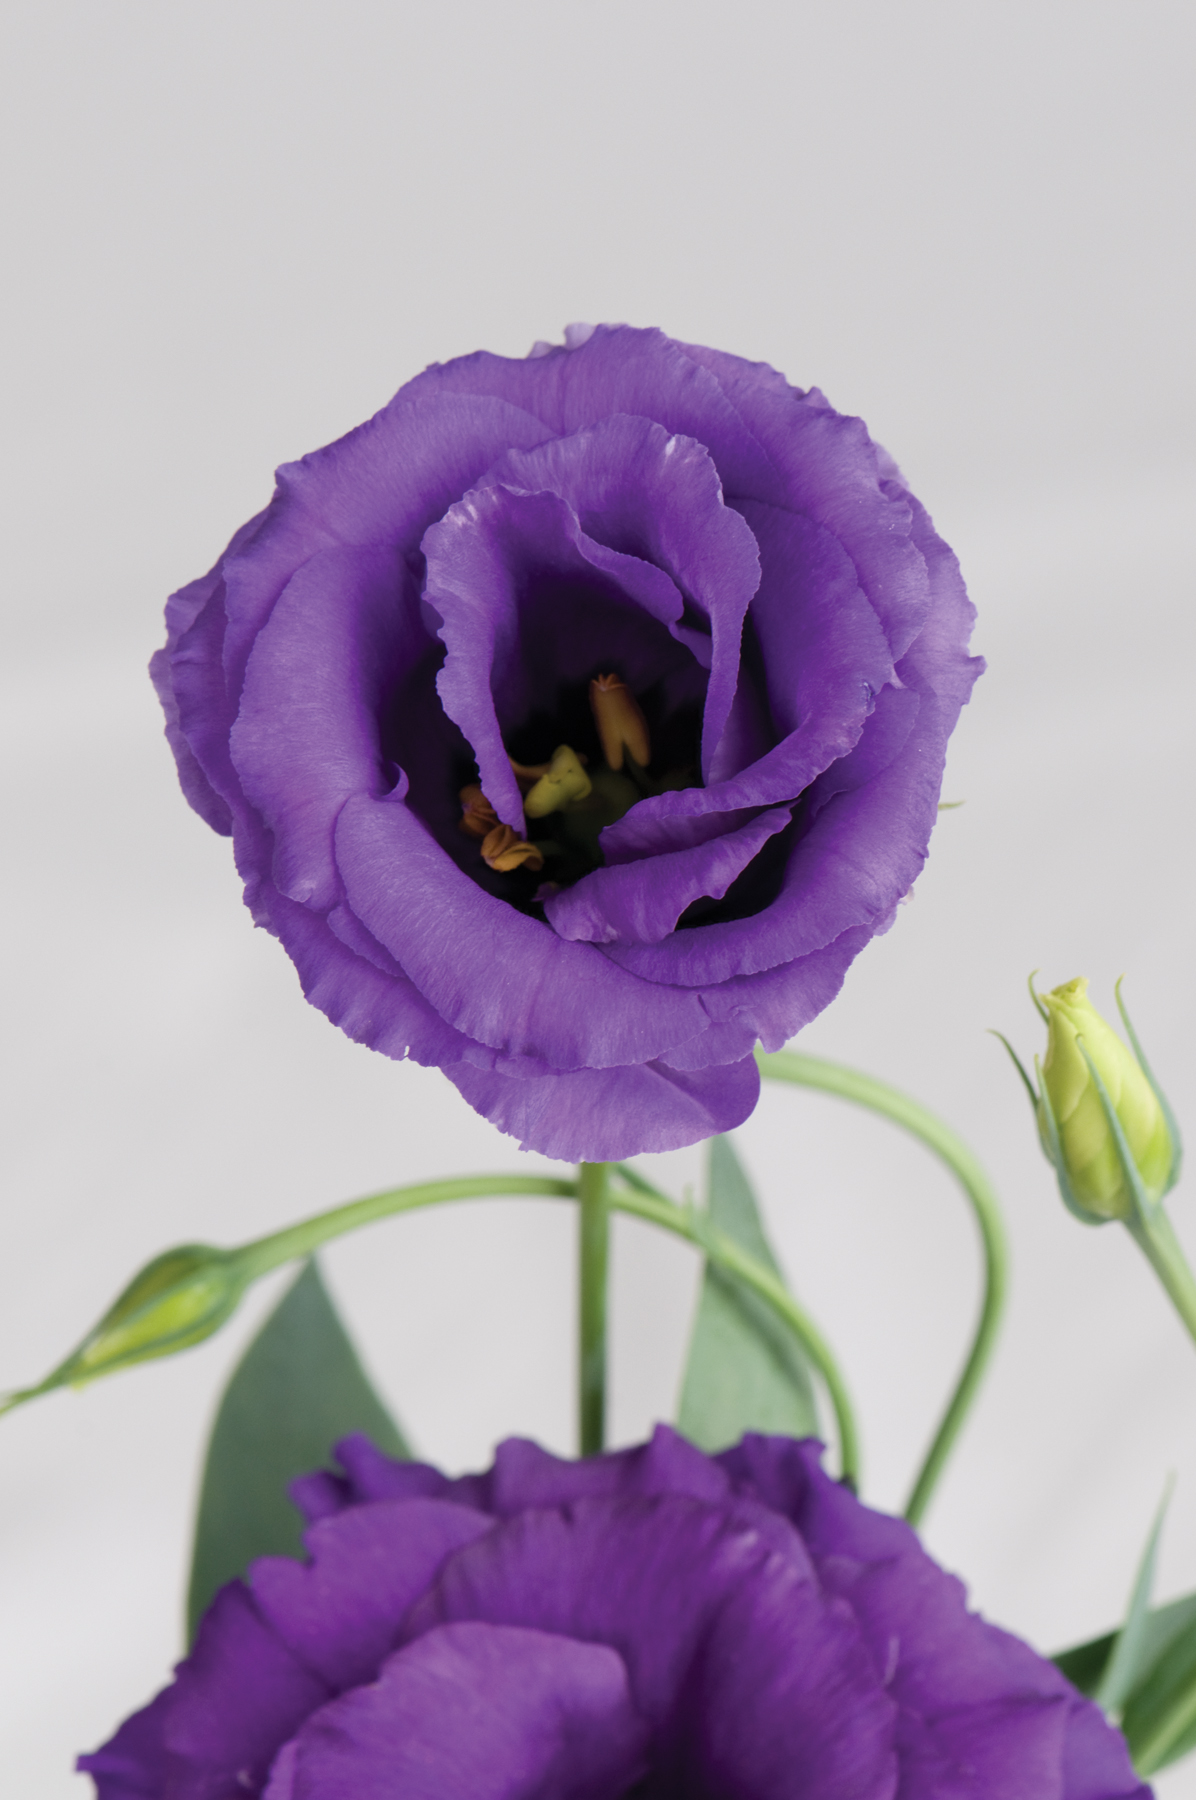
Lisianthus Echo Blue
What I like about the Chiltern catalog is that it has species of perennial flowers that I can’t find in even a most extensive nursery collection. Now it may be that I do not find Dicentra scandens for sale in New Hampshire or Vermont because it is a perennial that will not grow here. It’s a relative of our bleeding hearts but is a yellow (or pink) climber that it comes from the Himalayas – so it just might. My copy of the plant encyclopedia Botanica lists it as hardy to Zone 4 (minus 30) but I went on line and most people selling seed say it is only hardy to Zone 6 (minus 10 degrees). Either way, germination can take months, even a year, so I shall not buy seeds for it.
My Johnny’s Seeds catalog tells me to plant lisianthus 12-13 weeks before lost frost, so I still have time to order seeds. They have a tall one that is supposed to be dark red that looks awfully good. But I’d better get started soon. I know they’re fussy.
Henry Homeyer lives and gardens in Cornish Flat, NH. His Web site is www.henryhomeyer.com. E-mail him at henry.homeyer@comcast.net.
The Flower Shows
Posted on Wednesday, January 30, 2013 · Leave a Comment
The old timers say that on Groundhog’s Day you should still have half your woodpile left. I say you should have ordered your seeds and made plans to attend at least one spring flower show. I’m still working on my seed orders, but would like to share the details of the flower shows with you now so you can make plans, too.
The first each year on the list of shows is the New Hampshire Orchid Society show in early February, this year February 8-10. It is just orchids. Orchids of all kinds, and paraphernalia for orchid growers. Adults are $10, seniors $6, and you can get a $2 off coupon on their web site ((www.nhorchids.org)). It’s at the Radisson Hotel in Nashua.
Rhode Island Show 2012
The first big shows are in Providence, RI and Hartford, CT on the weekend of February 21-24. I attended the Rhode Island show these last 2 years, and loved it! It has many of the attractions of the Boston show, but not the crowds and crazy drivers of Boston. It has a good menu of speakers, an excellent variety of vendors and plenty of floral displays. I also love the sand sculptors that create magical sand castles – almost life size.
The Providence show is held in the Rhode Island Convention in downtown Providence. Admission is$19 for adults, but you can save $2 by buying in advance. There is also a food and wine show featuring well-known chefs from 1-5 daily; if you intend to attend that, the price for both is $30. Info: www.flowershow.com.
The Connecticut Flower and Garden Show will be at the Connecticut Convention Center in Hartford, February 21-24. The theme this year is “Love in Bloom” and boasts 300 booths and 80 hours of seminars. I went on a Saturday last year, and it was very busy – almost too busy, for me. But there is a lot to see. Admission is $16 for adults and, please note, they only accept cash for tickets at the door. Info: www.ctflowershow.com.
Rhode Island Snow 2012
One of my favorites is the biennial Vermont Flower Show, held this year on March 1-3 at the Champlain Valley Expo Center in Essex Junction, Vermont. I love that the members of the Vermont Nursery and Landscape Association all work together to create special exhibits – rather than competing against each other. This year’s theme is “The Road Not Taken” after the Frost poem. Parking is free and easy, crowds are reasonable, there is plenty to see, and there will be a nice variety of speakers. I’ll be presenting Friday afternoon and Saturday morning. Admission is $15, only $3 for kids 3-17 and $12 for seniors over 60.
The Vermont Show is a family-friendly show: There is a nice family activity room where they will have performers as well as art supplies and games. The Vermont Federated Garden Clubs Association encourages children to enter a container-grown plant with interesting foliage or flowers. And, for kids of all ages there is a great display of model trains. This is the smallest of the shows, but full of flowers and flowering shrubs. There will be an excellent show of stonework by Dan Snow, a dry stonewall expert. Info: http://greenworksvermont.org/

Rhode Island Show 2012
The Philadelphia Show is the opposite of the Vermont Show: big, busy, and brassy. It has been in existence since 1829, and hosts over 250,000 visitors each year. It will be held March 2-10 at the Pennsylvania Convention Center. Tickets are (ouch!) $27 – but worth it. If you’re a serious gardener, you must go at least once in your life! Info, http://theflowershow.com/.
The Portland, Maine Flower Show is March 7 -10 at the Portland Company Complex on Fore St, downtown. Tickets cost $13. Info: http://portlandcompany.com.
Boston is another big show with lots to offer. Held each year at the Seaport World Trade Center, it is March 13-17. Lots of displays, lots of speakers. Reading the list of talks, I loved this one: “Jaw-Dropping, Traffic-Stopping, Get-Your-Neighbors-Talking Container Gardens” by Deborah Trickett. That alone is almost enough to get me there! There are lectures by plenty of well known garden experts to choose from. Tickets are $20. Info: http://www.bostonflowershow.com.
After Boston comes The Seacoast Home and Garden Show in Durham, NH on March 23-24. A nice small show. Tickets are only $8. Info: www.NewEnglandExpos.com.
The last show of the season is Bangor, Maine April 5 to 7 in the Bangor Auditorium. Their website www.bangorgardenshow.com
We can’t change our weather, but we can change our attitudes about winter – by going to the garden shows. I recommend it. Smell the daffodils, go to a lecture, buy something in bloom. You’ll feel better.
You can reach Henry at PO Box 364, Cornish Flat, NH 03746 or henry.homeyer@comcast.net. His websites are www.gardening-guy.com and www.henryhomeyer.com.
Weeds … Alien Invaders or Plants Just Looking for a New Home?
Posted on Wednesday, January 23, 2013 · Leave a Comment
It’s winter, and I have time to get caught up on my reading. When I was in Wales last fall I made a book-lovers pilgrimage to Hay-on-Wye. This is a town of 1,500 to 2,000 souls with at least 28 independent bookstores, mostly stores selling used books. That’s about a bookstore for every 50 people living there! Needless to say, it attracts lots of booklovers, especially in June when it has a book festival.
I spent 2 days poking around bookshops looking for weird and wonderful books and found plenty. Among them was a book on weeds, Weeds: The Story of Outlaw Plants by Richard Mabey (Profile books, 2010).
The author is a British nature writer with an interest in plants, especially weeds. Weeds, he explains, are opportunists. Cities are full of weeds growing in the most unlikely places: between the cracks of the sidewalks or walls, in abandoned lots – and once a weed seed even germinated in someone’s eye! Wherever they find a niche, they grow. Many can produce large numbers of seeds or are able to spread by roots that wander; most have arrived from distant countries.
We gardeners know, as he points out, that weeds move in when we disturb the soil – to plant a tomato or to create a flower garden. But a weed, according to Mabey, is just a plant growing where we want to grow something else, or nothing at all. I liked his quote from Ralph Waldo Emerson that a weed is “a plant whose virtues have not yet been discovered”.
In late fall I got an email from a friend asking me to identify a weed that had been troublesome in his cold frame. “I attach an image, as I do not even know the name of this curse to the garden world, this Medusa which has been defying eradication. Can you put a name to this curse with an idea how to best cope with it?”
I told him that his bane was chickweed (Stellaria media), and that it is edible – some people use it like lettuce or steam it like spinach. Once he knew that, he changed his attitude 180 degrees. Which is lucky, as he did some research and found that chickweed can bloom 5 times per year with each plant producing up to 20,000 seeds that can remain viable in the ground up to 40 years. He emailed that, “I guess I might as well enjoy the fact that it is edible and is most profuse at a time of the year (early December) when there is not much else edible growing vibrantly.”
But back to Richard Mabey’s book on weeds. I learned that Kentucky bluegrass is not originally from Kentucky, but arrived from Europe where it is a not-very-prominent meadow grass. But it found different conditions here in the new world, and thrived.
Speaking of lawns, some gardeners, I think, could enjoy life a lot more if they accepted weeds a little more. I’m pretty lax about weeds in my lawn – I don’t remove them unless, like thistles, they can hurt bare feet. If they’re green and can be mowed, they’re okay by me. I like dandelions, I think they’re cheerful. I don’t understand the desire to poison them or dig them out.
In another bit of trivia, I learned that the common burdock (Arctium lappa) inspired a Swiss inventor, George de Mestral, to create velcro. According to Mabey’s book, Mestral came back from a walk with his dog and studied the burrs attached to its fur – and realized that it could be copied in nylon. He patented Velcro in 1951.
Weeds, Mabey pointed out, are highly adaptable. In a relatively few generations they can modify their color, height, or seed size to fit in with agricultural crops – disguising themselves, as it were, to avoid being eliminated. And some are positively vicious. Field bindweed (Convolvulus arvensis), which resembles morning glories, not only monopolizes soil nutrients, it exudes pheromones that inhibit germination of most grain crops. Quack grass (Agopyron repens) produces a toxin that can poison corn.
But many “weeds” invade our spaces and become a part of our acceptable plant palette. The state flower of Vermont is red clover, which is not a native flower, for example. Mabey is all for giving “naturalized” citizenship to those weeds that can be useful to us, like that chickweed mentioned above. There are just a few that he singles out as truly scary.
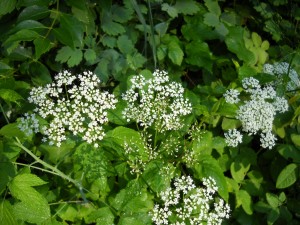
Goutweed
First on the scary list is kudzu, a Japanese vine that has become a real pest down South. Unless/until global warming gets much worse, we don’t have to worry about it here. But we have Japanese knotweed, also known as bamboo. He says an insect predator is being tested in England as a way to control it, but at present there really is no easy way to get rid of it– even for gardeners who are willing to use chemical poisons on it. And he writes about my nemesis, goutweed (Aegopodium podagraria). Ugh! I thought I had beaten it once by digging it all out and replacing 12 inches of soil, but after a few years it came back.
So enjoy your winter, and try not think about the weeds that are just waiting, like us, for spring. Either that, or get your house ready to go on the market if you have goutweed or Japanese knotweed.
Henry Homeyer is the author of a new children’s book, Wobar and the Quest for the Magic Calumet. His web site is www.henryhomeyer.com.
Tulips
Posted on Wednesday, January 16, 2013 · Leave a Comment
Winter is here and our flower gardens are, for the moment, just memories. But potted tulips in reds, purples and yellows are available at florist shops and grocery stores to brighten our spirits and grace our tables. For about $10 you, too, can have a few tulips in a 6-inch pot. If you keep them lightly watered and not too hot, they should last for at least a week.
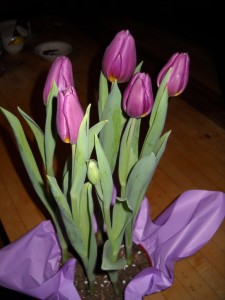
Potted Tulips
On a recent rainy, slushy day I dug out a book on tulips that I’d been given years ago and never read, The Tulip by Anna Pavord. She is an excellent writer, but a bit obsessive when it comes to tulips. She follows the history of tulips in Europe from its origins in Turkey and Iran, describing in detail the kinds of tulips and who grew them. She even mentioned one sultan who had 920 gardeners!
The book continues through the tulip fads of Europe and the well known tulip craze in Holland when certain tulips sold at auction for the equivalent of 10 years income for a tradesman. I love tulips, but I’d certainly never be tempted to bet the ranch on being able to propagate and sell rare tulip bulbs. The Dutch particularly loved striped tulips. The best ones were actually created by a virus that was carried from plant to plant by aphids, causing some (but not all) to mutate.
The book has a nice summary of the kinds of tulips available: there are 15 “divisions” or groups of tulips, including the simple ones akin to the wild varieties originally from Persia or the East. It also has 50 pages of description of the common named varieties. This is truly a book for tulip-obsessive gardeners, and I admit I skipped over long sections of it. At 438 pages it would be a challenge for all but the most avid tulip lover to read in its entirety.
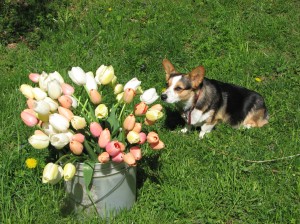
Maureen/Other Tulips & Daphne
As I read through the descriptions of the divisions of tulips, I realized that I have at least tried growing of a few of each kind at some point in the past 30 years. I have settled into growing the tallest, most dramatic ones and treating them as annuals. My favorite is a creamy colored one called ‘Maureen’. I’ve read that it is a tetraploid, meaning that it has been somehow manipulated to have twice the number of genes as normal, so it grows bigger than most– 28 to 32 inches tall. This is not a GMO (genetically modified organism), but a hybrid developed in the 1950’s.
In my experience tulips run down hill with time: if I plant 100 bulbs in a cluster, as I like to, I expect to get 90 or more blossoms, come spring. But the second year I might get just 50, and half that the following year. So I re-plant in the same bed each year, and don’t worry about past year’s bulbs. After bloom season, I grow annual cutting flowers in that same bed, mainly zinnias.
Of the shorter tulips, I’ve found that the division called Kaufmanniana is very pleasing. These are short, stocky red tulips that are much more perennial than the big ones. The division called Greigii is another low, simple group. Those that I grew were yellow with stripes, and lasted several years before they disappeared. Tulip bulbs, as you may know, are attractive and tasty to rodents of all kinds and the stems and flowers have been providing lunch for deer forever.
My gardening grandfather, John Lenat (1885-1968) was a very friendly character, who spoke to everyone he met – in the line at the grocery store, at the bank or walking down the road. Along with a love for flowers and tomatoes, I inherited that – to my advantage. Many years ago I was standing in line at the local food Coop and, as Grampy would have done, I struck up a conversation with a woman who had selected some freshly cut tulips to buy.
That woman in line taught me a great trick. She explained that tulips can be persuaded to stay in bud rather than opening up (and soon dropping their petals) by dropping 3 pennies in the vase of water. Actually, this woman was someone who remembered WW II when, in 1943, pennies were made of steel and clad with zinc. So she said, “Drop three copper pennies in the vase.” Since I collected pennies as a boy, I knew about the zinc penny. But anyhow, I tried it, and it works! I don’t know what the copper does, but I’ve had tulips stay in bud for a week or more in the vase until they finally dropped their petals all at once.
Whether you are enjoying cut tulips or live tulips growing in a pot, keeping them cool always prolongs their bloom time. If you keep your house at 70 degrees, try to find a cooler location for them. Or put them in the fridge or in an unheated entryway at night.
Each fall I plant tulips in containers and store them in a cool dark place. Around the first of March I bring the tulips up to the warmth of the house and they soon blossom – long before my outdoor tulips.
So go buy some tulips. They’ll help you through the gloomy days of winter.
Henry Homeyer can be reached at PO Box 364, Cornish Flat, NH 03746 or on-line at henry.homeyer@comcast .net. His website is www.henryhomeyer.com.
Small Seed Companies
Posted on Wednesday, January 9, 2013 · Leave a Comment
Although seed catalogs started arriving in my post office box even before the holidays, now is the time when I expect a deluge of colorful catalogs promising me hundreds of kinds of seeds for new/old/flavorful/special plants. I enjoy growing vegetables and flowers from seeds, so I am the kind of sucker those companies love. It’s too early to plant things, but now is the time to drool over those catalogs and order some seeds.
Most big seed companies do not grow their own seeds on a farm in their home state. They contract with farmers in places that excel at growing a particular crop – beans, for example, or carrots. They provide seeds, the farmer grows them, and then the farmer sells the product to the company.
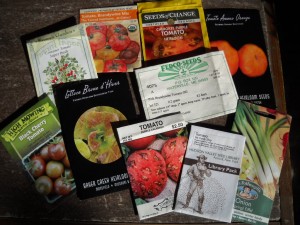
Seed Packages
I like small seed companies, particularly those that specialize in heirloom, open-pollinated plants. Open pollinated plants are those that breed true, year after year – if you follow some basic rules about planting distances and saving seeds. I bought seeds from Hudson Valley Seed Library in New York State last year (www.seedlibrary.org) and was pleased with the performance of their seeds, and with the fact that they encourage you to save seeds – and even to buy seeds you grew for a credit.
I like seed cooperatives that are not out to make their stockholders a lot of money. Fedco Seeds in Maine is one of those, and I have been buying their seeds for decades (www.fedcoseeds.com). I like that they sell seeds in small quantities. Most of us don’t need 100 tomato seeds of any one variety.
Seed companies that grow their seeds in New England are the ideal, but few exist. High Mowing Seeds (www.highmowingseeds.com) is a wonderful Vermont company, but Vermont weather is “iffy” for a seed grower. So they grow some seeds in Vermont, but also contract farmers to grow their seeds in places like Idaho which have more reliable growing conditions.
One of the problems we have here in New England, many years, is our short growing season and cool weather. So I recently did a little research on-line to look for Canadian seed producers. Many are not willing to ship to the US because of the paperwork, but some are. I recently talked to Greta Kryger at Greta’s Organic Gardens (www.seeds-organic.com or 613-521-8648) in Gloucester, Ontario. She is a small producer with a flair for the unusual. Thumbing through her on-line catalog I ran across several things I have never grown before – or even heard of.
I shall try the “lichti tomato” from Greta. According to the web site, “They’re about the size of a cherry, and taste like a cherry crossed with a tomato. A very pretty and attractive plant that originated in South America, but has been naturalized in many countries. Start plants like you would a tomato.” She told me on the phone that the plants have thorns and are quite prickly. On that same page she lists Jaltomato, Greenberry and Miltomato Vallista – all either in the same genus as tomatoes, or closely related to them. All are small fruits, but offer some unusual flavors.
Vesey’s Seeds (www.veseys.com), located on Prince Edward Island has been in business since 1939 and they say their varieties are good for short, cool summer seasons. They are not focused on heirloom or organic seeds, though they sell some of each.
Some gardeners get intimidated by catalogs with hundreds of choices, so Vesey has made some nice collections of seeds to help you out. Among these are a “Vegetables for Beginners” collection, which includes things like ‘Merlin’ beets that require no thinning and ‘Sugar Sprint’ peas that do not require a trellis. They also have a children’s collection with things like ‘Purple Dragon,’ a purple-skinned carrot that my grandkids love. You can save money by buying their collections – their beet collection, for example contains 3 packages of beets for just $6.20. And so forth.
Vesey’s website also has a page with a single top pick for each kind of vegetable. I’ve grown many of them, and think their choices sound good. You can get your order priced in US dollars, which is handy, even though the American and Canadian dollars area nearly equal.
Starting plants from seed is not for everyone. But you can save money and try things that are not available from garden centers if you do. And if you teach your children to start carrots by seed outdoors, they will love to eat raw carrots and grow up to be gardeners. What could be better?
Henry Homeyer has a new book for kids, a fantasy-adventure chapter book about a boy and a cougar: Wobar and the Quest for the Magic Calumet. Go to www.henryhomeyer.com for details.


 Click Here to buy from Cobrahead