-

Now available for $24.95 including shipping. -

Now available for $21.00 including postage. Vendors I Like
 Click Here to buy from Cobrahead
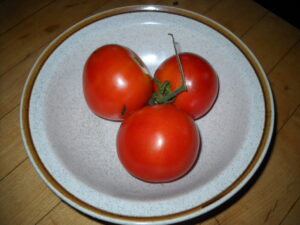
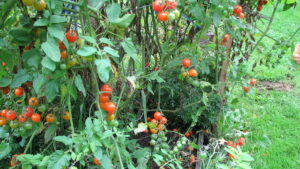
The Tomato: Queen of the Garden!
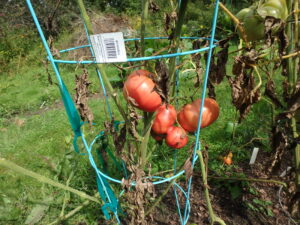
Defiant tomato are resistant to late blight
For me tomatoes are the best tasting, most important vegetable I grow. I eat them raw in salads and sandwiches or cooked in soups and stews. I dehydrate some, I freeze many whole, and I make some sauce for quick dinners in winter. But they are not grown without difficulties – and sometimes heartbreak.
The leaves here have been killed by a blight which is common but does not affect the fruit
Of lesser portent is ‘early blight’. Except for first time gardeners, we all get it. It causes lower leaves to darken and dry up, but fruit is produced until all the leaves are gone. You can minimize this problem by mulching under your tomatoes with grass clippings or chopped fall leaves. You should do that now. Unlike late blight, early blight survives our winters in the soil, and splash up from hard rains or watering gets it onto the leaves.
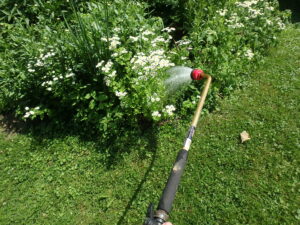
A watering wand directs a soft spray just where you want it
By now most of you have planted your tomatoes. If you haven’t, and if you think this will be a hot, dry summer, plant them deep in the soil. You can bury the root ball six inches down or more, and the stem will grow roots in the cooler, moister soil down deep.
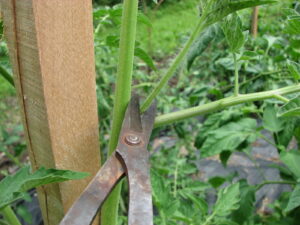
Remove tomato suckers early and often
Alternatively, you can buy 5- or 6-foot hardwood stakes. These are one inch square stakes that come with a pointed end that you can drive into the soil with a hammer – small rocks or not. But you have to tie your tomatoes to the stakes as they grow up. You can use old rags to tie them on, or sisal twine. Don’t use plastic twine as the vines may get damaged when they are loaded with heavy tomatoes. You may need to tie your tomatoes onto cages, too.
Sun Gold tomatoes
I grow at least a dozen Sun Gold cherry tomato plants each year. Each plant produces more tomatoes than I can count (even if I take off my socks to use both my fingers and toes). They are supremely tasty fresh, and are great dried and saved for soups and stews. I cut each tomato in half, and use a food dehydrator to get it ready for storage. Later, I add them to soups, stews – and even scrambled eggs.
Getting Ready for Spring and Worrying About Tomatoes
I know that most of you have probably already ordered your seeds, but I just did so on the day I wrote this column in the last week of February. I spent a recent Sunday afternoon going through my seeds and throwing out any seeds that were older than those packaged for the 2010 growing season. Almost any seed is viable for 3 years, and some are good even longer. Of course storing seeds in a cool dark place helps prolong viability, too. It hurts me to throw out seeds, but I don’t want to plant and then find that I my seeds didn’t germinate well – or at all.
Many people have e-mailed me with questions about the various blights that have plagued our tomatoes in recent years. What can we do? Well, I hedge my bets. I buy both heirloom seeds (which generally have little resistance to blights and diseases but taste great) and modern hybrids that have been bred to resist diseases. Of the first generation hybrids (called F-1 hybrids in the catalogs) I have had good results with Sungold cherry tomatoes, Defiant, and Mountain Magic. The latter two are available from Johnny’s Selected Seeds. Sungold is available everywhere. All are tasty, but nothing beats the flavor of an heirloom Brandywine.
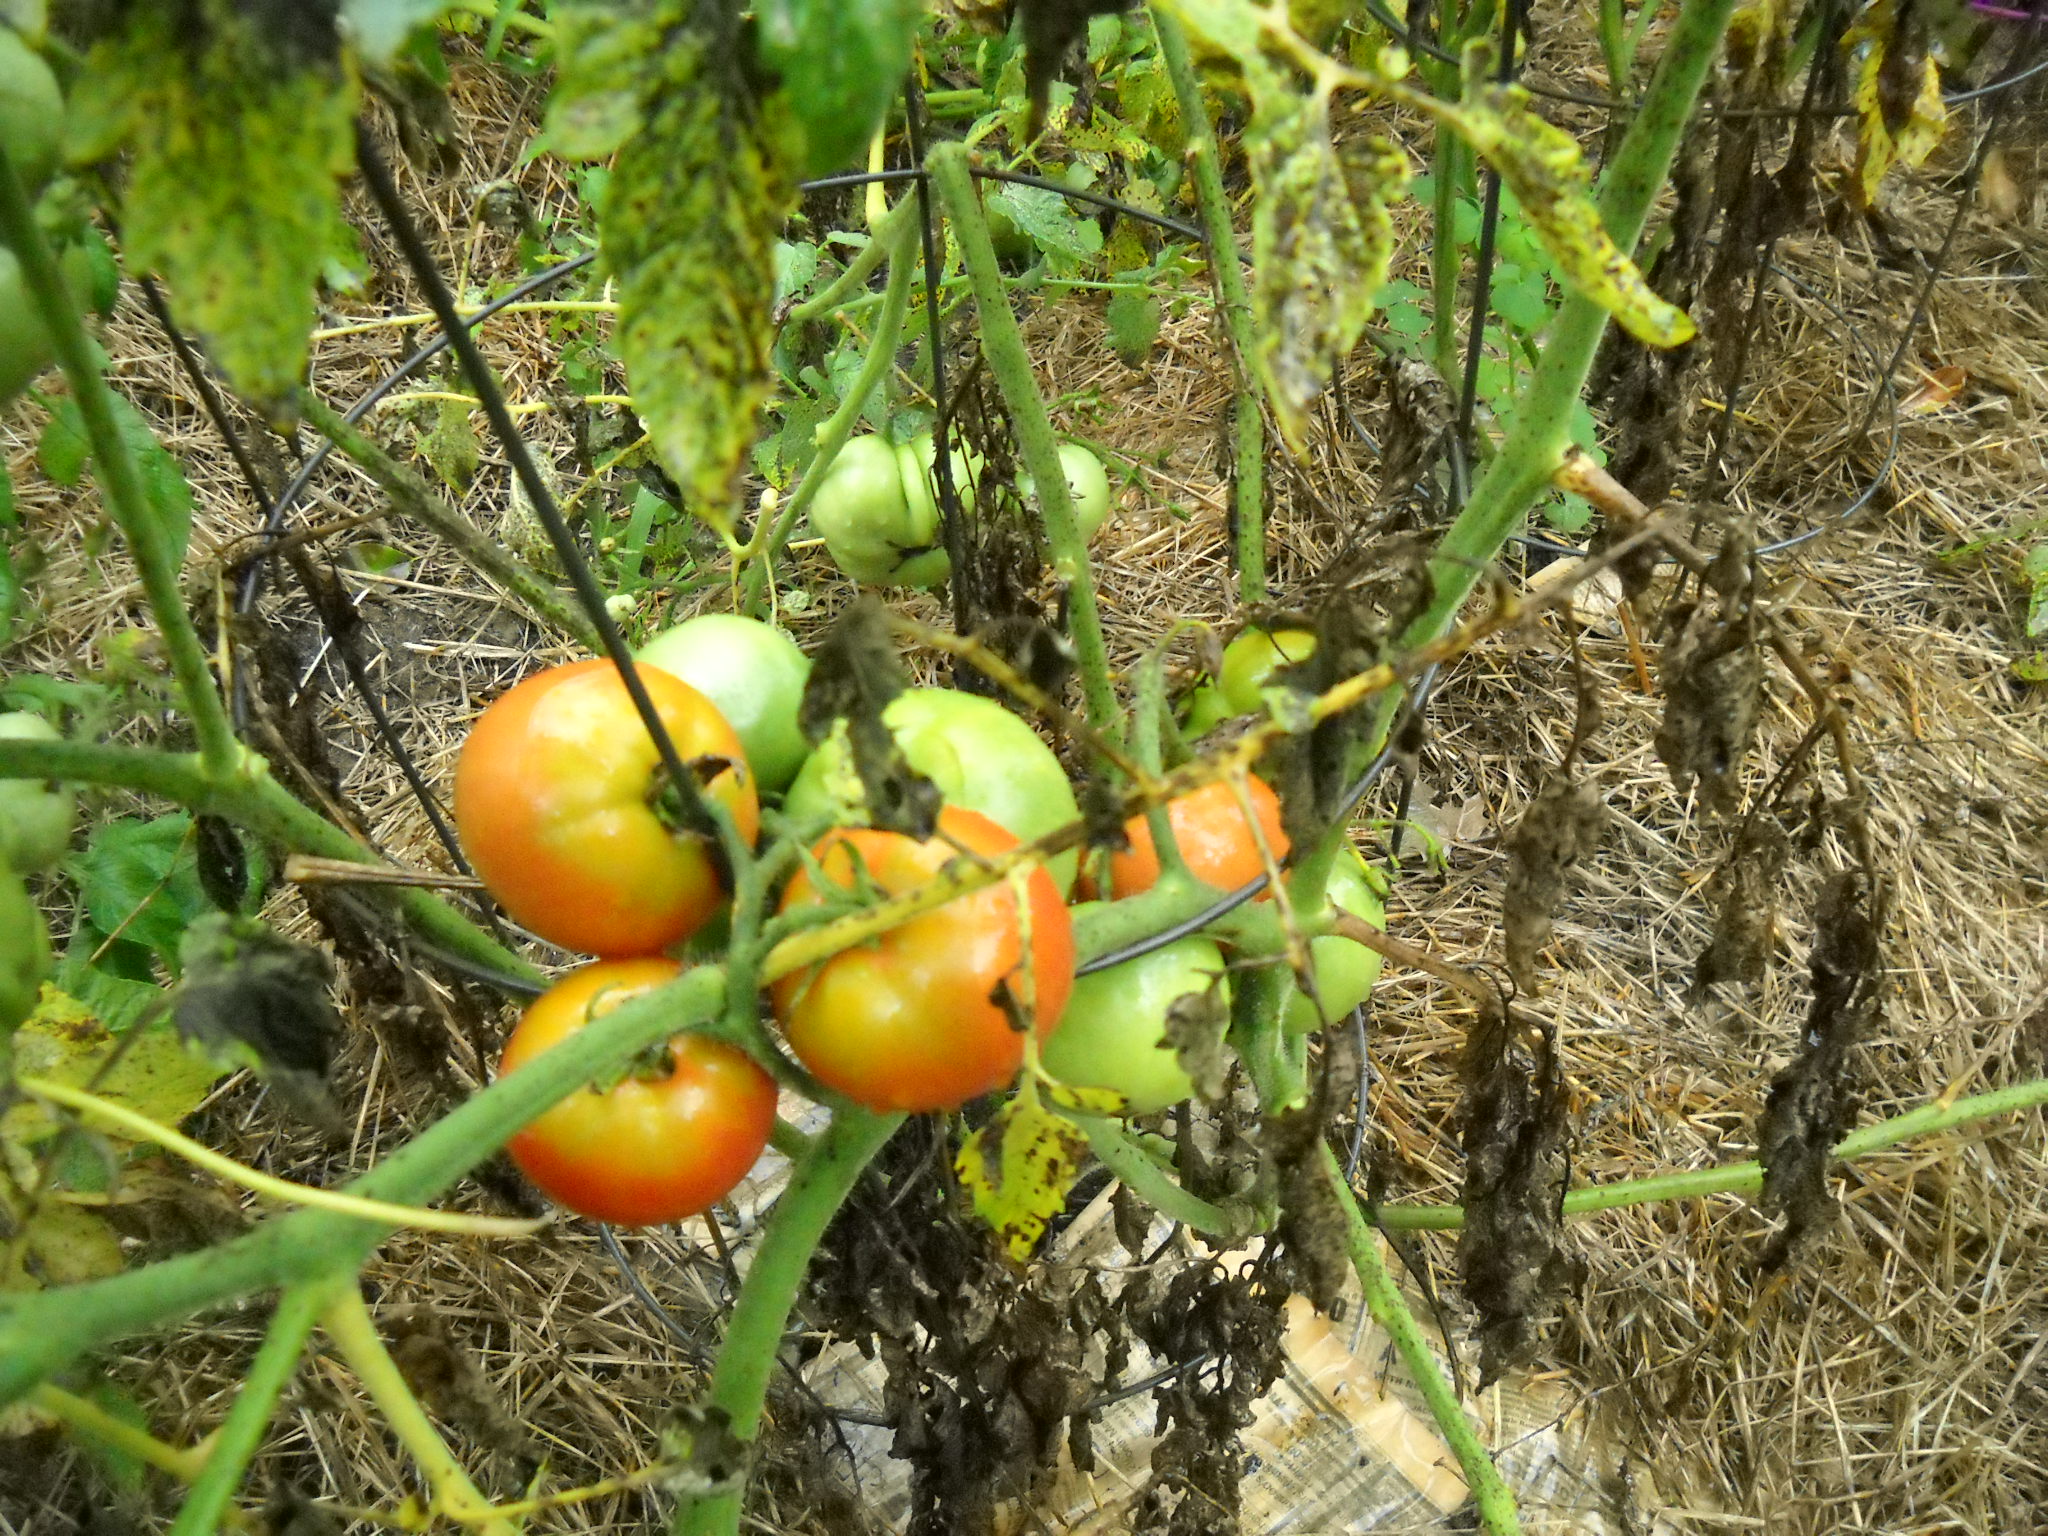
Tomatoe Plant With Early Blight
I also order some seeds for tomatoes that are early to produce. A 60-day tomato is much more likely to survive long enough to produce a good batch of fruit than one that takes 78 days or longer. Those days on the seed packages, by the way, refer to how many days under ideal conditions it should take to get fruit after transplanting seedlings into the ground. If we have a cold, rainy summer a 60-day tomato can take a week longer – or even more.
In responding to a reader who asked about blights, I came up with a plan I shall try myself: creating a simple plastic-covered hoop house for some of my tomatoes. Some diseases have spores that live in the soil, and get on the lower stems and branches by splash-up. If I keep the plants protected from the rain and I water carefully, I should have few of those diseases. Mulching helps, too.
Other diseases are air-borne. Late blight, one of the most virulent diseases, is air-borne. Depending on the prevailing winds and the presence of diseased plants in your neighborhood, you might get it – or you might not. A greenhouse would be a big help keeping out those spores, but greenhouses are expensive. A simple open-ended hoop house should help some, and not cost much. It will be most protective if the open ends are not facing the prevailing winds. So that is what I shall do.
I’ve built hoop greenhouses with windows and doors, and it’s quite a bit of work. So this year I shall try something easier. I will make a 10 ft by 10 ft hoop house big enough to walk through, but without all the carpentry of a door and a window. It should hold 10-12 tomato plants, maybe more.
Here is what is needed: Twelve 10-foot pieces of ¾ inch PVC electrical conduit and some PVC glue. A piece of greenhouse plastic roughly 20 feet by 12 feet. Enough row cover or “Reemay” to drape over the ends, maybe 12 feet by 8 ft (I’m hoping this breathable fabric will keep out spores but allow breezes to pass through). Some carpenter’s spring clamps to hold the plastic and Reemay in place. And two 10-foot pieces of wood strapping that I will screw into the ribs of the hoop house to keep the hoops from moving.
I will pull a string tight between 2 sticks to define one side, and then measure over 10 feet and do it again. My soil is soft, so after I have glued 2 pieces of conduit together, I shall just push the ends in the ground, creating a hoop (the conduit is flexible but sturdy). Measure over 2 feet, repeat. And so on. I will try to buy my greenhouse plastic from a local greenhouse, or see if I can get a used piece they have taken down. Worst case scenario? I’ll buy 4-mil plastic that is not UV protected –but it will only work one year before it decays in the sun.
Once the cover is on, you could use a screw gun to screw right though some strips of wood strapping into the ribs with sheet rock screws to stabilize the structure and help hold the plastic in place. I’ll do it 3 feet off the ground on each side of the hoop house. Carpenter’s spring clamps can be bought for $2 each, and could be used to clamp the Reemay over the ends.
I reckon I can build that hoop house in an afternoon. If you want to have something even smaller, use just 10 feet or 15 feet of conduit per hoop over a 3 or 4 foot wide bed. You won’t be able to walk in it, but it will be even cheaper and easier to build. You’ll have to remove the plastic each time you want to weed, pick or water, of course.
Gardening is a constant challenge. If the blight doesn’t attack, maybe the hornworms will. But I’ll try not to worry too much, and try to figure out what I can do cheaply and efficiently to get the best production possible. Wish me luck!
Henry Homeyer’s Web sites are www.Gardening-Guy.com and www.henryhomeyer.com