My Vegetable Garden Report
Posted on Wednesday, October 17, 2012 · Leave a Comment
Remember when we had to write reports about our summer vacations for school? Well, this is my report on my summer in the vegetable garden: what worked, what didn’t.
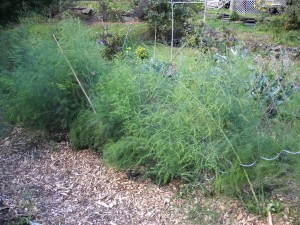
Asparagus Patch
Overall, it was a great growing season. We had lots of sunshine and my garden got about an inch of rain a week, just what most plants need. My tomatoes suffered a bit from a variety of early blights – the leaves browned and dried up, starting at the bottom. This has been increasingly the case in recent years, and next year I intend to try a bio-fungicide called Serenade, which contains live bacteria that destroy fungi. Still, I put up lots of tomatoes and ate them 2 or 3 times a day from early August until the end of September.
Of the new varieties of tomatoes I tried this year I liked best a small red one called Mountain Magic, a full sized yellow called Valencia and an oversized plum tomato called Linguisa. The first two are from Johnny’s Seeds, the last from Hudson Valley Seed Library. All 3 were quite disease resistant.
At the end of September I saw what appeared to be the dreaded late blight so I sent a sample to the UNH plant pathology lab, and it was diagnosed as late blight. Fortunately, late blight does not survive our winters except, occasionally, in potato tubers.
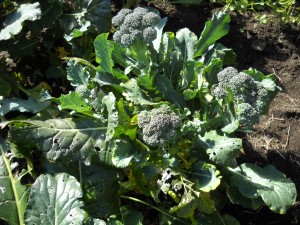
Broccoli Side Shoots
What did well for me? It was a great year for onions, beets, carrots, broccoli and leaf crops from lettuce to kale. My most surprising success was my new asparagus patch. I planted roots in June, and each plant is now 6-12 bushy stems. Many of the plants sent up stems thicker than a pencil, but I restrained myself and did not eat any. I used a “Jersey” cultivar of asparagus which produces all-male plants and no seeds, which is good. Seeds yield too many little plants and these compete for water and nutrients. If you have older plants with seeds, cut them down now.
I always try a few new things in the garden if I can, and this year I got some peanuts for planting from Burpee Seeds. I planted some in cell-packs indoors since peanuts are a southern crop, and I wanted to give them an early start. I also tried direct planting once the soil was fully warmed in early July. Direct seeding didn’t work, and the transplants only produced a few peanuts each. Peanuts bloom down low, and then a “peg” develops
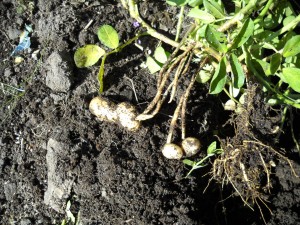
Peanuts
which contains the flower stem and peanut embryo. The peg grows into the soil, and produces a peanut. I only got 3 or 4 pegs per plant, so they are not worth the bother, I think.
I also tried scorzonera, a European root crop also called black oyster plant, serpent root, viper’s herb, viper’s grass and black salsify. I harvested one recently – but with some difficulty. I tried to pull it like a carrot, only to have the top break off. I used a trowel to loosen what I thought was pretty loose soil in my wood-sided raised bed. I got my hand down around the root some 6 inches below the surface and tugged. Slowly I lifted it out. Much to my surprise, the root was 12 inches long, black, and nearly perfectly cylindrical, though only ¾ of an inch across!
I also planted salsify, a similar root crop, though white. It is a slow-growing root crop. If you do try it, be advised that the young plants look like grass, so don’t weed them out. I enjoyed the flavor of both salsify and scorzonera, though I liked the latter better – it has a somewhat nutty flavor when sautéed in olive oil.
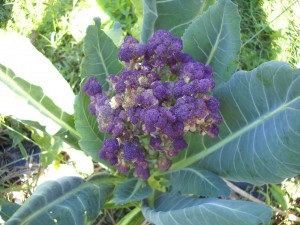
Purple Cauliflower
I planted purple cauliflower this summer, and it was very tasty. The variety I tried, from Franchi Sementi seeds promised that it would develop side shoots like broccoli, and I have seen a few little ones starting in October. The primary heads took until mid- to late-September to develop fully. Broccoli has been fabulous this year, producing side shoots into October. The variety that did best this year is ‘Arcadia’, and I will do it again next year. Very productive.
Usually I have no deer problems, but one rogue 4-point buck came around often. He ate my pole beans late in the season and several summer and winter squashes. Dang! I hope he doesn’t start a family here! My dogs aren’t keeping him away – I may have to reduce their dog biscuits quota to keep them on their toes.
Another new effort was growing ground cherries. These resemble tomatillos with paper skins, but with a sweet fruit inside. Very tasty, but they didn’t ripen until late September- if then. I learned they are called ground cherries because they fall on the ground when ripe.
Gardening is always somewhat a mystery. Sometimes one vegetable does well, other times it can be a complete bust. But I keep on experimenting with new things – that’s part of the fun of it.
Henry’s new book is out: Wobar and the Quest for the Magic Calumet from Bunker Hill Publishing. It is a chapter book for kids, a fantasy-adventure about a boy born with a mustache and a magical ability to speak to animals and understand them. Learn more at www.Gardening-Guy.com.
Garlic
Posted on Wednesday, October 10, 2012 · Leave a Comment
If you’ve harvested everything but the kale and Brussels sprouts in the garden, pulled the weeds and shaped your raised beds in anticipation of spring, you may think that you’re all done. But unless you‘ve planted at least a little garlic, you are not. If you love Italian or French food as I do, you simply must plant some garlic. It’s the simplest, easiest crop I grow.
First, unless you have saved garlic from your harvest in July, you need to buy garlic. Do not just buy garlic at the grocery store. Much garlic sold is “soft neck” garlic grown either in California or (shudder) China. It is not as hardy as the “hard neck” garlic we grow here in New England. I’ve read that garlic at the supermarket has been chemically treated to prevent sprouting, too. I, personally, will not eat anything imported from China as their regulations about the use of chemicals are much less stringent than ours.
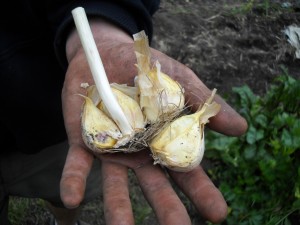
Hardneck Garlic
There are two basic types of garlic. The hard neck garlic I grow has a stiff stem in the middle, around which the cloves of garlic grow. It is plenty hardy in our climate, going through the winter unscathed. Soft neck is the type that is braided and hung in restaurants and kitchens. It last longer, but is not as hardy in the winter, and is less pungent than hard neck. I think hard neck garlic tastes better.
Go to your local farm stand to buy locally grown garlic, preferably organic garlic. Tell them that you are buying it to plant, and ask if they have more than one variety. Try 2 or 3 varieties, and label the garlic as you plant it. Each bulb has from 4-8 cloves, so buy enough to meet your needs in the kitchen – if stored properly it should last all year. One clove a day does not seem like much – but it would be 50 bulbs or more, depending on the number of cloves per bulb. I plant a hundred or more each year, as I also save garlic for planting the following year.
If you can’t get garlic at the farm stand, try your garden center. As a last resort, go to a seed company or search on-line. I like to buy locally, not only to support our farmers, but also because the garlic is best adapted to our local climate.
Mid October is the proper time for planting. It will grow roots and get established before the ground freezes. Some years it will also send up green shoots that will die back when winter comes, but that’s not a problem.
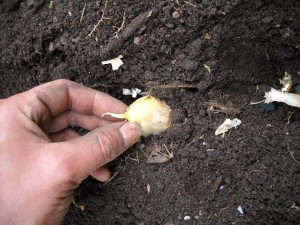
Planting Garlic
Here is what to do. First, inspect your garlic and reject any damaged or discolored cloves. Crack open a bulb and pay attention to the shape of the cloves. The rooting end is flatter, the growing tip is more pointy. You should plant the pointy end up, though planting it upside down wouldn’t kill it – just wastes energy.
Prepare the bed by working in 4 inches or more of compost if you have it. Garlic grows best in rich, dark, well-drained soil that also holds moisture. If you have sandy soil it will dry quickly in summer, so adding compost or chopped leaves will help to hold moisture. Garlic should not be grown in soggy, wet soil either. Clay soils hold water; if you have clay, amend it with compost and shape up the soil into raised beds for better drainage.
Next I take my favorite hand tool, the CobraHead weeder, and mark straight lines in the soil with its single finger-like steel tip, creating furrows. I sprinkle some Pro-Gro organic fertilizer into the furrows, and then run the CobraHead through it again, loosening soil to a depth of 4 to 6 inches and mixing in the fertilizer. In general, I plant 3 rows down a raised bed that is 30 inches wide.
Then the fun part: planting. Just push the cloves of garlic into the soft soil. The pointy tip should be a couple of inches deep. I plant cloves about a hands-width (5 inches) apart. I don’t cover the cloves until I have finished a row, so I can see my spacing as I go along. Then I gently cover the row and firm the soil in place by patting it gently.
The last part of the planting is to cover the soil with a thick layer of straw or mulch hay. I put on 6 inches or more, and the winter snows pack it down so that it becomes a 2-3 inch layer. Garlic sprouts will push right through the hay in spring, but most weeds will not germinate and compete. Garlic, like most plants, does best without weeds.
So that’s all you have to do. In June the garlic scapes, or flower stems, will be tall and curly. Great for use in stir fries. I also use them in flower arrangements as they are very interesting to look at, swooping around in curves and loops. Then in late July or early August I harvest the garlic. Store it in a cool dry place. I just wish growing tomatoes was as easy as growing garlic. Sigh. But that would be too easy!
Henry’s new book is in bookstores! Wobar and the Quest for the Magic Calumet is a fantasy-adventure for children 8-12 about a boy and a cougar. For more, go to www.Gardening-Guy.com.
Planting Bulbs
Posted on Wednesday, October 3, 2012 · Leave a Comment
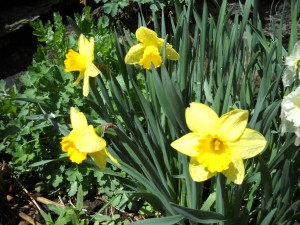
Daffodils
One of my very favorite gardening activities is planting bulbs on a sunny, crisp fall afternoon with Monarch butterflies flitting around and colorful leaves swirling in the air. Each year I plant anywhere between 50 and 300 bulbs and have done so for decades.
I accept that not every bulb I buy is going to last forever. I buy 50 to 100 tulips most years, and consider them annuals because they lose vigor each year, most disappearing after just a few years. I was at a garden center recently and bought 50 mixed tulips for $22. I planted them in one big clump, shoulder-to-shoulder, and will delight in them when they appear. I like tulips as cut flowers and give them away to friends who need a pick-me-up.
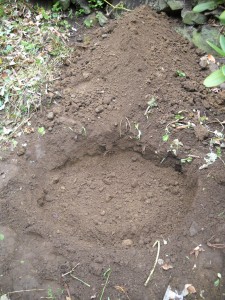
Hole ready for planting bulbs
Yes, I know that rodents and deer like tulips. In my experience, squirrels dig up bulbs in the fall right after you plant them. They see the fresh, soft earth and say to themselves, Oh Boy! Treats! You can help to keep them from digging up the bulbs by laying chicken wire over the bed, and then covering with chipped branches or mulch of some sort. Not that a determined squirrel couldn’t get to them, it’s just my belief that squirrels are relatively lazy, and there’s plenty of other stuff to eat.
Back at the end of the Clinton era at the White House I got to interview the White House gardener. Gardeners there were busy planting hundreds – perhaps thousands – of a yellow tulip that someone thought Mr. Bush (elected, but not in office at the time) would enjoy. It was called the Hilary Rodham Clinton tulip, and I have never found it for sale, but I like the idea: gardening with giggles.
Anyhow, the Rose Garden is full of big fat gray squirrels. I asked Dale Haney, the gardener, how they dealt with the squirrels, and he told me about the chicken wire technique and one other. Your tax dollars are (or were then) at work buying 50 lb bags of corn. That’s right, they feed the squirrels, keeping them fat and happy, and the squirrels pretty much leave the gardens alone. If you try that approach, please don’t sue me if that only serves to invite all the neighbor squirrels to your yard. It just might.
Deer can be a problem when tulips are ready to bloom. You can repel them by using repellents made for the purpose, available at garden centers. Bobex is one particularly nasty smelling one that they hate. I have sprayed it on shrubs, but if you want to bring tulips into the house, I wouldn’t spray it on the flowers themselves, but around them. It loses its disgusting rotten egg-based smell after 2 to 3 days for us, but lasts much longer for deer.
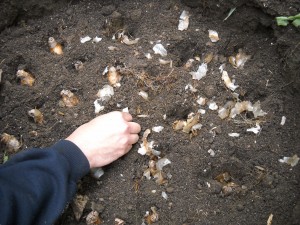
Planting bulbs
Bulbs do best in rich, well drained soil. If you have heavy clay, it will stay wet and may rot some of your bulbs. If that is the case, dig a little deeper hole, and put a two-inch layer of compost in the bottom. I never plant bulbs one at a time. I always dig a hole big enough to hold at least a dozen bulbs, and plant them in a mass. It is much more dramatic, come spring.
According to the International Daffodil Register, there are 12 divisions (classifications) of daffodils based on physical looks and genetic background, and one last division based on botanical names only. All are mildly toxic if eaten, so rodents and deer leave them alone. The range of colors and flower type is truly mind-boggling. Go to your local feed-and-grain store or garden center to check out what is available. If you really want the unusual daffies, you may have to go on-line to a company like Brent and Becky’s or McClure and Zimmerman.
I like to plant early, mid-season and late-blooming daffodils, and read the labels carefully when buying to see their bloom season. One trick to keep in mind next spring is this: cut the spent flowers off after blooming, so the plants do not waste energy making seeds. But don’t cut back the foliage until it turns brown. The leaves are “re-charging” the bulbs. I like to plant clumps of daffies between clumps of hostas – the hosta leaves hide the daffodil foliage after blooming.
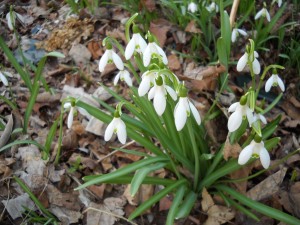
Snow drops in April
Get adventurous when you plant this year. A great early summer bloomer is giant snowflake (Leucojum aestivum) which looks like a snowdrop on steroids. These lovelies are 12 or more inches tall and are nice cut flowers. Snowdrops, of course, are essential to any garden. If you plant them on a south-facing hillside, you should get blossoms in early March unless they are planted where snow slides off the roof.
So get outdoors and plant bulbs. You’ll be rewarded with blossoms just when you need them most – after the dreariness of winter.
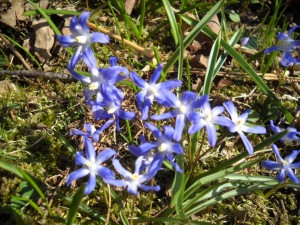
Glory of the snow
Web Extra: Other great bulb plants include Scilla and glory of the snow, both very early blooming. Both are blue to purple, and quite short – 4 inches tall or so. Scilla blossoms look down, while glory of the snow looks up and shows it white and yellow throat. Don’t dismiss them as cut flowers just because they are short – they are available when other things are not.
Winter aconite is lovely, too. This is an early yellow flower that is low to the ground. It has 5 or 6 petals that look up, as bright as any daffodil. It is marginally hardy in my Zone 4 garden, and I seem to lose them some times, but I consider them worth re-planting to keep a small supply going.
Henry’s new book, Wobar and the Quest for the Magic Calumet will be in bookstores October 15. For information about it go to Henry’s Web site, www.Gardening-Guy.com.
Apples!
Posted on Wednesday, September 26, 2012 · Leave a Comment
I read my first piece of propaganda when I was eight, maybe nine years old. It was a biography of Johnny Appleseed. It was one of a series of library books, all with orange covers, large print, and just a few simple drawings. They were fascinating, every one of them. Johnny, I learned, was a happy-go-lucky sort who walked around America giving away apple seeds. Not so. Johnny was a businessman who sold apple seeds and seedlings so frontier folk could make hard cider and its distilled companion, applejack. Most of the apple trees back then were what we would call wild apples – those that we wouldn’t consider good eating apples.
Here’s my quick course on apples: any named apple variey today is genetically identical to all others of the same name. That’s right. All Macs or Cortlands are the same, genetically, as all other Macs and Cortlands. Before you buy a tree, someone has grafted scions (living twigs) onto root stock to produce a tree that will give you tasty apples of a named variety. Some nurseries even sell trees with 3 or 4 different varieties grafted onto one tree.
The roots affect whether your tree is full sized, mid-sized or dwarf. Most new apple varieties – Macouns, for example – are hybrids developed by apple researchers, tested and then propagated by grafting – not by seed. So don’t plant seeds from your favorite apple thinking the tree will be like the mother apple.
Apple trees are easy to grow – you should have one, or perhaps more. Not only that, one can grow good eating apples without using toxic chemicals, although most orchards use some chemicals to control apple scab and sometimes insect pests. Americans have grown very fussy about their food, demanding perfect fruit, unblemished by even a spot of blight, which makes the orchards spray. The home grower can eat organic fruit with a few small brown spots, or cut them out.
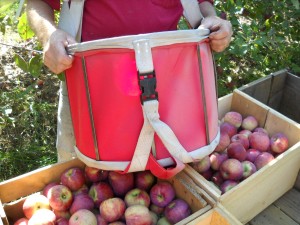
Apple Picking Basket
I recently visited Paul Franklin at his farm, Riverview Orchard, in Plainfield, NH; he has been growing apples for sale for over 25 years, and is a wealth of knowledge. One of my first questions to Paul was this: how do you know when an apple tree is ready to pick? It’s easy, he said. Just cut open an apple and look at the seeds. If they are tan to dark brown, the apple is ready. Paul added that some apples resist coming off the tree, even when they are fully ripe while others are easy to pick even when still green.
What about that film often seen on apples? It’s not a pesticide, Paul said, but Mother Nature at her best. It is a thin film of wax, which protects the apple. Polish it a bit, and the apple shines. Some apples have more wax than others.
This past spring many apple blossoms were damaged by a period of unusual warmth that was followed by a hard frost. The frost damaged the opening buds, so many of us lost all or most of our apples. I live in a cold spot and lost all mine. Paul Franklin’s orchard is near the Connecticut River, so the little bit of heat released by the water minimized his losses. If you are choosing a site to plant apples, remember that near the top a hillside is a good spot. Cold air is dense, and tends to slide down hill. Often only a degree or two can make the difference between success and failure.
I asked Paul about his favorite apples. He said that Cortland and Honey Crisps are two of his favorites. Honey Crisp is tasty and somewhat resistant to apple scab. Cortlands are great apples for both eating and making pies. Honey Crisp are great keepers – a customer of his picks a bushel of them, then stores them in a spare fridge for up to a year. If you do that, don’t store other vegetables in the fridge because apples give off ethylene gas, which prompts other veggies to age and go past their prime.
If you planted an apple tree recently be sure to protect the bark with a collar of quarter-inch hardware cloth (metal screening). An 18 inch square can be used to wrap around the base to keep meadow voles (voracious mouse-like creatures) from nibbling the bark in winter. If a vole eats bark all the way around a trunk it will kill the tree. Dig the screen in an inch to keep them from going under it. After 5-7 years the bark is thick enough that the hardware cloth is not needed.
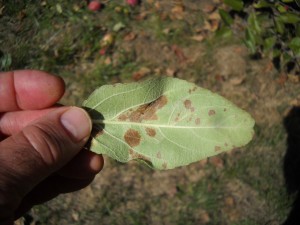
Apple Scab
What else can you do for your apple trees now? In order to minimize apple scab and other diseases, rake up the leaves under your trees. Scab overwinters on leaves. Mowing under trees helps, too – chopping up the leaves and helping them to break down. Young trees benefit by a little slow release organic fertilizer in the fall, but older trees do not need it.
So go pick some apples on a warm sunny fall day. Eat plenty, make a pie, save some for winter. And thank Johnny Appleseed – if you believe in the propaganda.
Henry Homeyer’s Web site is www.Gardening-guy.com. Henry’s upcoming kid’s fictional chapter book, Wobar and the Quest for the Magic Calumet, is just out. Check for Wobar at your local bookstore or go to henryhomeyer.com to learn more.
Filed under Article · Tagged with apple genetics, apples, cortland apples, grafting apple trees, Henry Homeyer, honey crisp apples, macoun apples, Paul Franklin, picking apples, plainfield nh, Riverview Farm
Putting The Garden To Bed
Posted on Wednesday, September 19, 2012 · Leave a Comment
Just last week that I was planting tomato and pepper seedlings – or so it seems. But now the big yellow buses are out there each morning, delivering the next generation of gardeners to school, and there is a definite nip to the air when I go to get my newspaper out of the box in the morning. Where has the summer gone? It’s time to start thinking about putting the garden to bed.
This is the time of year that weeds take advantage of us. Most of us tend to be lackadaisical about weeds now that our vegetables have produced, our flowers have bloomed, and our attention has turned elsewhere (school, football, presidential debates). But if you want to reduce your work next year, pay attention to those weeds that have snuck into the garden: they are producing seeds that will lie in wait for the spring, ready to grow before we get the good plants established.
I hereby resolve to spend a minimum of 20 minutes every day weeding for the rest of September. If I do that, I shall save myself much aggravation next spring. Here are a few things to consider when you weed. First, weed when the soil is moist – you are much more likely to get out the entire root system. That is very important for perennials weeds like dandelions or witch grass because a scrap of their roots will regenerate new weeds.
Annual weeds pull more easily, and it’s less important to get the entire root. They reproduce by seed, and often produce hundreds, even thousands of seeds per plant – and those seeds can stay viable for years. When weeding things loaded with seeds, be careful not to shake off the seeds when you pull the weeds. It means that you can’t shake off all the topsoil that comes out with the roots, but I’d rather avoid dumping seeds into my garden soil- even if I lose some.
I also try to place seed-bearing weeds in a compost pile that I will not use any time soon. In fact, I have compost piles where I dumped problem weeds decades ago. I let it turn into soil and use it for fill dirt– but not in my vegetable garden. After all, I heard that King Tut’s tomb had weed seeds that were still able to germinate, though that may be just a myth.
I am also conscious of erosion when weeding and removing annual plants in the fall. I think it’s better to cut off the stem of big zinnias, for example, than yank them now. That way I am not opening up the soil, making it vulnerable to erosion or providing a nice resting spot for air-borne weed seeds. Many weed seeds are tiny and can blow in from your lazy next-door neighbor’s garden. I can always dig out roots in the spring when I plant something else, and they may decay and add some organic matter to the soil in the meantime.
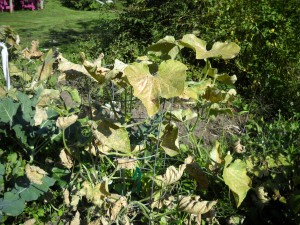
Get rid of diseased leaves
In the vegetable garden it is important to get rid of diseased or insect-infested plants. You shouldn’t put them in the compost, either. Put them on the burn pile if you’ll be burning brush this winter, in the household trash, or in a pile far from the vegetable garden. This will help to minimize the recurrence of problems. That goes for moldy phlox or other flowers that get diseases, too.
If you have an asparagus patch, look to see if your plant are loaded with those little “berries”, their seeds. If you see seeds, cut down the stems before winter. Some of those seeds will settle in and start more asparagus plants, but you really don’t want more plants – they will fight for moisture and minerals just as weeds do. Most asparagus plants sold now are in the “Jersey” series and are all male, so they bloom but do not produce seeds. But one of the 25 plants I put in this year was a female, so take a look at yours now and cut down any with berries. And for best production, get out any weeds this fall.
I like to prepare my vegetable beds in the fall. After weeding them, I re-shape my mounded raised beds and add some compost or aged manure. Then I cover them with chopped fall leaves and grass that I rake up after mowing. This stuff does not blow away as you might imagine – one good rain storm and it settles down for a long winter’s nap.
Fall is a good time to spread some limestone on the lawn, or to your vegetable and flower gardens if your soil pH is acidic. Most things grow best at a relatively neutral pH, say 6.2 to 6.8, but what with acid rain, many of us have soil that is pretty acidic. This is a good time to get a soil test done and make adjustments as needed. It takes time to adjust soil pH, so working on that now will make the soil better next spring.
There is so much to do in the garden, week after week. It’s important not to just throw up your hands and say, “I’m done!” Yes, fall is here. But don’t stop gardening – everything you do now will help make next year’s garden even better.
Henry Homeyer is the author of four gardening books and a new children’s book just out called “Wobar and the Quest for the Magic Calumet”. Check for Wobar in your local bookstore or go online to henryhomeyer.com to learn more about the book.
Saving the Harvest
Posted on Wednesday, September 12, 2012 · Leave a Comment
Tomatoes are an important part of my diet. I cook with them year round, and eat them more than once every day in season. My grandmother used to can them, and I still do on occasion, but the easiest thing to do with them is to freeze them whole. No blanching required. Just put clean, dry tomatoes in gallon zipper bags and freeze. Then, when you need tomatoes to cook with, take out a few and run them under hot water in the kitchen sink. Rub and the skins come off. Allow them to sit for a few minutes and they soften enough to chop and use.
I do make tomato sauce, but generally freeze it instead of canning it. I core the tomatoes and squeeze out some of the seeds and water, then puree them in the Cuisinart. I cook the tomatoes with onions, garlic, basil leaves, fennel seed, salt, pepper and whatever other spices appeal to me the day I make it. Sometimes I cheat and stretch my tomatoes by adding pureed zucchini to the sauce. The trick is to cook it enough so that the sauce is rich and thick. A little sugar (or maple syrup) is sometimes needed if the tomatoes are not dead ripe.
I also make tomato paste by cooking down pureed tomatoes until I can stand up a spoon in the mixture. I freeze the paste in ice cube trays, and then transfer it to Ziplock bags.
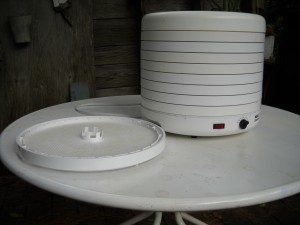
Dehydrator
I dry tomatoes in a dehydrator, making little nuggets of pure tomato flavor for use in winter stews. Although you can use any size tomato, I generally just dry cherry tomatoes. I cut them in half and place on a try, cut side up. It takes about 24 hours to fully dehydrate a batch of cherry tomatoes – but I get about 75 of them on each tray and dry 6 trays or more each batch. Afterwards I put them in zipper bags and store in my freezer. I have plenty of freezer space, but if you don’t, they will store well in the fridge or even in the pantry. I also dry apples, pears and hot peppers most years. I grind my hot peppers in a coffee grinder after they are dry enough to be brittle. Making pepper powder allows me to add just the right amount of zing to a sauce.
My potato harvest was smaller this year than I would have liked, but I have enough for a few months. Potatoes store best between 33 and 50 degrees, with high humidity. An attached garage, bulkhead or unheated mudroom might have the proper temperature. Mice love them, so store them in plastic buckets or storage bins covered with hardware cloth (quarter-inch mesh screening) to keep mice out while allowing good air circulation.
Carrots, beets, rutabagas and celery root (celeriac) store well under the same conditions as potatoes: high humidity and cool temps. All root crops can be stored in the fridge (I keep a spare fridge in the basement), but tend to dry out unless in a drawer. You can leave root crops in the ground until it gets cold outside – although rodents may nibble on them. So if you leave root crops in the ground, check to make sure they are not being eaten.
Carrots store well in the ground. Just cover them with a layer of hay or straw , and then a layer fall leaves. Be sure to place a tall stake in the ground at each end of the row so that you can find the carrots even if we get 3 feet of snow. I’ve stored carrots that way, but found that in years of little snow the ground freezes, making digging difficult. Still, cold temperatures make carrots sweeter. I leave my parsnips in the ground and eat them in the early spring.
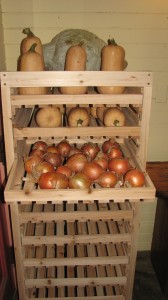
Orchard rack
Cool dry storage is appropriate for winter squash, onions and garlic. Fifty degrees is about right, with low humidity. An upstairs bedroom with the heat turned off is usually good. I have an “orchard rack” from Gardeners Supply that works very well for storing those items. It is made of wood, with slats to allow good air circulation. It is always good to cure or dry onions and winter squash a bit before you put them in their final resting place. I spread them out on the deck in the shade, where they only get morning sun, but get good breezes. That allows them to lose a little water and to harden up a little on the outside.
Freezing veggies is one of the best ways of keeping them. Leafy greens, broccoli, Brussels sprouts, beans and summer squash need to be blanched. That means dropping them into boiling water just long enough to kill the aging enzymes that make them tough and tasteless. Sixty seconds is enough for most things – or until the color changes. Don’t blanch so long your veggies are cooked or mushy. Drop them into a sink of cold water to stop the cooking process as soon as you take them off the stove. I recommend investing in a blanching pot, which has an inner pot with holes, allowing you drain out the water as you lift them out of the bath.
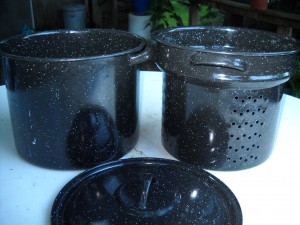
Blanching pot
Once your veggies are cool, spin them dry in a salad spinner and then pat dry with cloth towels. Put them in freezer-grade Ziplock bags, and suck the air out with a straw before closing the zipper all the way. No need to blanch tomatoes, leeks, berries or peppers.
I get great satisfaction from eating my own homegrown food. It takes work at this season, but for me it’s worth it.
A correction: A helpful reader let me know that the moth of the hornworm is not the hummingbird moth. Hornworm moths are as large as hummingbirds, but look different and have different habits. So don’t harm those hummingbird moths!
Henry Homeyer is the author of 4 gardening books. His e-mail is henry.homeyer@comcast.net and his web site is www.Gardening-Guy. com.
How Long Does it Take to Create a Mature Garden?
Posted on Wednesday, September 5, 2012 · Leave a Comment
Several years ago I interviewed the late Tasha Tudor, the reclusive illustrator and author, at her garden in southern Vermont. One question I asked her was, “How long does it take to create a garden?” Her answer, as reported in my book Organic Gardening (not just) in the Northeast, was succinct. “It takes twelve years to make a garden. Everything takes time that’s worthwhile.” I find that fascinating in light of recent visits to the gardens of Susan Weeks, of Lebanon, NH. Her lovely mature gardens were started around the year 2000 – some 12 years ago. And although Susan says they are still a work in progress, hers would make most gardeners ready to sit back and just admire them.
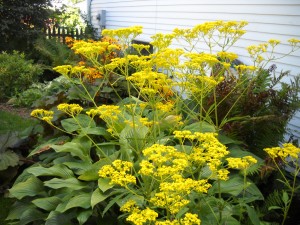
Patrinia
Susan moved into her house in 1995 with the idea that it was her final move: “I knew this was going to be my last home – the canvas I was going to be working on for the next 40 years – or until they drag me out of here.” When she moved in, her landscape consisted of a modern white house on a green lawn with just a few trees – a small blue spruce, a white pine and a rug of juniper on either side of the front door. It took her awhile to decide what to do, but by 2002 she decided to start planting some trees.
Susan decided to spend her money on trees that were already of fair size – at least 2 inches in caliper (diameter). She knew that she could cut corners and buy from a big box store, but doesn’t think it makes sense to do so. “I believe in buying local. They (locals) know what works here. It might be more expensive, but it works out better for everyone,” she told me. Over a few years she had a crab apple, two sugar maples, a Japanese tree lilac and a Japanese red maple installed. She kept them watered, made sure the lawnmower stayed away, and now these trees provide shade and beauty.
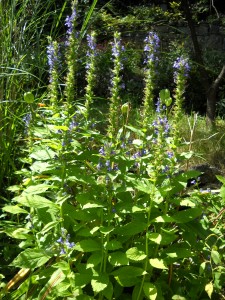
Great Blue Lobelia
A mature woman of relatively small stature, Susan knew that these trees would best be installed by someone else, so she hired E.C. Brown Nursery of Thetford, Vermont to supply the trees and plant them. “As you get older, if you have some heavy work that needs to be done, it makes sense to get somebody it to do it for you.” That allowed her to work on the perennial gardens that she has developed over the past 10 years.
Gardening should be fun, and should be consistent with a gardener’s value system. Susan has two adorable old dogs that have grown up in her gardens, and she decided from day one that no chemicals would be used in her gardens – she didn’t want to risk harming Zoe and Maggie, her dogs. She fenced in part of the yard so the dogs would have a nice place to lounge around, and trained them to respect the flower beds while allowing them places to dig holes to lie in on hot days. Over the years she has expanded the fencing 3 times (as her budget allowed, I suppose) and the 4-foot tall white picket fence now encloses just about all of her property. There is a buffer zone, also planted, between the fence and the street.
Susan started planting perennials, adding the more each year. She has plenty of common flowers: bee balm, hostas, daylilies, iris, and black-eyed Susans. But after awhile, she took a four-evening class on gardening and started to get more confidence. She craved more interesting and unusual plants.
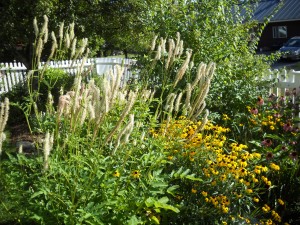
Canadian burnet
She tried Canadian burnet (Sanguisorba canadensis), great blue lobelia and ligularia. She got things with no common name like Persicaria superbum. Right now she has a tall shade-loving plant with bright yellow flowers that I’d never seen before, one she got from Cider Hill Gardens in Windsor, Vermont. It’s a Patrinia (no common name) and it’s not clear if it is a P. triloba or a P. gibbosa. I must get one.
At some point Susan decided she needed a small water feature, and created a little pond about 8 feet long and 3 to 4 feet wide with a pump that shoots a gentle stream of water into the air. She dug the hole herself, lined it with a special rubber liner, and covered the edges with flat stones. “A weekend project,” she said. She put in goldfish – and moved them indoors each winter to keep them alive. She told me that the sound of the bubbler is good for attracting birds. She loves the birds – another good reason for using all organic products.
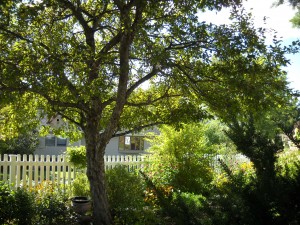
Crabapple tree planted
Over time Susan has introduced flowering shrubs to her landscape, saying that as one gets older it’s important to have lower-maintenance plants. She is moving away from perennials that need to be dug and divided on a regular basis. Among the shrubs she has planted are weigela, hydrangeas, lilacs, ninebark, fothergilla; blueberry (for fall foliage); beauty bush; viburnum, daphne, Clethra, butterfly bush and others. She has a dog-eared copy of Taylor’s Guide to Shrubs, and each time she plants a new shrub she ticks it off in the book and writes the date planted.
And although Susan says she is cutting back, slowing down, I noticed that she had just excavated a new bed outside her fence. And she is eyeing a bit of lawn by the street. “Grass – it’s just one big perennial. It’s okay to dig some up for other perennials.” I can’t wait to see what happens in her gardens after she retires from her job in a few years.
Henry Homeyer’s upcoming kid’s book, Wobar and the Quest for the Magic Calumet, will be on shelves in October.
Filed under Article · Tagged with beauty bush, blueberries for fall foliage, butterfly bush, Canadian burnet (Sanguisorba canadensis), Clethra, daphne, fothergilla, great blue lobel, hydrangeas, ligularia, lilacs, mature gardens, ninebark, patrinia, tasha tudor, viburnum, weigela
Tomato Hornworms and Other Late Summer Pests
Posted on Wednesday, August 29, 2012 · Leave a Comment
Sometimes it’s easy to get discouraged about the garden: Early in the spring there are seeds that don’t germinate well in cold, wet soil. Then the weeds germinate too well and try to take over the garden when things warm up. Next Colorado potato beetles attack the potatoes. By mid-summer early blight and other diseases start killing leaves and slowing growth on tomatoes, and now the tomato hornworms come along to browse the tomatoes and their vines. Gee whiz, is there no mercy for gardeners? I thought gardening was supposed to be easy!
But there is some good news. Mother Nature is doing her best to control some pests, tomato hornworms among them. Tomato hornworms are green larvae that get huge (up to 3-5 inches long), and have voracious appetites. Bad infestations can defoliate tomato plants in just a day or two. Because of their green color and markings, they are often very hard to notice, too. This year they seem worse than normal, according to some of my readers – though not in my garden. This is the season when they are most prevalent.
If you seen a tomato hornworm with little white attachments something like small grains of uncooked rice, do not kill the hornworm as it is being attacked by the larvae of a parasitic wasp. These white projections are cocoons containing the pupae of a braconid wasp. They indicate that the good bugs have found the bad bugs, and will destroy them.
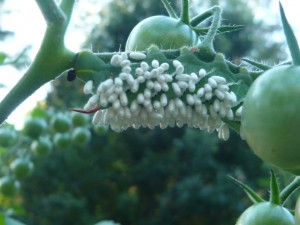
Hornworm with cocoons attached
I watched a hornworm that was covered with these tiny white cocoons, and over a 24 hour period it ate nothing. It was slowly dying, and appeared to have no appetite. I called Dr. Alan Eaton, NH State Entomologist, who told me that the wasps kill their prey slowly, allowing the larvae to feed long enough to develop. At a certain point, he said, the hornworms stop feeding. When he encounters a hornworm with parasitic wasp cocoons, he takes no chances – he moves it to another location away from his tomatoes where the braconid wasps can develop.
If you’ve seen a moth that resembles a hummingbird, that is the adult form of the tomato hornworm. According to Dr. Eaton, an adult moth of the tomato hornworm is about the same size as a ruby throated hummingbird. They are very strong fliers, and actually overwinter in the places where they can survive without freezing. Then they fly north in the spring, finding new feeding and mating territories.
One last hornworm tidbit: according to Dr. Eaton, there are 2 species, the tomato hornworm and the tobacco hornworm, and the tobacco hornworm is much more prevalent. So if you have been cussing out those nasty tomato hornworms, maybe they’re laughing and saying, “We’re actually tobacco hornworms!”
According to Dr. Eaton – and several readers who have sent me questions – this is a bad year for green stinkbugs. These triangular-shaped green bugs are feeding on everything from grasses and veggies to peaches and apples. Perhaps the mild winter resulted in higher numbers of them. They stink if crushed, so Dr. Eaton recommends picking them and dropping them into soapy water. The brown marmorated stinkbug is often a pest, but the green one is not usually as prevalent as it is this year.
This is also the season that fall webworms appear. You may call them tent caterpillars, but they are of a different species of pest. The tent caterpillars form webs, or tents in crotches of trees early in the summer, but the webworms create their nests near the tips of branches now, and into the fall. With time, the nests get bigger, enclosing more and more leaves as they grow. If the tent is down low you can physically remove the teeming mass of caterpillars by clipping off the branch and dropping it into a bucket of soapy water.
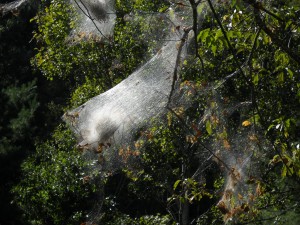
Fall Webworm
If the fall webworms are close enough to the ground that you can spray the leaves near them, you can apply a biological control. There is a product called Dipel, which contains a bacterium (Bt kurstaki) that will kill the worms if they eat leaves sprayed with it. This bacterium will not hurt us, our pets, fish or birds. It is specific to caterpillars. And Dipel lasts for years in the container, so you can invest in a package of it and know that it will be good in the future.
I understand the urge to “nuke” the bad bugs. Hornworms eating my tomatoes? Nuke ‘em. But I don’t. And since I let the braconid wasps feed on the hornworms years ago, I rarely see one of those bad boys. Chemical pesticides change the garden environment. It may please you in the short run, but in the long run, let Mother Nature – and your fingers – take control. Pick’em, don’t nuke ‘em.
Henry Homeyer’s new children’s book, a fantasy-adventure for 8-12 year-olds called Wobar and the Quest for the Magic Calumet, is coming out in October. His Web site is www.Gardening-Guy.com; his e-mail is henry.homeyer@comcast.net.
Uninvited Visitors: the Good, The Bad, and the Ugly
Posted on Wednesday, August 22, 2012 · Leave a Comment
Years ago my sister had a friend in New York who would arrive at my house once or twice a year, unannounced – and always at dinner time. He always stayed until we invited him for dinner but never brought anything to contribute. He had good stories to tell of his times in Africa, so we fed him and excused his unannounced arrivals and large appetite. I‘ve had other visitors who also arrived without an invitation, some of whom wanted to stay for days and who left wet towels on the bathroom floor. There are similarities in the plant world, too: some plants arrive unannounced and shouldn’t be allowed to stay, while others welcomed.
Decades ago a handsome flower arrived in my garden on its own. It was a bellflower, one called, in scientific parlance, Campanula glomerata. This is a nice cut flower with a bright bluish-purple blossom. Never having seen one, I thought I had discovered a new plant, or perhaps a fabulous wildflower had arrived in my garden. I soon learned its name, and that it spread by root, but flopped over, and was, though nice, not as nice as I had first thought. Where did it come from? Who knows? Seeds, I suppose, perhaps in a pot containing other flowers, or carried by a bird.
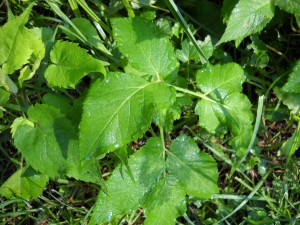
Goutweed
Not all uninvited visitors are nice. Goutweed (Aegopodium podagraria) and bishop’s weed (the variegated form of goutweed), is the bane of many a gardener’s existence. This invasive was introduced from Japan as a groundcover that could grow in sun or shade, wet or dry. The all-green form, goutweed, will take over a flowerbed in no time, smothering less persistent plants. It is nearly impossible to weed out, as even a small section of root will produce a plant – and more roots. For the organic gardener, the only way to control it is to smother it with plastic and a thick layer of bark mulch. I got some many years ago with a gift of iris – their roots were intertwined. Bishops weed, with its green and white leaves, is less invasive, but sometimes it reverts to the all green form and takes over. So beware!
Great blue lobelia (Lobelia siphilitica) is a fine, upstanding blue-flowered plant that comes and goes in my garden as it pleases. I let it pick its own location, seldom weeding it out, as I know it will never be a problem. It forms small clumps of a dozen plants or less, each spike standing 18-24 inches tall. I’ve known it to travel over 100 yards from one year to the next, and I don’t recall that I ever purchased a plant.
Last winter was virtually snowless, so roots of plants got colder than normal (snow is an excellent insulator). I lost most of my hollyhocks, but I assume that seeds are in the ground and that they will return. Many books list hollyhocks as biennials, but I have had some plants that persisted, growing from the same roots for several years – especially if I cut down the stems right after flowering. Hollyhocks have moved around my gardens at will, seeds traveling downhill on rainy days, as near as I could tell. I had to transplant some as they became very well established in my vegetable garden.
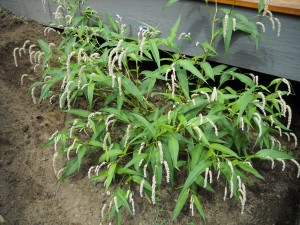
Lady’s Thumb
I recently installed a small garden for a client in Wilder, Vermont, who would not let me remove some of her weeds! She had one that stood nearly 3 feet tall and was covered with small white flowers. It looked to be related to flowers in the genus Persicaria. The weed, deemed a wildflower, is on a Brandeis University web site, http://www.bio.brandeis.edu/fieldbio/leeci_unet/. It’s called lady’s thumb, with the scientific name Polygonum persicaria. That name indicates that the plant looks like a Persicaria, but is in the buckwheat family. So it continues to thrive in her garden – as a wildflower. And now that I know it is a wildflower, not a weed, I like it better. Isn’t that silly? I guess I fear that weeds will take over a space, but know that most wildflowers will not.
That same client also requested that I leave a creeping weed called purslane (Portulaca oleracea). It has glossy, fat leaves and can lay flat against the soil, or stand up as tall as 6 inches. Hers was a low-growing type, and makes a good groundcover – and a nice meal. Yes, I’ve eaten it by sautéing it in olive oil with a little garlic. If you wish to try some, please be sure to get positive identification of it from a knowledgeable person. Most plants are not poisonous, but I’d hate for you to get sick from trying something you should not eat.
Another client told me that she weeded out rose campion (Lychnis coronaria or Silene coronaria) because it jumped up all over the garden. I love it, and let it choose to grow wherever it chooses. It is a biennial with slightly fuzzy gray leaves that has a 4-petaled magenta flower in its second year. But if you want your garden to be ordered and organized in a specific way, perhaps it is not for you.
We all have different tolerances for uninvited visitors, both flowers and people. I think the important thing for me is to know that, if I choose, I can get rid of them without too much trouble.
Henry’s new children’s book, a fantasy-adventure about a boy and a cougar, will be out soon: Wobar and the Quest for the Magic Calumet from Bunker Hill Publishing. His Web site is www.Gardening-Guy.com.
Filed under Article · Tagged with bellflower, biennial plants, cooking pursalane, goutweed, great blue lobelia, hollyhocks, lady's thumb, organic control of weeds, pursalane, weeds in the garden, weeds or wildflowers? henry homeyer
Garlic
Posted on Wednesday, August 15, 2012 · Leave a Comment
Everything has its season; for me, this is garlic season. In early to mid-August each year I harvest 60-100 garlic plants, each bulb or head with 6 to 8 cloves. I tie them in bundles of 10 and hang them in a cool dry location, whole plants including the tops. A month later I trim off the tops, but I’ve been told that curing them with their tops on allows certain nutrients to flow back into the cloves from the foliage. If you haven’t picked your garlic, you should. If you wait too late the outer skin of the garlic will break down and the garlic will not store as well.
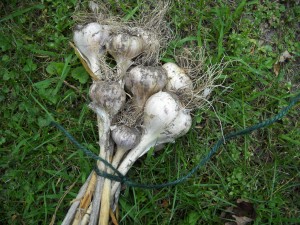
Garlic ready to cure
And what, you might fairly ask, does one do with 100 heads of garlic? For starters, I will save the best 15 heads or more for re-planting. I don’t buy seed garlic, I use my own, year after year. Planting time is not until October, but I select the best garlic and set it aside for planting. That means, over time, that I am developing strains that are best for my soil and climate. Now, after 25 generations of doing so, I grow garlic that is well adapted to my specific conditions.
Then there is pesto. I planted a bed of basil about 4 feet square this spring from plants I started indoors. Recently I cut most of that basil about 8 inches from the soil line and processed it all at once for pesto – the plants will grow new leaves for other uses later. I’ve tried a lot of recipes, and have decided this one, below, is the best. I used pine nuts for it, instead of walnuts or almonds, even though those nuts cost me $22/pound. But 6 batches of pesto only used 3 cups of pine nuts, which translates to about $8 for the nuts. This is a treat, and will last for months if spaced out between meals and not consumed on toast with tomatoes for breakfast, which is what I did the day after making pesto.
Henry’s Pesto Supremo
2 cups basil, well packed down in the measuring cup
1/3 cup pine nuts, roasted
3-6 large cloves of garlic according to your taste
1/3 to ½ cup olive oil
½ cup grated Romano cheese (or Parmesan if you prefer)
salt and pepper to taste
I began by browning the raw pine nuts in a cast iron fry pan at medium heat. The pan had been oiled and then wiped with a paper towel to remove the excess. I find roasting improves the flavor considerably.
Remove basil from stems, wash, spin dry and then pat the leaves dry with a cloth towel. You need enough basil to fill a 2 cup measuring cup with leaves packed down firmly, which is a lot of leaves.
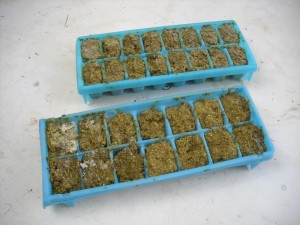
Pesto Frozen in Ice Cube Trays
Place leaves in a food processor and add 1/3 cup of pine nuts and pulse a few times. Mince the garlic in a garlic press, add to blender and then pulse. Add oil slowly with the processor running. Finally add the cheese and pulse a few times. Taste immediately on toast!
Looking for other ideas I called Bill Howard, Executive chef at Three Tomatoes Trattoria (my favorite Italian restaurant) which is located in downtown Lebanon. He started by reminding me that different strains of garlic have different flavors, some with lots of “bite”, others quite mild.
Bill likes a mild strain called “Music.” He roasts it in a 350 degree oven for an hour or so, caramelizing the sugars in it and making it suitable for spreading on toast. I’ve done this in the past by putting whole heads of garlic (skins on) in a small, oven-safe baking dish with a little olive oil. When the garlic is roasted I let it cool, take scissors to snip off the tops, and then squeeze out the soft inner mush onto toasted bread. Sometimes I first lather the toast with a soft goat cheese and then spread the roasted garlic and top with a slice of fresh tomato. Oh boy!
Bill Howard also told me that sometimes when using garlic that has a lot of bite he slices it, and then poaches it in milk, which mellows it out. That seems truly bizarre to me, but I’ve never eaten one of his dishes I didn’t like. Not only does he use the garlic, he makes a garlic-infused béchamel (white sauce) sauce using the milk, butter and flour.
Garlic keeps best in a cool location with low humidity. I keep garlic on an “orchard rack” in the mudroom, a place that stays cool. I got the rack a few years ago from Gardeners Supply (www.gardeners.com) and use it for winter squash and onions, too. It is made from hardwood slats, so there is good air circulation. If you just have a few heads of garlic I suppose you could keep it in a basket in the kitchen, or perhaps in the fridge.
Garlic is believed to cure or prevent all manner of ailments. I learned from herbalist Nancy Phillips (author of The Village Herbalist) that one should mince or chop garlic and then let it sit for 10 minutes before cooking with it. She says this allows certain anti-cancer compounds to develop full potency before use. I have been doing it for years – it can’t hurt.
I do know that garlic adds great flavor to almost any dish. And who knows, I might poach some in milk and use the milk on my cereal. That would be an interesting way to start the day!
Henry Homeyer’s new children’s book will be available in September. Look for Wobar and the Quest for the Magic Calumet from Bunker Hill Publishing.
Filed under Article, Uncategorized · Tagged with best pesto recipe, Chef Bill Howard, freezing pesto, garlic, growing garlic, growing great garlic, Henry Homeyer, nancy philips, the village herbalist, Three Tomatoes Restaurant


