Growing Roses
Posted on Wednesday, March 7, 2012 · Leave a Comment
Before we launch into this week’s article…
Gardening Classes with Henry
Lebanon College: Gardening: A Practical Workshop. Garden writer Henry Homeyer will teach you the basics of organic vegetable and flower gardening. From garden design to seed-starting , planting, watering, weeding, mulching, and harvesting, this course will give each student practical knowledge of gardening. Tuesday nights from 6:30-8:30 for 5 weeks, April 3-May 2.Contact Lebanon College to reserve a spot for this5-part workshop www.lebanoncollege.edu or call 603-448-2445.
AVA Gallery, Lebanon. Henry will teach 3 classes at AVA Gallery this spring. You may sign up for one or all of these workshops:
Sculpting the Living Landscape: Starting Flowers from Seed
April 9; Monday, 6:30–8:30pm; One 2-hour class
Sculpting the Living Landscape: Perfect Perennials for the Upper Valley Garden
April 23; Monday, 6:30–8:30pm; One 2-hour class
Sculpting the Living Landscape: Organic Techniques for Enriching Soil and Managing Pests
May 7; Monday, 6:30–8:30pm; One 2-hour class
For more information go to www.avagallery.org or call 603-448-3117.
Growing Roses
When I read a new gardening book I generally read it with a pen in hand. If I see something of special interest, I make a check mark in the margin. If I read something I agree with, and want to pass on to others, I underline.
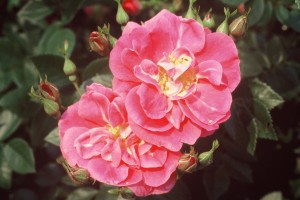
William Baffin: Zone 2/3 8 Ft. Climber
When I learn something important, I make a star in the margin. I recently finished reading – and marking up – Roses for New England: A Guide to Sustainable Rose Gardening by Mike and Angelina Chute of East Providence, R.I. The whole book is marked up and has several stars. If you’ve been leery of growing roses, this book de-mystifies the process and gives you all the information you need to succeed.
March may seem like a funny time for reading about roses, but it makes sense to me: we have time to read now, before the gardening season begins. And if you want to order special roses, it takes some time make and receive an order. Bare root roses need to be planted while dormant – and while available. The Chutes recommend planting bare root roses in April or October.
The book describes 6 easy steps to success:
1. Select good plants. They have 150 suggestions for roses that are winter hardy and disease resistant. Steer clear of roses that have spots, blemishes or disease. Don’t buy a potted rose with wrinkled canes – it’s dehydrated.
2. Start with good soil. Test the pH: it should be between 6 and 6.8. Add lots of organic matter into a large planting
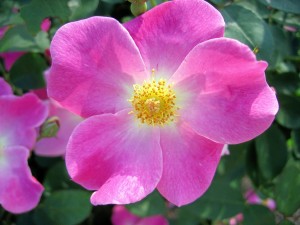
Nearly Wild: Zone 4/5, 3 Ft. Tall
hole, and some limestone if needed.
3. Plant in a sunny location. Six hours of sunshine is needed for lots of blossoms.
4. Provide plenty of water. Water deeply, up to 5 gallons per week in hot times. Do not get the leaves wet.
5. Fertilize 3 or 4 times in the course of a summer. They use a combination of 10-10-10 and slow-release organic fertilizers, and sometimes give liquid fish fertilizers as a supplement to get more blossoms. As an organic gardener, I do little fertilizing and still do fine – my soil is good.
6. Manage pests and diseases by “maintaining strong, healthy roses right from the start… Healthy plants have tougher immune systems”.
Although the authors recognize that some gardeners will want to use chemicals, they use no chemicals for insects, and rarely for fungus. A stiff stream of water from the hose will wash off aphids and spider mites, they explain, and hand picking beetles is better than spraying. If you spray for insects, the beneficial insects are killed along with the pest insects.
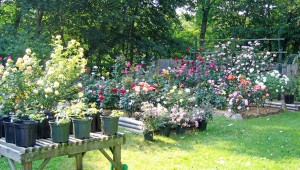
Chute's Garden
If you purchase bare root roses, you may be troubled by the question of how deep to plant them (I know I have been, at times). We’ve all learned not to bury the trunk flare (the natural base) of a tree or shrub, but roses are not the same. Looking at a bare root rose, you can see where it has been grafted onto a rootstock, which is called the bud union. That union should be 2-4 inches below the final grade of the soil. The colder the climate, the deeper the roots. I plant 4 inches deep for Zone 4.
Pruning roses is another problem area for many gardeners, but one easily and simply explained in Roses for New England. Mike and Angelina explain that some roses only bloom once a year, while others bloom repeatedly. For one-time bloomers, prune after blooming. For the others, you should prune early in spring, and then after each flush of blossoms.
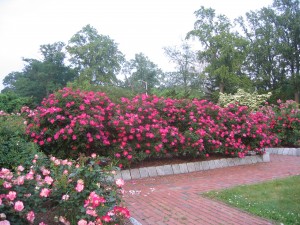
Knockout Bed: Zone 4/5, 5 Ft. Tall
Pruning is important for rose health, too. To prevent fungal diseases, prune to open up the bush and allow good air circulation. You can direct growth by pruning just above a bud that is pointing away from the center of the bush, instead of one pointing in towards it.
I was fascinated to read (stars in the margin of my book) that the Chutes know how to prune repeat-blooming roses to get a flush of blooms on a certain date. Each rose has a certain time interval between bloom cycles. Cutting off all spent blossoms (and pruning back the canes) after a first blooming will stimulate a second set of blossoms. The more petals, the longer the period.
The simplest floribunda roses take just 40 days to re-bloom, while heavily petaled hybrid tea roses can take 55 days. Learn the intervals on your roses, and you can have them bloom for your August tea party. The average time for
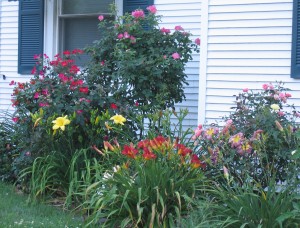
Brite Eyes Bush
re-blooming roses is 50 days. Of course, 2 weeks of cold rain can upset that schedule.
I like that this book explains that you don’t need a hazmat suit to protect yourself from all the chemicals that were used in the past. Buy roses that are disease resistant, plant them well, and they will resist most diseases – and make you swoon. To learn more about roses, go to the authors’ Web site, www.rosesolutions.net. You can order your own copy of the book there, too.
Henry’s WEB EXTRAS:
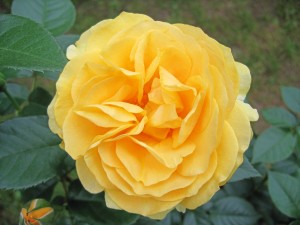 Julia Child: Zone 6, 4 Ft. Tall
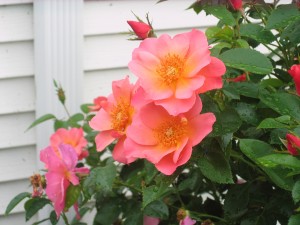
All The Rage: Zone 4, 3-4 Ft. Tall
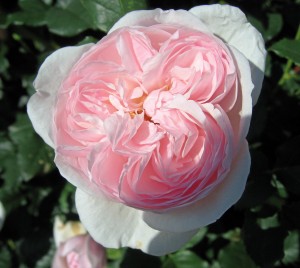
Heritage: Zone 5, 4 Ft. Tall
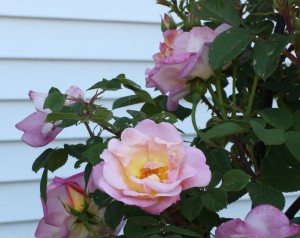
Brite Eyes: Zone 5, 6-8 Ft. Tall
Starting Seedlings Indoors
Posted on Wednesday, February 29, 2012 · Leave a Comment
Before we launch into this week’s article…
Gardening Classes with Henry
Lebanon College: Gardening: A Practical Workshop. Garden writer Henry Homeyer will teach you the basics of organic vegetable and flower gardening. From garden design to seed-starting , planting, watering, weeding, mulching, and harvesting, this course will give each student practical knowledge of gardening. Tuesday nights from 6:30-8:30 for 5 weeks, April 3-May 2.Contact Lebanon College to reserve a spot for this5-part workshop www.lebanoncollege.edu or call 603-448-2445.
AVA Gallery, Lebanon. Henry will teach 3 classes at AVA Gallery this spring. You may sign up for one or all of these workshops:
Sculpting the Living Landscape: Starting Flowers from Seed
April 9; Monday, 6:30–8:30pm; One 2-hour class
Sculpting the Living Landscape: Perfect Perennials for the Upper Valley Garden
April 23; Monday, 6:30–8:30pm; One 2-hour class
Sculpting the Living Landscape: Organic Techniques for Enriching Soil and Managing Pests
May 7; Monday, 6:30–8:30pm; One 2-hour class
For more information go to www.avagallery.org or call 603-448-3117.
Starting Seedlings Indoors
As winter morphs into spring, I get antsy. I want to start growing things. Even though it is still too early for starting most things by seed, it is the right time to plant artichokes, onions, peppers and leeks indoors. Tomatoes? Not until April. Squash? Not until May.
Whatever and whenever you start, there are several variables that need to be controlled: light level, moisture, available fertilizer and temperature. Pay attention to these factors and you will do well. The first thing I do each year is get out my lights. Starting seedlings on windowsills really doesn’t work for most things. Little seedlings get tall and leggy, reaching for light if all they get is a few hours of sunshine in a window.
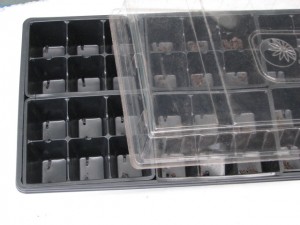
6-Packs and covers
My lights were an investment, but have paid for themselves many times over the years. I start 200-300 seedlings each year and seeds are much cheaper than seedlings bought in 6-packs at the nursery. And I often start 20 kinds of tomatoes and half a dozen types of hot peppers – most of which I would never find for sale.
This year I have upgraded my lights. The old T-12 (fat style) fluorescent tubes lose their potency over time, and are less efficient than the modern, thinner T-8 tubes. And the T-12 lights are being phased out due to federal energy regulations. So if you have old lights, think about upgrading. LED lights are also available, and while considerably more expensive than fluorescents, they are more energy efficient. I got some from Sunshine Systems (www.sunshine-systems.com or 866-576-5868).
If you don’t want to invest in a plant stand, a card table will do if you’re not starting too many plants. Still, I like my stand because it will hold 2 flats of plants on each shelf, and has 3 shelves – that’s enough for about 200 seedlings. Gardener’s Supply (www.gardeners.com or 888-833-1412) has some nice plant stands, but they are not cheap. Try your local garden center, too, or think about making your own. If buying, look for a stand that allows you to raise the lights as plants grow – 6 inches above the plants is ideal. One last thing: only run your lights 14 hours a day. They need their beauty rest, too.
When seeds first germinate they are very sensitive to drying out, so I like the clear plastic covers that are sold to fit over flats. They hold the moisture like little greenhouses. If you use them, plant things that germinate at the same rate in any given flat – germination times can vary from 3 to 18 days, depending on the plant species. Remove the covers as soon as plants touch them.
Don’t keep your seedlings soggy. Let the potting mix dry out before watering. You may need to water lightly every day as plants get bigger, however.
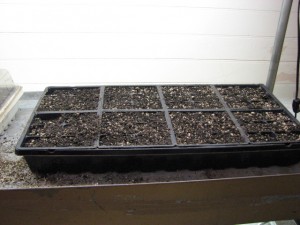 If you buy potting soil or seed starting mix, it is mostly peat moss, which has little nutrition to offer a plant. It is used for its ability to hold moisture. I suggest mixing it 50-50 with compost – either your own homemade stuff or the kind that comes in a bag.
Even with compost added to the mix, as your plants get bigger, you will need to offer some plant food. I don’t recommend using the chemical versions. My plants, once in the garden, will have to grow without chemical fertilizer, so I don’t want to give them any now. I believe that my seedling’s root systems will be more vigorous if they are not given lots of soluble chemical fertilizer.
The options for natural fertilizers are many. You can buy fish or seaweed fertilizers such as Neptune’s Harvest. Some fish fertilizers (made as emulsions) have an odor that may offend the nostrils of sensitive people. Neptune’s Harvest claims theirs is not stinky due to their special hydrolyzing process. Mega Green is another brand of fish fertilizer made by hydrolysis; it combats odor with natural mint essences, too.
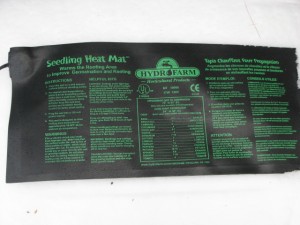
Heat mat for seedlings
Temperature is a key factor, too. I have electric heat mats that I place under my flats – bottom heat helps germination. These mats are sold at garden centers and may seem expensive, but if you grow peppers, for example, they really help. Once seedlings are up and growing I remove the mats– too much heat will push growth too fast (though sometimes I keep my peppers on them longer – they love heat).
I like 65-70 degrees during the day and 10 degrees cooler at night. A spare bedroom is a good place to grow things – you may be able to regulate the temperature by opening a window or turning off the radiator.
Finally, I like to move tomato and pepper seedlings into 2 or 3 inch pots once they are 4-6 weeks along. This allows the plants to have bigger root systems and minimizes root crowding. Our seasons can be cut short by fall frosts, so I like to give my plants any advantage I can.
You may reach Henry Homeyer at henry.homeyer@comcast.net
Identifying Trees in Winter
Posted on Wednesday, February 22, 2012 · Leave a Comment
Before we launch into this week’s article…
Gardening Classes with Henry
Lebanon College: Gardening: A Practical Workshop. Garden writer Henry Homeyer will teach you the basics of organic vegetable and flower gardening. From garden design to seed-starting , planting, watering, weeding, mulching, and harvesting, this course will give each student practical knowledge of gardening. Tuesday nights from 6:30-8:30 for 5 weeks, April 3-May 2.Contact Lebanon College to reserve a spot for this5-part workshop www.lebanoncollege.edu or call 603-448-2445.
AVA Gallery, Lebanon. Henry will teach 3 classes at AVA Gallery this spring. You may sign up for one or all of these workshops:
Sculpting the Living Landscape: Starting Flowers from Seed
April 9; Monday, 6:30–8:30pm; One 2-hour class
Sculpting the Living Landscape: Perfect Perennials for the Upper Valley Garden
April 23; Monday, 6:30–8:30pm; One 2-hour class
Sculpting the Living Landscape: Organic Techniques for Enriching Soil and Managing Pests
May 7; Monday, 6:30–8:30pm; One 2-hour class
For more information go to www.avagallery.org or call 603-448-3117.
Identifying Trees in Winter
Most of us enjoying knowing the names of our acquaintances – including trees. It’s tougher to identify trees in winter because most have no leaves, which is how we generally recognize trees. But by observing overall shape, bark, branching patterns, buds and the presence or absence of leaves, you should be able to pick out several common trees quite easily.
The trees discussed here include 5 that keep all or some of their leaves; the rest lose all their leaves. The first group includes white pine, Canadian hemlock and spruce, all of which have green needles – their form of leaves. Oaks and beeches are broad-leafed trees that hold all or some of their leaves, though the leaves are dead and brown. Young trees hold more of the dead leaves than more mature ones.
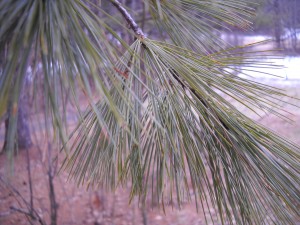
White Pine
White pine (Pinus strobus) has clusters of 5 soft needles, each about 3 inches long. Branches grow in whorls off the trunk; each year the tree grows just one new set of branches, so you can see how fast they grow by observing the distance between whorls on the main trunk. From a distance you can see clumps of needles pointing up near the top of the tree.
Canadian hemlock (Tsuga canadensis) has short, flat needles that feel soft to the touch and that have a white line on the underneath side of each. It is one of the few trees in the woods that can grow in deep shade – as well as full sun.
There are several kinds of spruce (Picea spp.), but all share this characteristic, which will separate them from hemlock trees: turn over a branch and observe the color of the leaves. If the needles on the top side and the bottom of the bough are the same color, it is a spruce. Spruce needles are pointy and sharp. Spruce hold more snow on their branches than other evergreens, too, often leaving little snow beneath the tree.
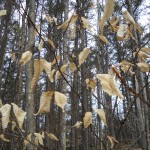
Beech Leaves
American beech (Fagus grandifolia) is most easily identified by its smooth gray bark; some older trees have bark that is scarred by a fungus. Their buds are up to an inch long with sharp pointy ends; they are shaped a bit like little cigars. Young beech trees hold lots of leaves but the older ones tend to lose most. Leaves are 2-5 inches long, oval, and have serrated edges.
Oaks ( Quercus spp.) also hold at least a few leaves. The leaves are lobed, often ending in a sharp point. There are a few oaks that have different shaped leaves, but you probably won’t come across one. Acorns are a dead giveaway, too, though most acorns have fallen by now.
Buds and small (side) branches are either opposite each other on a branch or they alternate – one here, one
farther along on the other side. Only 3 common trees have opposite branching: the maples (many species), ash (4 species), and horse chestnut. There are several kinds of shrubs that have opposite branching, including viburnums, most dogwoods, lilacs and honeysuckles. Don’t be deceived by the fact that often twigs are broken off, so that the branching pattern may not appear at first glance to be opposite.
Of the many kinds of maples (Acer spp.), sugar and red maples are common in most woods. At the end of each branch you will see 3 buds: a terminal bud and a bud on each side of it. The buds are sharply pointed on sugar maples, less so on red maples. Red maple buds get redder as the winter progresses. Get to know a few big old sugar maples during sugaring season, and you will soon recognize the color of bark and the overall shape. Red maples tend to have branches that spread less than sugar maples, and they can live in wet places (but sugar maples rarely do).
White ash (Fraxinus americanus) also has opposite buds, but they are much more rounded than those on maples. The key characteristic for me is the bark, which is furrowed into diamond shaped areas on mature trees. You will also see that small branches on an ash are also much less delicate than those on a maple. Looking up at branches, you will see that they have lots of lumps and bumps near their tips.
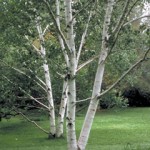
White Birch
White or paper birch (Betula papyrifera) is one of the best known of our native trees: it has bright, white bark that tends to peel as the tree gets bigger. Other birches include gray and yellow birches. The former has dirty gray bark; the latter has finely peeling silvery or golden bark. All have horizontal marks on the bark called lenticels. Lenticels allow air into the inner growing layer of the tree. Their twigs are fine, and may have catkins (narrow pollen-producing structures 2 inches long or so) towards the top of the tree.
One of our most common trees is the poplar (Populus deltoides). Poplars are fast growing, short-lived trees that jump up anywhere, even in poor soil along roadsides. They tolerate wet or dry locations and are immune to road salt. I recognize them from the color of the bark – it is greenish to putty-colored, particularly up high. It is often an irregular-shaped tree that is considerably taller than wide.
So clip this article and take a walk in the woods. See what you can identify. And bring along a tree I.D. book to help. I like A Guide to Nature in Winter by Donald Stokes, as it has information about everything you can see outdoors in winter, not just the trees.
Henry is the author of four books and writes a self-syndicated weekly column for 12 newspapers throughout New England. You can contact Henry by e-mail at henry.homeyer@comcast.net.
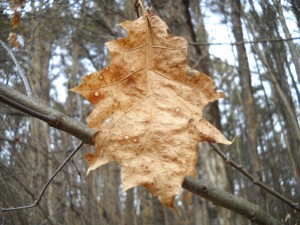
Oak Leaf
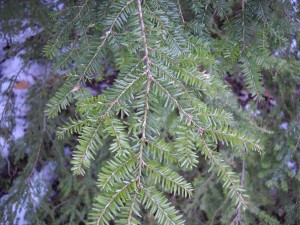
Hemlock
Planting by the Phase of the Moon
Posted on Wednesday, February 15, 2012 · Leave a Comment
Before we launch into this week’s article…
Gardening Classes with Henry
Lebanon College: Gardening: A Practical Workshop. Garden writer Henry Homeyer will teach you the basics of organic vegetable and flower gardening. From garden design to seed-starting , planting, watering, weeding, mulching, and harvesting, this course will give each student practical knowledge of gardening. Tuesday nights from 6:30-8:30 for 5 weeks, April 3-May 2.Contact Lebanon College to reserve a spot for this5-part workshop www.lebanoncollege.edu or call 603-448-2445.
AVA Gallery, Lebanon. Henry will teach 3 classes at AVA Gallery this spring. You may sign up for one or all of these workshops:
Sculpting the Living Landscape: Starting Flowers from Seed
April 9; Monday, 6:30–8:30pm; One 2-hour class
Sculpting the Living Landscape: Perfect Perennials for the Upper Valley Garden
April 23; Monday, 6:30–8:30pm; One 2-hour class
Sculpting the Living Landscape: Organic Techniques for Enriching Soil and Managing Pests
May 7; Monday, 6:30–8:30pm; One 2-hour class
For more information go to www.avagallery.org or call 603-448-3117.
Planting by the Phase of the Moon
The moon attracts me the way my porch light attracts moths. I am drawn to it. I love to stare at it and I can feel its presence – particularly the full moon when I’m trying to get to sleep. Some gardeners believe that it affects plants, too, drawing up water from the soil into leaves and fruits as the moon gets bigger, pulling water and nutrients down to roots as it wanes. If the moon can affect the tides, some say, it is logical that the moon can affect our garden plants.
It’s nearly time to start artichokes, leeks and peppers indoors, so I thought I should learn more about planting by the phase of the moon. I called Sarah Milek of Cider Hill Gardens in Windsor, Vermont (www.ciderhillgardens.com) because I know she decides exactly when to plant seeds and seedlings according to the phase of the moon.
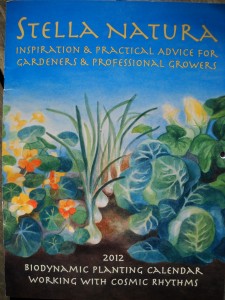
Stella Natura
Sarah bases her decisions on a biodynamic calendar called Stella Natura: Inspiration & Practical Advice for Gardeners & Professional Growers (www.stellanatura.com). The calendar explains on the cover that it is the “Biodynamic Planting Calendar Working with Cosmic Rhythms”. She told me that the calendar indicates for every day of the year, and for every hour of the day, whether it is an auspicious time to plant, transplant, weed or harvest. Following the calendar, she says, results in quicker germination, earlier crops, and better storage capabilities of her veggies.
Sarah Milek told me of a friend who planted onions according to the calendar. But he didn’t finish that day, and did so the next – even though the calendar said not to plant anything that day. Those onions did poorly – the crop was a total bust – but those planted according to the calendar thrived. Everything was the same except some were planted a day later – and very different results were obtained. It made me wonder.
Stella Natura uses the phase of the moon and the position of the planets and the constellations to determine when to plant. The calendar is based on the principles of biodynamic agriculture, first proposed by an Austrian, Rudolph Steiner, in 1924.
Rudolf Steiner (1861-1925) was a philosopher and visionary. Waldorf schools are based on his educational principles, and the biodynamic movement is an outgrowth of his philosophy of agriculture. He spoke of life forces not detectable by the physical senses, yet linking together the universe and all living things. He believed that the energy of plants can be affected not only by our actions and the weather, but also by the energy of the moon, stars and planets. His philosophy of agriculture goes beyond the principles of organic farming, dealing not only with our inputs – compost instead of chemicals, for instance – but with life forces that affect our plants.
A follower of Steiner, a German named Maria Thun, did decades of observations and record keeping to aid in determining when to plant or to work with plants. According to biodynamic principles there are four elements: earth, air, water and fire. She noticed that root crops (including potatoes, onions and leeks, which are not technically root crops) do best when sown when the moon is passing through constellations associated with the earth element. Leafy things do best when the moon is associated with the element water, flowering plants do best associated with the air, and fruits with fire. Stella Natura is based on her work.
On a practical level, it makes sense to avoid planting leafy things during a time that is optimal for flowering plants – practitioners of this way of planting believe that this will encourage bolting. Tomatoes, beans, grains and tree fruits should be planted on a fruit day, or even a flower day (as flowers are an integral part of getting fruit).
Stella Natura spells out very precise instructions, day-by-day, hour-by hour. During transition times, when the moon is moving from one constellation to another, or when other factors affect the energy of the cosmos, there are times when no planting should be done. These areas are indicated with gray in the hour-by-hour boxes. Sometimes these time last a full 24-hour period, other times they are for as little as 2-4 hours.
The calendar explains that practical considerations such as the weather can and should affect when to plant, too. If you have started tomatoes indoors and the calendar specifies that the day is auspicious for planting them outdoors, do not do so if frost is predicted. I bought the calendar and shall do some lettuce plantings indoors this spring during times designated as good for leaves, some during times for flowers, and some during the blacked out parts of the calendar. This appeals to my scientific training. I vow to keep good records, and will report back to you, my faithful readers.
Even though I started gardening as a small boy and have been gardening for over 60 years, gardening is still a bit mysterious to me. Some years my onions are large and keep well. Other years they are smaller – or they rot. The same is true for my winter squash and other crops. So it’s time to see if the moon can help me to do better. I encourage you to do the same – and let me know what you find out.
Henry’s Web site is www.Gardening-Guy.com. His e-mail is henry.homeyer@comcast.net.
Easy Houseplants to Brighten Your Winter
Posted on Tuesday, February 7, 2012 · Leave a Comment
Before we launch into this week’s article…
Gardening Classes with Henry
Lebanon College: Gardening: A Practical Workshop. Garden writer Henry Homeyer will teach you the basics of organic vegetable and flower gardening. From garden design to seed-starting , planting, watering, weeding, mulching, and harvesting, this course will give each student practical knowledge of gardening. Tuesday nights from 6:30-8:30 for 5 weeks, April 3-May 2.Contact Lebanon College to reserve a spot for this5-part workshop www.lebanoncollege.edu or call 603-448-2445.
AVA Gallery, Lebanon. Henry will teach 3 classes at AVA Gallery this spring. You may sign up for one or all of these workshops:
Sculpting the Living Landscape: Starting Flowers from Seed
April 9; Monday, 6:30–8:30pm; One 2-hour class
Sculpting the Living Landscape: Perfect Perennials for the Upper Valley Garden
April 23; Monday, 6:30–8:30pm; One 2-hour class
Sculpting the Living Landscape: Organic Techniques for Enriching Soil and Managing Pests
May 7; Monday, 6:30–8:30pm; One 2-hour class
For more information go to www.avagallery.org or call 603-448-3117.
Easy Houseplants to Brighten Your Winter
Many a would-be gardener has been deterred from growing veggies or flowers outdoors because they’ve had a bad time with houseplants. “Garden? Not me! I’ve got a brown thumb.” If I’ve heard it once, I’ve heard it dozens of times. When I inquire, people tell me they’ve killed houseplants, even the so-called “bullet proof” ones.
More houseplants are killed by over-watering than by under-watering. Some inexperienced gardeners think they are being kind and attentive to their plants by watering often. But roots of most houseplants will rot if kept constantly wet. So my first rule of indoors plants is simple: only water a plant when the soil is dry to the touch. For most, that is no more than once a week. For some once every 3-4 weeks is adequate.
Some houseplants are grown for their blossoms and others for their lovely foliage. Foliage plants are generally the easiest: if it isn’t dead, it probably looks good.
Jade plant (Crassula ovate or C. argentea) is an easy plant that is almost trouble-free. It has thick, waxy succulent leaves that are round and shiny. The trunk is thick in mature plants, and is a smooth gray or brown. My friend Cindy Heath has one, and it languishes in her living room getting no care at all. I mean it gets little direct sunshine and if it gets a drink of water every couple of months, it’s lucky. Last summer I carried it outside on the porch for some sunshine, which prompted a growth spurt.
Jade plants are easy to propagate. Bernice Johnson of Cornish Flat, NH, showed me a jade plant that she started from a cutting 3 years ago that is now about 2 feet tall and 2 feet across. She said that to get a new plant she just snips off a short section of a branch with a leaf or two, and plants it, or sets it in water to root, then plants it. She plants her many houseplants in a mix of garden soil and compost she makes herself from leaves and garden waste. The soil drains well, which is important. She keeps the plant near a north window and waters it about once a month. I find a 50-50 mix of compost and potting soil is good for most houseplants.
Happy Griffiths of Lebanon, NH grows many houseplants, including both rosemary and bay. Those two not only produce handsome foliage, but also edible herbs for use in the kitchen. Both, she told me, like a cool environment with bright natural light. She keeps hers in an unheated sunroom that gets down below freezing on cold nights, but never very cold. Some forms of rosemary bloom annually, though other types do not.
If you grow rosemary indoors, you need to increase the water you give it starting in March, or even by mid- February. The sun is stronger, the days are longer, and the roots and leaves are beginning to grow. Even though it is a Mediterranean plant, if it gets totally dried out – as mine have in the past – the plant dies. Instead of once a week, water twice a week.
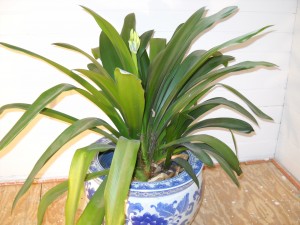
Clivia
I grow clivia (Clivia spp.) as a foliage plant – it has long, shiny strap-shaped leaves and requires virtually no care. I’ve had mine for more than 10 years and have never divided it nor fertilized it. Even so, once a year it sends up a flower spike with a big cluster of orange blossoms that last for a couple of weeks. I water it very irregularly –once a month, if I think of it. It doesn’t need direct light, which is nice as I have it in a pot too big for the window sill. Its leaves stand about 30 inches tall.
Another nice foliage plant is aloe (Aloe vera)). It is a succulent that needs little watering, rarely has pests, and survives wherever you plunk it. A nice benefit is that if you cut a leaf and rub the juice on a burn or insect bite it will soothe your skin.
Bernice Johnson grows lots of old fashioned geraniums (Pelargonium spp.) that she keeps on sunny window sills. When I visited her recently she had one in full bloom in her warm kitchen that also has a wood stove. Wood stoves generally are hard on houseplants – they make rooms too hot and too dry for most. But her geraniums thrive – in part because she waters them regularly. In the spring she will cut back the long stems and put them outside, pots and all, for the summer.
I recommend that everyone have a few houseplants. I have too many (including a large banana plant, a hibiscus tree, a nice clump of papyrus and many more). Plants make the interior air more humid, and some take out pollutants. And best of all, they keep my hand in gardening activities all winter long.
Visit Henry’s Web site, www.Gardening-guy.com for more information and photos of houseplants. His e-mail is henry.homeyer@comcast.net
Web Extras: Other House Plants I Grow
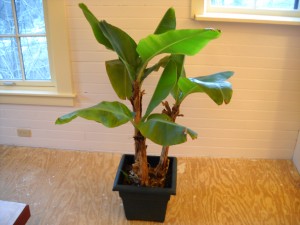 Another great foliage plant I grow is a banana “tree”. They don’t get woody, even in the tropics, but can get tall – even in the house. I got a small one 5 years ago and have been growing it in a large pot since then. In the summer it is outside, and in the winter I keep it in a west-facing window. Well, not in the window,but on the floor near the window. The banana has yet to produce fruit, but it has made 3 or 4 shoots that I intend to separate next summer and put in individual pots. My banana is now 4 feet tall, and has never had aphids or other pests.
The exception to the rule, “Don’t overwater” is the papyrus. It needs to grow in a constantly wet location. I planted a small one a few years ago in a nice Chinese vase that has no hole. I water until the water is saturated and standing water is above the soil line. I grow mine in an east-facing window. The stems get to be 3-feet tall, with nice lacy fronds.
Pineapple plants, decorative ones, are also on the market this year. I got one at a florist shop and it is very nice. It has a miniature pineapple on a stem above the foliage, but it will never get big – or edible.
Seed Catalogs
Posted on Thursday, February 2, 2012 · Leave a Comment
Before we launch into this week’s article…
Gardening Classes with Henry
Lebanon College: Gardening: A Practical Workshop. Garden writer Henry Homeyer will teach you the basics of organic vegetable and flower gardening. From garden design to seed-starting , planting, watering, weeding, mulching, and harvesting, this course will give each student practical knowledge of gardening. Tuesday nights from 6:30-8:30 for 5 weeks, April 3-May 2.Contact Lebanon College to reserve a spot for this5-part workshop www.lebanoncollege.edu or call 603-448-2445.
AVA Gallery, Lebanon. Henry will teach 3 classes at AVA Gallery this spring. You may sign up for one or all of these workshops:
Sculpting the Living Landscape: Starting Flowers from Seed
April 9; Monday, 6:30–8:30pm; One 2-hour class
Sculpting the Living Landscape: Perfect Perennials for the Upper Valley Garden
April 23; Monday, 6:30–8:30pm; One 2-hour class
Sculpting the Living Landscape: Organic Techniques for Enriching Soil and Managing Pests
May 7; Monday, 6:30–8:30pm; One 2-hour class
For more information go to www.avagallery.org or call 603-448-3117.
Seed Catalogs
I love thumbing thought the seed catalogs, and look forward to their arrival every year. On the other hand, I do wonder about the environmental impact of having so many seed companies sending thousands upon thousands of catalogs through the mail. So I have resolved not to request any more catalogs and I have started searching for seeds on-line.
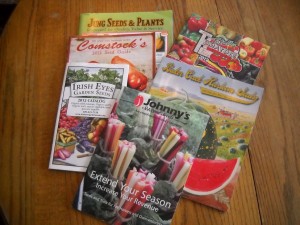
Seed Catalogs - Just Say No!
I was inspired to shop on line this year, in part, by Renee’s Garden seeds, which only sells seeds from its Web site (www.reneesgarden.com). Her Web site is very easy to use. Click once, you have a basic description, cost and a drawing. Click on “How to Plant and Grow”, and you get lots of info. Click on “Photos”, and there they are – especially helpful for flowers. I have learned from her articles that are also on the Web site. (see Kohlrabi, for instance)
In my on-line search for interesting catalogs I found an old friend, Dan Nagengast, who now owns a seed company in Kansas called Seeds from Italy. (www.GrowItalian.com). Dan was in the Peace Corps in Mali, West Africa, when I was there. I called him right up and learned that he and his wife have been market gardeners for 20 years, and recently bought the company. He told me that seeds from Italy do well here, and that his company has seed racks throughout New England.
I use lots of fennel seeds in cooking (they add a nice licorice flavor), and love fennel bulbs for use in salads, but have not grown fennel in ages. Dan confirmed that there are 2 different kinds of fennel – bulbing fennel and a wild fennel that produces flowers and seeds that are wonderfully powerful, adding a licorice flavor to soups and stews. I shall order seeds of the wild one, Fennel Sylvatico. I’ll also try their chickory, a green that Dan recommended, and a few kinds of beans – they sell 35 named varieties!
I grow lots of heirloom seeds – varieties that have been around for a long time and that are good for seed saving. Baker Creek Seeds (www.rareseeds.com) is one of the leading companies for heirlooms – their online catalog boasts of 1400 varieties this year. But, quite frankly, finding what you want with that many varieties is a bit overwhelming for me. A paper catalog would be easier to manipulate. Their honesty is overwhelming. Describing one called “Big White Pink Stripes Tomato”, they write “Lovely big, globe fruit … a sweet tropical taste with hints of melon. A lovely tomato with low yields; yes, low. But who cares? It is so gorgeous!” I’ve never seen a catalog admit to low yields.
A great source for organic tomato seeds is in Carmel, CA: Tomato Fest (www.tomatofest.com). Gary Ibsen grows about 600 varieties of tomatoes. Like Renees’ Seeds, they only sell from their web site. They have a PDF file that you can print out to read if you must –but it’s 82 pages. They have been growing tomatoes for many years (and until 2008) they had a tomato festival each fall, hence the Web address. I like the fact that the web site allows you to search for things like “Cooler climate varieties”, or” Gary’s Personal Favorites”. Unlike almost all other seed companies, they grow all their own seeds.
Then I spent some time on the Seed Saver’s Exchange Web site. The Seed Savers Exchange is a non-profit organization that is ”a member supported organization that saves and shares the heirloom seeds of our garden heritage, forming a living legacy that can be passed down through generations.” Anyone can buy seeds from them. If you become a member you get the seeds savers exchange yearbook which connects you to other seed savers who grow and save heirloom seeds (and you can sell your seeds, if you wish). This year there are over 20,000 kinds so seeds available to you. You also get a quarterly magazine and other benefits, including a 10% discount on seeds.
I love the names of heirloom seeds, they tell a story, or the opening line, if you have an imagination. There is the Lazy Housewife Bean, a tomato called Black from Tula (which turns out to be from Russia, not Auntie
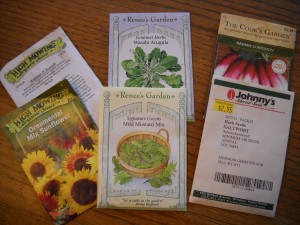
Seed Packets
Tula), or the Rat Tailed Radish (Native to South Asia. Grown for the crisp, pungent, edible seedpods (up to 6 inches long) and not for the roots. Pods should be gathered before fully mature and eaten raw, pickled, or chopped in salads. 50 days.). The Seed Saver Exchange Catalog online is not overwhelming – they only have a tiny percentage of the varieties offered by members. About 40 kinds of beans, for example, not hundreds. It gives planting specifications and a photo for each.
And of course, seed racks are great for purchasing seeds. I am a big fan of supporting local businesses and of course, there are no shipping charges for seeds purchased at your local feed and grain store. I like buying seeds of known companies, not the cheapie seeds of some big box stores as I have no idea how they were grown, or where. And of course, organic seeds are better even if sometimes a tad pricier.
For a list of seed companies Henry likes, visit www.Gardening-guy.com. Henry is the author of 4 gardening books. His latest, Organic Gardening (Not Just) in the Northeast, is available online and at bookstores throughout New England.
Web Extra: In addition to the catalogs mentioned above, I buy seeds from lots of companies, but here are some I like best, and what I like about them:
Johnny’s Select Seeds (www.johnnyseeds.com): This is a company that has been selling seeds under the same management for more than 35 years. It’s now an employee-owned company based in Winslow, Maine, and the founder, Rob Johnston is still running it. They supply a lot of farmers I’ve interviewed, which tells me that their seeds are top quality, reasonably priced and reliable year-after-year. They have a great selection of seeds as well as tools, row covers and other gardening/farming supplies. They sell both organic and conventional seeds.
High Mowing Seeds (www.highmowingseeds.com): These folks only sell organic seeds, and are located in Wolcott, Vermont. I like buying seeds from them because they test seeds in Vermont – over 800 varieties every year. I’ve talked to the owner, Tom Stearns, who is in the business not just to make money, but to help change the world. Their Web site explains their philosophy, which says, in part: “We believe in a hopeful and inspired view of the future based on better stewardship for our planet. Everyday that we are in business, we are growing; working to provide an essential component in the re-building of our healthy food systems: the seeds.”
Seeds of Change is another nice company (www.seedsofchange.com). They are fully organic.
Flower Shows of New England
Posted on Wednesday, January 25, 2012 · Leave a Comment
Before we launch into this week’s article…
Gardening Classes with Henry
Lebanon College: Gardening: A Practical Workshop. Garden writer Henry Homeyer will teach you the basics of organic vegetable and flower gardening. From garden design to seed-starting , planting, watering, weeding, mulching, and harvesting, this course will give each student practical knowledge of gardening. Tuesday nights from 6:30-8:30 for 5 weeks, April 3-May 2.Contact Lebanon College to reserve a spot for this5-part workshop www.lebanoncollege.edu or call 603-448-2445.
AVA Gallery, Lebanon. Henry will teach 3 classes at AVA Gallery this spring. You may sign up for one or all of these workshops:
Sculpting the Living Landscape: Starting Flowers from Seed
April 9; Monday, 6:30–8:30pm; One 2-hour class
Sculpting the Living Landscape: Perfect Perennials for the Upper Valley Garden
April 23; Monday, 6:30–8:30pm; One 2-hour class
Sculpting the Living Landscape: Organic Techniques for Enriching Soil and Managing Pests
May 7; Monday, 6:30–8:30pm; One 2-hour class
For more information go to www.avagallery.org or call 603-448-3117.
Each year I rejoice at the coming of the flower shows – they bring a taste of spring. By the time they arrive I‘m more than ready for blooming daffodils and tulips; I hunger for leafy trees and shrubs – even indoors. And I like their ambience: it’s like strolling down the midway at a country fair – but the products are different. Instead of trying to win a bear, I take a chance buying new and different bulbs or plants I can’t get in the ground for another 3 months. The hawkers, instead of selling temporary tattoos and Harley tee shirts, are selling garlic peeler/dicers and handy gadgets for cleaning floors.
The season starts February 11-12 with the New Hampshire Orchid Society’s annual show in Nashua, NH at the Radisson Hotel. Admission is $10, $6 for seniors. It’s a small specialty show, but nice. www.nhorchids.org.

Rhode Island Flower Show Sand Sculpture
The first big one, The Rhode Island Show, occurs February 23-26, and I can’t wait! I went last year for the first time and loved it. They have a wonderful line-up of speakers and educators showing slides and sharing wisdom. There is a real independent bookstore with hundreds of different titles of gardening books – I could stand there all afternoon, just thumbing through them. There are artists, craft producers and –get this – sand castles ten feet tall! (Someone brings in truckloads of sand and artists make a wonderland of castles with moats and gnomes and fairy princesses. It was fabulous last year, and will be there this year, too)
Last year the Rhode Island Show had competitions to see who could make the best sculpture using vegetables and fruit. There were garden hats decorated with flowers and –can you believe it? – women’s bathing suits made of leaves and flowers (displayed on mannequins, not gardeners!) There was beautiful stonework for inspiration, and lots and lots of plants – this year there will be 100,000 blossoms, I’m told. They are adding a food and wine section to the show in conjunction with Johnson and Wales College of Culinary Arts, among others. The show is at the Rhode Island Convention Center, Providence. Tickets $18-15. www.flowershow.com.
That weekend (February 24-26) is also the Connecticut Flower Show in Hartford. I went last year after leaving Providence and it was pretty crowded that Saturday – Saturdays anywhere are the busiest, and to be avoided if possible. It has over 300 booths and 80 workshops to attend over the course of the weekend. This year the theme is “Fabulous Fifties”. Tickets are $16. www.ctflowershow.com.
Next comes the Flower and Patio Show in Worcester, Massachusetts at the DCU Center March 2-4. I’ve never attended, but from what I’ve heard a major emphasis is on patios, outdoor furniture and the like. Tickets are $10. www.centralmaflowershow.com.
The Portland, Maine show is March 8-11 at the Portland Company Complex. Tickets are $15. www.portlandcompany.com.
If you don’t mind traveling, the Philadelphia Flower Show is March 4-11. Admission is $27, but the show is huge – and has gorgeous displays – it’s worth a visit if you can afford the trip. www.theflowershow.com.
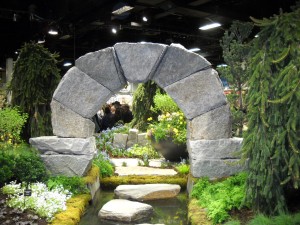
Boston Flower Show Stone Sculpture
The Boston Flower Show is always a big event. It’s at the Seaport World Trade Center, March 14-18. I went last year and liked it despite the crowds. Admission is $20. Lots of displays, lots of garden paraphernalia for sale- plan a full day. This year’s theme is “First Impressions” – stressing the “Wow! Factor”. www.masshort.org.
New Hampshire has the Seacoast Home and Garden Show each year at the Whittemore Arena in Durham. This year the dates are March 24-25 and tickets cost $8. www.homegardenflowershow.com.
Bangor, ME has a show April 6-8 at Bangor Auditorium. Tickets are only $5. www.bangorgardenshow.com.
The Vermont show, always one of my favorites, is now held only every other year and is not happening this year.
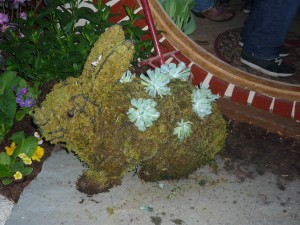
Whimsy at the Vermont Flower Show
And for those of you with deep pockets, there is the Chelsea Flower Show in London, England May 22-26. Definitely on my list of places to go before I kick the bucket, I’ve never been, alas. It sounds incredible. www.rhs.org.uk/shows.
I try to go to at least 3 flower shows each year. There is something about the scent of flowers in winter that draws me in, and there is always much to learn at the lectures and demonstrations. Maybe I’ll see you at one.
Henry Homeyer’s web site is www.Gardening-guy.com. Go there to see photos of last year’s shows. His e-mail is henry.homeyer@comcast.net

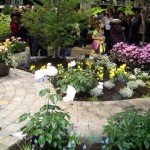
Boston Flower Show
- Rhode Island Flower Show Fashion
Eating from the Garden – Now!
Posted on Wednesday, January 18, 2012 · Leave a Comment
Before we launch into this week’s article…
Gardening Classes with Henry
Lebanon College: Gardening: A Practical Workshop. Garden writer Henry Homeyer will teach you the basics of organic vegetable and flower gardening. From garden design to seed-starting , planting, watering, weeding, mulching, and harvesting, this course will give each student practical knowledge of gardening. Tuesday nights from 6:30-8:30 for 5 weeks, April 3-May 2.Contact Lebanon College to reserve a spot for this5-part workshop www.lebanoncollege.edu or call 603-448-2445.
AVA Gallery, Lebanon. Henry will teach 3 classes at AVA Gallery this spring. You may sign up for one or all of these workshops:
Sculpting the Living Landscape: Starting Flowers from Seed
April 9; Monday, 6:30–8:30pm; One 2-hour class
Sculpting the Living Landscape: Perfect Perennials for the Upper Valley Garden
April 23; Monday, 6:30–8:30pm; One 2-hour class
Sculpting the Living Landscape: Organic Techniques for Enriching Soil and Managing Pests
May 7; Monday, 6:30–8:30pm; One 2-hour class
For more information go to www.avagallery.org or call 603-448-3117.
___________________________________________________________________________
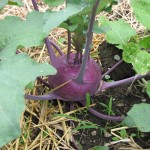
Kohlrabi
I made a nice omelet for breakfast Sunday morning that had (in addition to the regulars of eggs, cheese and onion) parsnips and kohlrabi saved from my garden. The kohlrabi gave crunch, but not much flavor. The parsnips, however, were fabulous. They added zing – real garden flavor in January. I could have used carrots, beets, potatoes, celeriac or rutabagas, all of which I still have from my garden. I really like growing much of my own food – and saving it for use all winter is something I’ve worked hard on. It’s easy, and if you are studying those seed catalogs now, you might think about the veggies you can store well for winter eating.
Root crops like those mentioned above store well at 35-50 degrees, with high humidity – and a low rodent population. That’s right, mice and squirrels like root crops, so storing those veggies requires that you have a system. In past years I’ve stored root crops in 5-gallon pails in a cement-block “cold cellar” with an insulated plywood lid. The cold cellar was installed in a cold part of my basement and it kept my huge potato crop nicely. But mice can slip through the tiniest sliver of space, and sometimes did. So this year I’m trying something new.
Through the town list serve I obtained a free refrigerator, which I installed in my basement. It’s not new, but serviceable. I’m storing my root crops in it, and it is doing a fine job. No rodents to worry about, and it keeps the crops at a steady 35 degrees. Its only imperfection is that fridges are designed to maintain a lower humidity than my vegetables prefer.
Only the 2 vegetable drawers allow me to maintain high humidity, so for the rest I use plastic bins of veggies covered with moist towels. I also have a jute-lined wire bin that I use for carrots and parsnips. I layered them
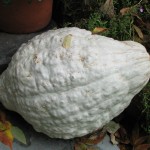
Blue Hubbard Squash
with moist sand last fall, which keeps the humidity right (available from Gardeners Supply www.gardeners.com). Of all my root crops, rutabagas seem to require the highest humidity, so I place those in the drawers of the fridge.
But not all veggies like cool, moist storage. Winter squash like low humidity and a temperature of about 50 degrees. I don’t have the perfect place for them, but if you have an unheated guest bedroom, that’s perfect. Onions and garlic like the same type of environment. Last year I stored a blue Hubbard squash for more than 12 months! It grows a leather-like skin which protects the interior nicely, and when I finally cracked it open around Thanksgiving the flesh was perfect!
Some years I find my Waltham butternut squashes store for 6 months or more without problems, and then some years they tend to rot. I imagine it has to do with the moisture level at harvest time. I’ve read that washing winter squash before storage and then dipping them in a 10% Clorox solution will minimize fungal rot, and I have done it, but cannot swear that it makes much of a difference.
The freezer is always great for storing veggies, so I am currently using 2 full-size freezers in the basement, and the big freezer section in my kitchen fridge. Each summer I fill gallon bags with whole tomatoes that I freeze for winter use in soups and stews. I suck out the air from the bag with a straw, which minimizes frost on the fruit – it’s almost as good as using one of those machines sold for the purpose, but much cheaper. I just zip the bag shut (up to the straw) and once the bag is clinging to the fruit, I slide out the straw and close the bag shut.
Here’s a list of what I am still eating from my garden, in addition to the veggies mentioned above: frozen broccoli, kale, Brussels sprouts, leeks, peppers, beans, zucchini, winter squash, parsley, pesto, corn and peaches bought for winter use, raspberries, black berries, blueberries, plums, elderberries and apples and cider. I have tomato sauce in jars and in the freezer, along with tomato paste in the freezer. Then I have dehydrated Sungold cherry tomatoes, apples, blueberries, hot peppers on the shelf of the pantry or in the fridge. And of course I have lots and lots of garlic (stored whole in a cool, dry location), and a variety of winter squashes including butternut, buttercup and delicata.
But back to that blue Hubbard squash: There is something inherently daunting about a 20 pound squash. First there is cracking it open (I use a meat cleaver, but a saw or a wood splitter would work, too, I suppose).
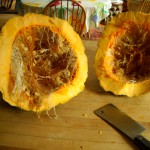
Processing Blue Hubbard Squash
Then there is the question of what to do with all that squash – when I finally did process it, it yielded 25 cups of pure food.
I placed big chunks of squash in my 16-quart stock pot with an inch of water and steamed it. When the flesh was soft I scooped it out and used some for a soup and froze the rest in zipper bags for later soups. My favorite soup using winter squash (based on one I ate while a Peace Corps volunteer in West Africa) also has peanut butter, hot peppers, fresh ginger, cumin and frozen tomatoes or tomato paste. I sometimes add black beans or kale for variety. It’s a good hearty winter soup that warms the body and soul. It’s great to be eating out of the garden in January. For the complete recipe, and one for roasted spicy squash seeds, go to my web site, www.Gardening-Guy.com. Bon appétit.
Henry Homeyer is the author of 4 gardening books. Contact him at P.O. Box 364, Cornish Flat, NH 03746 or by e-mail at henry.homeyer@comcast.net
Henry’s African Squash and Peanut Soup
This is my interpretation of a soup served throughout West Africa that I learned to love while living in Cameroon and Mali. You can vary the proportions according to your taste – a lot of hot pepper or a little; a lot of peanut butter or not so much. Improvising is good: I have been known to add kale or even fresh cranberries to it. Bon Appétit!
8 cups steamed winter squash, preferably Hubbard, but use what you have.
8 cups water
2 onions 2-4 cloves of garlic 4 fresh jalapeno peppers, chopped, or 1 tsp ground dry jalapeno
(add peppers in small portions until you decide how much you like)
2 stalks celery or half a large celeriac (which I use, because I grow it), chopped
6oz tomato paste
½ cup peanut butter
3 tablespoons grated fresh ginger
¼ teaspoon cinnamon
¼ teaspoon cardamom
½ teaspoon cumin
2-3 sprigs fresh rosemary, or 1 teaspoon Herbes de Provence or dry rosemary
2-3 bay leaves
2 Tablespoons honey (optional)
Salt and pepper to taste
Cooking Directions: Blend the cooked squash with water in food processor, add to a large heavy kettle in which you have sautéd the onions, garlic and celery. Add the other ingredients and let simmer for an hour or two. If you wish you can stretch the soup by adding more water.
Spicy Squash or Pumpkin Seeds
Remove and clean the seeds from a large winter squash or pumpkin and allow to dry for a day or more on a plate. Oil a large cast iron frying pad and add seeds. Keep heat at medium.
Stir in chili powder or hot pepper powder according to your taste. A pinch of cumin can add zing.
Add salt to taste.
Roast until the seeds are dark brown, stirring regularly to avoid burning.
Inspirations – deCordova Sculpture Park & Museum
Posted on Wednesday, January 11, 2012 · Leave a Comment
January is generally an all-white month in my garden, though this year the snow has been off to a slow start. I love the curves of drifts, the smoothness of open spaces, the contrast between snow and the outlines of my trees, shrubs, arbors and stonework. Snow can create free sculpture in the garden – even without making snowmen.
In many gardens, however, winter is a boring time: without flowers, the garden is largely empty of interest. On a brilliant, blue-sky day I decided to visit an outdoor sculpture garden to enjoy a garden that is full of three-dimensional interest in winter. I wanted to see not only the sculpture, but the trees, shrubs and paths of the deCordova Sculpture Park and Museum in Lincoln, Massachusetts.
The deCordova was once the summer home of Julian de Cordova (1851-1945), a Jamaican by birth, who made his money as a tea broker and President of Union Glass Company. It is now offers a 35-acre sculpture park with 60 works of art, a museum (once his brick castle), a store, café and classroom space. When I visited, the museum was closed for the installation of a new show which opens January 22.
I spent about 3 hours looking at the outdoor sculpture and studying the landscape to see what I might be able to do on my own property – or that you might on yours. I am not an artist and have no budget for sculpture, but I had a great experience looking at contemporary sculpture of New England artists – the focus of the deCordova – and the landscape.
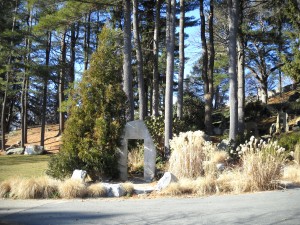
Stone Gateway At deCordova
Leaving the parking lot on foot, I was immediately drawn to a glade of trees and shrubs that had a lovely collection of decorative grasses and a stone entrance created by cutting a doorway into large piece of granite. Any arbor or entry catches my eye, and draws me to – and through – it. Passing through this doorway, I ascended a gentle hill which had natural ledge exposed and other cut stone pieces added. Evergreen rhododendrons and tall pines provided texture and color. It was lovely.
At the top of the incline was an open lawn surrounded by majestic oaks and populated with large sculptures. I continued on, climbing a rocky hillside, following a pathway. Paths are great for moving visitors along, particularly in a multi-level landscape – I always want to move forward to see what lies ahead.
In the course of my visit I walked on several types of paths – gravel, grass, stone and pavement. The most interesting to me, and one that can easily be copied without having a big budget, was quite simple: an arrangement of stepping stones. By that I mean that the stones were not flush to the ground, but a few inches above it; each stone was anywhere from 18-48 inches in width and/or length. Due to the irregularity in size and shape, and the fact that each stone was separated from the next by 6-12 inches, the visitor is required to slow down and step carefully.
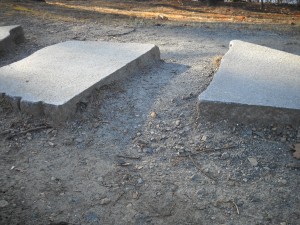
Steppingstone Walkway
I’d never seen a stepping stone walk like this in a public space. It is not wheelchair accessible (though wheelchairs could travel on the hard-packed smooth lawn near the pathway), and it would be easy to trip and fall if not paying attention. Still, I liked the fact that I could not rush along it. If you have a garden with interesting small flowers, a stepping stone path would be one way to keep visitors moving through the garden slowly to see them – or your sculpture.
At the far end of one path was a 3-foot tall retaining wall on which visitors had made their own sculpture, which delighted me. The wall was decorated with small cairns – 3-6 small stones placed in a pile. I made one myself. Again, this is something you can easily do on your own landscape – now, in winter. You can see a short video of the cairns here:
httpv://www.youtube.com/watch?v=_pPkbBy73iE
In order for your cairn to survive, given the movement of the ground as it freezes and thaws, you need to build it on a stable base such as a stone wall. But if you accept that your stone sculpture may tumble down by spring, you can build one anywhere. I’ve seen cairns that are 3 feet or more feet tall but a nice collection of stones can be just a few inches. Place them carefully so that when you lightly touch the stones they don’t fall.
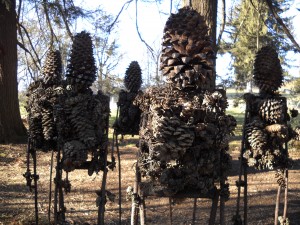
Pine Cone Sculptures
Sculptor Ronald Gonzalez created a site specific installation, a collection of human-like figures made of pine cones and steel. This is something that I could do, even though my artistic talents are (very) limited. He made simple stick figures of steel rebar, then attached (with wire) various sized cones to create heads and bodies. He created a tribe of them – a dozen or so – standing inside a circle of evergreen trees. I almost missed it when I walked by – but then let out a shout of glee when I saw it. Art? That’s for each viewer to say – but it was fun to see, and I might just create one – for winter interest.
So if your garden is flat and boring in winter, visit the deCordova to see what ideas you can bring home with you – and create something that will tickle your fancy and delight your eye next winter. See below some of the other sculptures at the deCordova:
Sisters, Bob Boemig

Black Hearts, Jim Dine
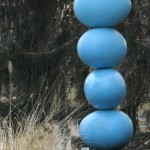
Laid, Martha Friedman

Humming, Jaume Plensa
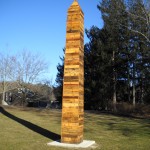
Cleopatra's Needles, Liz Glynn

Listening Stone, Joseph Wheelwright
Henry Homeyer is the author of four gardening books and writes a self-syndicated column on organic gardening that appears in 12 newspapers throughout New England. Henry’s Web site is www.Gardening-gGuy.com.
Gardening Resolutions for 2012
Posted on Wednesday, January 4, 2012 · Leave a Comment
I am, at heart, an optimist. I believe that the rodents will leave my tulip bulbs alone, so last fall I planted plenty. I believe that the Zone 5 perennials I planted last summer in my zone 4 garden will survive the winter. I believe that late blight will not return next summer to ravage my tomatoes the way it did in 2010. But I also try to learn from my mistakes – and from the mistakes of others. Each winter about this time I like to reflect on the past year’s gardening efforts and make resolutions about what to do – or not – this coming summer.
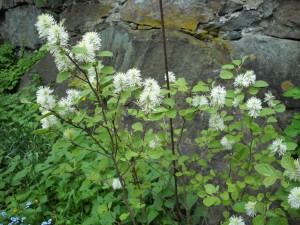
Easy Care Shrub, Fothergilla Major
This year I also asked some readers what resolutions they are making, and I’m going to share a few of their thoughts. I’ve had to edit and condense a few, so forgive me if I’ve edited yours – or left it out completely.
As the owner of a corgi, I liked this resolution, from Maria van Beuren: “I will plant the garden without assistance, however enthusiastic, from small dogs.” She provided this back story, which made me laugh:” I crawled down the row, carefully doling out tiny carrot seeds and tenderly covering them. Reached end of row and looked back to see that two puppies had concluded that I needed their expertise in digging and had come along behind me, efficiently trenching. Needless to say, most of the carrot plants I grew last year were oddly distributed in the garden.”
Nelson and Brenda Barter solved the carrot spacing problem (the seeds are small and hard to space properly), saying “We’ve learned that we really like premeasured seed strips for some applications. We always had trouble growing carrots and beets from seed packets, we’d thin them but they’d still bunch up and grow poorly or leave bare patches. We’ve had really good luck with both carrots and beets since we started using the strips; for us, they’re worth the small additional cost.” So try those, next year, Maria.
A number of readers said they were going to downsize next year. Tom Brennan had an interesting way of doing that – stay away from the catalogs:, “I’m going to make my garden smaller. At 79 it takes a lot longer to get things like weeding and cultivating done. BUT the drawback is I see something in a seed catalog and I’d like to try that, or something is said to be the very best tasting – and what’s one more row? So I think I won’t look at catalogs this year.”
Readers Donna and Bill Heroux wrote saying, “Instead of planting just one variety of radish, we’re going to plant an assortment-lots of colors, lots of flavors.” Now that is a resolution that I suspect will be kept – unlike some others which were much more ambitious.
Speaking of ambitious, Carol Mayer wrote, “Ditch the perennials and plant the trees and shrubs” is my motto for 2012. I plan to “garden smarter, not harder” as so many of us are saying now. I’ll keep the hostas and other easy care perennials but those that must be dug, divided, and replanted every 2-3 years must go.” Now that is a great resolution, but it sounds like a lot of work. More than will be done in 2012. And if Carol is like me, it’s very hard to shoot a plant – or throw it on the compost pile.
Might I suggest a modified resolution, Carol? How about this: Dig up 10 or 20 perennials and have a “yard” sale? Then use the money to buy those nice shrubs you want. A big perennial can often be divided into 6 smaller plants that still will sell like hotcakes at $2-3 each. Invite everyone from your garden club or even your entire e-mail address book! Twenty perennials can earn you a couple of hundred dollars. One last suggestion: pot them up nicely in the spring, and then sell them in mid-June when the plants have recovered from the move and look good. And remember that nothing sells better than a plant with blooming flowers!
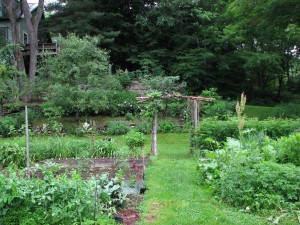
June in Henry's Garden
Meanwhile Marta Smith had a different approach – “My resolution is to not get carried away and end up planting too many plants for the space I have. My plants were too crowded and consequently did not produce as well as they should have. I will plant less and hopefully reap more, or maybe I will just turn the whole yard into garden space! Who needs a lawn anyway?”
Judy Hallam wrote, saying, “From now on I will only use slow release fertilizer in my garden boxes and containers for healthier, thicker plants. She added, “PS: This was your suggestion, Henry!” Thanks, Judy, Glad somebody pays attention to what I write!
And on a more philosophical note, I’d like to end with this from my friend David Zoffoli, who wrote, “I resolve to not worry about weeding, to go outside when it rains and enjoy life with the plants; to continue to order way too many annual seeds that I don’t plant; to plant more trees for birds, and to eat a pint of blueberries straight from the bush.” In other words, relax and enjoy the garden!
As for me? I resolve to try moderation in everything I do – even though it’s not my inclination! Thanks to all of you who wrote, and my best to all gardeners for 2012.
Henry Homeyer is available to speak at your gardening club or library. His Web site is www.Gardening-Guy.com. E-mail him at henry.homeyer@comcast.net
 If you buy potting soil or seed starting mix, it is mostly peat moss, which has little nutrition to offer a plant. It is used for its ability to hold moisture. I suggest mixing it 50-50 with compost – either your own homemade stuff or the kind that comes in a bag.


