Cold Weather Crops
Posted on Wednesday, October 22, 2014 · Leave a Comment
At this time of year I eat one of the “three B’s” from my garden every day: broccoli, Brussels sprouts or kale. All right, don’t get on my case. I know kale doesn’t start with a “B”. But it’s a brassica, the family that contains those other two, plus cabbage, rutabagas, cauliflower, kohlrabi and more. All are good cold weather crops.
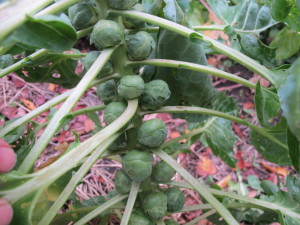
Brussels sprouts
In addition to surviving frosts, all the brassicas are healthy foods with lots of Vitamin C, soluble fiber and compounds thought to prevent cancer (though that is a little controversial). What you may not know is that boiling brassicas removes most of those cancer-fighting compounds, but steaming them or cooking them in a microwave dos not. Three to four minutes of steaming will cook your brassica nicely, but not steal many nutrients. But the best way to eat them is raw.
There are many varieties of broccoli, almost all are excellent. Arcadia is one that has done well for me, and is very cold hardy. I talked to my friend Chaz Meyers of Cornish Flat, N.H., who I think of as Mr. Broccoli. He and his wife, Jill Johnson, grow about 50 plants every year, freezing it and eating it all year. He told me that ‘Packman’ is favorite, in part because it produces lots of side shoots. He also likes ‘Waltham’ and ‘Gotham’ varieties.
Chaz recommends cutting the primary head of broccoli on an angle so that the stem, which is often a bit hollow, does not hold water (which might promote rot). He also suggests, if the summer is dry, watering your broccoli well after cutting the big head. That keeps the plant healthy and promotes the development of side shoots.
I once planted a little vegetable garden for a woman who didn’t know much about gardening. I planted two broccoli plants that produced magnificent heads in July. She ate them, with glee, and then pulled out the plants. Yikes! I regretfully explained that the most productive part of the plant are all those little “side shoots” that come after the main head. That, like the Energizer Bunny, broccoli keeps on producing for months. I’m still eating side shoots from plants I put in back in June.
Although broccoli are known for having little green caterpillars on them, mine have not had any this year – or none that I’ve seen. Maybe I’ve eaten a few. The best solution to the green caterpillar problem is just to soak the broccoli in cold water with a little salt in it before cooking. They will float up.
I dare say that my Brussels sprouts are perfect right now. Each is the diameter of a quarter- or a half dollar – and unbothered by any pests or diseases. I eat some every night for dinner: a dozen is just the right sized serving for me, so my six plant will keep me eating them for weeks. Brassicas are very hold hardy, and Brussels sprouts and kale will survive temperatures down to 20 degrees – or even colder. Frost helps to sweeten up their flavors.
Deer don’t bother my garden until it gets cold. Then they look for my Brussels sprouts and kale and broccoli. Once they waited until the night of December 24 to eat my Brussels sprouts, though that might have been the reindeer, waiting while Santa was inside the house. I recently took some preventive measures. I covered my kale with a scrap of chicken wire that I just draped over my plants, and then I surrounded the Brussels sprouts with some four-foot chicken wire. The broccoli will have to fend for itself – I’ve run out of fencing.
Kale is the perfect vegetable to freeze. Unlike spinach, it doesn’t get soggy when frozen. It keeps its character. I blanch it for a minute in boiling water. That kills the aging enzymes that would make it turn old and woody after just a few months in the freezer. When I take it out, I drop it into a sink full of cold water, spin it dry in my salad spinner, pat it dry with a tea towel, and put it in freezer bags. I suck out the air in the bags with a drinking straw. The straw goes into a zipper bag that is 99% closed, and I suck out the air. I snap the bag shut as I pull out the straw, and it’s ready to go in the freezer.
I know people that are gaga about kale chips, dried kale that is salty and crispy, the health-nut food to substitute for potato chips. I recently tried making my own but I’m neutral about them. Here’s what I did: I stripped the leaves off the central stem, and tore the leaves into pieces and put them in a big bowl. I coated them with a garlic and olive oil solution (I used 3 cloves garlic and a few tablespoons of oil). I sprinkled pepper flakes or nutritional yeast on the leaves and tossed some more. I added salt, but not a lot.
Then I put some kale chips in the oven at 150 degrees for 2 hours with the convection fan blowing, others in a food dehydrator at 135 degrees for 2.5 hrs. Maybe I needed to use more salt or oil, but I was aiming for a health food. And this tasted like something a little too healthy. Oh well. They’re crispy, but they’re definitely not as good as potato chips. Darn!
Eating the brassicas from my garden at this time of year is a wonderful way to transition to winter. I have food in the freezer from the summer, and root crops stored in the cellar. But it feels great to walk to the garden with a knife and cut something fresh for dinner.
Henry Homeyer is a gardening educator, speaker and writer. Reach him at henry.homeyer@comcast.net.
Planting Garlic
Posted on Wednesday, October 15, 2014 · Leave a Comment
Garlic is one of those magical flavors that give foods depth of flavor and the richness of another world. Italian food, French food, Indian food – these all include liberal use of garlic. Why the English decided on fish and chips and boiled dinners as their staples is a mystery to me. Maybe they can’t grow garlic. But I’ve been growing garlic for my kitchen for decades. It’s easy to grow and now is the time to plant it for next year.
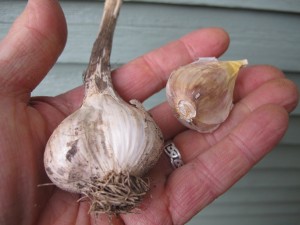
Hard neck garlic
Your first task is to find some garlic suitable for planting. You can’t just go the grocery store and buy some. Most commercial (non-organic) garlic has been treated with chemicals to keep it from sprouting. Instead, go to your garden center to buy some – or get a few heads of garlic from a farm stand or a friend who grows it.
Here in New England the recommended type of garlic is called ‘hard neck garlic’ and it survives our cold weather nicely. Soft neck garlic, commonly grown in California, is less cold tolerant. It is the type that can be braided and hung in the kitchen. Hard neck garlic sends up a stiff stalk, called a scape, which grows out of the middle of the bulb – a stiff neck, if you will.
Hard neck garlic generally has a stronger, richer flavor with more bite. It also comes in a wide range of flavors – just as different varieties of tomatoes and sweet corn have distinct flavors. Hardneck garlic is often classified as either rocambole, porcelain or purple stripe. Rocambole garlic has a tan outer covering and usually produces up to a dozen cloves per bulb. Porcelain garlic has a satiny white wrapper and tend to produce larger cloves with as few as four per bulb. Purple stripe garlic is one of my favorites – it is productive, tasty and generally a nice, plump size.
I like to say that everyone would be a gardener if growing all vegetables were as easy as growing garlic. There are just three steps to growing garlic: planting it, mulching it, and harvesting it. That’s right, if you mulch well it will grow well and you will never – or rarely – need to weed.
I grow garlic (and all my vegetables) in wide, mounded beds. Each bed is 30 to 36 inches wide, and mounded up 4 to 6 inches above the walkways. A short-tined garden rake or hoe is useful for shaping the beds, and to gather up loose soil from the walkways.
The first step when planting garlic is to remove any weeds from the soil. Then I enrich the soil by adding 3 or 4 inches of compost on top of the bed I am planting it in. I use a garden fork or my CobraHead hand weeder to loosen the soil and stir the compost into the top few inches of soil. Rototilling would mix the compost in deeper – good for drainage in a clay soil if you have it, but away from the roots of my garlic.
Rows of garlic need to be spaced 6 to 8 inches apart. Most years I plant short rows across my wide beds, but sometimes I will plant rows down the length of the beds – it really doesn’t matter which way you do it. I create furrows with a hand tool in the fluffy soil of my bed and sprinkle on some bagged organic fertilizer, then mix that in.
It is important to plant your garlic right side up. If you look at a bulb of garlic, you should be able to see roots, or where the roots have been cut off. The top of each clove has a slightly pointy tip, and the bottom has a small, flat scar. And of course, when looking at a bulb of hard neck garlic you can see where the scape grew. If you plant the cloves upside down, they use up a lot of energy trying to get started and grow toward the sun.
To plant, just push each clove into the prepared soil about 4 inches away from its nearest neighbor. The top of the clove should be 2 to 3 inches beneath the soil after you cover it up. Pat the soil with your hands to firm it up.
The last step is to mulch. I use mulch hay because it is inexpensive, but straw is fine, and should have fewer seeds. I put a thick, fluffy layer of hay over the entire bed – and about a foot deep. Fall rains and winter snows will compact the mulch to a 3 to 4 inch thick layer of mulch that should keep out all weeds – while allowing the garlic scapes to push through in the spring.
Garlic is ready to pick in July or August. The scapes will curl and dance as they grow, and are wonderful in a vase with flowers. The scapes are also tasty – you can chop them and add to stir fries or omelets. Store your garlic crop in a cool dark place for best storage. And don’t eat it all! Save some for planting your next crop.
I’ve been told that garlic has cancer-fighting compounds, and that it’s best to chop or press you garlic 10 minutes before cooking it to preserve the best effects. And it’s supposed to be good for keeping away vampires, not just cancer. Me? I find it necessary for a good spaghetti sauce!
Henry Homeyer is a garden designer, coach and the author of 4 gardening books. His web site is www.Gardening-Guy.com.
Planting Bulbs
Posted on Wednesday, October 8, 2014 · Leave a Comment
This is one of my favorite times of the year. Trees are turning brilliant colors, food from the garden is in the larder, and it’s bulb planting time. Some bulbs have a bad reputation: tulip bulbs for example, are often food for squirrels, and their blossoms are often munched by deer. But I know that if I plant daffodils, I’ll get blossoms six or seven months later and nothing will even think about eating them. Daffies are sure winners.
Daffodils will thrive and survive in sun or part shade. I grew up in Connecticut in a house that had a nice wooded back yard and a path through it that was lined with hundreds of daffodils. Maybe thousands. They multiplied and survived and bloomed year after year.
The soil was a dark woodland soil nourished by decomposing leaves. There was good drainage – which is important, as bulbs can rot if planted in heavy, wet soil. Occasionally my parents would dig up some big clumps and divide them, but really, we did almost nothing and the daffodils thrived.
I called Brent and Becky’s Bulbs, a family-owned business in Virginia to talk about my experience with daffodils. Their catalog says daffodils need half a day of sunshine even after the leaves come on. Why, I asked owner Becky Heath, did those daffodils of my youth do so well in our woods?
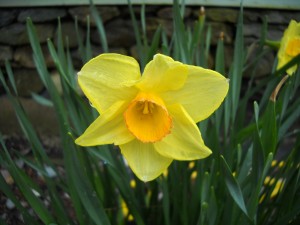
Daffodils- A sure sign of spring
Becky said that daffodils do best in nutrient-rich soil. Our soil was that. She also said that some types do better than others. There are more than a dozen categories of daffodils, and of these, the Cyclamineus group includes many of the most shade-tolerant varieties. These are not the classic daffodil: their petals lean backward, away from their trumpet – sort of like the ears of a dog with his head out the window of a fast moving car.
Becky also told me that daffodils in the Cyclamineus group also do better than other types of daffodils in wet, heavy clay soils. ‘Tweety Bird’, ‘Jack Snipe’ and ‘February Gold’ are examples in this group.
If you read a package of daffodil bulbs carefully, you will probably see that each variety is labeled Early, Mid-Season or Late. In the past I have always selected some from each time period. But Becky Heath suggested to me that I focus primarily on bulbs that bloom early because much of my property is getting quite shady – especially where I want to plant bulbs – and early bloomers do better in part shade than late bloomers. Examples of early spring daffodils include ‘Rijnveld’s Early Sensation”, and many of the miniature varieties.
Bulbs expend a huge amount of energy in order to produce flowers. Those bulbs need to be “re-charged” each year or they will decline and have less energy for blooming next year. They do this through the miracle of photosynthesis – sunshine on their leaves produces food for the bulbs. Leaves on early-blooming bulbs generally come up and get to work early in the spring – before trees have leaves. If a bulb can get the needed energy before the leaves appear, it will thrive. Many daffies still have green leaves through June.
That theory is supported by this: my snowdrops and Scilla and Glory-of-the-Snow have thrived and multiplied, even in shade. They are small flowers that come up in March, long before the maples have leafed out. They have done much better than the daffodils planted near them.
According to Becky Heath, another factor in the success or failure of bulbs is whether or not they are hybrids. Hybrids don’t self-pollinate and re-seed themselves. Those that are called “species” daffodils do spread and naturalize by seed, she said. Thus some of the older varieties do better than the “new, improved” hybrids.
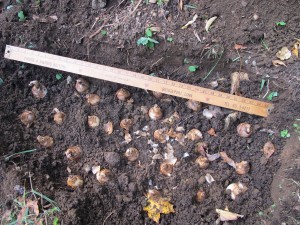
Daffodil bulbs planted in a 36-inch oval hole
Some gardeners plant bulbs one-by-one with a little tool that can dig a round hole when plunged into the soil. I find that hard work, and slow. I prefer to dig one big hole that will hold 25 bulbs or more. I dig the hole, add some organic fertilizer and scratch in some compost. I want daffodils to have about 6 inches of soil covering the bulbs, or less for the small bulbs.
After a long winter, I long for color. You may think of daffodils as just one color – yellow – but some varieties can offer white, orange, pinkish peach, and lots of variations of colors I can’t name. But whatever you choose, plant some bulbs now for a punch of color in the spring.
Henry’s e-mail address is henry.homeyer@comcast.net, or you may reach him at P.O. Box 364, Cornish Flat, NH 03746. If you have a question, please include a self-addressed stamped envelope.
Learning on the Road
Posted on Wednesday, October 1, 2014 · Leave a Comment
I’m not much of a country music fan, but do love Willy Nelson’s “On the Road Again” – probably because I love to travel. Recently I’ve been on the road again, visiting friends and family in Pennsylvania and Ohio, traveling by car. Unlike Willy, it’s not the honkytonks or making music that interests me, it’s the public gardens, garden centers and private gardens. There is always something to learn.

‘Fireworks’
While in Pennsylvania I visited Longwood Gardens in Kennett Square. These are at the home of the late Pierre S. Dupont which have been open to the public since the 1920’s. The gardens are largely formal, with huge expanses of lawn, fountains, shaped hedges and trees, ancient tulip poplars, displays of perennials, annuals, wonderful long shaded walkways, experimental plots and even a vegetable garden. A new addition is an 86-acre meadow, allowed to grow up in wild plants including many called weeds by gardeners. Right now dominant species include golden rods, fall asters and tall grasses.
Meanwhile, at the home of friends nearby, I spent time in a smaller version of the Longwood Meadow. Lisa and Chris Brinton bought a run-down farm about 30 years ago and have been working on it ever since. For the past decade that included bringing back to life a few acres of field that had been farmed for corn until the soil was depleted. When they bought the place the soil was so poor that even weeds had a hard time growing.
What struck me about their meadow was the number of bees, birds and butterflies. The field had been allowed to grow up in milkweed, goldenrod and native grasses. Trees that attract wildlife had been planted or allowed to colonize. It was a slow process as they didn’t bring in new topsoil, they just allowed leaves and grasses to decompose where they landed each fall and winter. Slowly the land came back to life. Mother Nature was allowed to reclaim the land.
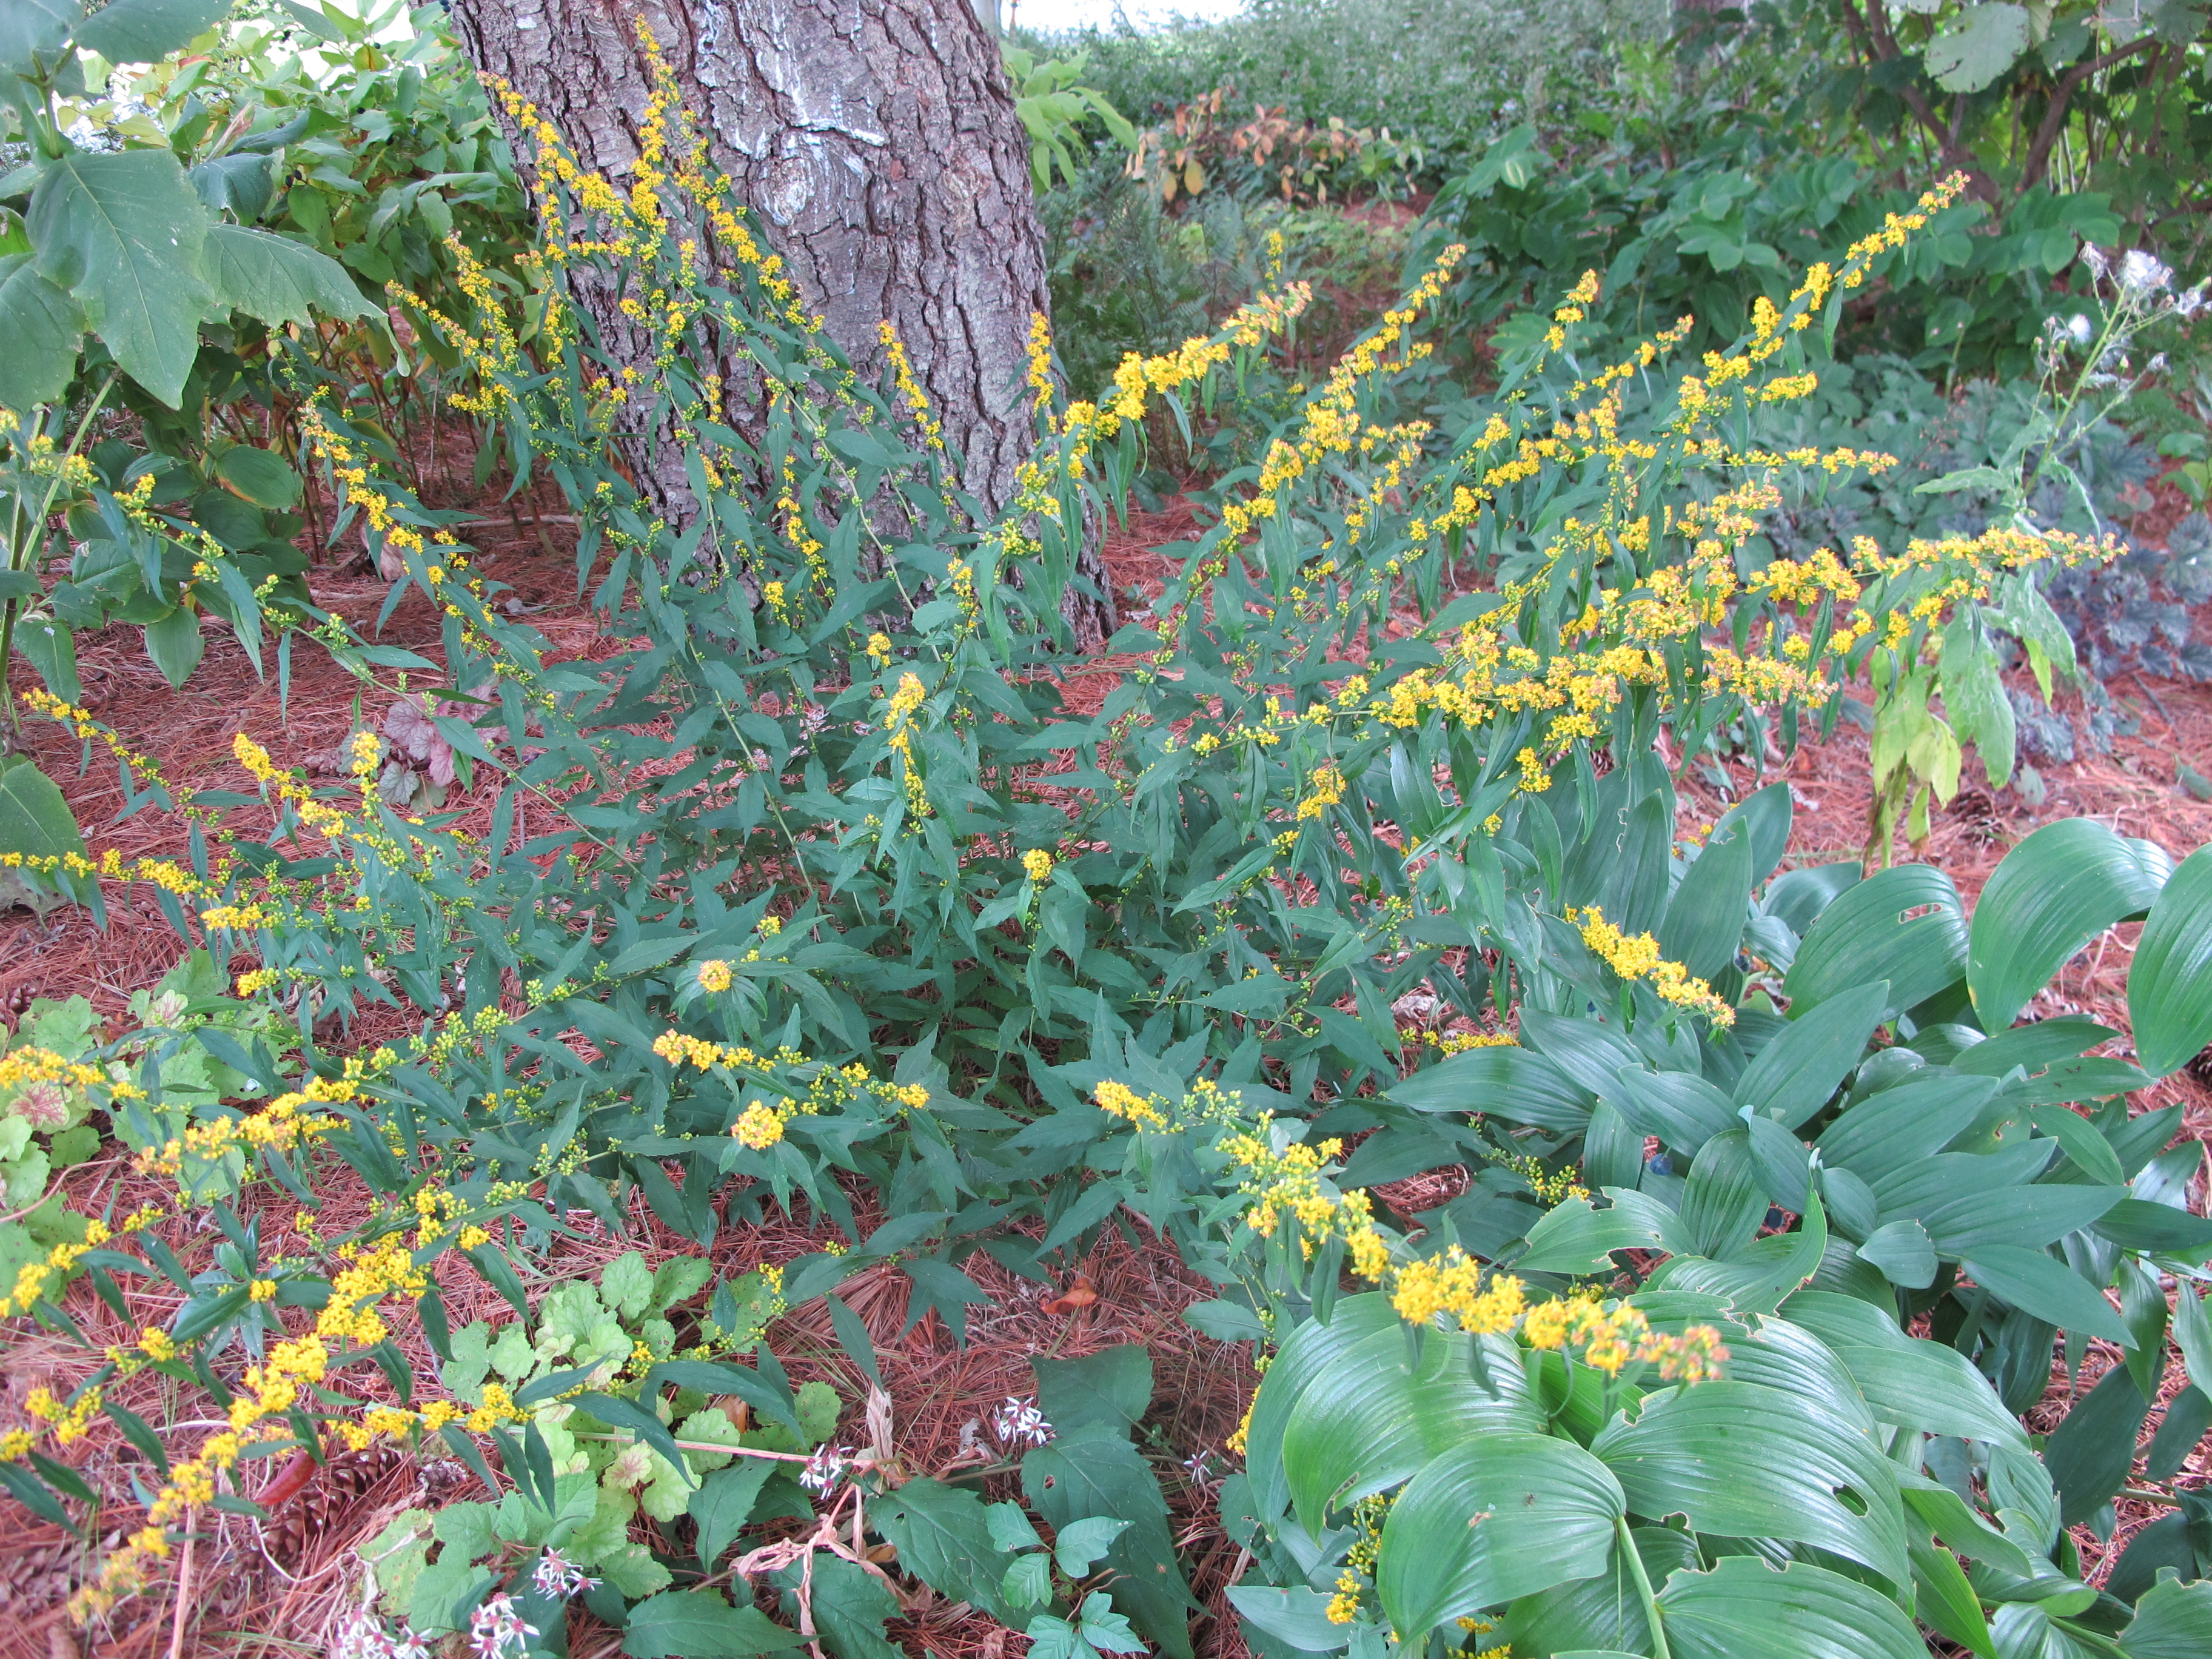
Goldenrod gets a bad rap from most gardeners, but there are some varieties that are well mannered and beautiful at this time of year. I visited North Creek Nursery in Landenberg, Pennsylvania .This wholesale nursery grows hundreds of kinds of native plants, including half a dozen different kinds of goldenrod. Unlike the 5 to 6 foot giants that try to muscle their way into my gardens, they had some nice smaller varieties of goldenrod that I plan to grow.
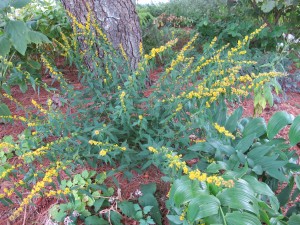
Solidago caesia
Among their goldenrods there is an 18 to 36-inch tall shade-loving goldenrod, Solidago caesia, that I grew for some years before it was weeded out by a well-meaning helper. It’s hardy to Zone 4 and it thrives in dry shade. The small blossoms appear all the way up the stems. I also loved ‘Fireworks’ (a variety of Solidago rugosa). It stands about 3 feet tall, and prefers average to moist soils in full sun to half shade. Its blossoms are distributed along the stems, which arch out from this clump-forming perennial.
Of the various ornamental grasses I saw in the trial gardens at North Creek, my favorite was a little blue stem (Schizachyrium scoparium) called ‘Standing Ovation’. It is a North Creek introduction that is said to stand up well all year and at this time of year is a handsome reddish purple. It is hardy to Zone 3, meaning it will survive even our coldest winters.
Visiting friends in Athens, Ohio I liked the way my friends had terraced their gardens – without spending a fortune. Stone walls are great for creating terraces, but many of us cannot afford to make the investment. My friends used cement blocks that came with faux-stone fronts. The blocks stack nicely and lay flat, and hold back the soil to create level gardens. I have never worked with landscape blocks of this sort, but see that they are a good building material that is easier to work with than the irregular sizes and shapes of real stone.
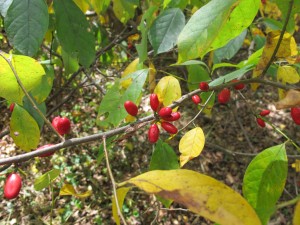
Spicebush
Also in Ohio I saw spicebush (Lindera benzoin), a native understory shrub that has flavorful leaves and seeds. At the farmers market in Athens I bought some dried leaves for tea, and then saw it growing in the woods at my friends’ house. The bright red berries are very attractive right now, and I am told they can be used to flavor gin or as a substitute, dried and ground, for allspice. Birds love the seeds, robins in particular, and strip the berries in the fall when other foods become scarcer. Spicebush is a favorite food plant of two butterflies: the spicebush swallowtail and the promethea silkmoth. Spicebush is hardy to zone 4, and I definitely want to plant one.
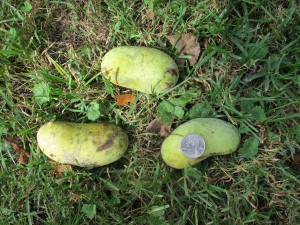
Pawpaw fruit
In both Ohio and Pennsylvania I got to eat the fruit of the pawpaw tree (Asimina triloba). Pawpaw is a native fruit tree with fruit that is flavored somewhat like a cross between a banana and a mango. The flesh is mushy, and seeds are large. It is hardy to Zone 4, though not commonly grown in New England. I got a couple of small pawpaw trees early this summer, and one day maybe I’ll get fruit from my own trees.
Being a serious gardener means wherever I go I’ll have something interesting to see – and learn about.
Henry is the author of 4 gardening books. His Web site is www.Gardening-Guy.com. Contact him at henry.homeyer@comcast.net.
Fall Color
Posted on Wednesday, September 24, 2014 · Leave a Comment
Some years ago, in a moment of enlightenment, the New Hampshire legislature outlawed the propagation, transport and sale of three popular landscape plants: burning bush, barberry, and Norway maple. All three had been proven to be invasive, seeding into the woods and crowding out our native plants. Both Massachusetts and Connecticut have banned them, too, but so far Vermont, Maine and Rhode Island have not.
I agree with the ban. All three are thugs. Even where banned, the plant police will not come and take away your invasive plants, although I do recommend that you pull yours and replace them. I also understand why so many people love burning bush (Euonymus alatus), especially now when it displays brilliant red foliage. It will grow anywhere and stays a nice size.
Fothergilla
There are good alternatives to burning bush that will provide good – even spectacular – fall color. The best I can recommend is fothergilla (Fothergilla spp.). This is a small to medium sized shrub with gorgeous white bottlebrush flowers in April and brilliant leaves starting now. It is slow growing, so it need not be pruned often, which I consider an advantage. The fall foliage can range from red and purple to yellow and orange – and I’ve had all 4 colors on one plant. A named variety, ‘Mt Airy’, is one of the best.
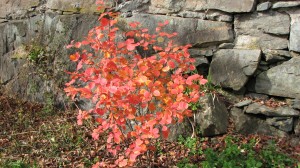
The common blueberry is another nice shrub that has red and yellow leaves in fall. The white blossoms in June are nice – and who knows, you might even beat the birds to a few berries. The trick to success with the berries is to get the soil very acidic by adding garden sulfur to the soil, or, right after flowering, add an acid fertilizer like Holly-Tone or Pro-Holly. But don’t add fertilizers now – you don’t want any soft new growth just before the winter.
Disanthus cercidifolius
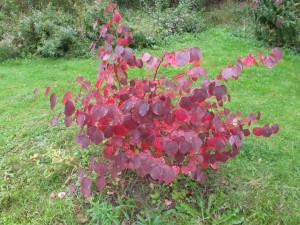
Another great plant for fall color is redbud hazel (Disanthus cercidifolius). It is not commonly found in garden centers, but I predict it will be: the leaves turn a brilliant claret red to purple early in the autumn. I got one last year and it suffered from the cold winter with some branches dying back. It also was munched by deer. But it rebounded nicely this summer, and is putting on a great show. According to Professor Michael Dirr’s books, it might reach 6 to 10 feet tall, and does well in partial shade and moist, rich soil. Dirr says it is hardy to minus 20, and we saw temperatures colder than that last winter, so I should be glad mine survived.
Spirea is the common (and scientific) name for a group of shrubs commonly planted around post offices and municipal buildings. It is what I think of as an “urban survivor”. Like that banned burning bush, it requires little and will survive almost any conditions. There are some varieties that have excellent fall color. ‘Glow Flame’ and ‘Glow Girl’ are varieties with good red color that I have seen, though, not grown.
Some azaleas also develop good red colors. ‘Cornell Pink’ is a very early- blooming azalea that also has excellent red leaves right now – in some places, but not others. I saw two examples growing side-by-side. One had a nice burnt red color, the other had leaves that were still an ordinary green. Beats me why one should turn color, the other not.
Both the double file viburnum (Viburnum plicatum) and arrowwood viburnum (Viburnum dentatum) often have excellent red fall color. But like the azaleas mentioned above, there is limited consistency. If you want to get a specimen that shows good color, buy one with good color at the nursery and plant it now. Both produce nice white flowers in the spring and produce berries in late summer that are relished by birds. They are medium-sized shrubs that are pleasant additions to the landscape.
One word of warning: there is a viburnum leaf beetle, a foreign pest, that has recently appeared in the landscape and it can devour the leaves of viburnums and ruin their appearance – or even kill them. I’ve been told that this new pest came down from Montreal, so some northern gardens have been affected before those in southern locations.
One last suggestions to consider is the red chokeberry (Aronia arbutifolia. I bought one 10 years ago after reading about this species and seeing a specimen with brilliant foliage. What struck me was that the tops of the leaves in fall were red and the undersides were silver. But my specimen has not thrived, and I have moved it once on my property trying to find just the right place for it. It is generally said to be adaptable to soils and sun conditions, and the berries are so bitter that even the birds will not eat them. Still, it’s worth a look. My specimen has stayed about 6 feet tall.
As with anything we do in the garden, there are few guarantees when it comes to fall color. Burning bush? Yes. Red, year after year. And I’ve always been pleased with fothergilla. But even our favorite maples cannot be depended on to put on a spectacular show every year. So please don’t sue me if you pull out your burning bush and plant a spirea or a viburnum and it doesn’t perform as well! Each shrub we plant has its virtues.
Henry Homeyer is the author of 4 gardening books and is a UNH master Gardener. His web site is www.Gardening-Guy.com/.
Planting Trees
Posted on Wednesday, September 17, 2014 · Leave a Comment
Fall is hard upon us, or at least here, in Cornish Flat. I know I should “toughen up” and ignore the cold, but I admit it here: I had my first fire in the wood stove recently. It felt great on a raw, rainy night. “Real” New Englanders never admit to turning on the heat or starting a fire until Halloween or later. Not me. And I’m looking at fall chores outside, too. Chief among them is planting trees and shrubs.
There is disagreement among experts as to the best time to plant trees. Some like spring, saying roots have a longer time to get established before winter. Other say no, if you skip a week or two of watering in the heat of August, you can damage roots or even kill a tree. Fall is safer, they say, because the weather is cooler and often rainy. Experts explain that roots grow and extend in fall, even after leaf drop – right up to the time the ground freezes. That last argument makes sense to me, so I’m in the “plant trees in fall” camp.
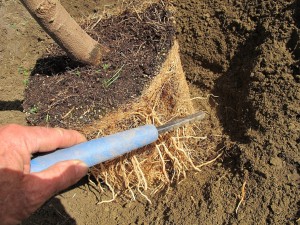
Trees sold in nurseries are often grown in fields like corn – row after row of maples, birches and oaks. Then they are lifted out of the soil and plunked into plastic pots. Those pots are then filled up with a potting mix but little or no regard is paid to the placement of the seedling in the pot. Workers don’t seem to know or care that it’s important that the “trunk flare” is on the surface of the potting mix – not buried 3 to 6 inches below the surface. This often causes trouble later on.
I recently planted a 10-foot tall Merrill magnolia for a client. It came in a plastic pot that was about a foot deep and wide. One of the first tasks I did was to dig around in the planting mix to find the trunk flare. Trees in nature – or well planted in the landscape – don’t look like telephone poles at the ground’s surface. Instead, the trunk flares out, displaying above ground “roots” that stabilize the tree in high winds. But even a large tree in a pot may not show much flare.
Here’s the problem: If the flare is covered up, the bark will be covered by soil and will eventually rot. The growing layer beneath it (the cambium) will be ruined – and the tree will decline and die. But it’s a slow process, taking 6 to 10 years. Sometimes more. Look for tip die back – trees that lose their leaves at their tops long before the rest of the leaves. Those are trees that are not doing well, and may have trunk flares covered by soil or mulch. Remove the soil until you can see the trunk flare, and you can save the tree.
At planting time you need to figure out what was above ground while the tree was growing in the ground, and clear soil off it before planting. You might be misled by little roots growing out of the trunk flare if the tree has been in the pot for a year or more. Trees in nurseries are watered from above, so trees in pots grow roots at the surface of the pot. But you can disregard those roots, or cut them off. Use your fingers to loosen soil around the base of the trunk and expose the trunk where it flares out. Then you are ready to plant.

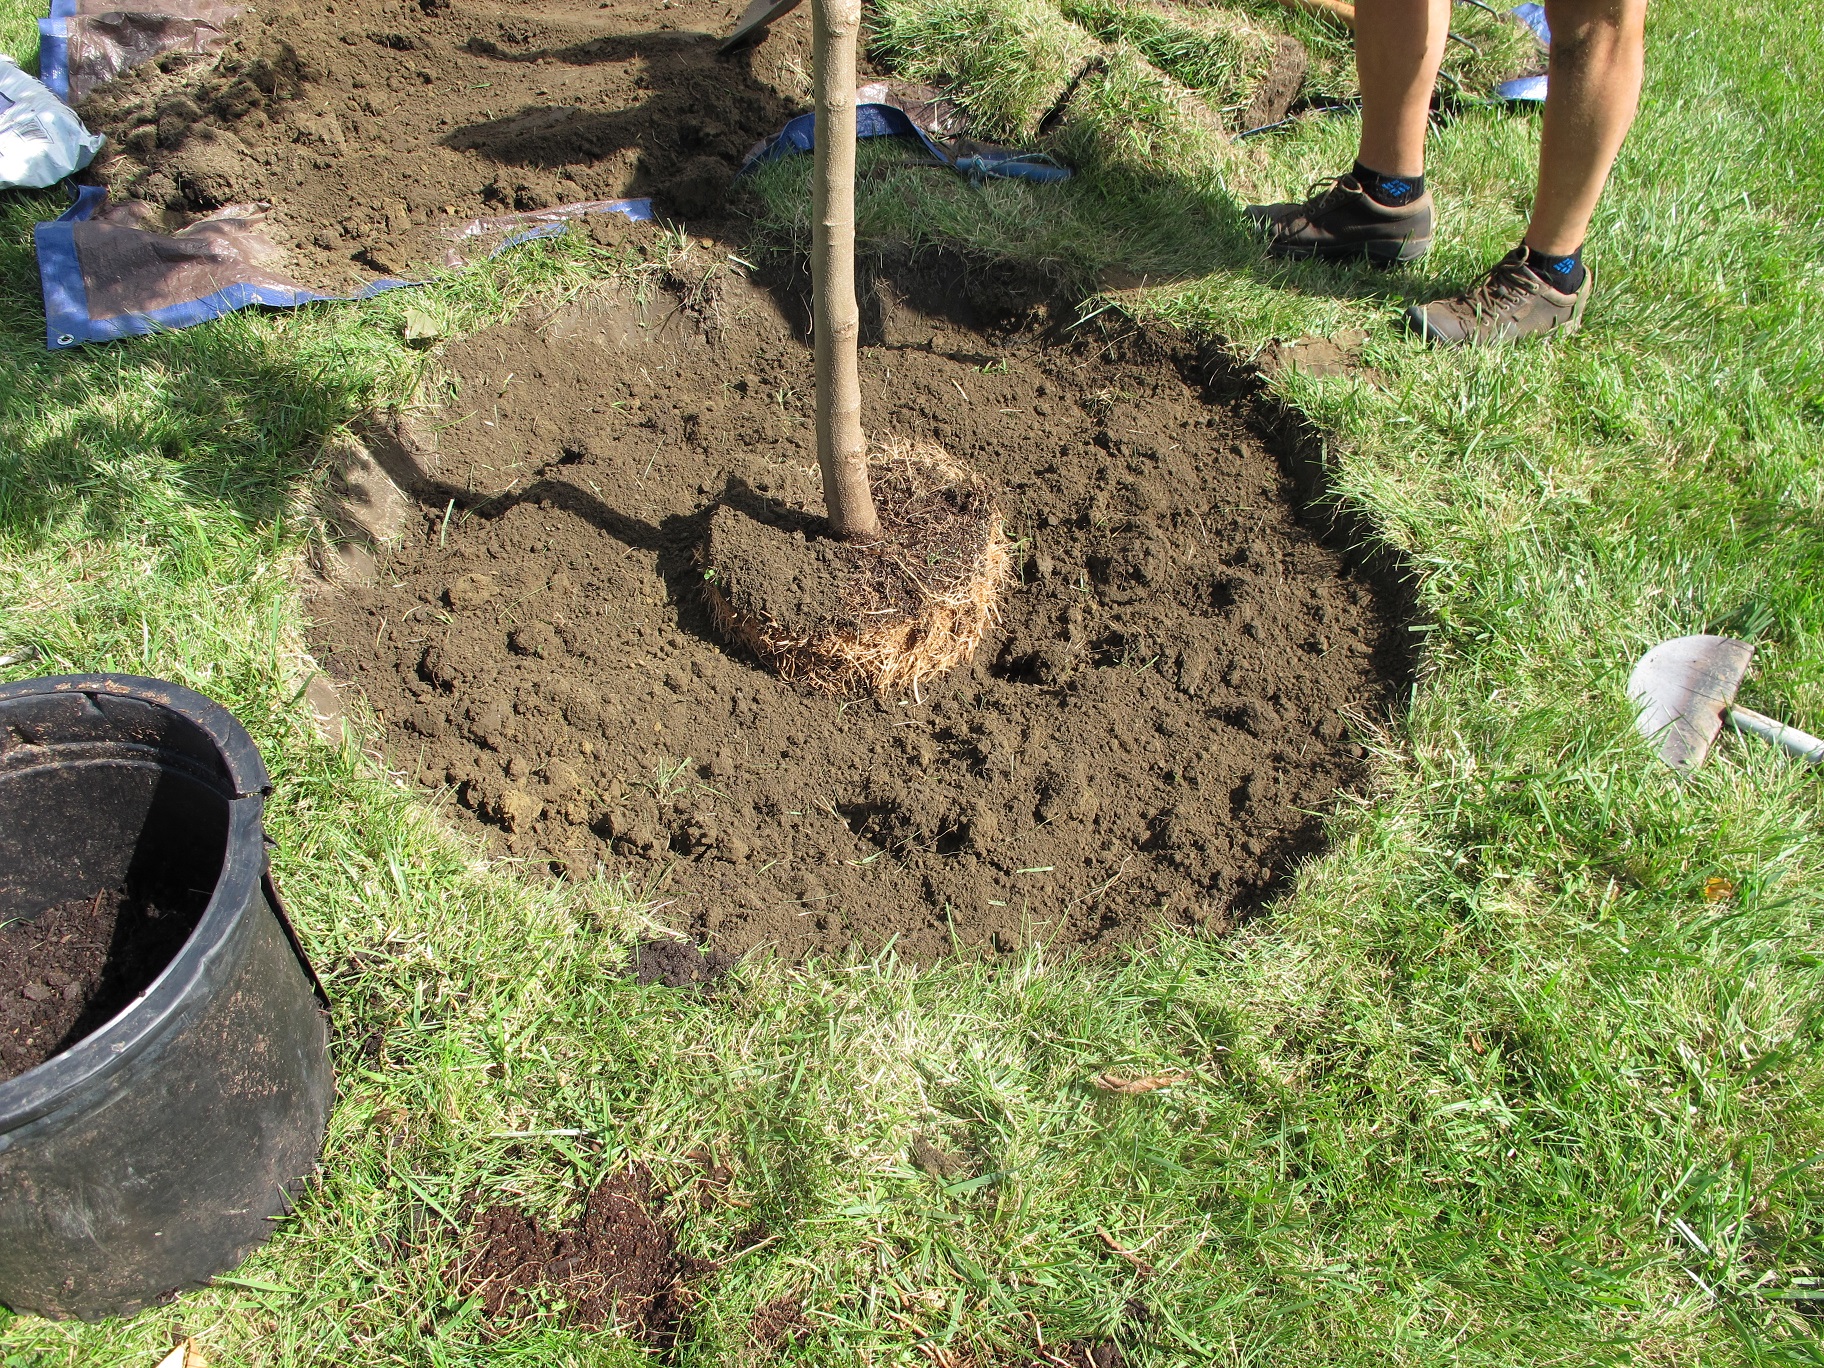
Filling the hole that is wide, not deep
Many experts advise digging a hole that is three times as wide as the pot it came in. I like 4 or 5 times the width of the root ball. The idea is create a zone around the planted tree that has nice loose, fluffy soil that will allow fine roots to penetrate it. But the depth should just be the depth of the root ball, not more. You want the root ball to sit on unexcavated soil so that it doesn’t sink down deeper after a few rains or waterings.
What do you do if planting on a hillside? You must create a level terrace for the tree by cutting into the bank and/or filling up the lower side with fill. Generally it is better to cut into a hillside and re-grade the soil.
Once the hole is dug, remove the tree from the pot and place it in the hole. If you place a tool handle over the hole you can easily see if the hole is the right depth. Be sure the bottom is flat and the tree is vertical, not leaning. Look at it from 2 sides to see if it is straight, and if the best side is showing forward.
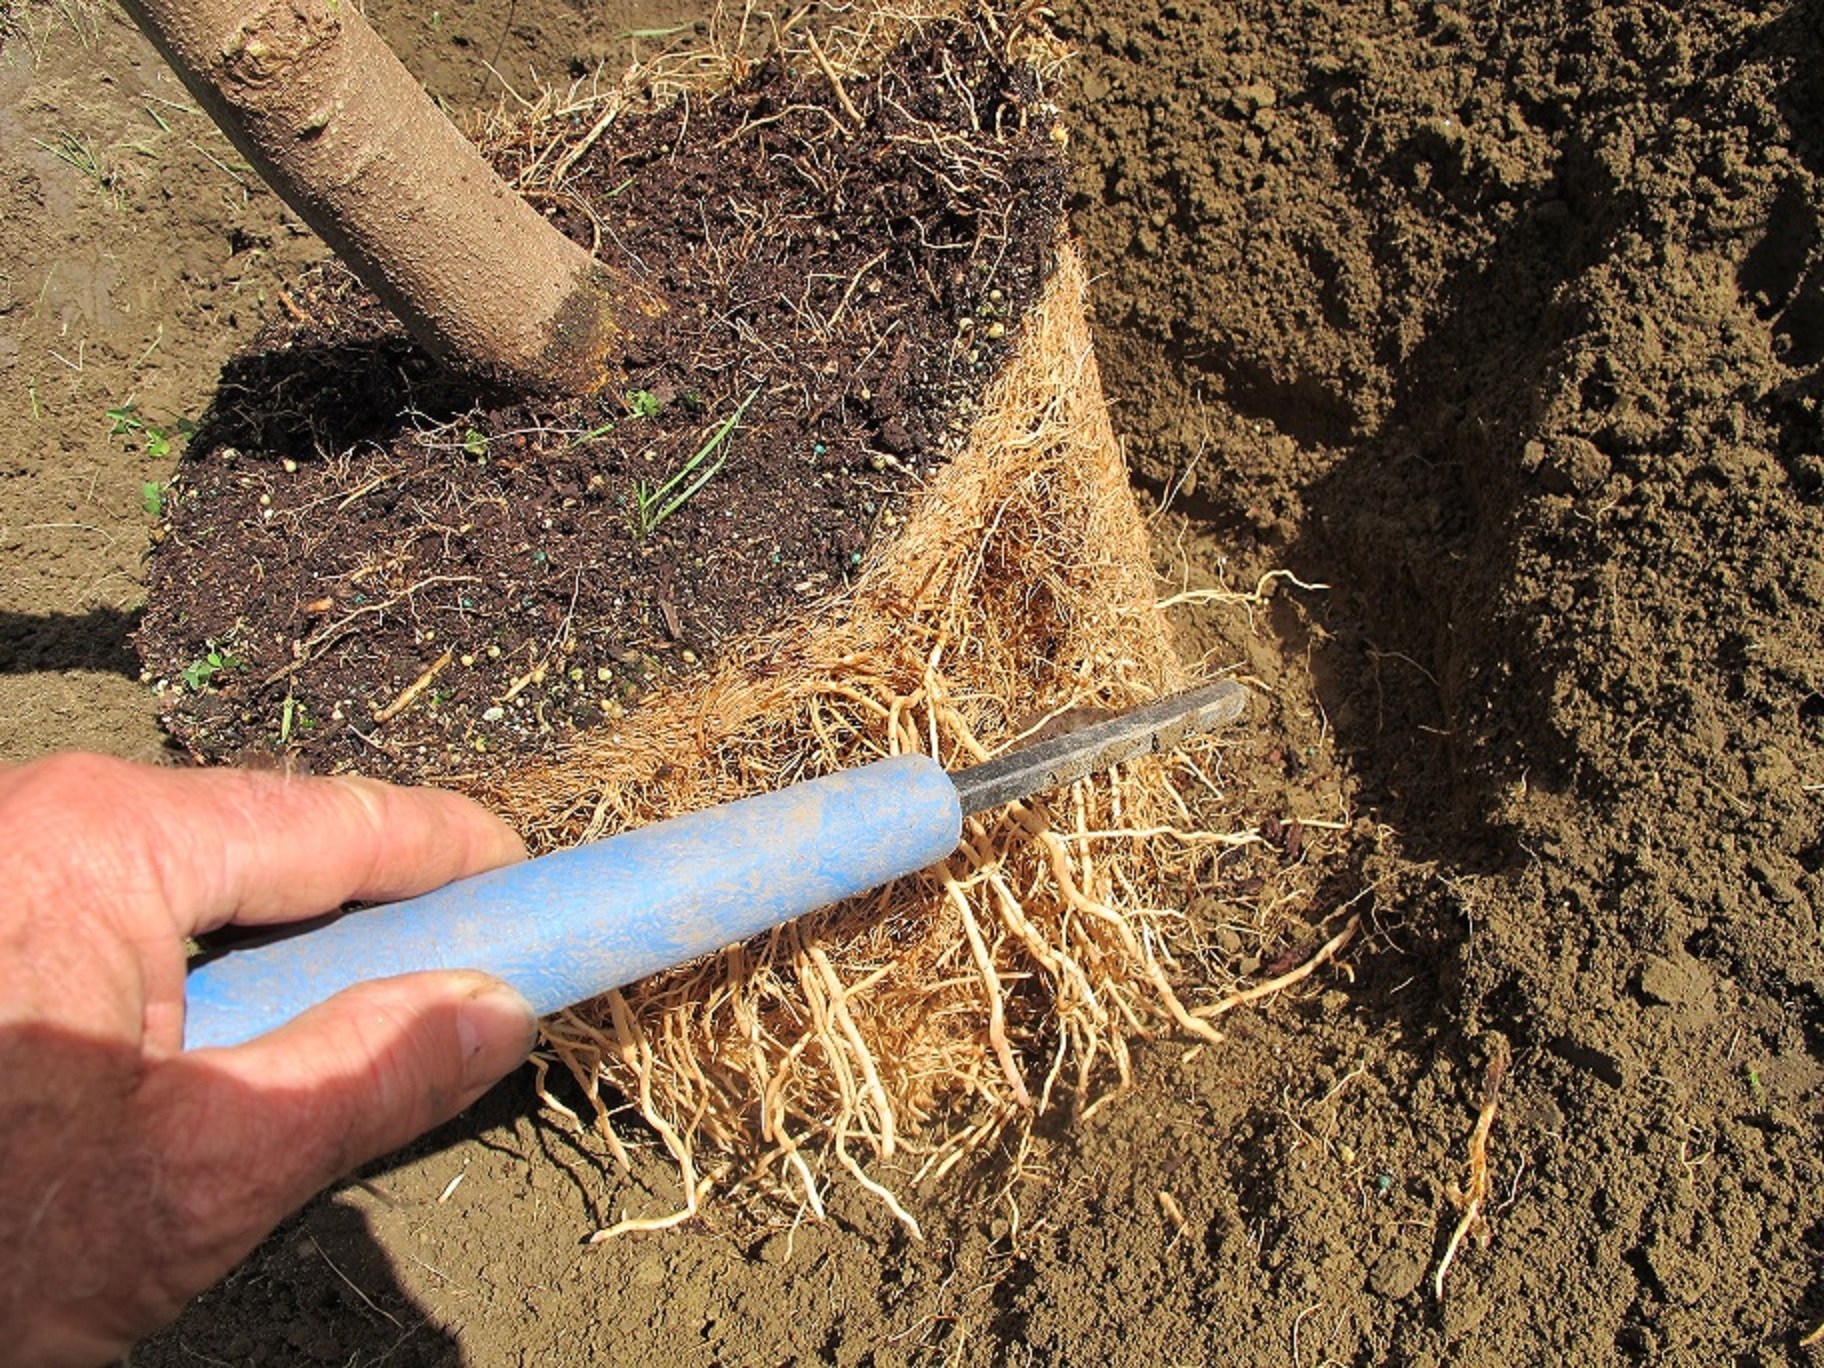
Teasing out the roots
I tease out the roots on the sides and bottom of the root ball to loosen them up before filling the hole. Then I refill the hole, using the same soil I dug out – minus the rocks. It’s okay, according to me, to add a little compost or rich topsoil to the fill if planting in poor soil. But don’t fill the hole just with topsoil and compost. If you do, the roots may never extend past the hole you have dug – like a tree growing in a bathtub.
Mother Nature doesn’t use fertilizer, and I don’t either. I don’t want to push a tree to grow fast in its first year, which fertilizer would promote. I want it to get established, and to send out roots looking for water and minerals.
Planting a tree is not rocket science. Just expose the trunk flare before you put it in the ground, dig a nice wide hole, and keep it watered for the first year of its life. Planted right, your tree should out last you!
Henry Homeyer is a UNH Master Gardener, and the author of 4 gardening books. His e-mail address is henry.homeyer@comcast.net. His Web site is www.Gardening-Guy.com.
Fall Chores
Posted on Wednesday, September 10, 2014 · Leave a Comment
The fall equinox arrives on September 23 this year. On that date, days and nights are of equal length, but with each subsequent day the nights get a little bit longer and we begin our descent into winter. For many gardeners, the shortening days are not welcomed. I try to look at the positive side: we all need a break from weeding and working on our gardens. It’s not time to hang up our tools and put them away, but we can start to slow down.
My vegetable garden did well this year. We had plenty of rain – but lots of sun, too. Often the rain was torrential – which is not ideal – but it most often fell at night, followed by sunny days which were great for growing. I worked a piece of borrowed land this summer, one that had been fallow for a couple of years, and I was not bothered by tomato blights there, so the leaves are still green and the plants producing well.
Organic Corn from my Garden
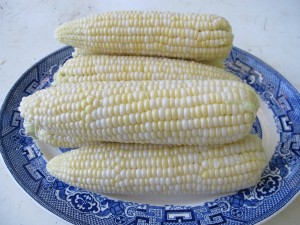
I grew corn for the first time in more than 20 years and was delighted that the corn did not all get ripe at once; it ripened over a 3 week period. I had plenty to share, which is nice, too. People often say that you can’t grow corn organically – that you need insecticides to kill the corn ear worms and chemical fertilizers to feed the nitrogen-hungry plants. I used neither, and got fat, juicy ears that produced not a single worm. I fertilized with Pro-Gro organic fertilizer at planting time. Period. Too much nitrogen from chemical fertilizers has been shown to attract insects.
I used a lot of hay as mulch this year, and that really helped to keep weeding to a manageable level. Three or four inches of mulch hay around the tomatoes applied early on kept down weeds and provided a nice clean place for fruit, some of which inevitably lands on the ground (despite the cages).
It’s important to clean up and remove diseased plants once they have stopped producing. I like to mix plant carcasses with brush in a pile in the garden where I can burn it all after the snow flies. Insects (and their larvae and eggs) and fungal spores can be effectively destroyed that way. Weeds harboring seeds can go on the pile, too. Weeds with big clusters of seeds should not go in a compost pile that you intend to use anytime soon. Weed seeds can last for years, and composting often does not kill them.
Some of my flower beds are less weedy this year than in the recent past. I’ve realized that I have more flower beds than I can keep up with by myself, so I hired a fellow to help me weed this summer – and he actually knows the difference between a flower and a weed! It was quite liberating. But I need to go over some of the beds he worked on and get out little weeds that have appeared since he cleaned them up. Weed seeds – or scraps of root – are a fact of life, and re-weeding is always necessary. If I get these little weeds now, it will help me have cleaner beds in the spring. It will help, too, if I put down a layer of bark mulch after this weeding.
Each summer I grow colorful plants on my deck, and I dread the onset of cold weather as many of these plants will never be happy inside the house. They just can’t survive the lower light levels indoors. Each fall night that portends frost I scurry back and forth from the deck to the indoors, lugging my favorite plants. I keep them living as long as I can but realize that some will have to be left to succumb to the arriving cold.
A fall chore I do each year without fail is to wash the leaves, top and bottom, of any plant that I bring in from the outside. I do this to wash off aphids and their eggs and larvae. Aphids are well controlled outdoors – there are lots of predator insects that consider them the Ben and Jerry’s of the insect world, consuming them with glee. But indoors? Even a few eggs will soon produce adults that will reproduce and make a mess of my houseplants. So I wash them with a sharp stream of water from the hose, let them dry in the sun, and then bring them indoors for the winter.
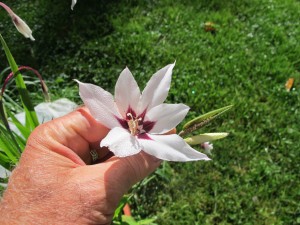
Sword lily
A fall chore I often forget to do in time is to dig up and store tender bulbs like gladiolas, dahlias and peacock orchids or sword lilies (Acidanthera spp.). These will not survive our winters and deserve to come indoors to live in a paper bag in a cool spot. This year I resolve to do better. I planted sword lilies in pots and they are blooming beautifully right now, and are delightfully fragrant.
This week I will plant some grass seed. Fall is a good time to fill in dead spots on the lawn. The soil is warmer now than in the spring, and fall rains will make watering less needed. There is still plenty of time for the new grass plants to get established before cold weather. I’ll just scuff up the soil with a short-tined garden rake, spread some seed, and then cover it with a thin layer of mulch. Finally I’ll smooth over the mulch with the back side of a lawn rake to mix in the seed and compress the soil a bit by putting down a board or small square of plywood and stepping on it lightly.
There will still be plenty of summer-like days ahead, but it’s good, I think, to start planning for fall and winter. Before we know it, we’ll be raking up the leaves – and shoveling snow.
Henry Homeyer is a garden designer and consultant, and the author of 5 books. His web site is www.Gardening-Guy.com.
Plants for the Front Porch
Posted on Wednesday, September 3, 2014 · Leave a Comment
We New Englanders have a long tradition of doing something to brighten the approach to our front door. In winter it’s a nice green wreath; my grandmother liked red geraniums in a pot by the door all summer; in fall, pumpkins and chrysanthemums are traditional decorations. Three common decorative plants are available for purchase at farm stands now – and worth a look.
Chrysanthemums are very popular, and are readily available in a wide range of colors. I treat them as annuals even though some are touted as perennials. I once estimated the number of buds and blossoms on a potted “mum”. By counting and multiplying I arrived at an estimate of 300 blossoms on a plant that was perhaps 18-inches across. Phenomenal. But if I had planted it in the ground and it came back the next spring, I would have gotten just a small fraction of the number of blossoms the following year. Why? The growers pinch back the stems at least twice to make the plant branch again and again. I don’t have the patience to do so.
A few tips about keeping mums happy. First, they have a large number of blossoms and leaves for the size of their pots. On a crisp fall day a mum loses a lot of water, especially on a sunny doorstep. You probably should water daily, or every other day. If yours comes in a peat pot, which many do, the soil or potting mix will dry out even faster than if it’s growing in a plastic pot. I find that submerging the pots in a big container of water and holding them down until they stop bubbling is the best way to get the roots full hydrated. Or transplant them to self-water containers that have water reservoirs to prevent roots from drying out.
Secondly, if you want to plant your mums in the ground, be careful at planting time: the branches are often very brittle. It’s always disappointing to me when I break off a big section of a mum before it can even strut its stuff for a moment. Usually I just leave my mums in their pots and arrange them by the front door.
If I do plant my mums, I endeavor to plant them deep enough so that I can cover the root ball with an inch of real soil (they are planted in a peat-based growing mix that dries out very quickly). And although you can plant the peat pots directly in the ground, tear off the top 2 inches of pot so that it won’t be sticking up and wicking water away. Remember, a dry mum is an unhappy mum. Frost seems a long way away now, but remember to cover mums when hard frost comes, or bring the pots indoors. They survive light frost nicely.
Another great fall doorstep plant is decorative cabbage or kale. I just bought a big fat one at a farmers market recently, and it will look great all fall, assuming I don’t let it dry out. Last year I started a couple of dozen decorative kales from seed, but was disappointed that they stayed smaller than those generally sold, and bolted in the heat of summer. Huh. The professionals seem to have tricks I do not. I had mine in the ground, not pots, and had planned on transplanting them into nice containers after Labor Day, but ultimately I didn’t think them worthy of moving to the front of the house.
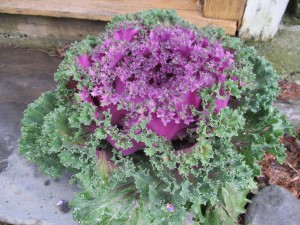
Decorative Kale
Decorative kale generally has dark green or purplish leaves on the outside, and pink, white or light purple inside. I’ve read that they are, indeed, edible, but are tough and leathery; why bother when edible kale is so easy to grow and tasty? Another great feature of decorative kale is its ability to survive frost. It will not even blink when temperatures drop down into the teens, assuming that your plant has seen temperatures in the twenties and has had time to get used to cold weather. I’ve read that they will survive temperatures as low as 5 degrees without harm.
The last of the fall porch plants are the short asters commonly available in blues and purples, and occasionally in white. Like the mums, these have been pinched back to stimulate the production of more blossoms – and to keep them short. Most are winter hardy, and I have planted them in the ground and let them come back for a second show the next year. But instead of being under a foot tall, they were at least 18 inches tall and only had a few blossoms. I never got around to pinching them back. Nice in the second year, but not dramatic. I usually prefer to buy new plants and let someone else do all the hard work.
Even if you have some new mums on the porch, don’t forget about your window boxes and planters full of annuals. Yes, they may look bedraggled now, but with a little care you can give them new life. Deadhead blossoms, cutting back stems several inches below those tired seed heads. This is tedious, but worthwhile. And give those annuals a burst of energy with some liquid fertilizer. I use a liquid fish mix, but there are plenty of choices, and almost anything will help.
When I see a nice pot of flowers on a neighbor’s porch I always think, “How nice. She is blessing us all with a glimpse of beauty as we go by.” I try to do my part in doing the same, and hope you will, too.
Henry Homeyer is a gardening coach, garden designer and the author of 4 gardening books. His Web site is www.Gardening-guy.com.
Getting Ready for Winter
Posted on Wednesday, August 27, 2014 · Leave a Comment
Summer is nearly over. Those big yellow school buses are beginning their morning ambles and cool nights call for blankets on the bed. It’s time for me to get serious about putting up veggies for the winter.
With the exception of lettuce, most vegetables can be saved for the winter – and beyond. Freezing them is one of the easiest ways of doing so and, if done properly, your veggies will be splendid when cooked and eaten on a cold winter night. But home-frozen vegetables won’t be the texture and flavor you like unless properly prepared. Do small batches to make it easier and quicker.
For starters, only use your best vegetables for freezing. Beans that are oversized and woody when you pick them will only be worse 6 months later. Pick things at their prime, and freeze them within 24 hours of picking. Sitting in the fridge for a few days will not improve them.
Many vegetables have enzymes that promote ripening of seeds – and general aging. Unless you drop them briefly in boiling water to kill those enzymes – a process called blanching – they may get woody or tough. Knowing how long to blanch your vegetables is very important. Boil them too long and you’ll have mushy beans or zucchini. In my experience a brief blanching – a minute or so – is perfect.
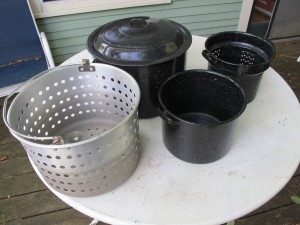
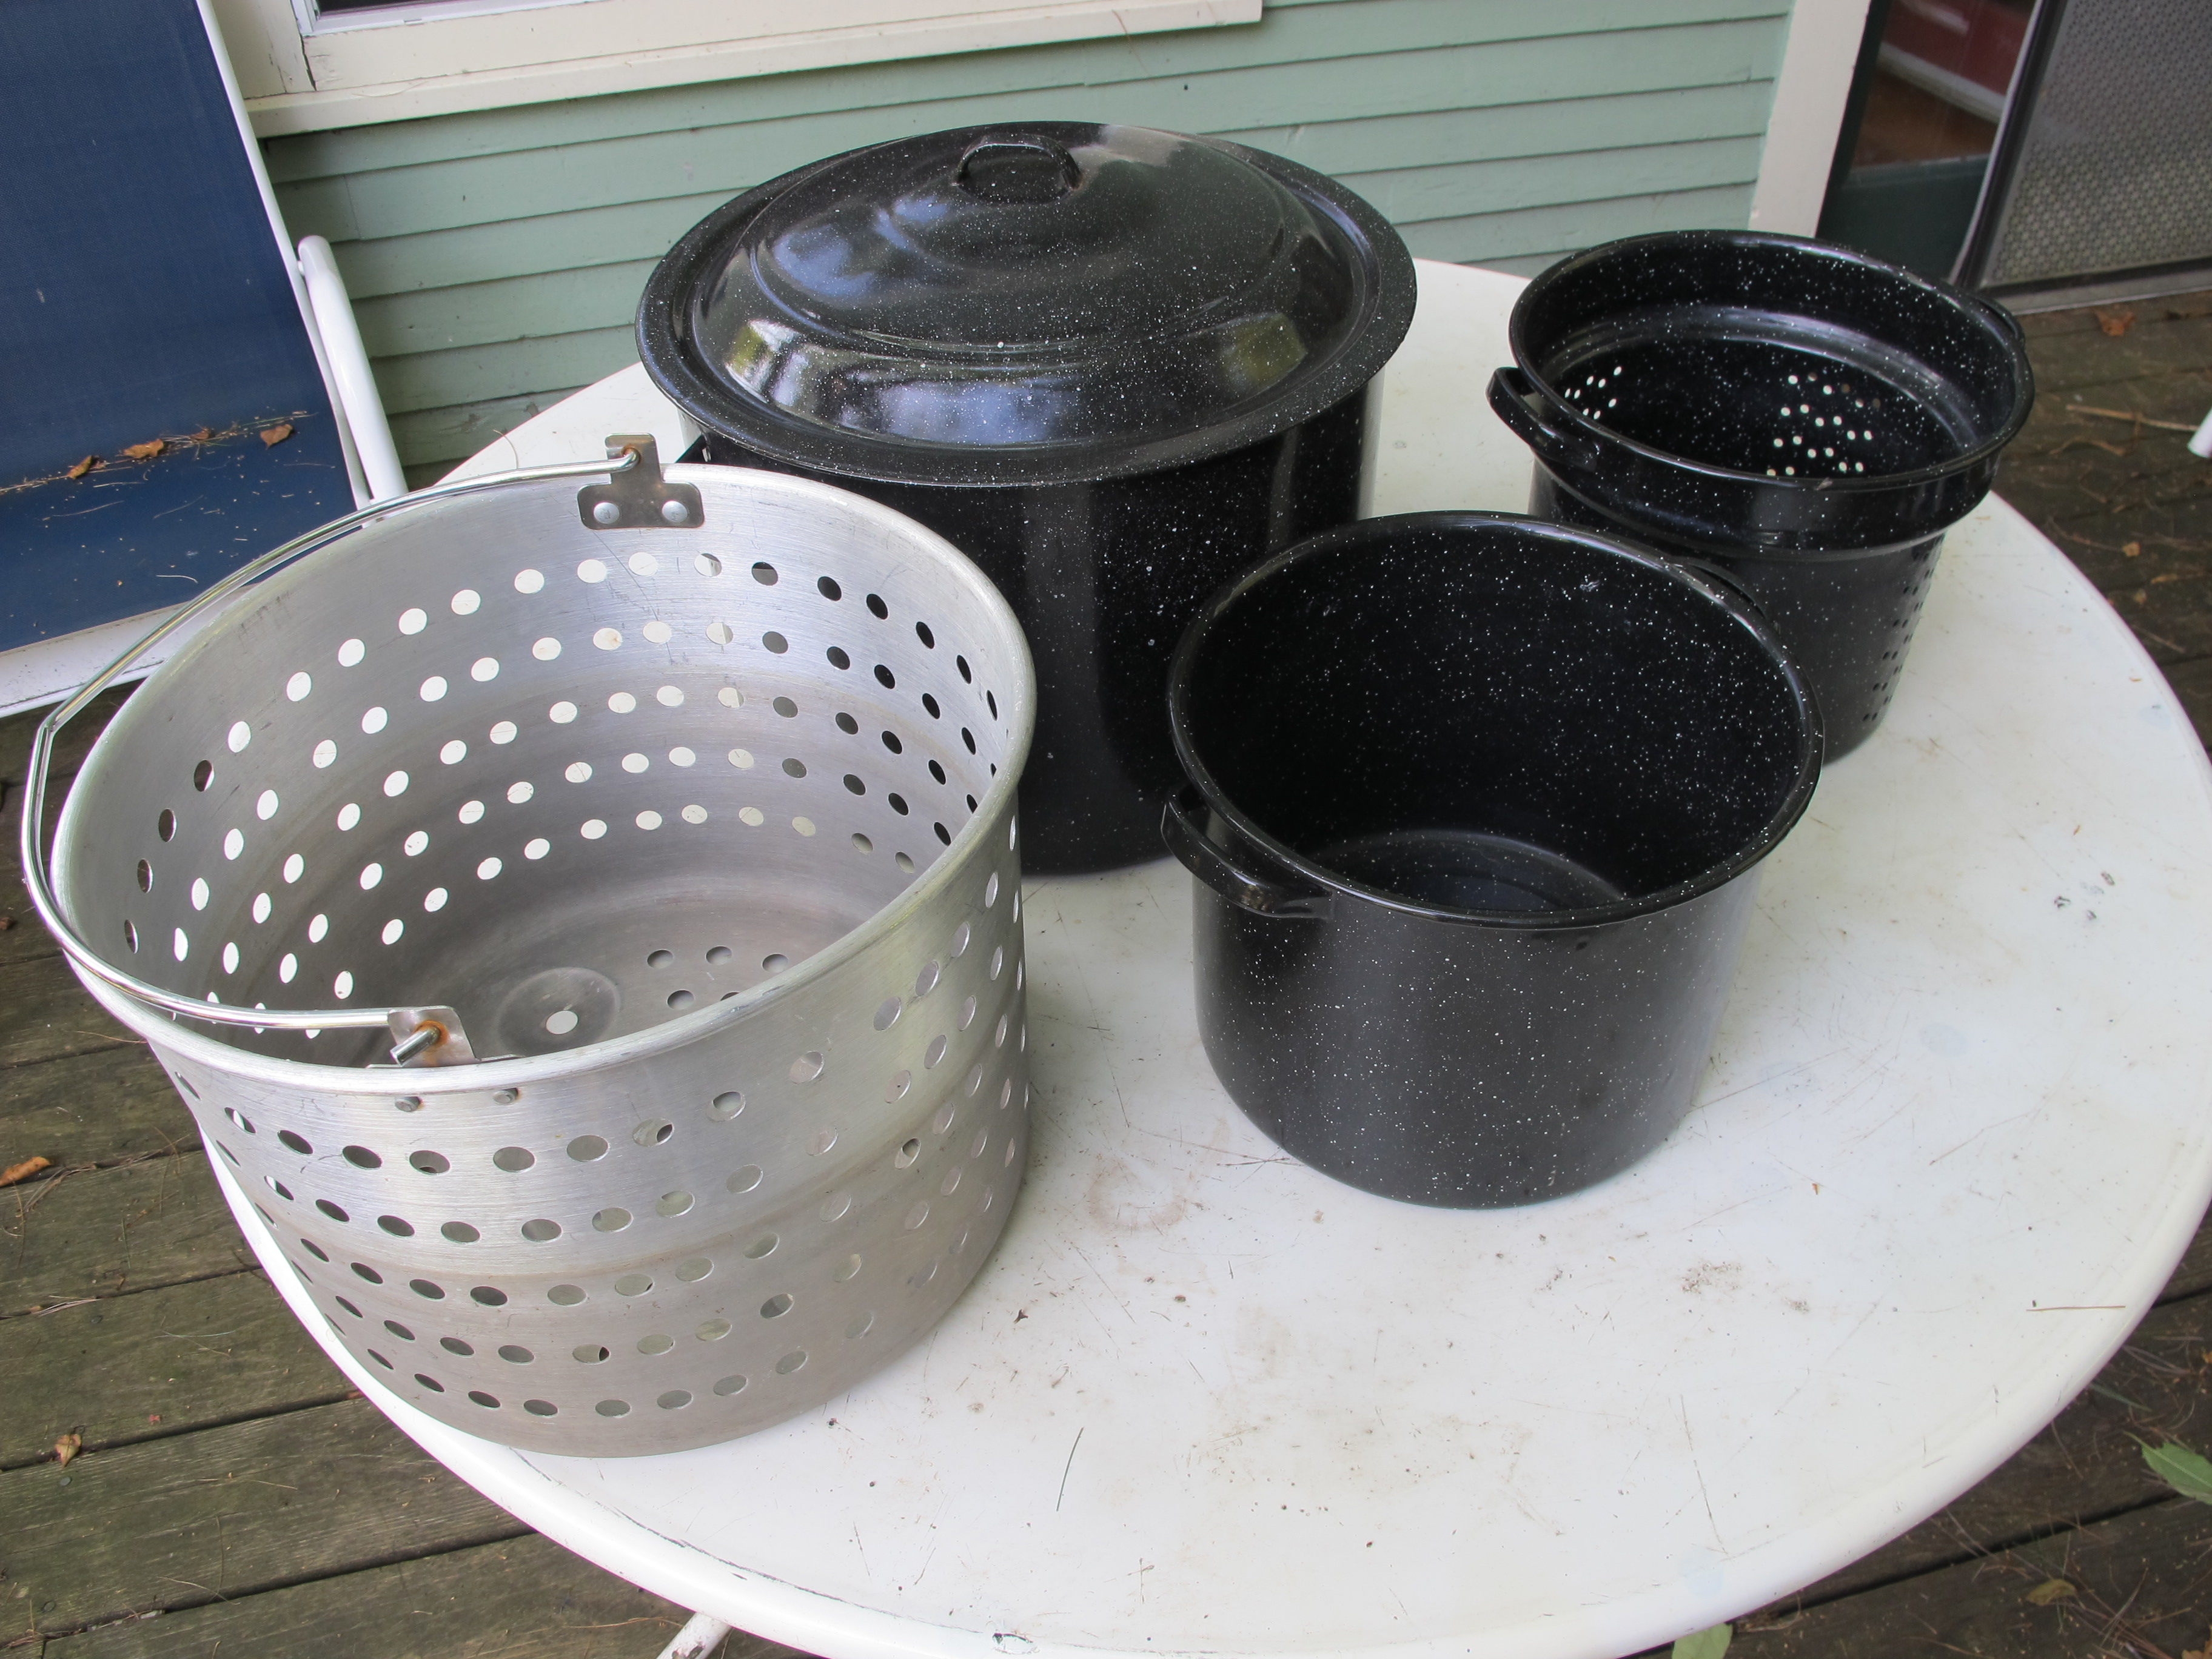
Blanching pots
It’s worth buying a blanching pot if you want to freeze vegetables. This is an enameled tin pot with an interior pot that is full of holes for drainage. I fill my pot –complete with its inner section – roughly half full of water and bring it to a rolling boil. Then I drop my veggies into the water and time how long they are in, while watching them change color. Vegetables like beans, broccoli and kale will noticeably turn a lighter, brighter green when they are adequately blanched.
Generally 60-90 seconds of blanching is all that is required, even though the water may not even return to a full rolling boil. Use lots of water and not too many veggies for a quick return to boiling. Vegetables should still be crunchy, not mushy when they come out of the hot water. Brussels sprouts take a little longer in the hot water because they are larger and denser than most veggies.
But taking veggies out of the hot water is not enough. You need to cool them quickly in a cold water bath. I fill the sink with cold water and drop them in for a few minutes to cool them quickly, drain them, and spin them in my salad spinner. I like the kind of spinner that has a pull string (mine is a Zyliss brand). Finally I spread them out on a cloth tea towel and blot them with another. They are then ready to go in freezer-grade zipper bags. I always use new bags for freezing, not ones I’ve washed and recycled.
When freezing vegetables it’s a good idea to remove the excess air from the bags. There are machines sold that will do so, but I just use a common drinking straw. I get the bag closed around the straw, suck out the air, and then push the bag shut as I pull out the straw. The bag should cling to the vegetables if done right.
What should you blanch? Beans, beets, broccoli, Brussels sprouts, carrots, cauliflower, corn, kale, spinach, squash and Swiss chard. What does not need it? Apples, pears, peppers, leeks, and tomatoes do not seem to need blanching, in my experience. Tomatoes, beans and Brussels sprouts freeze well whole, the others I cut up. Summer squash freezes well in half-inch cubes and is a great addition to winter soups. Winter squash I often steam or roast, then scoop out of the skins and into bags.
If you haven’t picked your garlic yet, pull it today! If left in the ground too long, the outer skins deteriorate and the garlic won’t store as well. But don’t cut off the tops just yet: let them cure in a dry, shady place. I’ve read that they absorb some nutrients from the stalks and leaves while curing. They store well anywhere – a cool dry spot is good, but you can hang them in the kitchen or keep them in the garage if the garage doesn’t get below freezing. Freezing and thawing would not be good for the garlic.
Onions are ready to harvest when their tops flop over. Like garlic, they need to cure for awhile before storing. Some gardeners just pull them and let them dry in the garden for several days. I prefer to put them on the shady deck to dry out. Then I store them on my wooden drying rack that I got from Gardeners Supply (www.gardeners.com). They sell them as “orchard racks” for $199. It has nine large wooden drawers with excellent ventilation. I generally use mine for onions, garlic and winter squash.
In addition to freezing, I also store potatoes, carrots, kohlrabi and rutabagas in a spare fridge or in a cold cellar with high humidity. I dry fruits, hot peppers and cherry tomatoes in a dehydrator. I do some canning, including my grandmother Lenat’s bread-and-butter pickles and some tomato sauce. But more about all of that on another day. I gotta get down to the garden and pick some veggies!
Henry Homeyer is the author of 4 gardening books and a fantasy-adventure for children. His Web site is www.Gardening-Guy.com.
Daylilies
Posted on Wednesday, August 20, 2014 · Leave a Comment
What one kind of flower would you bring with you if you were being sentenced to life on a deserted island? Would you pick peonies for their big, bold blossoms and tantalizing smell? Or perhaps primroses for their bountiful blossoms and willingness to spread? A better choice might actually be daylilies. They’ll grow just about anywhere, are generally untroubled by pests and diseases – and you can eat them! This is daylily season, and a good time to buy some more for your garden.
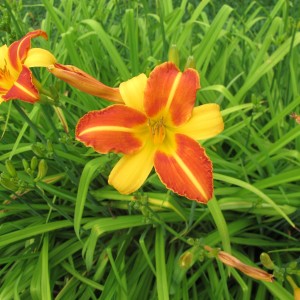
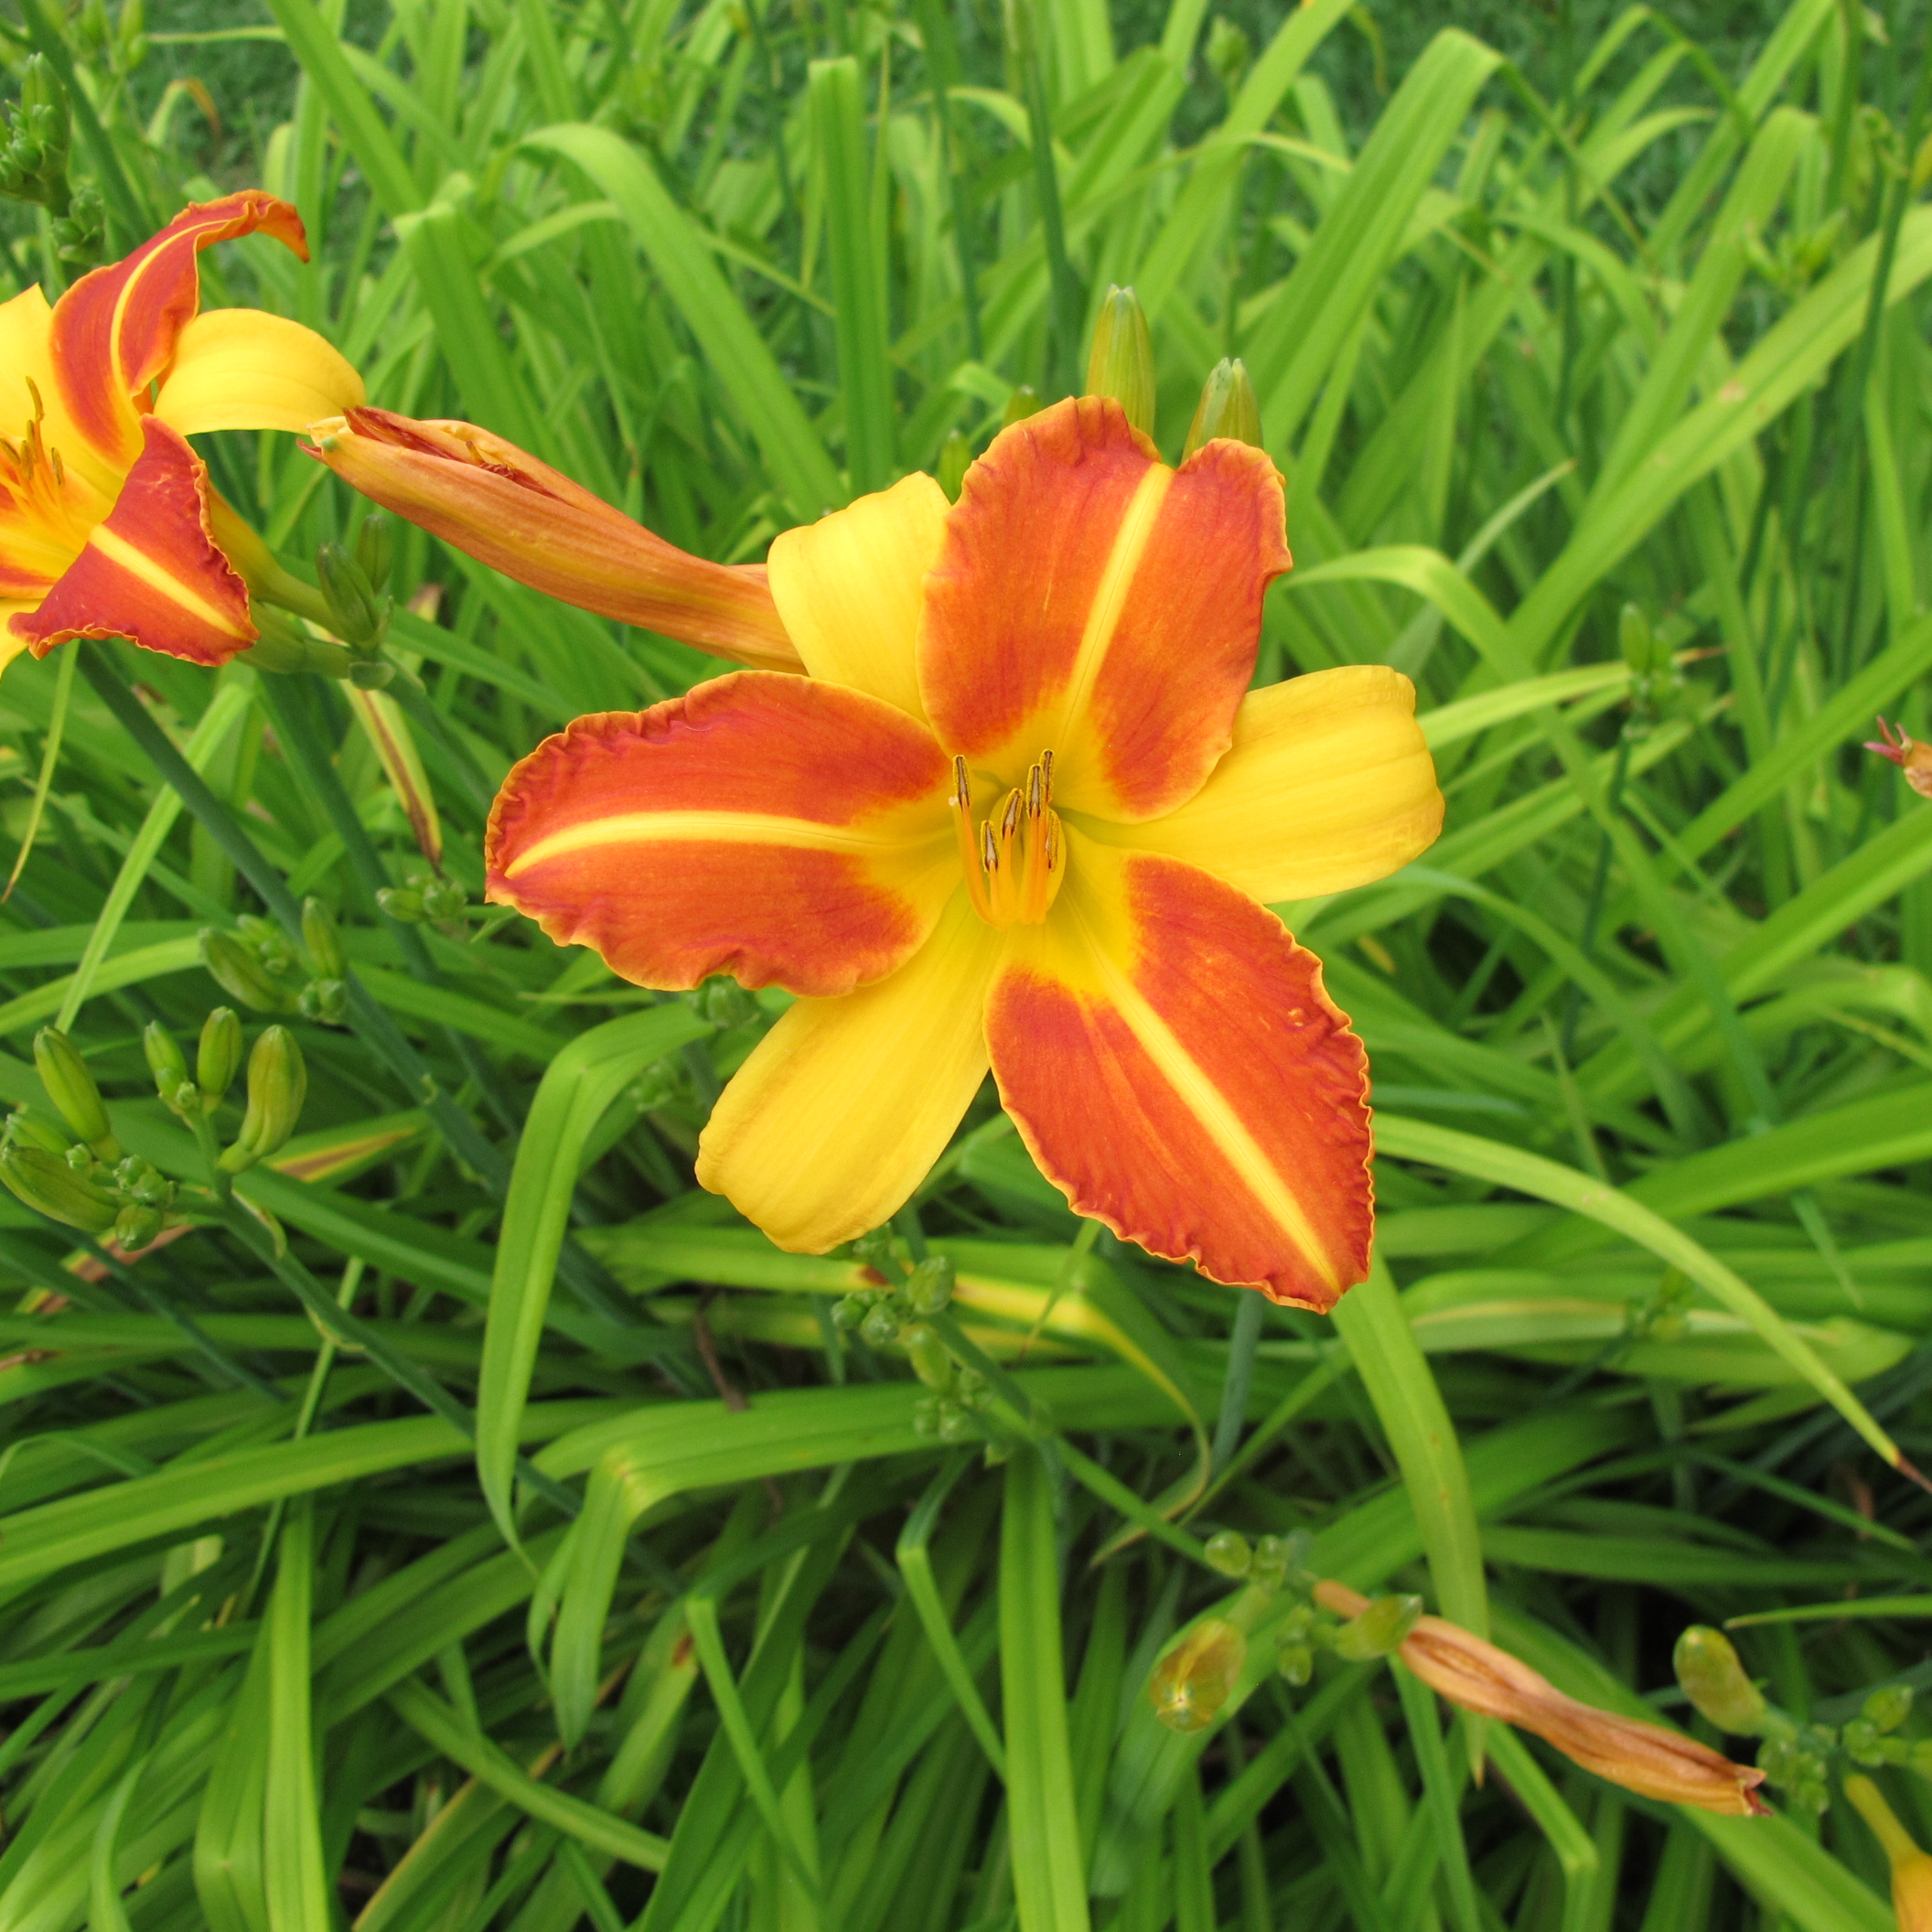
Frans Hals
Let’s start with the common orange daylily (Hemerocallis fulva). Most gardens have some. You’ll also see them by the side of the road as if gardeners – having too many, but unwilling to compost them – have heaved them out the windows of their cars. These sturdy perennials will grow anywhere, and will even bloom in the shade. They were introduced from Asia in the late 1800’s and were admired as exotic at the time, I’m sure. But now they are too common for most gardeners’ taste. And they do spread by root, which can be bothersome.
In the Chinese market in Montreal daylily tubers are for sale for cooking. I’ve tried cleaning and cooking the roots of my own orange daylilies, but have decided that it’s too much work to get them clean enough to eat. They were tasty enough, but fry up almost anything with garlic and onions, and it will be yummy.
The flowers are edible and surprisingly delicious. Make a big green salad and add daylily petals for color. Don’t use the stamens and pistils (the little stuff inside the blossoms) as they’re not tasty. Chop or tear the petals. And toss in a few buds, which taste a bit like asparagus or green beans.

Blueberry Breakfast
For a nice vegetable dish, sauté chopped onions, shallots or garlic in olive oil or butter. Add a little chopped tarragon and black pepper. When the onions are almost cooked, drop in buds from those common orange daylilies you have been meaning to manage, but haven’t. Select buds an inch to an inch and a half long. They will start to open when they are cooked – in just a minute or two.
For dessert you can take a wine glass and place in it a fully open, brightly-colored daylily blossom. Put in a scoop of sherbet in the blossom and garnish with a few fresh berries and a mint leaf if you have one. Yum!
Daylilies are great cut flowers. Because each blossom only lasts a day – hence the name – most people don’t use them in flower arrangements. But I cut scapes (leafless stems) that are just starting to bloom and have numerous fat, unopened buds. The buds will open one at a time for up to a week, depending on number of buds. This works most reliably if the arrangement gets some sunshine each day.
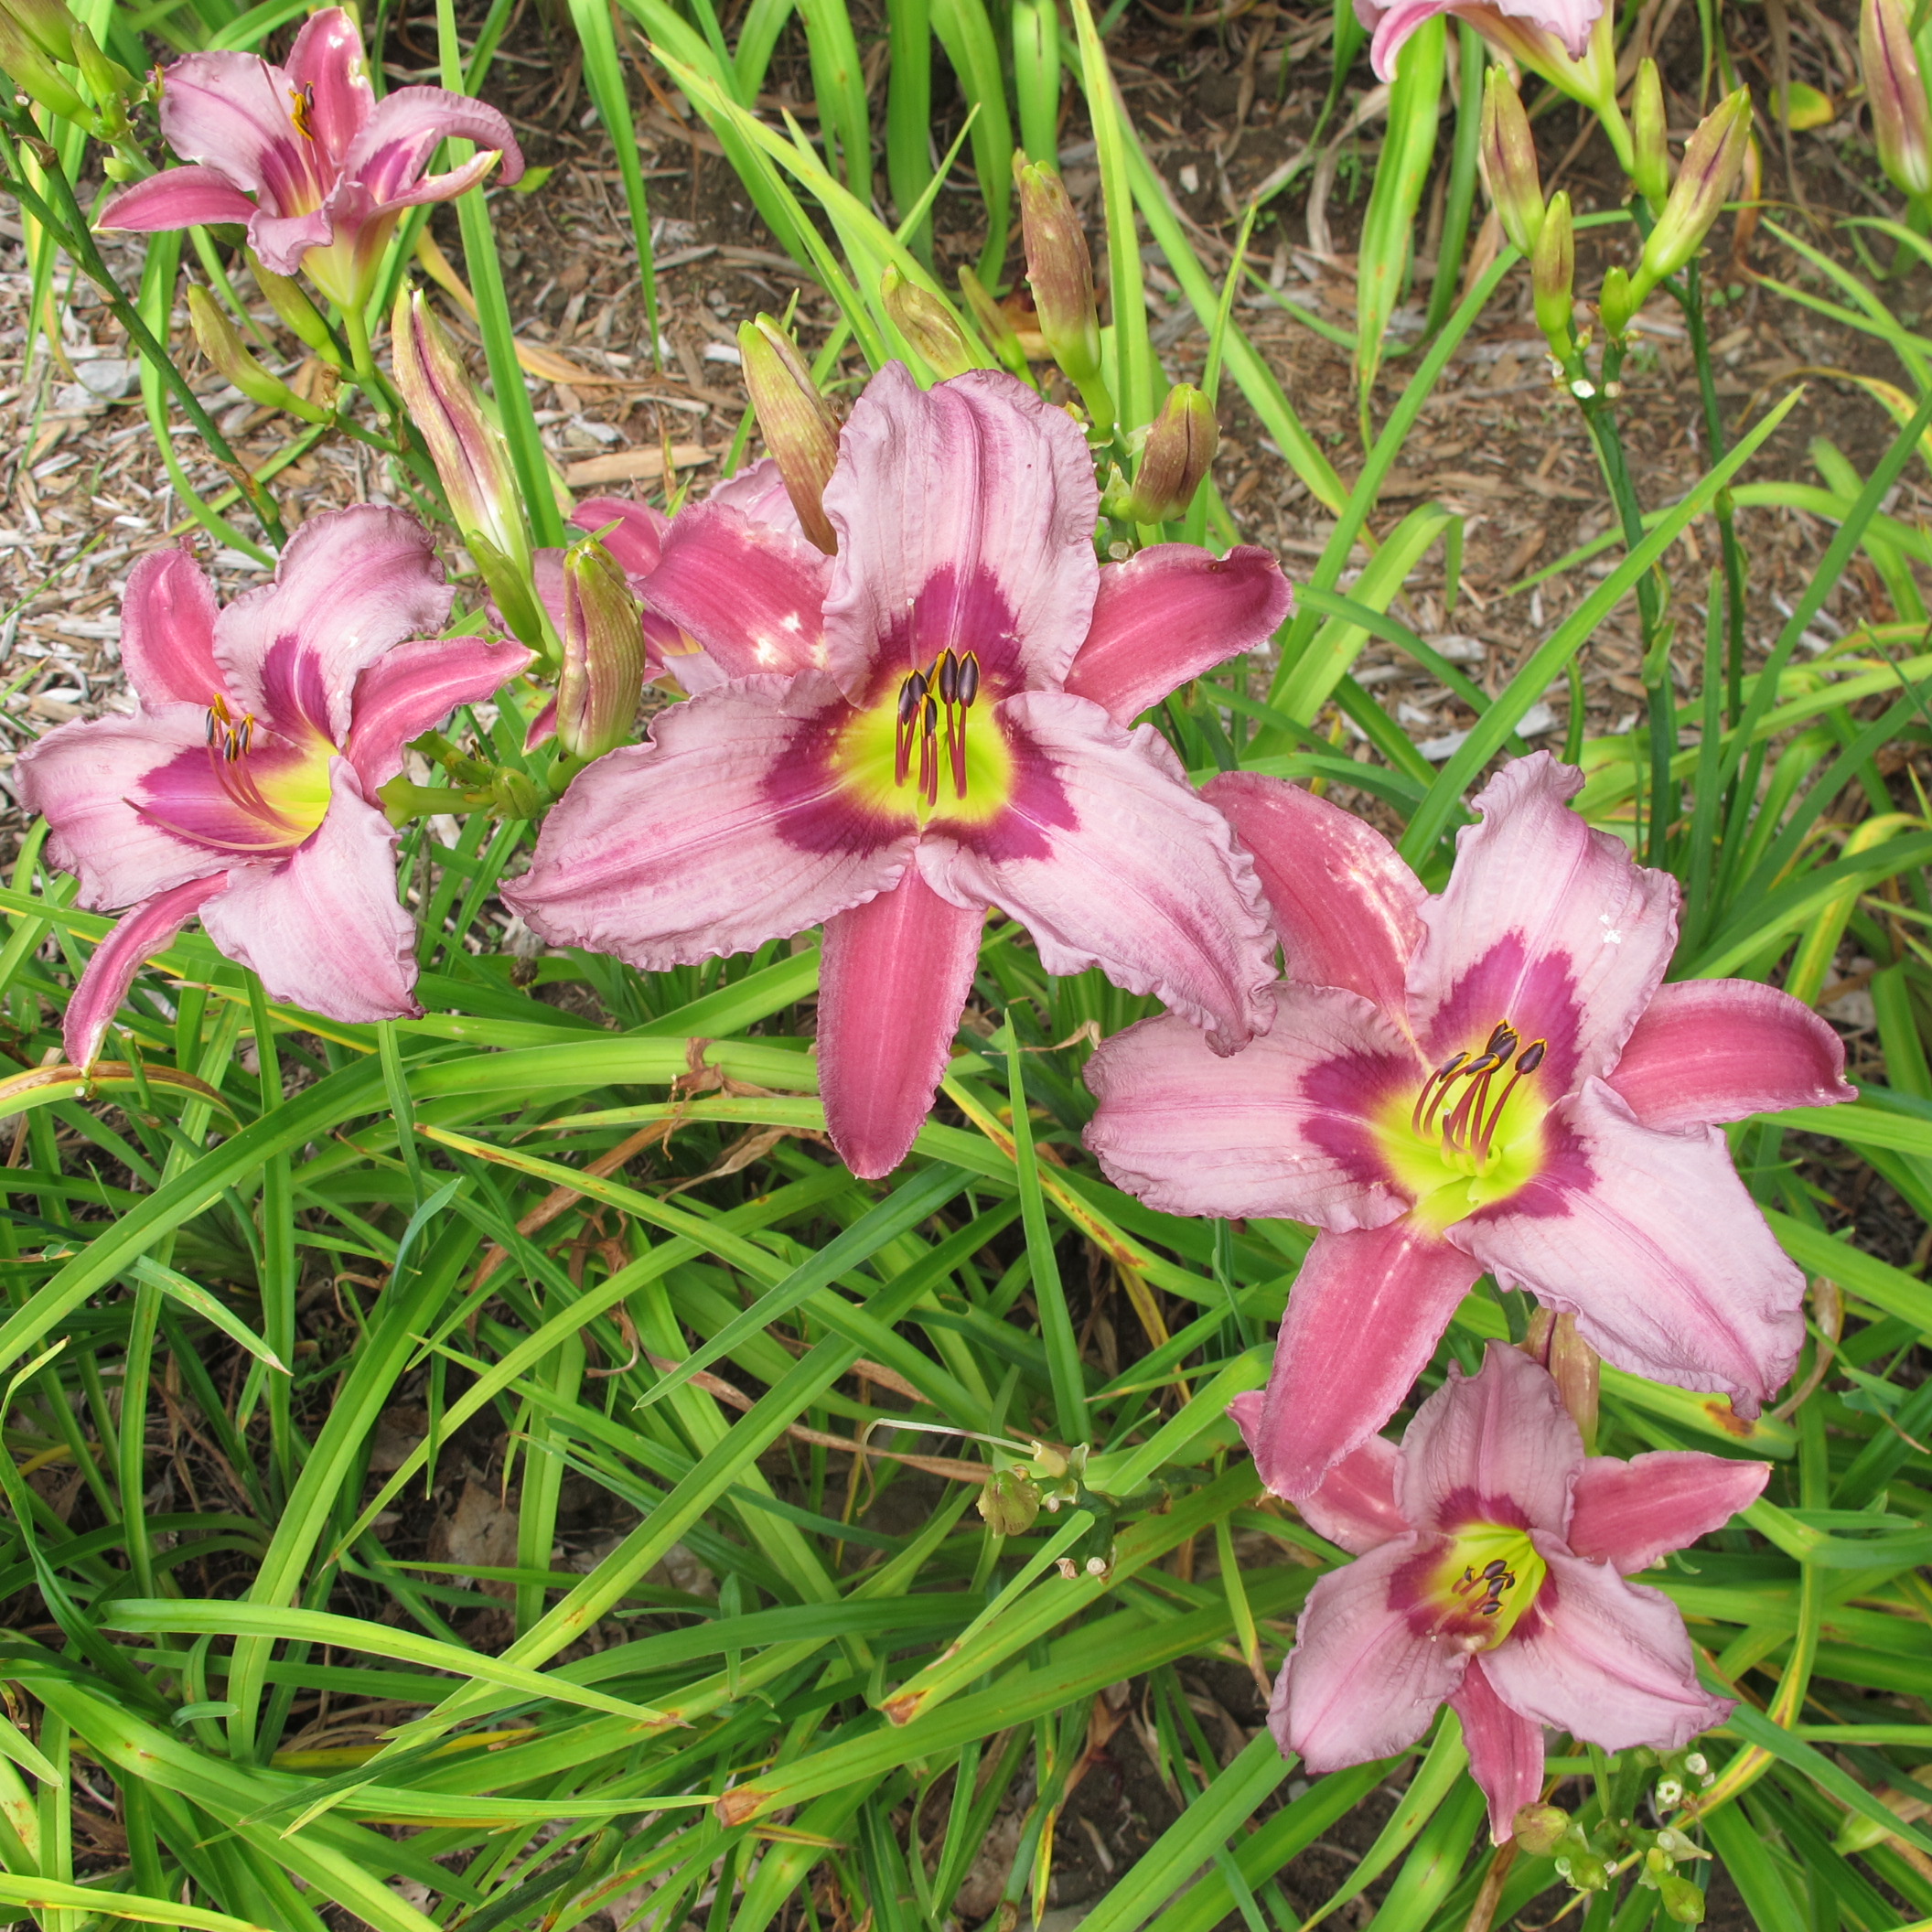
I recently visited Cider Hill Gardens in Windsor, VT to admire their collection of daylilies. They have daylilies in a wide range of colors, from nearly white (‘Ice Carnival’) to deep reds that border on black. They have daylilies that are pink, creamy yellow or light orange, lilac, lavender, bluish and red. Some come in one color, but most are bi-colored, with a throat or eye of a second color. Each flower has both petals and sepals, and in some, like ‘Frans Hals’, the petals and sepals can be different colors – a look I like.

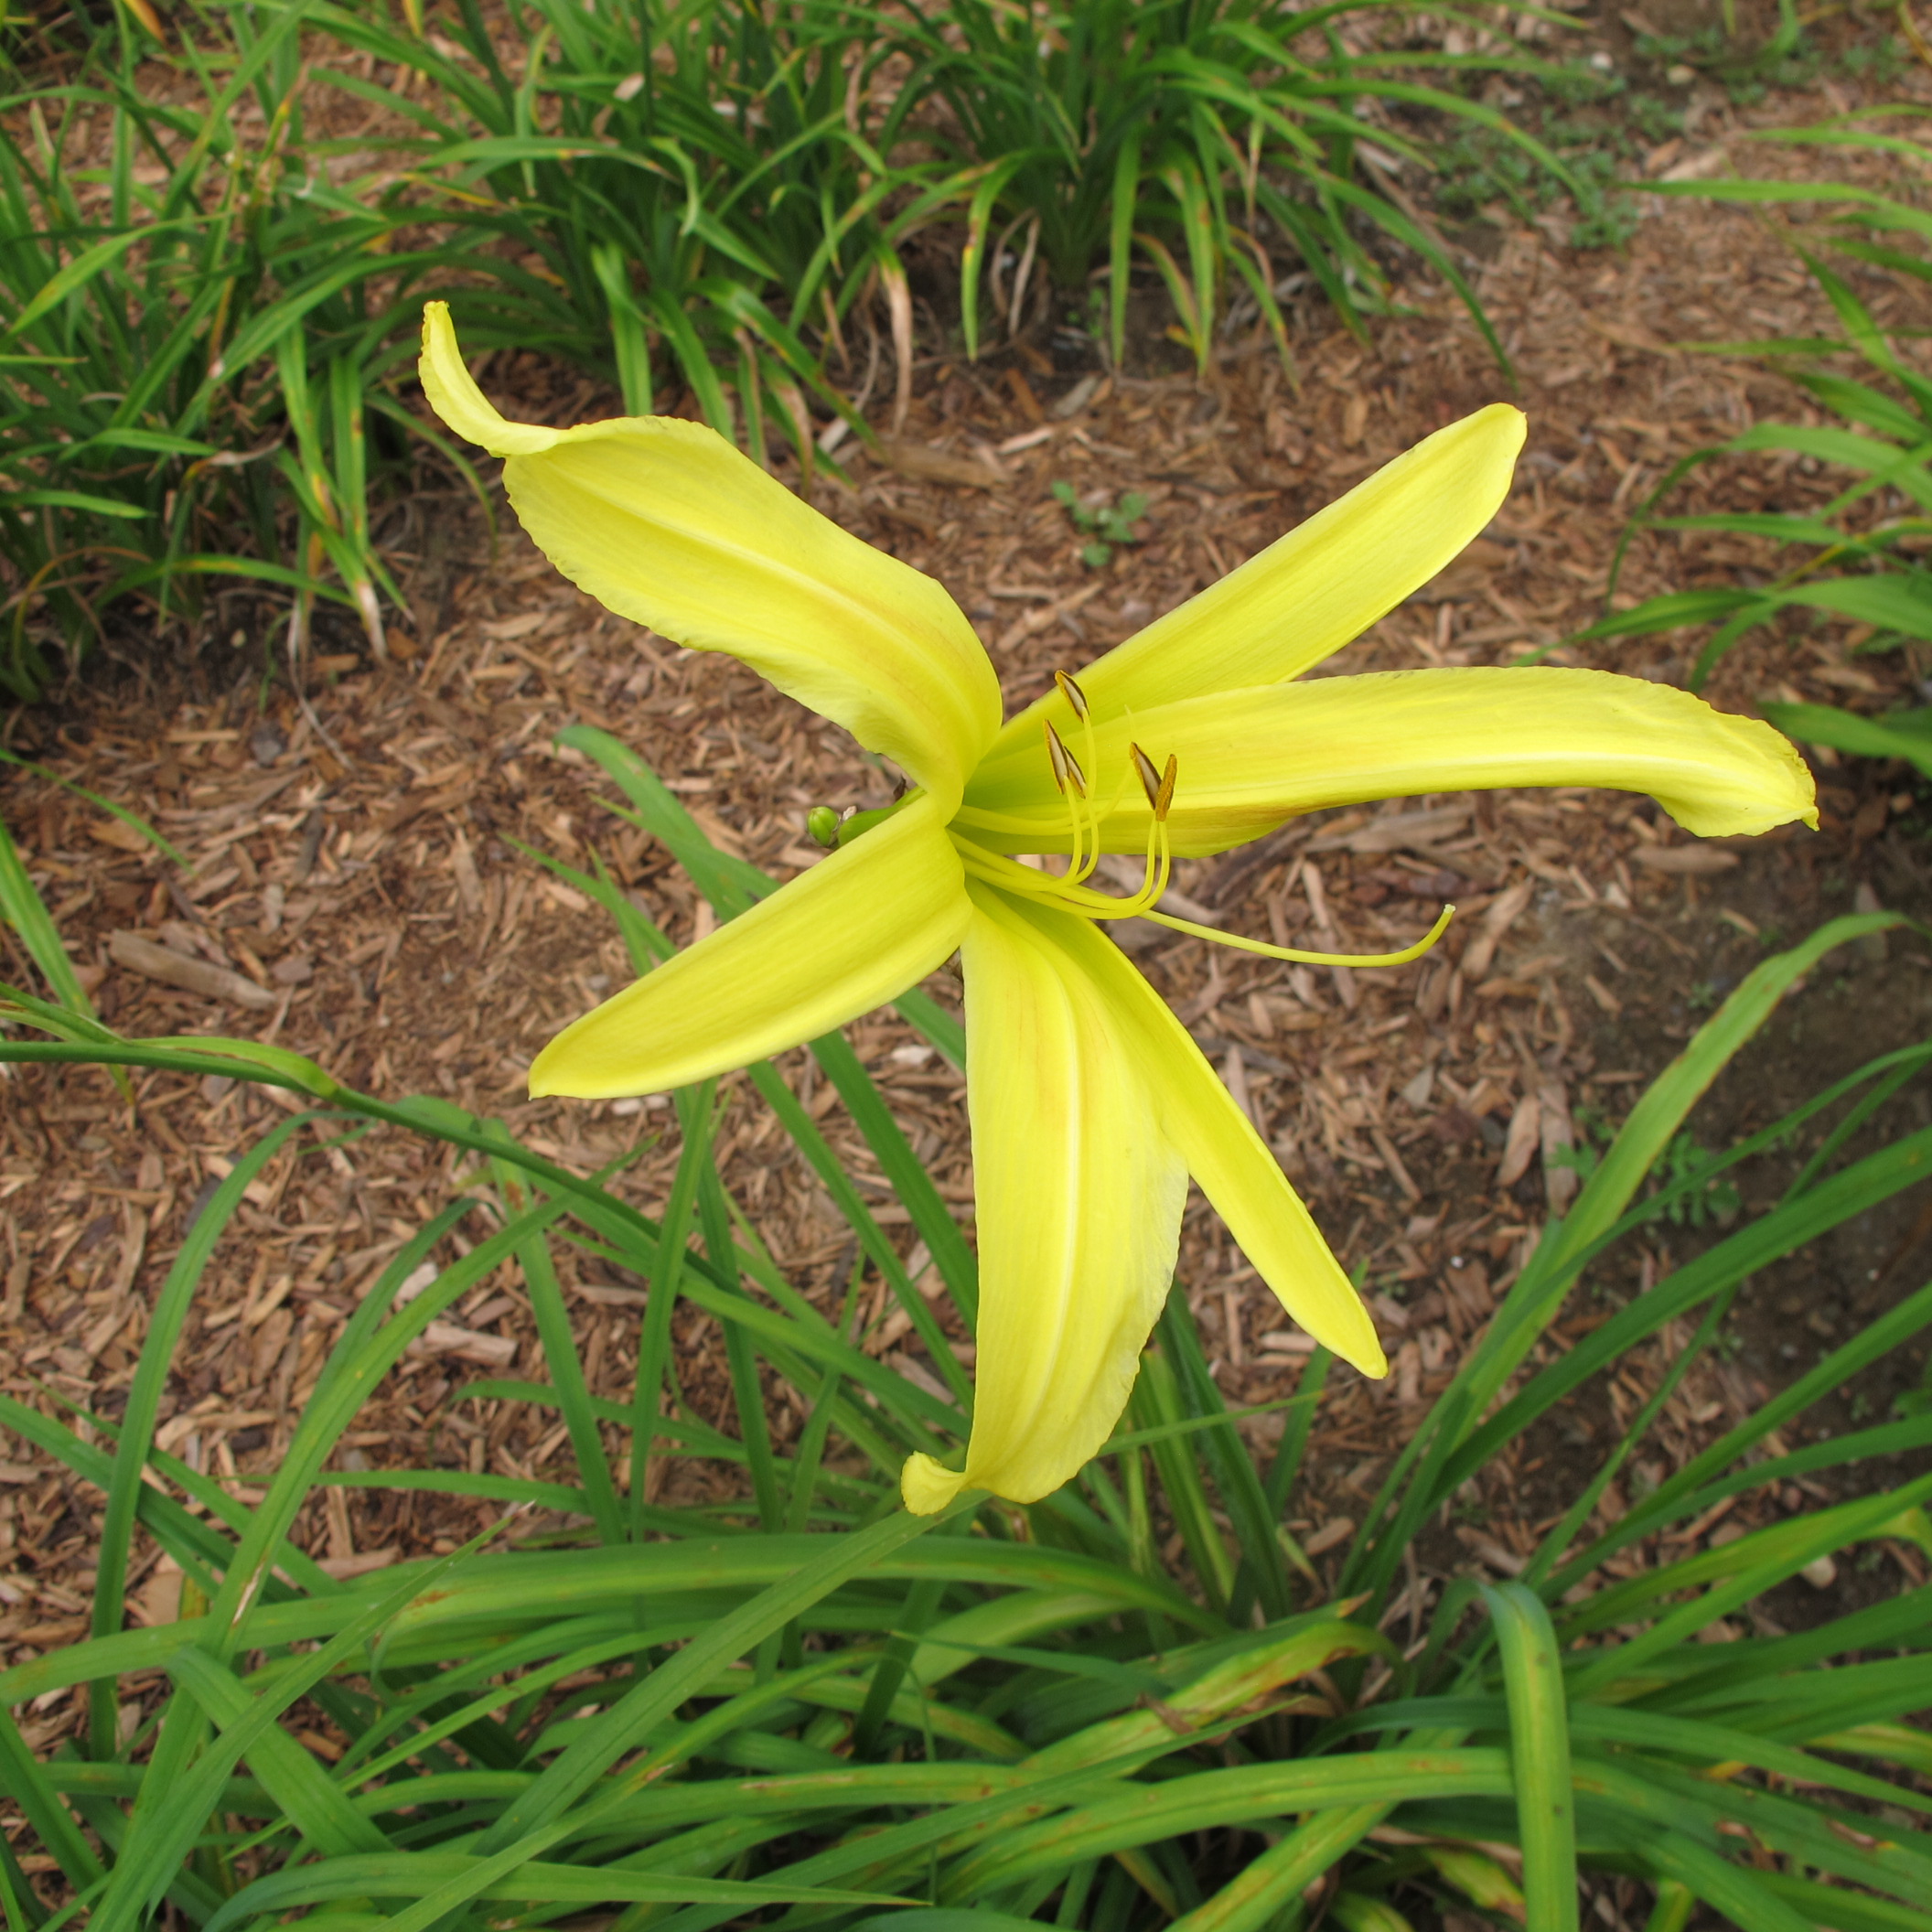
Kindly Light a spider dayllily
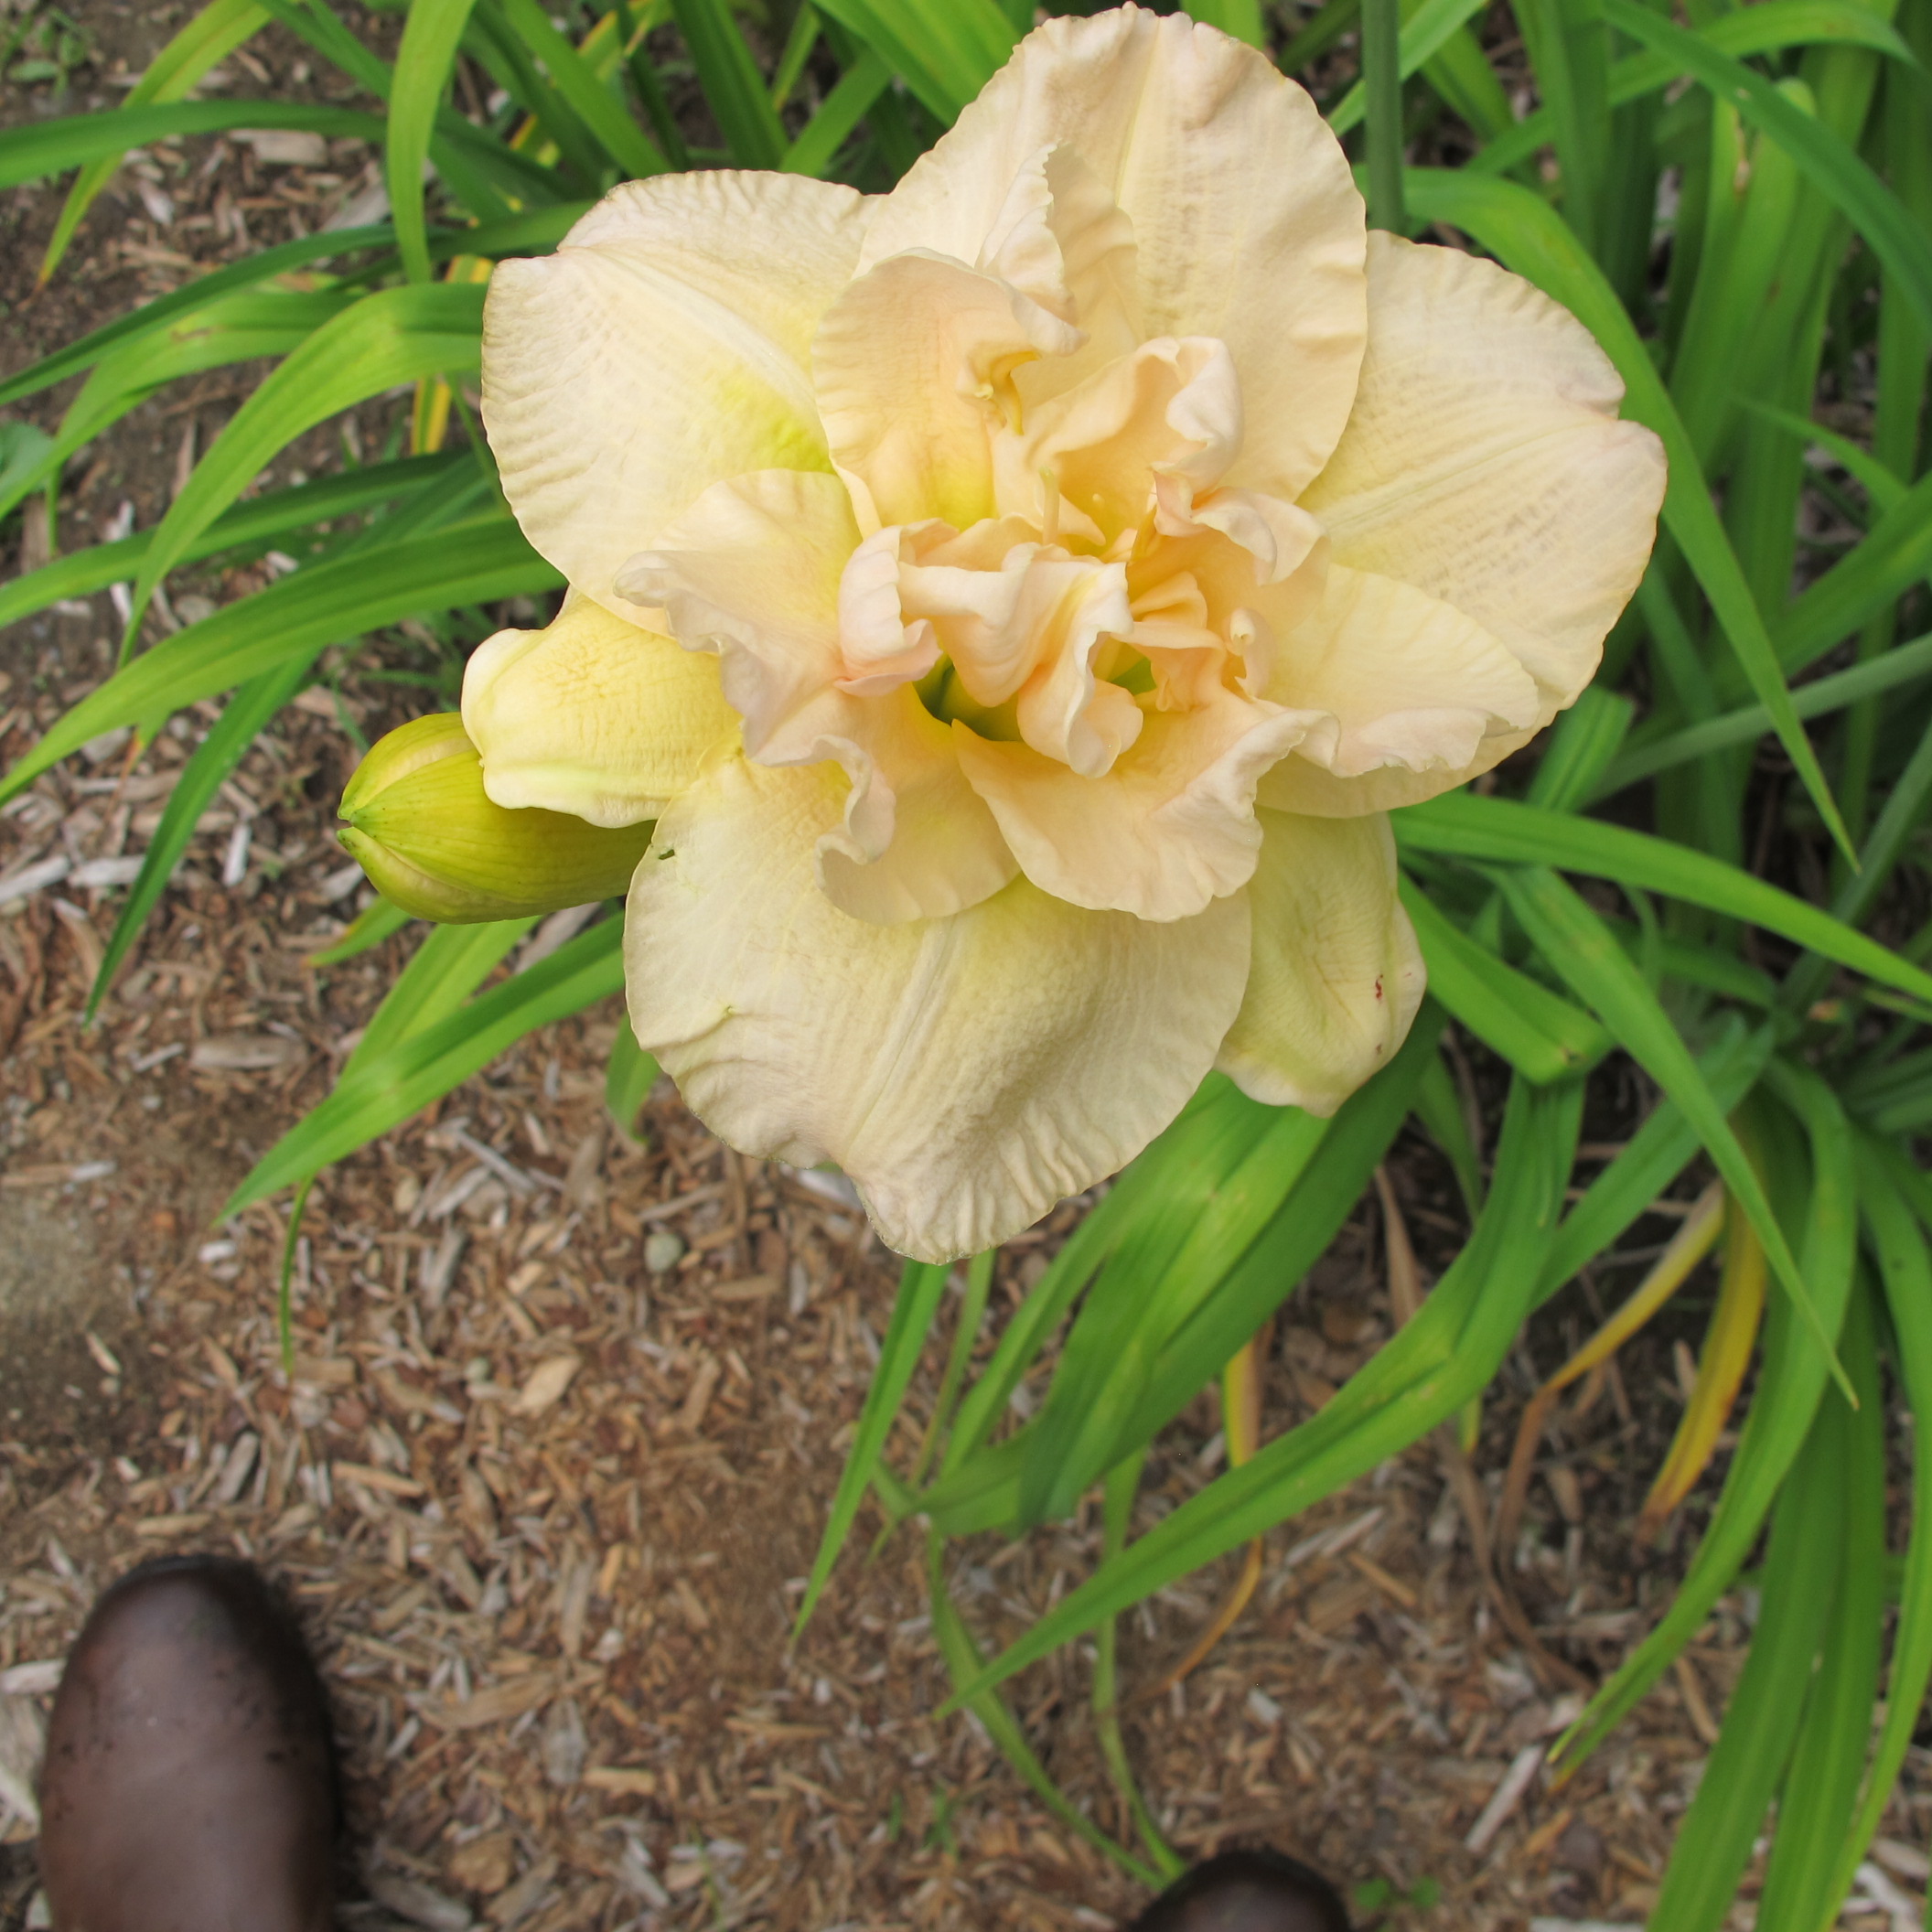
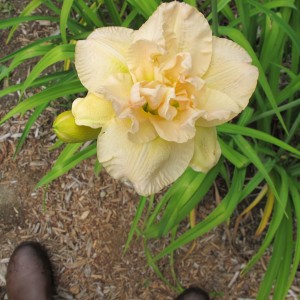
Flower shape varies as much as the colors. There is the standard trumpet. Then there are those with ruffled edges (‘Here She Comes’ is a good one). And the so-called ‘spiders’, whose petals are narrow and spaced apart a little – like the legs of a spider. ‘Kindly Light’ is a nice yellow one. ‘Doubles, such as ‘Jean Swann’ have their centers filled in with lots of extra petals. And some are worth buying for their great names like ‘Blueberry Breakfast’ or ‘Bodacious’.
Then there are the re-blooming daylilies, like Stella de Oro, a gold-colored daylily that is very popular because it blooms off and on all summer. I’ve seen pictures of a re-bloomer called Purple de Oro that I simply must have. So many kinds, so little garden space!
Jean Swann
What do daylilies want in life? Sunshine, dark rich soil, and adequate moisture. But they will settle for less – even a lot less- and bloom almost anywhere. Yes, slugs will sometimes nibble on the leaves, but they are not a magnet for bugs the way some roses are.
Over time clumps of daylilies get bigger, and you can divide them to start new clumps. Simply slice through a big clump with a spade to make two or four new plants, pry them apart and re-plant. I’ve been known to take out a chunk shaped like a piece of pie with a serrated knife – and the mother plant never even seemed to notice I’d done so. So run to your neighborhood plant center and have a look – you’ll likely come home with something wonderful.
Henry Homeyer is the author of 4 gardening books, and a children’s fantasy-adventure, Wobar and the Quest for the Magic Calumet. Contact Henry through his Web site, www.Gardening-Guy.com.


 Click Here to buy from Cobrahead