Composting
Posted on Wednesday, August 13, 2014 · Leave a Comment
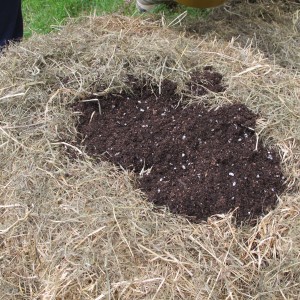
Most of us have our own insecurities. We might be insecure about some aspect of our looks, or how we did in school, or perhaps about our athletic abilities. For gardeners, our compost piles are often a source of mild angst. We think we should be able to make compost that looks and smells like the black rich soil in just three months. Some go to great lengths: turning their compost piles and adding grass clippings or manure to get their compost piles to heat up. Yet most of us never have a “textbook perfect pile”. I say, “So what?” I buy it by the truckload as I can’t make enough with kitchen scraps – and it’s not convenient to dig it out from under a pile of freshly pulled weeds.
That being said, all of us should have a compost pile, or more than one. Compost piles keep food scraps out of the waste stream, and weeds eventually break down and turn to that magical dark compost. But I say 2 or 3 years is a reasonable time to let a pile slowly digest its contents. In fact, I recently harvested some black gold from a pile I had made and abandoned about 20 years ago. I used it as soil for a new planting of hostas, and they seem very pleased it.
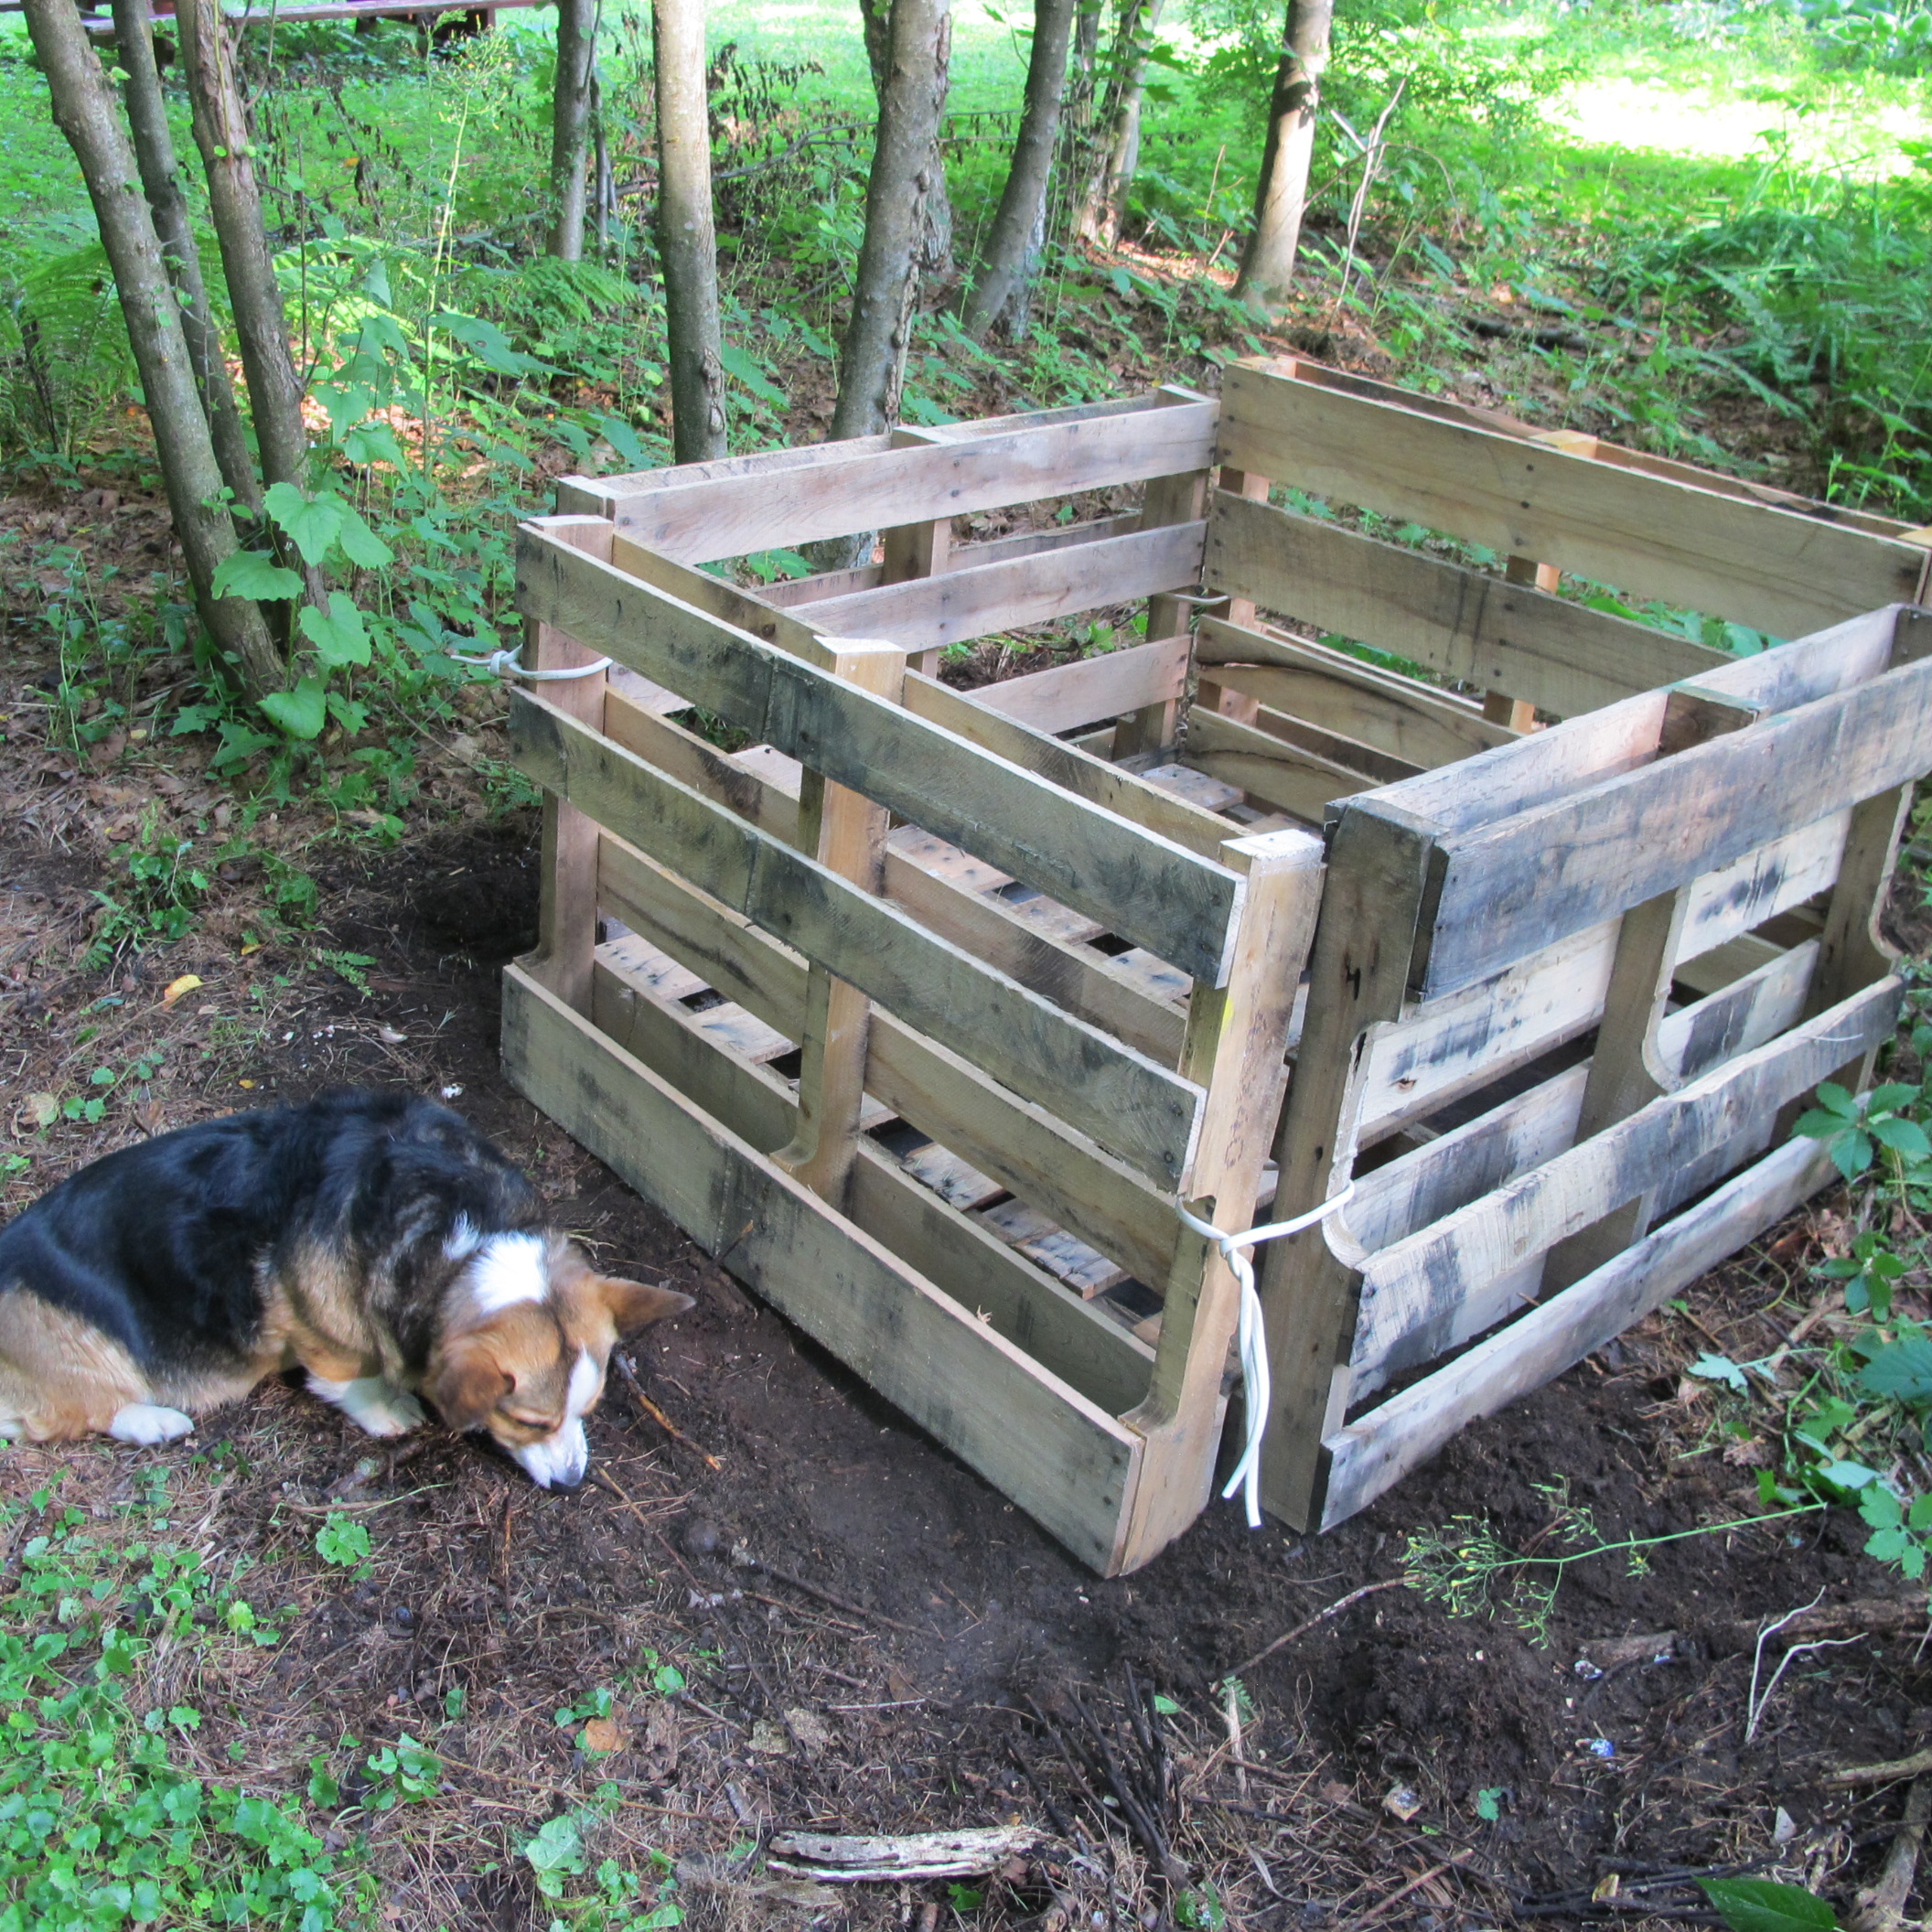
I have a dog, Daphne, a corgi that is quite a rascal. She loves to eat anything, and will roll in almost anything – the stinkier the better. I always need to have a way to keep her out of the compost pile that I use for kitchen scraps, and recently built a new one using pallets I got for free. Wood pallets are generally available – everything these days is shipped on them.
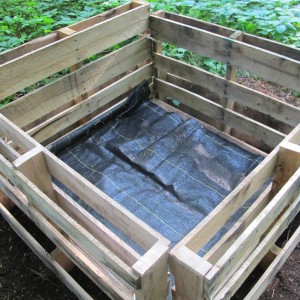
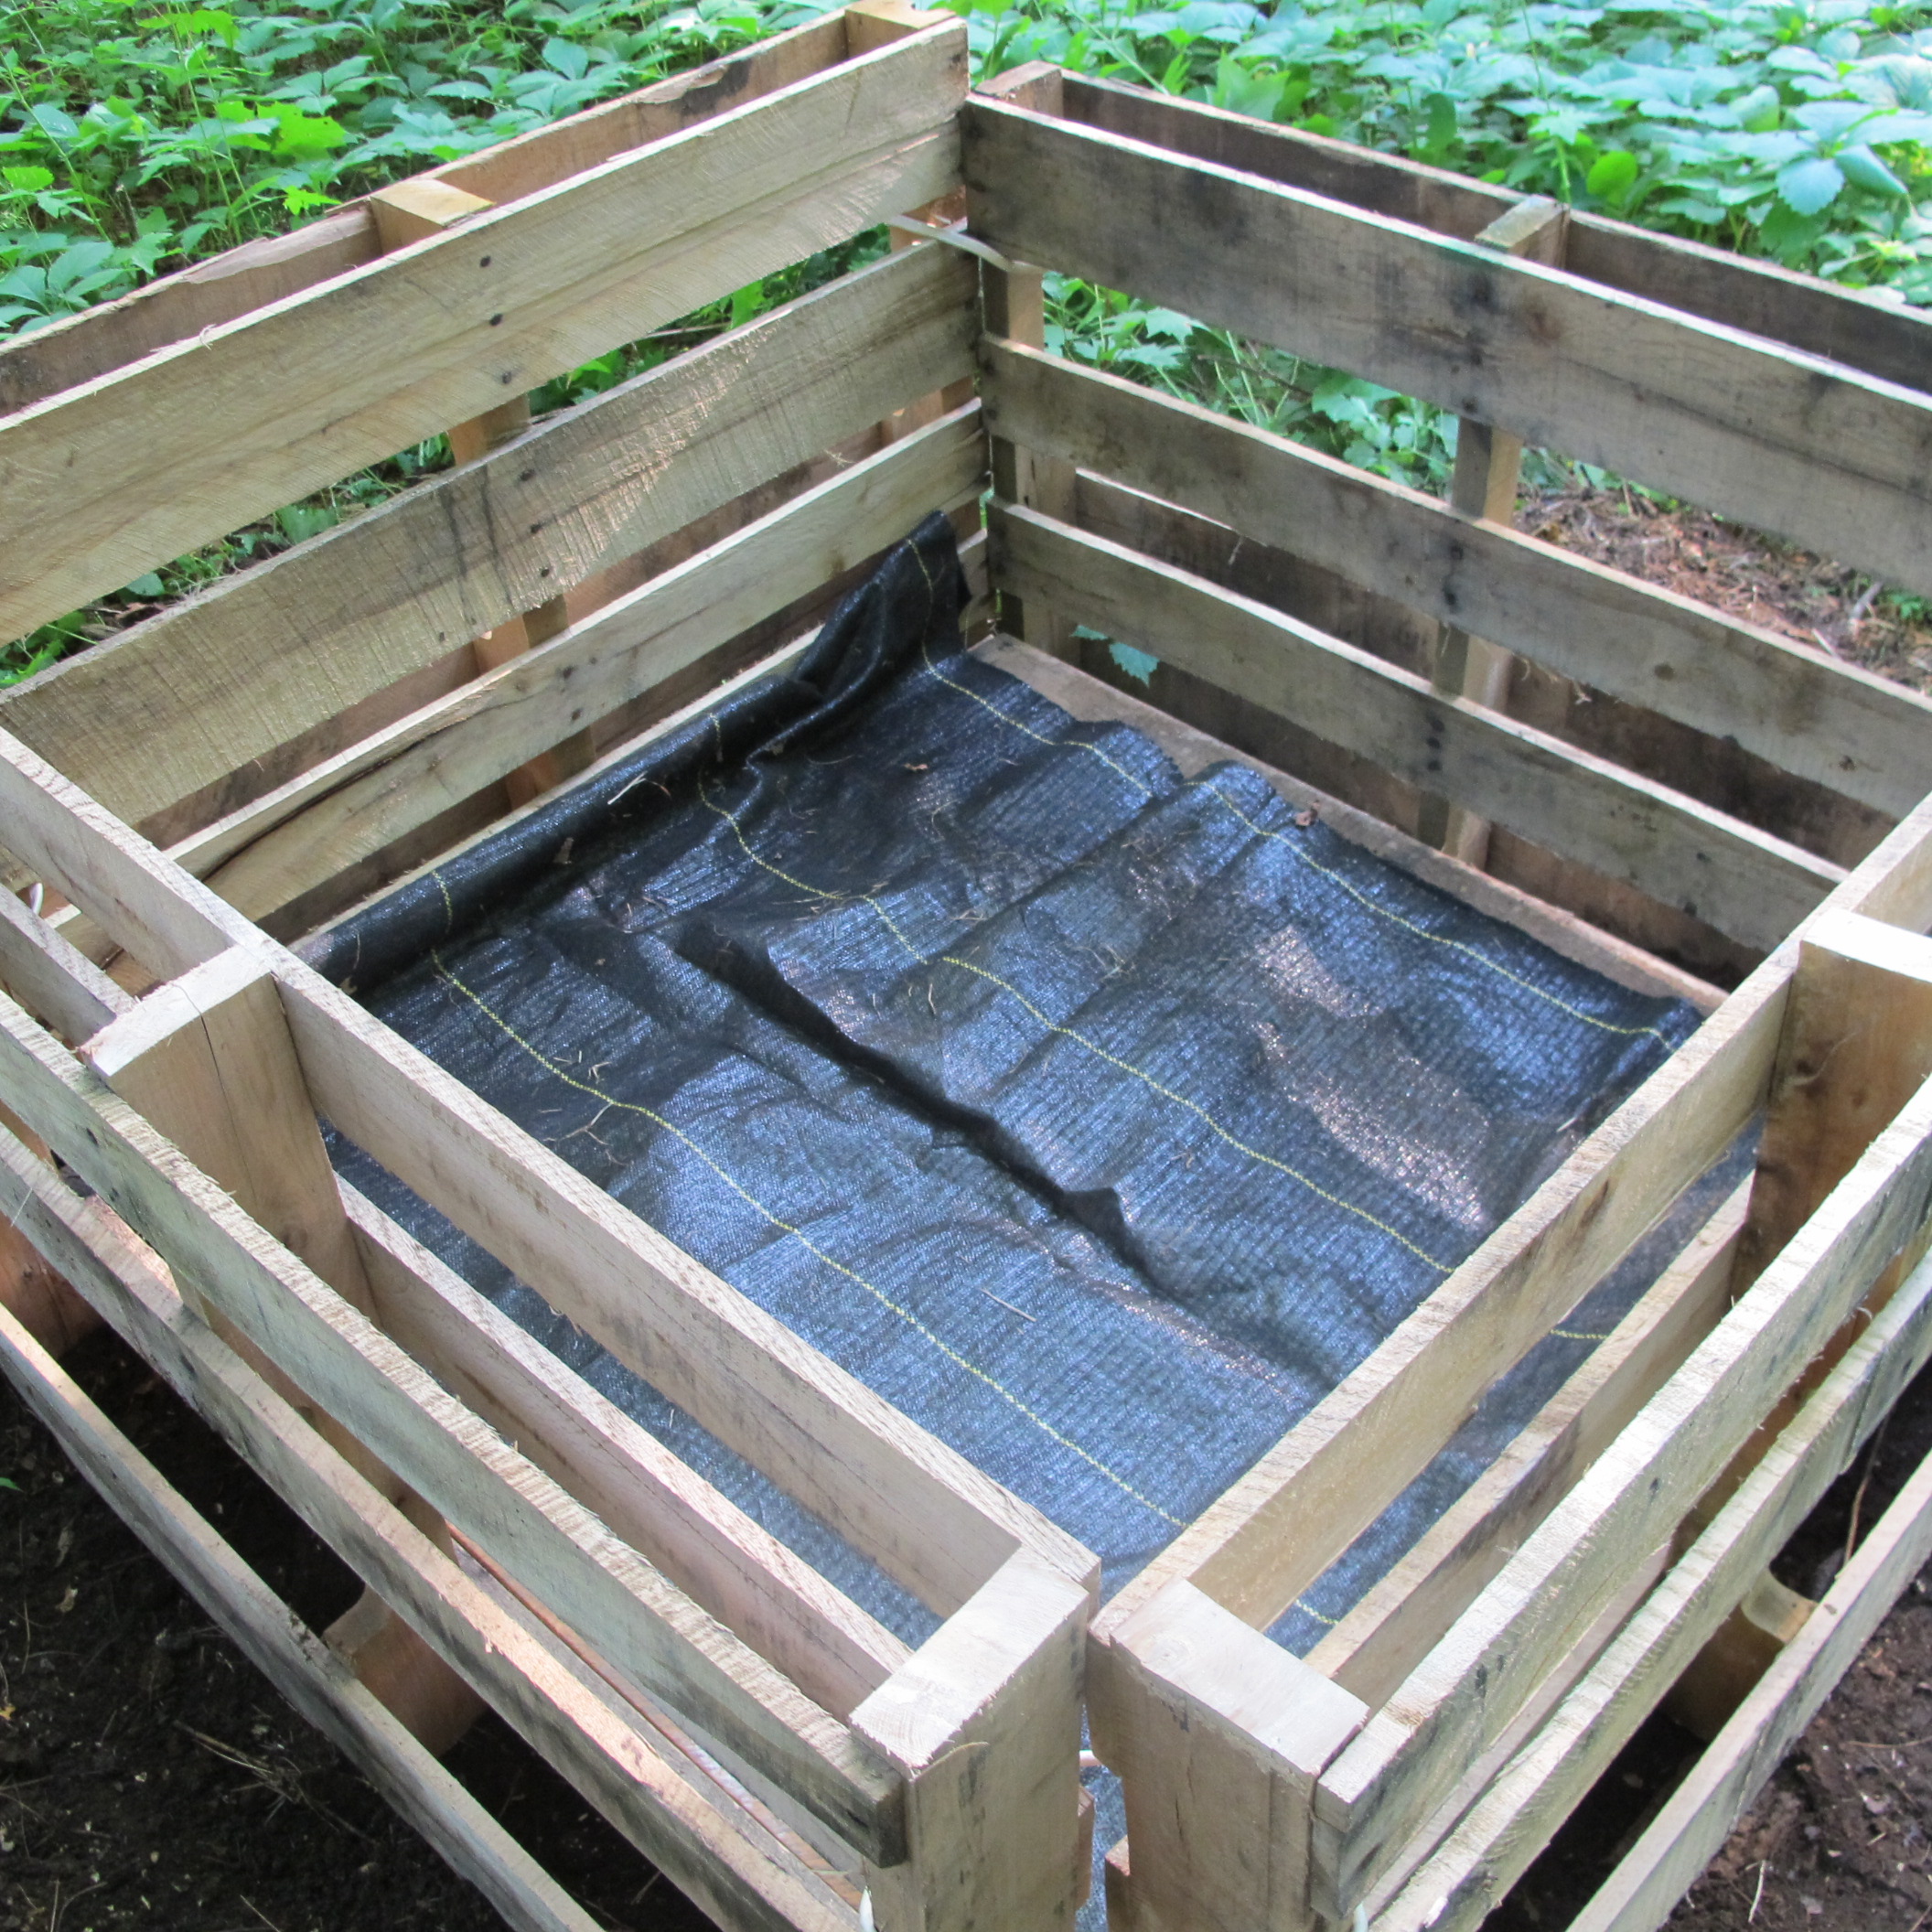
Finished compost bin
I decided to make a compost bin with a low profile – Daffy is short and not much of a jumper. I used a reciprocating saw to cut the pallets down to a more manageable size – instead of building a bin that is 4 feet tall, I only needed one half that height.
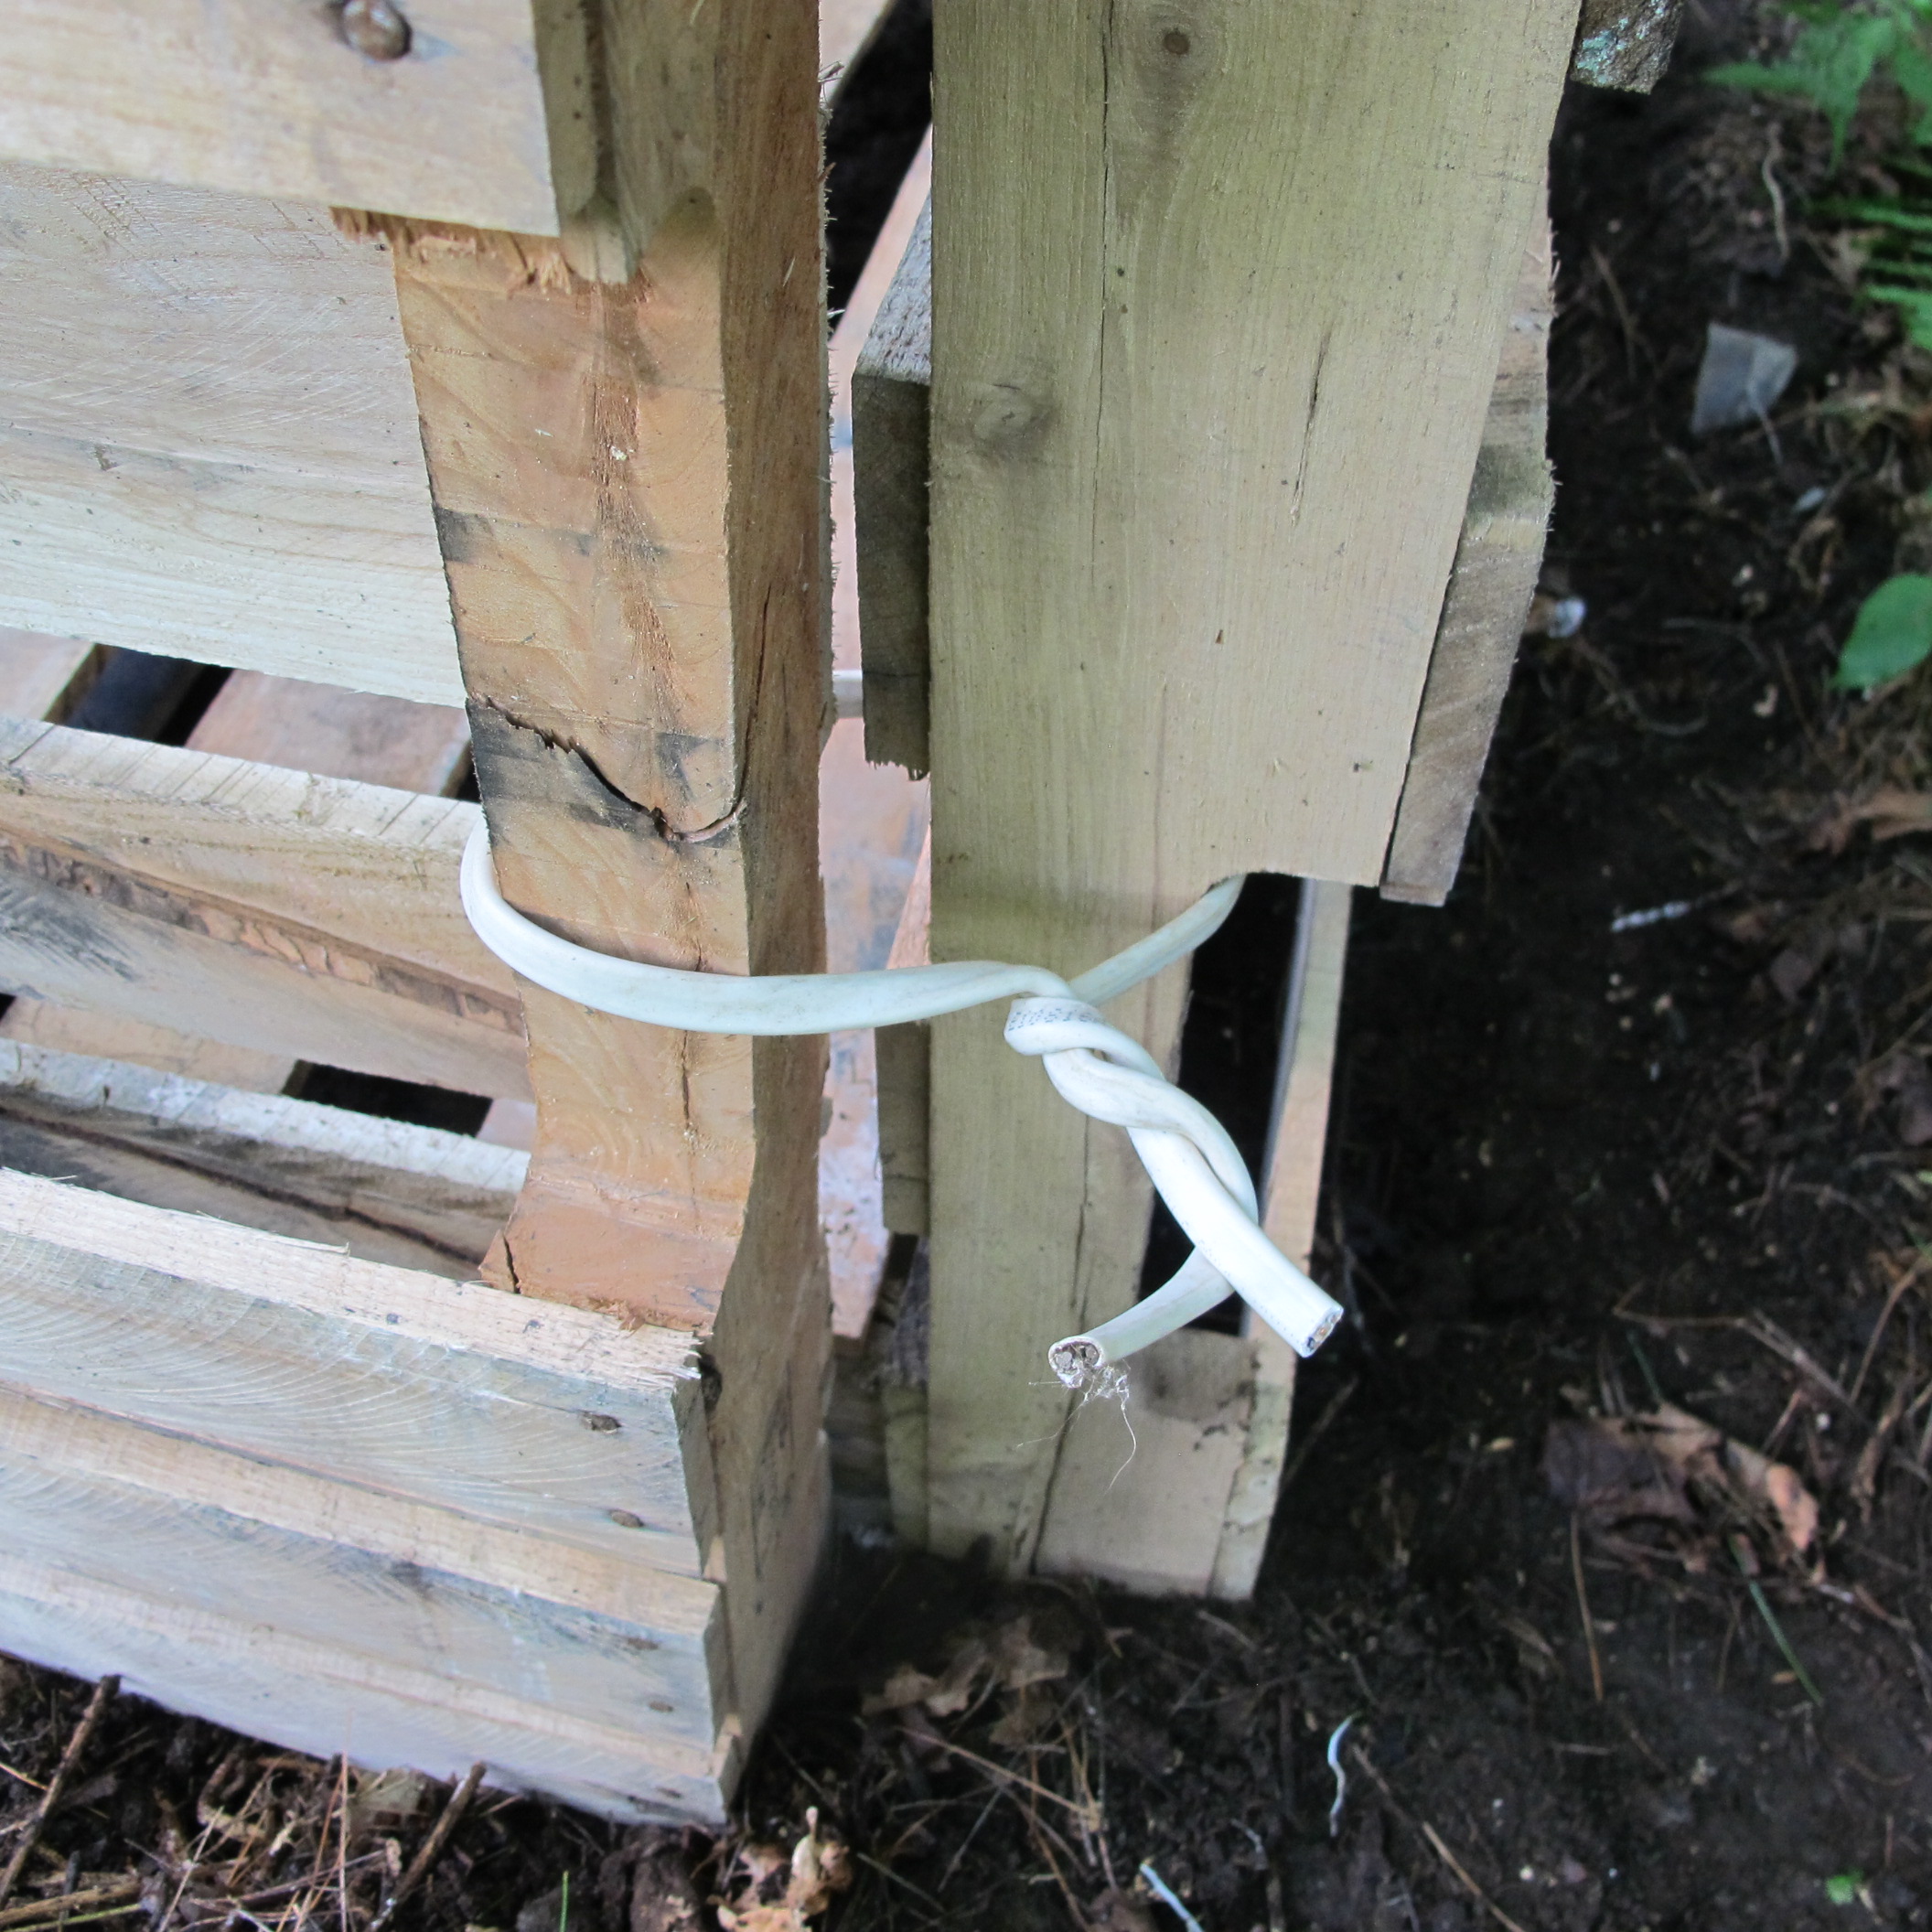
I placed one full-sized pallet on the ground and arranged four shortened pallets around it. The bottom pallet keeps the pile from sitting in collected water or on soggy soil in rainy times. Compost does not want to be soggy. I connected the four sides using building wire – either 14-2 or 12-2 wire is fine, or nylon rope would work. I just twisted the wire around the vertical corner pieces. When done, I put landscape fabric on the bottom to keep material from falling through between the slats.
What will go in that new compost pile? I’ll toss in vegetable by-products like carrot tops and moldy broccoli. Old flower arrangements. Any organic matter that can break down with time: stale bread, tea bags, egg shells, and peanut shells and corn husks will go in mine. But no meat products, vegetable oil, dog poop or kitty litter – the latter two could carry diseases or parasites.
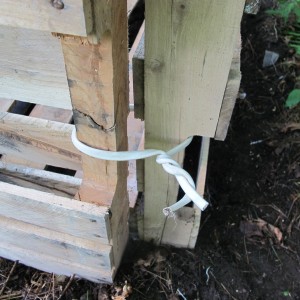
Detail of corner connection
According to the experts, most of what goes in a compost pile should be carbon-based: brown leaves and dried grass or weeds, for example. A little nitrogen-rich material should also be added – things like fresh cut green grass, cow or chicken manure, fresh vegetable scraps. The ideal ratio is 30 parts brown matter to 1 part green matter. But our kitchen waste is generally high in green matter, low in brown matter, so it doesn’t break down as well as it should. In addition to the kitchen compost, I have separate piles for garden waste and these are easier to get “cooking” and breaking down the organic matter.
What can you do to improve the balance in your kitchen compost? Rake up some dry lawn clippings and put a layer in the compost bin before adding a bucket of kitchen scraps. Or if you have a leaf pile, occasionally add some to the bin. You could even buy a bale of hay to layer into your compost bin. You are trying to encourage microorganisms to break down the vegetable material, and they need lots of carbon and only a little nitrogen to build their little bodies and reproduce.
A compost pile needs oxygen in order to encourage aerobic bacteria, which are the good ones. Anaerobic bacteria thrive in a low-oxygen environment and are the ones that produce foul odors. The smell of rotten eggs, for example, can be produced in a compost pile that is wet and compacted and doesn’t have a good carbon-nitrogen ratio. If yours smells bad, fluff it up and layer in some hay or dry leaves.
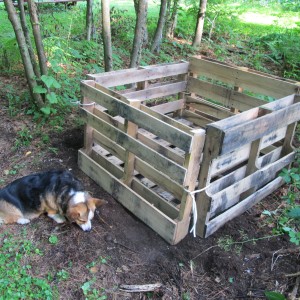
Daphne and the new compost bin
There are plastic compost bins available and even rotating compost bins. Those are great for urban gardeners – they do a great job of keeping out skunks and raccoons. But they are relatively expensive and do not necessarily make compost any faster than the simple bin described above.
If you really want fast action, you’ll need to have multiple bins and turn the fermenting compost from one to another, adding carbon or nitrogen as needed. A compost pile that is working well heats up past 130 degrees, killing most seeds. But, as I said in my first book, you may need to quit your day job to tend a compost pile that works perfectly. I’d rather spend my time weeding – or goofing off.
Henry Homeyer will not be answering questions this week. His web site is www.Gardening-guy.com. He is the author of 4 gardening books.
Going on Vacation? What’s a Gardener to Do?
Posted on Wednesday, August 6, 2014 · Leave a Comment
Sometimes life interferes with being a gardener. Here it is, mid-summer and most of my vegetables are nearly ready to be eaten or to be put up for the winter. But I was invited to a wedding of a dear friend in Tanzania, and I am going! So I will be leaving my gardens for nearly two weeks in August. If you are going away, there are things you can do that will help your garden thrive in your absence. Here are some of the things I am doing.
First, I am thinking about the deer. I have a vegetable plot this year that was lent to me nearby, but it is not adjacent to my house. At home the deer rarely bother my garden – there is plenty of activity every day, and a vicious corgi, Daphne, lurking around, ready to take them on. (Unless she is asleep indoors, which is most of the time). But this vegetable plot is more remote, and I have been battling deer all summer. Untended for 2 weeks? It might get munched to the ground.
Because the garden is about 250 feet long and 15 feet wide, I haven’t fenced it in. Fences 8 feet tall are the best defense against deer. Even light-weight bird fencing is generally effective, especially if you hang strips of cloth or reflective tape on the fencing so that they can see there is a fence.
Instead of fencing, I have tried various smelly things to make them think poorly of my garden. I tried hanging bars of Irish Spring soap, but that did not deter them. Then I sprayed Garlic Barrier on foliage. This is a garlic and water spray that comes in a quart bottle. Diluted and sprayed on, it is quite stinky, and deer, like vampires, generally avoid garlic. The garlic oils are supposed to penetrate the leaves, repelling insects. But why not deer, too? It can’t hurt, and if it repels some bugs, too, all the better. The directions suggest spraying every 2 weeks, so I’ll spray my plants just before I go.

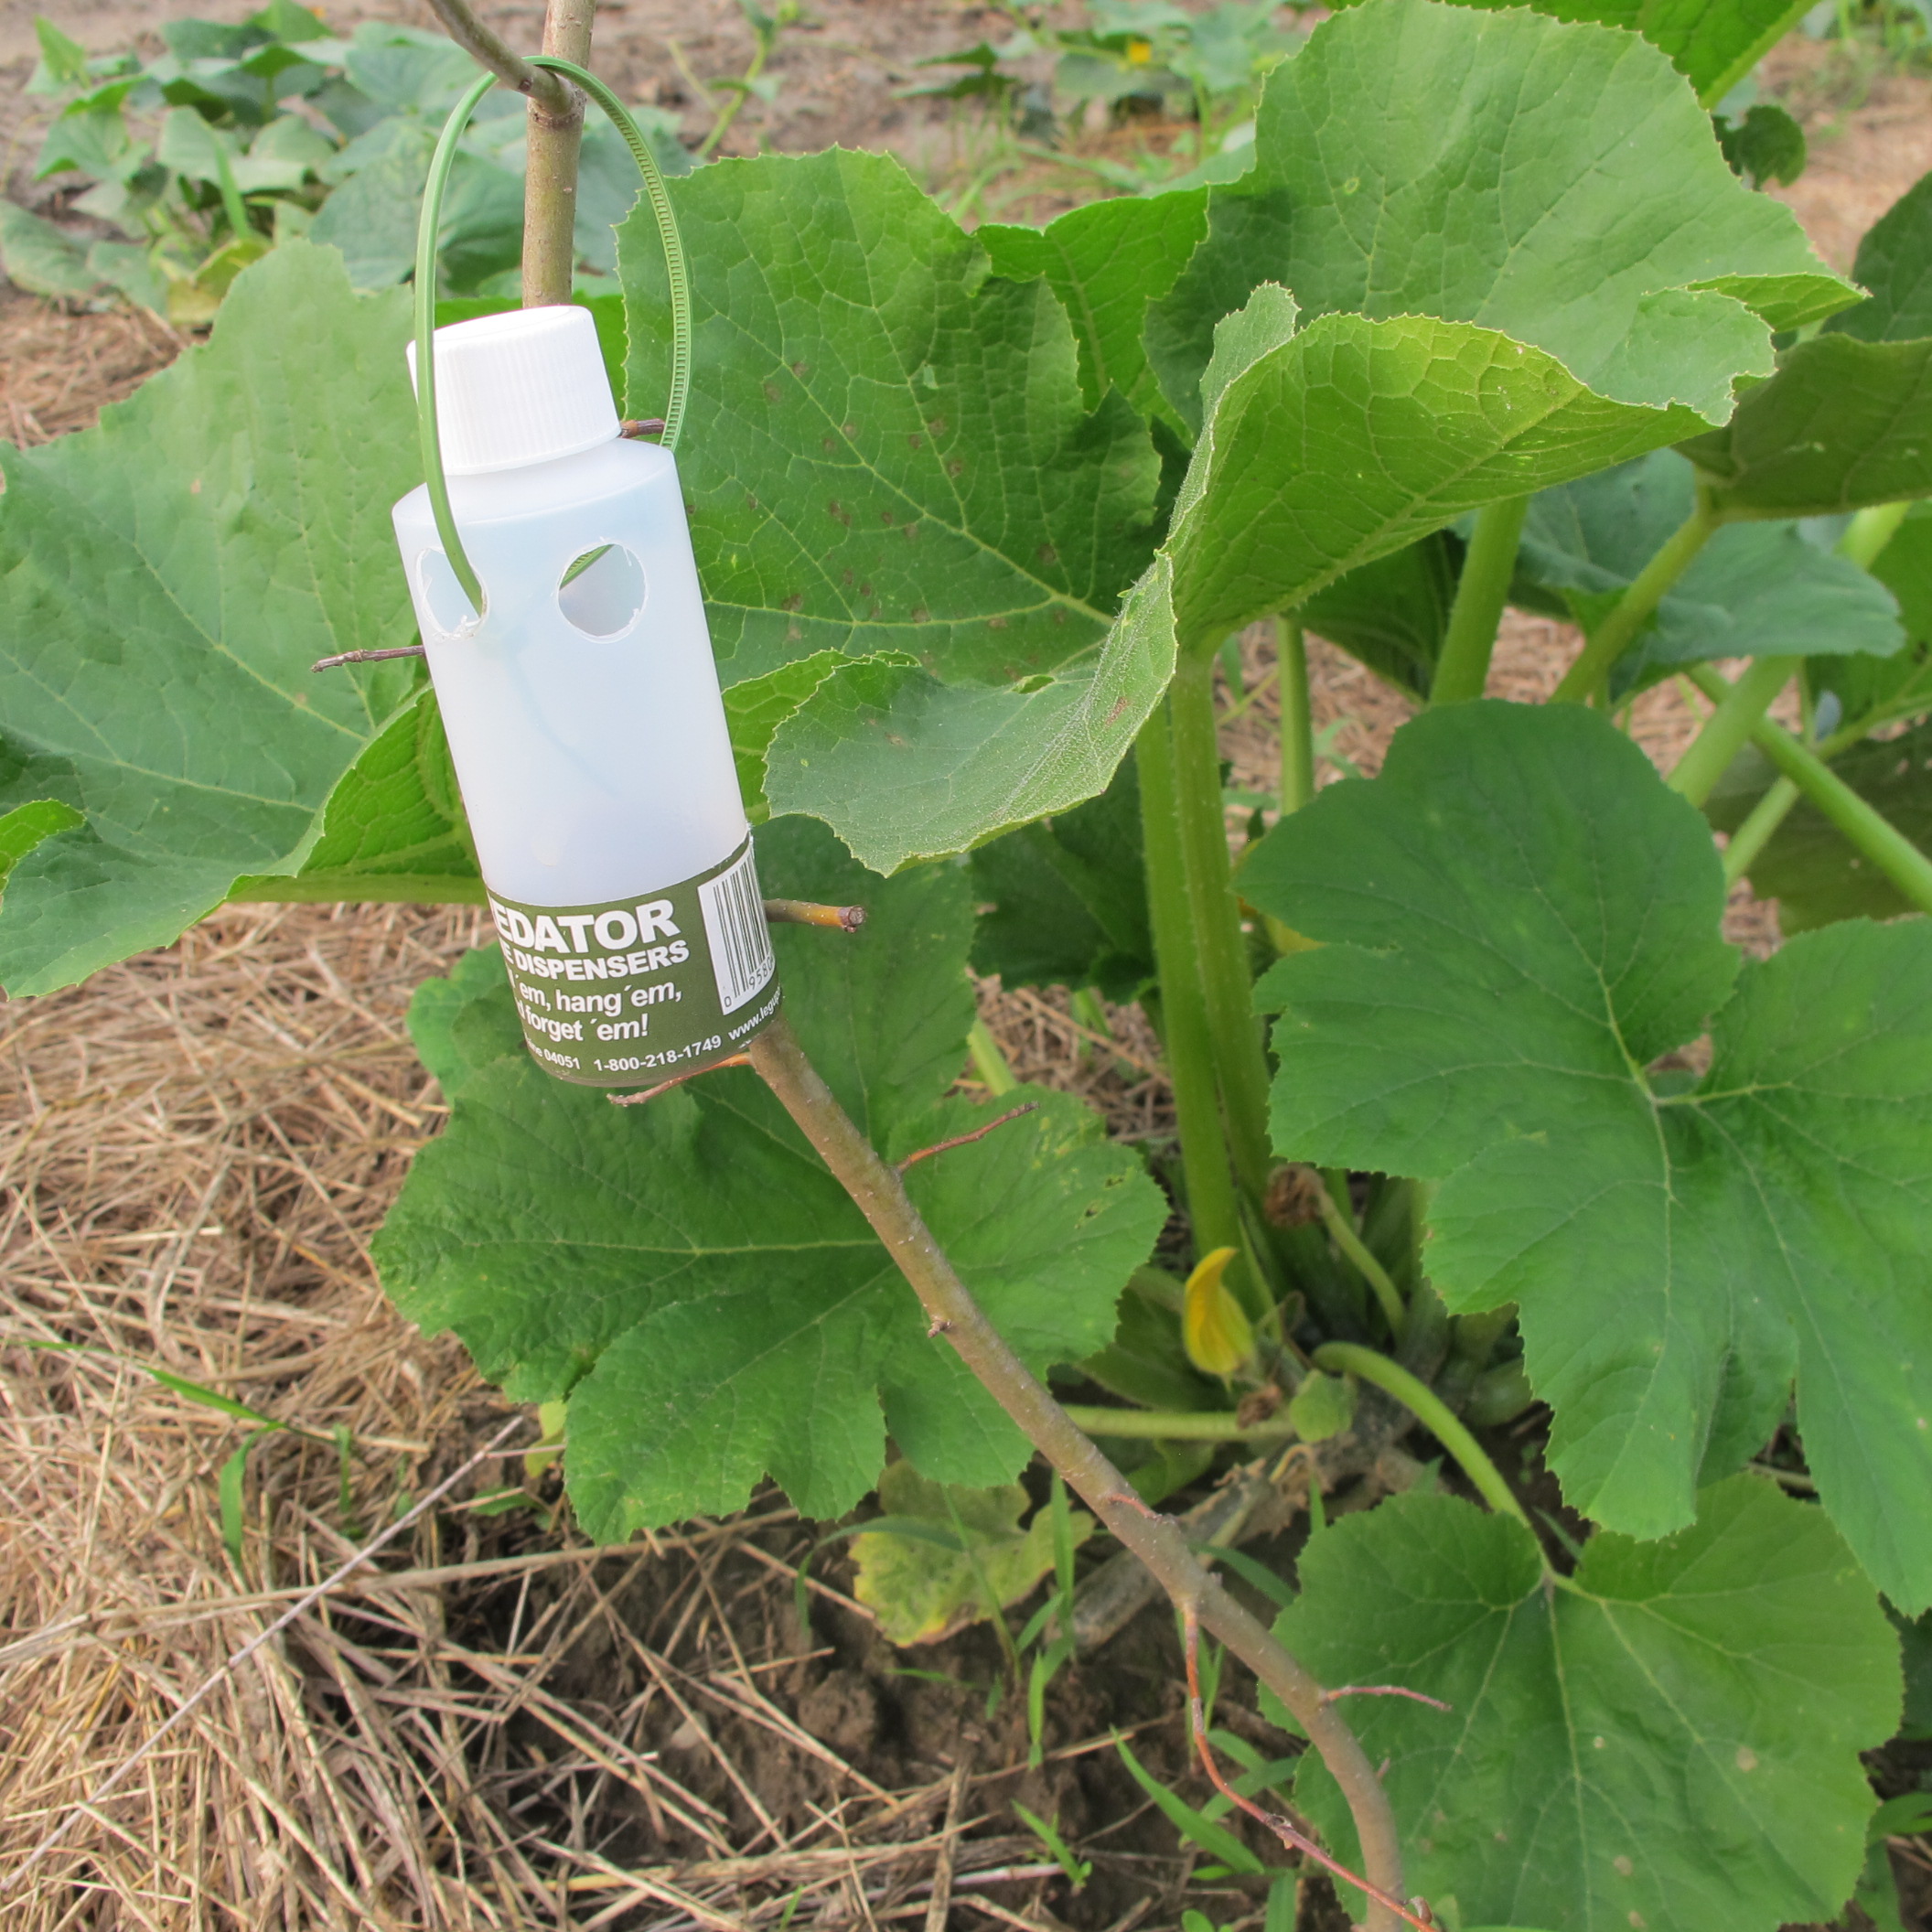
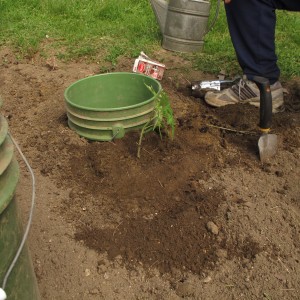
Containers for coyote urine
The last resort, and one which so far this summer seems to have helped, is coyote urine. It is sold along with little plastic bottles with holes drilled in the sides near the top, cotton balls in the bottom, and wire loops for hanging. I poured some coyote urine on the cotton balls, and hung them from short forked sticks in the garden. Since I have done that, I’ve had no losses to deer in the garden. Deer are creatures of habit, and I am hoping they have decided that my big plot is one to avoid. We’ll see. I’ve also heard that aluminum pie plates hung on strings in the garden will ward off the deer, but haven’t tried them.
I have 50 sweet potato plants in that plot, and the deer ate some of the foliage the first night after I planted the slips (some of which had leaves). Most plants recovered, and I covered them with “row covers” to keep away the deer and to hold in heat. Row cover is a spun agricultural fabric that breathes and lets rain and air pass through it. I use stiff wire hoops to keep it above the plants and give them space to grow. So now my sweet potatoes are not available to the deer.

Row covers
Writing this article in yet another thunder storm, I have to admit that I am not worried about watering my garden while I am away. Still, if you have a dry garden and we get a dry spell, there are timers that will turn you hose on and off . They are battery operated and will turn off and on every day, or every other day, or once a week for a predetermined period. I have used timers made by Melnor and they are easy to program and use. You just need to have sprinklers or soaker hoses set up to water your garden.
It helps to have a friend or neighbor who will turn the timer on if you get a dry period, or turn it off after a big rain. Presumably there are now phone apps that will allow you to turn timers on or off from a smart phone. I’m just not that smart – nor is my phone (which is not an old fashioned rotary, but close)..
Potted plants often suffer in August when people leave without giving them thought. It’s best to move them out of the sun to keep them cool and reduce their water needs. Give them a good soaking before you leave – I find submerging pots in a big bin of deep water is best. Hold them down until they stop bubbling.
And I know you are not going to like this piece of advice: weed your garden well before you leave. Yes, you’re busy getting ready to go. But if you let weeds get big, flower, and make seeds, you will be paying a price for a long time to come. Seeds can live a long time – some even for decades, or centuries. So have a good look around for weeds getting ready to produce seeds.
Lastly, remember if you offer your neighbor free beans or tomatoes or lettuce, they are more likely to come and fuss with your watering device, or even water the potted plants. And veggies need to be picked in order to keep on producing. Have a great trip!
Henry Homeyer will not be answering e-mail questions this month. His Web site is www.Gardening-Guy.com.
Tomatoes
Posted on Wednesday, July 30, 2014 · Leave a Comment
This has been, knock on wood, a great year for tomatoes. I planted my seeds indoors earlier than I usually do, which meant that my plants went in to the ground earlier, and bigger. And there were no late frosts, so I’m eating tomatoes earlier than most years. Cherry tomatoes started producing in early July, and I picked my first full sized tomato on July 16. Lots of sun and adequate rain have pushed them along. Barring an attack of late blight, I will have more than I need to feed myself all winter – if I process them now.
My mother and grandmother canned tomatoes. They worked in a hot kitchen in August and September turning homegrown tomatoes into canned tomatoes and sauce. In order to avoid the deadly disease, botulism, they boiled jars seemingly forever. But now, in the day of chest freezers, we can make sauce and not have to go through the canning process. You can make sauce and freeze it for use in the winter. And there are lots of other ways to save the harvest.
First, my favorite technique: freezing tomatoes whole. I call it the “no-work” method. Just place clean dry tomatoes in gallon freezer bags, suck out any excess air with an ordinary straw, and place the bags in the freezer on a cookie sheet. I generally get 9 large tomatoes into a gallon bag. After the tomatoes are frozen, you can take them off the cookie sheets and stack the bags.
When you are ready to use the tomatoes for a soup or stew, you can remove the skins easily, if you wish, by running them under hot water and giving them a quick rub. Halve the tomatoes and cut out their attachment points, chop and cook. If you let the tomatoes thaw they will be mushy and no good for sandwiches. But cooked? They’re great.
Last summer I tried roasting tomatoes in the oven, and was very pleased with the results. I cut tomatoes in half, and placed them in a shallow roasting pan and placed them in the oven at 350 degrees. I cooked them until the tomatoes caramelized and lost most of their moisture. Then I placed them in zipper bags, one layer thick and put them in the freezer. To avoid the need for scrubbing the roasting pan, I cooked them on a sheet of aluminum foil. These tomatoes worked fine in sandwiches in winter. I just put the frozen tomatoes in the toaster oven to thaw and heat, and put them on bread. Yum!
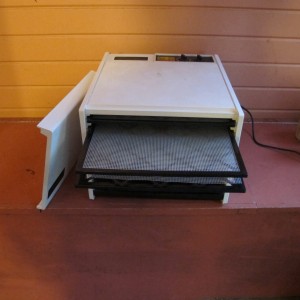
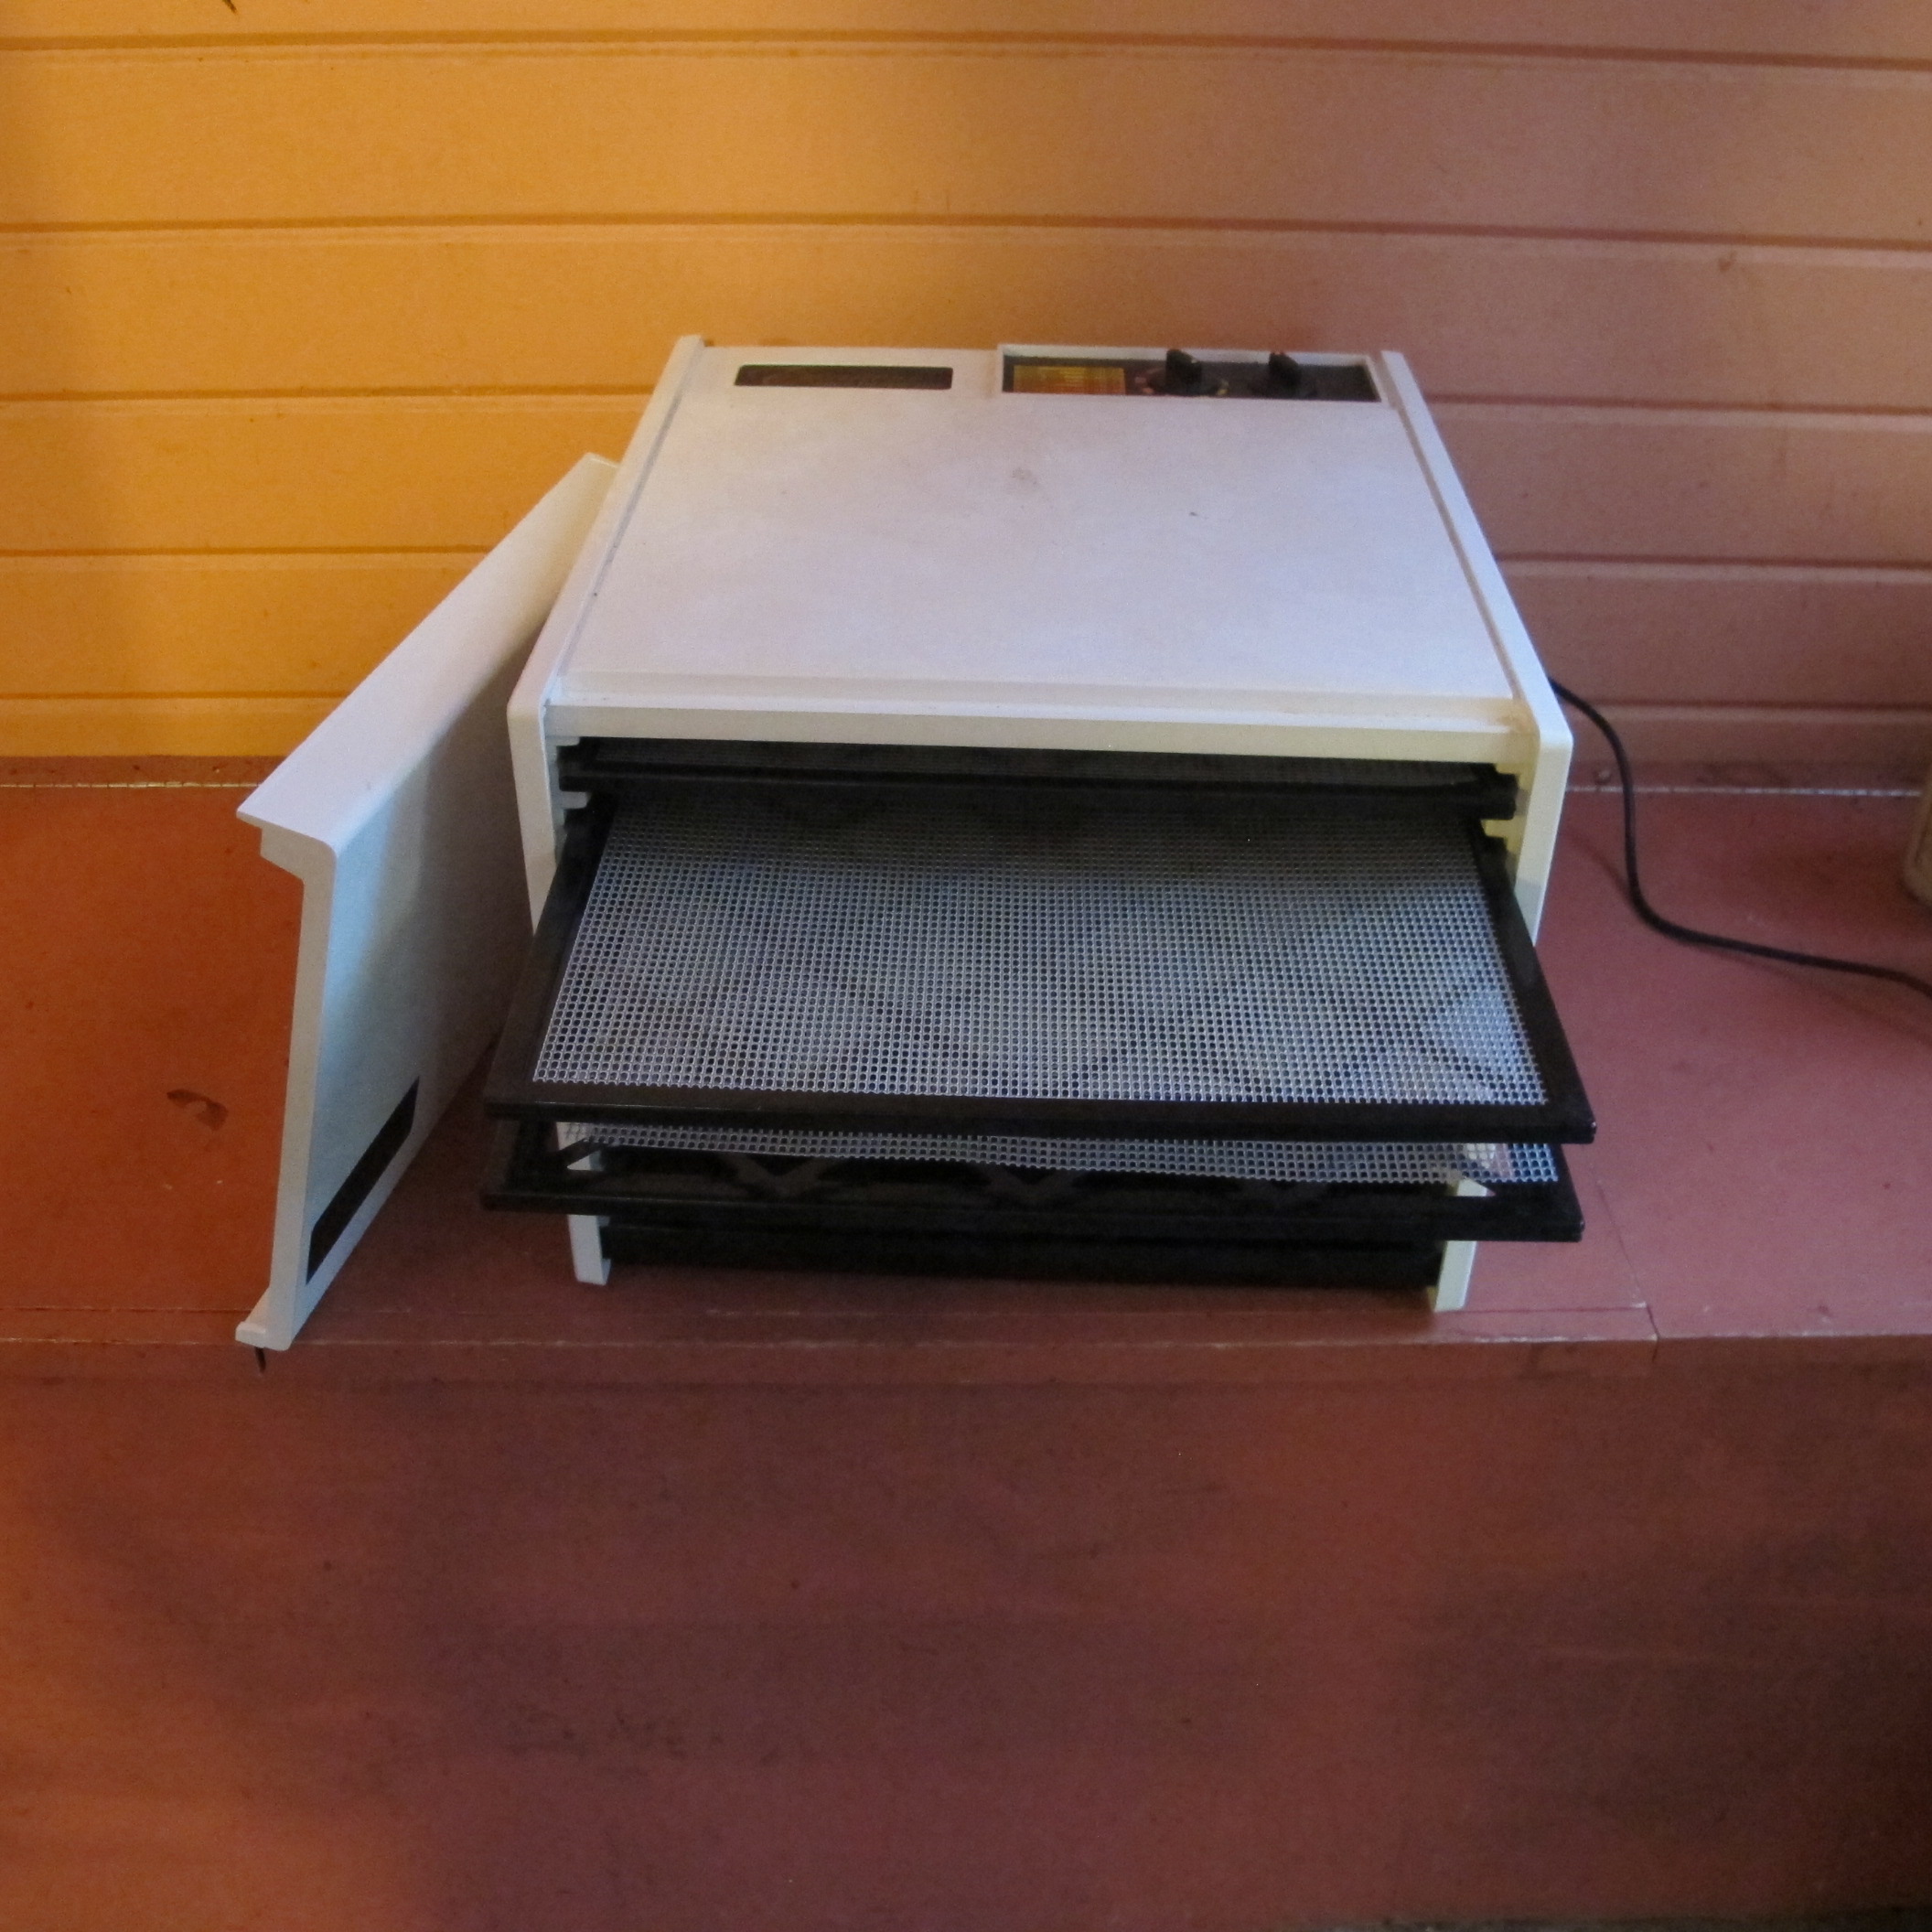
Excalibur dryer
I grow a lot of cherry tomatoes each year – 10 plants or more. I eat them every meal in season, and snack on them between meals. My favorite variety is ‘Sun Gold’, a hybrid. What do I do with the vast numbers of these sweet cuties? For years I have been cutting them in half and dehydrating them. I’ve tried all sorts of dehydrators, and think I have found the best.
The machine I use is the Excalibur. This machine has 9 square trays, a heating element, a thermostat, a timer and a fan that sits behind the trays. The fan and heater location is key. This machine blows hot air across the trays as opposed to all the others I have used, which send hot air up from the bottom or down from the top. Either way, the tomatoes closest to the fan and heating element dry first, and those farther away dry more slowly. So one must rotate the trays, or take out the dry ones and continue to dry those that are still not fully dried.
The Excalibur also uses less electricity – 660 watts an hour, while the NESCO unit I used for years uses 1000 watts – but both take about the same time to dry a batch of tomatoes. The Excalibur also can hold more fruit per tray as the trays are square and the others are round.
I store the dried cherry tomatoes in zipper bags. They are fine on a shelf in the pantry, in the fridge, or, for long term storage, in the freezer. When I want to use them, I just toss them into a stir fry or stew, and these little nuggets bring a “Wow!” to the lips of my guests. If you don’t dry them to the crispy stage, but leave them a little chewy, you can even use them in salads and sandwiches.
Lastly, I make a lot of tomato paste. It’s easy and allows me to use chunks of tomatoes that had bad spots that needed to be cut out. I core tomatoes over the sink and squeeze out juice and seeds. Then I pop them into the food processor and puree them, skins and all. I pour the liquid into a heavy enameled cast iron pot, and slowly boil the slurry until it is thick enough to stand up a spoon in it. I let it cool all night, uncovered, and spoon the paste into ice cube trays. Once it’s frozen I bag it in zipper bags. Then I can get just the right amount of tomato paste and never waste any – I just use 1, 2 or 3 cubes, depending on my recipe.
It is still work to put up the harvest, but the methods above are a lot less work than canning tomatoes in jars in a hot –water bath. And come winter? There is nothing better than eating your own tomatoes.
Henry is the author of 4 gardening books and a children’s fantasy-adventure called Wobar and the Quest for the Magic Calumet. His web site is www.Gardening-Guy.com.
Mulching
Posted on Wednesday, July 23, 2014 · Leave a Comment
I love the musical Porgy and Bess, especially the song, “Summertime,” with its catchy refrain, “Summertime and the livin’ is easy”. Clearly Gershwin was a) not a gardener, or b) he mastered the art of mulching. Mulching makes the summer easy, if done right. No mulch? The summer is spent weeding and watering. If you’re still weeding, it’s time to mulch.
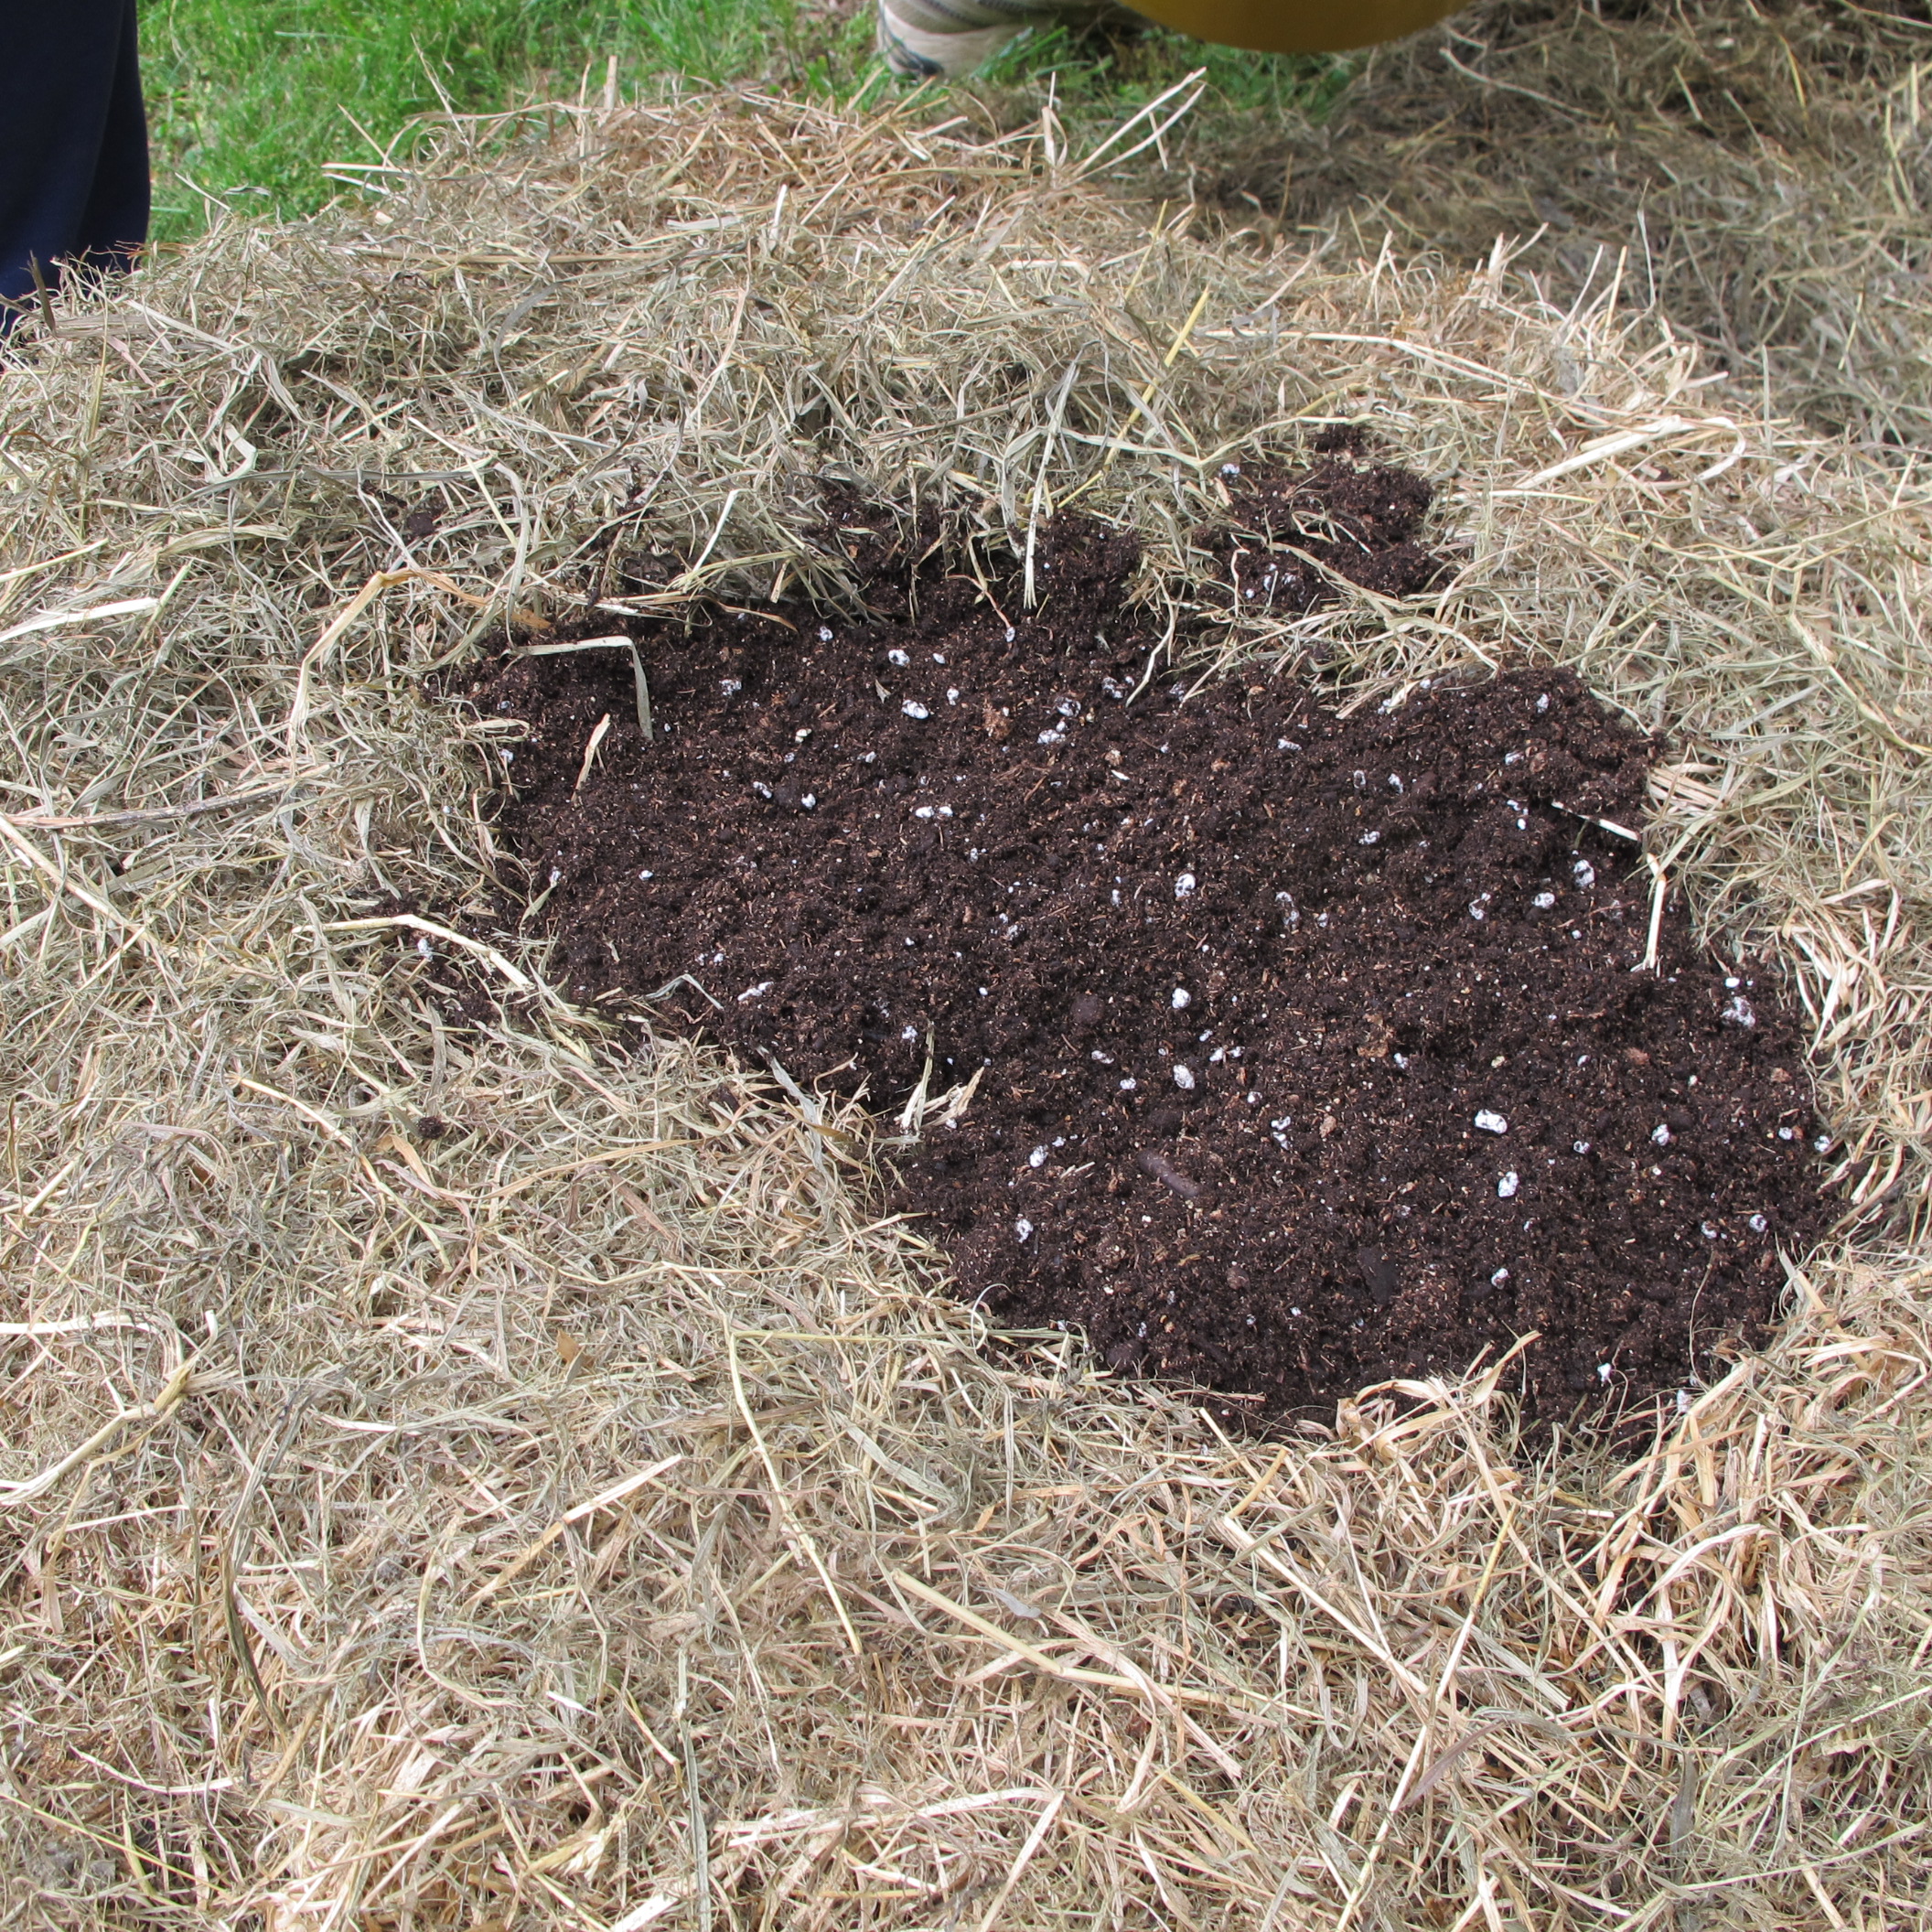
My vegetable garden gets mulched in June as soon as the soil has warmed up. I take a sharp hoe and slice off any weeds in the walkways, and lay down 6 pages of newspapers. Then I cover the papers with mulch hay or straw. Straw is supposed to be free of seeds as it is the stems of oats or other grains that have been threshed. But I often find the straw germinates and sends up green shoots.

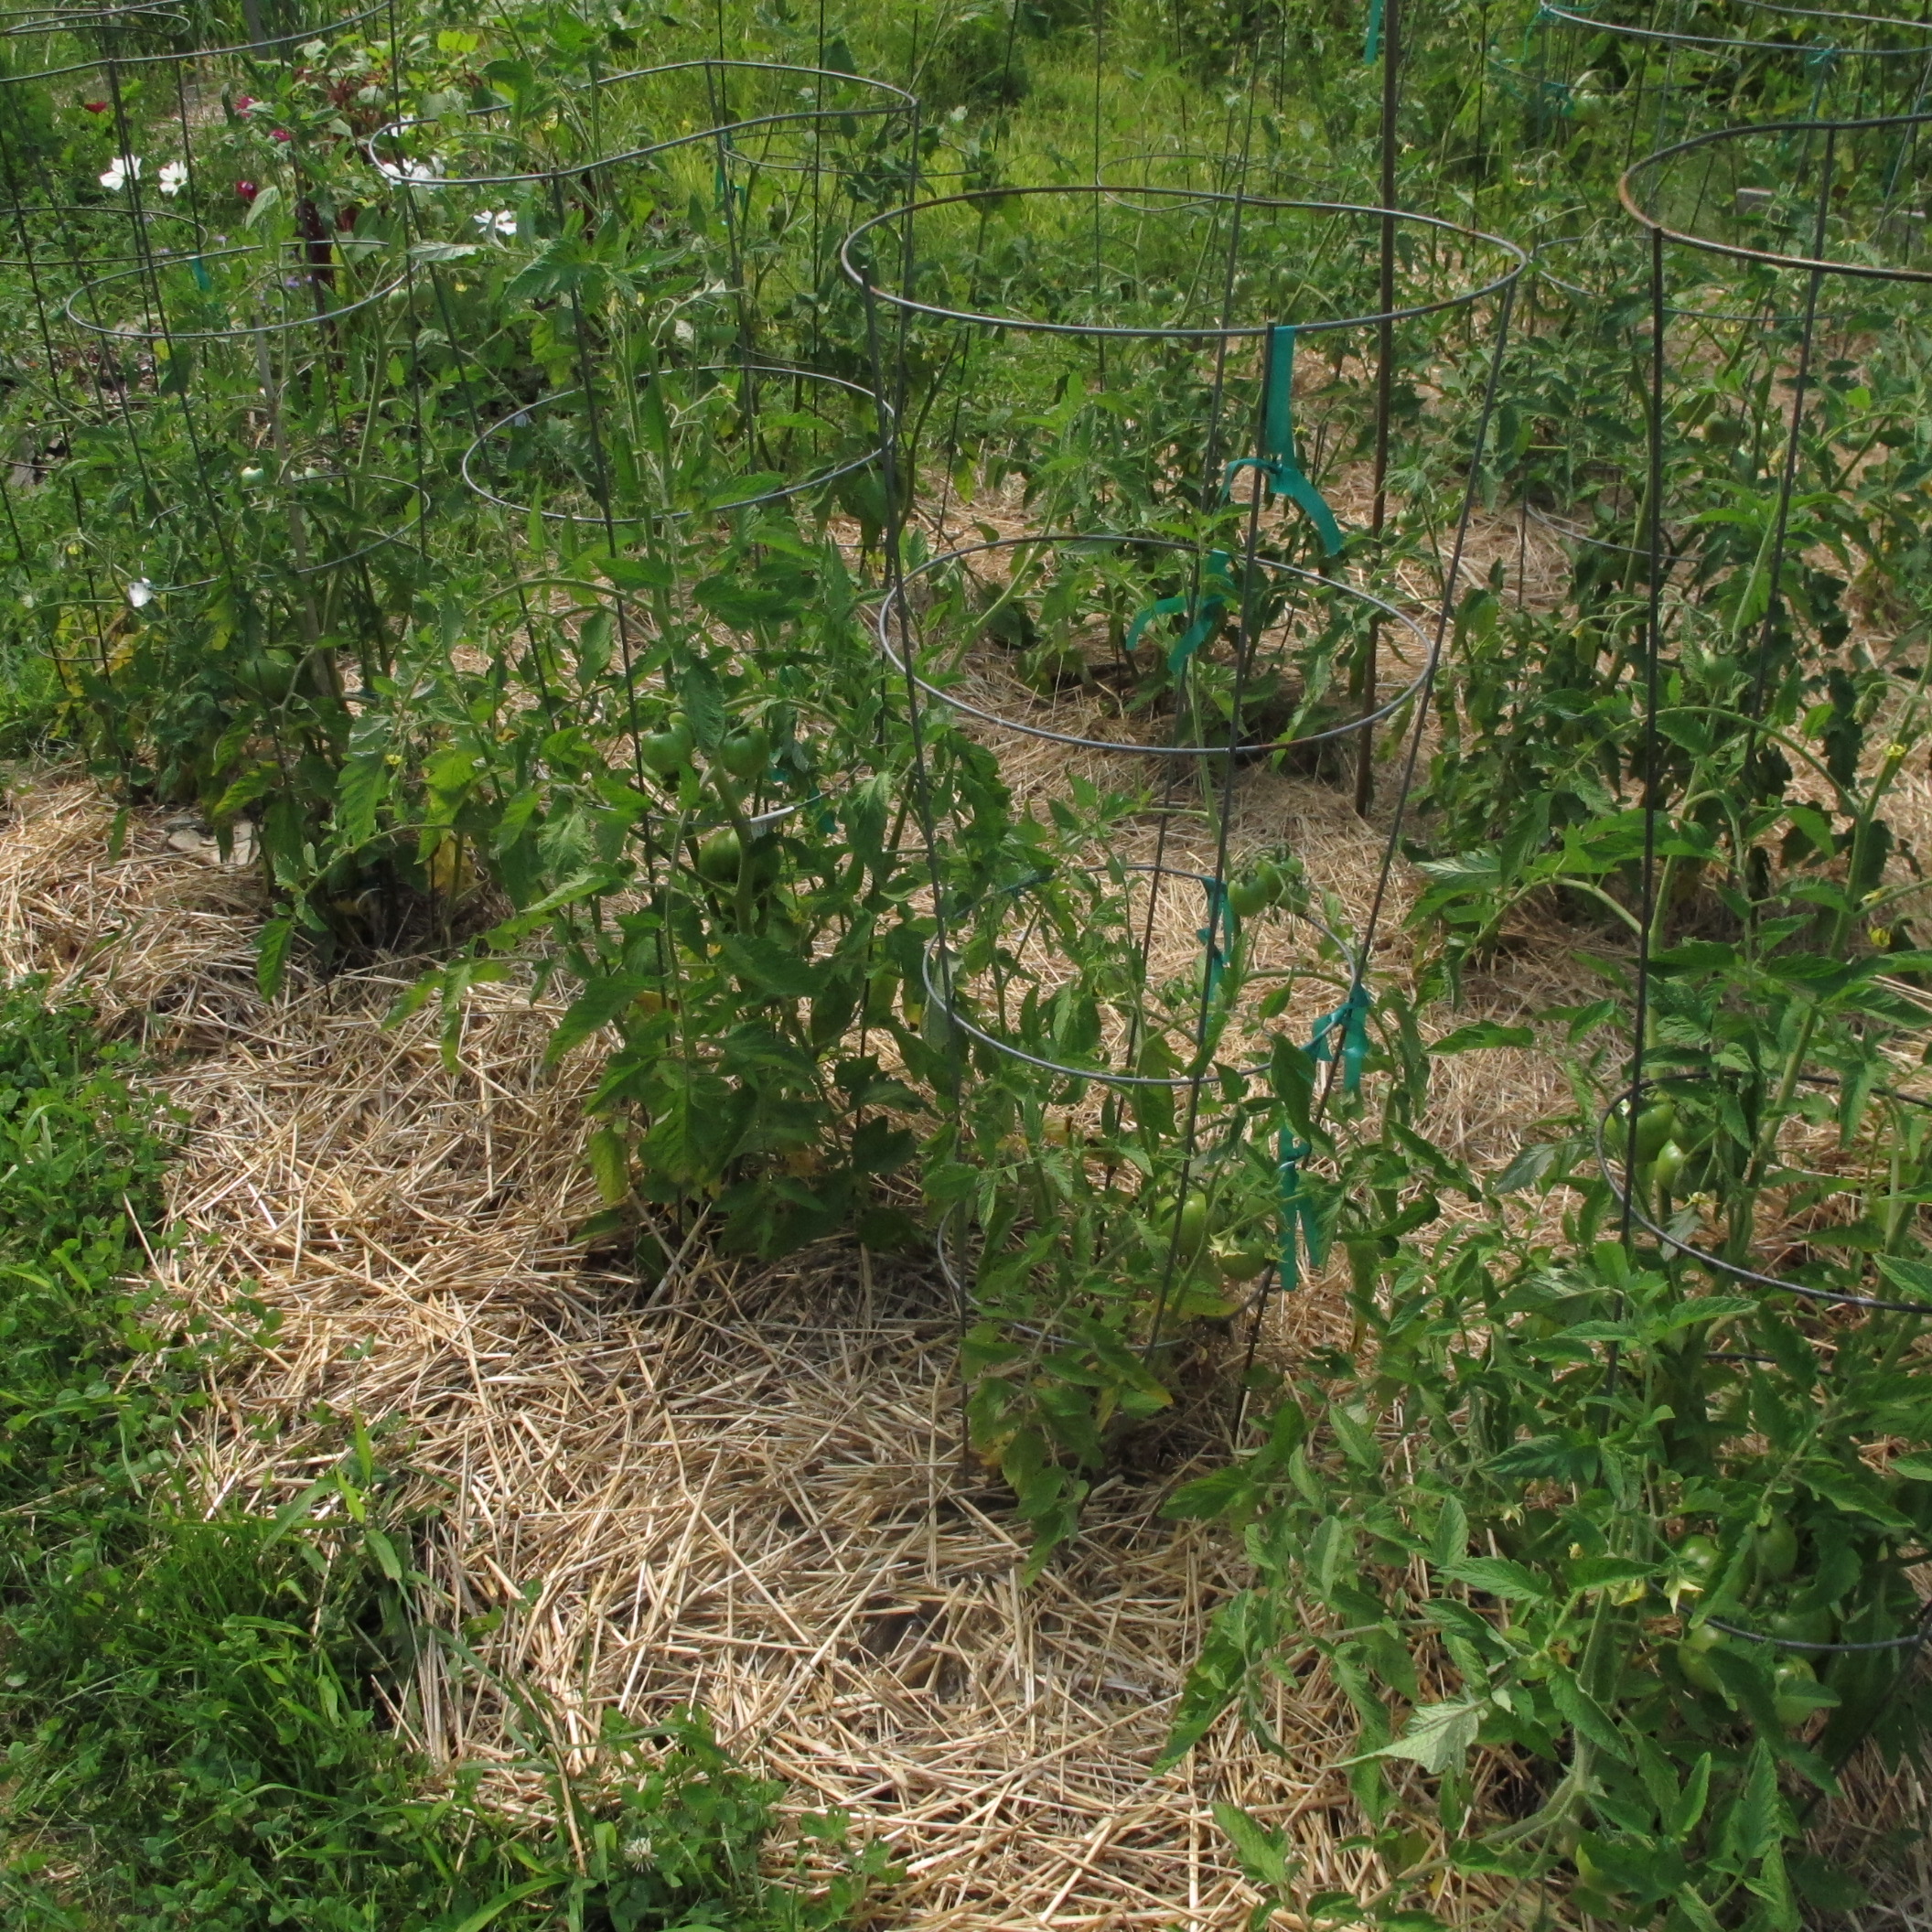
Mulching with hay
Hay, on the other hand, is grass that is grown for animal food and harvested with stems and seeds intact. But mulch hay is much cheaper than straw – a quarter the cost – and I find it doesn’t generate any more undesirable growth than straw. The fact that I lay down newspapers helps – it keeps the seeds out of the soil until the end of the season.
Big plants like tomatoes and broccoli get the same treatment as the walkways. I do leave some space right next to the stalk of each plant that gets no newspaper – so a light rain shower can get moisture to the roots. Little plants like onions or carrots get hay alongside their rows, but no newspaper. You could tear the papers and lay them down, and I have done it, but it isn’t worth the bother.
Leaves collected in the fall are excellent mulch. I run them over with the lawnmower, which makes them more compact and less likely to blow around. An inch of chopped leaves is an adequate layer of mulch. Pine needles are also good mulch, despite the fact that they have the reputation of being too acidic. In my experience they are fine – any biologically active soil with earthworms, fungi and bacteria will breakdown the needles over time without making your soil too acidic.
I don’t generally recommend using wood chips or shredded bark in the vegetable garden, but do use it in flower gardens. Vegetable gardens tend to have rows that move from year to year, and I don’t really want wood chips mixed into the soil. Flower gardens have more or less permanent plantings, and the wood chips stay put.
Some gardeners worry that the microorganisms breaking down wood chips will use up nitrogen from the soil, causing a nitrogen deficiency. If that were true, a lot of flower gardens would have flowers with yellowed, anemic-looking leaves. If you want, you can sprinkle a layer of organic fertilizer on the soil before you mulch. Organic fertilizers are made from natural ingredients such as seaweed, chicken litter, oyster shells, peanut hulls or other natural ingredients, and all break down slowly, which is an advantage in most applications – including under mulch.
Be advised that many of the wood or bark mulches sold in bags are “color enhanced”. That means they have used dyes of some sort to make the mulch dark – or even bright orange. I am an organic gardener, so I won’t use dyed mulch. I don’t know what is used to make the colors, so I avoid it. Many garden centers sell all natural mulch in bulk, which is much less expensive than buying it by the bag. All you need is a pickup truck – or a friend that has one. Cedar mulch is the most expensive, but I believe it lasts the longest before it breaks down.
Cocoa hulls are sold as mulch with very fine particles of organic matter. This mulch looks very tidy. Mostly. Usually some mold will appear on it after a couple of weeks, but then that goes away. And a nice layer of it will make your yard smell like you’re cooking brownies. That’s fine, but some dogs have been known to eat the cocoa mulch and get sick or even die. It’s probably not for homes with Labrador retrievers. And the mulch can be slippery when wet. Buckwheat hulls are another fine, fancy mulch. It is only sold in bags, and costs a fortune. I love the look, but can’t afford to use it.
Landscape fabric comes in a variety of types, all of which purport to keep down weeds and allow air and moisture to pass through. Fabric needs to be covered with mulch – generally wood chips – and I find that eventually some weeds grow in the mulch and get tangled in the fabric.
One final word of caution: don’t apply too much mulch. More is not better. Two inches of bark mulch is fine, but a five -inch layer will prevent moisture from getting to your soil in a light rain shower. And plants get their oxygen from the soil, so you don’t want to create a barrier that will keep gases from being exchanged. Mulch won’t control everything. Annual weeds? Yes. But established perennial weeds like goutweed or witch grass cannot be controlled with mulch. Still, mulch can save you lots of work and make the livin’ easy. Or easier, anyway.
Henry Homeyer is the author of 4 gardening books. His web Site is www.Gardening-Guy.com.
Good Bugs, Bad Bugs
Posted on Wednesday, July 16, 2014 · Leave a Comment
Many gardeners seem to think that any UFI (Unidentified Flying Insect) is a potential threat to their tomatoes or the spinach. When in doubt, they swat it, squish it or submerge it. But most bugs are not bad – and many are helpful.
We all know that lady bugs are good. They eat aphids and in fact, some enterprising businesses are selling lady bugs by the thousand. My advice? Don’t bother buying them. If you’re not spraying your flowers and vegetables with insecticides, you will naturally have some ladybugs and other aphid eaters. Of course insecticides will throw off the balance of nature, and the pests may dominate. But a good healthy garden should attract beneficials like ladybugs in the quantities that you need. Bring in a thousand? They might fly away the same day.
According to the lovely little guide book, Good Bug Bad Bug: Who’s Who, What They Do, and How to Manage Them Organically by Jessica Walliser, a ladybug can eat up to 5,000 aphids in its lifetime. But there are plenty of other good bugs. This book, by the way, is simple, well illustrated and sturdy enough to take to the garden. I recommend it.
The assassin bug is just that: a voracious predator that will eat cabbage worms, potato beetles, cucumber beetles, cutworms, earwigs, Japanese beetles, Bean beetles, tomato hornworms, and more. They are generally black, and about half an inch long with a broad body and bristly front legs. They have a sharp curved beak they use to penetrate other insects, allowing them to inject a poison to kill them and turn their insides into a “smoothie” they can drink. They can sometimes pierce human flesh if handled roughly.
Lacewings are beautiful green flying insects with diaphanous wings. You’ve probably seen them on your window screens, attracted to the lights – they’re about an inch long. But it is their larvae that do they work in the garden – they eat about 100 aphids a day! The larvae are brown and white with big mandibles for grasping prey. They are half an inch long, and fast moving. The adults eat nectar and pollen of flowers and weeds including dandelions, Queen Anne’s lace and goldenrod so a few weeds are good to have – alonmg with plenty of flowers.
Parasitic wasps are generally small – from 1/32 of an inch to half an inch – but do great work. There are some 200 different kinds, according to Good Bug Bad Bug. Many have noticeable ovipositors for laying eggs, but don’t be confused and think they are stingers – these beneficial insects do not sting. They generally lay their eggs in the bodies, larvae or eggs of other insects. Once their eggs hatch, the young parasitic wasps feed on their prey.
One type of parasitic wasp feeds on the tomato hornworm. If you see small white “grains of rice” on the back of a hornworm, these are actually larvae of a wasp. Don’t kill the hornworm! Just move it off, away from your tomatoes, and let the wasp larvae do their thing. Like the lacewings, the adults feed on nectar and pollen, so a diverse garden with continuous blooms is a good attractant.
One of the things I like about the book Good Bug Bad Bug is that it offers many solutions to an insect problem. Row cover, a breathable spun fabric, is offered as a solution to striped cucumber beetles, and it reminds the reader that cukes are insect pollinated so you can’t keep it on once your vines start to produce blossoms. The book also suggests interplanting with marigolds, catnip or tansy or putting out yellow sticky cards to catch the culprits. Mulch, the book says, will help keep females from contact with the soil where they lay their eggs, too. I didn’t know that.

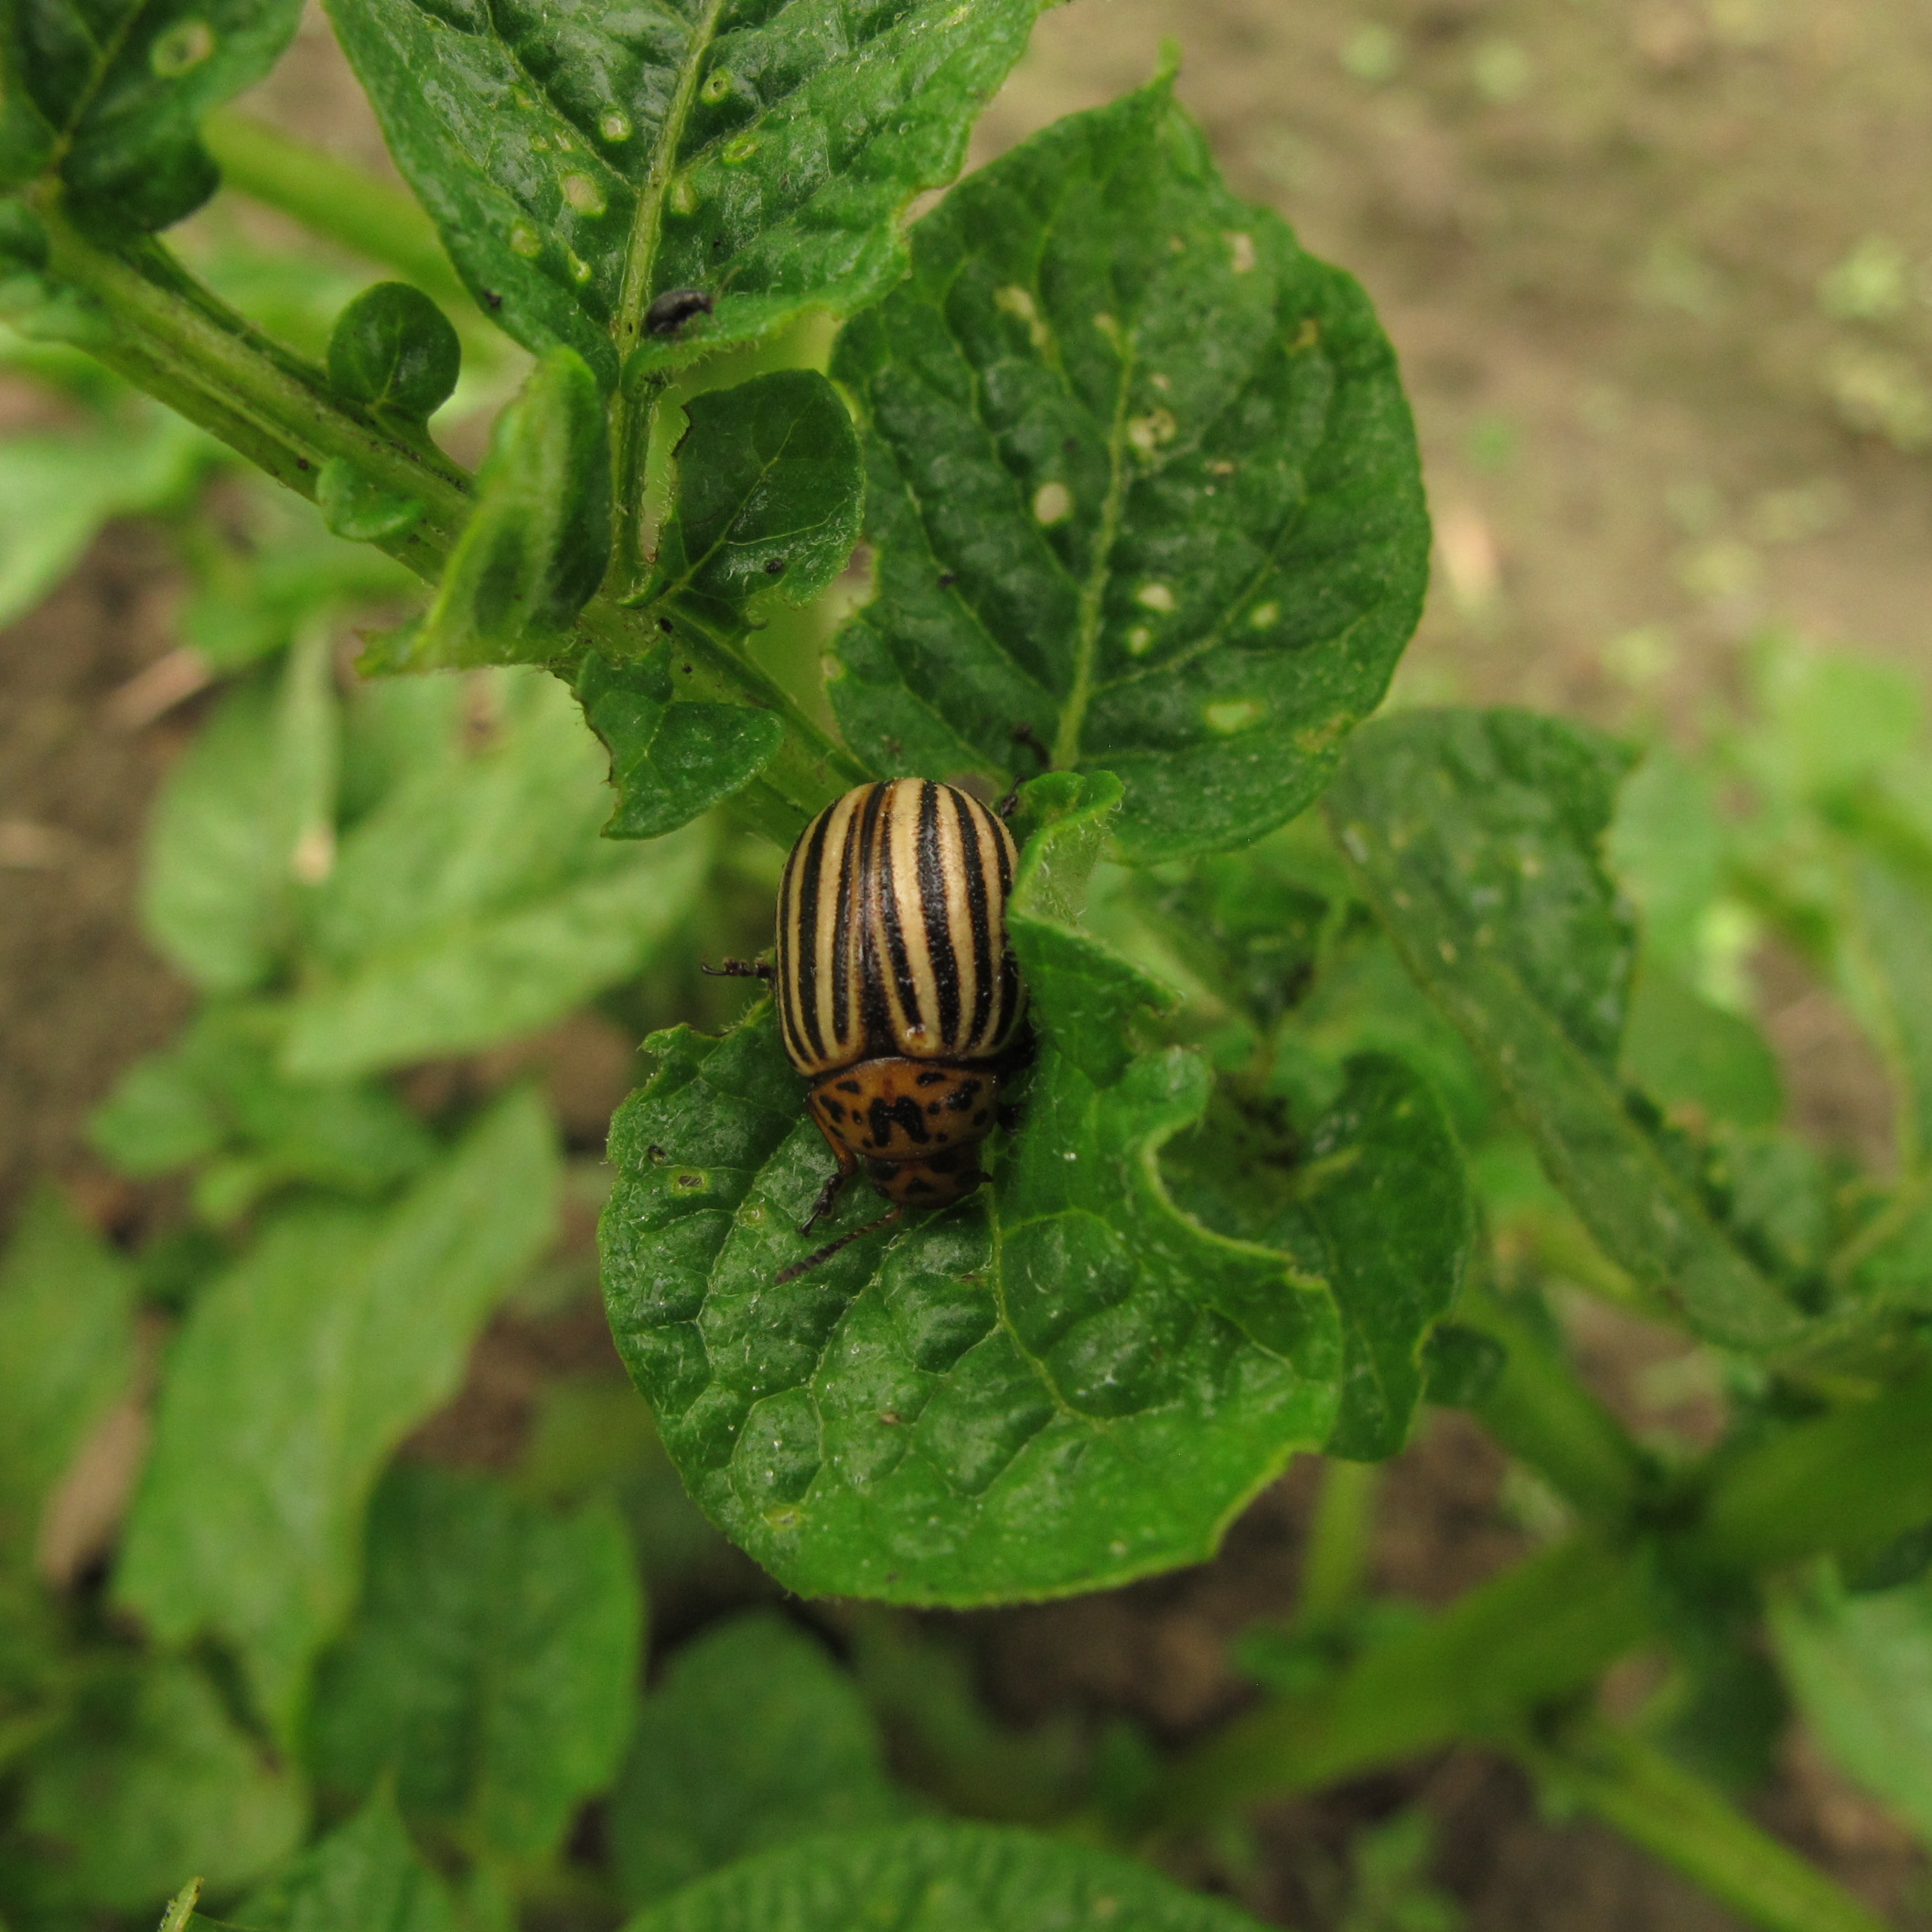
Potato beetle
Potato bugs are my current nemesis. I plant my potatoes much later than my neighbors (in late June) which often means the bugs are already busy by the time my spuds come along. This year they have found me anyway. Every day I go down the row of potatoes, flipping the foliage over to look for adults and orange egg masses underneath the leaves. If I spot eggs, I remove that part of the leaf and put it in soapy water. This sounds tedious, but is actually just a 5 minute job for my 65 plants – and it makes a huge difference.
Diligence counts: I skipped a couple of days of patrol, and found potato bug larvae eating my plants. And picking 50 larvae is a lot more work than removing one leaf. So I shall keep up my vigilance. And if the larvae seem to be winning, I can always spray a biological control called Bt. This is a bacterium that will control them, but damage nothing else. But not all Bt is the same: ask for one that controls potato beetles (San Diego or tenebrionis).
Try to get over your aversion to bugs in the garden, if you have one. Just because a bug is unknown to you is no reason to squish it. It may be an assassin bug, ready to help you!
Henry Homeyer is the author of 4 gardening books. His Web site is www.Gardening-Guy.com. He is also a garden designer, gardening coach and public speaker.
Trees and Shrubs for the Shade
Posted on Wednesday, July 9, 2014 · Leave a Comment
I grew up in a small town in rural Connecticut. Behind the house there was a brook and a hardwood forest with a high canopy of old maples that created a cool space for spending hot summer days. My favorite understory tree was a small, bushy tree that had very fragrant leaves and stems, which I decided must be witch hazel, as the barber splashed witch hazel on my neck after each haircut, and it was vaguely the same. I frequently chewed on the leaves and green twigs in lieu of the chewing gum that was forbidden to me.
This summer I discovered the name of that plant: spicebush (Lindera benzoin). One of my gardening clients had requested one for her garden, and as soon as I crushed a leaf, I was transported back 60 years. I knew it immediately. Most winters my part of New Hampshire drop to minus 25 degrees Fahrenheit, so any plant that will survive here must be rated for Zone 4 (Minus 20 to minus 30). I checked my favorite tree book (Michael Dirr’s Manual of Woody Landscape Plants), and sure enough, spicebush is rated for Zone 4. I will get my own as soon as I find the right place on my property to plant it.
From Dirr’s book I learned that spicebush can get to be up to 12 feet tall and wide, and is in the laurel family. There are 80 species of Lindera, both deciduous and evergreen (L. benzoin is deciduous). Apparently it blooms in early spring but the yellow blossoms are only one fifth of an inch across, so not overwhelming (I have no memory of it blooming). Fall leaf color is yellow. Dirr’s book says it does well in moist, well drained soils in full sun or half shade, though in my experience it will do well in dry shade in open woodlands. Dirr says spicebush is not often found in nurseries, but E.C. Brown’s Nursery in Thetford, VT has several nice ones.
Another woodland plant that I would like to try is leatherwood (Dirca palustris). Like spicebush, this is a native shrub that will grow in shady areas but this one prefers moist to wet soil – and I have plenty of that. Apparently it only gets to be 3 to 6 feet tall and wide, and is more open and spreading in shade than in sun. It is has small yellow flowers that bloom very early in the spring, well before the leaves emerge. Native Americans used the bark to make bow strings, fish lines and in the manufacture of baskets. Tough stuff.

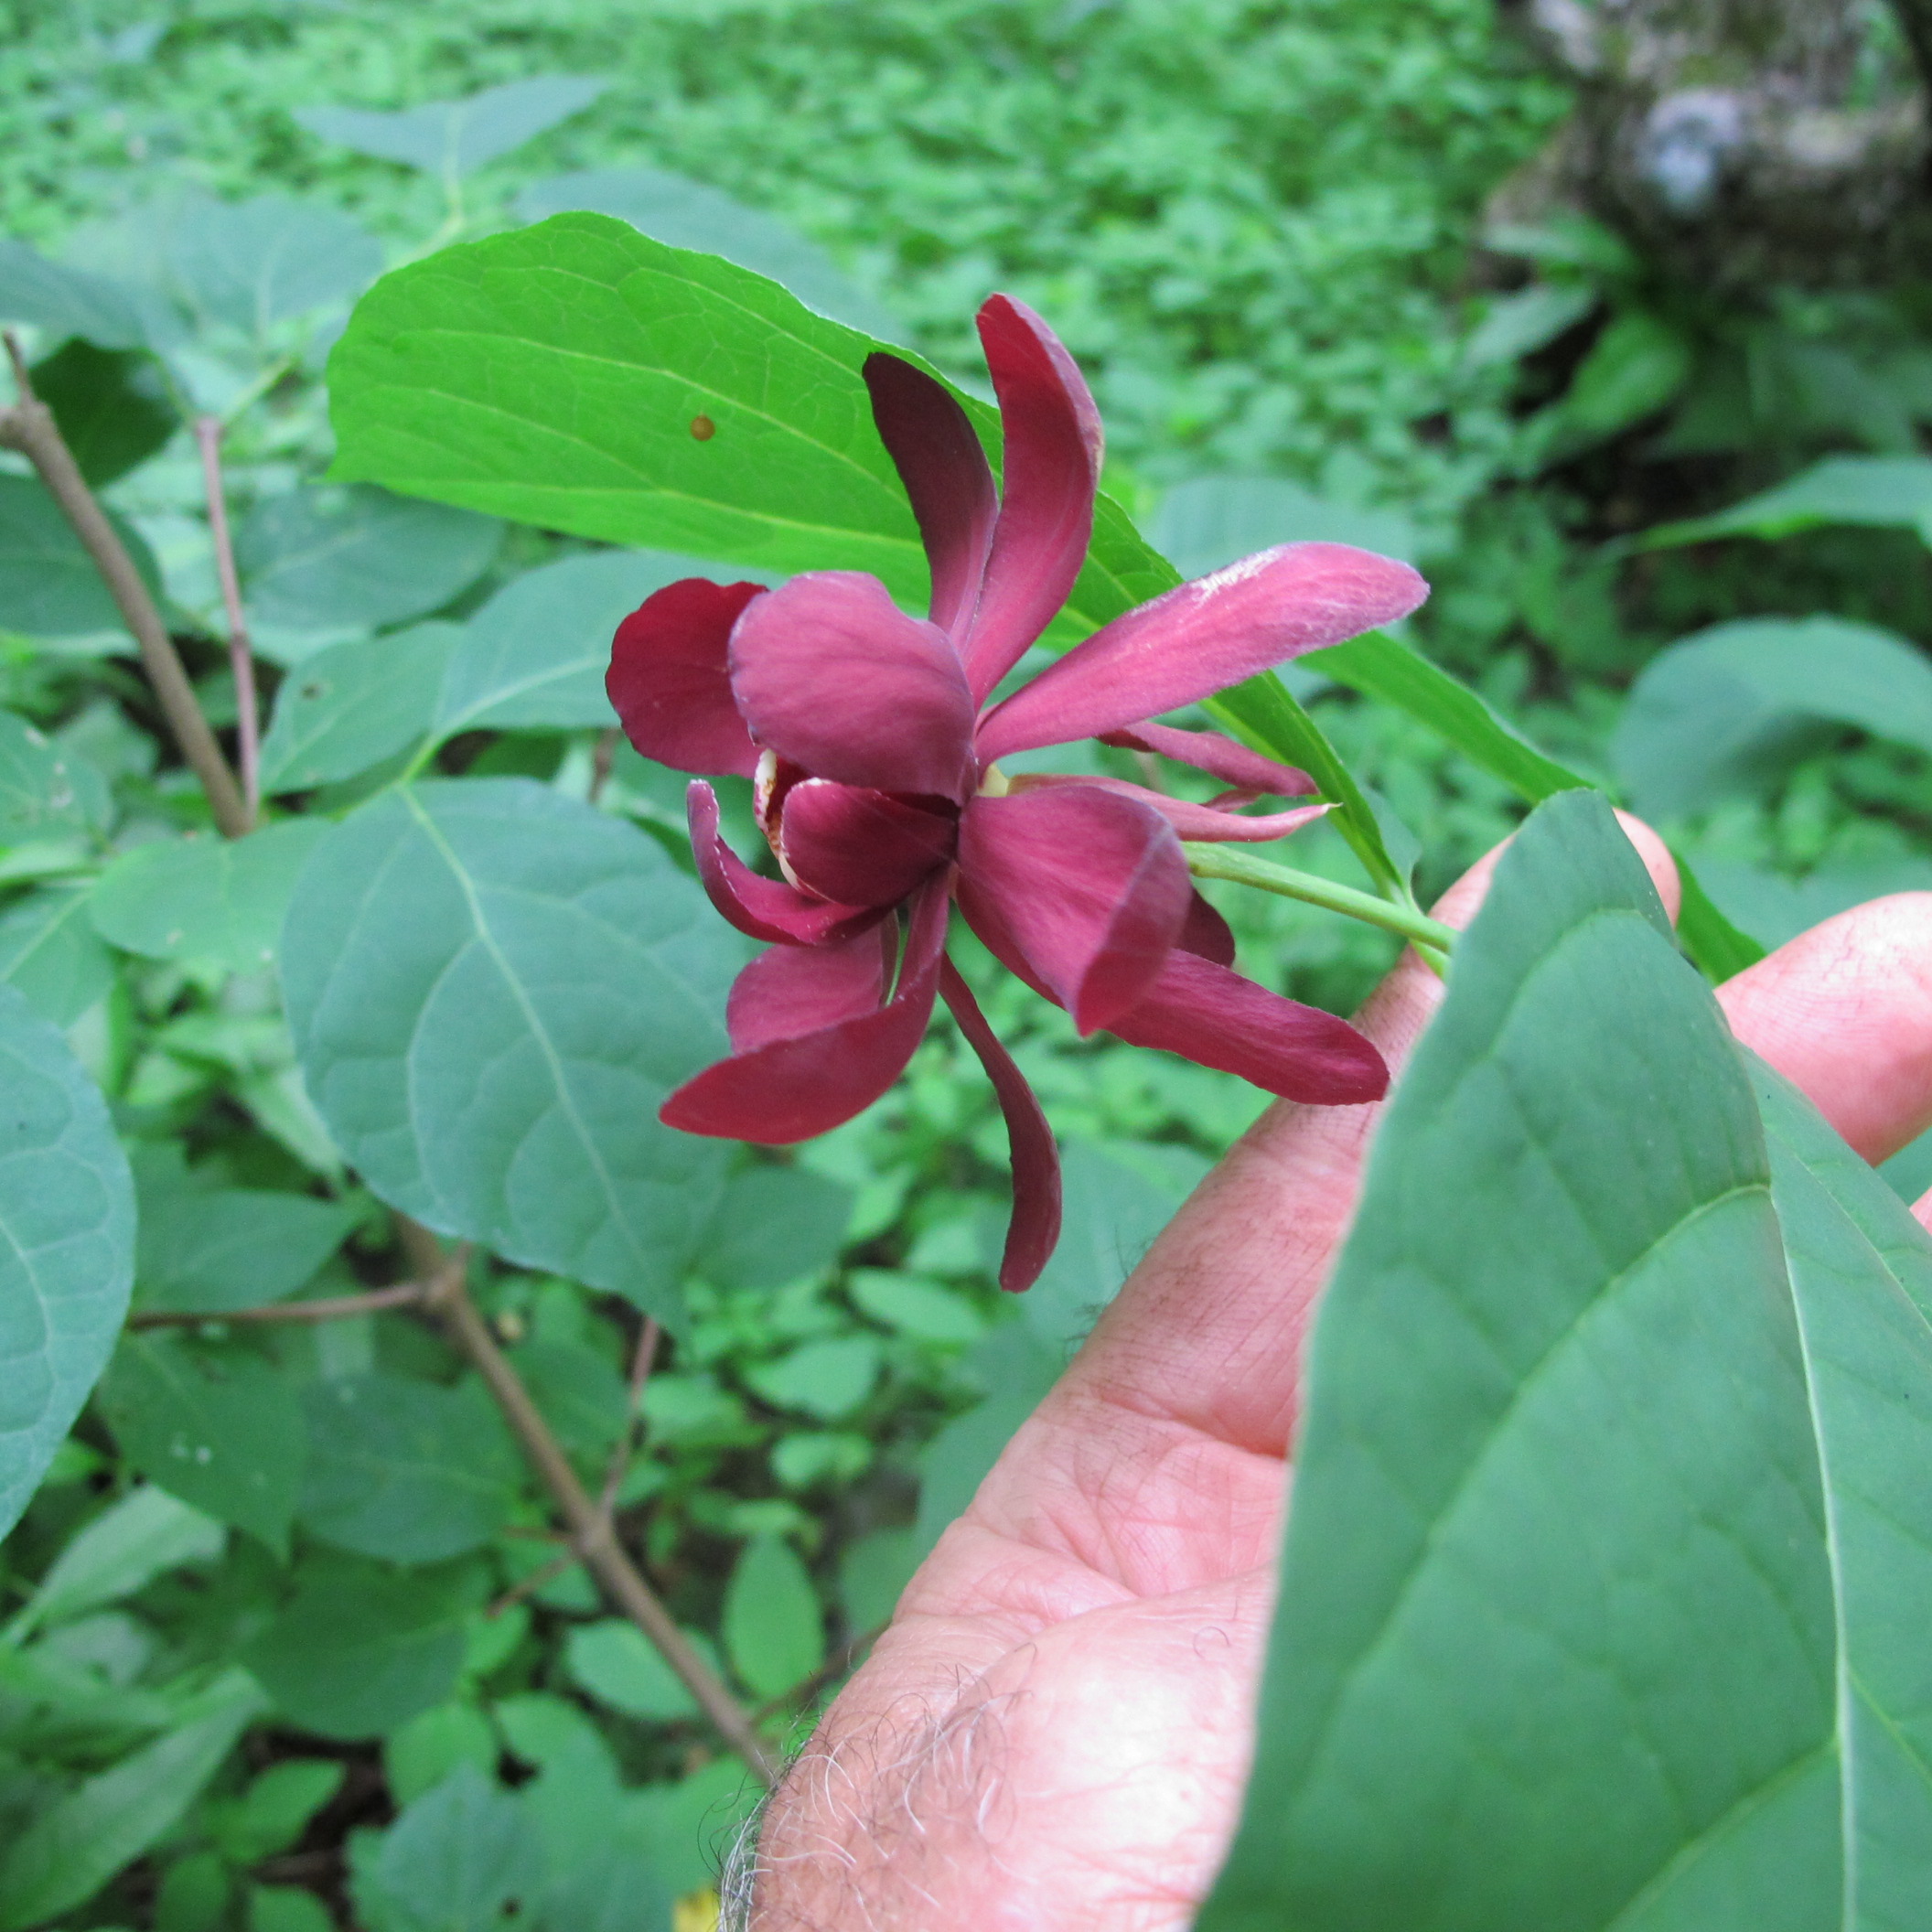
Calycanthus-or-sweetshrub
Three years ago I planted a sweetshrub or Carolina allspice (Calycanthus florida). The first 2 years I grew it in full sun with deep, rich moist soil. Both years the leaves yellowed – as if the sun were too strong and bleached them out. So last fall I moved it into a grove of old wild apples that provide full shade, and it seems to be doing much better. It is blooming now, and has put on considerable new growth.
Sweetshrub grows to be 6 to 9 feet tall with a 6 to 12 foot spread. Some varieties have very fragrant flowers, but mine is not. Dirr’s book suggests buying the shrub is in bloom in early summer, as the fragrance varies from plant to plant. It is adaptable to acid or alkaline soils, and is hardy to Zone 4.
Mountain laurel (Kalmia latifolia) is another fabulous shrub that will grow in deep shade (or even full sun), and I have grown it these past 20 years or so, even though I am on the northern edge of where it is successful. Mine produces delicate three-quarter inch diameter flowers, cups of white with pink veins. After cold winters I don’t always get flowers. There are cultivars with flowers in white to rose, and everything in between. Definitely buy when blooming. It does best in acidic soil that is cool and lightly moist. I have seen it growing abundantly in the wild at Sleeping Giant State Park in Hamden Connecticut, where there is a high, dry, open hardwood forest.
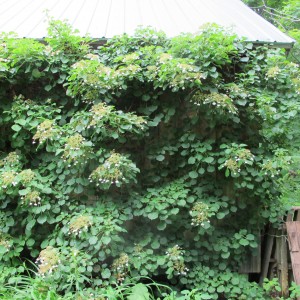
Climbing hydrangea on barn wall
Of all the shade-growing woody plants, the most dramatic on my property is the climbing hydrangea (Hydrangea anomala subsp. petiolaris). I have vines that completely cover the north side of my barn – and that only get a few hours of sun each day. It is in bloom now, with flower corymbs (flat topped inflorescences) that have both fertile and sterile (showy) blossoms and are 6 to 10 inches across.
Climbing hydrangea is slow to get established – mine took 6 years – but once it begins to grow, it quickly covers a surface. It will attach itself to stone or brick, but needs to be strapped onto wood surfaces, at least at first. Mine has grown through the cracks on the barn and is now self-supporting. Its vines can grow 60 feet or more, and has support arms for its flowers that reach straight out from the barn that are up to 3 feet long. It is truly dramatic.
So don’t despair if your property is mostly in the shade. There are these plants, and lots more, that will amaze and delight you.
Henry Homeyer is the author of 4 gardening books. His Web site is www.Gardening-Guy.com.
There’s Plenty to Do in the Vegetable Garden
Posted on Wednesday, July 2, 2014 · Leave a Comment
I got an inquiry recently about vegetable gardens: is it too late to start one? In a word, no. But you will have to act quickly if you want one because most garden centers are just about sold out of vegetable starts, though many still have large individual tomato plants in pots for sale. But even if you don’t find 6-packs of tomatoes or peppers for sale, many things can be started now by seed (though it is too late to start tomatoes and peppers from seed).
I planted 6 Hungarian wax hot pepper plants in early June, and quite frankly they look awful. Peppers like hot weather, and we haven’t had as much as they’d like. If I see some nice hot pepper plants for sale I’ll buy them – but I’ll plant them in big planters, not in the ground. Then if they are doing well in the fall, I can bring them indoors when it starts to get cold. I know a fellow who keeps hot peppers growing inside most of the winter.
Broccoli does well in the fall, and I often plant it by seed in mid-July. I prefer to start seeds in 6-packs rather than in the ground, but either way works. By planting seeds in multi-packs I can keep an eye on the seedlings better, and control how much moisture they get.
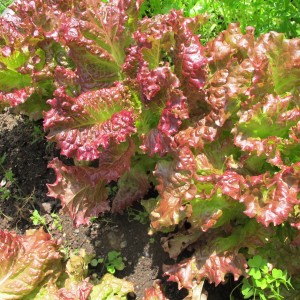
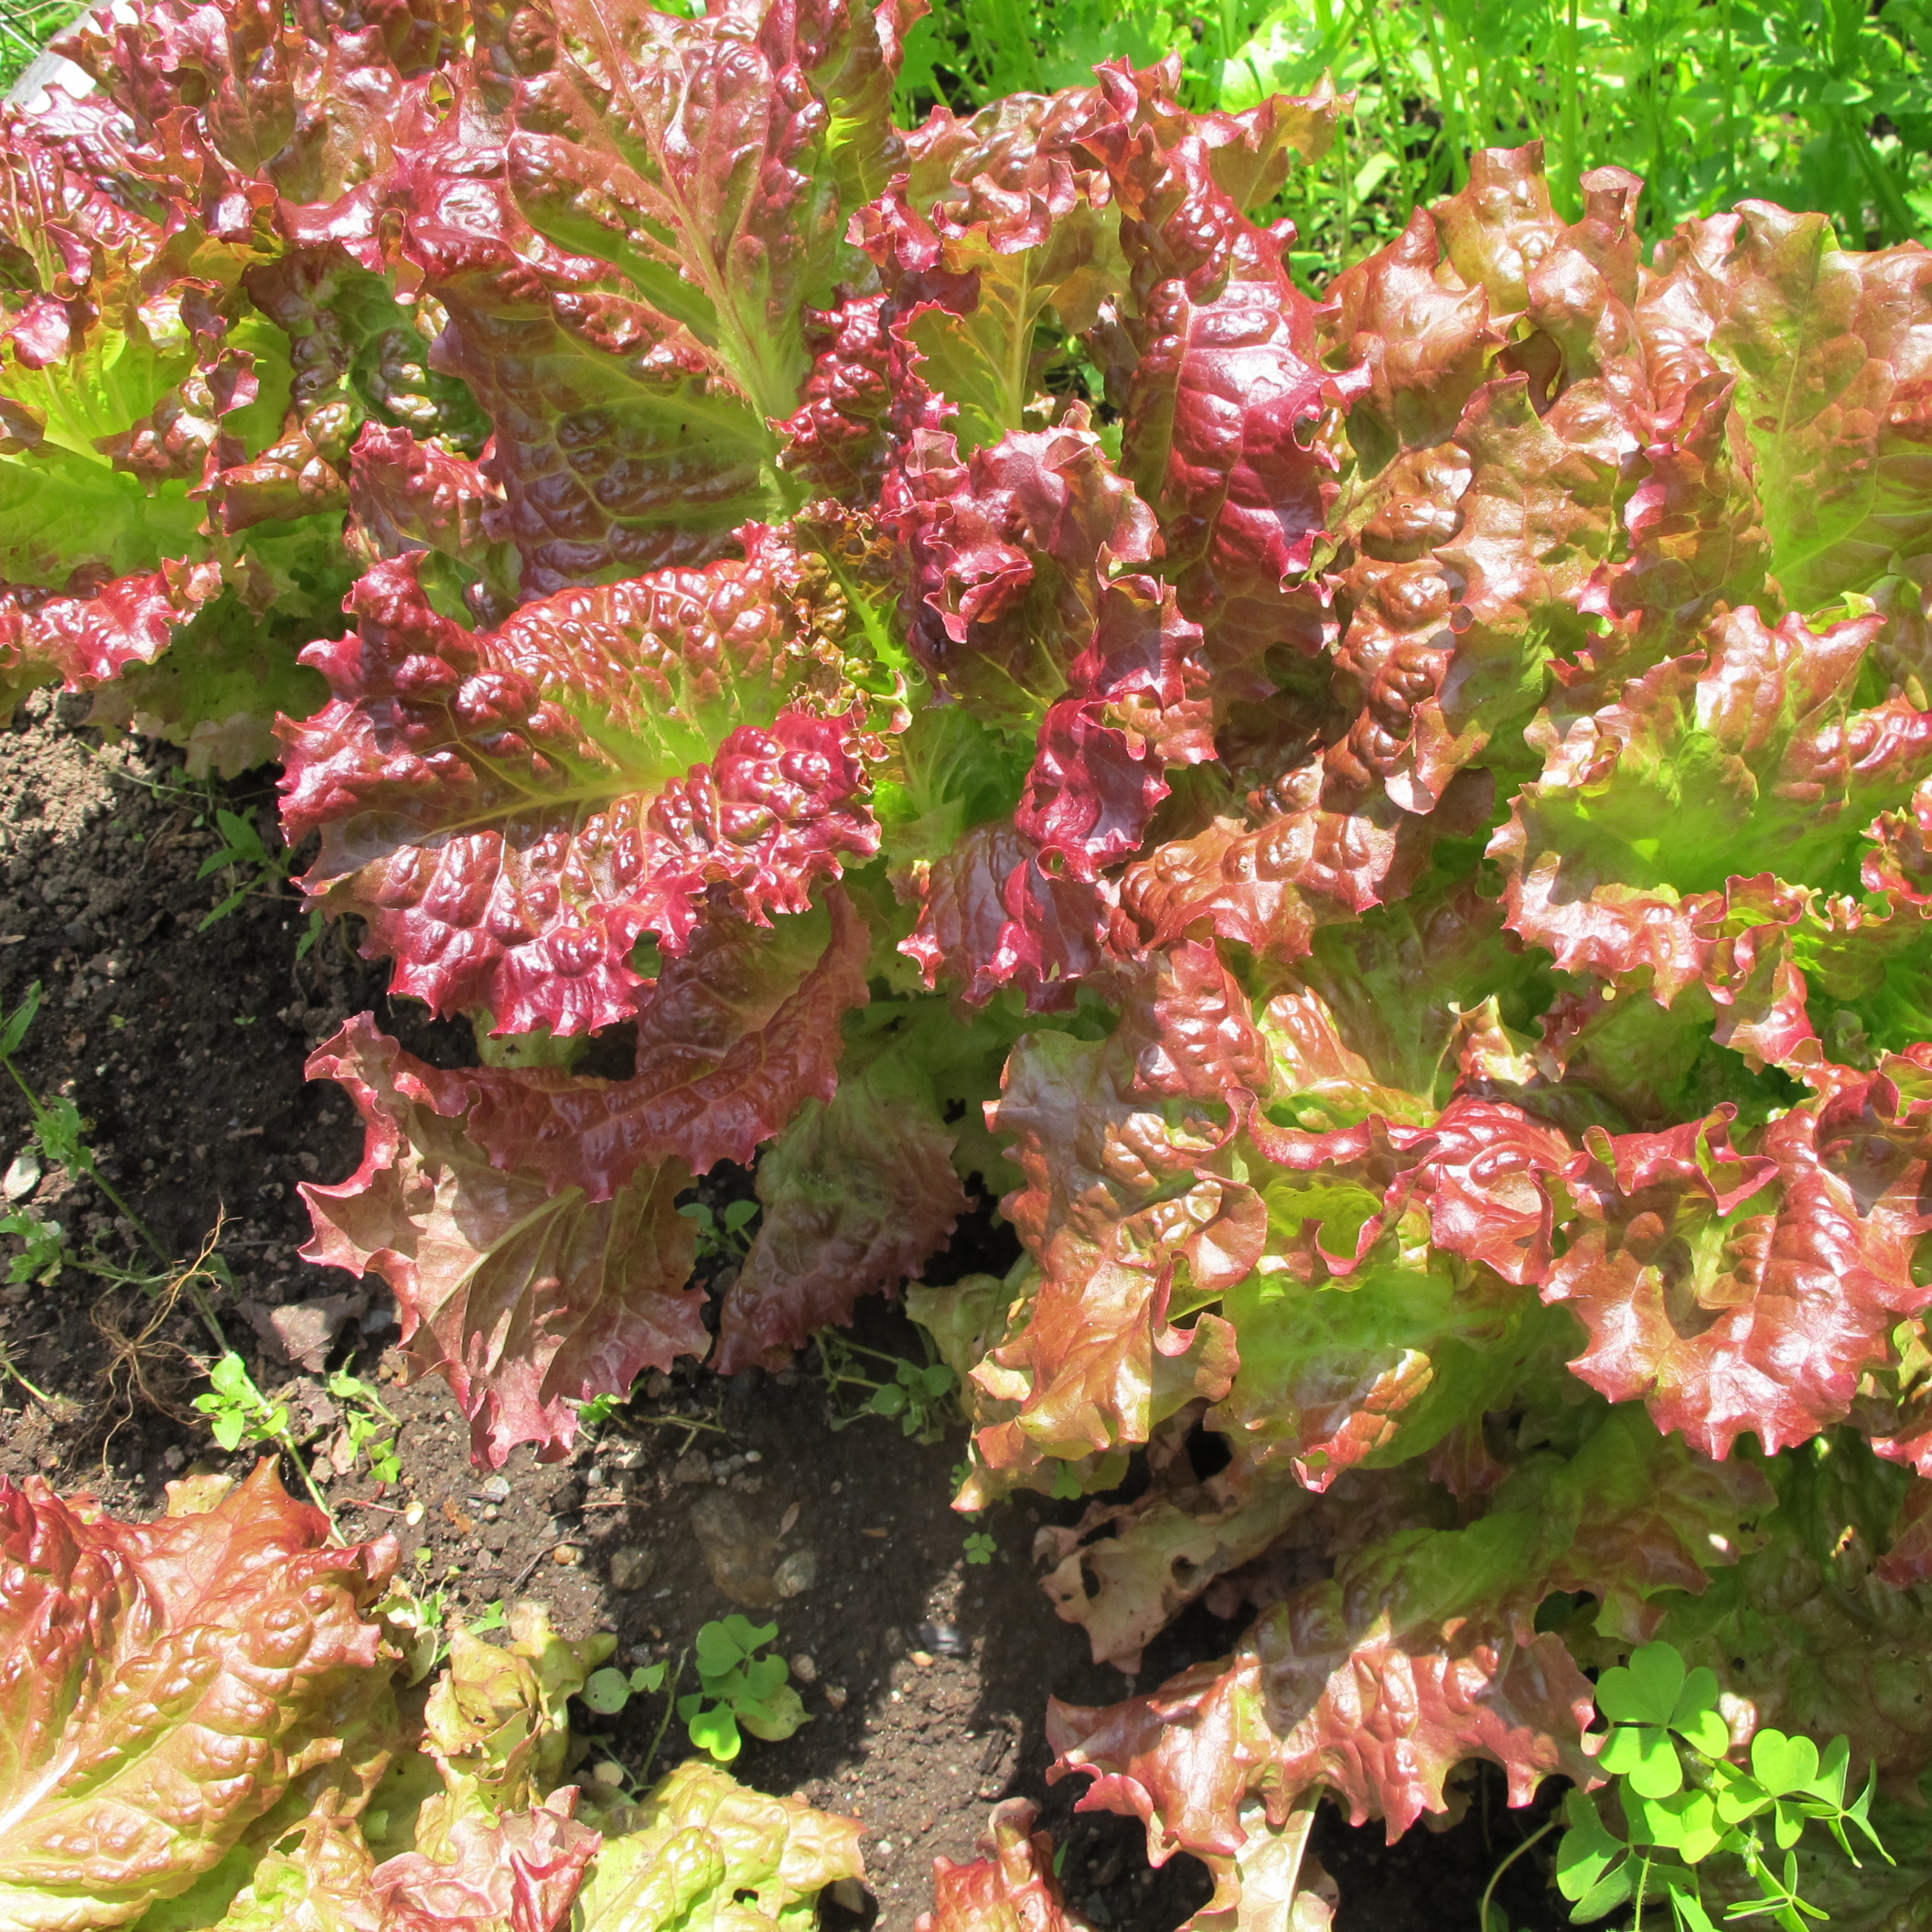
Replant lettuce regularly
Lettuce is a crop that needs regular re-planting. I like to start lettuce every couple of weeks all spring, summer and fall. Read the seed catalogs or packages carefully – some kinds of lettuce do better in the heat of mid-summer than others, and most companies will tell you which varieties do best in the heat. I recently called Johnny’s Selected Seeds in Maine (www.johnnyseeds.com) to see what they recommend. I was told that Romaine types are the most heat tolerant, things like ‘Muir’, ‘Concept and ‘Nevada’. I’m trying these, and I’ll report back in the fall on how mine did.
If you want to grow lettuce in mid-summer, plant it in places that get some shade in the afternoon – on the east or north side of the corn or tomatoes, for example, or shaded by a tree or building. And be sure to keep the soil moist – you will need to water lettuce during hot, dry times – especially just after planting seeds.
You can start carrots and beets for fall crops now, too. Carrots need a deep, loose soil, so work in plenty of compost and pull out the rocks before planting to get long, beautiful carrots. Raised beds work great for carrots because you can easily build up a deep fluffy soil.
It’s good to thin and weed spring plantings of carrots and beets by the Fourth of July. They should be thinned to an inch apart by now. And carrots, which require quite a lot of nitrogen in the soil for best results, can benefit from a topdressing of fertilizer now. I sprinkle some Pro-Gro organic fertilizer alongside each row of carrots, and then lightly scratch it in with my favorite weeding tool, the CobraHead (www.CobraHead.com).
It’s not too late to plant a (second) crop of green beans, either. Plant seeds directly in the ground an inch deep and 3 inches apart in staggered double rows that are at least 18 inches apart. Or you can plant pole beans, which take up less garden space and keep on producing all summer. Bush beans produce a heavy load of beans over a 3 week period, and then they’re done. That’s great for freezing, but I like some pole beans for daily consumption. ‘Kentucky Wonder’ is the tried-and-true classic pole bean.
Cilantro and dill are herbs that tend to bolt (go to seed) fairly quickly. But you can re-plant seeds now for a constant supply. I forgot to plant basil seeds this spring, but bought some nice young plants in 4-packs recently. But if your plants are big and are starting to flower by now, be sure to pinch the tops back. Basil gets bitter when it flowers. The more you pinch it back (or cut off big sections of leaf), the more it will bush out and produce more leaves.
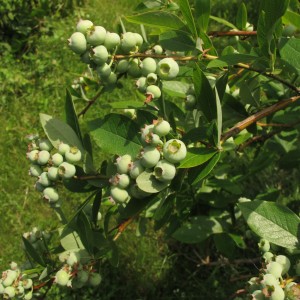
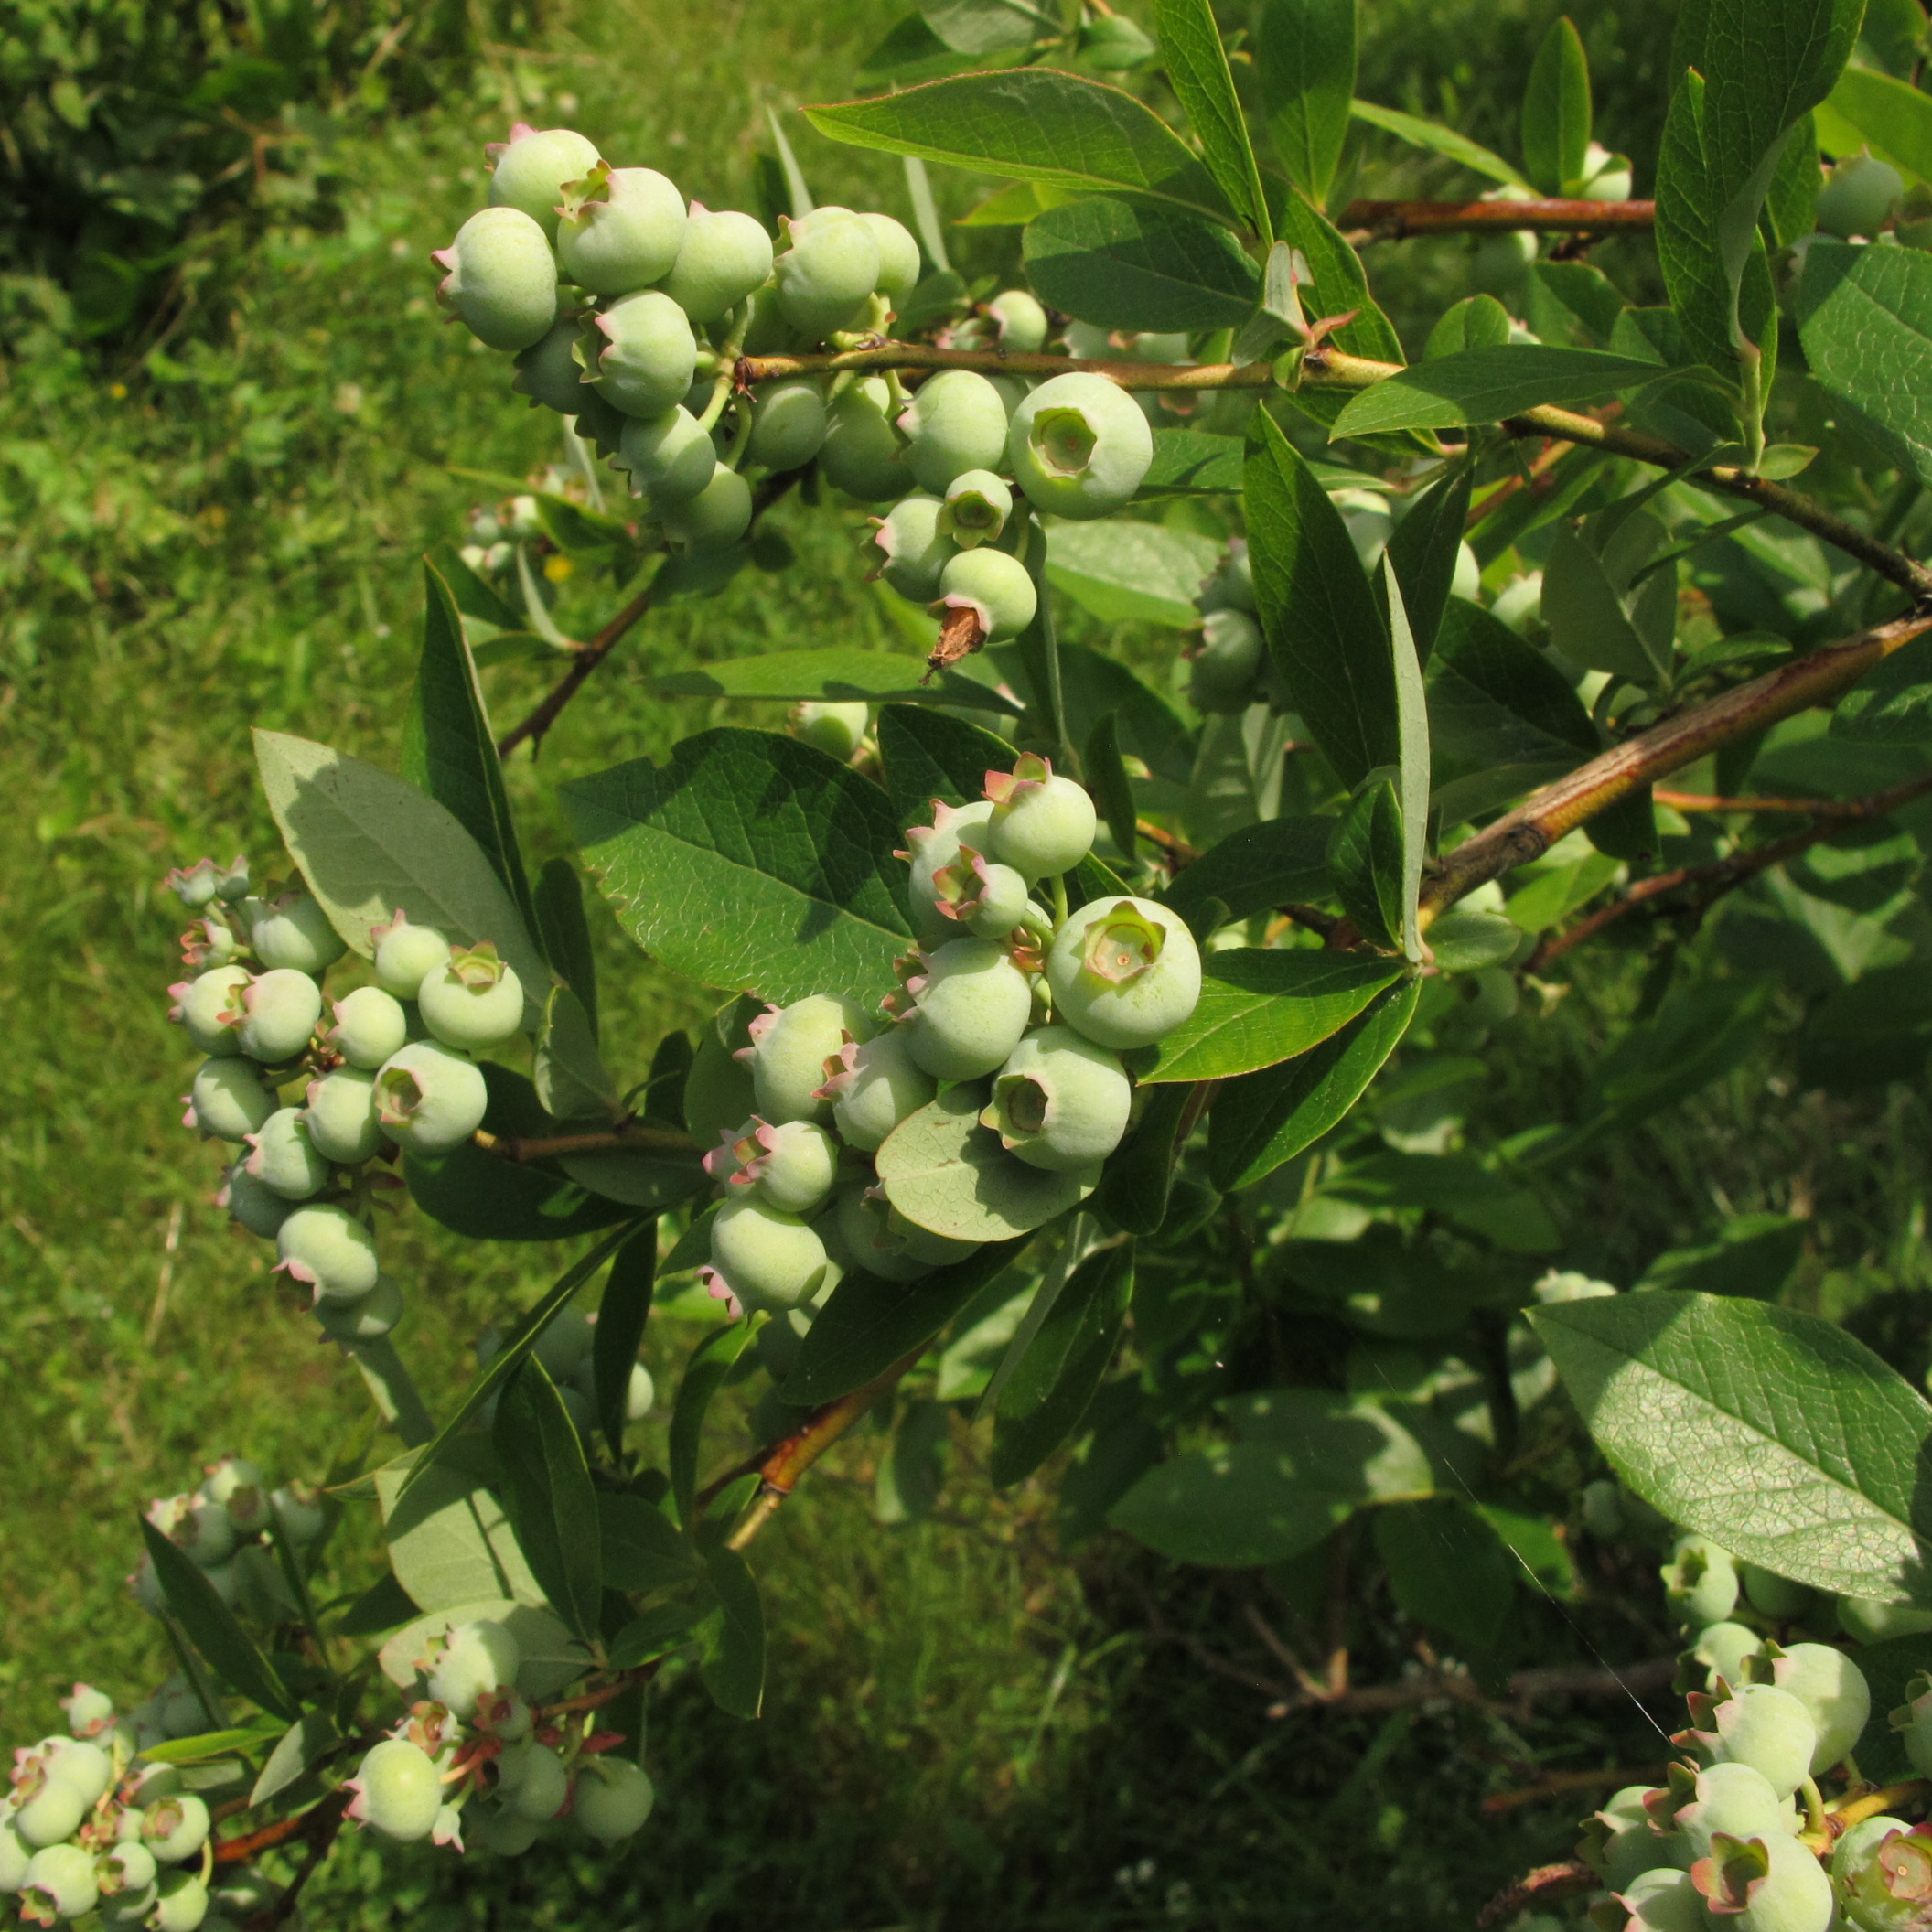
Blueberries produce best in acid soil
My blueberry bushes are doing well this year and are loaded with small green berries. This is a good time to weed out the space around the bushes and put down some ground bark or wood chips to keep the weeds down. Right after blooming is a good time to add some fertilizer, but even now would be fine. Blueberries need very acidic soil, so use a fertilizer like Holly-Tone or Pro-Holly that has sulfur in it. Or sprinkle some garden sulfur around the bushes after you weed them out and before mulching.
My work in the garden is never done. But that’s okay – having a few weeds keeps me out of trouble – there’s no time for mischief.
Henry Homeyer is a gardener, gardening coach, and the author of 4 gardening books. His web-site is www.Gardening-Guy.com.
Planting Flowers
Posted on Wednesday, June 25, 2014 · Leave a Comment
I love flowers, all kinds of flowers. I probably spend more than I should on seeds, annual flowers in 6-packs, 4-inch pots of trademarked annuals at $5 a pop, perennials, and flowering trees and shrubs. I can get a “runner’s high” just by installing flowers in a new garden space. When I went outside on June 17 with a notebook and a camera, I had 57 species of flowers in bloom, and many more on the way.
I’d guess I planted my first flowers when I was five. Probably some sunflower or morning glory seeds at my Grampy’s home in Spencer, Massachusetts. I spent part of every summer with him from the time I was six until he died on my twenty-first birthday in April of 1967.
But having nice flower beds is more than just buying flowers. Soil preparation and planting make the difference between “bodacious” and “barely bumbling by”. My grandfather was an organic gardener long before it was fashionable, and he taught me how to grow things well by example. He made compost and used it to nourish his soil – and his plants.
Soil can almost always be improved by adding compost. I buy it by the truck load because even the most dedicated gardener rarely has enough. Unless you quit your day job to work on your compost pile, you’ll need to buy compost. It’s rare that you can make enough from left over kitchen scraps and garden waste. For small projects, bagged compost is fine, but most garden centers and many dairy farmers sell it by the pick-up truck load at a reasonable cost.
When preparing a new bed I weed it, and then add 2 to 6 inches of compost on top and mix it in everywhere. This also loosens the soil, getting it ready for plants that have fine root hairs that do the work of penetrating the soil to get moisture and minerals. Soil needs to be loosed to a depth of at least 8 inches, so a garden fork is a good tool to use.
Even if the soil is already dark and rich, I still add a shovel of compost to the planting hole. Perennials get some organic fertilizer, too – half a cup or so in an 18-inch diameter planting hole. Many annuals like lean soil (with little nitrogen, a key ingredient of fertilizers) – so I don’t generally give them any fertilizer. And I don’t fertilize trees and shrubs at planting time – I don’t want them to put on much new growth their first year. And Mother Nature grows tree just fine without fertilizer, you know.
I like organic fertilizers because they provide lots of different minerals that are not present in chemical fertilizers, and they release their nutrients slowly. Pro-Gro is a good one made in Vermont, and Garden-Tone is another nice one. Be careful not to add too much chemical fertilizer if you go that route – it can burn root hairs.

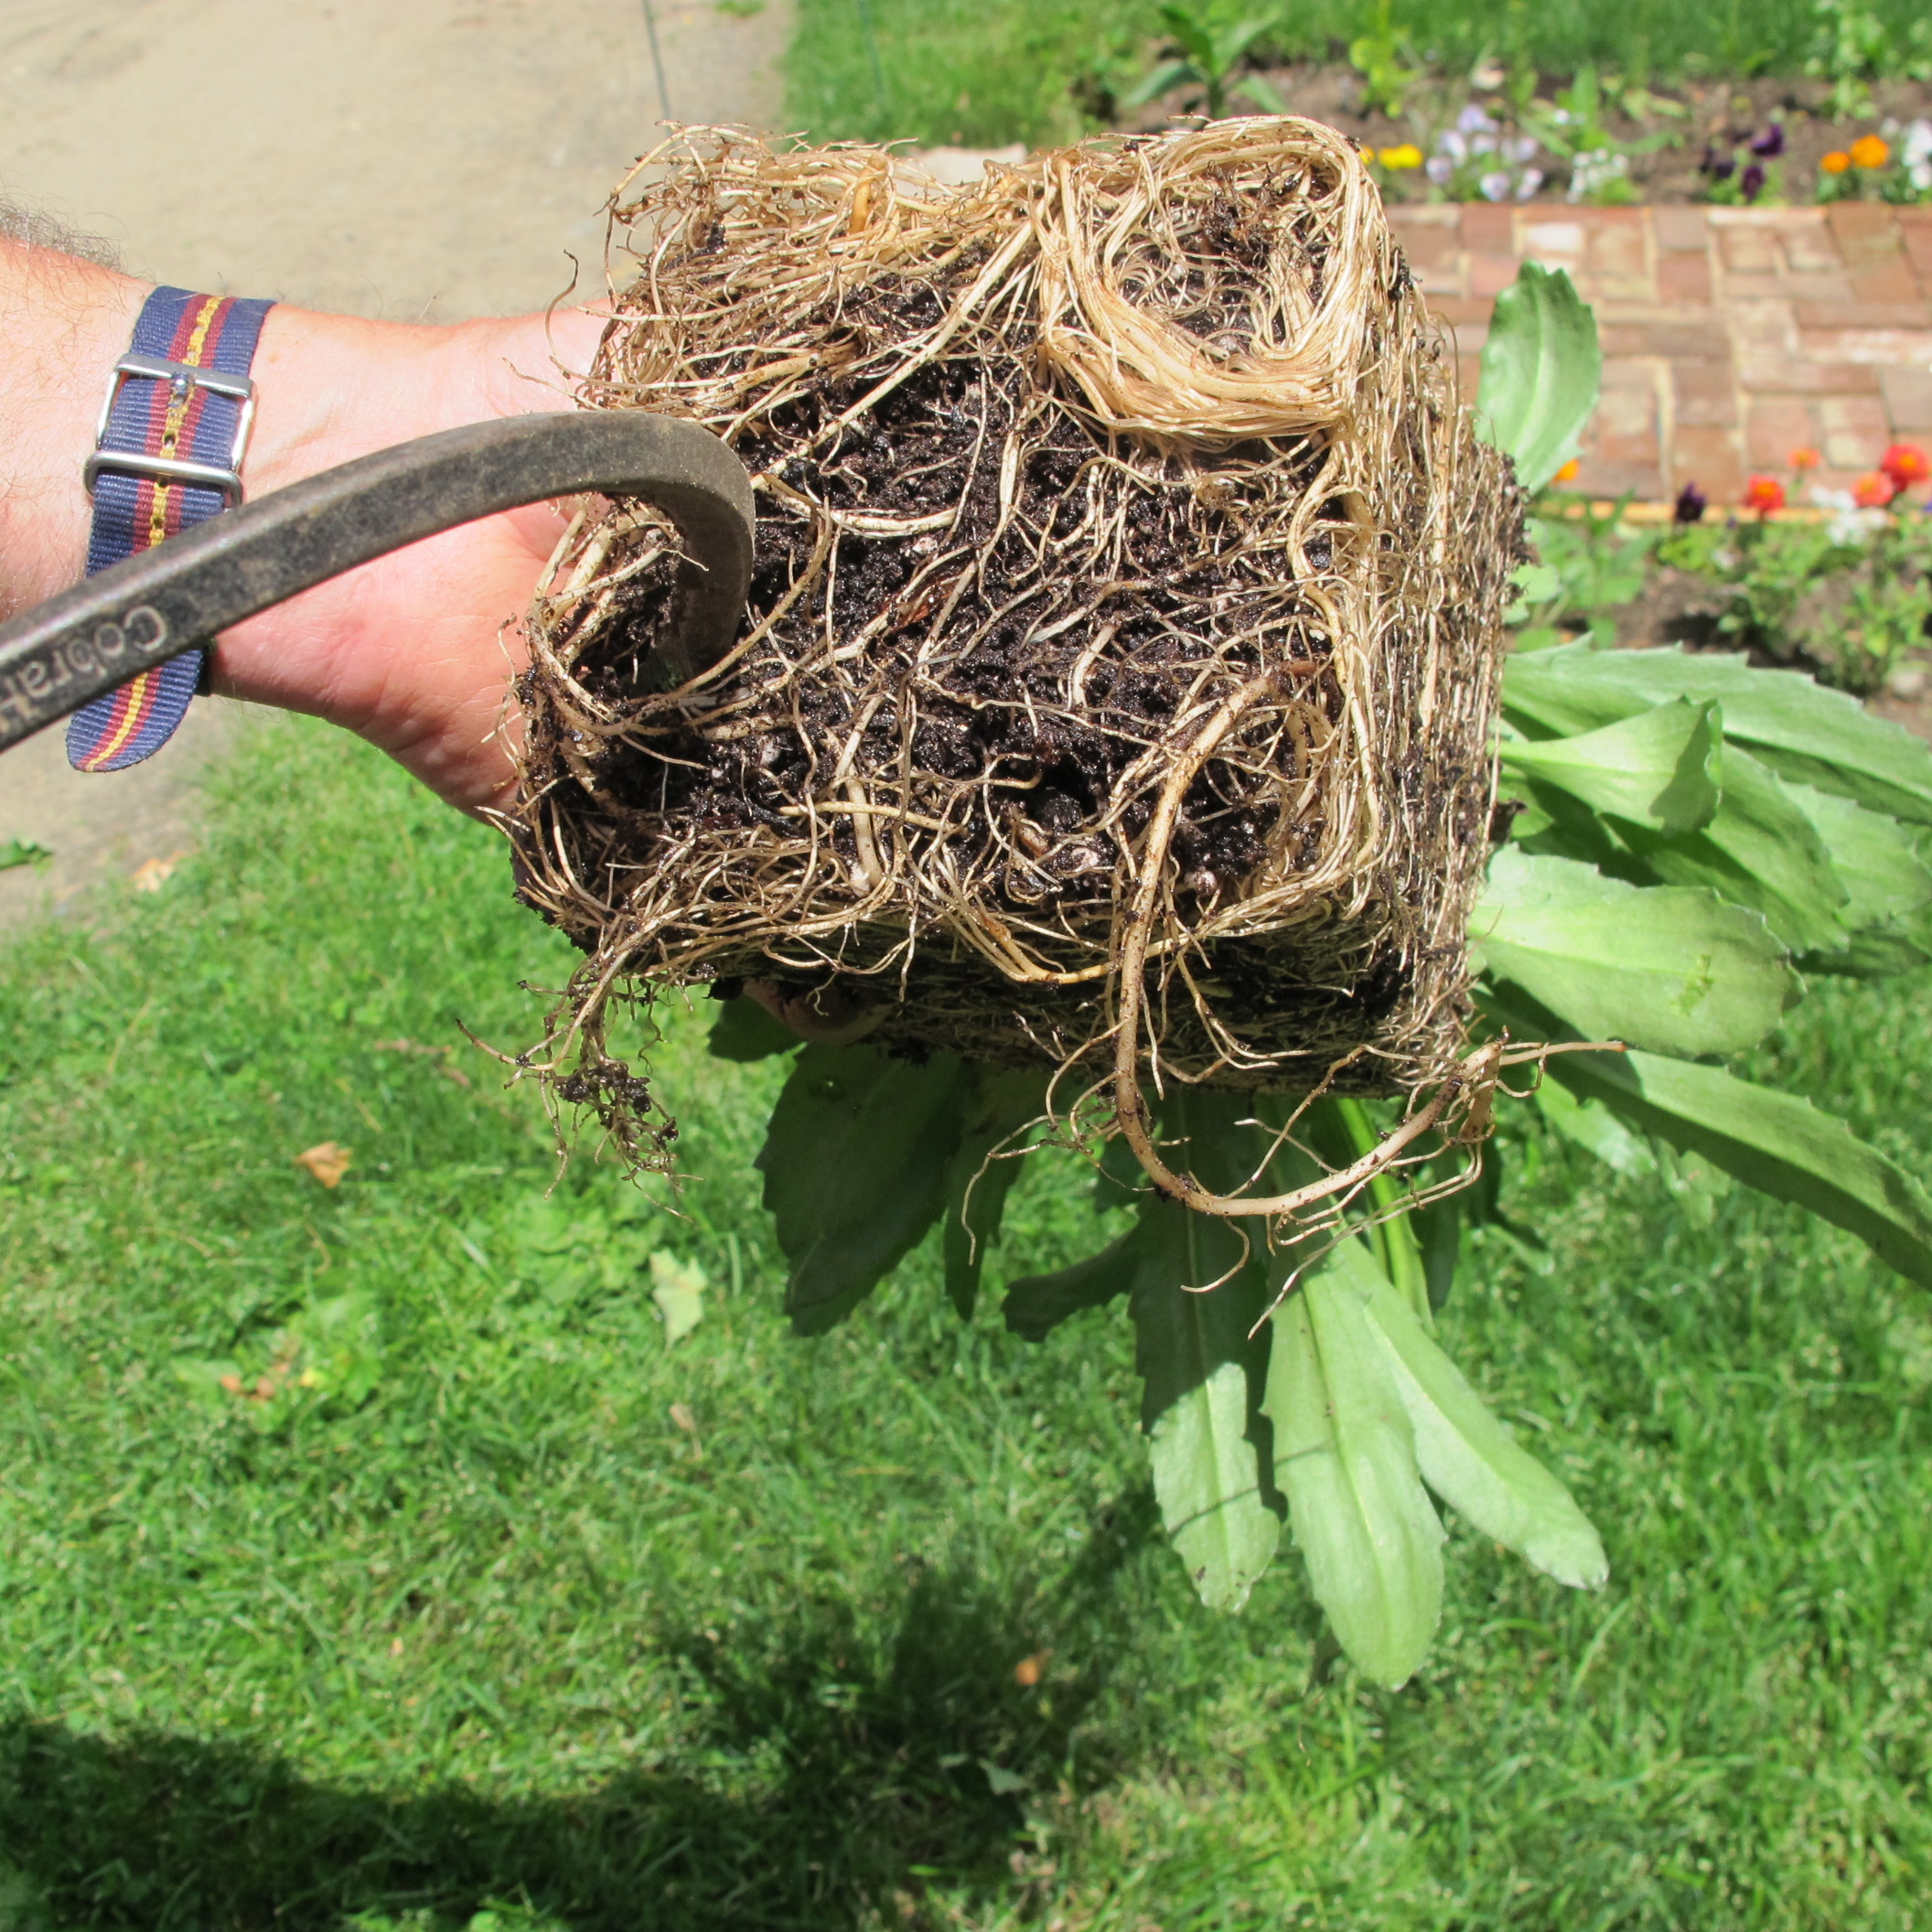
Loosening roots of a perennial
If you’re planting something that has roots that are tangled up or circling the root ball, you will need to loosen them – either with your fingers, or with a hand tool. I like the CobraHead weeder (www.CobraHead.com) for it – it’s my steel finger. At this time of year annuals that come in 6-packs are notorious for roots that are all tangled up. I don’t worry about breaking a few roots in the process of teasing them apart – that will just stimulate them to grow. If you just plop a plant with tangled roots into the soil, the plant might never figure out how to get its roots out into the soil.
Be sure to read the planting guide on the tag from the nursery. Full sun is 6 hours of sun or more each day. Part shade means morning sun, but not hot afternoon sun, or sun filtered through a light canopy of leaves. You can grow full sun flowers in part sun, but they will not flower as much.
Grampy was frugal. He loved his garden, but he didn’t go to garden centers to buy plants – but of course, there really weren’t many back in the fifties and sixties. He started much from seed, and he divided and shared perennials with others, and I imagine he got plants from friends, too.
But if you get flowers from friends, be sure you are not getting the roots of noxious weeds with your gift plant. Study the roots carefully, and pull out anything that is not attached to your new perennial. If your friend’s garden has goutweed, don’t accept any plants, especially iris (which seems prone to bringing goutweed roots tangled in its own). Color is a good way to identify weed roots – they are often different than roots of a perennial flower.
My older sister, Ruth Anne, quoted Grampy as saying, “When you move a plant, dig it up enough soil with it so that it will remember where it came from.” That’s good advice. Soil differs from location to location, and the microbes that favor a perennial at my house might not be present at yours – unless you introduce them.
Lastly, water! New plants need soil that is lightly moist. Check your plants daily, and create a moat of soil around the plants to catch your water, especially on hillsides. Be good to your flowers, and they will reward you handsomely.
Henry is a gardening consultant, coach and the author of 4 gardening books. His web site is www.Gardening-guy.com.
Gardening with a Chain Saw
Posted on Wednesday, June 18, 2014 · Leave a Comment
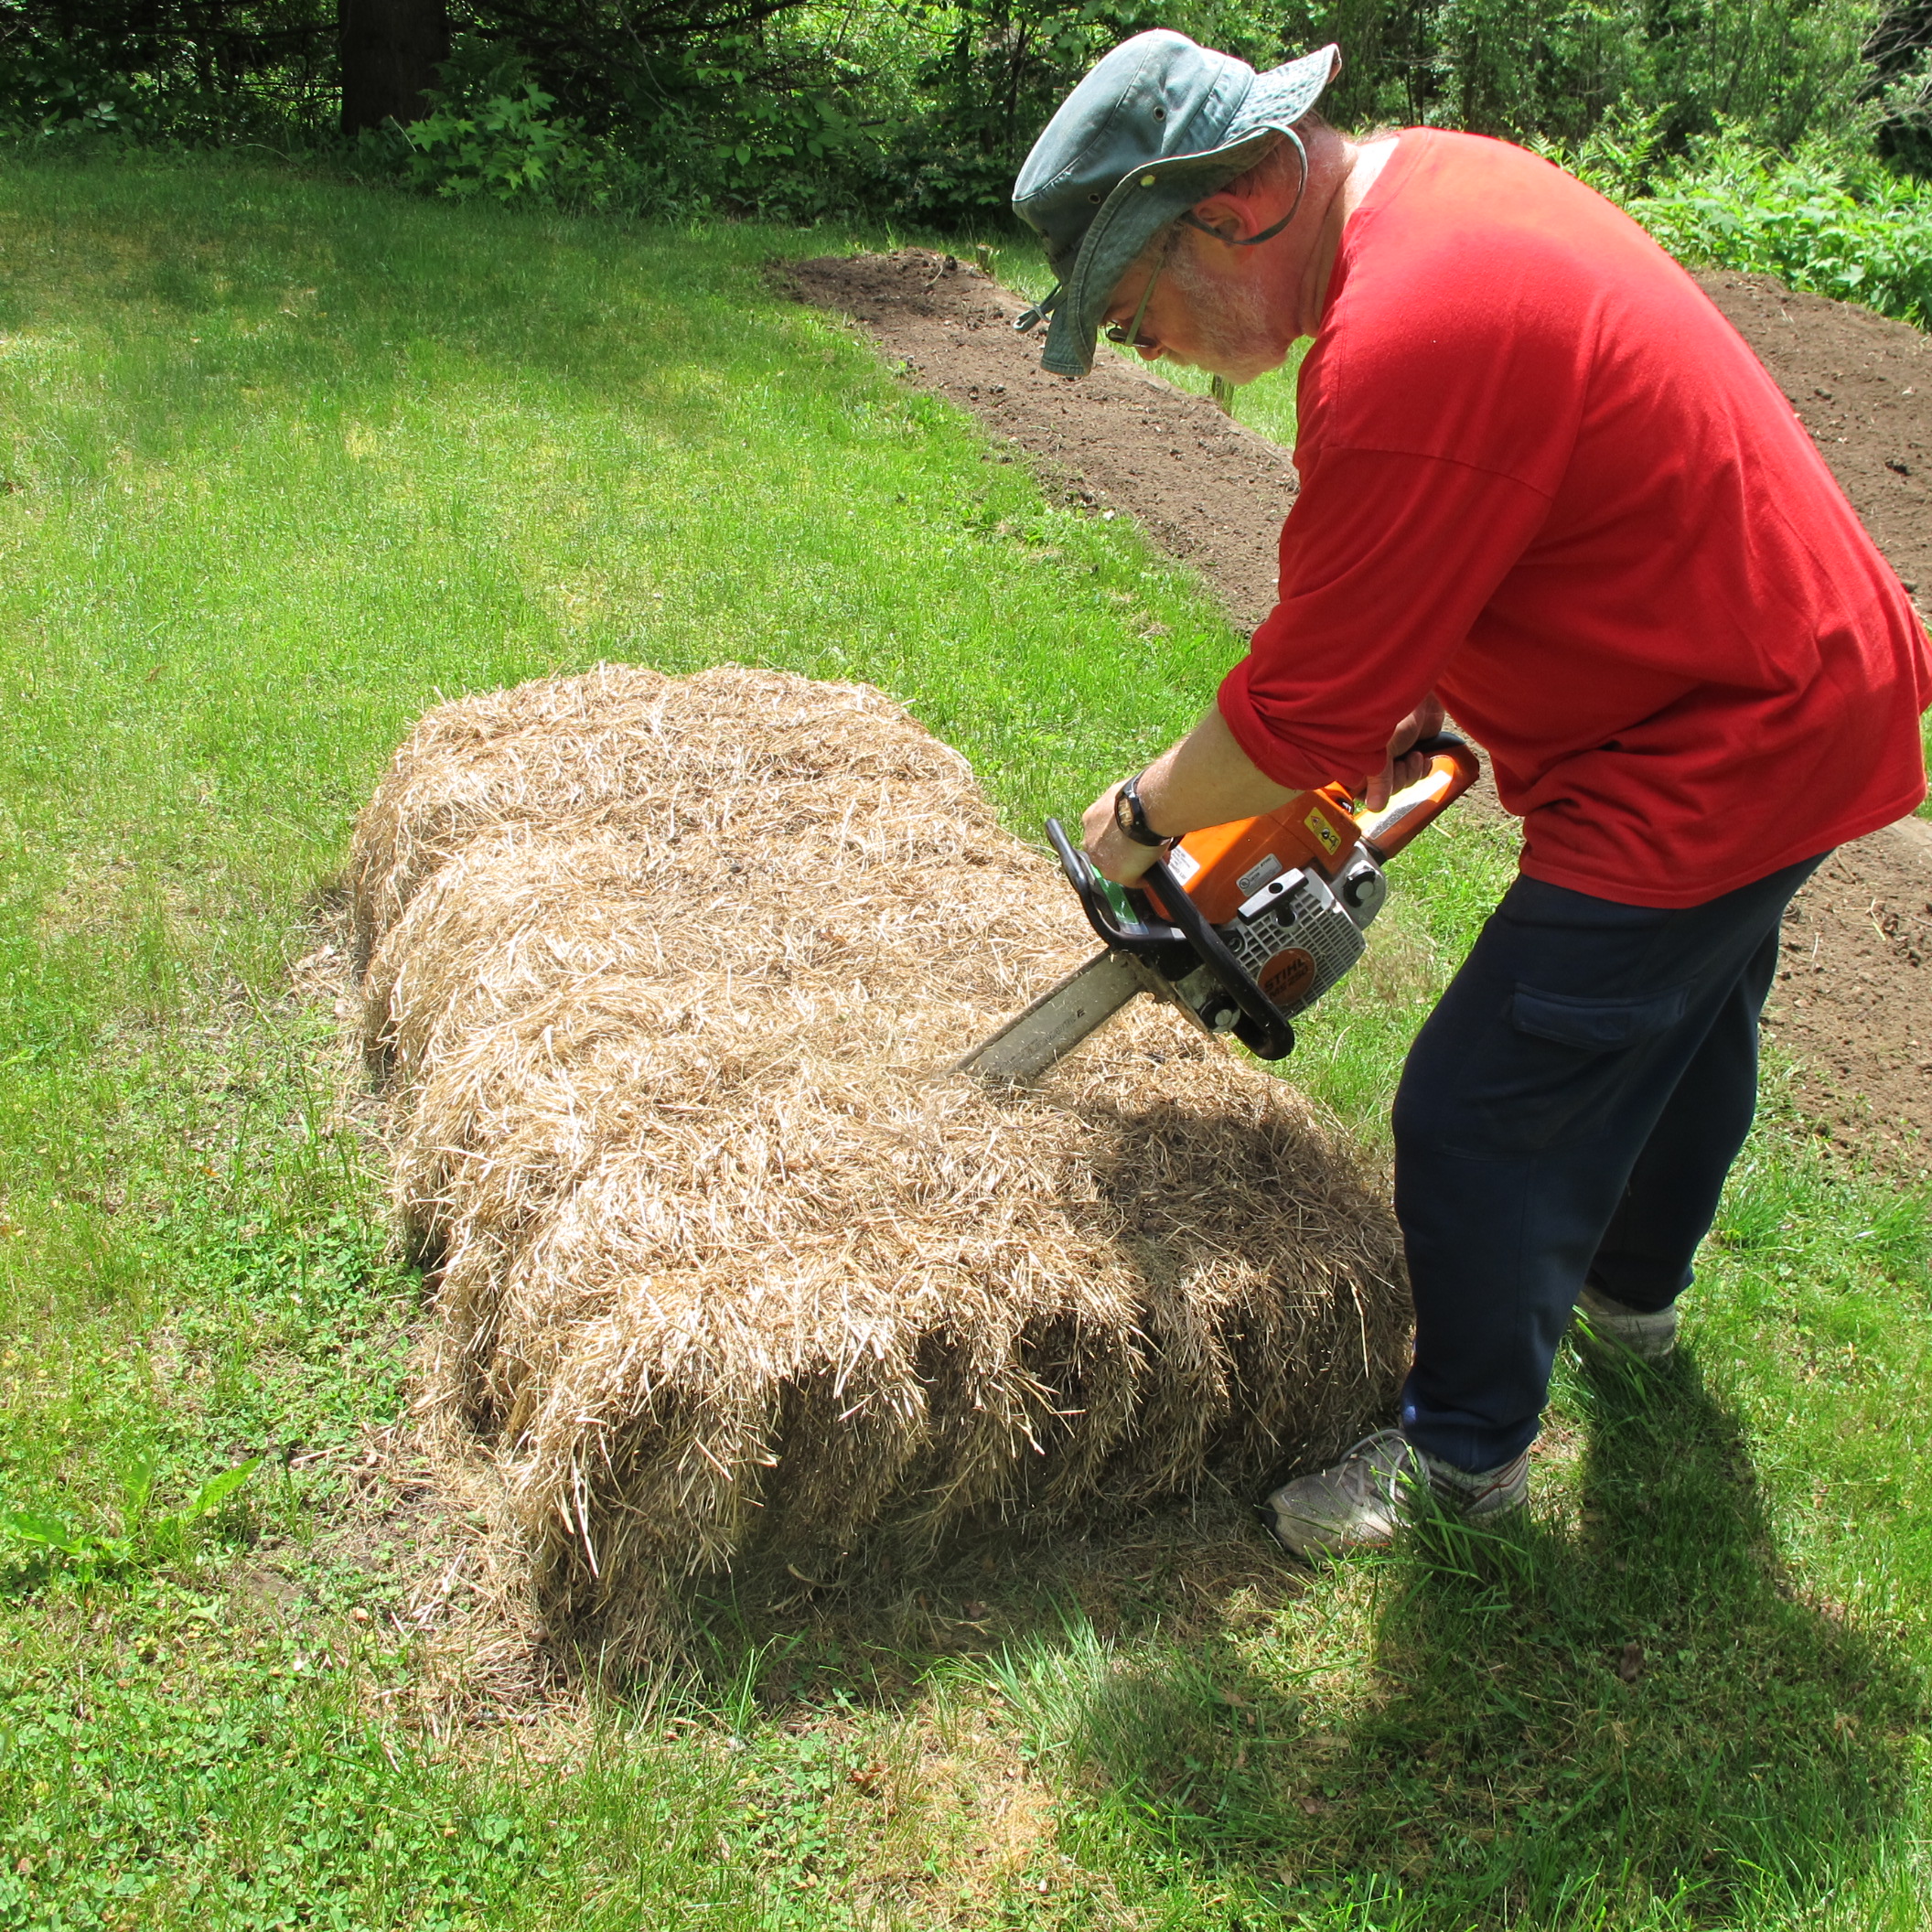
Bill Waste of Lyme, NH likes to say he gardens with a chain saw. Bill is a good humored fellow, and likes to joke. But I’ve seen him use the chain saw to get a growing bed ready to plant, so his claim is, at least partially, legitimate. What Bill was doing in the vegetable garden with his chain saw was preparing straw bales for planting.
Bill lives on a hill high above the Connecticut River in Lyme, NH with a great view, but limited space for gardening. He is surrounded by trees and the property has rocky soil that would daunt even a hard-working pilgrim. This was sheep farming country for good reason – growing vegetables is hard work in rocky soil. But each year Bill grows tomatoes, basil, pumpkins and squash. This year and last he planted his squash and pumpkins in hay bales.
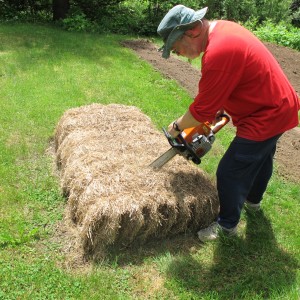
Bill Waste with chain saw
If you lack good soil, or have invasive weeds that terrorize your garden plot, you might want to think about growing some vegetables in hay bales, too. It’s easy, and you don’t really have to have a chain saw. Bill explained to me that he places three hay bales side-by-side to let them season – 5 weeks is a minimum, he said. He sprinkles about a cup of organic blood meal on the top of each bale to provide nitrogen to the hay, and waters it in well – encouraging the blood meal to penetrate the hay. The hay then begins to ferment, and the blood meal provides nitrogen for the microbes that are beginning to break down the hay.
This first step of seasoning the hay is important, Bill told me, because it gives off considerable heat. Enough heat so that seeds or plants might be killed after planting. As any farmer can tell you, moist hay can occasionally generate enough heat to start a fire by spontaneous combustion. In tests I conducted some years ago, a compost pile can attain temperatures of 130 to 165 degrees Fahrenheit, and grass seed will not germinate after a few days at those temperatures.
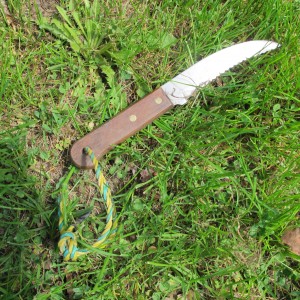
Root knife
But back to the chain saw. After 5 weeks or more outdoors, the hay bales are ready to plant. Bill uses the chain saw to carve out a planting cavity that he fills with soil. The cavity is roughly 6 by 12 inches, and 6 inches deep. I asked if I could prepare one planting hole with a knife, and he let me. I used a 6-inch long serrated knife that I got from Lee Valley tools called a root knife. It was a little slower than Bill’s chain saw, but it did the job. You could do it with a steak knife, I suppose.
After carving out the cavity, Bill fills it with potting soil and a little organic fertilizer. He plants 5 pumpkin or squash seeds in the potting soil, waters well, and steps back, ready for Mother Nature to take over. There are no weed seeds in the potting mix, and the only work that Bill needs to do is make sure the bale does not dry out. If all 5 seeds germinate, he thins out 2 plants.
Bed ready for planting
Although one could grow almost anything in a hay bale, Bill recommends vines, since they can spill over the sides and stretch out across the garden. The only down side I can see is that you must be willing to let the vines grow over the lawn- which cannot easily be cut while the plants are growing. One could, I suppose, put down black plastic or mulch to keep down grass and weeds as the vines grow.
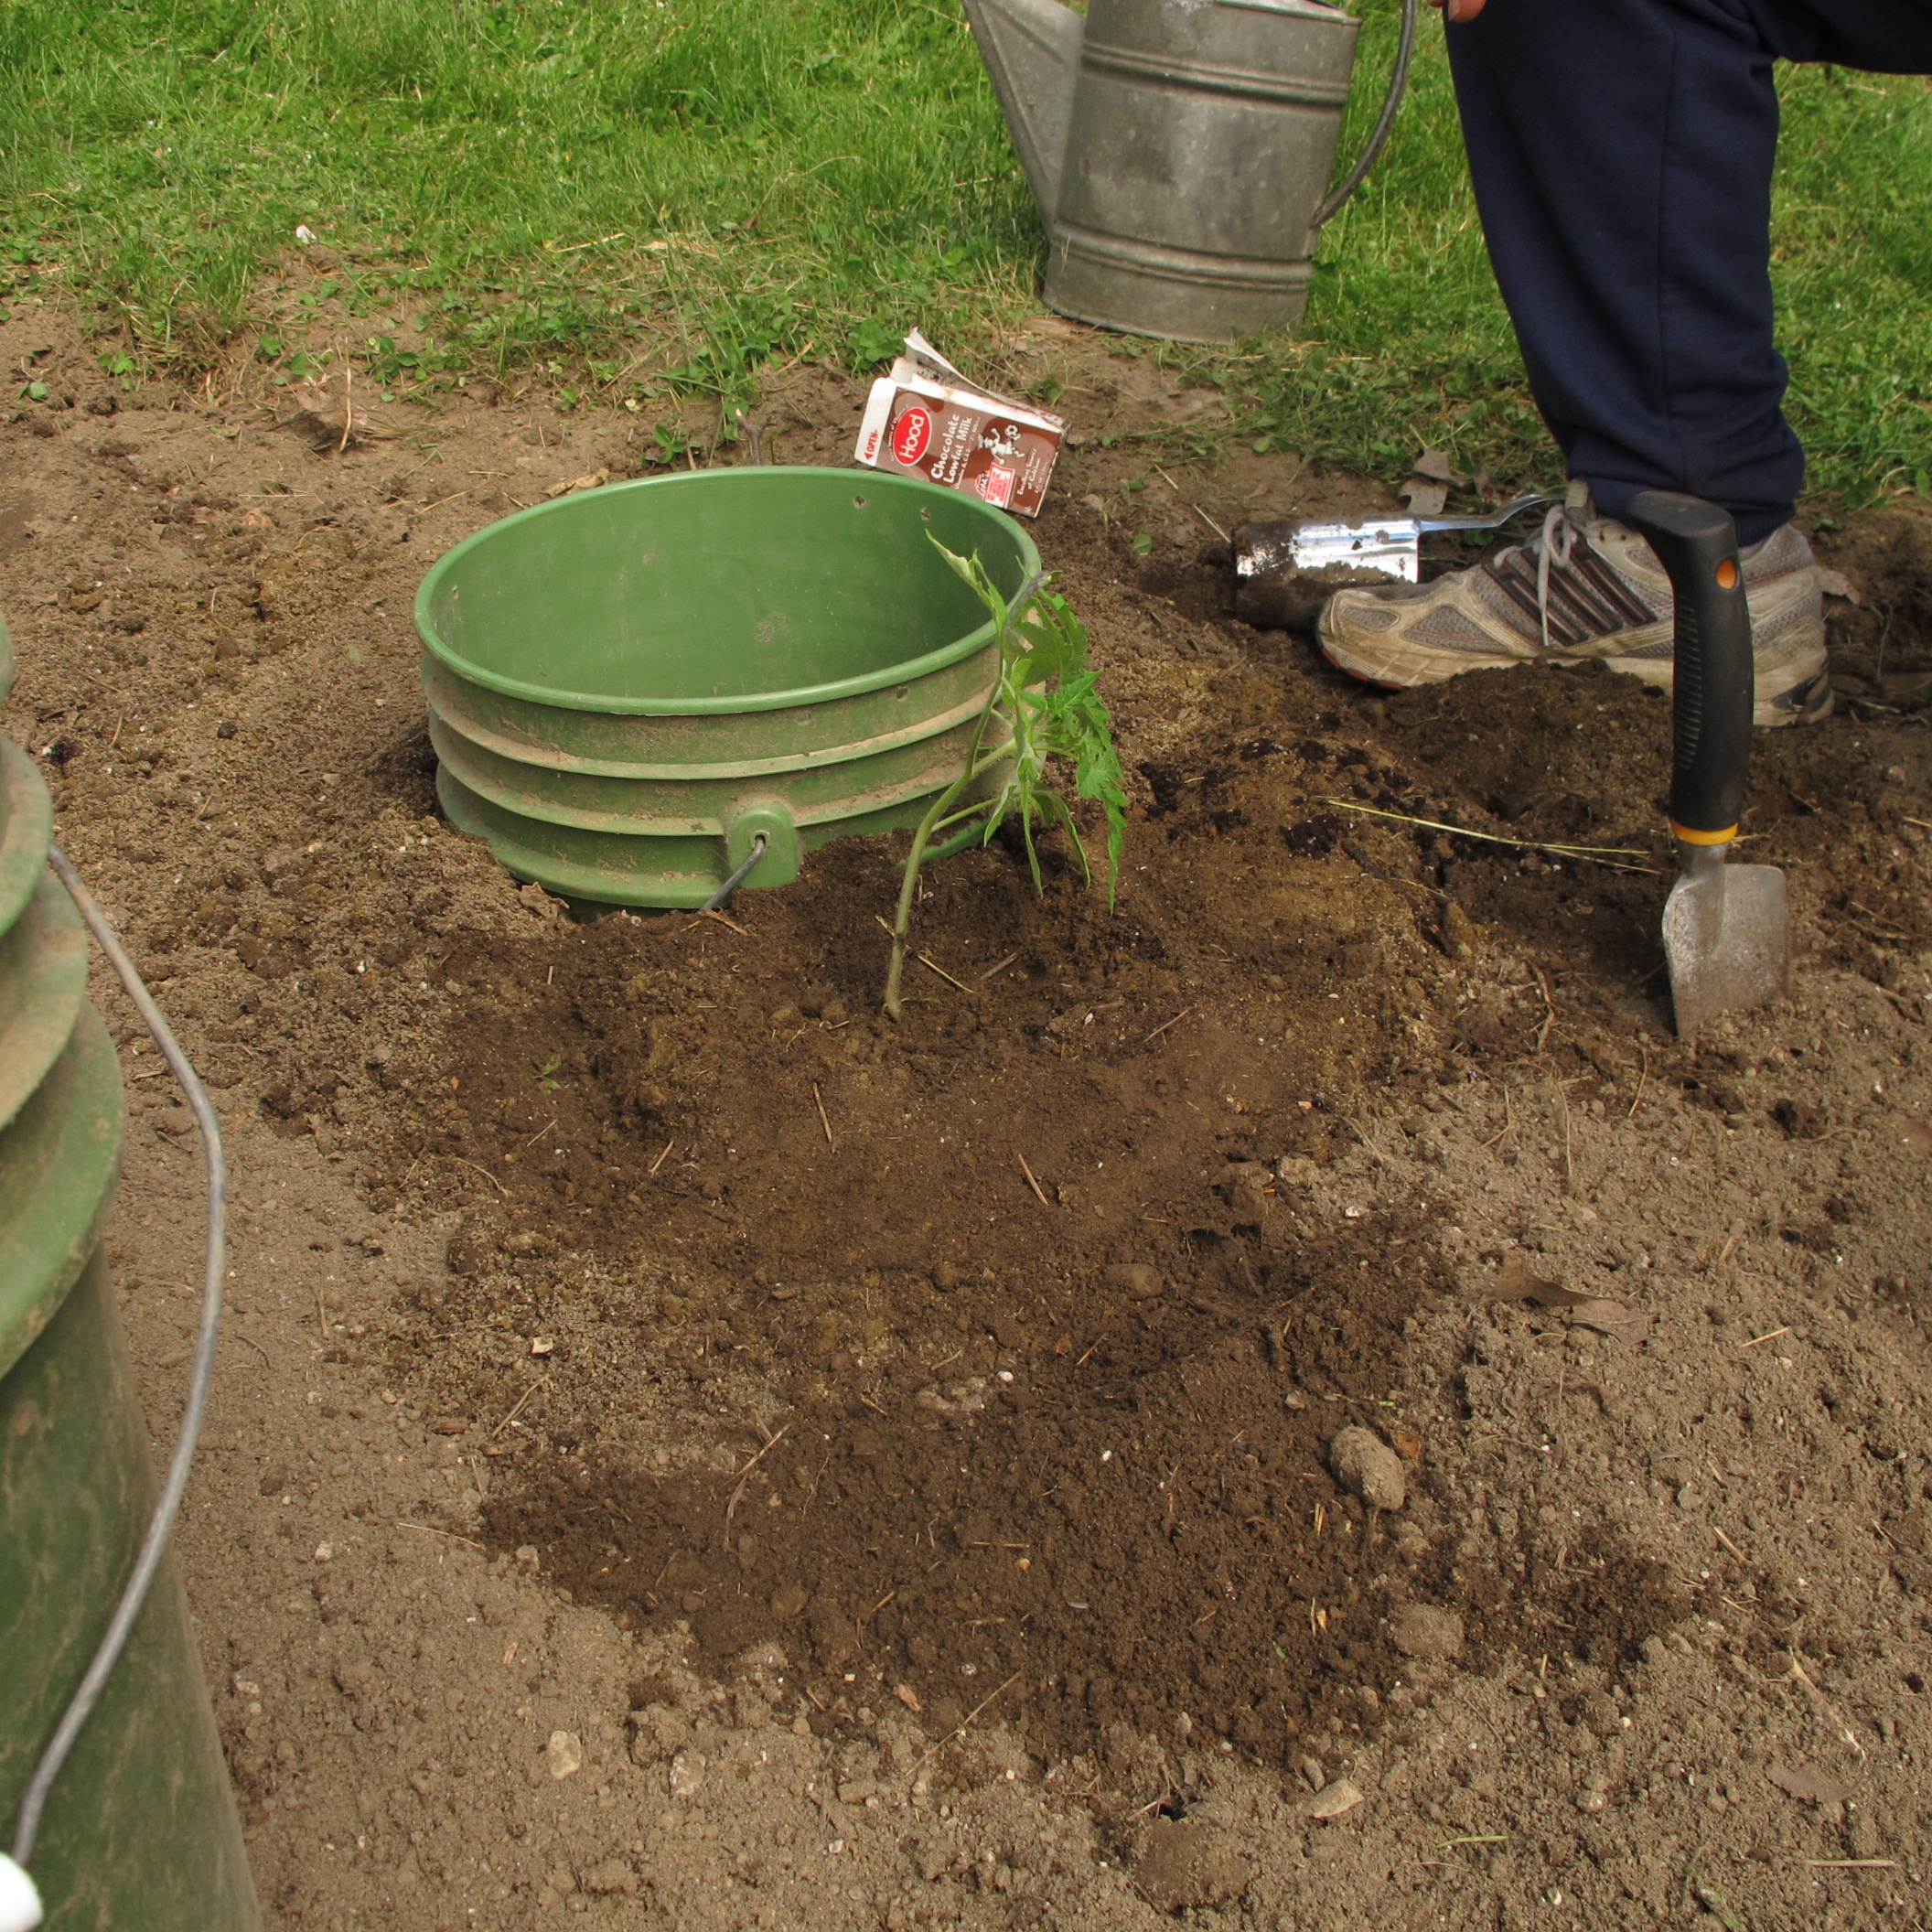
Bill is always looking for ways to save energy – his, that is. He has come up with a method of growing tomatoes that allows him to go away for a week if he wants, without letting his tomatoes suffer from lack of water. It requires access to lots of plastic buckets, which he has. Some fast food places give them away, and some building contractors have excess buckets that sheet rock “mud” comes in.
Bucket watering system
What Bill does is bury 5-gallon pails in his garden, leaving just a couple of inches above ground. These are his water reservoirs, and his tools for getting moisture down deep in the ground. Instead of surface watering every day in August when his garden is dry and thirsty, he just waters once a week by filling the buckets. The trick? He has drilled a series of eighth-inch holes in the buckets so that water leaks out to the soil after he fills them.
Around each bucket Bill plants 3 tomato plants, each just as close to the bucket as he can. The buckets have three sets of 6 or 7 small holes, each in an inverted “Y” pattern. The water leaks out in an hour or so, but it gets water where he wants it: down deep.
Each of us has a different approach to weeding, watering, planting. We figure out what works best. I doubt I will ever bury buckets for watering my garden, but if you have dry, sandy soil, you might want to. And hay bales? I’ll probably try it.
Henry’s Web site is www.Gardening-Guy.com. He can be reached at henry.homyer@comcast.net. He is the author of 5 books.
Spring Lawn Care
Posted on Wednesday, June 11, 2014 · Leave a Comment
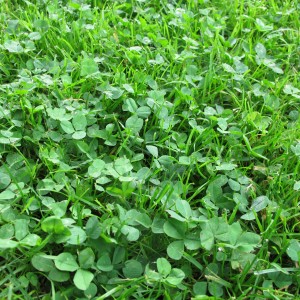
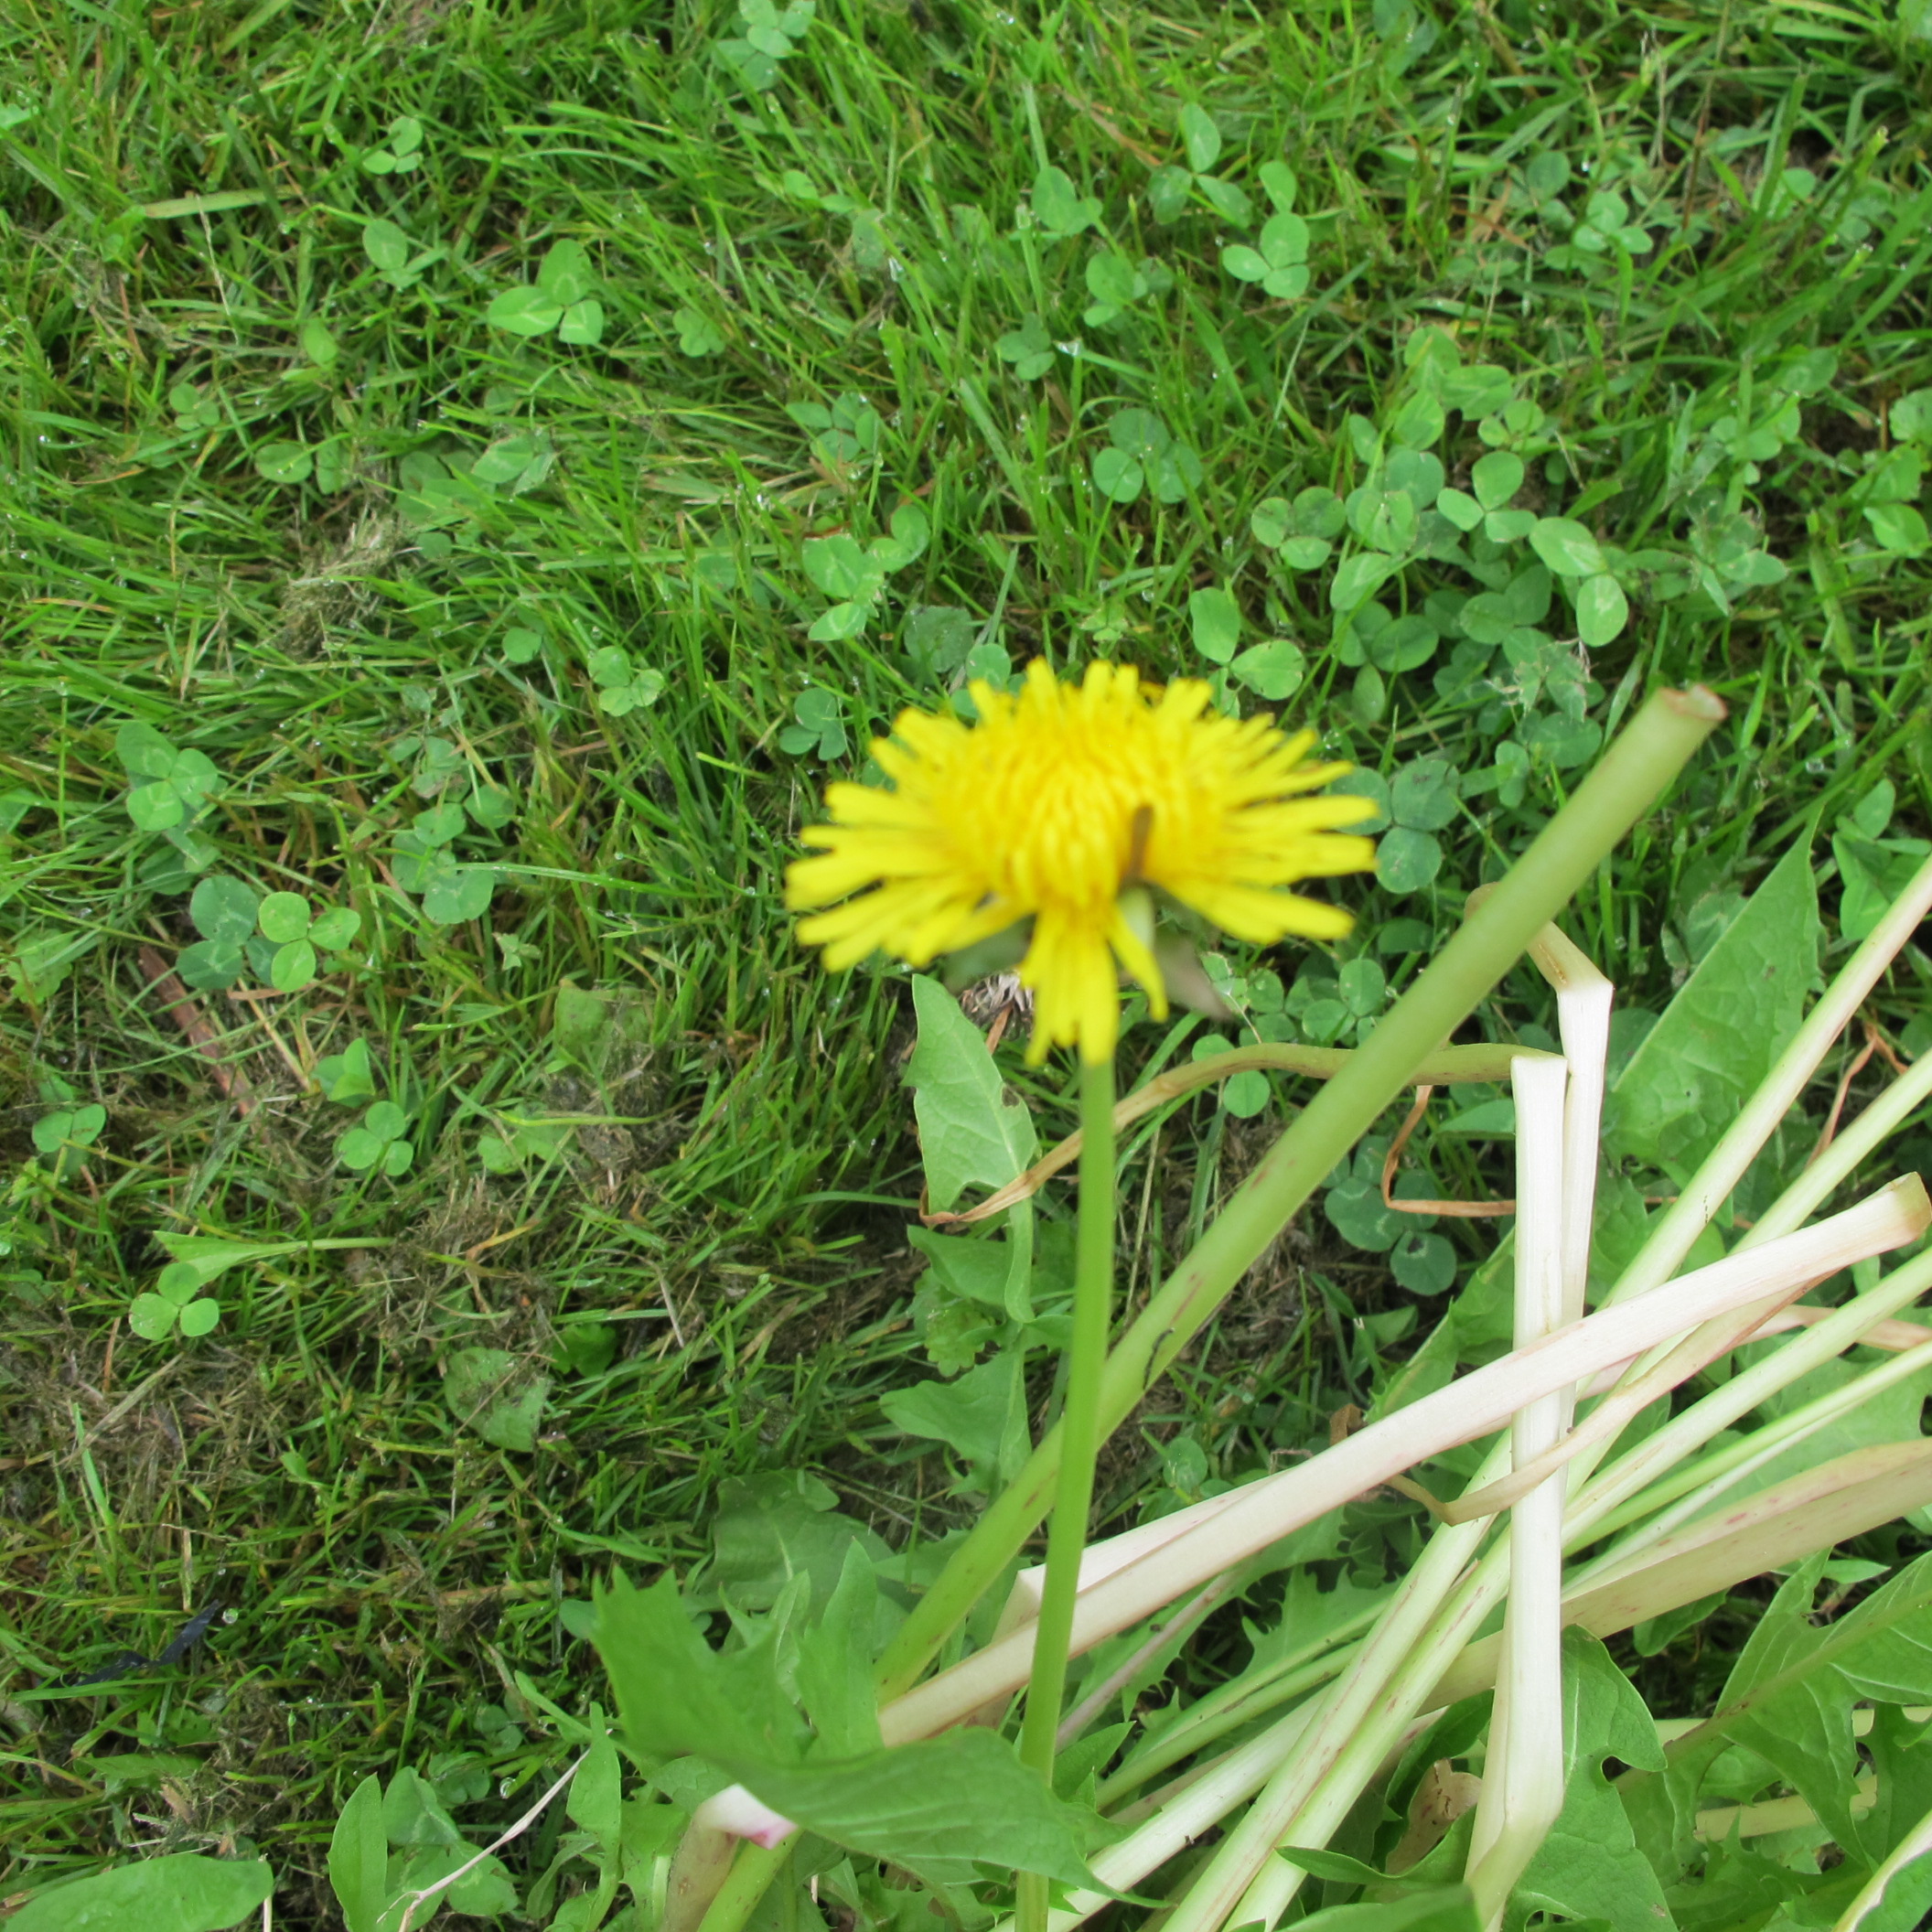
Clover in lawn
I love lawns. Not big lawns, and they don’t need to be pure Kentucky bluegrass, either. I love a little bit of mowed green that has some grass and clover; it can have a few dandelions or bluets or violets, too. I can live with Creeping Charlie (also called ground ivy or by its scientific name, Glechoma hederacea). Overall my philosophy is this: if it’s green and you can mow it, it’s a lawn. Only thistles and other sharp things need to be dug out- but never nuked with chemicals.
Despite that philosophy, people often remark on how lush and thick my lawn is, and how nice it feels underfoot. Having a nice lawn is easy if you follow a few simple rules.
First, stop worrying about it. And certainly never add any chemicals to it. Weed-‘n’-feed formulas kill off not only the broad-leafed plants like dandelions, they also diminish the biological activity in the soil. I want a healthy soil full of microbes (including bacteria and fungi) and know that many microbes are killed or adversely affected by chemicals.
Chemical fertilizers are made of salts of nitrogen, phosphorus and potassium. These have the ability to dry out and kill microbes. And of course if your product includes chemicals for killing moss, weeds, fungi or insects, all those chemicals add to the killing power. Your soil cringes when you load up the spreader with weed-‘n’-feed.

Clover and Dandelions are not all bad
If you want to have a good healthy lawn, you need good healthy soil. It needs about 6 inches of reasonably good soil that drains well (so as not to drown the lawn grasses) but is not so sandy that it dries out in an afternoon. Cut and peel back a one-foot square piece of sod after a rainstorm, and look at the soil. Grab a handful of soil. Does it form a cylinder in your hand when you squeeze it, and hold its shape when you open your fingers? If so, you have clay, or a clay-based soil.
If you perform the squeeze test on sandy soil, it will crumble apart when you open your fingers. When you rub the soil between your fingers, you will feel sharp grains of sand. But if you have a nice loam, the soil with be dark and the cylinder will fall apart if you touch it with a finger.
If you are not happy with your lawn, I suggest getting your soil tested. The Extension Service in most states will have on-line instructions on how to take a soil sample, and where to send it. Some garden centers have kits for sale. Find out what kind of soil you have, what it needs, and if your soil pH is in the right zone.
Soil pH is a measure of how acidic or alkaline your soil is. Lawns do best when the soil pH is near neutral (which is 7.0) or slightly acidic. Our rain is acidic, and neglected soils – including most lawns – have soil that is pretty acidic. You can fix this easily by adding limestone to the lawn, and a pH test will tell you how much to add to balance it out. If your soil is too far from neutral, some soil minerals will become unavailable to the grass plants, even if the minerals are there. You can add limestone at any time, though most lawn experts recommend the fall so that it will have time to do its work before spring growth begins.
The other additive that helps an anemic lawn is compost or organic matter. Good crumbly compost can be flung around the lawn with a shovel and then raked out to provide even coverage. Doing that now would help. Earthworms in a healthy lawn will be more than willing to eat that compost and then excrete the nutritious ingredients into the soil.
Earthworms, fungi and bacteria will also help you improve your lawn by breaking down your grass clippings. Those clippings will add organic matter and enrich your soil. So cut your lawn regularly – avoiding a thick layer of clippings that needs to be bagged or raked.
Lawn height is critical for a good, easy-care lawn. Get out of the golf course mindset. This is a lawn, not a putting green! I set my mower, generally, one notch down from the highest setting. Right by the front door I keep it a little shorter at times.
Why keep your lawn long? Your lawn is made of millions of plants, and each one can only create a healthy root system if you let it have enough blade to create its own food by photosynthesis. Too short? The roots will be stunted, and the lawn will not be healthy. And the taller the grass, the more it can shade out annual weeds and crabgrass.
Think about it: if there were daffodils that we could mow down only to have them bloom again, we would pay big bucks for them. But call those yellow flowers dandelions, and it’s war. I hope you’ll re-think your position about lawn chemicals if you’re in the weed-‘n’-feed school. Diversity of plant types in the lawn helps to create a lush, lovely green space.
Henry Homeyer is a garden designer and the author of 4 gardening books and a children’s chapter book. His Web site is www.Gardening-Guy.com.


 Click Here to buy from Cobrahead