What To Do When Company is Coming
Posted on Wednesday, August 14, 2013 · Leave a Comment
I’ve got company coming this weekend, and I want my gardens to look nice. I can’t make them perfect, but here are some of the things I’m doing – and that you can, too, whether company is coming or if you just want to get on top of garden tasks.
First of all, I am getting rid of all the tall weeds. A flower bed with 4-foot tall weeds is much less attractive than a flower bed with the same number of short things creeping around the bed. So golden rod that towers over the daylilies is much more of a problem than 6-inch tall creeping Charlie that scurries around their base.
Now a big clump of goldenrod can be a fearsome opponent. It holds on fiercely. But if you are truly in a hurry, you can fix the problem – in the short term- by cutting it off with pruners or a sharp serrated knife. That makes it disappear to the casual viewer. Later, when you have more time, you can dig up that big clump of tenacious weeds with a shovel.
Next I am buying some plants to fill in spaces. Each year a few perennials die over the winter, and I try to replace them each spring and summer. But this year was so wet that I never got around to doing so. There are places where, I must admit, some flower beds have patches of pure weeds. Nothing but weeds. As I weed them out, I am discovering spaces where I can plant new things.
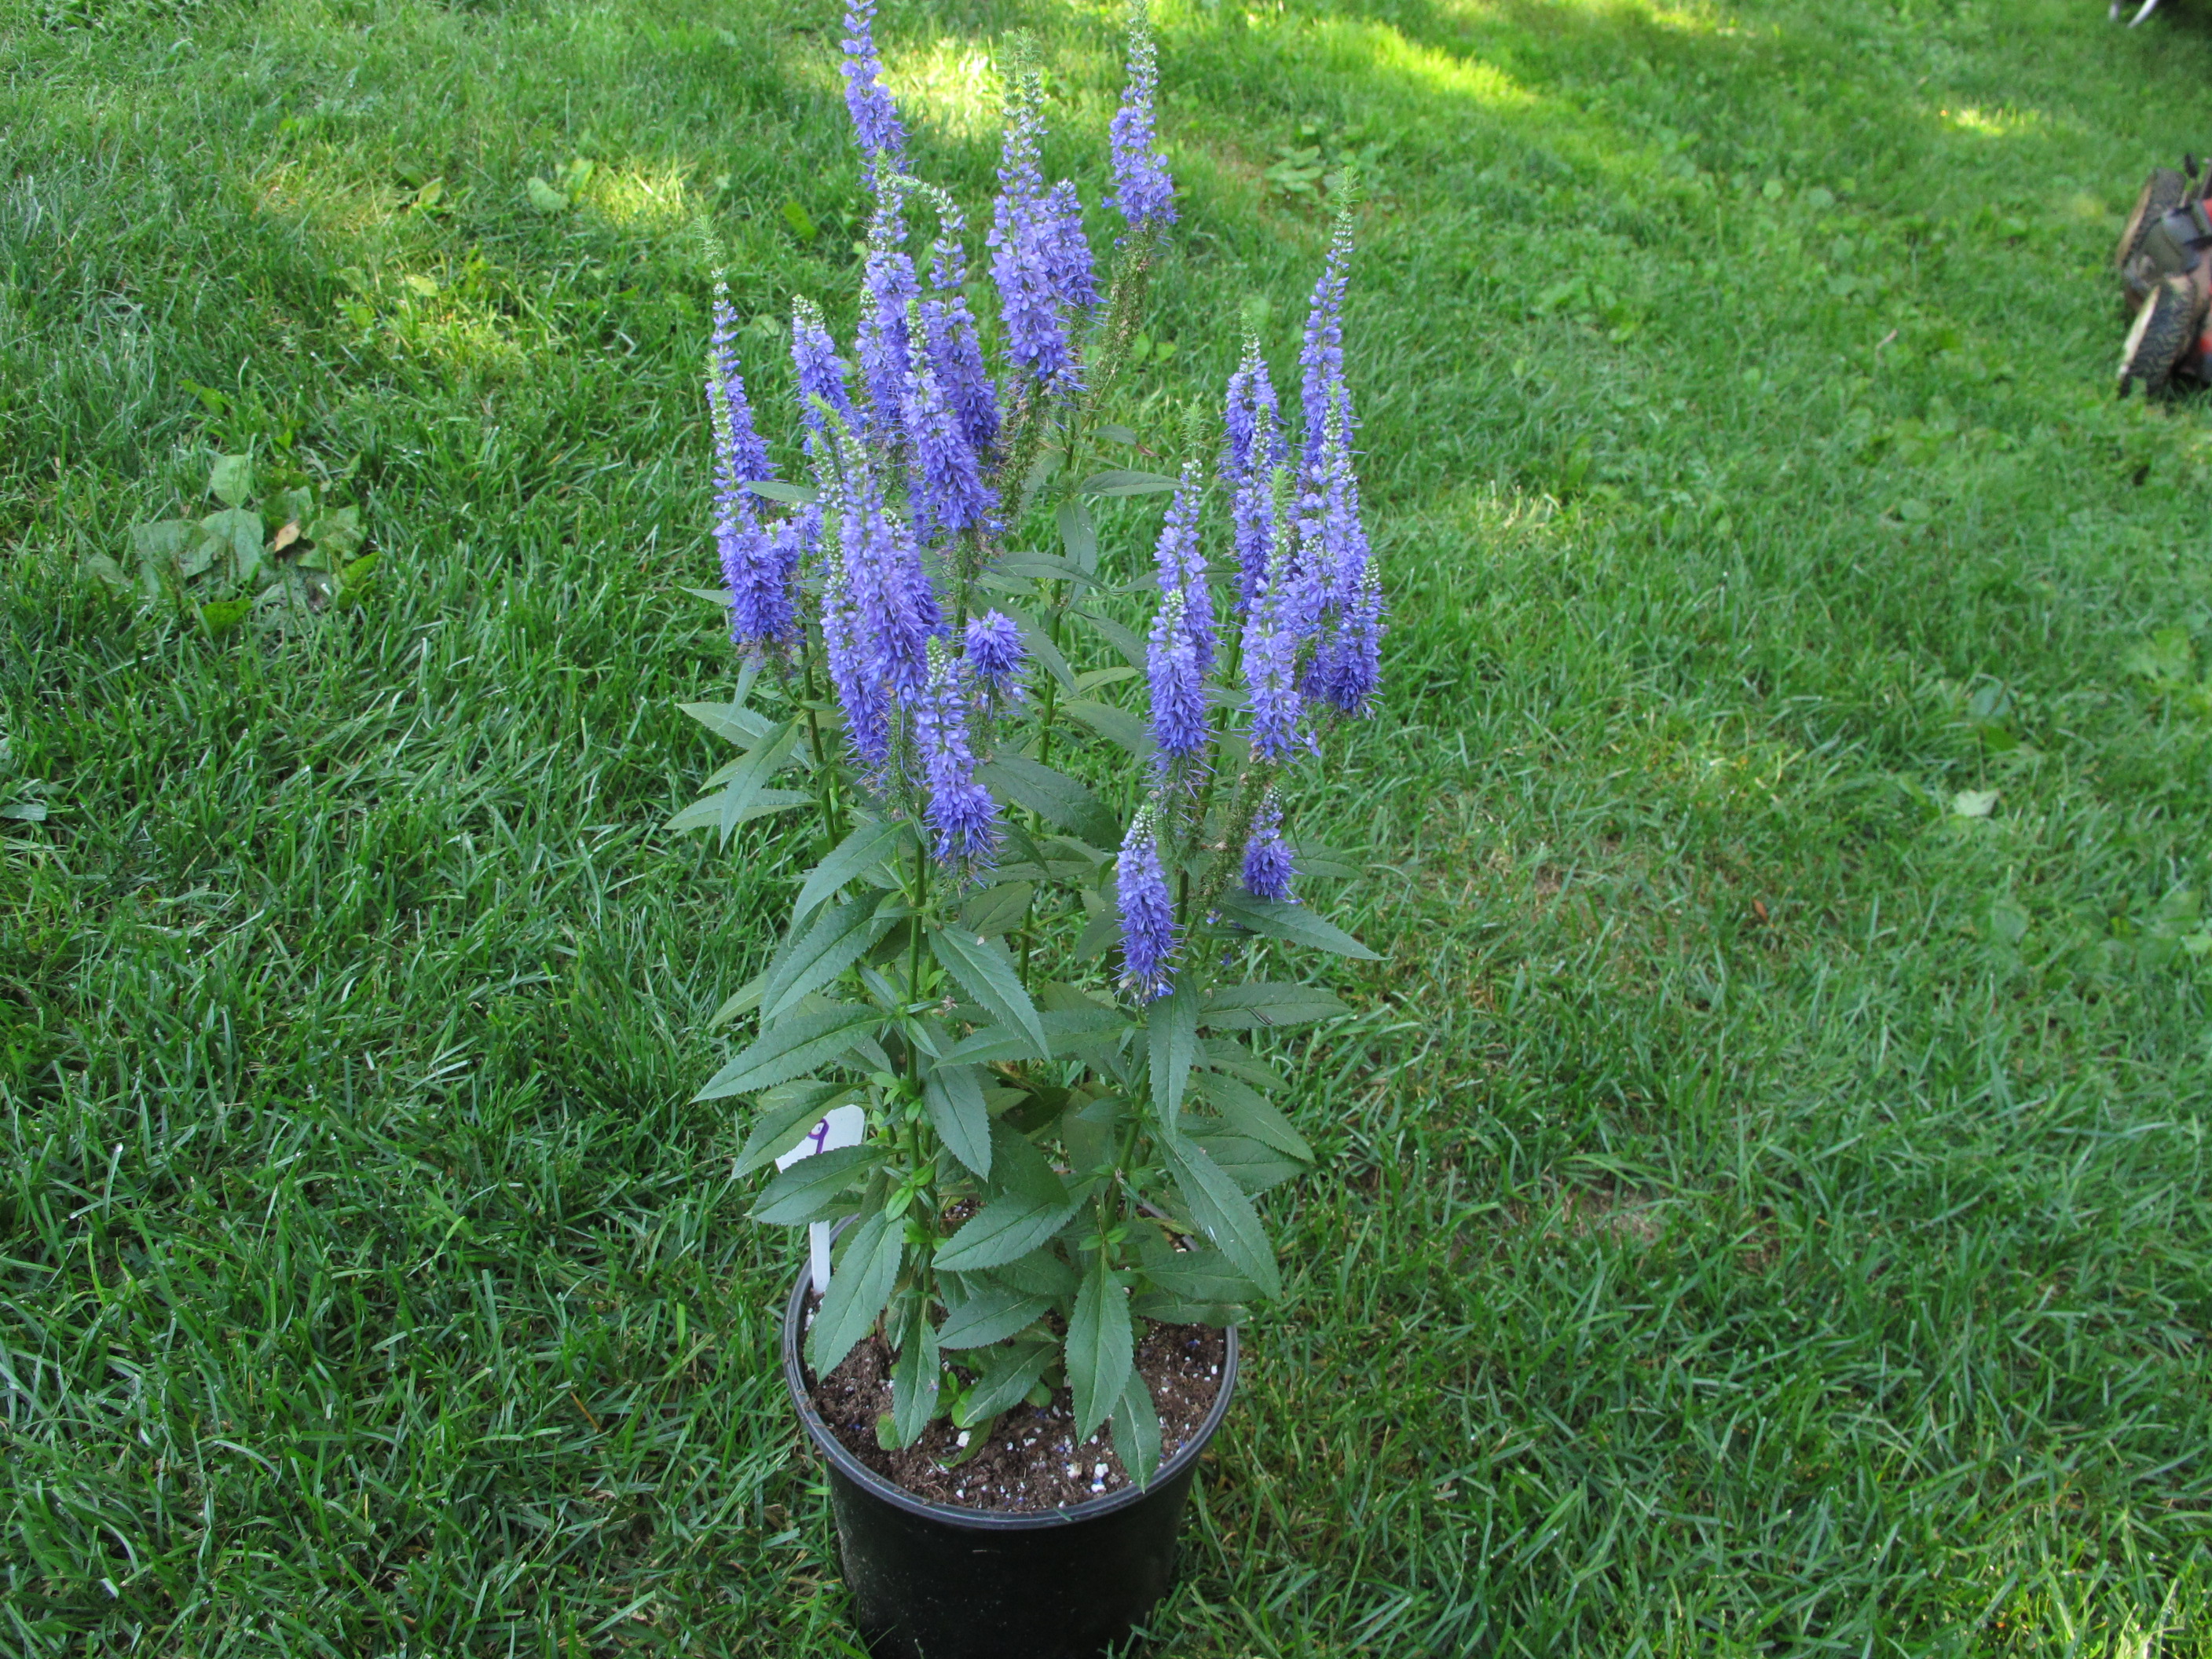
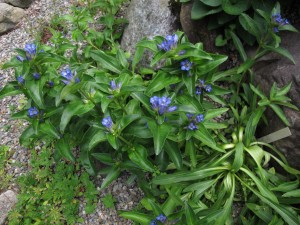
I recently was at a Farmers market and saw a beautiful purple-blue perennial known as a speedwell or veronica. (Veronica spicata). It was in full bloom and magnificent with 16 inch spikes of small flowers. I should have purchased three, but was unsure how much space (and money) I had, so I only bought one. Maybe next week there will still be some left and I can buy more. I had a nice spot in mind for it.
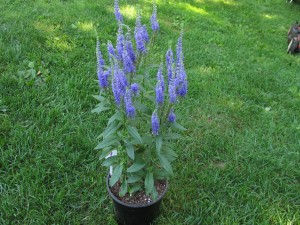
Veronica spicata
This is the time of year when daylilies are particularly lovely, so next I went to Cider Hill Gardens in Windsor, VT to look through their selection. I bought some nice ‘spider’ daylilies. These are a type that differs from standard daylilies by having longer petals that are spaced farther apart – almost like the legs on a spider. I planted them with the veronica – a very nice contrast.
You can divide most flowers almost any time of the year (except peonies, which should only be done in the fall). I had a big clump of a late fall-blooming clear yellow daylily that, over time, was being overshadowed (literally) by a multi-stemmed shrub known as common ninebark, a variety called ‘Diablo’. Diablo has dark purplish leaves and grows fast. Very fast. Each year- right after it blooms in June – I cut off about two feet from each stem to keep it under control. But each year the shrub sends up more stems from the ground, expanding its diameter. And so this wonderful daylily was being crowded.
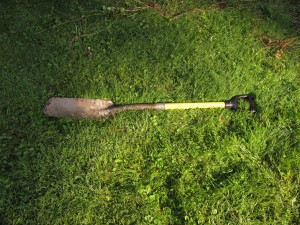
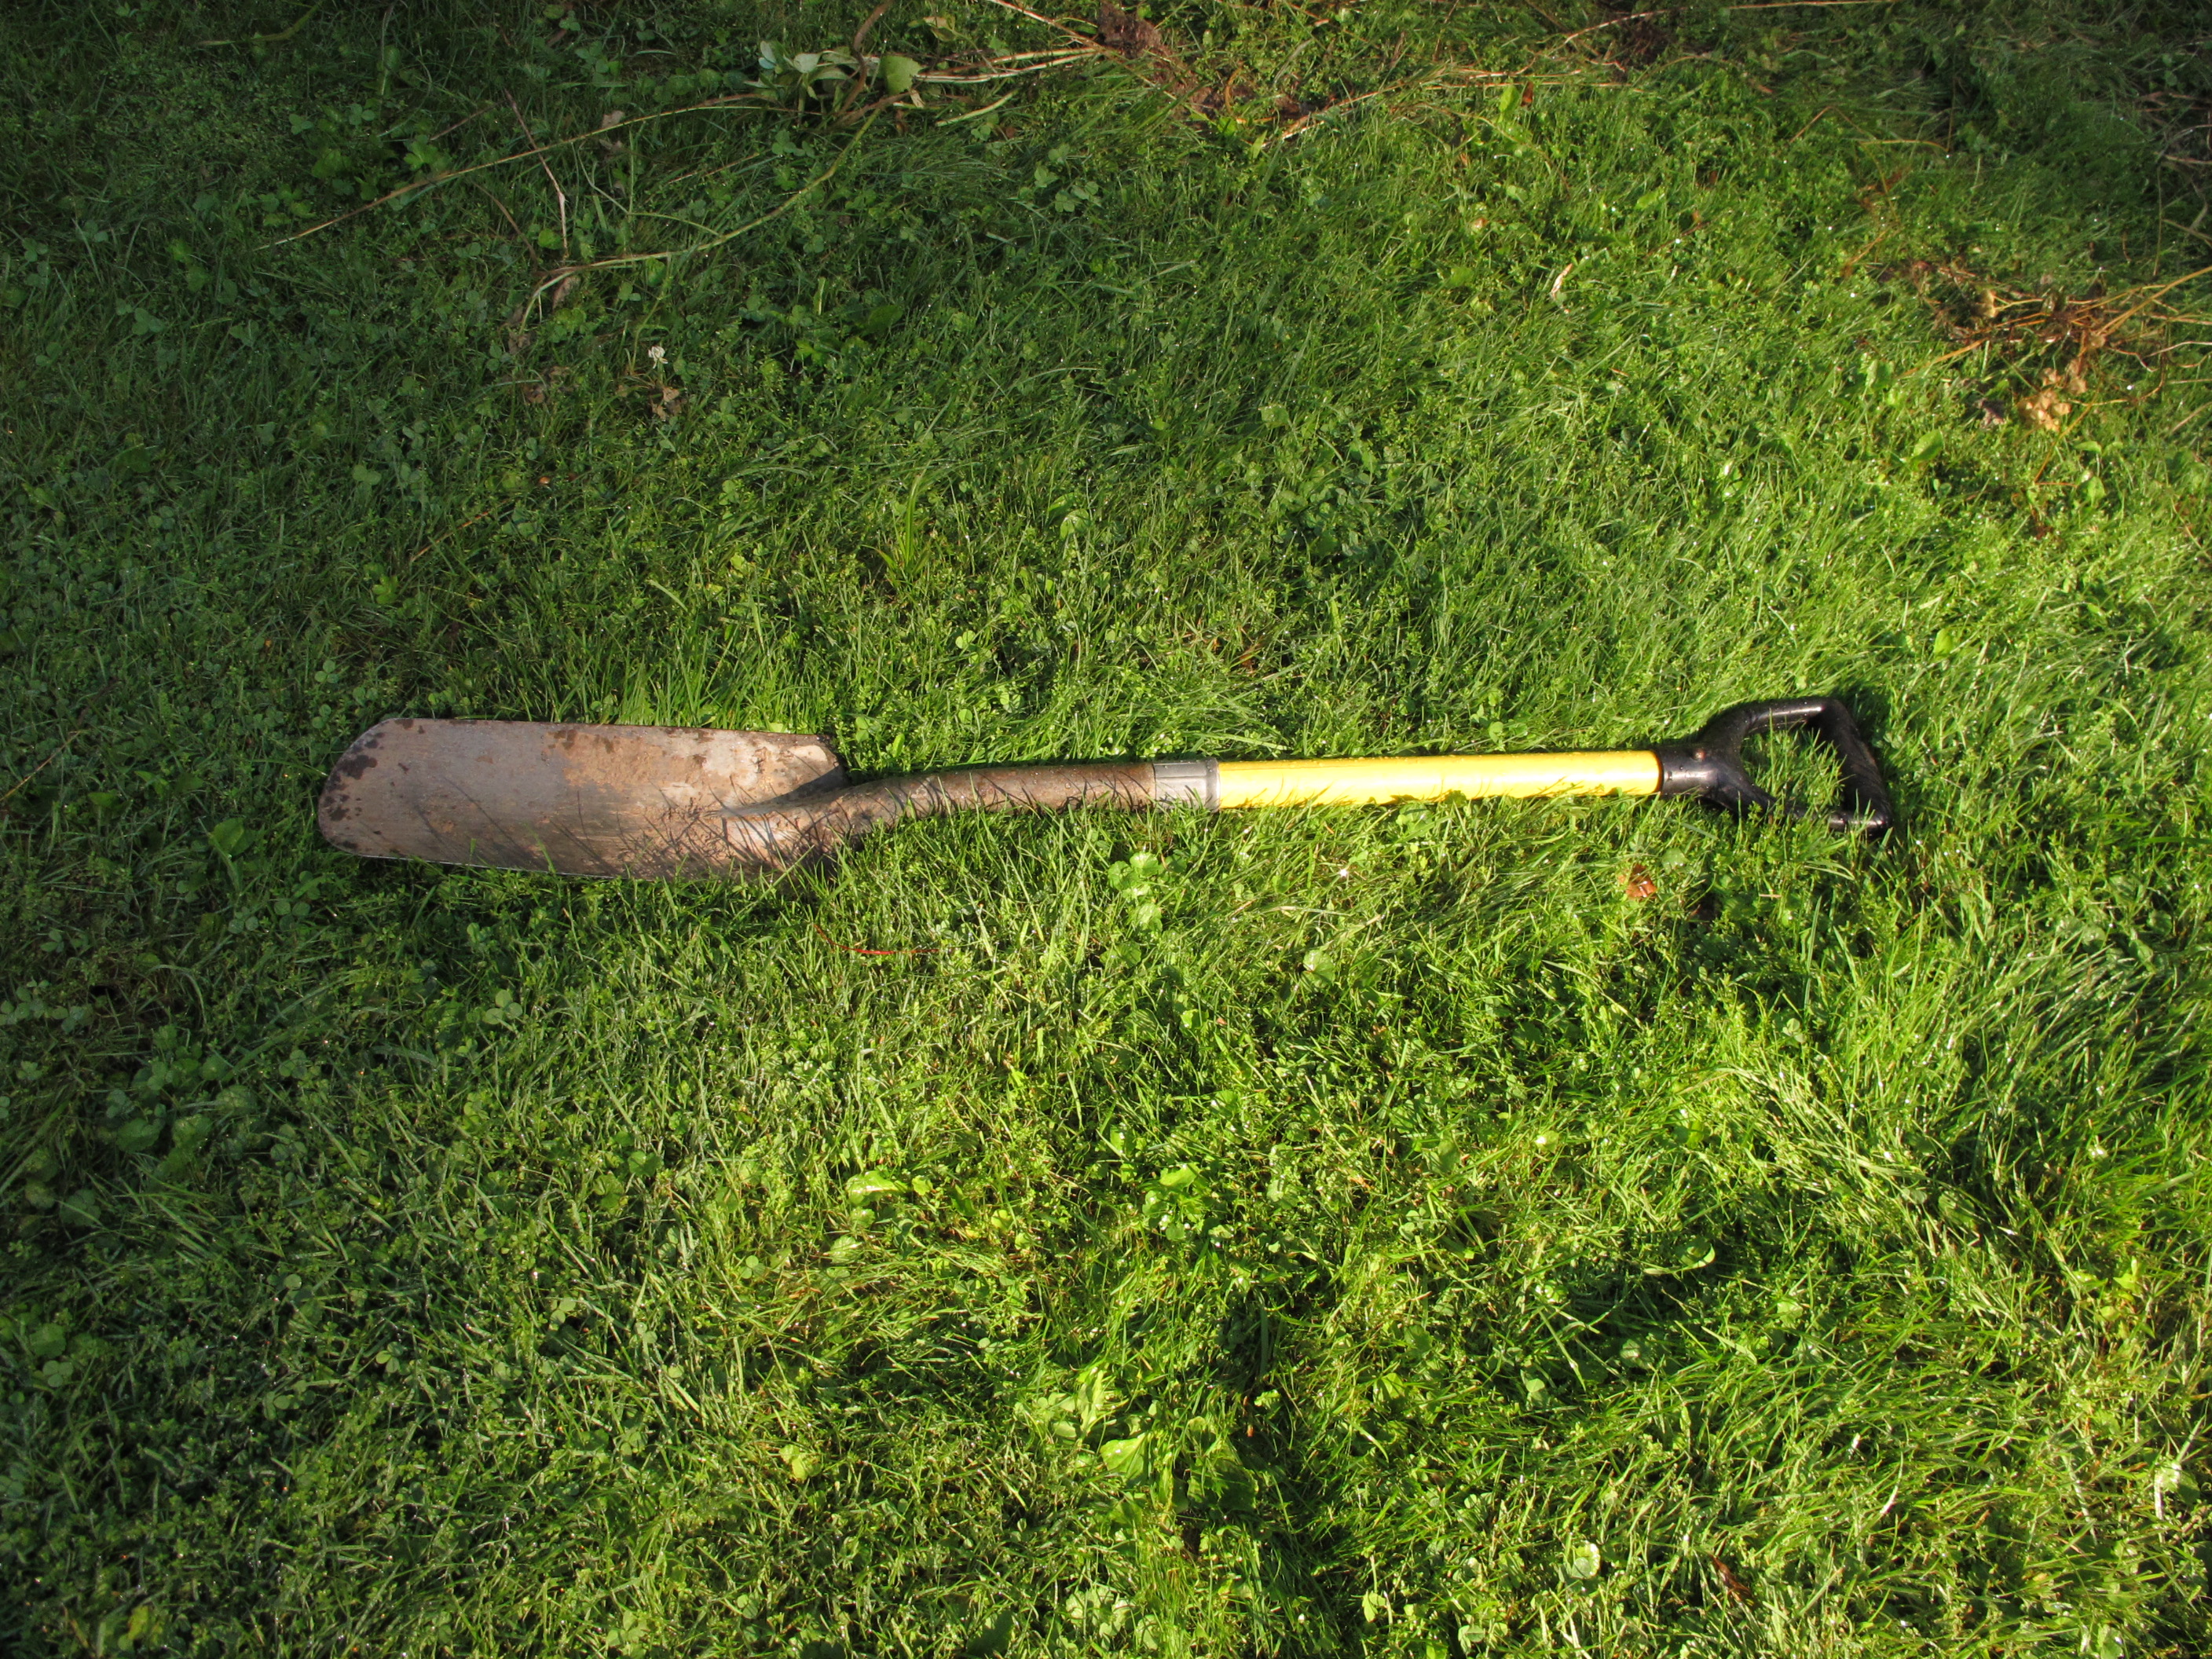
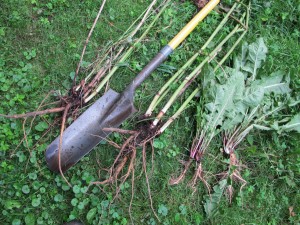
Drain spade
I used a drainspade to dig up that big daylily. This is a spade about 16 inches long and 6 inches wide. I pushed the spade into the soil at a 45 degree angle in 4 places around the perimeter. Each time it was fully inserted into the ground, I pushed down on the handle, lifting the clump a little. On the fourth and final push, I pried it out and carried it away.
At this time of year annuals are in short supply in most garden centers, but if you can find some, they are a great addition to the garden because most will bloom until frost. Just cut them back if they look ratty, and give them some liquid fertilizer.
Until recently, my window box by the front door was pretty pathetic. I yanked a lackadaisical dahlia and replaced it with a colorful pink ‘Superbena’. Superbenas are hybrids of annual verbenas that do very well in hot, dry locations like window boxes.
Potted plants can be used to spiff up the garden, too. I generally move all my potted plants outside in the summer, placing them on the north-facing deck. But when company comes, I am not above moving a few of the larger ones into the garden. I am careful not to put them in full sun, however, as they’ve been in a fairly shady location all summer and I could easily sunburn the leaves if I put them in too much sun. A nice clivia or papyrus in a decorative pot can be a nice addition to an otherwise drab location.
Last but least, mow the lawn the day before your mother-in-law or college roommate arrives. A well cut lawn is pleasing to the eye, especially if you use a push mower to go in all the corners, or use a string trimmer to do the edges. And it’s even okay to pay someone to do it. Then sit back, relax, and enjoy your property with your guests.
Henry Homeyer’s web site is www.Gardening-Guy.com. His is the author of 4 gardening books and a children’s book: Wobar and the Quest for the Magic Calumet.
Labor Savers
Posted on Wednesday, August 7, 2013 · Leave a Comment
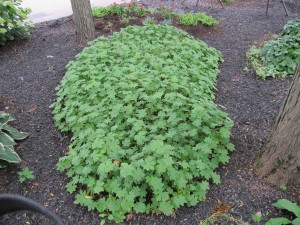
Geranium macrorrhizum
As I get older – I’m 67 – I sometimes wonder how long I will be able to keep on gardening at the level I do now. I have a large vegetable garden, fruit bushes and trees, many flower beds, a variety of decorative trees and shrubs – and some lawn. I have already accepted that it makes more sense to have a teenager mow the grass and to help me with some of the heavier drudgery of the garden. I am looking at ways to make less work for myself, and thought I might share a few labor-savers with you.
In the vegetable garden, mulch is my friend. It’s mid-summer, and some beds I have weeded more than once because I have not paid attention to my own dictum that mulching saves a lot of labor. But this has been a soggy summer, and there have been many days when I could not get in the garden because the ground was water-logged. And some days I almost could have kayaked down the pathways of my garden. So I did not get my mulching done early. Even when I could have mulched, I didn’t because soil looses more moisture when exposed to the sun, and I needed to let the soil dry out.
This past week I have made a real effort to weed the vegetable garden and put down mulch. My basic technique is to weed, then cover the area weeded with something to keep the sun from reaching weeds that surely will germinate. I like newspapers covered with straw or mulch hay. Six pages of this paper covered with straw will prevent most weeds and grasses from growing. This year I got some jute coffee bags to use for mulching the pathways, and I like them, too.
Weeds in walkways can spread to the beds by root or seed, so keeping them weed-free is a great boon to the tired or over-ambitious gardener. Last fall I planted grass seed in some rows, and mow it. But the width of the mower required that I space beds farther apart than I usually do. And it is awkward to get the mower around corners of rows. So it is not a perfect solution, though it looks great if you have the space to maintain nice mowed paths.

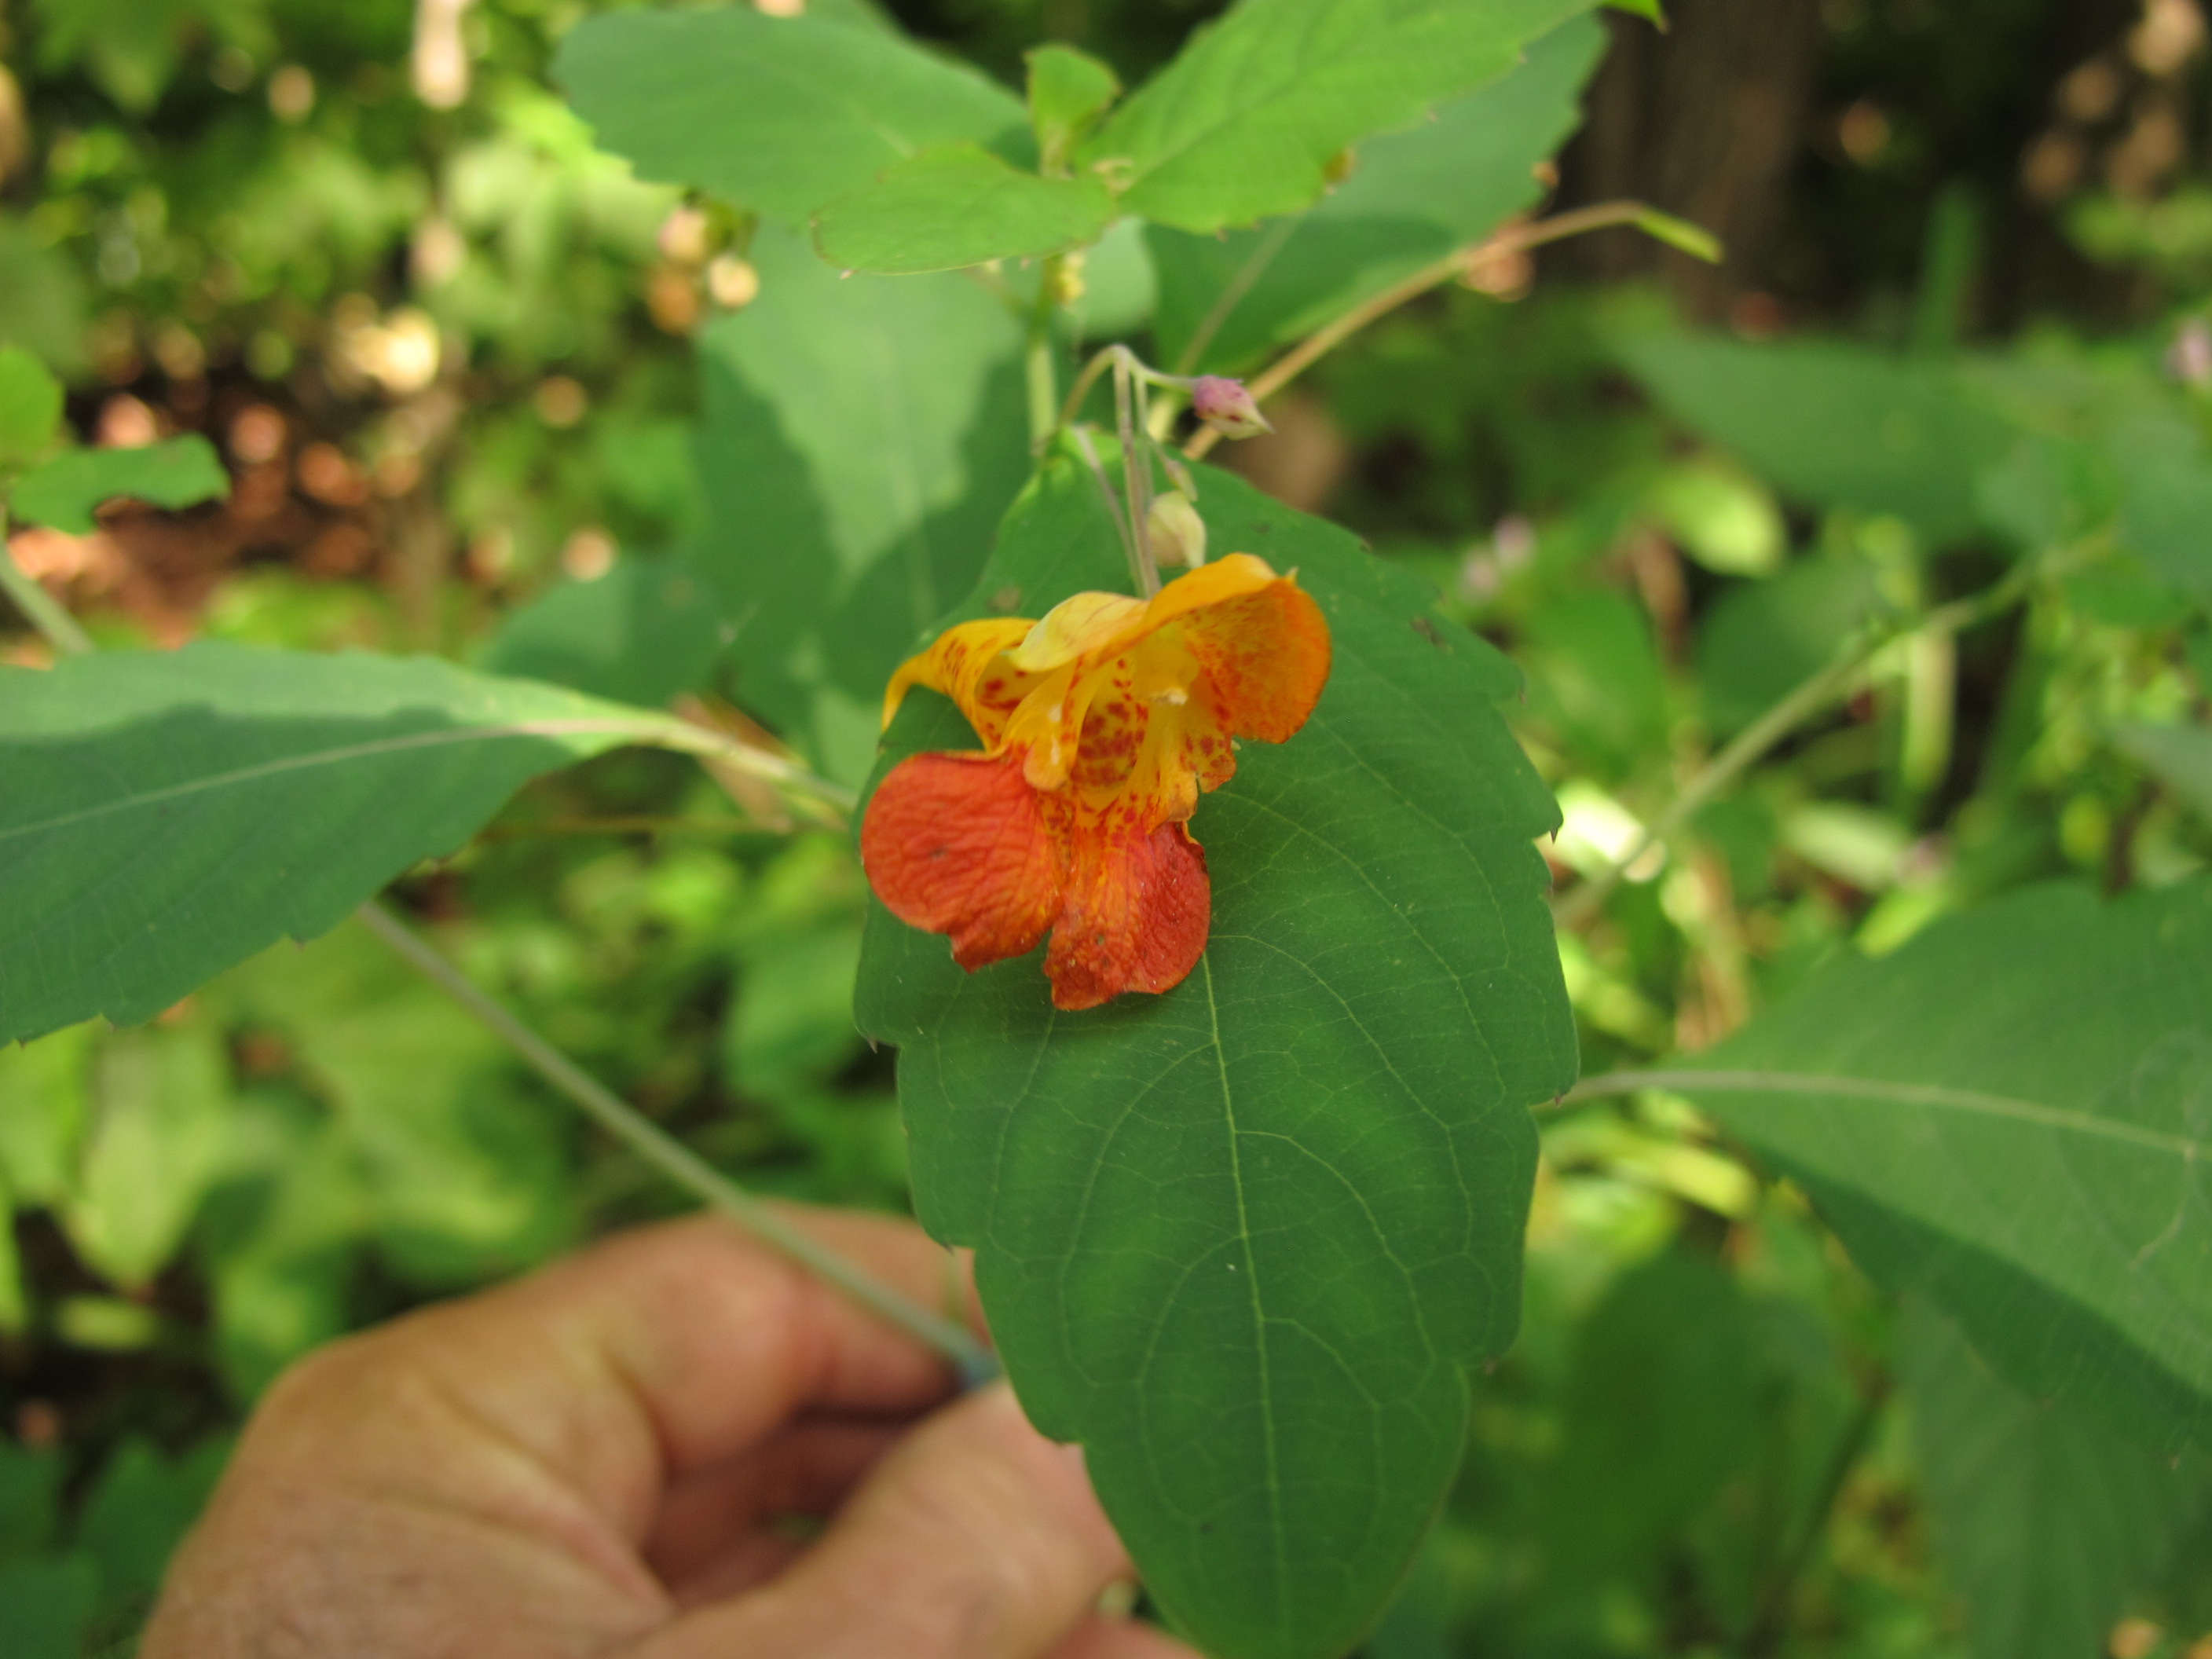
Jewelweed
It’s tough to find good weeders to help. But a teenager can do a nice job if you just teach her to identify and pull one or two particular species of troublesome weeds. So I have someone just working on jewelweed, also called touch-me-not (Impatience capensis). It is a tall weed with orange or yellow flowers and a hollow, watery stem. It generally grows in shade or part shade. It’s not a perennial so it has a relatively small root system that pulls easily.
Jewelweed’s other common name, touch-me-not, does not indicate any poisonous properties. It has to do with the fact that ripe seed pods have built-in springs that will propel seeds some distance. Lightly squeeze a pod, and good-sized green seeds go flying.
For the past decade I‘ve been ignoring touch-me-not because my grandchildren enjoy squeezing the pods. Doing so always provokes a giggle. But over time, more and more touch-me-not has appeared, and recently I declared war on it. The plants are just starting to bloom for me, so I must get them – now! This will not preclude having some plants next year or the year after, as most seeds of garden plants are good for 3 years (and weed seeds may last even longer). There must be plenty of seeds already in my soil. So Rule #1 of reducing work in the garden: Get rid of weeds before they scatter their seeds.
Some groundcovers can be great weed inhibitors in flower beds. Others spread so fast that they become weed-like themselves. If you want to plant groundcovers, be sure to weed the area well before planting them. Get not only the tops of your weeds, but their roots as well. Use a weeding tool that can get underneath a weed, loosen the soil, and lift the entire root system. I like the CobraHead weeder for that task.
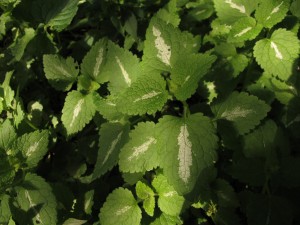
Lamium
There are lots of good groundcovers – too many to mention them all here. For dry shady areas, I like dead nettles (which I call by its scientific name, Lamium, because it is not related to stinging nettles). It has pink or white flowers reminiscent of snapdragons, and some varieties have nice silver and green leaves. It spreads and grows densely enough to keep many weeds from starting up under and between the plants.
Bigfoot geranium (Geranium macrorrhizum) is another good one. It’s not related to your mother’s potted red geranium (which is actually not a geranium but a Pelargonium). It makes a very dense mound of leaves a foot tall or more. It blooms in early summer, but I grow it for the foliage and because it shades out most things. And it will grow in dense, dry shade – or full sun.
Lungwort (Pulmonaria spp.) spreads by root in either sun or shade, as does lily of the valley (Convalaria majalis). I like the former, but find the latter a bit too aggressive to keep.
There are many ways to save labor, but most important of all is getting rid of any weed that is blooming now. It will save you labor later.
Henry Homeyer is a gardening consultant and the author of 4 gardening books. His Web site is www.Gardening-Guy.com.
Hydrangeas
Posted on Wednesday, July 31, 2013 · Leave a Comment
Although I think of August as the month for hydrangeas, there are many kinds and some have been blooming for weeks while others are still in bud. Coming on now for me is the PeeGee (from the scientific name, Hydrangea paniculata grandifolia). I’ve had one for 20 years or so, and I love it.
Like all mid-and late-summer bloomers, PeeGee hydrangeas bloom on “new wood” – this year’s growth. Mine sends out perhaps a hundred 2 to 3-foot long stems, each with a big white panicle made up of hundreds of little flowers. Over time, the white changes to pink on many, and frost turns the panicles brown.
The flowers clusters on my PeeGee hydrangea are so big that their pencil-thick stems often cannot hold them up when they’re in full bloom. The flowers bend down the stems, particularly after a rain. Some years I snip off the tips of the panicles with pruning shears before they get to full size. This lessens the weight and the stems do not bend so much. The shrub is 8-10 feet tall and wide.
In one sense, the PeeGee hydrangeas are like daylilies: they will bloom every year, no matter what. They do best in full sun, but put will still on a good show in part shade. It prefers rich, moist, well drained soil – but will grow anywhere.
Another variety of hydrangea is the ‘Tardiva’ type. The flower panicles contain fewer florets and are a mix of fertile and infertile blossoms. The infertile ones have wider petals, and help to attract pollinators with their looks. The panicles are longer and more tapered than PeeGee hydrangeas, and rarely flop, even when wet. I have a cultivar named ‘Pink Diamond’ that I just love. It fades to a light pink. ‘Pinky Winky’ is another nice one that develops a deeper pink color.

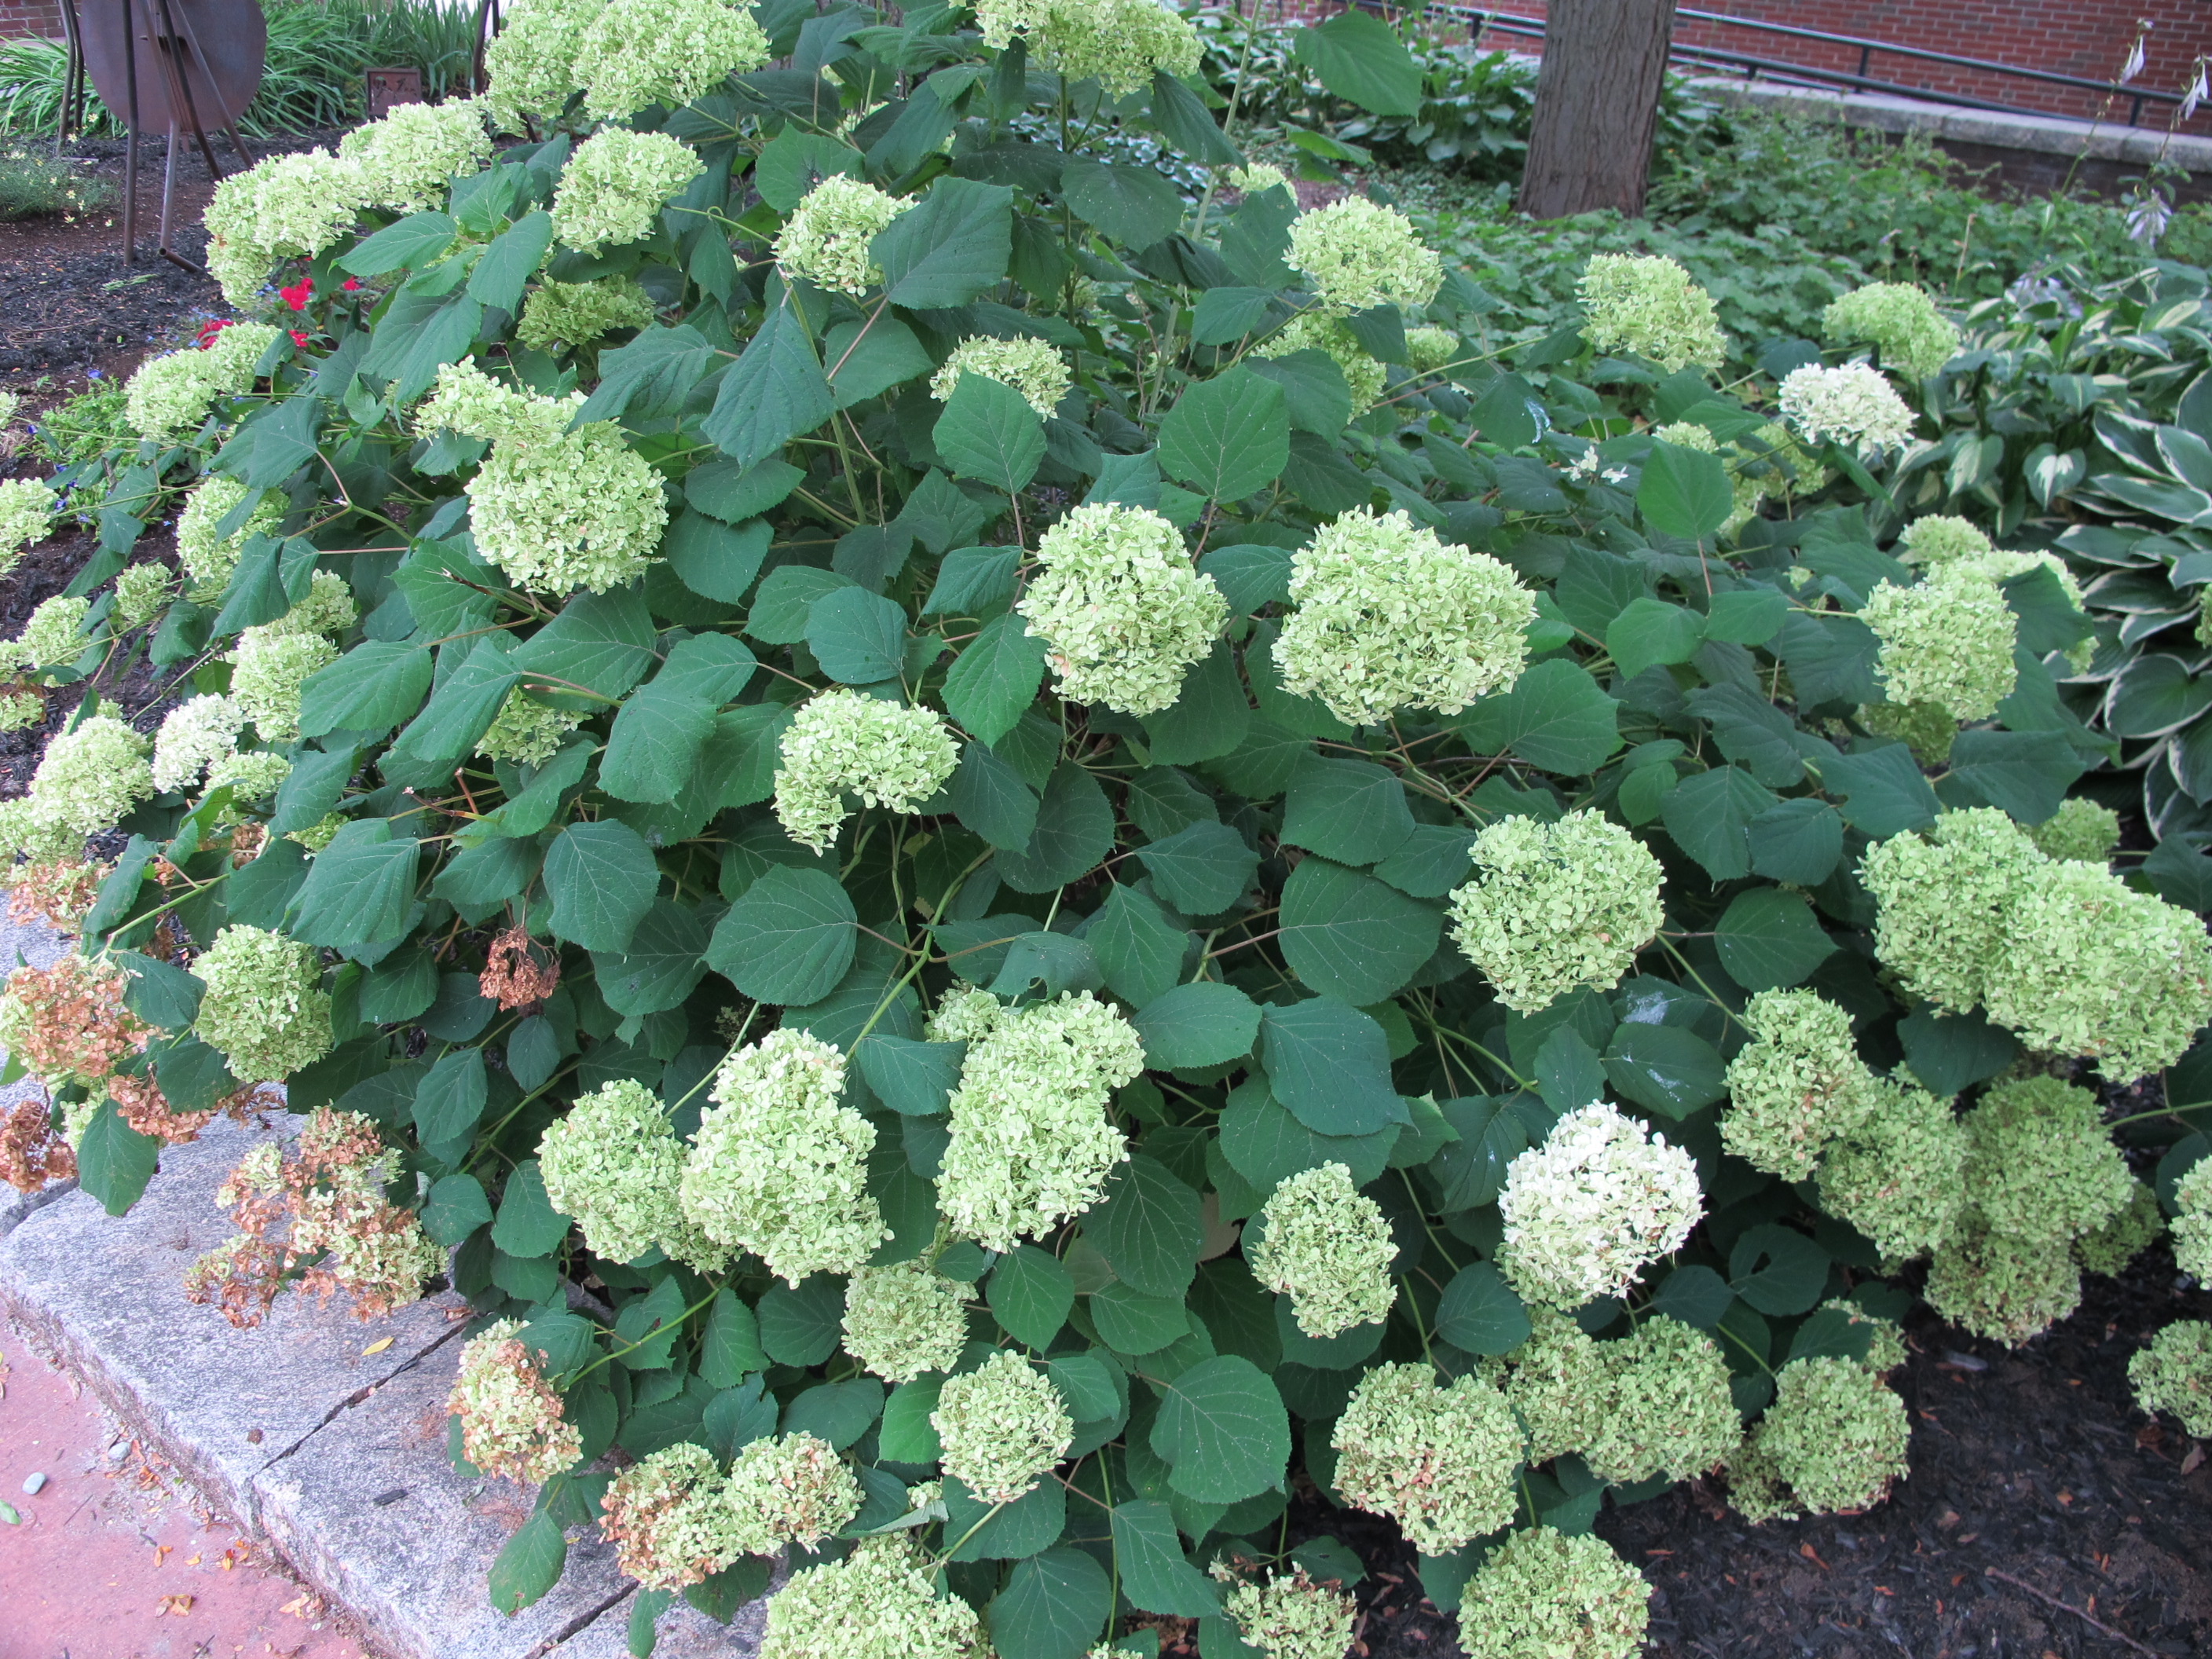
‘Snow Hill’ Hydrangea arborescens
The smooth hydrangea (H. arborescens) is another popular hydrangea, and one that will bloom well in shade. I particularly like ‘Snow Hill,’ which flowers well even in deep shade, and which produces nice small to medium-sized panicles that rarely flop. More popular, however, is ‘Annabelle’ because it produces huge flower panicles. But this variety always flops, especially after a rain, and I think they look as messy as an unmade bed. Annabelle is often used in perennial beds, even in full sun. In full sun it may require regular watering. The flowers start green, then go to white, and finally to brown, putting on a nice show for 6-8 weeks. The smooth hydrangea can be cut to the ground each fall or early winter and allowed to start anew each spring. I cut back ‘Snow Hill’ each fall, but do not cut it to the ground.
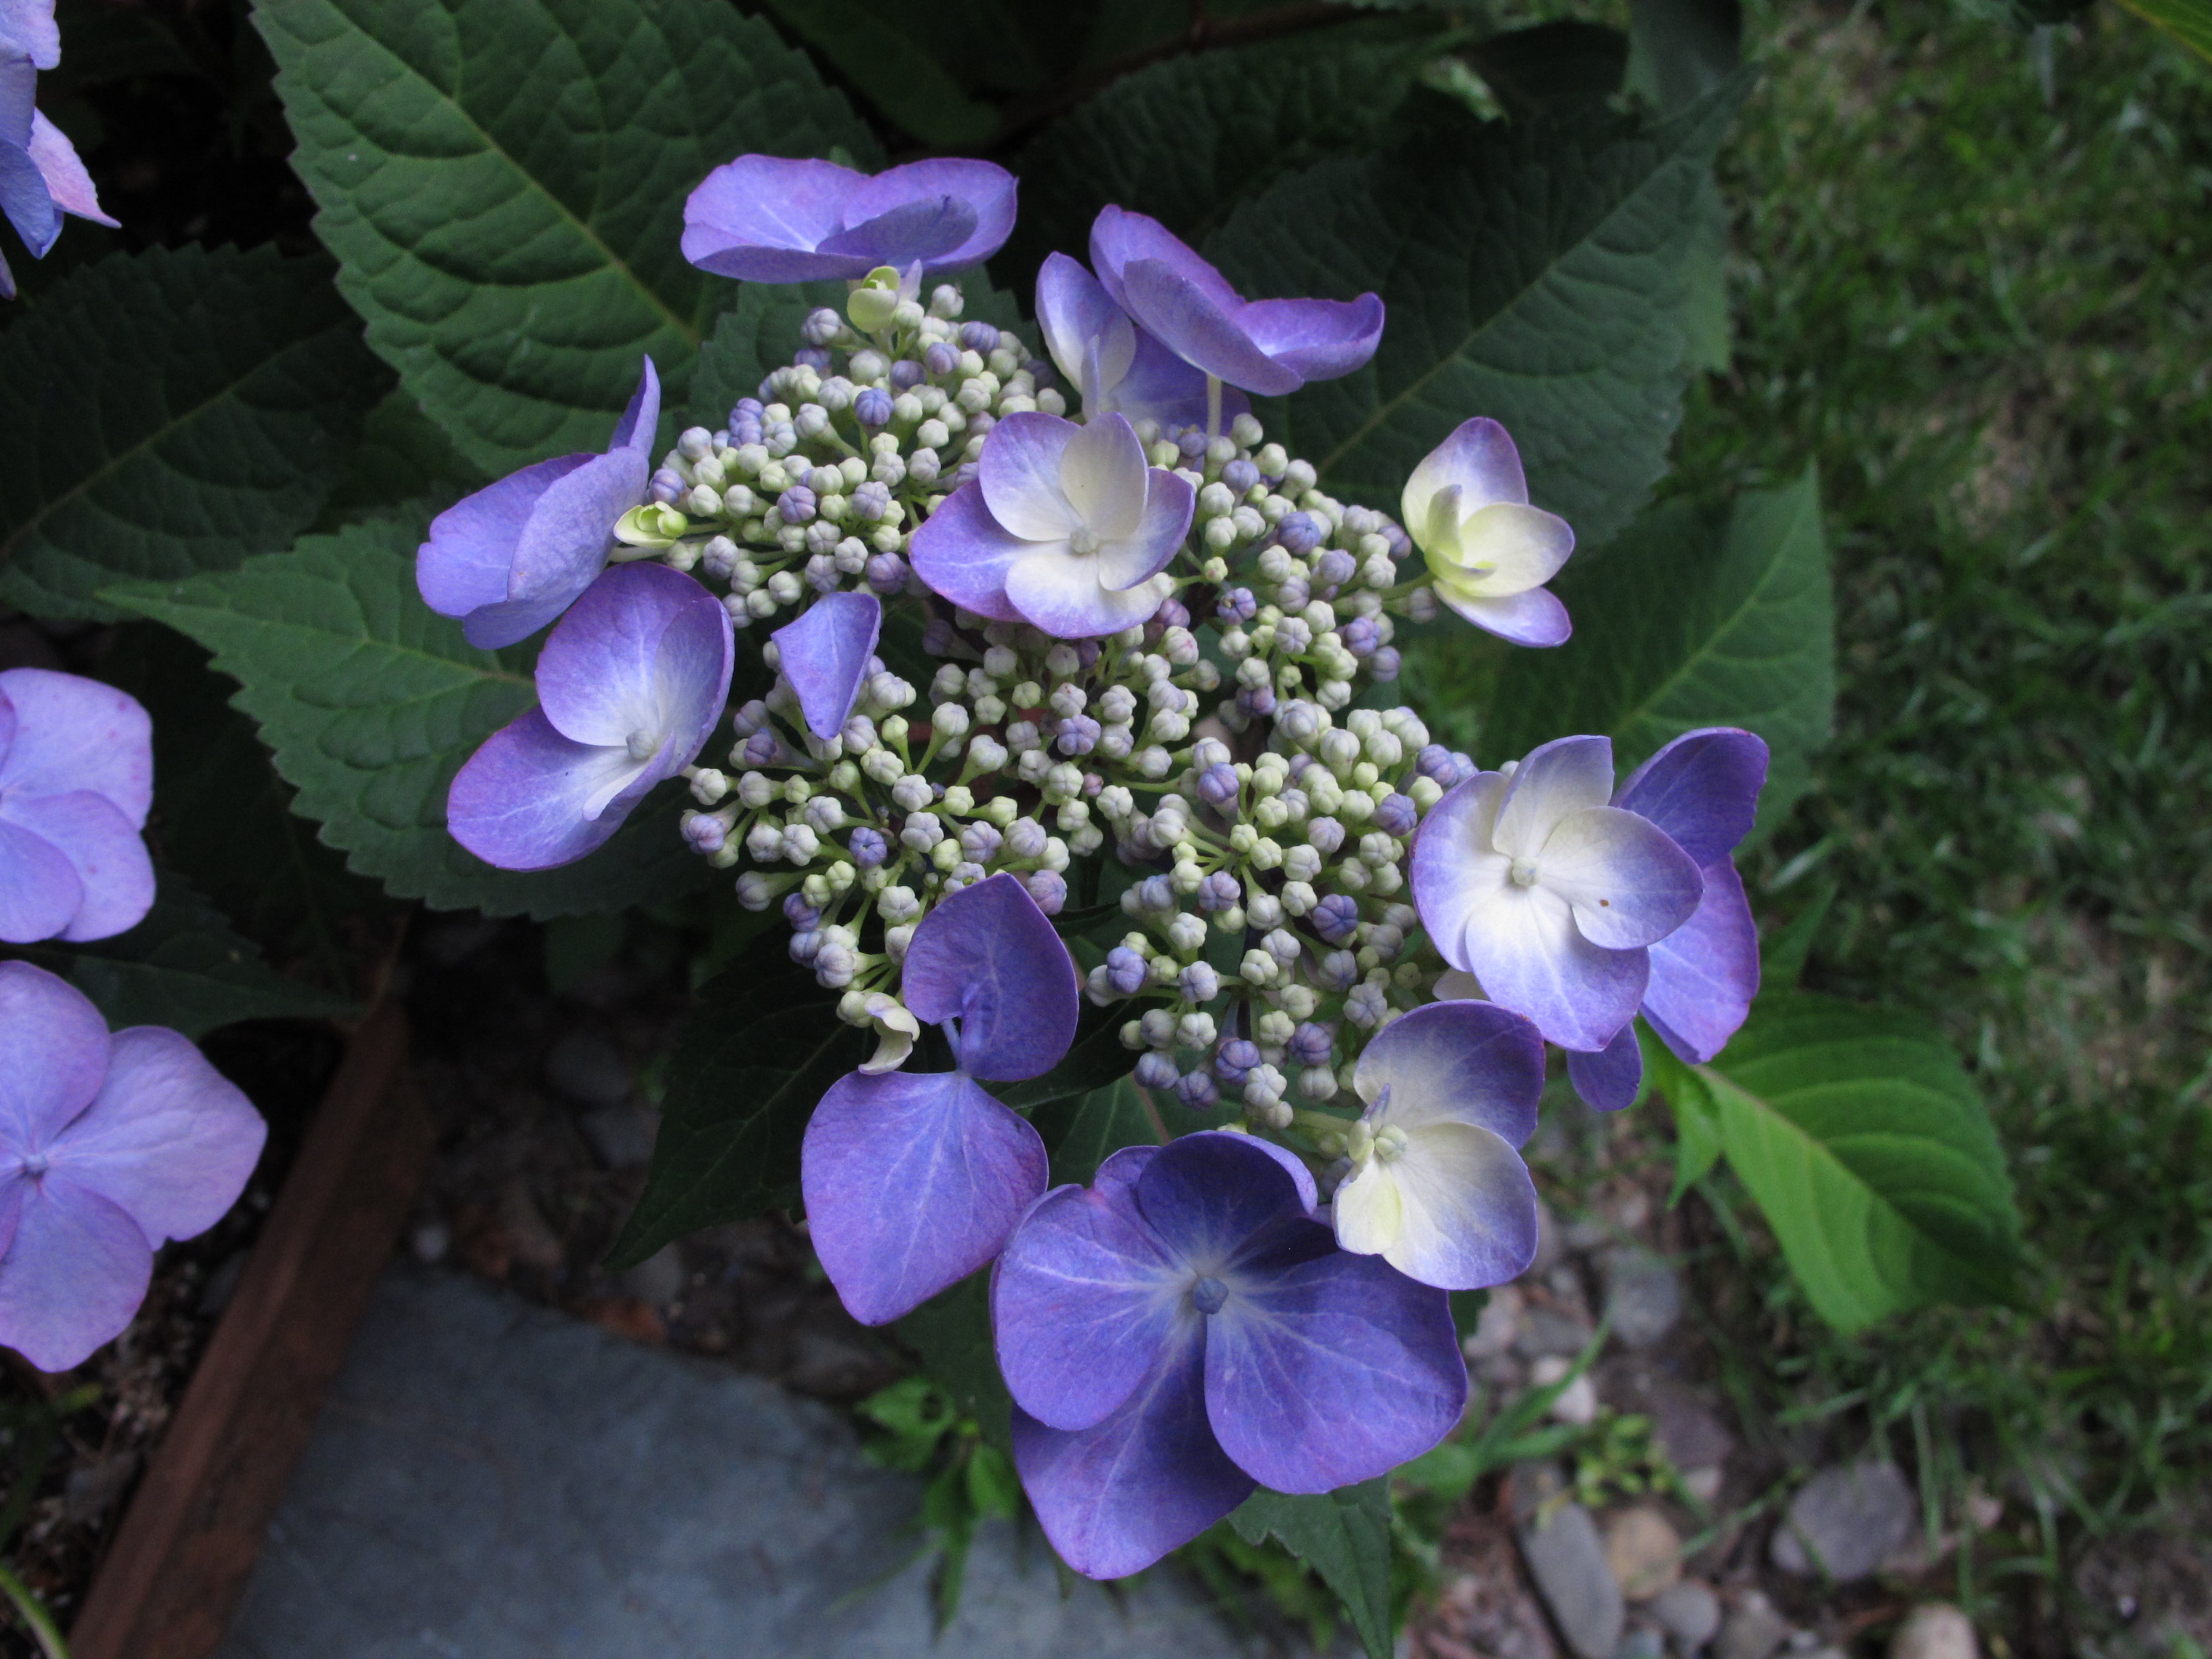
For those of us in cold climates, the blue or pink hydrangeas are best considered as annuals. Yes, many will survive a Zone 4 winter, but most times they will not produce many flowers after the first year. They are called bigleaf hydrangeas (H. macrophylla) for their handsome foliage, but we buy them for the color.
Bigleaf hydrangeas need very acidic soil (pH of 5.0 to 5.8) to have blue flowers, and a pH of 6.0 to 6.5 to be pink. On planting, you can add soil acidifier to get the blue color or limestone to get pink. Most blue ones come with some acidifier –usually sulfur- in the soil, but it goes away after a while.
Several years ago there was a huge fuss made over a variety of bigleaf hydrangea called ‘Endless Summer’ that was promised to thrive in Zone 4 (despite winters of minus 30 degrees). I often refer to it as ‘Endless Disappointment’ as I have tried it twice, and after Year #1 have only gotten a few blossoms very late in the summer.

Twist and Shout
This year I was given a nice blue one called ‘Twist and Shout’ At the website, it noted that it is a hybrid developed by Michael Dirr, one of America’s most noted horticulturists, and the author of the book I depend on to learn about trees and shrubs: Manual of Woody Landscape Plants: Their Identification, Ornamental Characteristics, Propagation and Uses.
I have my Twist and Shout in a large self watering container by the front door, but now that I know it was developed by Professor Dirr, I shall acidify a spot in full sun and plant it in the ground in the fall. The website says it is a re-bloomer, so does not just bloom on buds set the summer before, but on new wood, too.
Climbing hydrangea
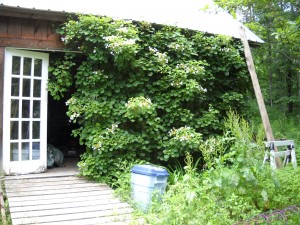
Another great hydrangea that I grow is the climbing hydrangea (H. anomala subspecies petiolaris). It can take up to six years for a small plant to get established and start growing, but then it takes off and grows like mad. It is a vine that will thrive in shade, though it also can grow in sun, if provided adequate moisture. The north or east side of a building is perfect. It easily attaches to brick, stone or trees, but needs help to grow on a wood building. Mine sends flower shoots out horizontally and can support its handsome flowers without flopping 3 feet or more from the barn.
Henry Homeyer can be reached at P.O. Box 364, Cornish Flat, NH 03746 or at henry.homeyer@comcast.net. He is the author of 4 gardening books, and a children’s fantasy-adventure about a boy and a cougar called Wobar and the Quest for the Magic Calumet.
Rock Gardens
Posted on Wednesday, July 24, 2013 · Leave a Comment
Many plants that do well in rock gardens originally come from places with extreme growing conditions such as deserts or the rocky slopes of mountains. Most have tight foliage, low profiles and deep tap roots to keep from blowing away when the wind blows. But generally in those difficult locations, pollinators are few and far between. In order to attract them, these plants favor big flowers (in relation to the size of the plants), bright colors and strong scents. “Hey, it’s me! Come visit!” they seem to be saying with their floral displays. And those flowers also attract gardeners who are willing to tend them, pull weeds and build soils to their particular needs.
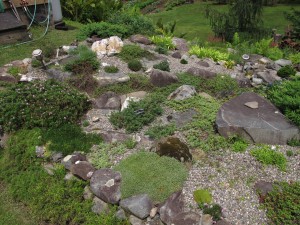
Rock garden overview
I recently visited Lisa Palmer and Dan Drew in Plainfield, NH where they have a splendid rock garden. In fact, Lisa is so avid a rock gardener that she was one of just 5 Americans who attended the Second International Rock Garden Society’s meetings in Czech Republic this May.
I asked Lisa what is critical for success with a rock garden. Without pausing to think, she said, “Perfect drainage.” Rich soil and lots of compost? Save it for the veggies. Good rock gardens are made with sandy soil and very little organic matter.
Seventeen years ago Lisa and Dan started a rock garden after they had an artesian well drilled which provided them with plenty of sand and ground rock. Dan enjoys hard physical labor, so he agreed to dig out the existing soil in the area where the rock garden was planned and spread the sandy, gravelly mess.
Dan dug out 18 inches of soil, replacing it with coarse sand and gravel. He also moved some good –sized river stones up to the garden, which gave it some “bones” to work with. Their subsoil was well drained and somewhat sandy, which was good for a rock garden. Lisa explained that you must work with what you have. If you have a heavy clay soil and live in a low place, you can’t easily create a rock garden.
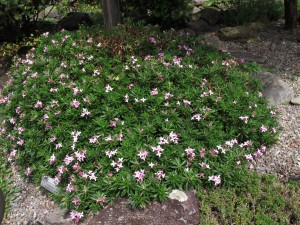
Daphne x schlyteri
Many of the plants in the rock garden of Dan and Lisa are related to plants I know, but not species I can grow in my rich garden soil. They have a number of kinds of daphne including rose daphne (Dapne cneorum) and a lovely hybrid in bloom right now, Daphne x schlyteri. This is an evergreen daphne that grows to just 8 to 12 inches tall and roughly twice as wide – much smaller than the daphne I grow. The leaves are narrow and dark green; they grow out from each stem like spokes on a series of increasingly large wheels. The flowers are small, pink and highly fragrant.
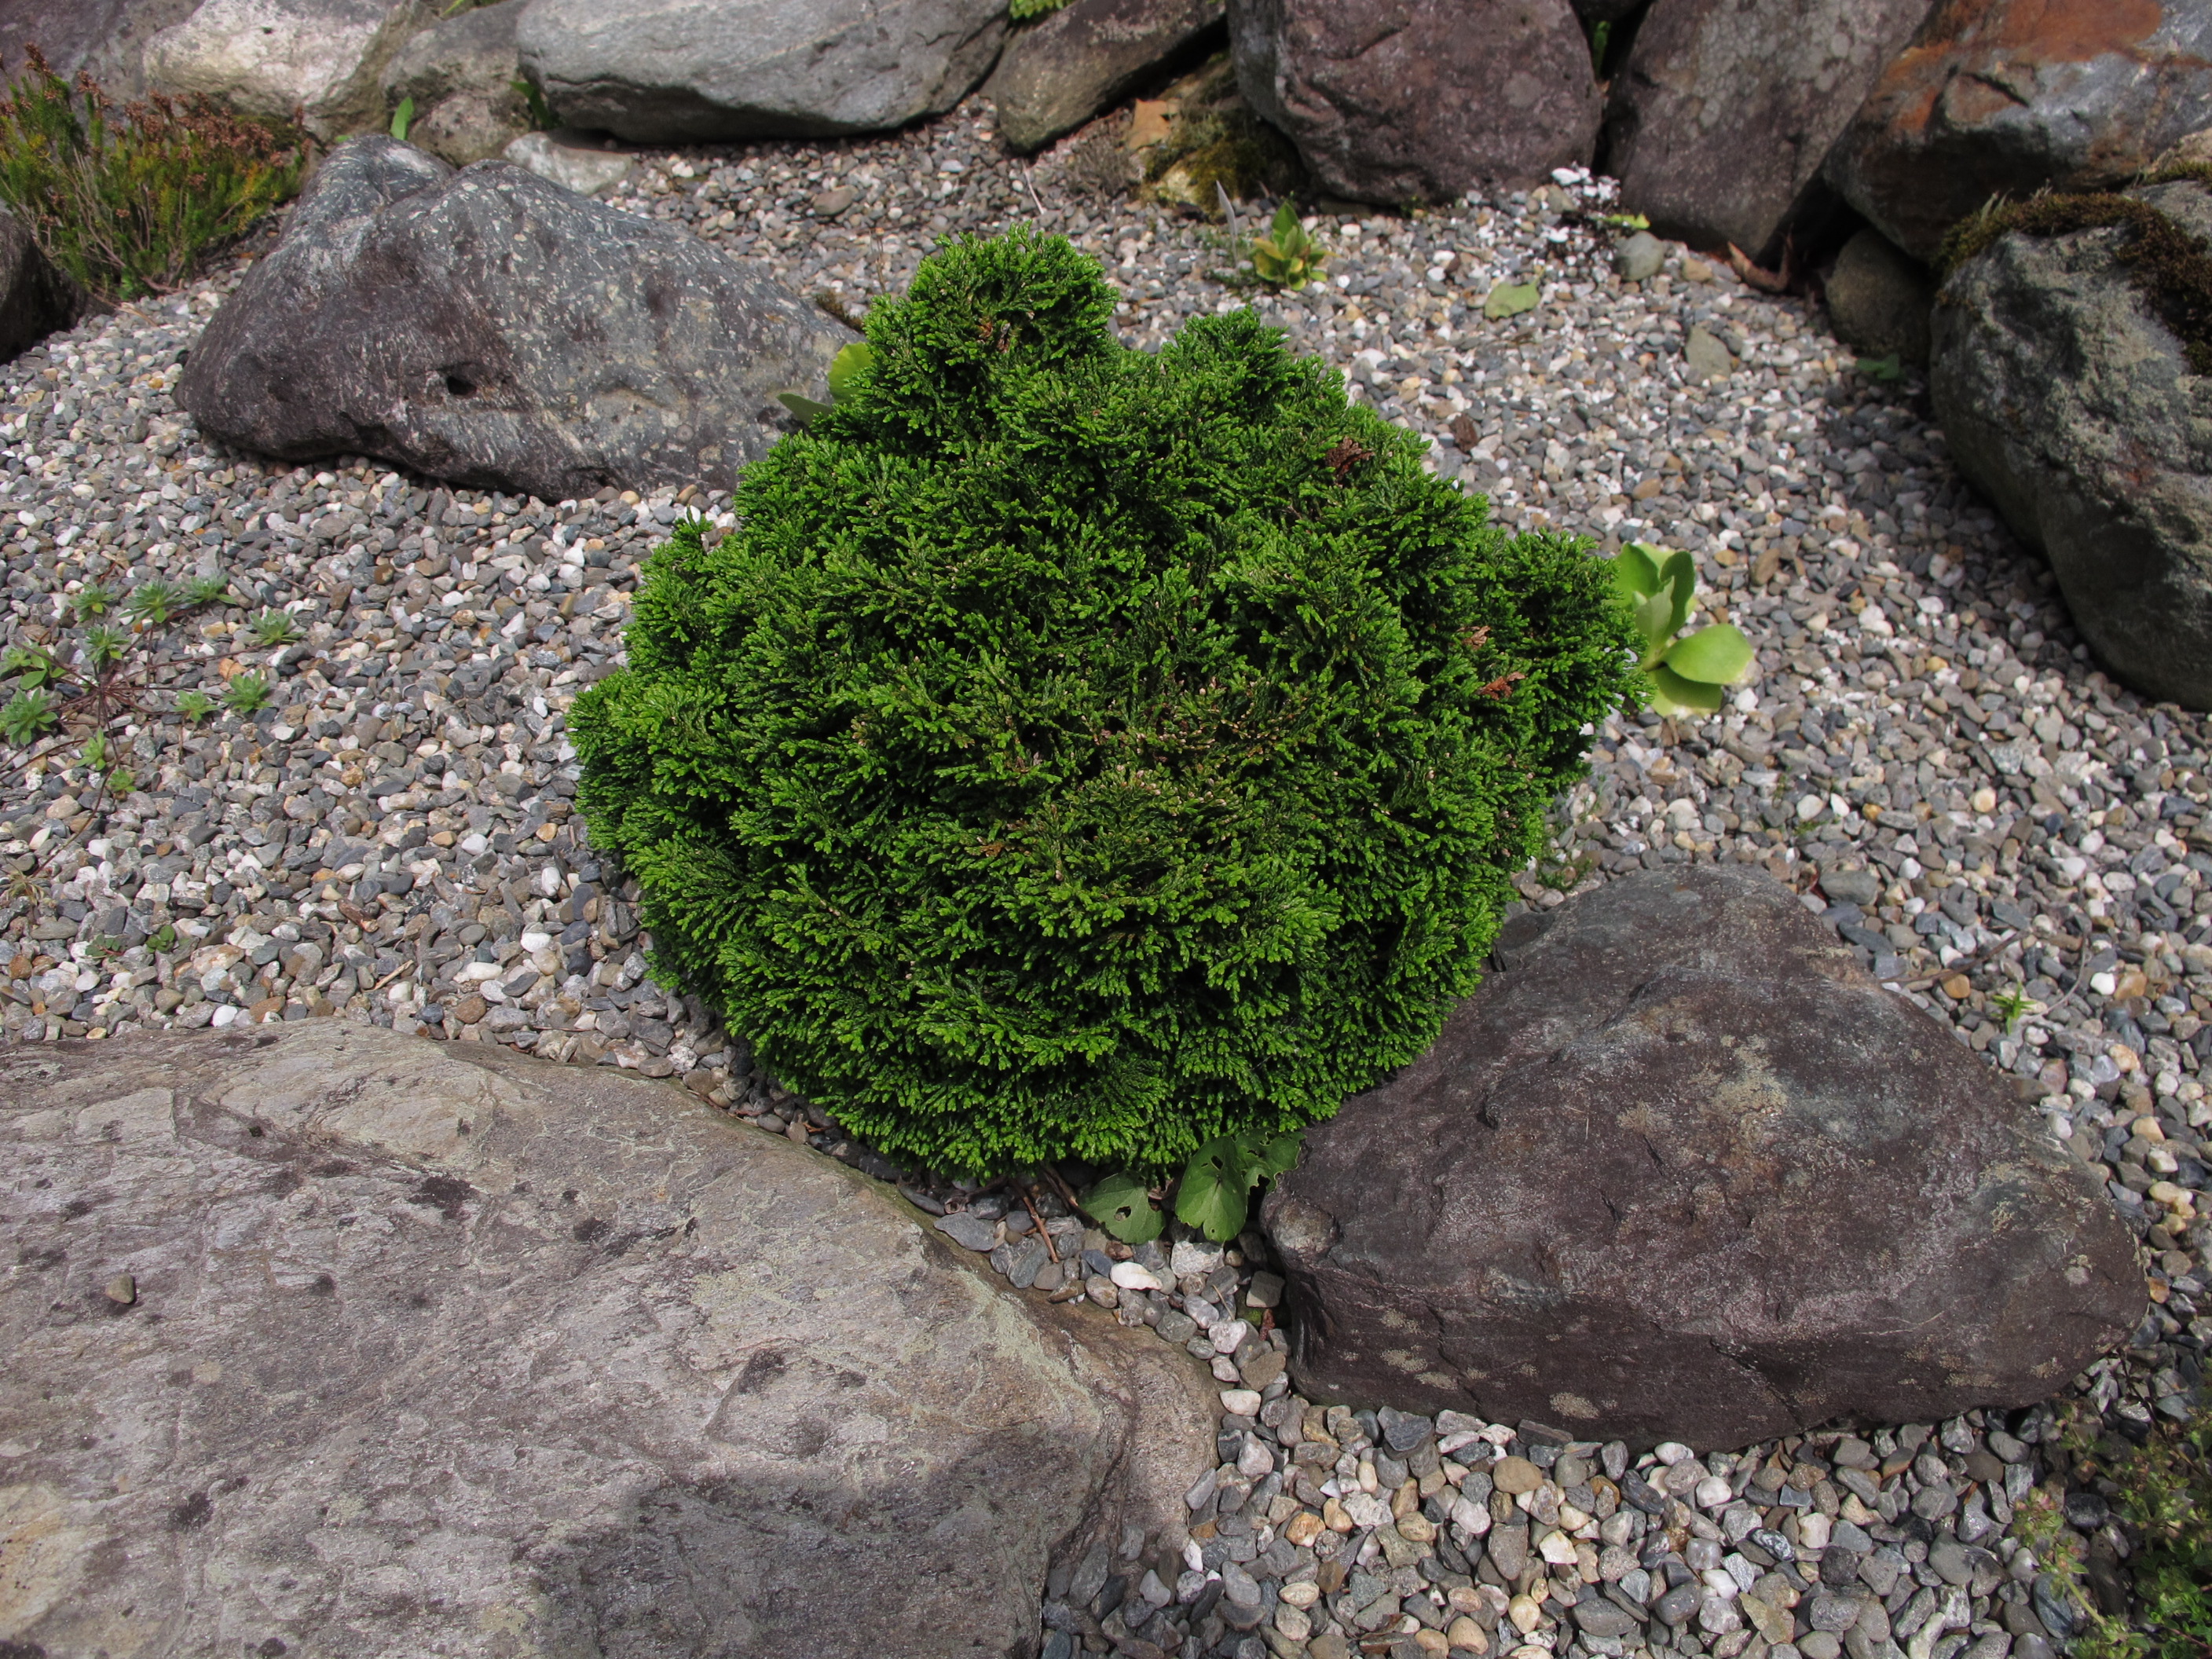
Dwarf conifers are the backbone of many rock gardens as they are slow growing and are as beautiful in winter as they are in summer – and perhaps more so, as they contrast nicely against the snow. One that Lisa and Dan use effectively is hinoki cypress, also called hinoki falsecypress (Chamaecyparis obtusa ‘Nana’).Whenever you see “Nana” in a scientific name ti means that the plant stays small – just like my grandmother, who we called Nana.
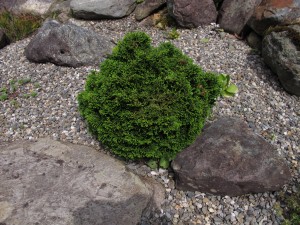
Hinoki cypress
Hinoki cypress reminds me of a something from the sea, perhaps a type of coral or seaweed. Its dark green foliage forms twisting fan-shaped little branches in dense tiered layers. It is hardy to Zone 4 – if it has the proper growing conditions: moist, well drained soil. It can grow to a foot or two tall and up to three feet wide. I’ve tried growing it without success – I somehow can’t plant something and not give it compost.
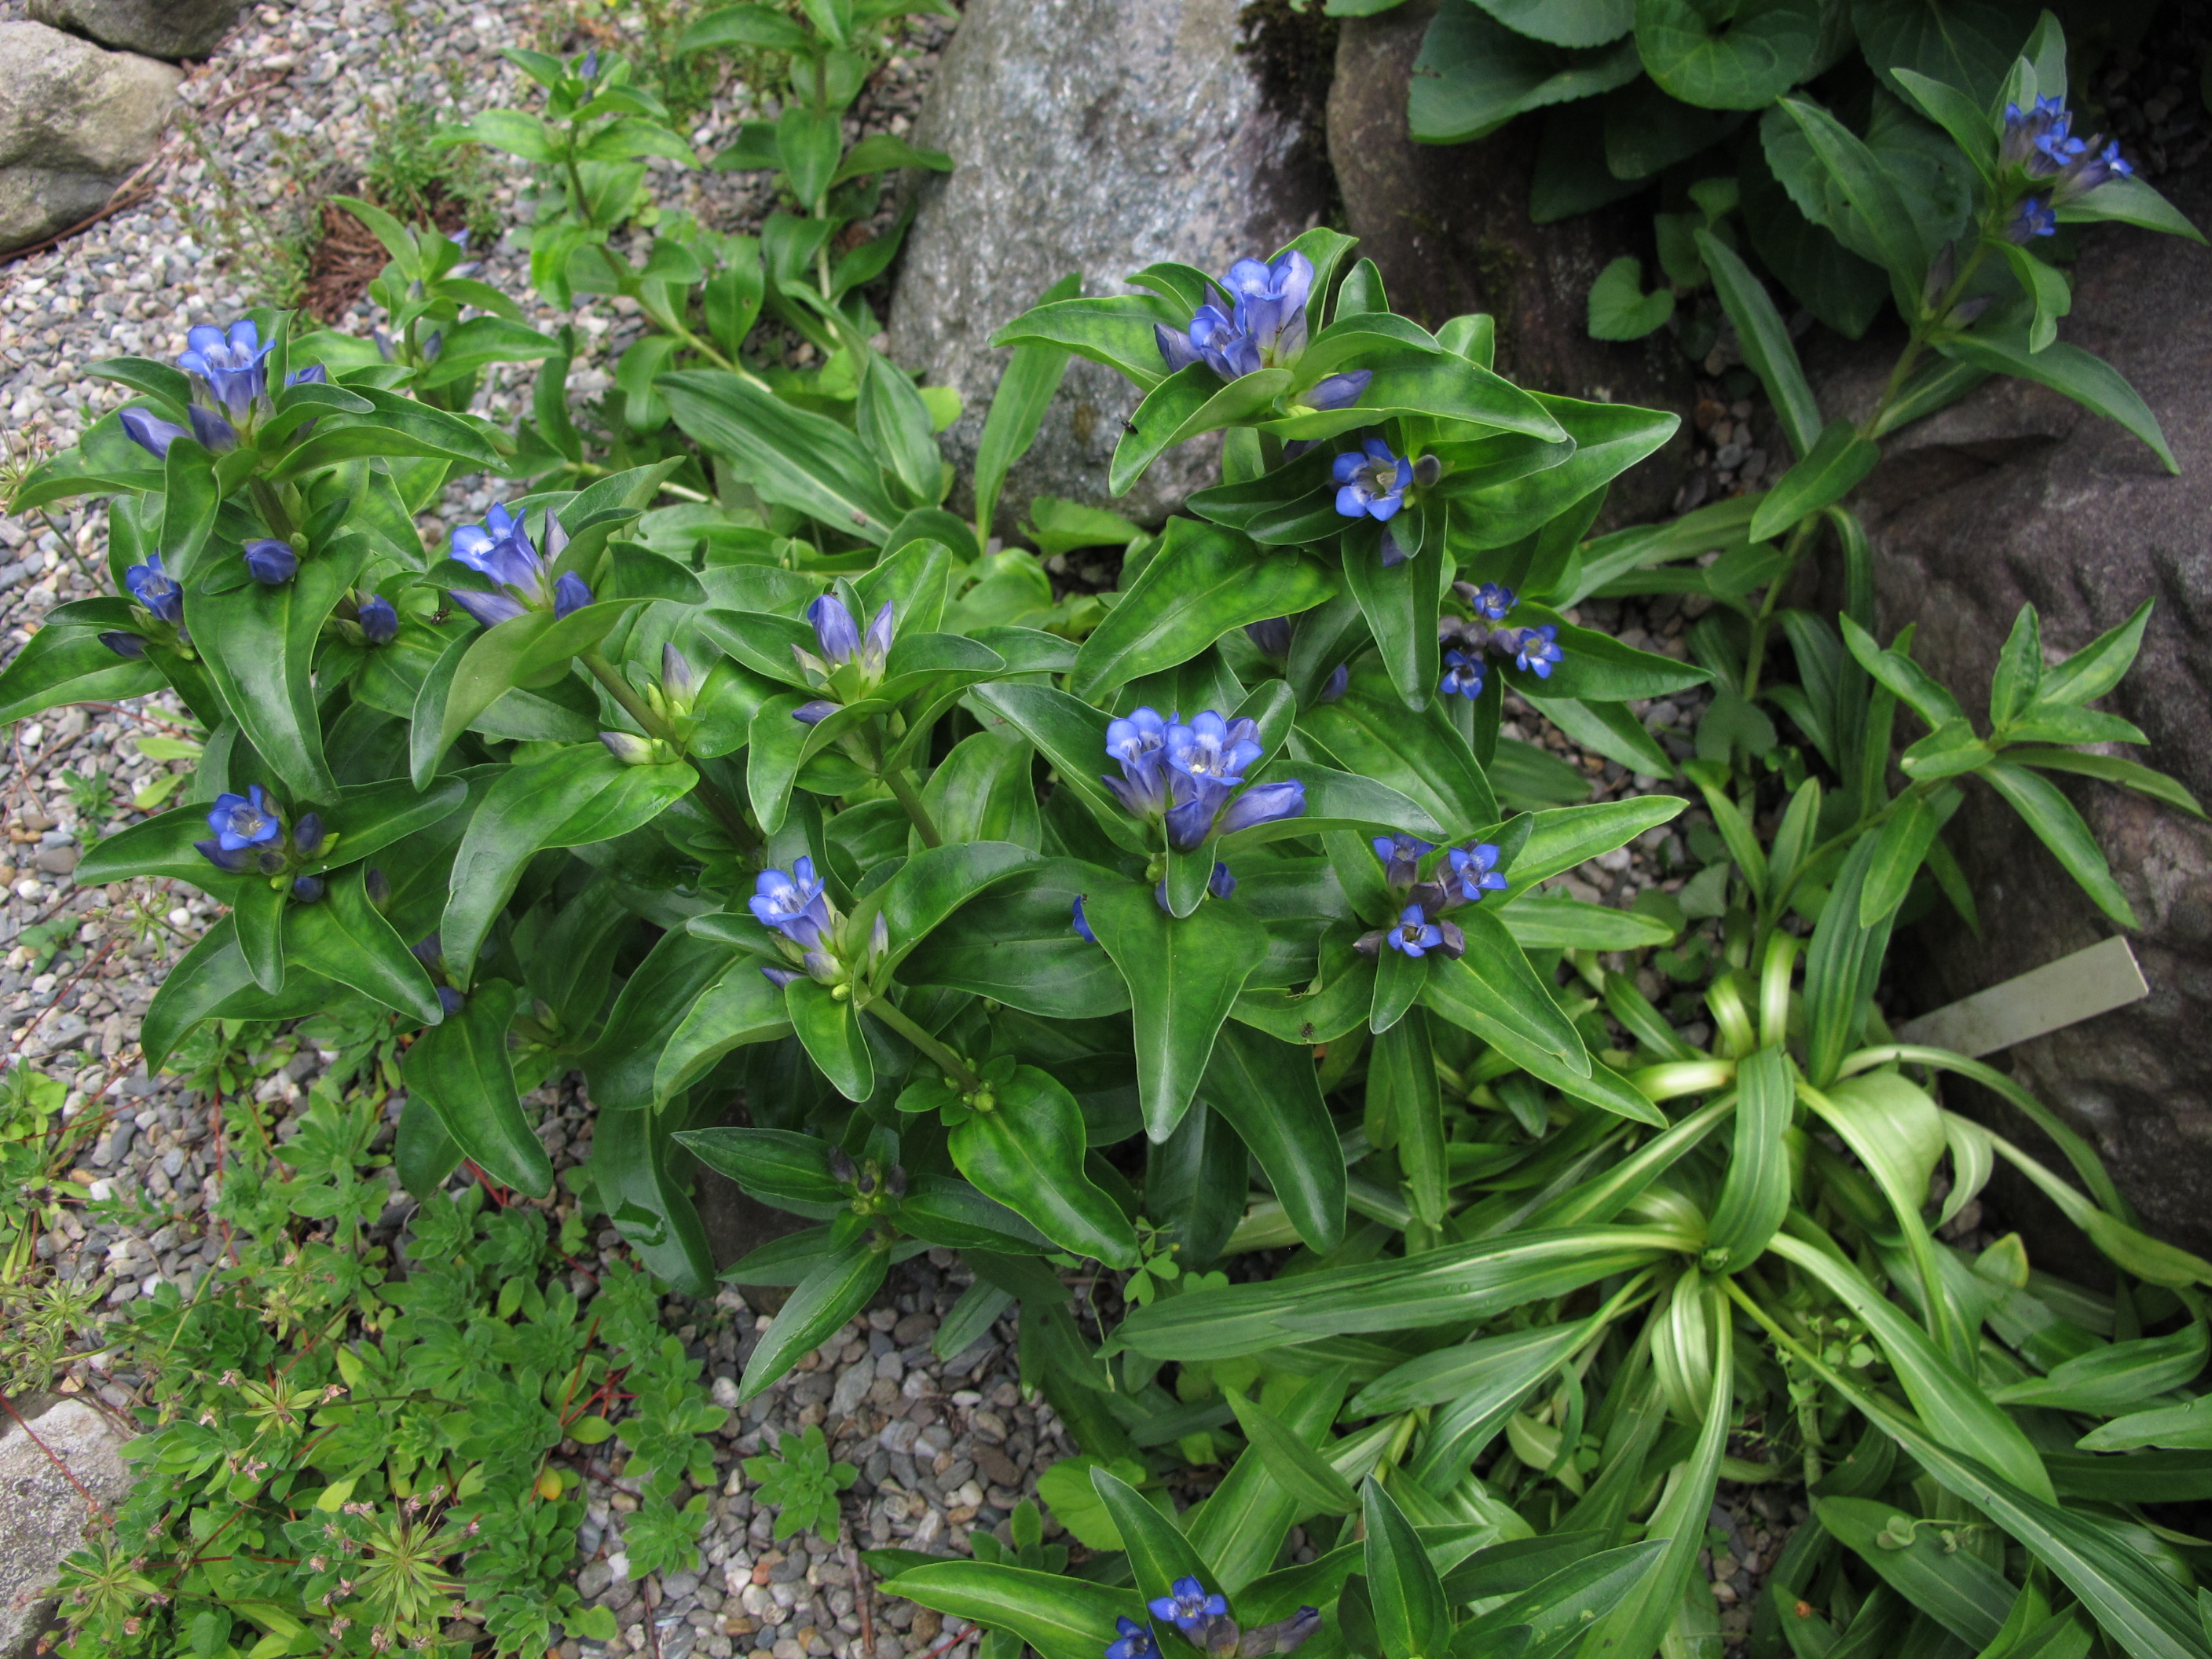
Gentians are good rock garden plants. I grow a nice fall blooming gentian, one called Gentiana makinoi ‘Marsha’ which blooms in ordinary garden soil with sky-blue flowers in September. Blooming now in their rock garden is one called star gentian (Gentiana cruciata.) In the spring they have others called Gentiana acaulis and Gentiana vern – plants that Lisa consider the gems of the genus. Both have wonderful blue flowers.
Star gentian
Cactus does well in rock gardens, some surviving in Zone 4 (with winter temperatures dropping to minus 30 degrees F on occasion). Prickly pear cactus (Opuntia spp.) grows well for Lisa and Dan, spreading to form small colonies. Sedums and hens and chicks also do well.
Lewisia is another genus of rock garden plant they like. Originally observed in 1806 by Meriwether Lewis of the Lewis and Clark Expedition, it needs very fast drainage to avoid rotting the root (which is edible, though since the common name of Lewisia is “bitterroot”, it is not likely to grace my table). The rosette –shaped flowers come in a variety of cheerful colors.
Maintaining a rock garden is a labor of love. Common weeds can choke out or overcome some rock garden plants unless you keep after them. Dan told me that he mulches most areas with pea stone (3/8 inch smooth gravel). It gets very hot in summer, effectively burning off young weeds. Still, I’m not ready to commit to creating and maintaining a rock garden. Well maybe … after I retire.
Henry Homeyer is a gardening consultant, public speaker and the author of 4 gardening books. His web site is www.Gardening-Guy.com. He lives in Cornish Flat, NH.
Rainy Day Woes
Posted on Thursday, July 18, 2013 · Leave a Comment
It’s been rainy here in Cornish Flat. I can’t remember whether the recent bout of rain was 10 inches in 7 days or 7 inches in 10 days. But I do know that my old leather clogs appear to have grown a layer of mold that looked like the stuff that grows on phlox and lilacs, powdery mildew. Sigh. My tomatoes want some sunshine – and I do, too.
But all this rain is not all bad. Let me sing praises to the rain: First, we don’t have to water anything. Usually I have to water my vegetable transplants and seed beds. Not this year.
I like raised beds for everything but onions and celeriac (also called celery root, a wonderful substitute for celery in cooking). Those two plants need lots of water, so I usually do not plant them in raised beds because raised beds drain better and dry out quicker- which they don’t like. But when my stream overflowed, my onions suffered from the running water that ran through my garden while most other things were not affected. No matter, I just righted them and re-mulched around them.
Newly planted trees and shrubs are doing well with all this rain, too. They need an inch of water a week, and that has not been a problem this year. And I always have plants in pots waiting to go in the ground which normally have to be watered. I have a pink magnolia that I bought over a month ago that is still waiting to get planted – and I have only had to water it once.
That magnolia is a hybrid called ‘Jane’, one of eight varieties developed by the USDA in the 1950’s. I’m surprised it’s not more common in cold areas, as it is gorgeous, hardy to Zone 3 (minus 40) and has the added benefit of sporadic re-blooms in August. It is a small to medium sized tree. Others in the series include Betty, Judy and Ann and others often referred to as “the magnolia girls”. All bloom 2-4 weeks later than the early star magnolia, thus usually avoiding frost damage. I can’t wait!
On the other hand, all this rain has been heaven for slugs and snails. They like wet surfaces, and that’s about all we’ve had. What can we do about them? I always start by hand picking. My kale has suffered the most. Lower leaves have been very heavily grazed by small snails. I have gone around with a jar of soapy water, tapping the leaves to make the snails drop into the water. I also have pruned off some of the lower leaves – they were Swiss cheese-like and not contributing much to the plants.
Snails and slugs tend to avoid sharp surfaces, so sprinkling coarse sand on the soil surface should help discourage them, though it is hard to know the effect. I mean I can’t exactly interview them. (Mr. Slug, how do you feel about crawling over sand to get to the kale?”)
Slugs can be controlled with a product approved for organic gardeners. It’s called Sluggo and is iron phosphate (a naturally occurring mineral) covered with slug bait. I use it around the logs that I inoculated with spore plugs to produce Shitake mushrooms. I haven’t gotten any mushrooms yet this year – they bloom best in hot weather following a wet period. A small amount of Sluggo goes a long way and ends up being cheaper than the traditional method of putting out saucers of beer to attract and drown slugs. Which I find disgusting, anyway. I never have to deal with the slugs done in by Sluggo.
I haven’t yet done much mulching this year so there is lots of bare earth in my vegetable garden. Although that means that weeds get a “Get out of Jail Free” card, it also means that the soil dries out more quickly, which is a good thing. I use my CobraHead weeder to scratch the soil surface after rains to slice off any young weeds, but more importantly, to rough up the soil surface. A rough surface allows water to evaporate more quickly. And we need that.
The last good thing about all this rain is that big-rooted weeds pull more easily. The key is to pull them slooooowly. Gentle pressure. And if they don’t move, loosen the soil with a drain spade and try again.
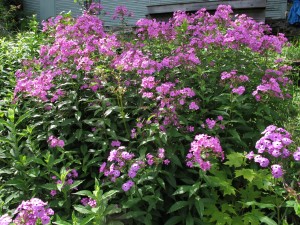
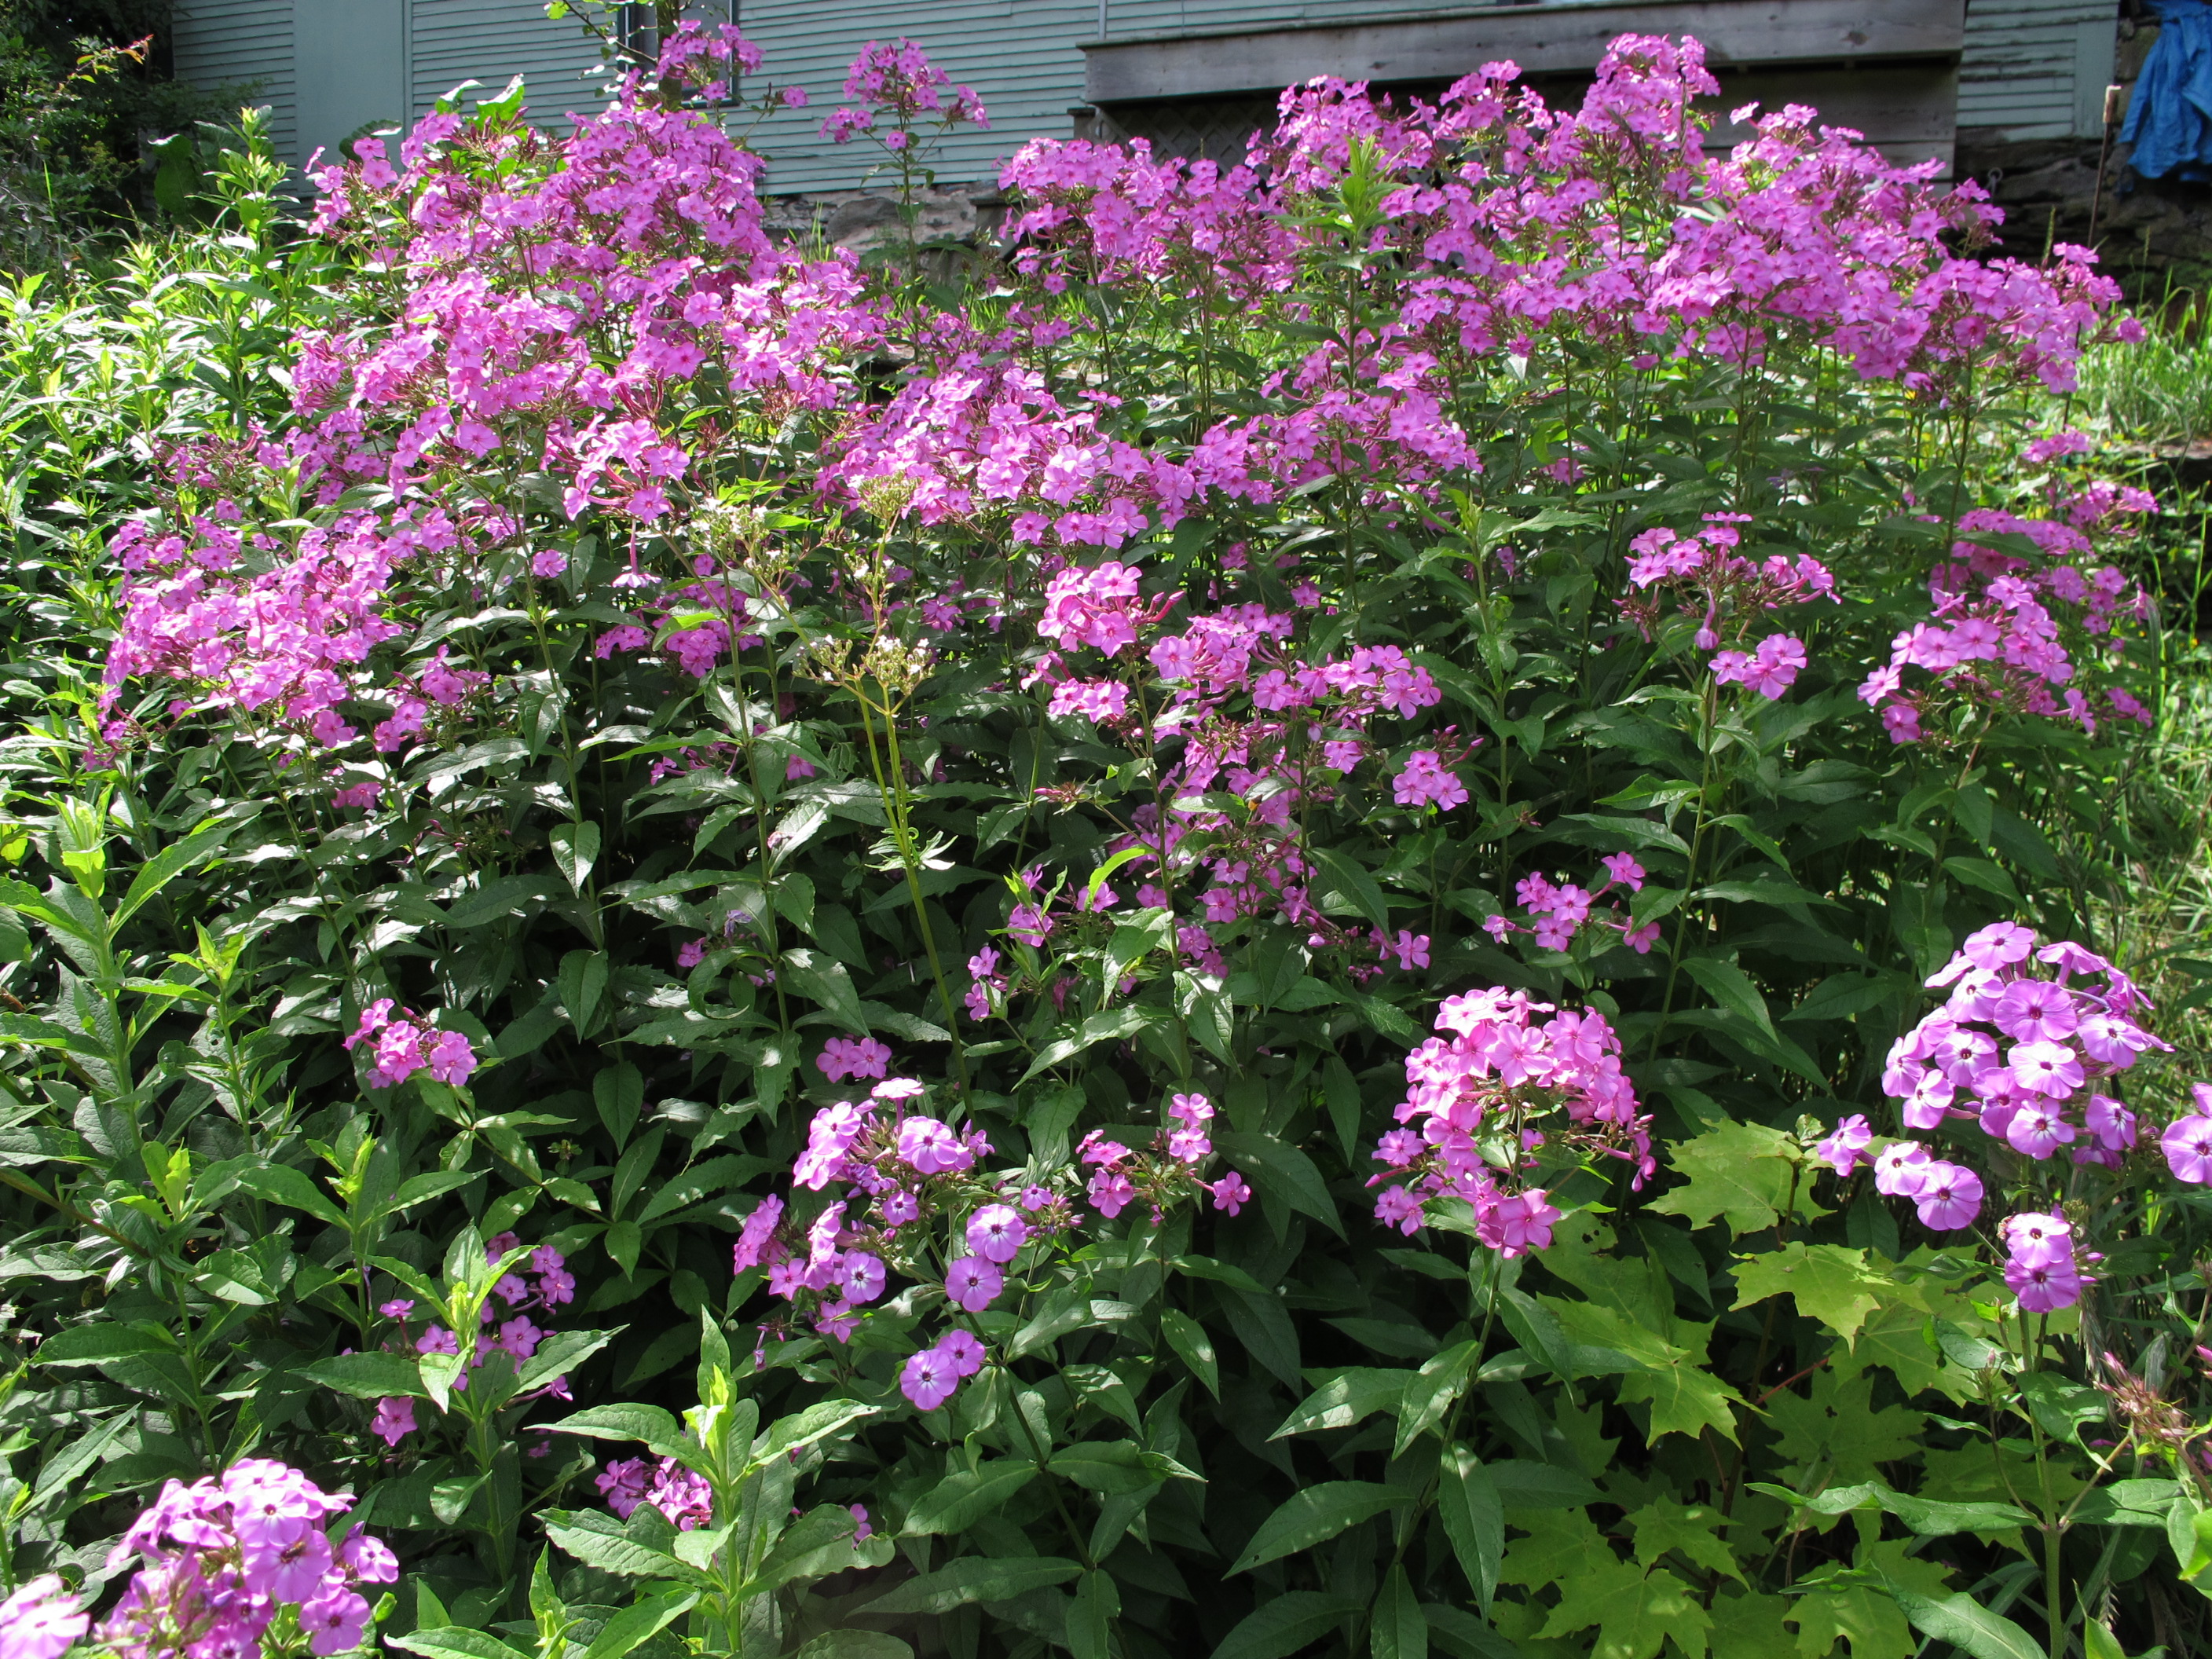
Phlox that needs to be divided to avoid powdery mildew
So far this summer I haven’t gotten powdery mildew, that bothersome white fungus that so loves old fashioned phlox and lilacs. By August, I suppose it will be rampant. Hot wet weather makes plants more susceptible to it.
You can do something now, if you’ve had trouble with powdery mildew in past years: you can divide big clumps of phlox and other mold-prone plants. That way you will have better air circulation, allowing leaves to dry out before mold hyphae (rootlets) can penetrate the moist leaves. Even mildew-resistant cultivars will get moldy if the conditions are right.
So yes, I’m ready for sunny days. But rain does have plenty of good qualities. Let’s all try to appreciate it for the nectar it is for our plants.
Henry Homeyer can be reached at henry.homeyer@comcast.net. His Web site is www.Gardening-Guy.com.
Eight Flowers Great Flowers
Posted on Wednesday, July 10, 2013 · Leave a Comment
“I have a brown thumb” is a claim I hear on a regular basis, but one which I always dispute. There are no brown thumbs, only bad soil or plants living (and dying) where they should not be. Of course, any plant can die of thirst when first planted, and poor soils can keep them from thriving. But some plants are tougher than others, so this week I shall suggest eight plants that you can use in your garden with a very high probability that they will do well for you. Even very well. Even if you have a brown thumb. Just put them in good soil in the right amount of sun.
Daylilies (Hemerocallis spp.) are fool proof. I once left a clump of daylilies on the lawn in a relatively shady place. I had dug them up and fully intended to put them in the compost pile, but didn’t get around it right away. Before I knew it, they had rooted in – and were blooming!
Daylilies prefer full sun and good soil, but they’re not fussy. The old orange ones spread by root, as do the double orange ones. Most others just develop into bigger clumps every year. Daylilies produce flower stalks called scapes, and each scape will produce 3 to 9 buds; these buds bloom sequentially, each for just about a day – hence the name. Most daylilies come in shades of yellow, but dark reds and some pinky ones exist, too. A few re-bloom off and on all summer.
Evening primroses or sundrops (Oenothera missouriensis) are blooming for me right now, but they are not really primroses at all. The flowers are bright yellow cups on 18 to 30-inch stems that flower – and spread – cheerfully. They spread by root and by seed, and might be thought to be thugs, except they pull easily and are pleasant. They will bloom in full sun to part shade, and are not fussy about their soil.
Peonies (Paeonia spp.) These beauties are mostly done for the season, though a few late bloomers might still be blooming. They love full sun and rich soil, but will still bloom in part shade and even in dry, sandy soils. Their roots are big, fleshy tubers that go deep down into the soil, so I recommend digging a much bigger and deeper hole for a peony than for other plants. Enrich the soil with composted cow manure, rotted leaf mulch or other organic products, especially some organic fertilizer.
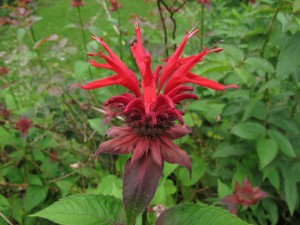
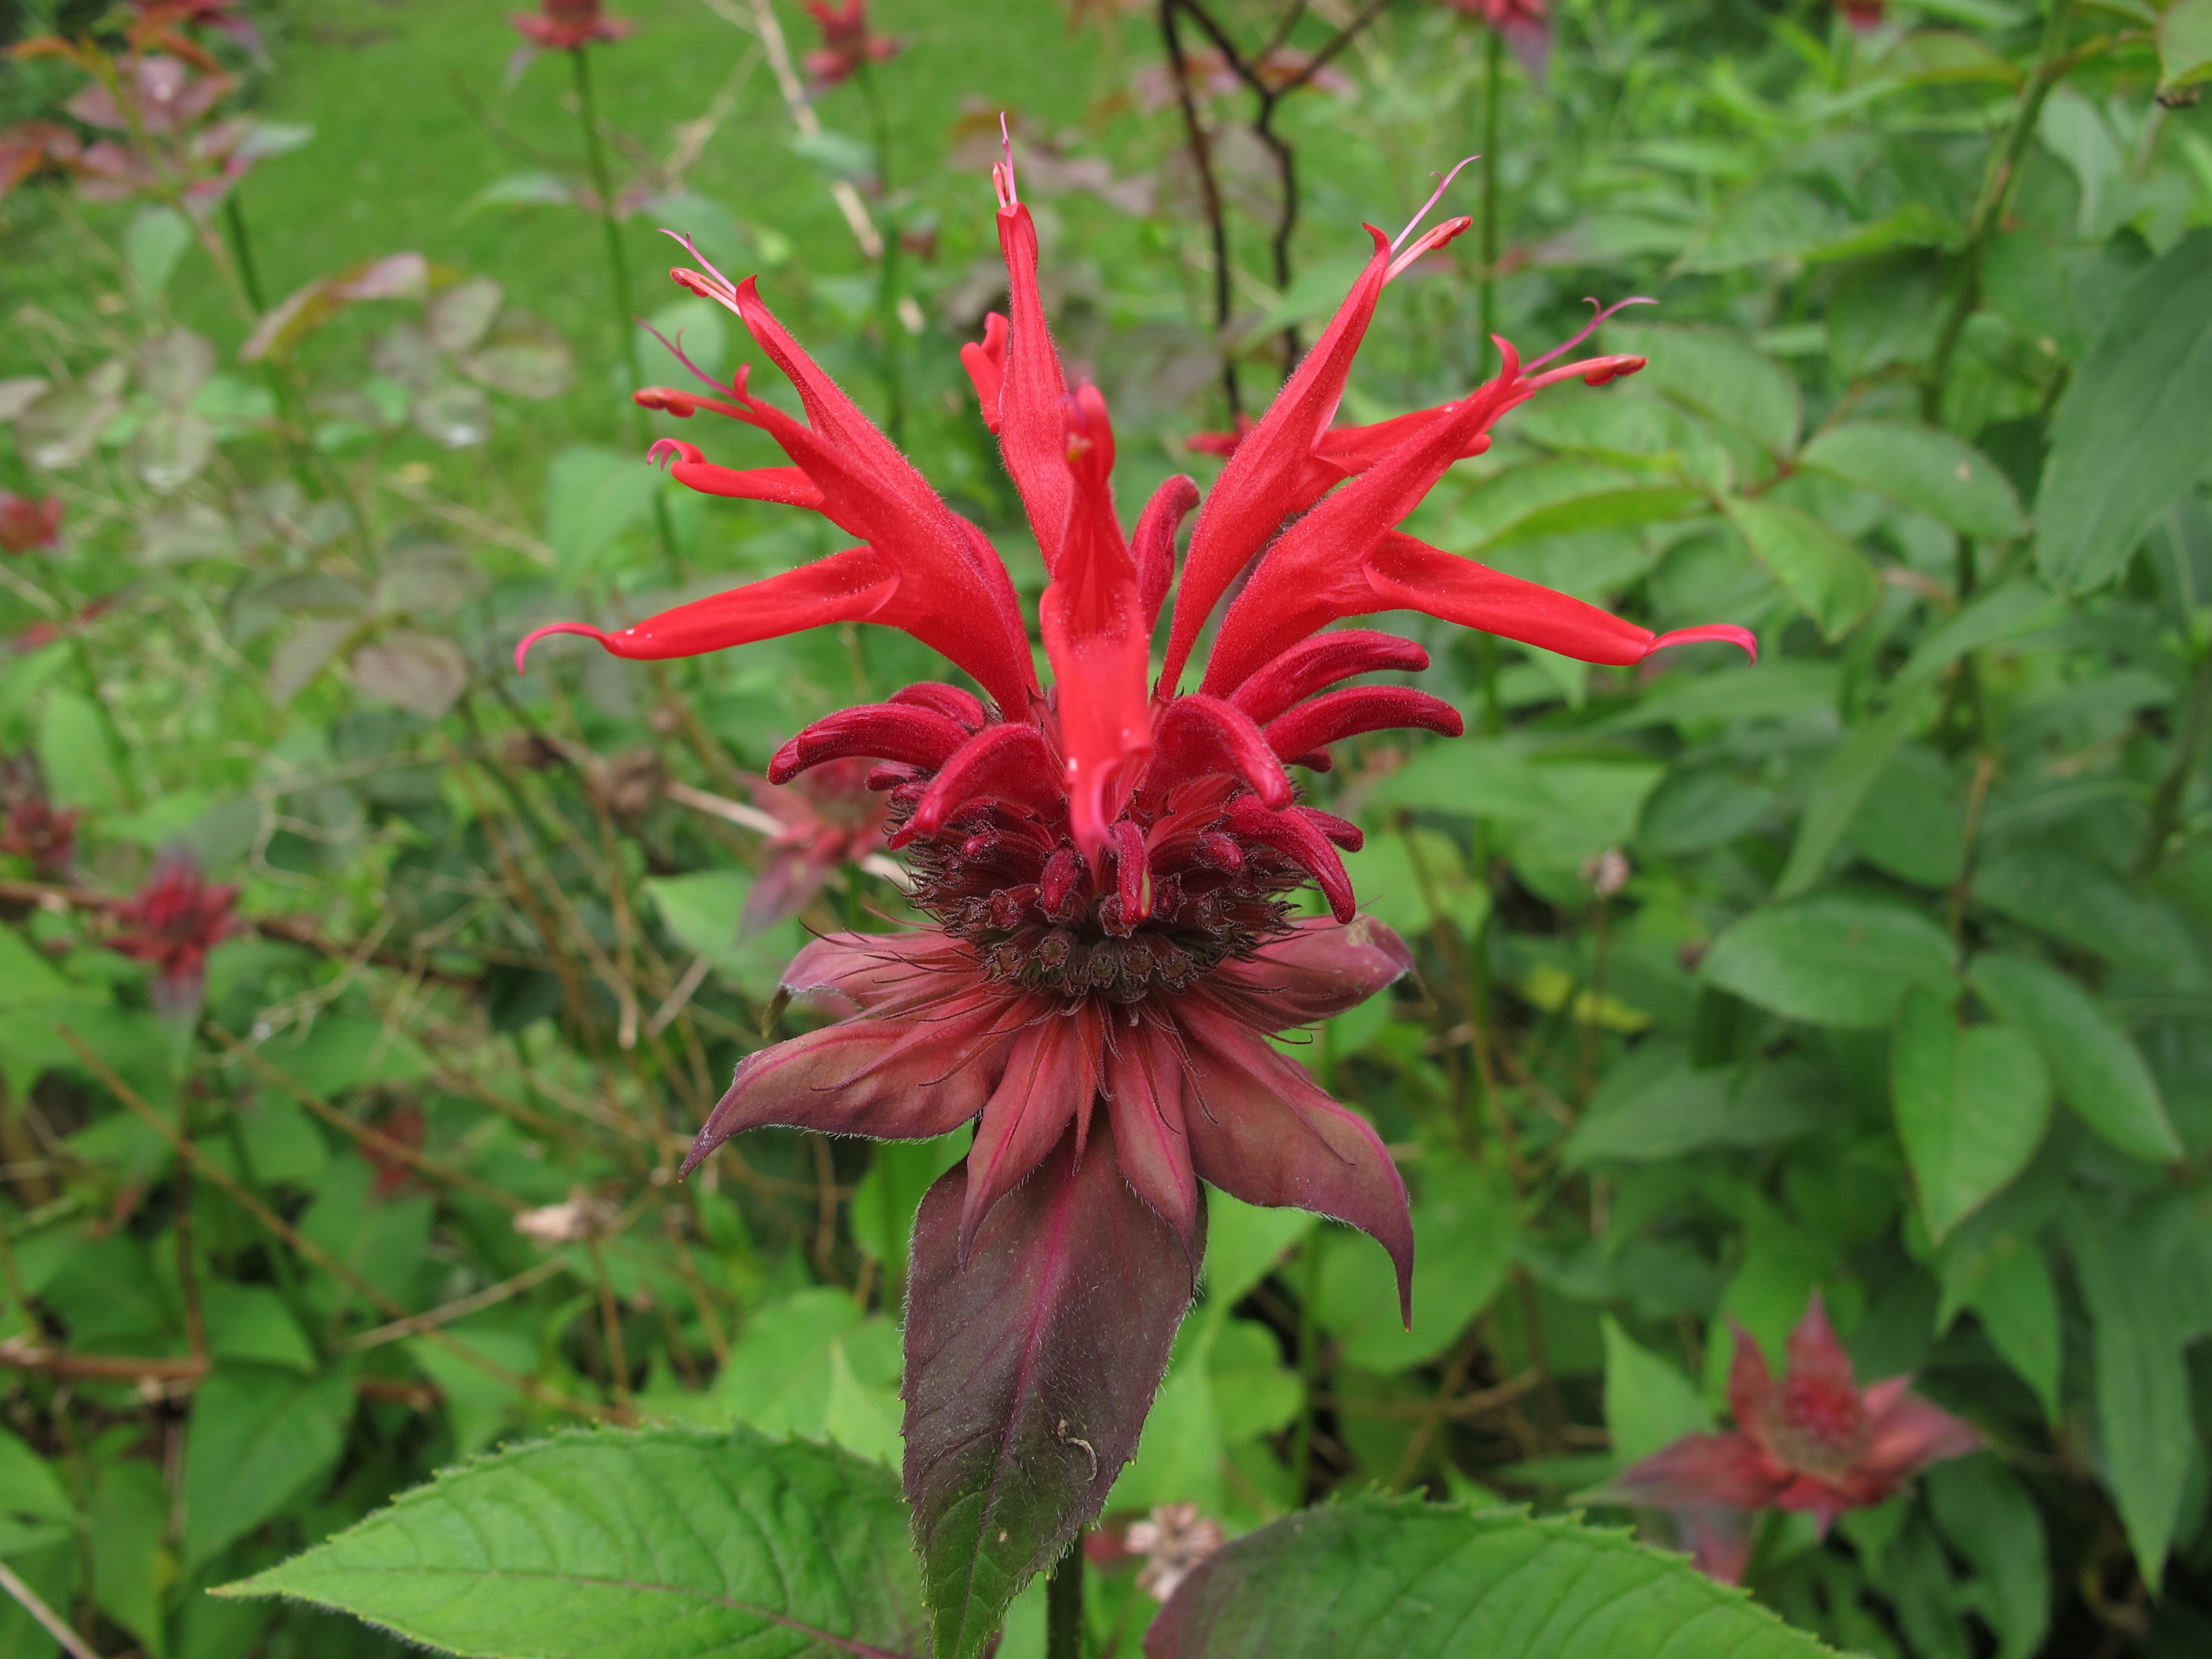
Bee Balm
Peonies grow from buds or “eyes” that develop each year beneath the soil surface. If you plant a peony too deeply and cover up the eyes with more than an inch of soil, the plant will not bloom after the first year. Other than that? Success is guaranteed. I have a peony that my grandmother Lenat planted – and she died around 1953. My mother grew it, now I have it. I shall leave it to one of my grandchildren. Peonies are forever.
Pink Mallow (Malva alcea). Some fancy gardeners turn their noses up at pink mallow, but I love it. It grows 3-5 feet tall and produces a bounty of pink blossoms that vaguely resemble single roses- but up to 3 inches in diameter. It has a deep tap root so it does not move easily, but seed-grown “volunteers” show up around my garden. Full sun to part shade. It is a short-lived perennial, but has plenty of “babies” so you will always have some.

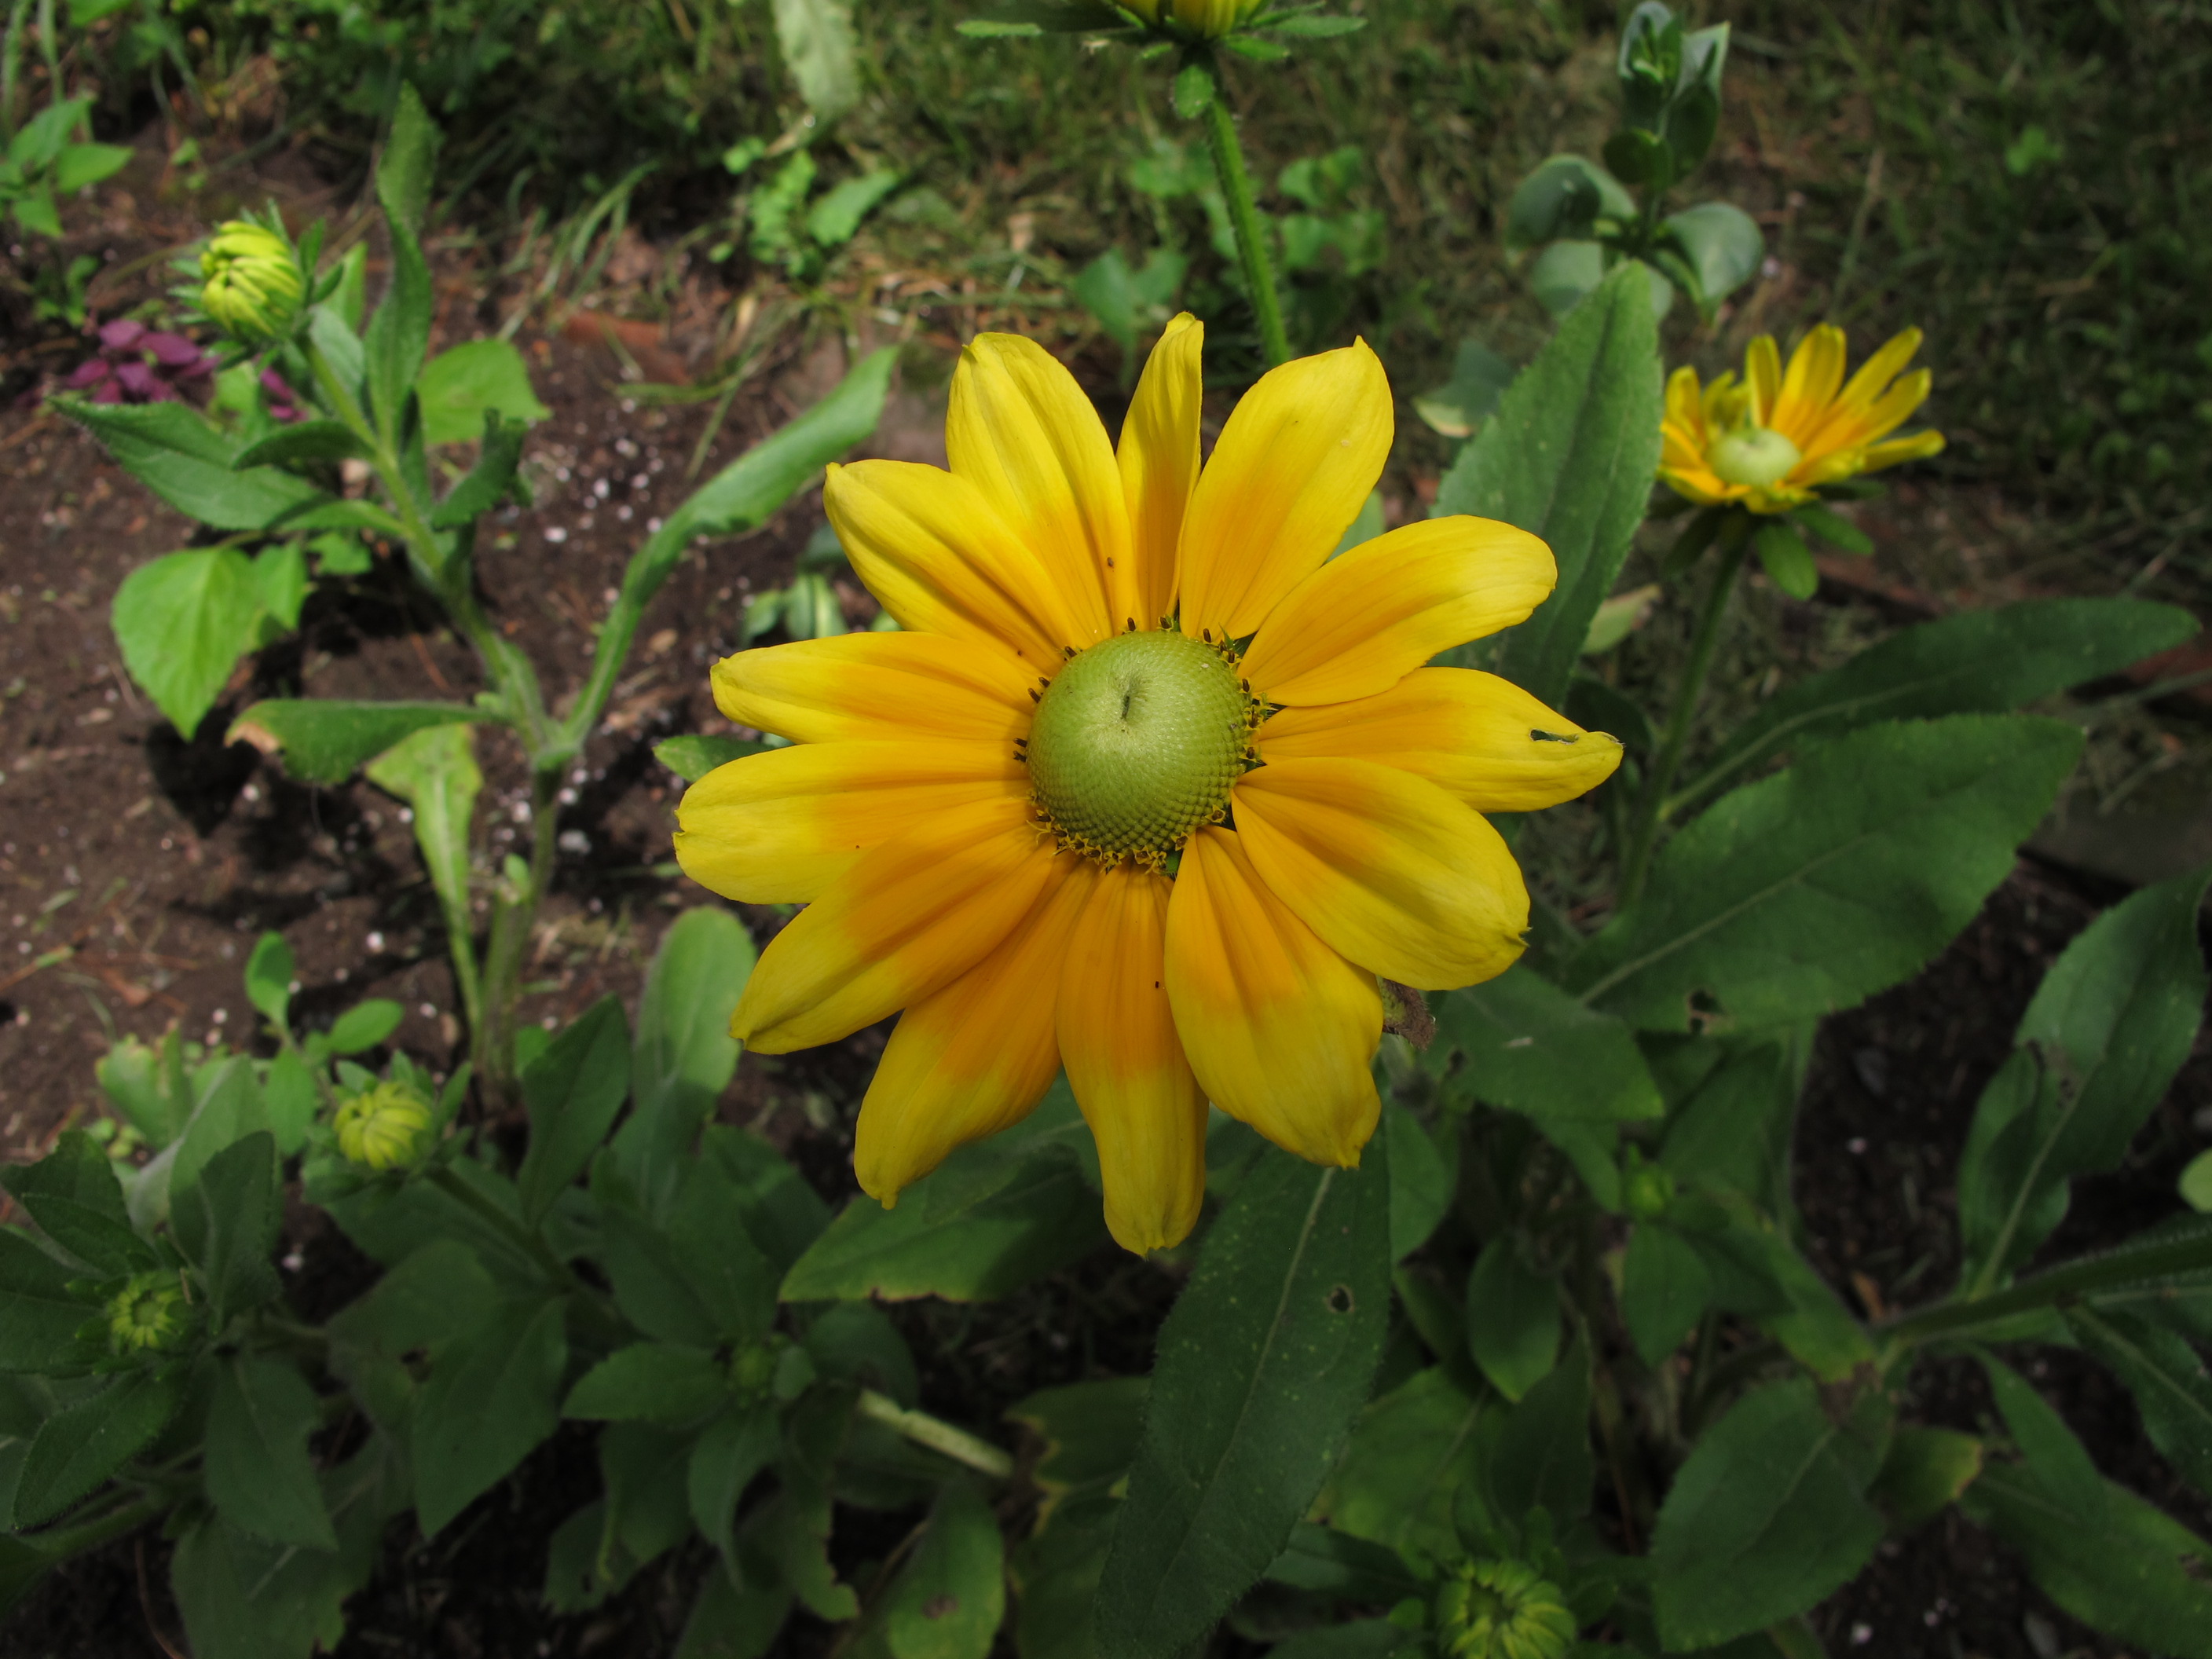
Rudbekia ‘Prairie Sun’
Black-eyed Susans (Rudbekia spp.) There are dozens of species of this joyful summer flower. I grow a variety called ‘Prairie Sun’ in my hot, dry front walkway, and it blooms all summer – but, truth-be-told, often die in winter. No matter, I’ll buy it again and again. One of my favorites is a fall-season bloomer with delicate flowers, Rudbekia subtomentosa ‘Henry Eilers’.
Hostas (Hosta spp.). These are primarily shade plants grown for their lovely leaves. If there is too much sun on them, the leaves will scorch and turn yellow. A few kinds will bloom with tall flower spikes, but others have blossoms that are not of much interest. Hostas do best with rich soil, but will grow in almost any soil. I have hostas from under 2 inches tall to more than 30 inches tall, and a variety of greens, some with blue or yellow tinges.

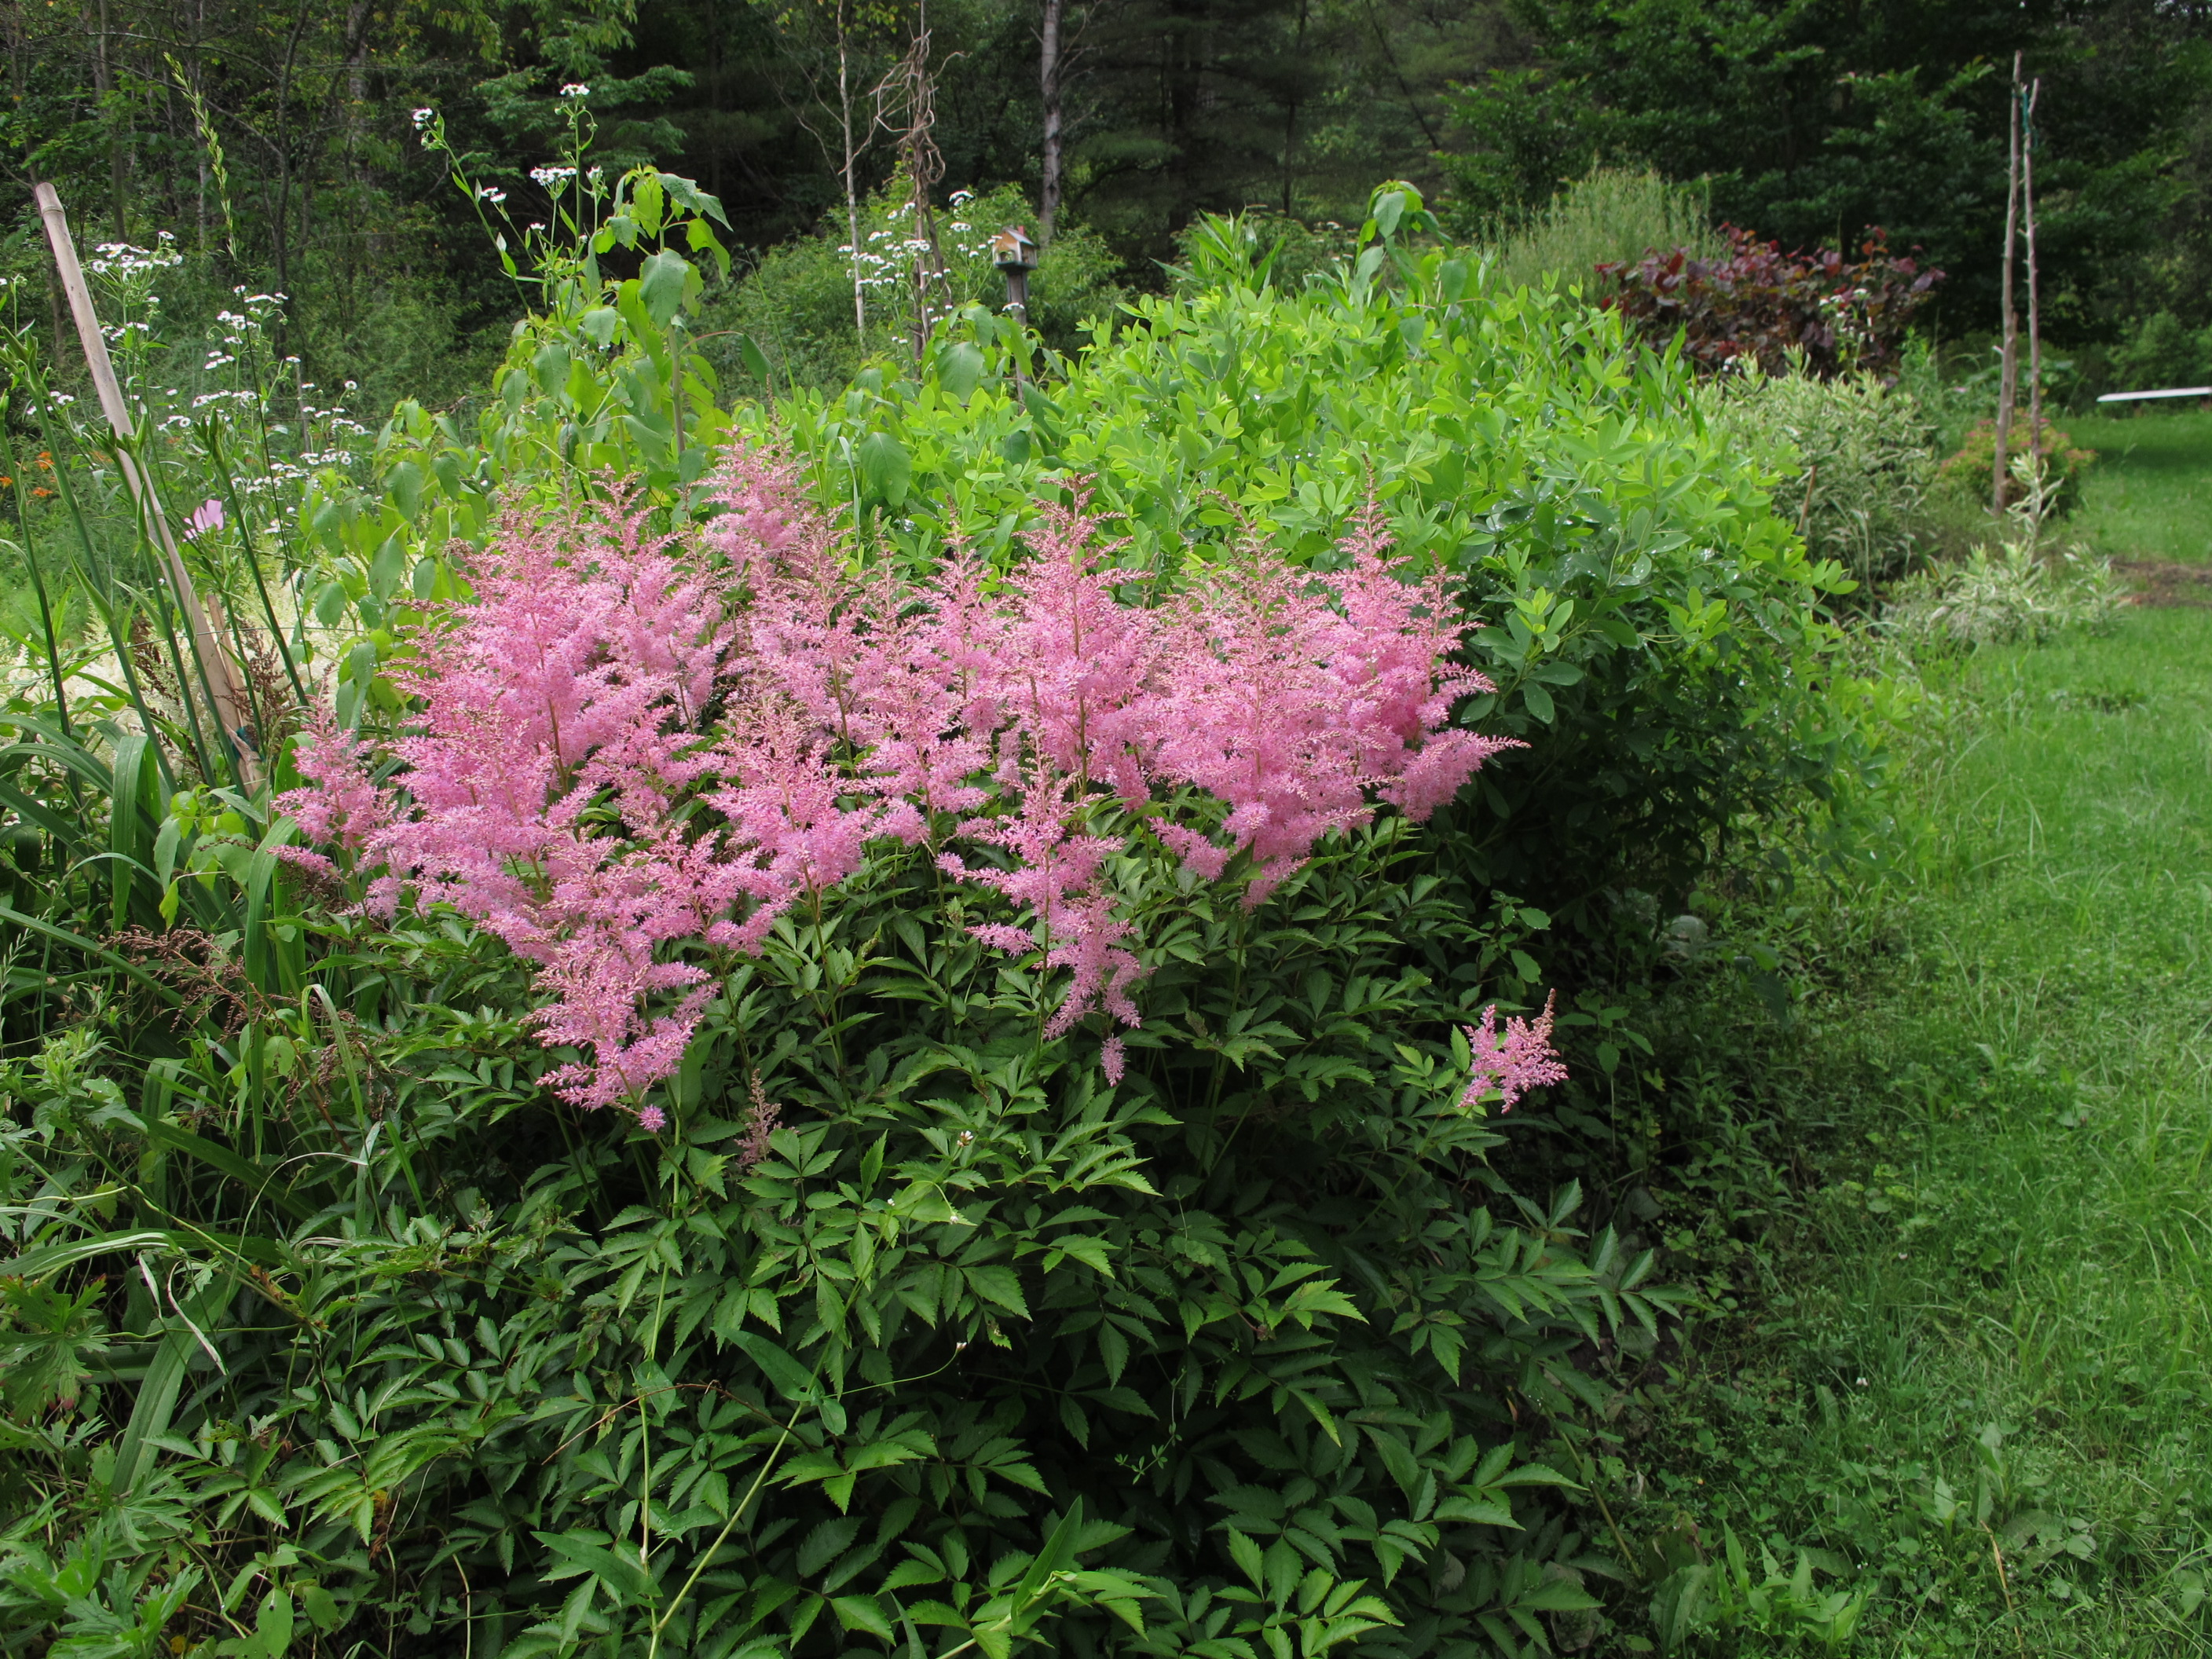
Astillbe
Astillbes (Astillbe spp.). These are primarily sold as shade plants, but I grow them in both full sun and partial shade. The key is this: the more sun there is, the more moisture is needed. They bloom in great plumes of tiny florets in pink, white and dark red. They appreciate rich, organic soil, so improve the soil before planting.
Bee Balm (Monarda didyma). Bee Balm displays nice clumps of red or pinkish tubular flowers that are arranged in whorls atop 3-4 foot stems. In the mint family, they are fragrant and clumps spread by root – sometimes too vigorously. But extra plants are easily pulled. Grow them in morning sun in ordinary garden soil. All day sun in dry, sandy locations will not lead to happy plants.
You don’t have to be born a gardener. Just follow the directions on the plant tags – or my articles – and be sure to add compost to the soil before planting in a nice, big hole. You’ll soon have a green thumb.
Henry Homeyer can be reached at P.O. Box 364, Cornish Flat, NH 03746 or henry.homeyer@comcast.net. His Web site is www.Gardening-guy.com.
Filed under Article · Tagged with astilbe, bee balm, day lilies, easy to grow flowers, eight great flowers anyone can grow, evening primrose, flowers for new england, gardening guy, Henry Homeyer, peonies, rudbeckia prairie sun
Early Summer Chores in the Vegetable Garden
Posted on Wednesday, July 3, 2013 · Leave a Comment
I don’t recall ever hearing a version of George Gershwin’s song, Summertime, that I didn’t like. But I’m not sure about the accuracy of that line “and the livin’ is easy.” Right now I have a lot to do in the garden.
Let’s start off in the vegetable patch. I’ve had a lot of rain in the last 3 weeks, so everything has been quite happy – especially the weeds. Of course since the soil is moist, weeds are pretty easy to pull. But still, I do not just pull weeds. Yank on the top of a weed, especially a big perennial weed like a dandelion or a burdock, and it breaks off. The roots stay behind to produce the leaves all over again. Sisyphus, the Greek who kept pushing the boulder up a hill in mythology, could have been a gardener – without a good weeding tool and proper technique.
In order to keep weeds and grasses from re-sprouting, you need to get the entire root out. After all, they evolved with herbivores that not only bit off their stems, but often gave a good yank. To survive, they must re-sprout from roots. So learn to know your weeds and their root systems. To remove a weed with tap root, you need to loosen the soil. In general, the bigger the plant, the longer the root.
From L to R, dock, drain spade, dandelions
Dock (Rumex spp.) is a big, tall weed that loves my garden. It has a root that can go down more than a foot. If the soil is loose, moist and fluffy I might be able give a long slow pull and remove all its roots. But in dry or compacted soil, I need to use a drain spade (mine is pointed and its blade is 16 inches long by 5 inches wide) or a garden fork to loosen the soil before pulling. I plunge it deep into the soil a couple of inches away from the weed, and pull back to loosen the soil. Of course, the blade may sever a side-root if I am not careful.
For ordinary weeds I use my CobraHead weeder, which is a like a steel finger, curved and sharp. I can get it under a clump of grass or weed and loosen the soil before I begin to tug from above. It’s very effective, especially to tease out long roots of invasive grasses.

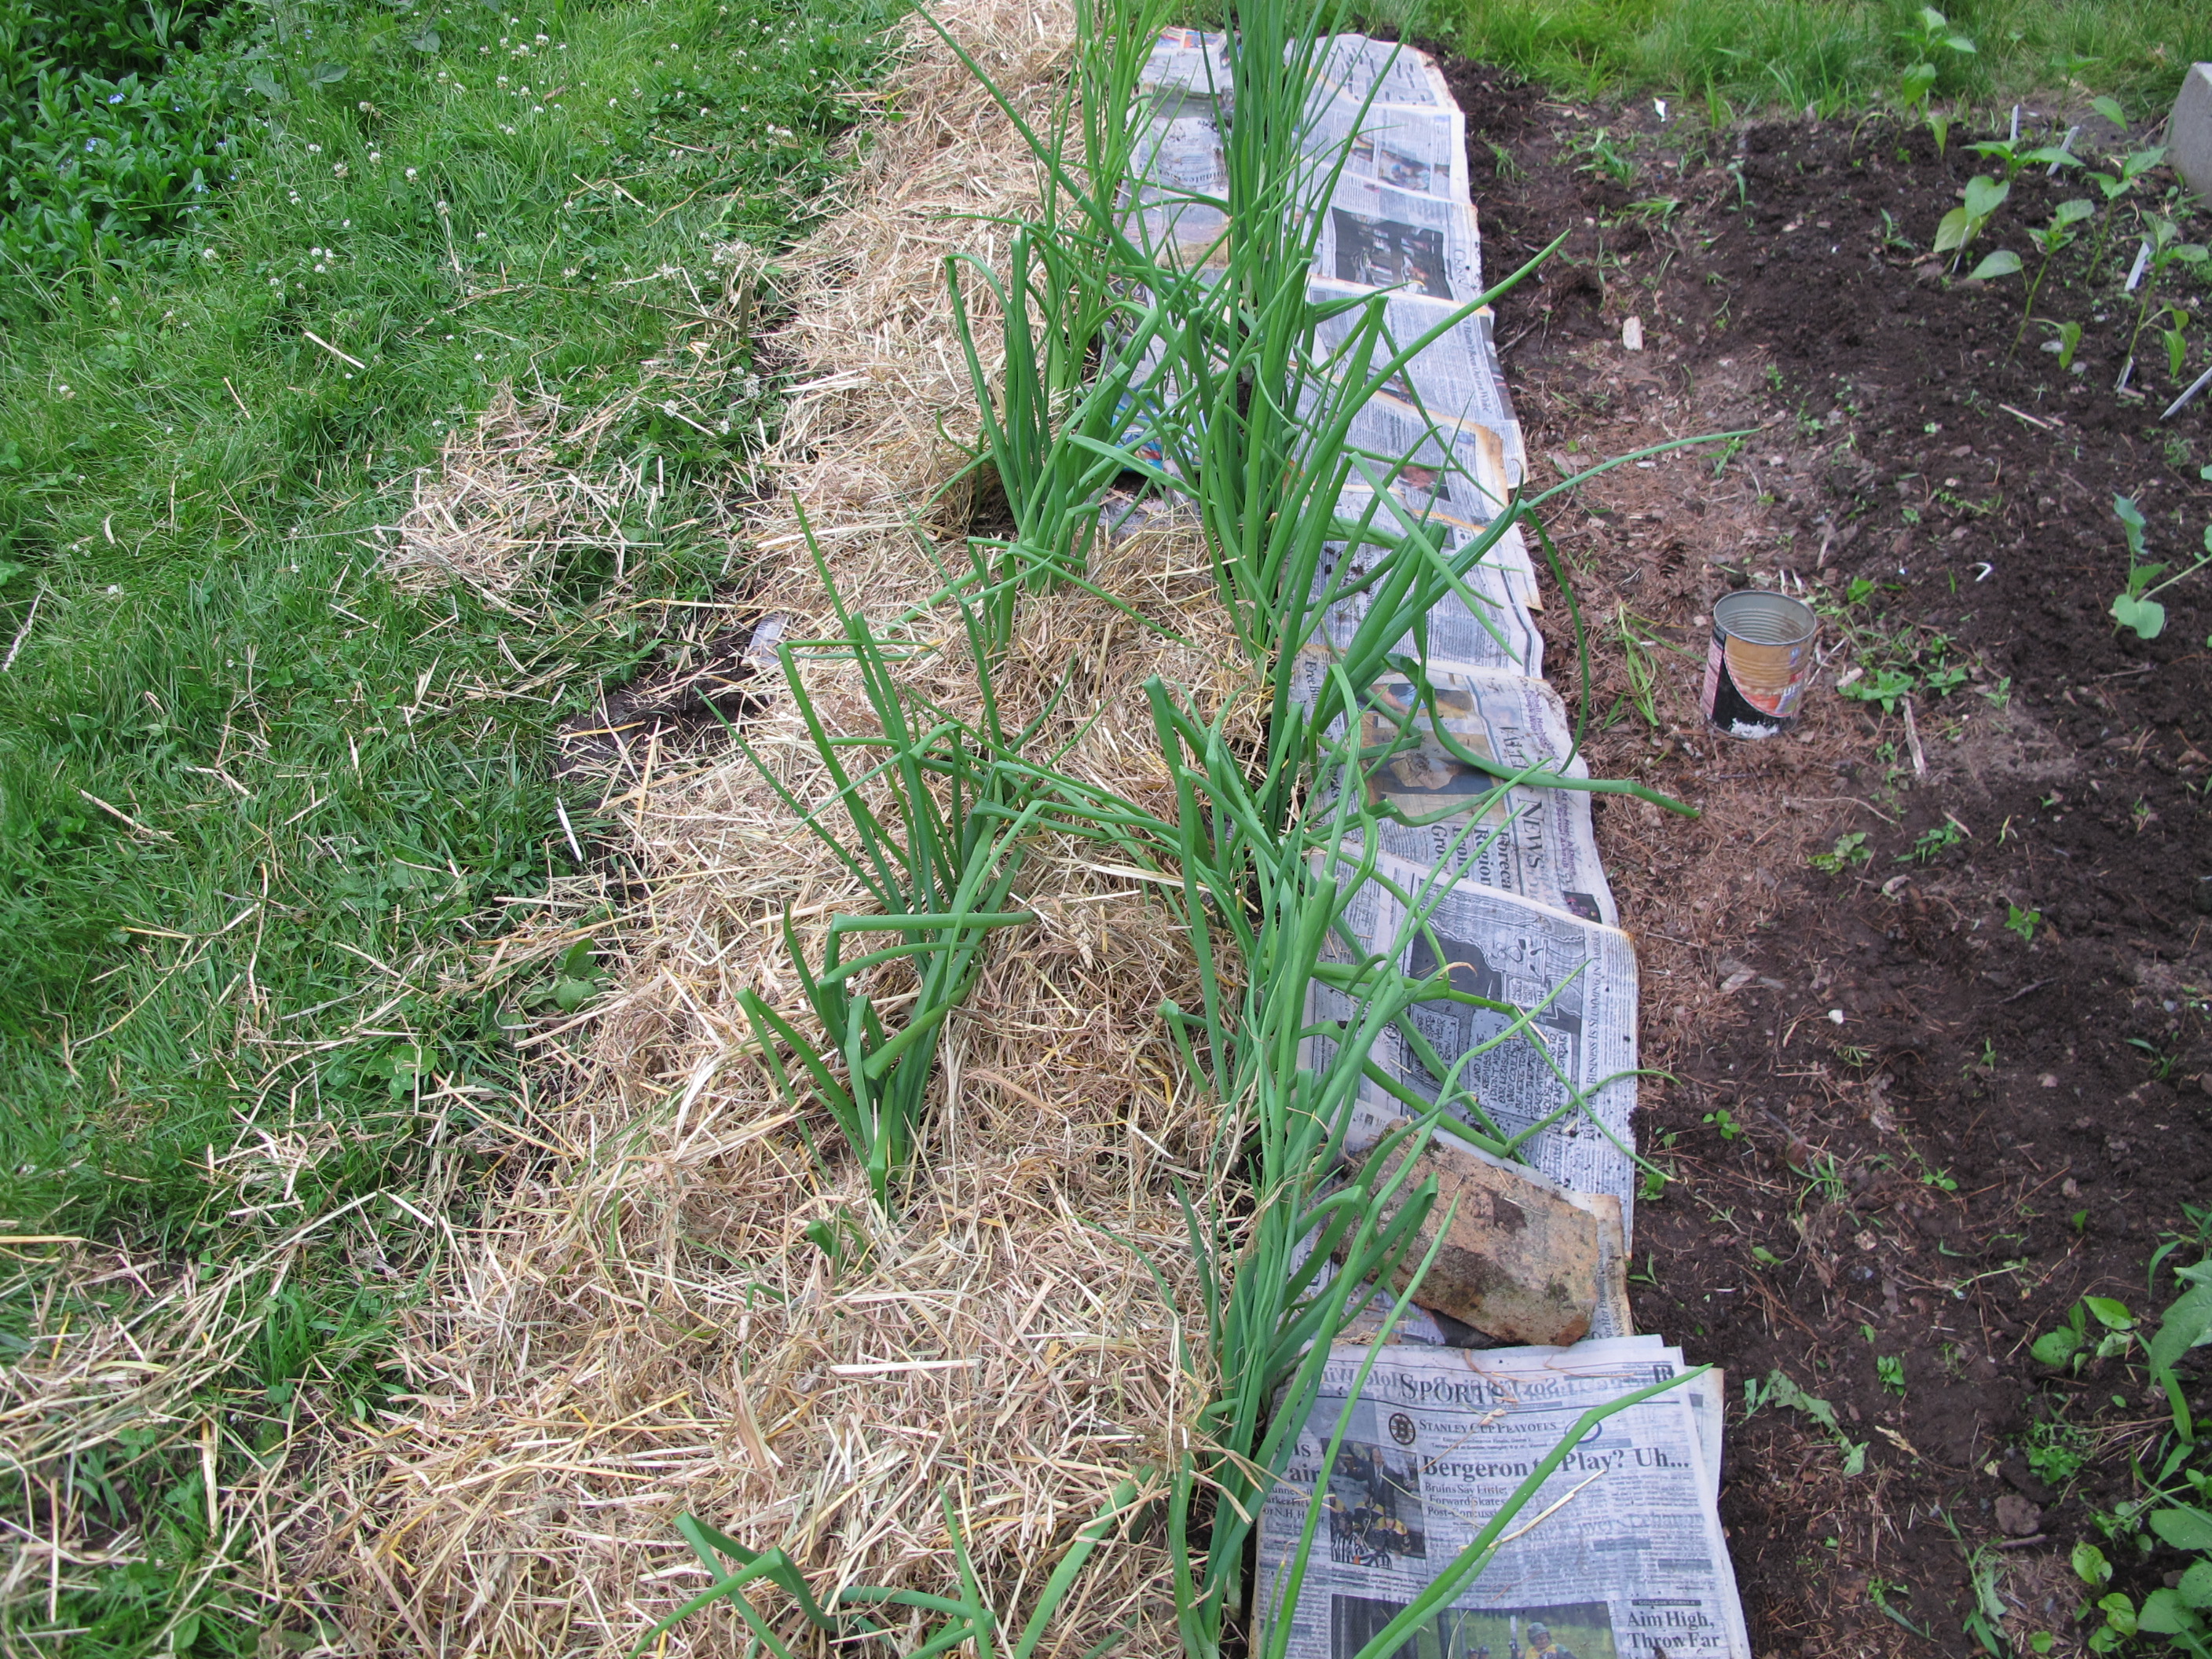
Mulching onions
I recently weeded my onion patch. Onions hate weeds – in part because weeds steal their moisture. After weeding, I soaked a pile of newspapers and then spread them out alongside the onions and in the space between my double rows. I didn’t put newspaper between the individual onions in their rows, as they are too close together and it would have been too much trouble. I spread mulch hay over the newspaper to keep it in place. The newspaper smothers any seeds that might germinate and try to grow after my late-June weeding.
When I give lectures on gardening, I tell my listeners that they must thin their beets and carrots on the Fourth of July at 10am. Or around that time. Carrot seeds are tiny and most of us manage to plant too many, too close together. And we all hate killing baby carrots. But if we don’t thin them, the carrots will compete with their kin for water and soil nutrients – just as weeds do. Thin them now, today, to one-inch spacing. A few companies (Johnny’s Seeds is one) sell pelleted seeds that are sold covered with a layer of clay, making the seeds a size you can handle and plant individually. Look for them.
Beet seeds are not seeds at all, but seed capsules. So no matter how carefully you spaced the “seeds”, you must thin them now as usually 2 or 3 plants start from each seed capsule. There are a few varieties like ‘Moneta’ that have just one seed per capsule, so you can avoid thinning.
This is also a time to start second (or third) plantings of lettuce and other greens. I’m eating my first crop of lettuce and new plantings will help to keep the salad bowl full all summer. I’ll plant a few seeds every 2-3 weeks. You can plant a second crop of broccoli from seed now, too. That will mean that you get big juicy heads of broccoli in September and October.

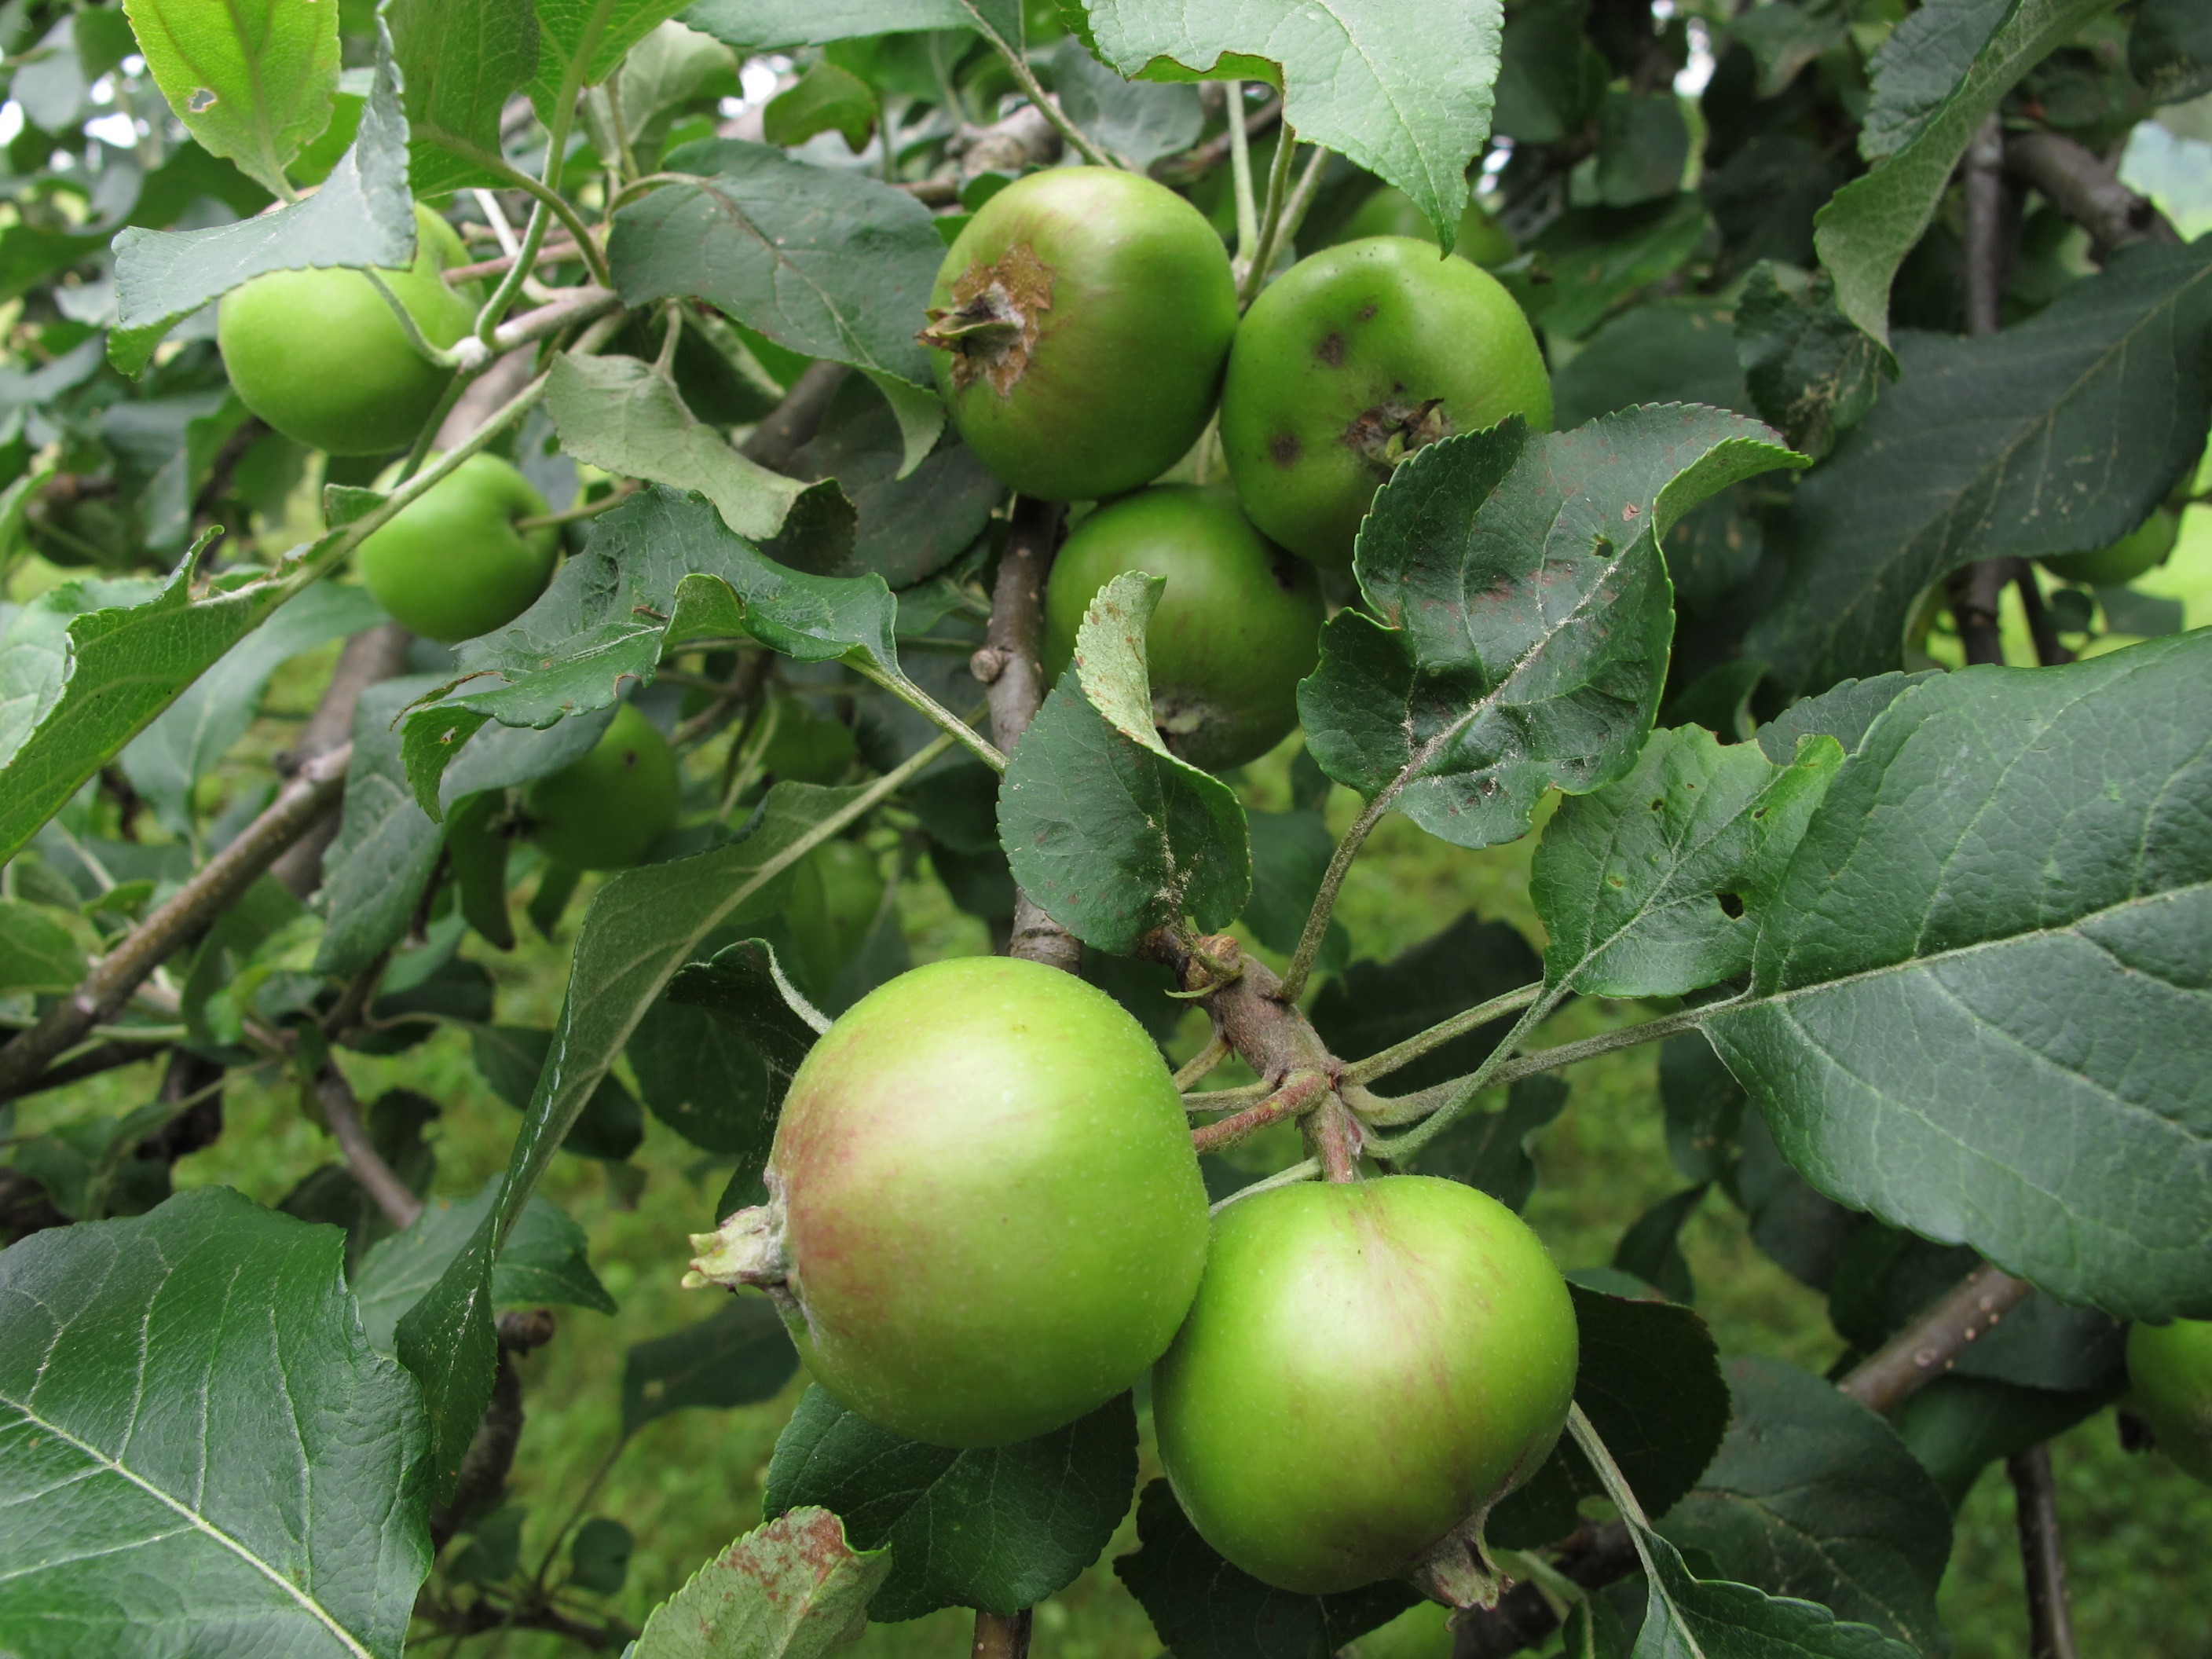
Apples ready for thinning
This spring my apple trees produced more blossoms than usual. That means that there will be huge numbers of apples, come fall, but that each will be smaller – unless I take action. A tree can support just so much fruit. Thinning out – removing fruit – will promote bigger apples. I should have already thinned my apples by now, but it will be all right to do it now. See a clump of apples? Leave just one or two and remove the rest. I’ve read that it’s good to space apples 4 to 6 inches apart on a branch by thinning. Thinning will also help to minimize the alternate-year pattern for big fruit loads that are common with some varieties.
You can also put paper bags over some apples (and tie off the bags with twist ties) to have a few apples

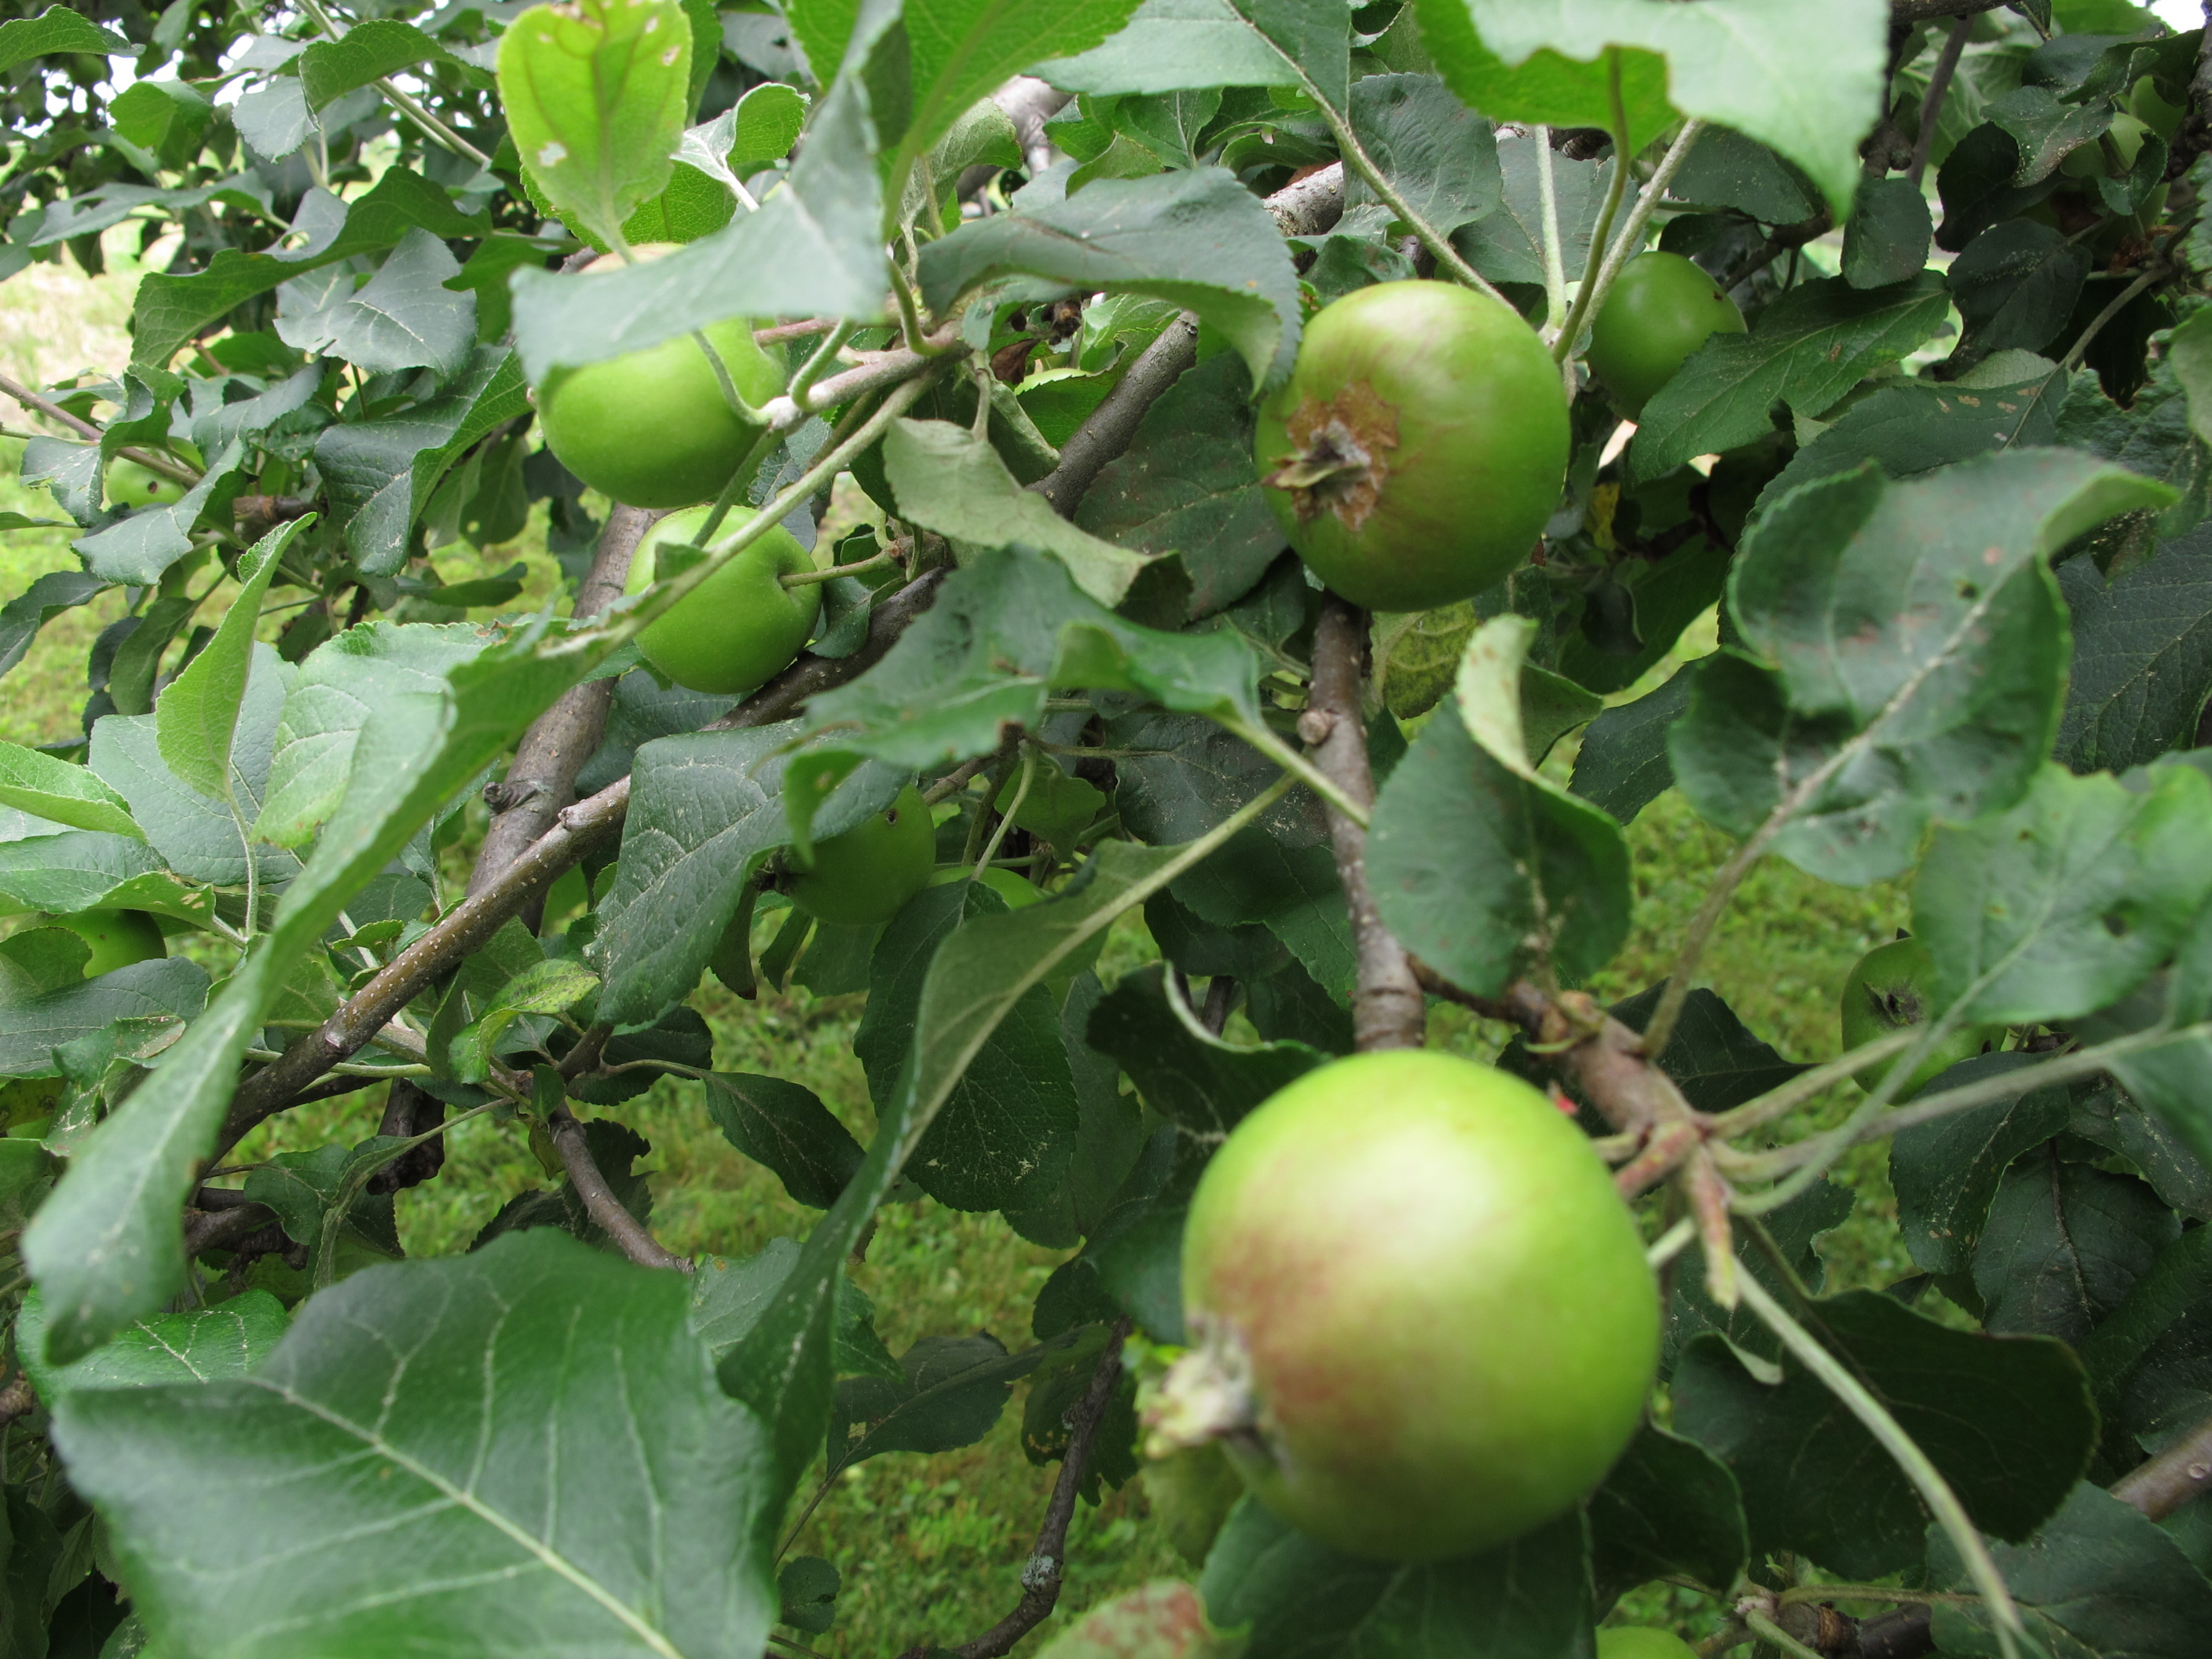
Apples after thinning
that are perfect and unblemished. If you’ve had trouble with apple maggots in the past, buy a few fake red plastic apples at the garden store, and cover them with a sticky substance (one brand is called Tanglefoot and is suitable for use by organic gardeners). This will catch the moths that are attracted to the redness of the fake apples – moths are not too bright.
So use your weekend to get caught up on some gardening chores. And okay, take some time off to snooze in the hammock if you must.
Henry Homeyer is the author of 4 gardening books and a new fantasy-adventure for children about a boy and a cougar. His web sites are www.henryhomeyer.com and www.Gardening-Guy.com.
Growing with Kids
Posted on Wednesday, June 12, 2013 · Leave a Comment
By all rights, I never should have turned out to be a gardener. I tell parents that if they want their children to be gardeners when they grow up, that they should never make them pull weeds. My parents made me pull weeds. We had a vegetable garden and we all worked in it. Gardening was considered a duty, not a learning experience. They had lived through the Depression of the 1930’s and had a deep fear that the economy would collapse once again. Growing vegetables was a hedge against hunger. My grandfather saved the day by making gardening fun when I visited him.
If you want to encourage children to love gardening, I’d like to suggest that you give each child a piece of earth that is theirs to use as they see fit – to grow carrots or flowers, or even to use with toy trucks. The right size plot is probably, for smaller children, as big as they are – their height by their arm span. For little ones, that’s three or four feet square. It could be a wood-sided bed, or just a corner of the garden marked off by string.
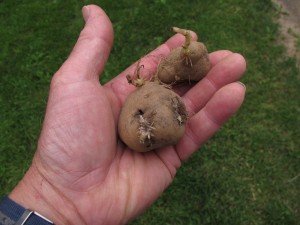
Seed potatoes with sprouts
Help your kids pick things to grow that are easy and tasty. I think most kids will eat cherry tomatoes right off the bush. Sun Gold is the name of my favorite – it’s delicious and highly productive. Buy a seedling and help your child plant it. These tomato plants get big and tall and will need some support. I recommend using a tomato cage made of heavy wire. Pick the biggest cage you can – 54 inches tall and with 4 legs, not 3. Later, you may have to add a tall wooden stake to help keep the plant from tipping over anyway, cage and all.
There really is magic in starting plants from seeds. Kids are fascinated by the idea of planting a seemingly inert speck and getting fresh tomatoes or carrots some months later. But they need guidance, and a certain amount of help. Carrots seeds, for example, are tiny and hard for small fingers to plant one by one. The solution? Buy pelleted seeds if you can find them. These are seeds that are coated with a layer of clay, turning a tiny seed into something almost the size of a BB. I had pelleted seeds for my grandkids to use this year, and it made a frustrating job fun. I ordered pelleted carrot seeds from Johnny’s Selected Seeds (877-564-6697 or www.johnnyseeds.com).
Radishes, beets and beans are bigger seeds and easy to handle, but not necessarily tops on the list of favorite veggies for kids. I love green beans now, but as a kid I only ate them under duress. Corn is easy to plant, but requires more space than you might want to dedicate to it, and is a magnet for corn worms which can be off-putting.
If you are working with kids, you surely do not want to use any chemicals in their little gardens. Not chemical fertilizer, not weed killer, not bug killer. Their systems are much more sensitive to chemicals than ours. Chemical fertilizers are not poisonous, but can be harsh on young fingers and the dust should never be inhaled.
In my experience, nothing is better to plant with kids than potatoes. They are easy to handle at planting time, and the excitement when harvesting is remarkable. And I’ve never met a kid that didn’t like eating freshly cooked mashed potatoes that they grew.
 If you’ve never grown potatoes before, they’re easy. Start potatoes from sprouted potatoes that are sold as seed potatoes at your local feed-n-grain store or garden center. Don’t try growing potatoes from grocery store spuds because many of those have been treated with chemicals to keep them from sprouting. You can plant whole small potatoes, or cut larger ones into 2 or 3 pieces, so long as each has two “eyes” that are starting to sprout.
For best results, each piece of potato needs to be placed in loose, rich soil that has been amended with some compost.. The roots of your plants will grow down, and the new potatoes will be formed above the seed potato. Loosen the soil well and place your seed potatoes 3 or 4 inches beneath the soil surface and a foot apart in the row. Cover with a thin layer of soil – an inch is fine. Then, after the spuds have sent up leaves, you can fill in the hold or the trench you have planted in. That’s called “hilling” the potatoes.
Potatoes are remarkably productive. Each piece you plant will produce from one to five pounds of potatoes. And they come in a variety of colors – which kids find fascinating: get some purple ones or red-skinned ones to plant if you can. The variety called Kennebec is an all white potato that is, in my experience, the most productive of all. Yukon Gold is another good producer, as is Red Pontiac, one of my favorites for flavor.
Maybe I became a gardener because, like my parents, I feared that calamity would strike and I’d need to depend on my garden for food. It is true that I eat something that came from my garden nearly every day of the year – garlic, for example, or veggies from my freezer. And I don’t mind weeding – I even enjoy it in moderation. So try to get your kids gardening. It’s not too late to start, and I think you’ll all have fun.
Henry Homeyer is a grampy and former school teacher. His children’s book, Wobar and the Quest for the Magic Calumet, is a fantasy-adventure for all elementary school kids. His web site for that book is www.henryhomeyer.com.
Shade Annuals
Posted on Wednesday, June 5, 2013 · Leave a Comment
Last fall a reader alerted me to the fungal disease that has devastated that wonderful shade annual, impatiens, throughout much of New England. The disease, called impatiens downy mildew, will be a problem again for most gardeners this year. Any garden that had the disease last year will have it again this year – even our coldest winters will not cleanse the soil of it. I wish I had known about it sooner, as prompt removal of affected plants may stop the spread of the disease. So if you did not have the disease last year, watch your plants carefully this year and bag and dispose of any diseased plants promptly.
Impatiens downy mildew symptoms are these: yellowing of leaves, then a limp appearance, as if it needs to be watered. Next comes a downy white fungal growth on the undersides of leaves. Then leaves and flowers drop, leaving just a stem with a few leaves on top – as if slugs had eaten the leaves. I have read that if you don’t plant impatiens in a site that has had the disease for a year or two, the soil may become free of disease. But I wouldn’t count on it.
There are two related plants that will thrive in shade or part shade and that are not susceptible to the mildew: New Guinea impatiens and SunPatiens, which is a trademarked hybrid. SunPatiens is advertised as good for part sun to sun – but not deep shade. But it is being marketed as a replacement of impatiens. I wonder if it will be able to bloom as vigorously as our old favorite in full shade. Both are generally sold in individual pots for around $5, quite an upgrade from a six-pack for $3.50 or so that I was accustomed to paying for impatiens in past years.
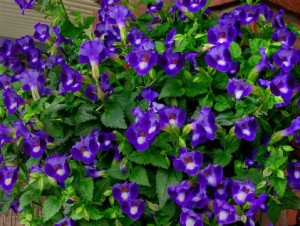
Torenia
Another plant that is being touted as a replacement for impatiens is Torenia. I spoke to two landscapers who have used Torenia in past years and say that it is nice enough, but it will not satisfy impatiens-lovers. I’ve heard that it does not have as many blossoms per plant, generally, and is often available in just a few colors – shades of blue and purple, and in white. However, I have found it for sale in multi-packs in a few places and did find one nursery with 4-packs that listed rose, magenta, lemon drops and white as colors available.
I have used bedding lobelia as a nice shade annual, though in my experience it wants a little sun or filtered sun. I love the intense blue that it often displays, though it is available in other colors, too. I started seeds indoors back on April 17, a mix called ‘Cascade of Color’ that promised blue, blue with a white eye, lilac, red, ruby and white.
Right now my lobelia seedlings are only 2 inches tall but I assume they will take right off when I separate them and get them in the ground. The only problem with a mix like that is that one cannot determine what color any given seedling will be – unless you wait for them to bloom in the pot. And, when I read the seed packet (from Botanical Interests) just now, I see that this variety is advertised for full sun. I have plenty, so I’ll try some in shade, too.

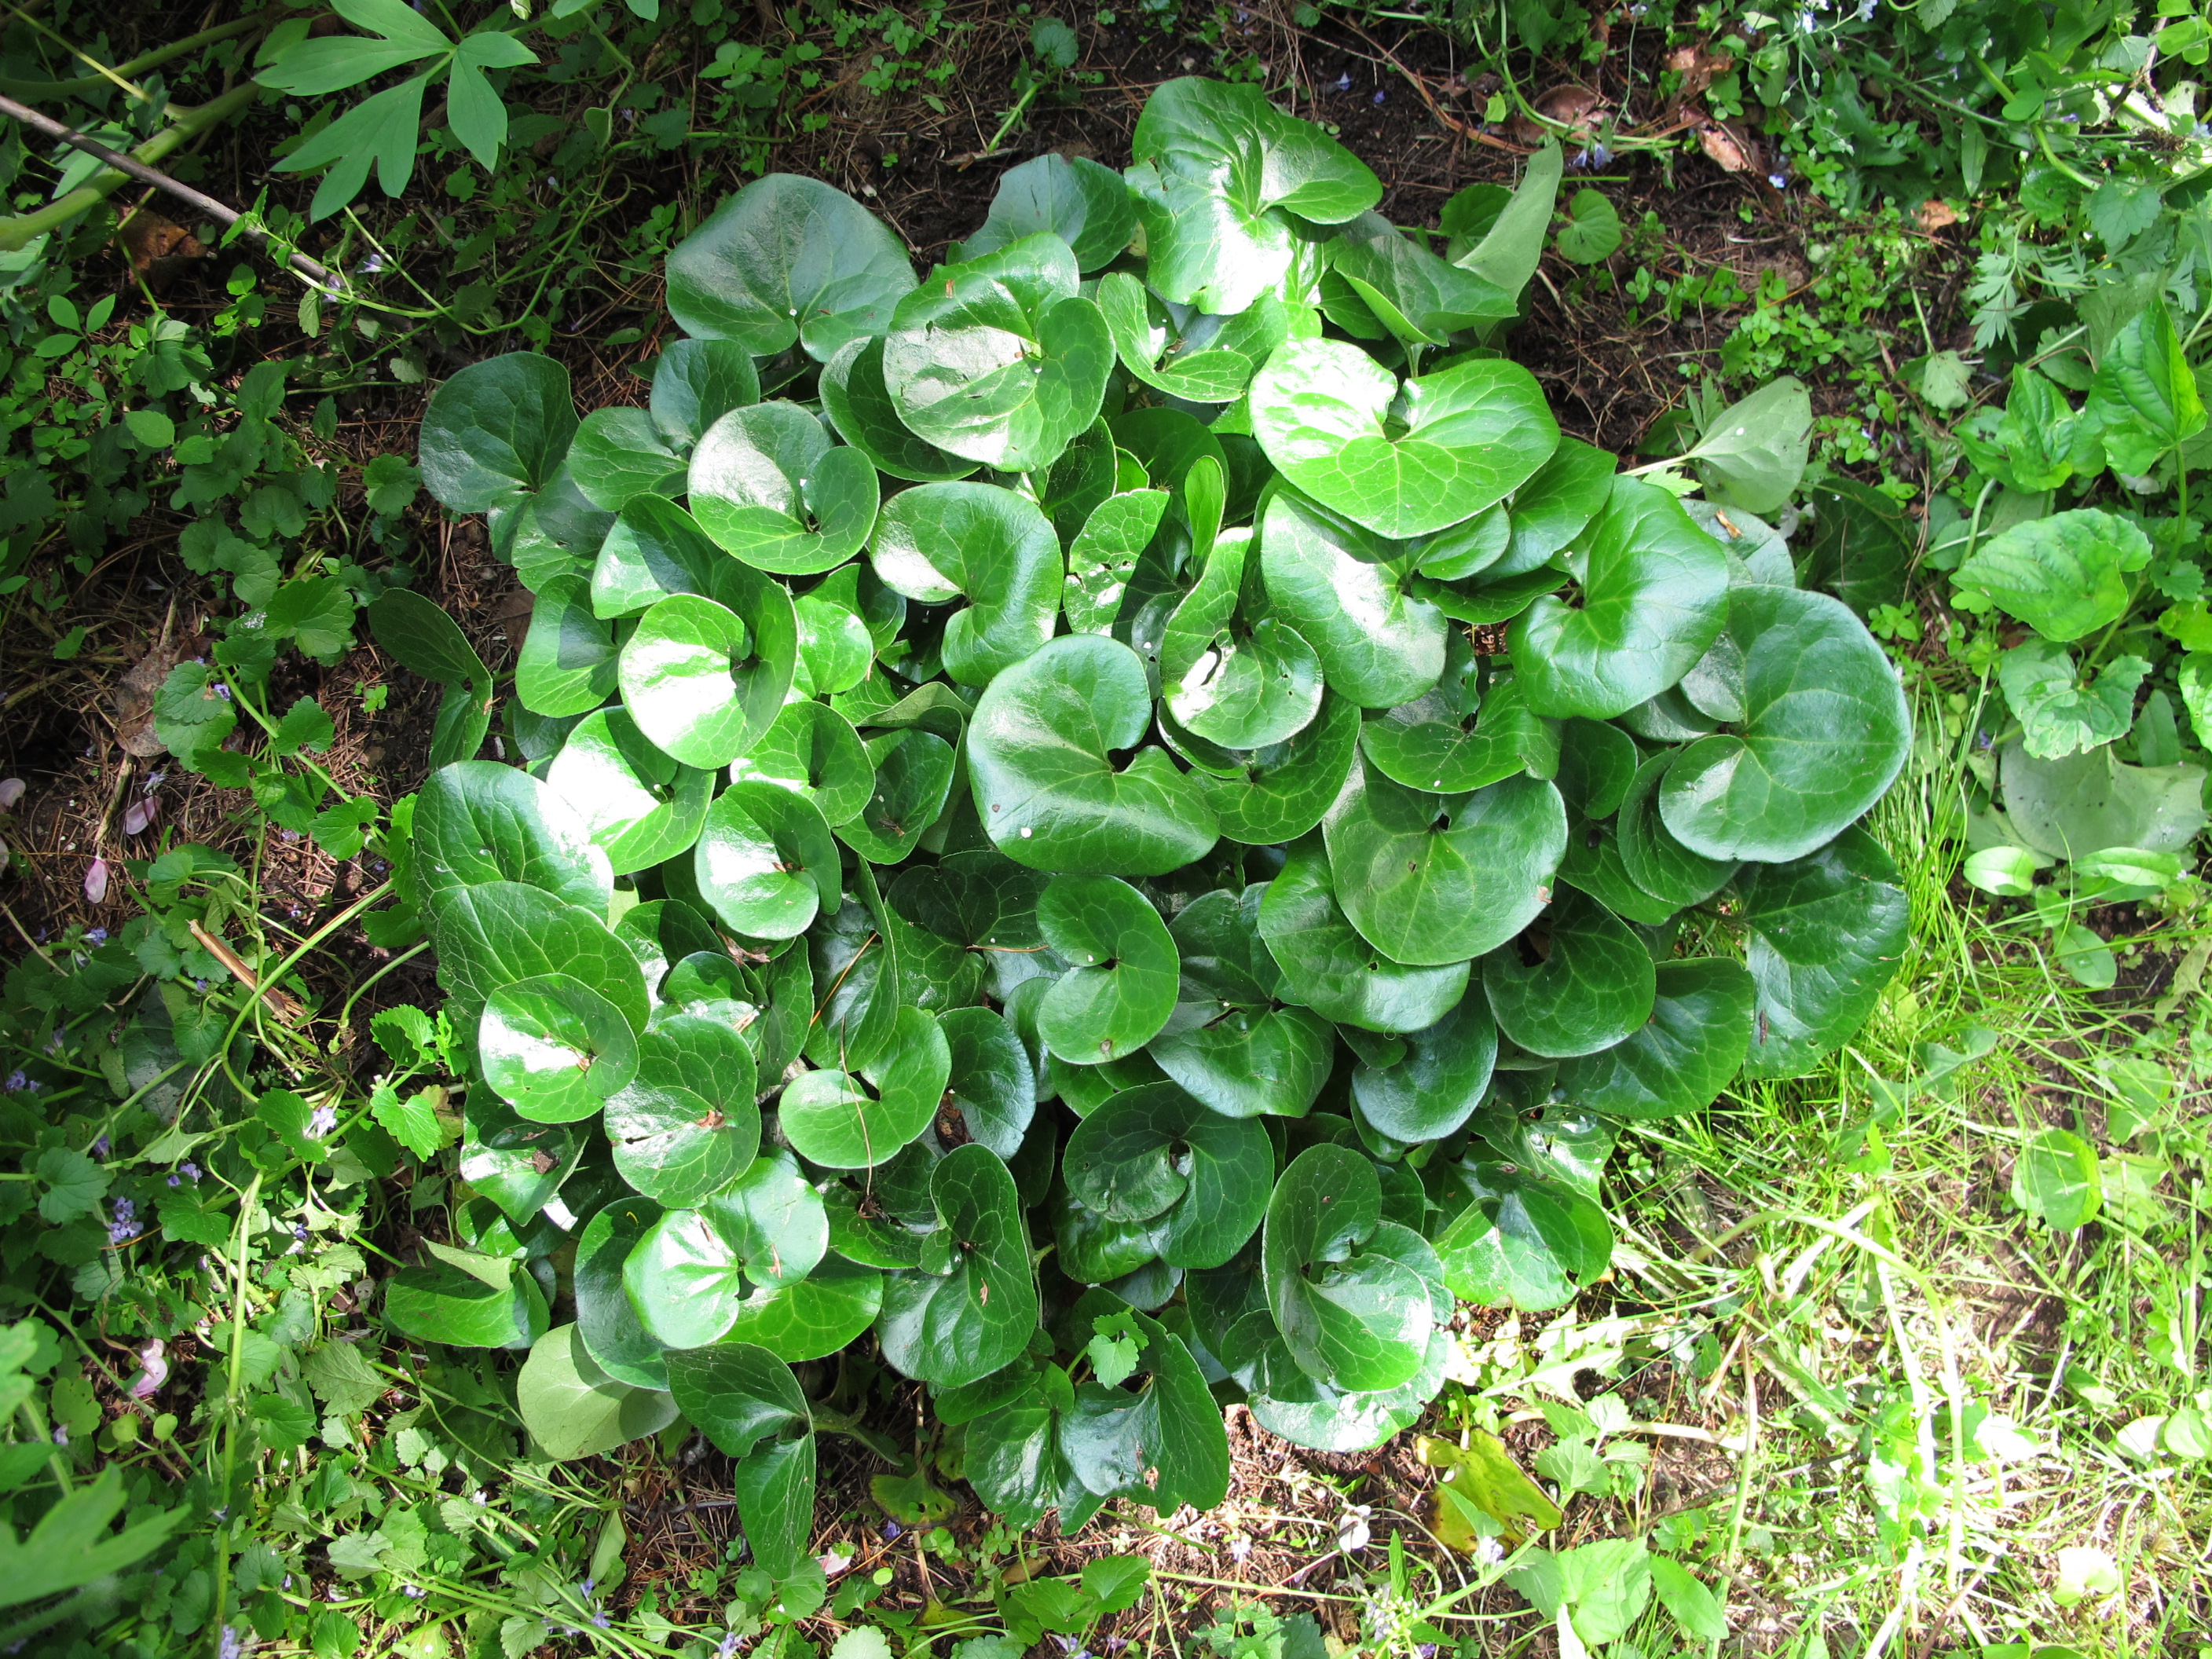
European Wild Ginger
So what else can we do to provide color in shade? Try some perennials. Granted, most only bloom for 1 to 3 weeks, but if you select plants with good foliage they can be a joy all summer. I love European wild ginger (Asarum europaeum) for its very glossy dark green leaves. It forms a nice expanding clump, even in dry shade with competition from tree roots. The blossoms are hidden beneath the foliage, but it doesn’t matter to me. This is a great shade plant. I plant them in clumps of three about 18 inches from center to center.
Then there is bigroot geranium (Geranium macrorhizum). Not to be confused with your mom’s red geraniums (which are technically not geraniums at all), this is a nice spreading plant that thrives in full shade and blooms with pink, magenta or white flowers in late May or early June. The leaves look good all summer, each plant a spreading mound 12 to 18 inches tall and 15 inches wide. I use it as a groundcover. I have read that it will do well in sun, too, and that it tolerates a wide range of soil and pH conditions. If it wanders too far? It pulls easily, and you can give the roots to someone who doesn’t have it.
I have never tried either the geranium or the ginger in a pot, but will this year and grow them on my north-facing, shady deck. I’ll give them a 50-50 mix of standard potting soil and compost, and I bet they look just fine.
It seems that every year there is a new bug or a new disease that threatens some plant in our garden. I guess we will have to keep on adapting and changing – just like the pests do. Good luck!
Henry Homeyer is the author of 4 gardening books and a children’s fantasy-adventure called Wobar and the Quest for the Magic Calumet. You may reach him at PO Box 364, Cornish Flat, NH 03746 or henry.homeyer@comcast.net.\
Growing Some Lesser Known Vegetables
Posted on Wednesday, May 29, 2013 · Leave a Comment
This year as you plan your garden, why not choose some lesser known veggies to see how they do for you? You might just be surprised how easy it is to grow kohlrabi or rutabagas – and how tasty they are. I grow those, and several other kinds of vegetables that you might not have tried. Most are not terribly hard to grow. You could be the first on your block to grow artichokes!
Let’s start with sweet potatoes. Most New England gardeners don’t generally grow this vegetable, thinking that it’s a southern crop. It is, but you can grow it. The trick is to grow it under black plastic, which increases the heat. It needs good rich soil, liberally amended with compost or aged cow manure. Start plants from little plants called slips, available from catalogs such as Johnny’s Selected Seeds (www.johnnyseeds.com).
Adequate moisture is key for growing sweet potatoes. Even if you leave an opening in the plastic for the plant, rain water probably won’t soak the soil enough. Run a section of soaker hose under the plastic and give it some water any time the soil seems dry. Soaker hoses are available at garden centers and are basically special hoses that ooze water very slowly, soaking the soil.
Rutabagas, like Rodney Dangerfield, don’t get the respect they deserve. They are easy to grow, rarely bothered by pests or diseases, and can substitute for potatoes in the kitchen. They look a bit like turnips (which do have a strong flavor) but rutabagas are mild. I find they are great in stews- they don’t get mushy the way potatoes do when you re-heat the stew several times.
Plant rutabagas by seed in mid-June about 2 inches apart and thin to 6 inches apart for maximum production. Rutabagas can get big –a pound each or more, but do not get tough or less tasty even when they get big. They grow best in soil that is near neutral on the pH scale and is rich in compost.

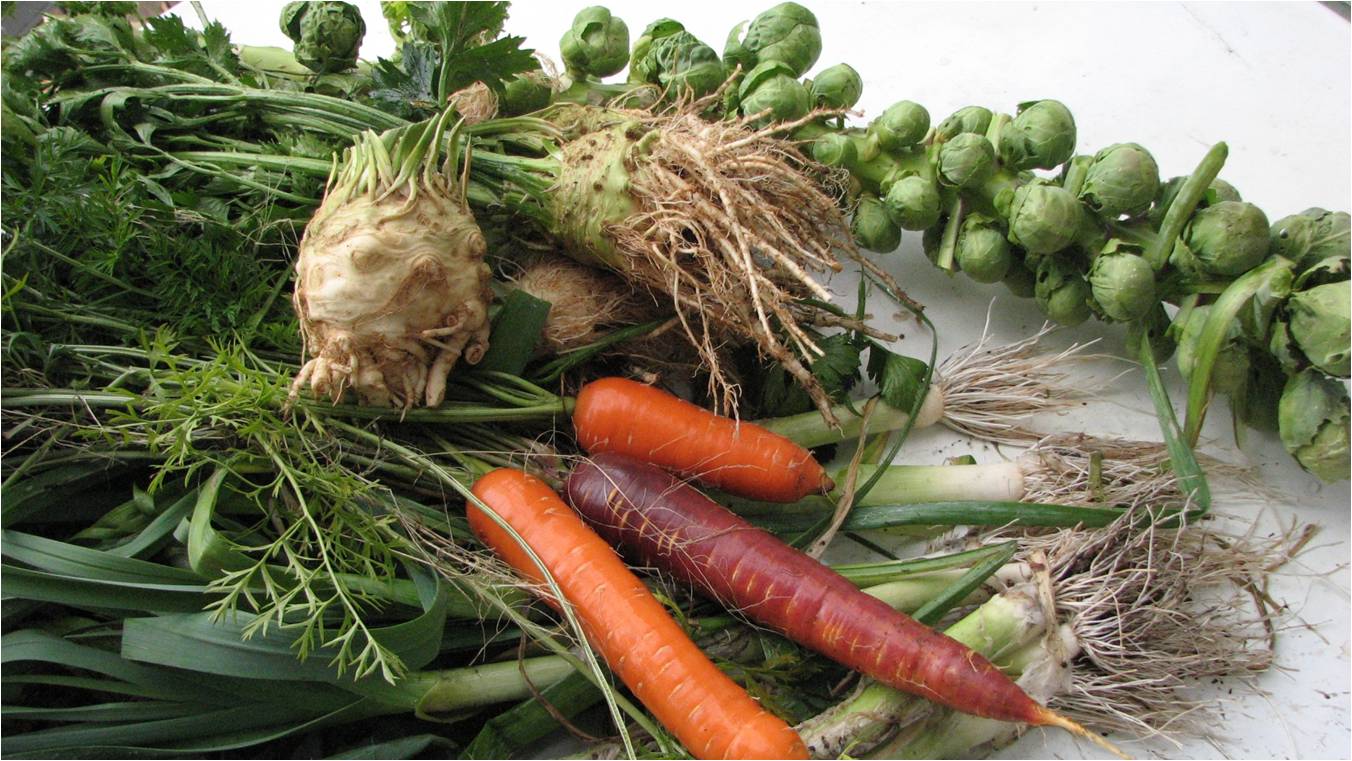
Celeriac with carrots & Brussels sprouts
As far as I am concerned, growing celery is best left to the professionals. When I’ve tried growing it, the slugs loved it and the stalks were dry and stringy. But you can have that same celery flavor in your soups, stuffing and stews by growing celeriac, also known as celery root. I start celeriac by seed in the house in late March or early April, but some better garden centers will offer plants already started. Celeriac loves moisture, so add compost to the soil to hold water, and water during dry times. Plant about 6 inches apart.
Salsify and scorzonera are long, thin root crops with a somewhat nutty flavor. They need deep, loose soil as they can grow 8-12 inches long. But each is only an inch or less in diameter, so they don’t produce much food per plant (compared to carrots or rutabagas, for example). Plant directly in the garden, and wait. They are slow growing, so plant early and harvest late in the fall. Great in turkey stuffing.
Artichokes are beautiful plants that look good in a flower garden, too. In California they are perennials, producing year after year in deep black soil rich with moisture. I have started them from seed, but one must start them early in March for best results. But some garden centers sell them in small pots, so most years I buy them.
Allow a 2-foot by 2-foot space or more for each artichoke plant. You will get one artichoke (which is really a flower bud) at the top of the plant, then side shoots with smaller artichokes after that, up to 5 more. None will be as big as the grocery store version. Be sure to pick them before they turn dry and open up.
My favorite of the odd ducks of the vegetable world is kohlrabi, which looks a little like a space alien: a round fat “root crop” that sits in the soil surface and has stems popping out of it like arms –and then leaves, of course. The vegetable is almost perfectly round and is actually a thickened stem. It comes in purple and green varieties. Eaten fresh in salads it tastes something like a cucumber crossed with a radish. But they are good in stir fries or stews, too.
Plant kohlrabi seeds directly in the garden about 3 inches apart and thin to 6 inches. It is in the cabbage family (Brassica) and grows fast, ready for harvest in as little as 8 weeks. Last year I grew a variety called “Kossak’ that is an 80-day variety, but it gets to be huge (8” or more) and stores well – Johnny’s Selected Seeds, the developer of the seed – says it will store for 4 months! It needs plenty of moisture, and like most veggies, plenty of compost in the soil.
Of the salad/cooking greens, think of trying orach. Seeds are hard to find – Baker Creek Heirloom Seeds is the only place I’ve found that has them (www.rareseeds.com). This is a gorgeous purple-leafed plant that gets to be three feet tall, and is in the goosefoot family which includes many varieties of weeds – but also spinach, beets and quinoa. If you let a few plants flower and go to seed, you will always have some volunteer plants in the garden, year after year. It has no special growing needs; it’s almost a weed, after all.
Gardening is supposed to be fun. For me that means trying more than the usual veggies. So this year, get adventurous. Try kohlrabi, rutabagas or even an artichoke! You’ll be glad you did.
Henry Homeyer’s Web site is www.Gardening-Guy.com. You may reach him at henry.homeyer@comcast.net.


 Click Here to buy from Cobrahead