Getting Ready for Summer: Lilacs and Grapes and Blackberries, Oh My!
Posted on Wednesday, April 24, 2013 · Leave a Comment
I love spring. It brings warm weather and plenty of excuses to stop working on the computer and get outside. Here are some of my chores for this week and next: 1) Prune the grape vines while still dormant. 2) Clear out last summer’s fruiting canes from the blackberry patch. 3) Give some limestone to the lilacs. 4) Fertilize the bulb flowers.
Grapes bloom and produce fruit on new shoots. That means that you can prune them now, and not lose any grapes later on. In fact, if you do not prune them now, you will get less fruit- and a jumble of vines. Pruning stimulates new growth – and better yields.
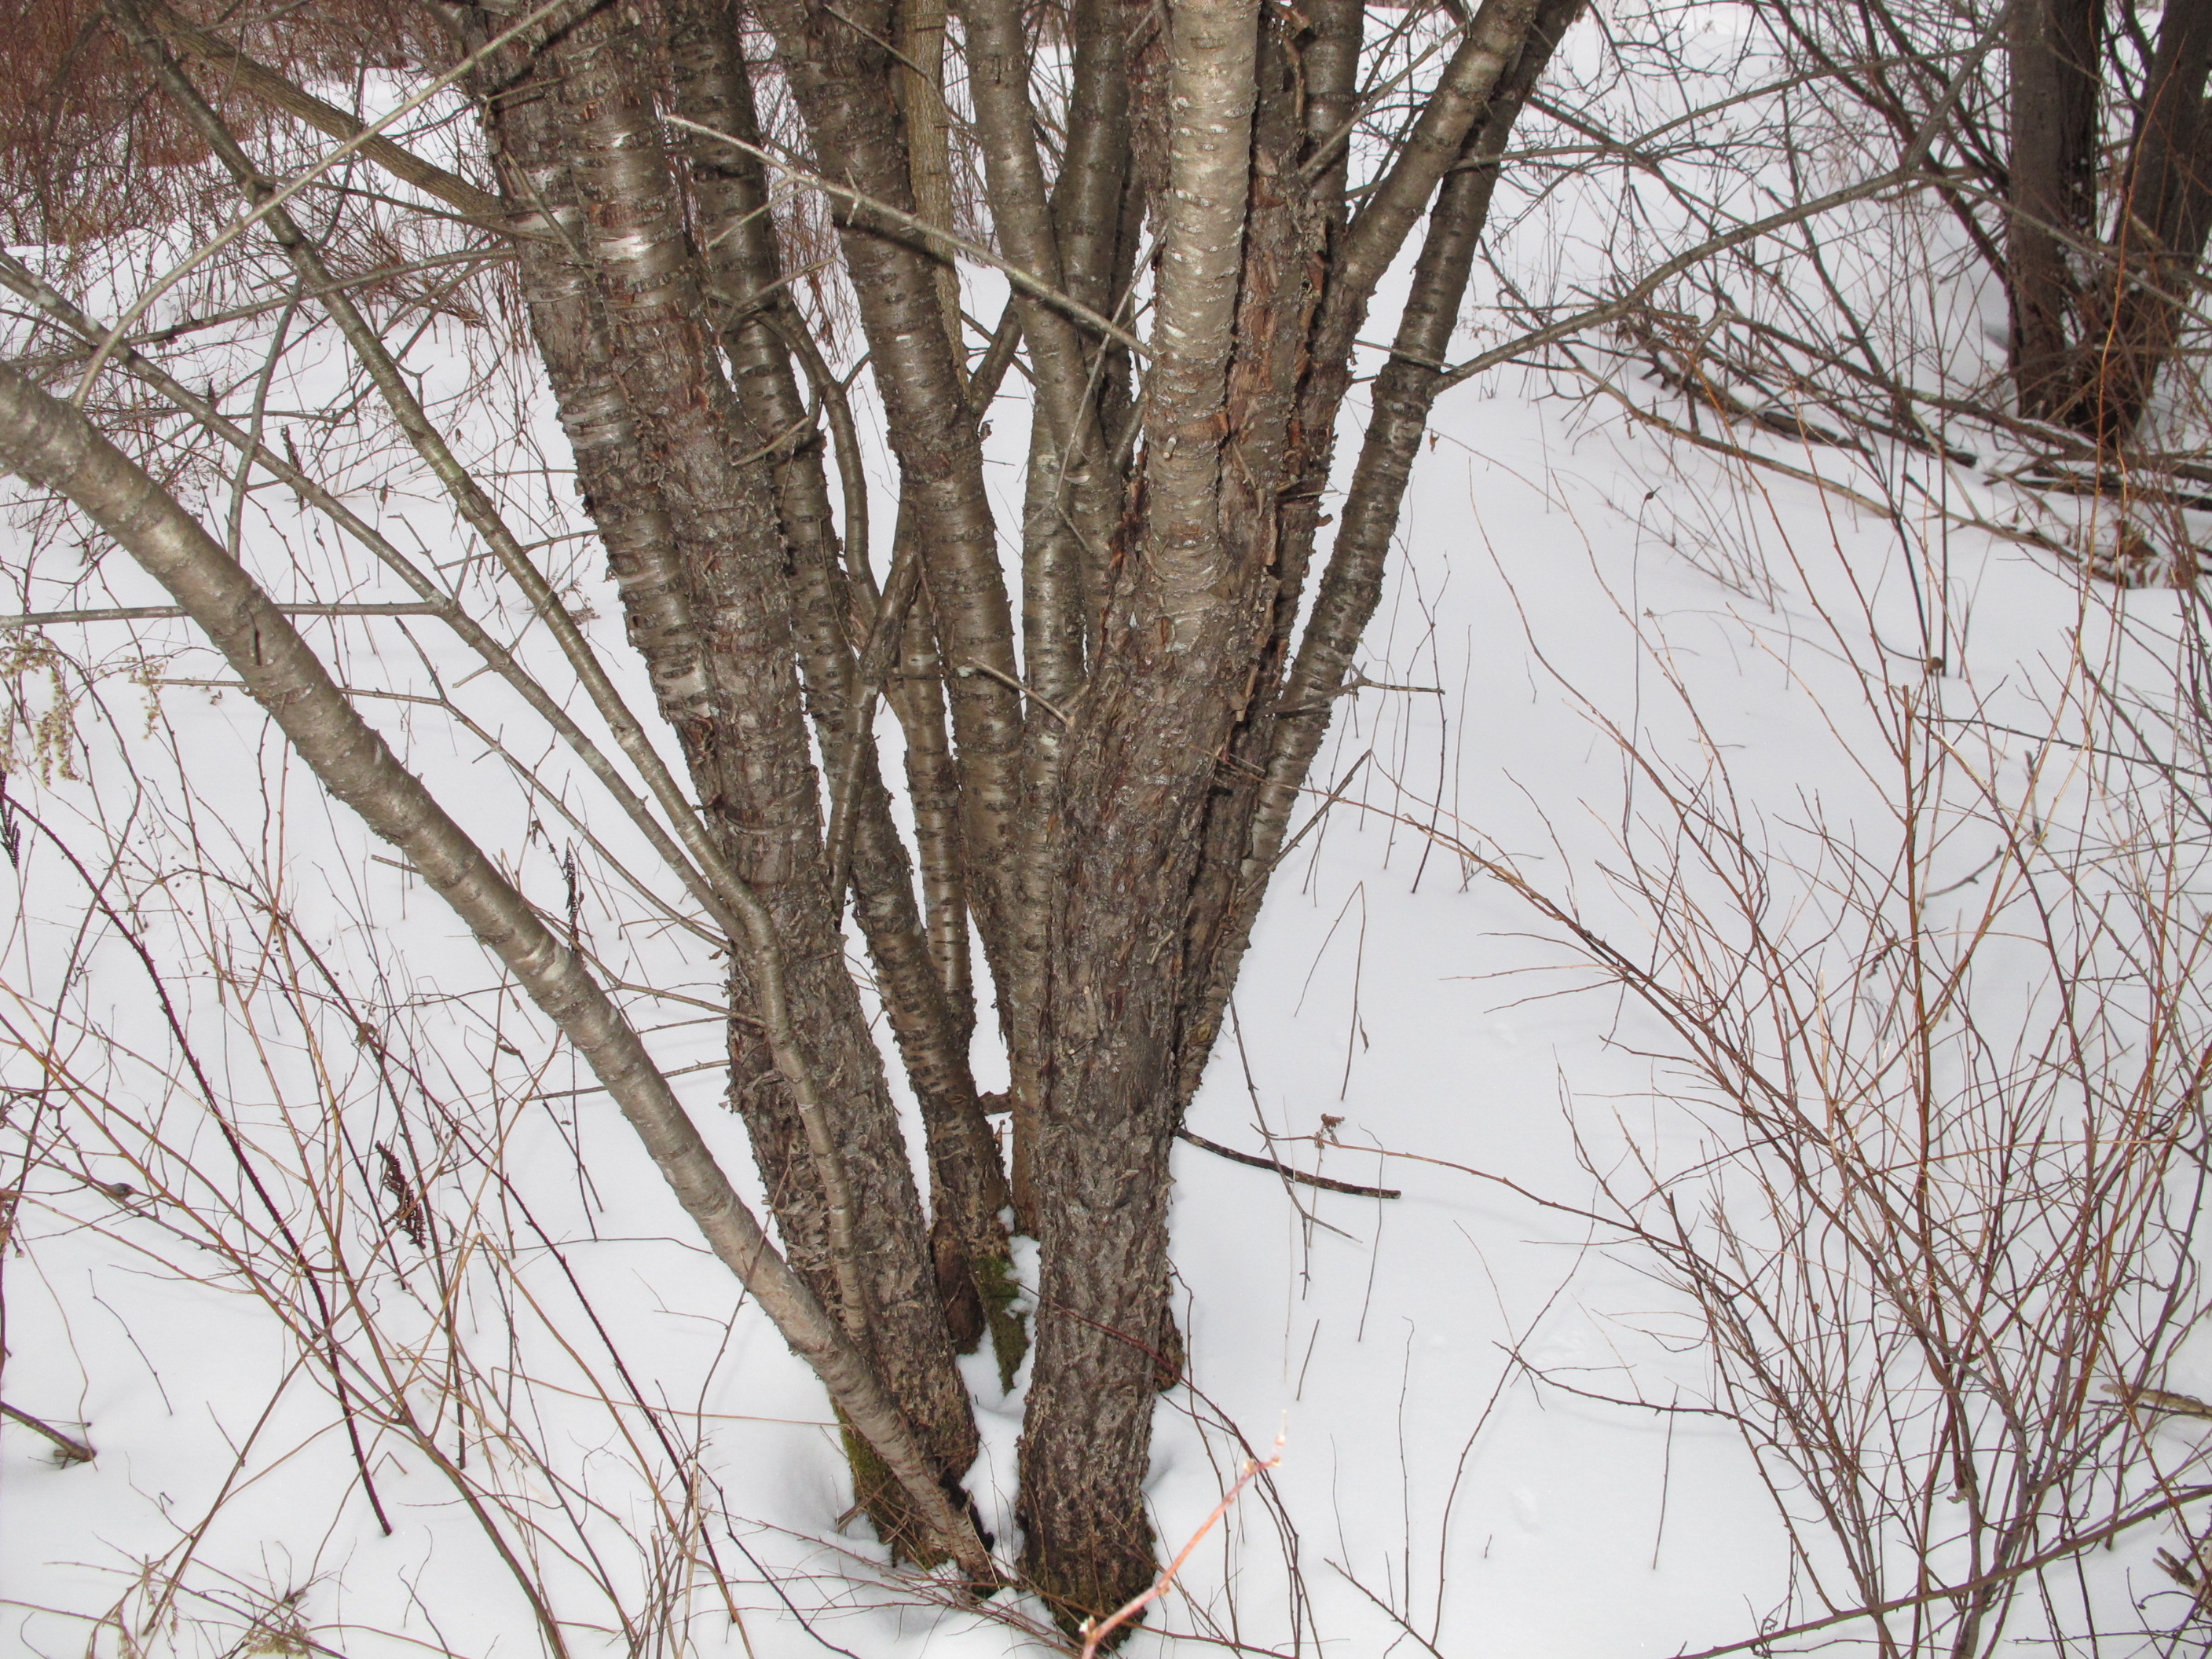
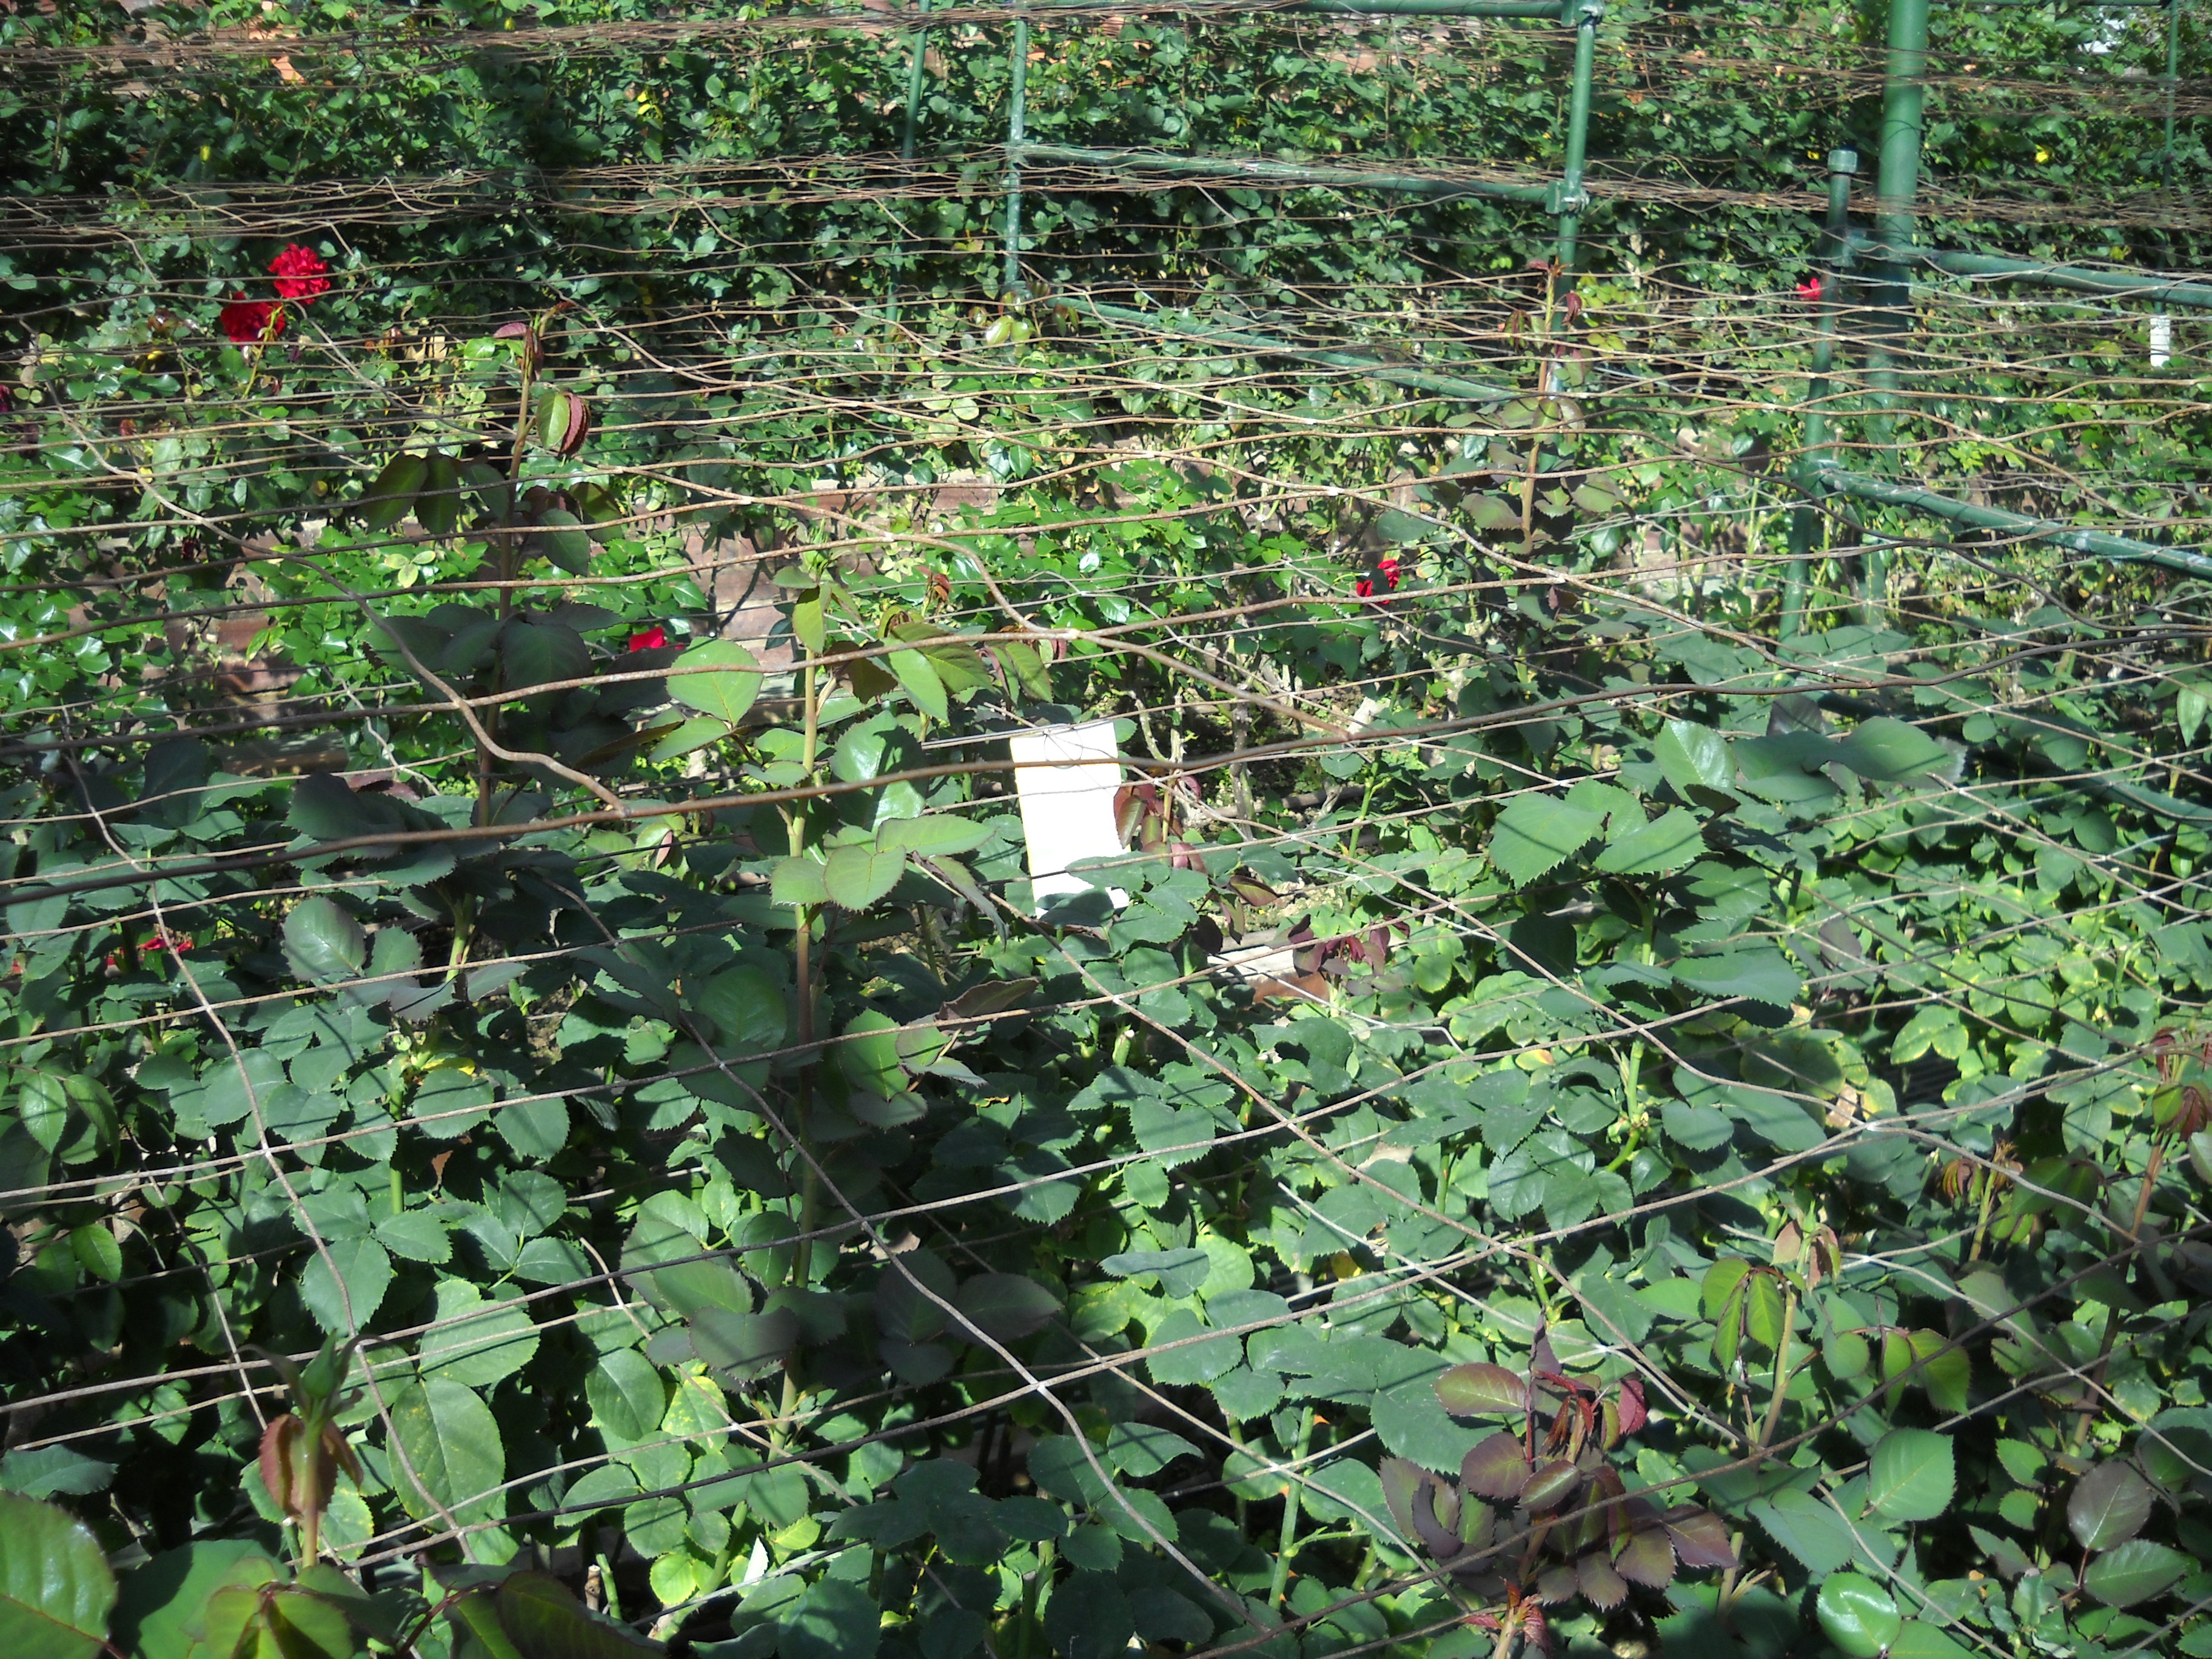
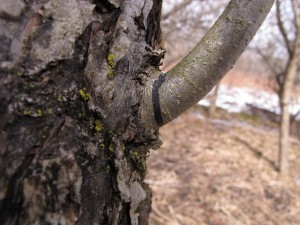
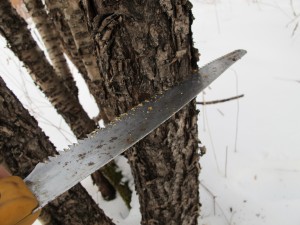
Old grape cane showing shaggy bark (center)
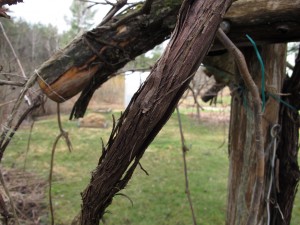
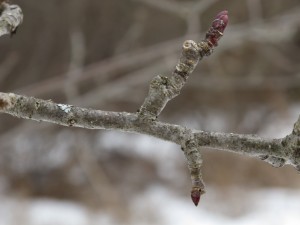
Many people avoid pruning their grapes because the task seems daunting. Here is the key: this year’s fruit grows on new shoots, or canes, that grow on last year’s canes, not older wood. Last year’s canes are smooth and tan, while older wood is darker and has shaggy bark.
Each of last year’s canes needs to be shortened up so that there are just a few buds that will produce new canes this year. Buds are obvious if you look carefully: small protuberances on last year’s growth. Some grapes have buds close together near the base of last year’s canes. Others have them well spaced out, say a foot apart. In either case, you only need a few buds to produce this year’s fruiting canes. So in the first instance, you prune back hard, leaving just a short spur with a few buds. In the second, you need to leave last year’s cane longer in order to have an adequate number of buds (and hence, new fruiting canes).

First year grape cane with bud
My friend Lewis Hill (1924-2008) wrote a nice book about pruning : Pruning Simplified. In it he warned that if you have an overgrown grape vine that has not been pruned in many years, you should spread out the work over a few years. The goal is to “get the vine back to a single trunk with four strong, well-spaced branches.”
Last year I worked hard at reducing the size of my blackberry patch and creating a pathway down the middle of the patch. It’s time now to do so again because blackberries are very vigorous and spread by root. A single row of plants can easily become 10 feet wide and virtually impenetrable unless worked on every year.
Blackberries produce fruit on canes that grew last year. Last year’s fruiting canes are dead, and need to be removed. Look carefully and it will become obvious what’s what. Last year’s canes are light brown and lifeless. This year’s fruiting canes are darker colored and covered with buds at this time of year. Your job is to cut off the dead ones at the base and remove them.
I use a pole pruner (an ARS brand) to cut off the canes, and then by gently squeezing the grips on the pruner, I use it to pull out the cut cane. This keeps me out of the blackberry patch – and without cuts or scrapes from the sharp thorns.
I use my lawnmower to control the spread of my blackberries. New shoots pop up in all directions, and each will grow into a new plant if allowed to grow. I have a row of blueberries 5 feet or more from the blackberries, and shoots regularly pop up amongst them. I put on heavy leather gloves and try to pull them up, roots and all. I put down a thick layer of wood chips on my walkway up the middle of my patch.
Conventional wisdom has it that March is the time to give lilacs some wood ashes or limestone to keep the surrounding soil near neutral. I disagree. You can do that any time of the year. March is just when of the past farmers cleaned out their wood furnaces and had the time to spread ashes. But now is a good time to do so if you haven’t already done so.
Lilacs do not flower well in highly acidic soil. Because we get acid rain, our soil tends to get more acidic each year unless we add something to counteract that acidity. I should note that I don’t add limestone or wood ashes to my vegetable garden because it is very high in organic matter, and is very biologically active. The microorganisms help keep the soil near neutral.
I sprinkle wood ashes around a mature lilac at the rate of 1-2 quarts per plant using a one-quart yogurt container or coffee can. I don’t bother stirring the ashes into the soil as the first rain will wash it in. Correcting the soil pH will not affect this year’s blooming, but will help next year. This year’s buds are already there and ready to bloom.
My last job this week is to sprinkle some organic slow-release fertilizer around my bulbs plants like daffodils. This will slowly enrich the soil and provide needed minerals to the bulbs so they will remain vigorous in years to come. I like to do it now because I can see where the bulbs are growing – in the fall the foliage will be long gone.
So get outside and get to work. We gardeners don’t get any time off now – or for that matter, until next winter. It’s what keeps us young!
Henry Homeyer may be reached at henry.homeyer@comcast.net. His Web site is www.Gardening-guy.com. Henry lives and gardens in Cornish Flat, NH.
Hastening Spring
Posted on Wednesday, April 17, 2013 · Leave a Comment
I don’t know about you, but I’m tired of cold, raw, rainy days. And I really don’t want any more snow or slush. We’ve had some good warm and sunny days, but I know I shouldn’t expect them consistently yet. There are things I do to make me feel like spring and summer are on the way, even when it’s sleeting outside.

Forsythia
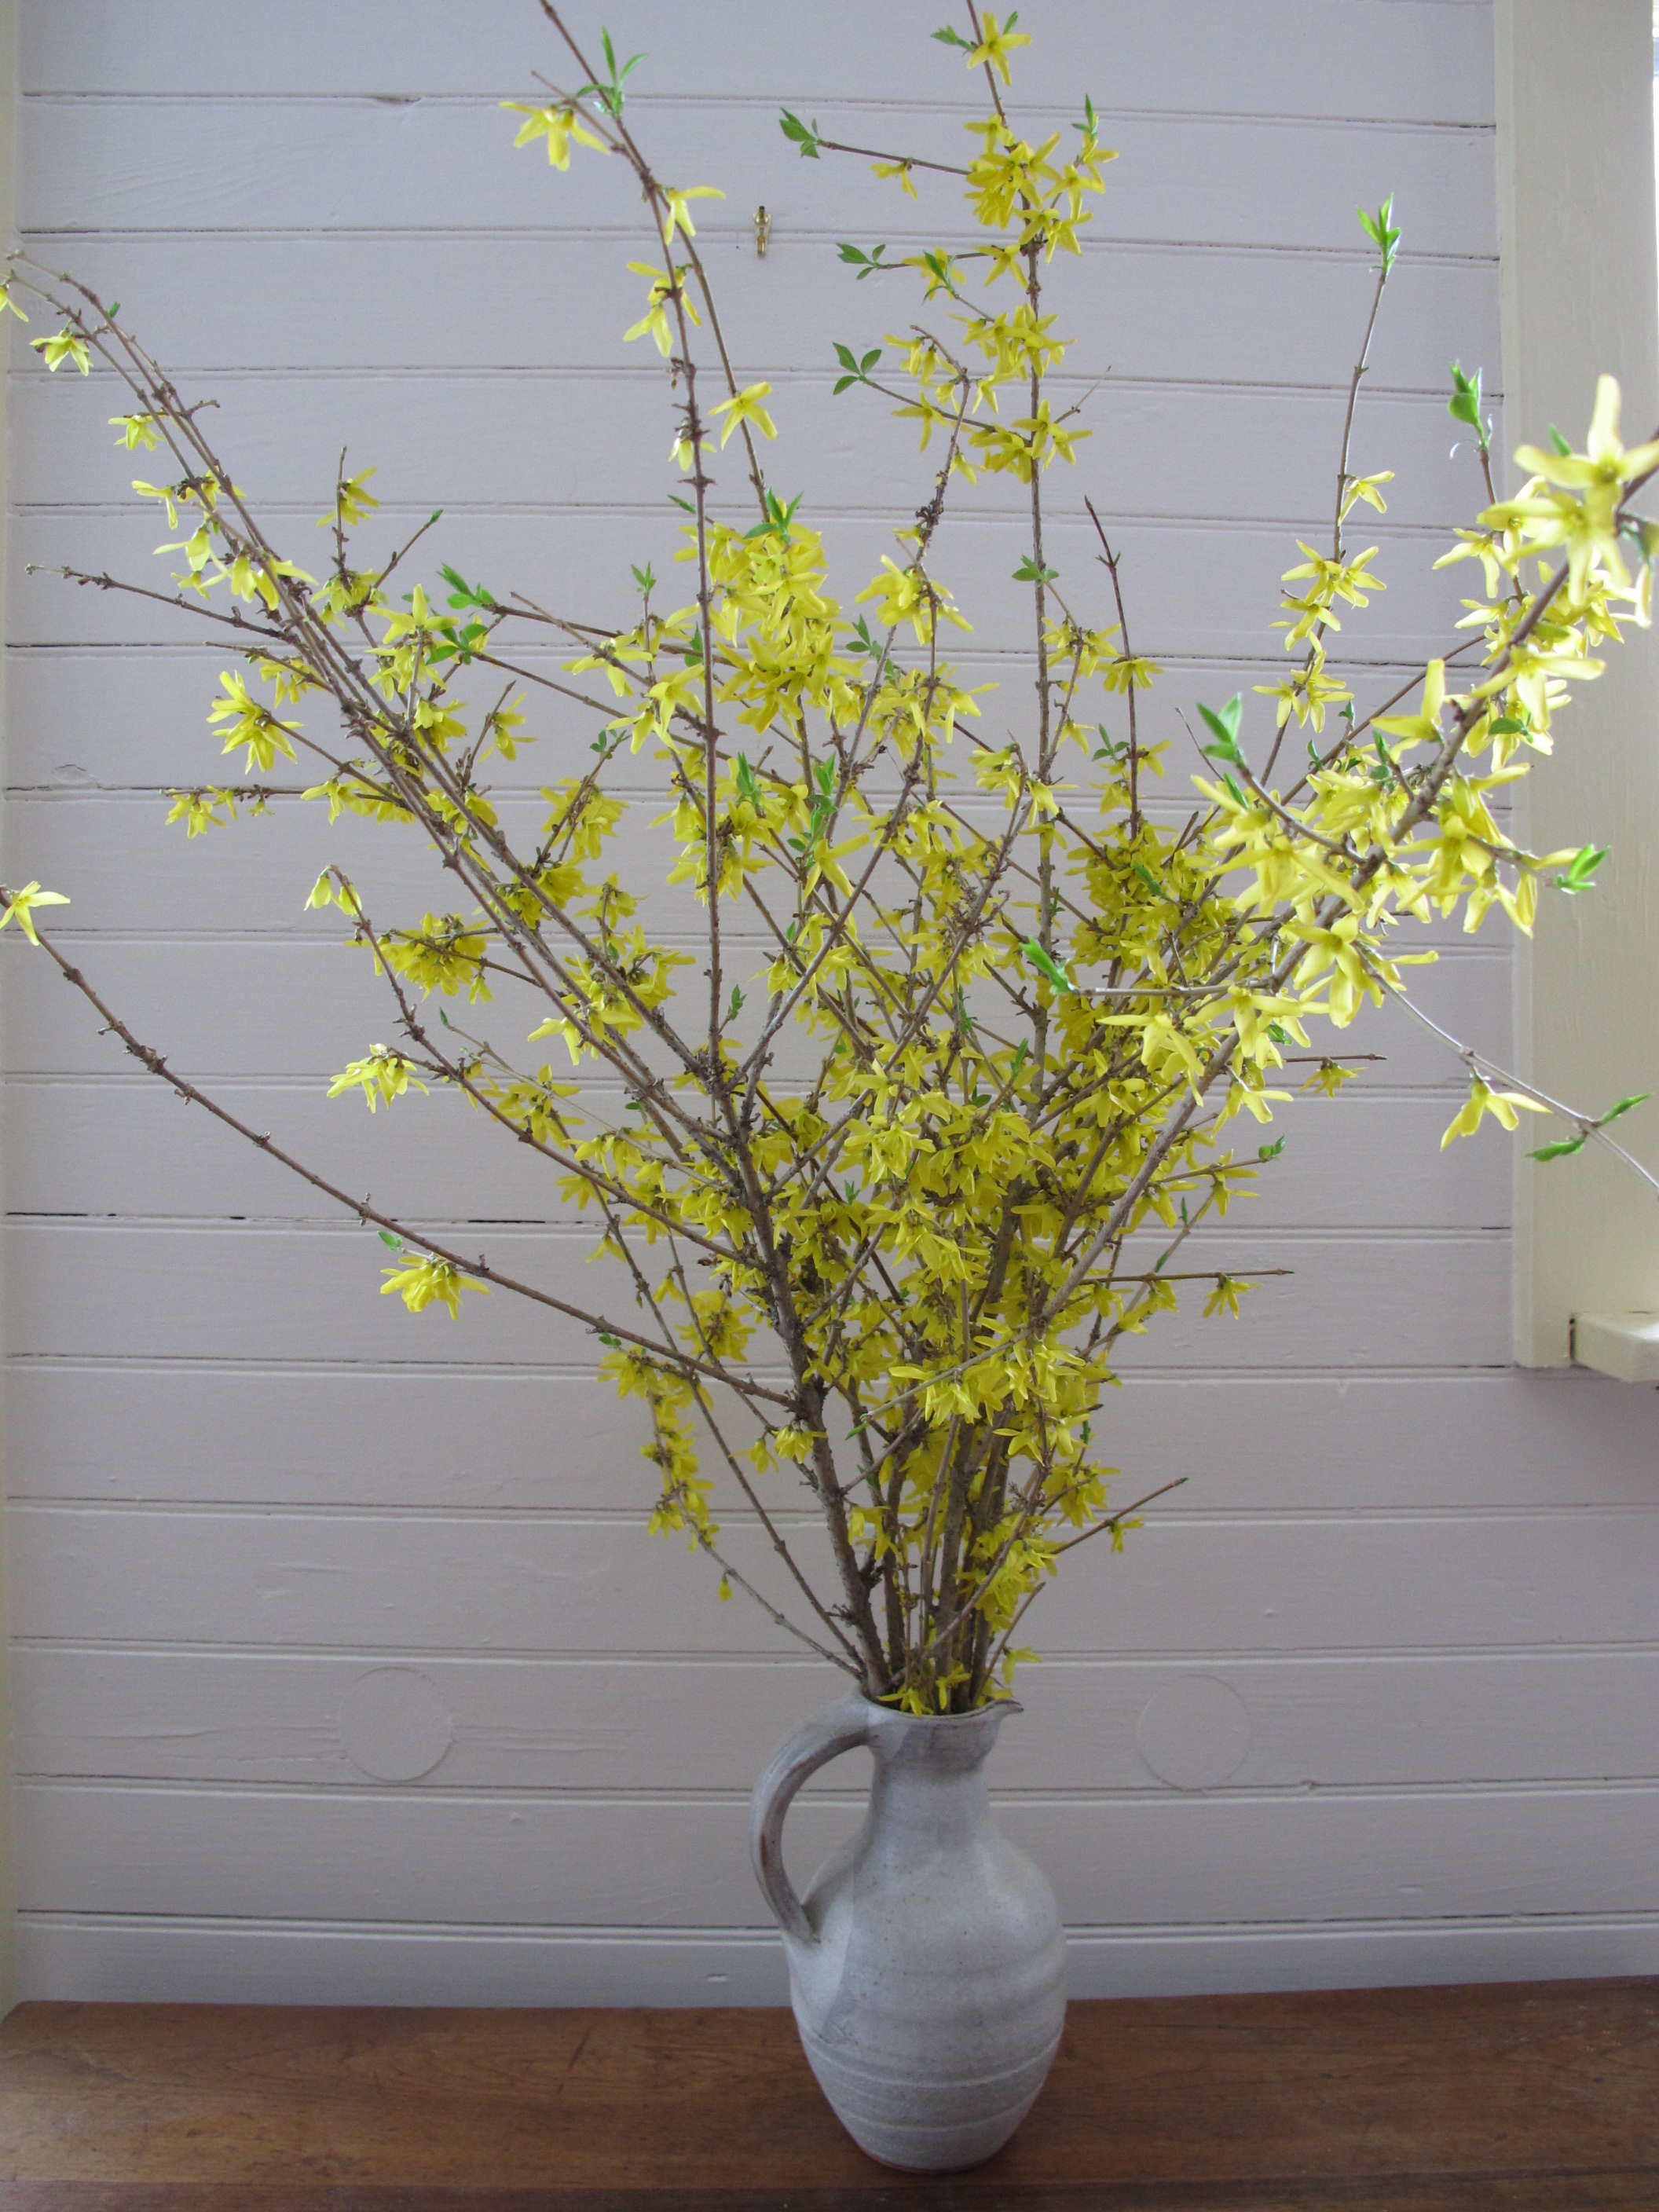
A couple of weeks ago I picked some stems of forsythia, that old fashioned shrub that displays mounds of bright yellow flowers long before most other shrubs bloom. By now these seemingly lifeless branches are loaded with flowers in full bloom on a sunny windowsill in my house.
The key to forcing forsythia is to pick twigs that grew last year – young, vigorous stems – that are loaded with pointy buds about a quarter of an inch long. These are the flowers buds. Cut stems 18-24 inches long and put in a vase on a sunny windowsill. It took less than a week for mine to bloom.
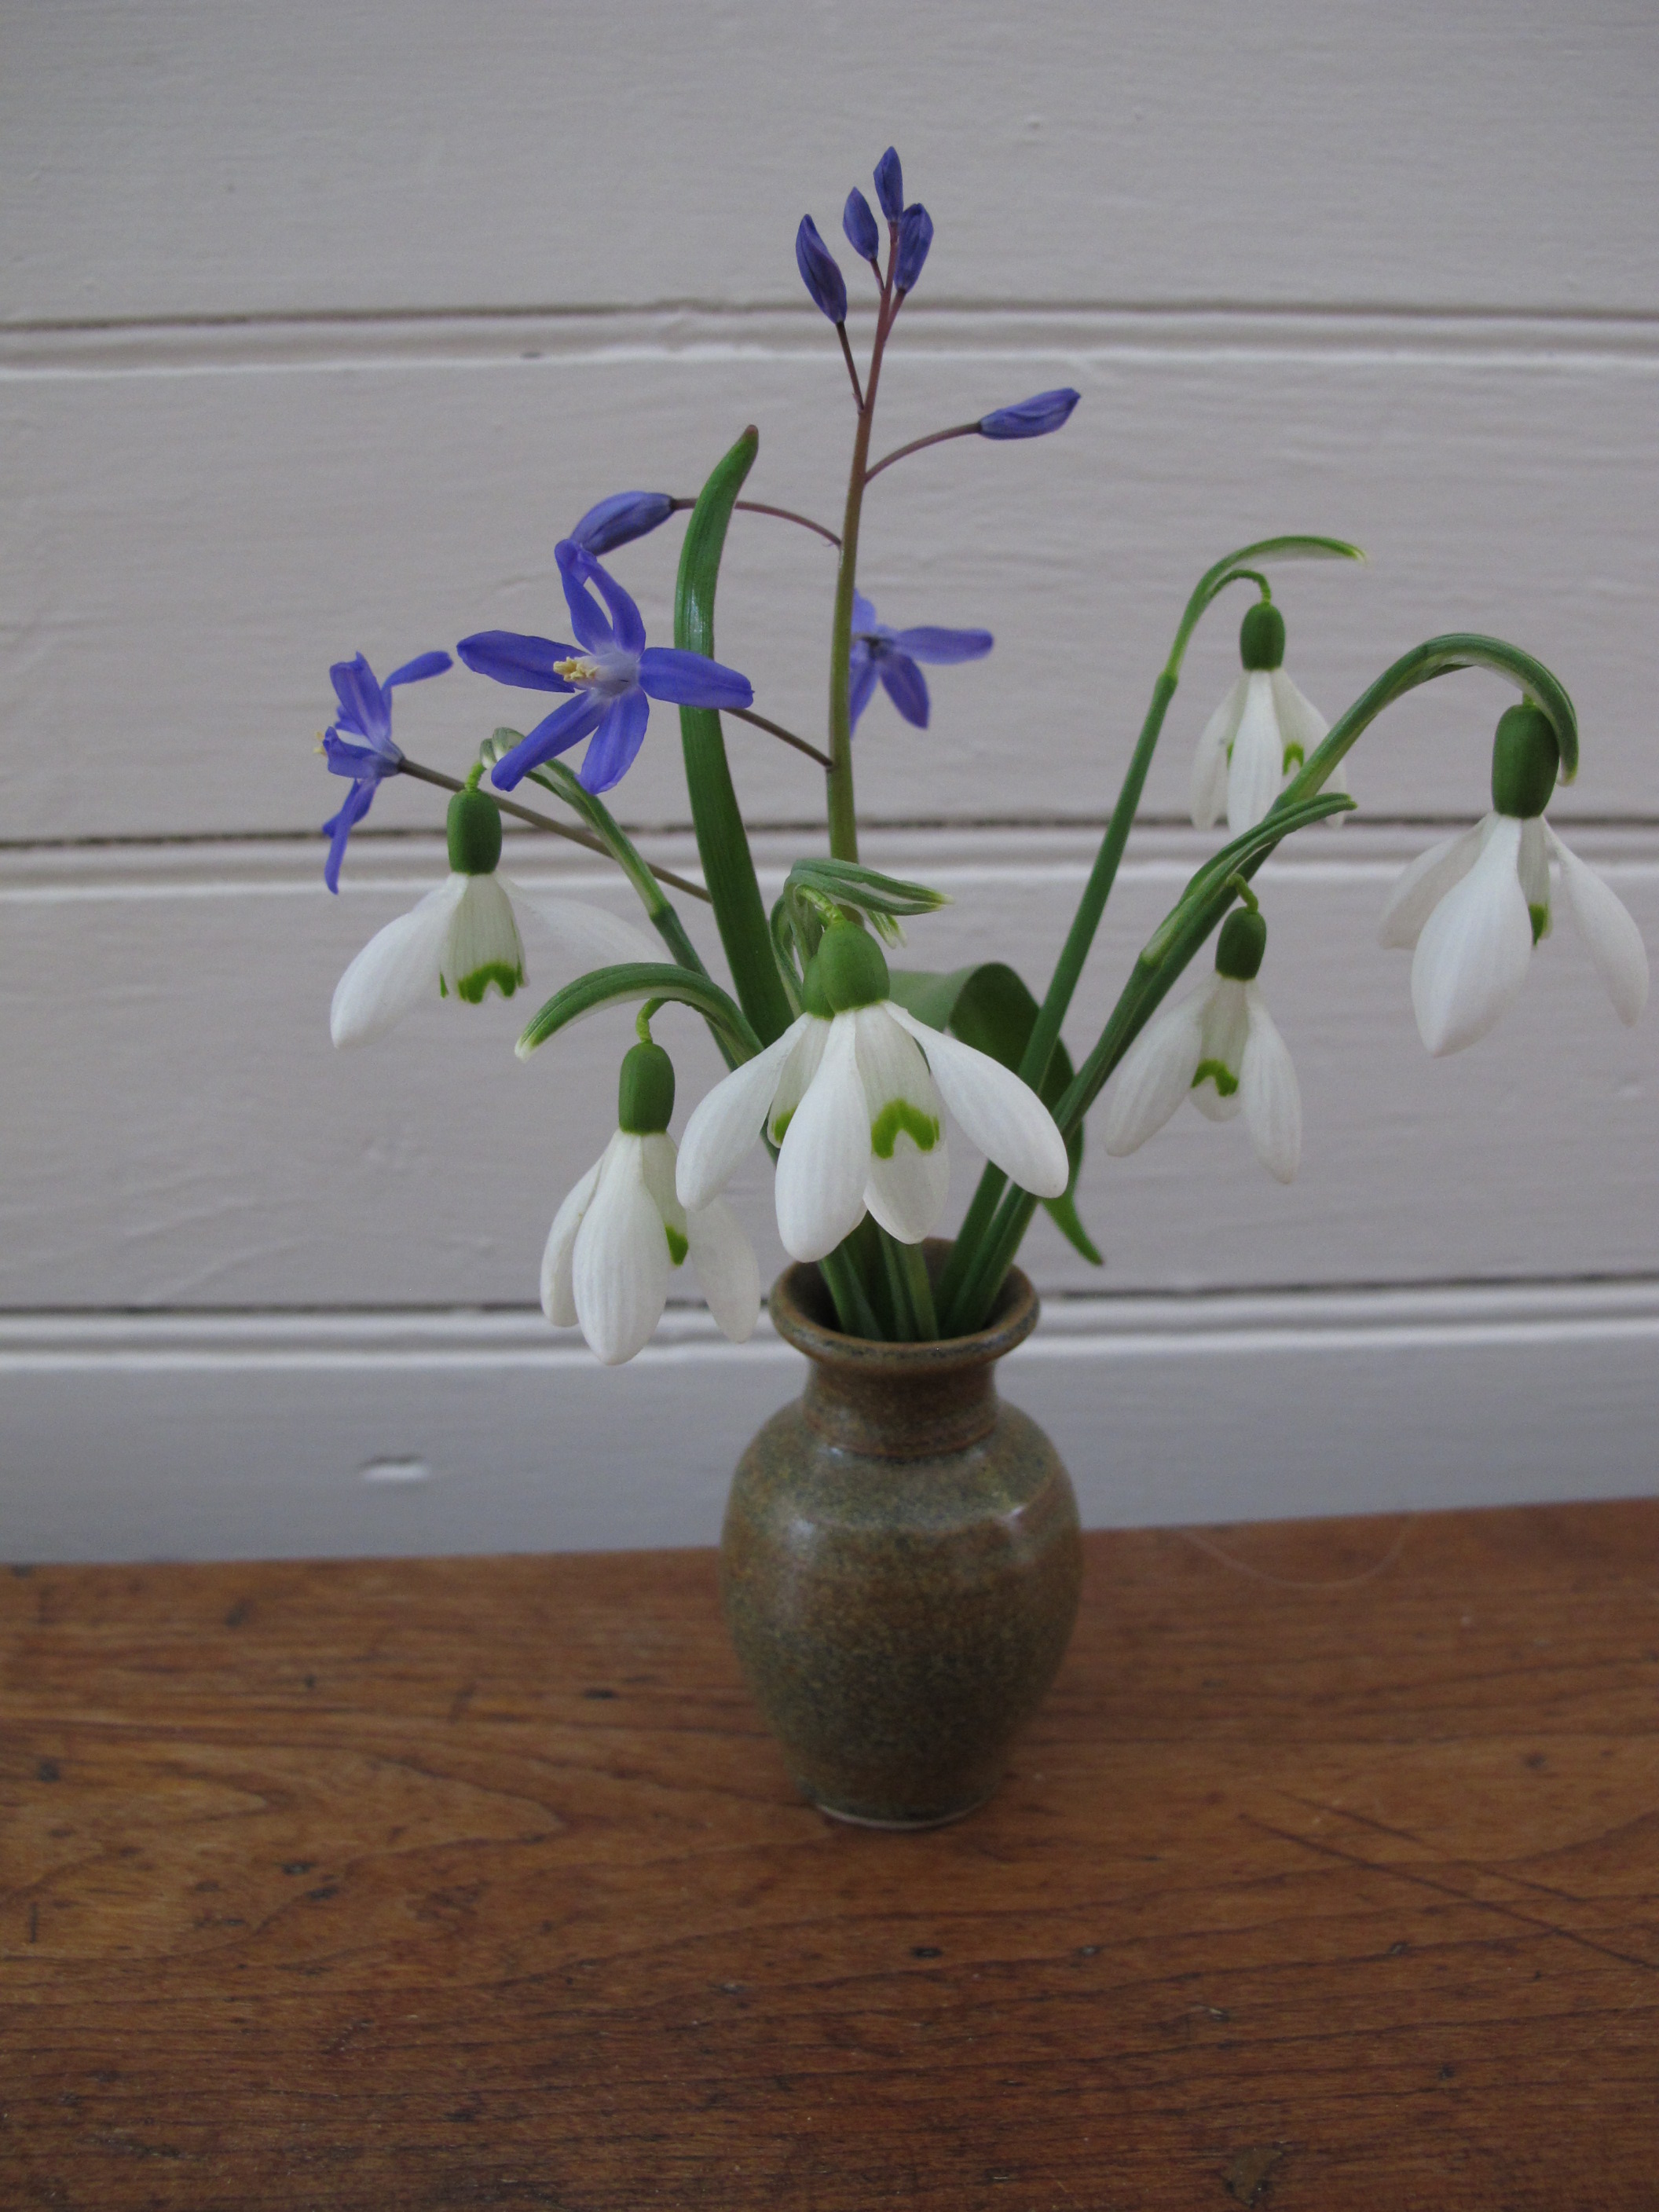
I pick flowers now, too. Right now I only have two things in bloom outdoors: snowdrops and glory of the snow. Snow drops are demure, understated white flowers that only grow 4-8 inches tall, and tend to stay on the shorter end of that range. I have a thousand or more in bloom now because I started transplanting them from my parents’ gardens back in the 1980’s and they have naturalized and spread by seed. They have spread out into my lawn, blossoming in clumps of a dozen or so.
Glory of the snow (Chionodaxa spp.) is another great early spring bloomer. I have the classic blue/purple ones as well as some less common pink ones. These diminutive beauties look up, showing their open throats, which are white and contrast nicely with their blue petals. Many gardeners ignore the small bulb plants, focusing on daffodils and tulips which are more dramatic when they bloom. But I like early blossoms, and have planted plenty of these small wonders, too. The time to plant is in the fall, September and October.
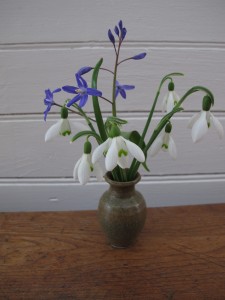
Snow Drops & Glory of the Snow
Now is the time to order spring bulbs – I know where the holes are in my planting space, and I know what I need to order. So I called Becky Heath, co-owner of Brent and Becky’s Bulbs in Gloucester, VA to order up more spring bulbs to plant next fall (www.brentandbeckysbulbs.com or 804-693-3966). I asked for the very earliest of crocus, as I mostly have late-blooming ones. Becky suggested ‘Blue Pearl’ and “Blue Bird’ (both varieties of Crocus crysanthus) as good early bloomers, and a species called Crocus tommassinianus.
I gave Becky my credit card info and asked her to fill up a $50 order with anything nice that is early. Later that day she emailed the details of the order which included some winter aconite (Eranthis spp.), a nice low yellow flower, and 2 species of Scilla, great deep purple flowers. I have both, but not enough. They will ship bulbs in September, but for now I will just mark the spaces where they should go with tags. Brent and Becky’s is one of the few remaining family-owned bulbs companies, and I like to support any family-run business that I can.
Pussy willows are starting to appear along my stream, and I will go pick some this week. The gray furry “pussies” are actually the flowers of a type of willow. If you pick them when still closed up, put them in water to get them to open. If they look fine when you pick them, just place them in a dry vase. They will not change in appearance if you keep them dry. In water they will go through their life cycle, producing yellow pollen and dropping it on your table.
If you planted tulips last fall, the foliage should be showing by now. Deer love tulips, and some of my gardening friends have given up on them because of the deer. My suggestion? Put chicken wire teepees around clumps of tulips now, and keep them in place until after they have blossomed. And pick the blossoms when they are just about to open up. Most of us spend more time in the house than in the garden, so having cut flowers indoors makes sense to me.
When I shopped for groceries recently a got a nice slump of daffodils in bud, 10 stems for $3.99. I have daffies coming along outside, but I want some now. But store daffodils can be iffy. Sometimes they don’t open up, or appear dehydrated and wrinkly. You are always sure to get good flowers from a florist, or from a store with a good floral department. In my experience, big grocery stores don’t always have great ones. It is always important to cut off ¾ of an inch of stem and put in water as soon as you get home.
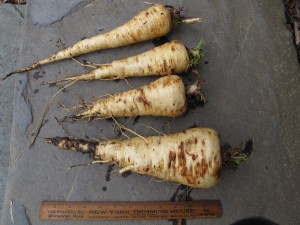
Parsnips
Lastly, I know summer is coming when I eat my first fresh garden vegetables. This year that was on April 11, when I dug some parsnips. Parsnips look like big white carrots, and are delicious after a winter in the ground, getting sweeter. I boil them, then serve with new maple syrup, raisins and walnuts. Spring is on the way!
Henry’s website is www.Gardening-guy.com. You can reach him at henry.homeyer@comcast.net or P.O. Box 364, Cornish Flat, NH 03746.
Growing Windowsill Greens
Posted on Saturday, April 13, 2013 · Leave a Comment
I grow a lot of my own food and strive to be as self-sufficient at possible. So I store, freeze, can and dehydrate lots of garden produce each summer and fall. I hate buying produce at a store if I can grow it myself, but so far I’ve never been able to produce winter greens or tomatoes. Not until recently, however, when I read Peter Burke’s wonderful new book, Indoor Gardening: Seed to Salad in Seven Days .And although I still can’t produce my own tomatoes indoors, I’ve grown edible greens on the windowsill. It’s easy.

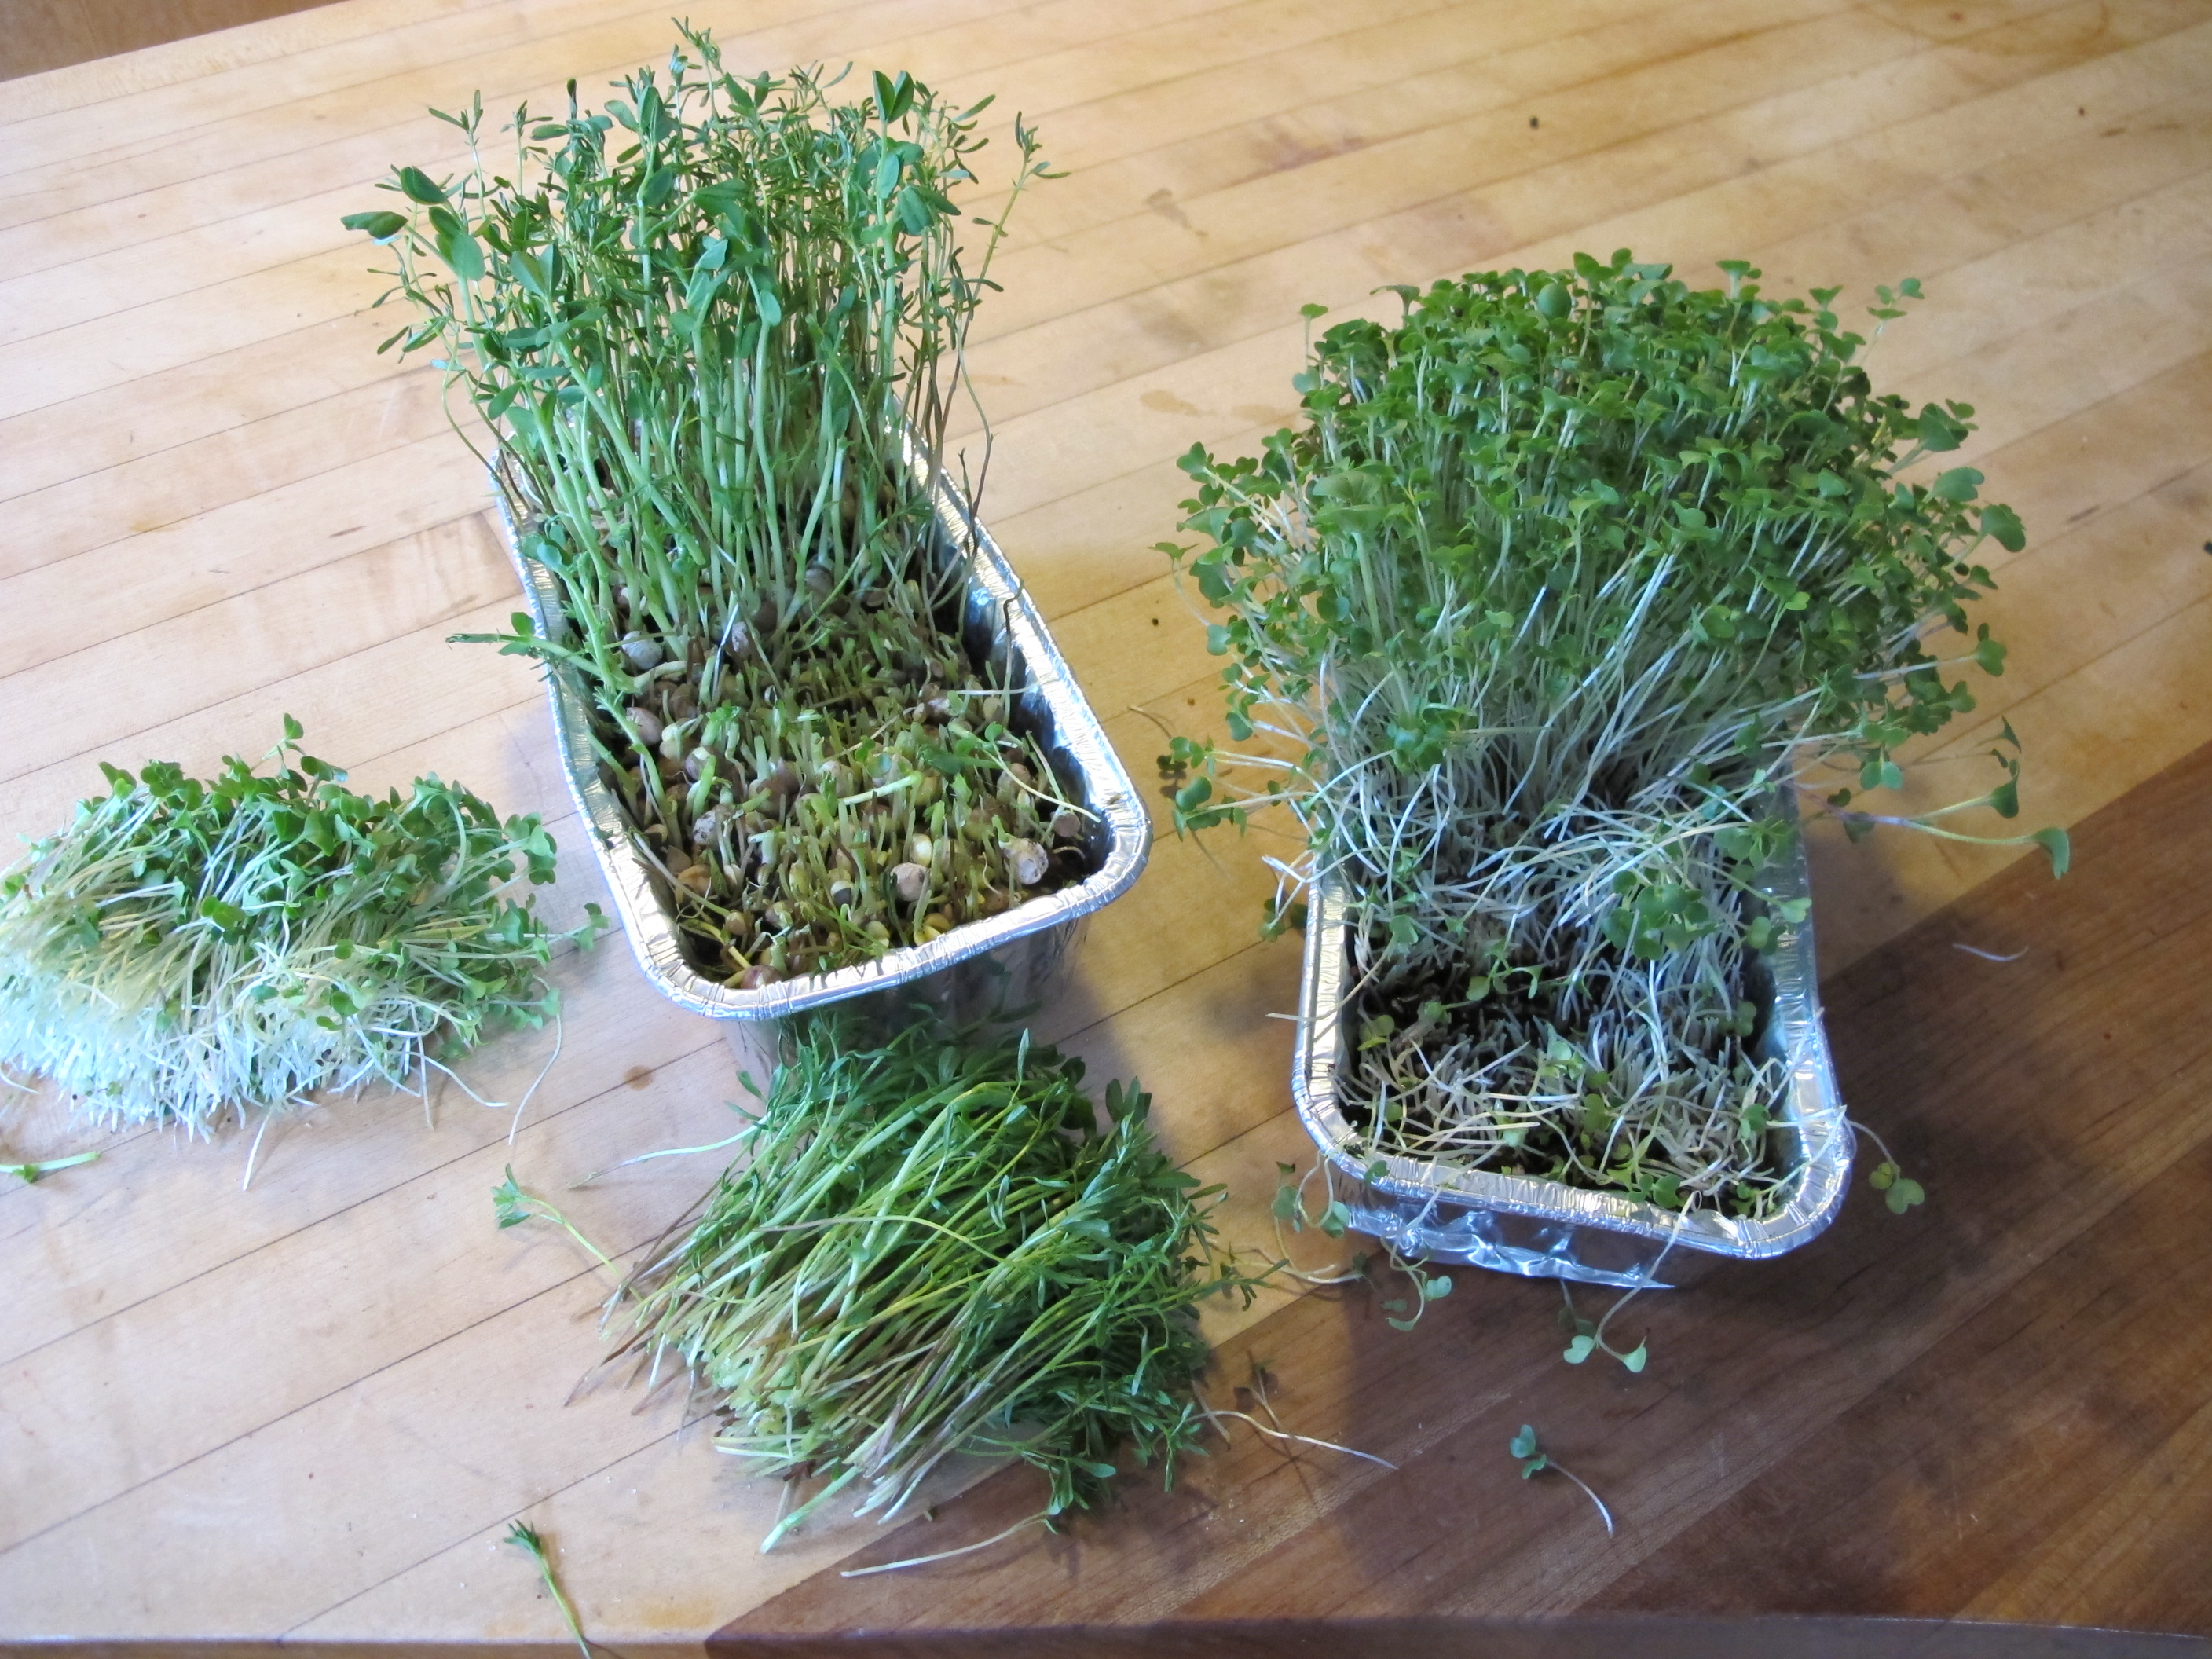
Harvesting Sprouts
Here’s the basic plan: you can grow sprouts of peas, broccoli, radish, buckwheat, sunflower or just about anything edible without lights or special equipment. You need a source of organic seeds, some soil-less potting soil, a little compost and some kelp meal, and some shallow containers (without holes in the bottom). I used “disposable” aluminum bread pans, the kind you would use to make a loaf of zucchini bread to give away, 4” wide and 8” long. Oh yes, and a windowsill, but it need not even be terribly bright.
I followed Peter Burke’s directions and soaked seeds overnight before using. A 4-by-8 inch container needs 2 tablespoons of large seeds like beans or sunflowers, or 2 teaspoons of small seeds like broccoli or radish. If you use the 3-by-6 inch size baking tin, you need only half that amount.
Meanwhile, I measured out a gallon of soilless potting mix into a plastic zipper bag and added 3 ½ cups of water. You need to do this ahead of time as the peat moss in the soilless mix is usually very dry, and it takes time to absorb the water. Peter recommends using a juice pitcher for measuring and pouring the mix. He starts sprouts every day, so he makes up lots of bags of mix at once.
The seeds are going to be placed on the surface of the “soil”, not planted in it. Their roots will go straight to the bottom of the container, so that is where the book says to place your “fertilizer” – 2 tablespoons of compost and 1 teaspoon of dried kelp (he pre-moistens it, though I didn’t). Add the moistened seed starting mix on top of that, leaving half an inch or so of space near the lip of the container.
After soaking the seeds for 6-24 hours, drain them by pouring them into a kitchen sieve, and rinse. Then spoon the seeds over the soil surface and use the back of the spoon to move them around, distributing them evenly. These seeds then need 4days or more to germinate and start growing. They should be in the dark for that phase. Peter Burke explains that folding a piece of newspaper so it is 6 layers thick and then soaking it will make a good cover to help keep out light and keep seeds lightly moist.
You need a warm, dark place to keep the containers during the next phase. I stored mine in a cool cupboard that was only 55 degrees, and they did not germinate in the 4 days that Peter suggested was to be expected. So I added some heat by putting an electric heat mat (the kind I use for starting seeds in flats) in the cupboard. That way I quickly got the temperature up to 65 degrees or more and they germinated in a couple of days. I left them in the dark for another day or two, as recommended, and the sprouts pushed the newspaper cover up and got 2 inches tall.
Then comes the fun part. I removed the newspaper and put the baking pans on the windowsill. The sprouts greened up almost immediately and started a growth spurt. Each day I marveled at this bright green food source growing on my windowsill, and gave a daily watering to keep the soil mix from drying out. Within 4 days they were 4 inches tall and ready for harvesting. Peter Burke explains in his book that you should harvest when sprouts are 4-7 inches tall and before they develop a second set of leaves, which can be bitter.
I gather that Peter Burke eats salads made entirely of sprouts, all kinds of sprouts. I mixed mine with some early spring lettuce mix from the store, and added cucumber and other standard salad ingredients. I like the flavor of the sprouts, and like watching them grow.
To learn more or to see plenty of very good color photos of the process, go to Peter Burke’s web site, www.thedailygardener.com and order his book. It’s available from him for $35 at P.O. Box 13, Calais, VT 05648.
As a grandfather and a former school teacher, I am always thinking of ways to get kids interested in growing things. Growing windowsill greens would seem to be a perfect Science Fair project, or a way to kids to like growing – and eating – healthy vegetables. And for the rest of us? Growing good food made quick and easy.
Henry Homeyer is the author of 4 gardening books, and a new children’s novel called Wobar and the Quest for the Magic Calumet. Learn more at www.henryhomeyer.com.
Starting Seeds Indoors
Posted on Wednesday, April 3, 2013 · Leave a Comment
Wind in the Willows, one of my favorite children’s books, has a great quote that came to me recently. The water rat says to his friend, the mole, “Believe me, my young friend, there is NOTHING–absolutely nothing–half so much worth doing as simply messing about in boats. Simply messing,’ he went on dreamily: `messing–about–in–boats; messing—-“. At that point he crashes into the bank and comes back to reality.
What, you might fairly ask, does that have to with gardening? Well, at this time of year I would substitute the word “seeds” for “boats”. Messing about with seeds is wonderful – for the soul, for the mind, and later –for your garden. It’s time now to start planting seeds indoors for summer vegetables.
I generally plant tomato seeds indoors around April 10, sometimes a bit sooner, for planting outdoors 8 weeks later. I have already planted onions, celeriac, a few special peppers and lots of lisianthus (an annual cutflower). Those all need more than 8 weeks. Later, 4-5 weeks before planting time in June, I will start my squash and cucumber seeds in 3-inch pots. By starting them indoors and putting out good-sized plants (they grow fast) I am able to prevent them from being eaten up by striped cucumber beetles. Those beetles can devour a freshly germinated seedling outdoors in a single night – but won’t do much to plants with 6-inch vines.
There are a couple of keys to success growing tomatoes and other seedlings indoors. Most important is having adequate light. You really cannot grow healthy seedlings by depending on sunlight on a windowsill. You need lights – either the new-fangled LED lights for plants, or T-8 fluorescent fixtures that are 4-feet long and provide good light for seedlings. You do not need those special (read expensive) “Gro-Light” bulbs with special wave lengths (equivalent to the sun) for starting seedlings.
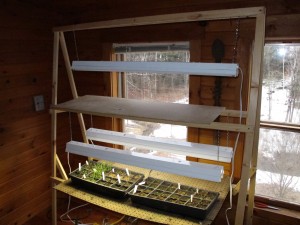
Plant Stand
Last year in my column I wrote directions for building a simple A-frame plant stand, so will not repeat them this year. You may find it at my web site, www.Gardening-Guy.com. Just go to the search engine box and type in plant stand. Or, if you prefer, design your own or buy a light stand from your local garden center or from Gardeners Supply (www.gardeners.com). But you do need lights to succeed.
It is also critical that seeds and the potting mix you use do not dry out, especially when the seeds are just starting to open up and send out little roots and shoots. They are particularly vulnerable then. So check your seeds every day and water as needed.
You may also get clear plastic covers to fit over your growing flats. These allow light to pass, but hold in water. Water will evaporate, then condense on these covers and rain down gently on your seedlings. You could accomplish the same effect with plastic wrap but then, as they germinated, the plants would butt heads with the wrap. The plastic covers provide an inch or two of growing space, allowing some to grow while others are still waking up.
Commercially prepared seed starting mix is largely composed of peat moss. Peat moss has no “food value” to plants. It provides a light, airy space that roots find easy to penetrate, and it holds water. Most have some fertilizer added, but this soon disappears either by washing away or being used up by the plants. So, as your plants get bigger, plan on giving them some liquid fertilizer – or they will languish.
Seaweed or fish fertilizers are readily available, and are better than chemical fertilizers – they provide a full menu of minerals, including the micronutrients important for plants. Fish fertilizers may offend some delicate noses when growing plants indoors, however.
An alternative to growing seedlings in straight potting mix is to mix it 50-50 with compost. It probably makes sense to buy compost for this even if you make your own. Why? Because commercial compost should be weed-free and your own compost probably is not. Unless you know what each seedling looks like when it first germinates, you may end up babying weeds along – or pulling out your seedlings. This can be a real problem if growing flowers that you have not grown before.
Lastly, think about planting seeds by the position of the stars and moon. I know, I know, it sounds pretty “out there”. But last year I used the Stella Natura (www.stellanatura.com) planting calendar which uses biodynamic principles to determine when to plant or transplant, and I saw real differences when I experimented with planting in the designated blackout times. Seeds are still one of life’s mysteries – all that life packaged in such a small container. Who knows what really affects them? Not me, that’s for sure.
Henry may be reached at henry.homeyer@comcast.net. His web sites are www.Gardening-guy.com and www.henryhomeyer.com.
House Plants That Are Really, Really Easy
Posted on Wednesday, March 27, 2013 · Leave a Comment
I recently went over to a houseplant and gave it praise. I said, “Thank you clivia, for producing flowers for me. I know I don’t deserve them because I don’t do anything for you. I don’t even wipe the dust off your beautiful green leaves. You are so undemanding that sometimes I’ve gone a whole month without watering you – and didn’t wilt or complain. And now you are beginning to flower. Thank you.” I really did say that. And I meant it.
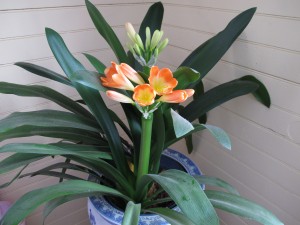
Clivia
Clivia, also known as Kaffir lily, is a plant that comes from South Africa where it lives in deep forests with low light conditions and survives much of the year without rain. So it is an ideal houseplant. It has18-24-inch glossy strap-like leaves and once a year it produces a tall flower stalk with a cluster of orange blossoms. I haven’t done anything for mine, and it has produced two more plants, offsets from the parent plant. And now one of those two offsets is preparing to bloom, too.
But bloom time is unpredictable for my clivia. Keeping it quite dry in the winter in a cold room and then giving it a little liquid fertilizer now is supposed to help it wake up and bloom. I’ve never given mine fertilizer, and still it blooms. One year it bloomed in August and won a blue ribbon at the Cornish Fair.
I like keeping an aloe plant in the house to use occasionally on a burn or a bothersome bug bite. You have bought hand lotion with aloe vera in it, I’m sure. The aloe plants available for purchase have similar healing properties – just cut off a leaf and rub the cut surface on a burn, spreading its juices. Again, I do nothing for it. It sits in a north window, getting little or no direct sunlight. And it only gets watered very occasionally. Yet it has survived for 25 years or so. Benign neglect.

Kalanchoe
At the Vermont Flower Show I bought some perky little plants that I’ve had before: kalanchoe. Think energizer bunny. They are commonly sold in grocery in 2-inch pots, loaded with little pink or yellow or orange blossoms. And they just keep on blooming, for months, it seems. I keep mine on a morning-sun windowsill, and do actually give them water once a week. If I forget to water they droop, but quickly recover with a good soaking. I only paid $3.99each and they keep blooming. What’s not to like?
Then there is the pony tail palm (Beaucarnea recurvata). This is a houseplant that reminds me of a soccer ball in a pot, topped with a woody stem and a big head of green strap-like leaves thrown off in all directions. I keep mine in a 12-inch deep pot and still the leaves are so long they hang down to the table.
In the summer I leave my ponytail palm on the deck where it gets a few hours of sunshine each day. In the winter I keep it in a west-facing window and only water once a month or so – the bulbous base stores water, and it goes somewhat dormant in winter anyhow.
Swedish ivy (Plectranthus sp.) is another “you can’t kill me” plant. It is not an ivy, but does make long stems that will hang down and out of a pot. The leaves of mine are all green with purplish stems. Occasionally it will produce tiny light blue flowers.
The great thing about Swedish ivy is that it is so easy to start new plants. Just cut off a few stems, put in a jar of water, and they will root. Then pot a group of them up for a nice pot of foliage. It does like more water than the other plants discussed above, but it always recovers if I let it dehydrate. It can appear dead, but so far, mine has always bounced back.
Crown of Thorns
The last of my favorite tough-as-a nail house plants is crown of thorns (Euphorbia milii). I have one that is at least a hundred years old, so you know that it has had some rough treatment in its day. I don’t like the thorns, but I do like that it produces dozens of nice small bright red flowers all winter in a west-facing window. Like the others, it never seems to complain when I ignore it.
The worst thing you can do for most houseplants is to water too often. Most reliable, rock-solid houseplants come from the tropics, often from South Africa. Most can go a month or more without water – it’s what they have to survive in the wild.
I don’t fertilize houseplants. In nature no one comes along with liquid fish juice or a chemical solution to “help” them. Fertilizer will push growth – but I don’t need bigger house plants. I need easy houseplants – and probably a few less than I have. Re-potting helps many houseplants, but those I mentioned above I have never re-potted, either. Crown of thorns is too prickly. I’ve read that clivia roots are almost impossible to pull apart. So I just say thanks to my plants, or offer them a few words of encouragement, and they do just fine.
Henry’s newest book, Wobar and the Quest for the Magic Calumet is a children’s chapter book about a boy born with a magical mustache and the ability to speak to animals. Learn more at www.henryhomeyer.com. Reach Henry at henry.homeyer@comcast.net.
It’s Time To Work On Those Old Apple Trees
Posted on Wednesday, March 20, 2013 · Leave a Comment
I recently spent 3 hours in an old wild apple tree, bringing it new life. Apple trees need to be pruned from time to time, and this one had not been worked on for several years. Even wild apples, those planted by birds, can be wonderful additions to the landscape if nicely pruned. The fruit of wild apples is not tasty, but the flowers and form can be a delight to the eye. You can work on apple trees of any kind from now until the buds begin to open. That isn’t until sometime in May, depending on the weather and the variety you grow.

Corona Pruning Saw
Before discussing how to prune, a few safety reminders are in order. Always wear eye protection when pruning. Safety glasses are best, but sunglasses or prescription glasses are better than nothing. When cutting branches above your head, wear a cap with a brim and try to stand up-wind of the cut. You don’t want to fill your eyes up with sawdust, especially if on a ladder or perched on an upper branch.
Wear gloves and a long-sleeved jacket. Those will help to protect your skin from cuts if the saw slips. As you finish a cut, slow down and reduce pressure on the blade so that the saw will be less likely to surge forward when it finishes the cut. Never steady yourself by holding onto a branch below what you are sawing. Lastly, use good, sharp tools – a dull saw will be a frustration and can be a danger.
I like to walk around a tree several times to study it before I begin to prune. I want to decide which branches I will take out before I begin. If working with someone (which is always good) I like to hear what my co-worker thinks should be removed.
Fruit Spurs
When I teach pruning I tell people that the goal of pruning is to thin out the canopy so that sunshine can get to each leaf. This will also allow for good air circulation which will help to reduce fungal diseases. I like to say a bird should be able to fly through the tree without getting hurt.
Don’t make cuts flush to the trunk or a larger branch. But don’t leave 3 inch stubs, either. Leave the wrinkled bark where the branch originates. That part is the ‘branch collar’ and it is where the branch will heal and scab over.
The tree I pruned recently was mature but healthy; it had no dead branches or signs of disease. Normally I remove dead wood first.
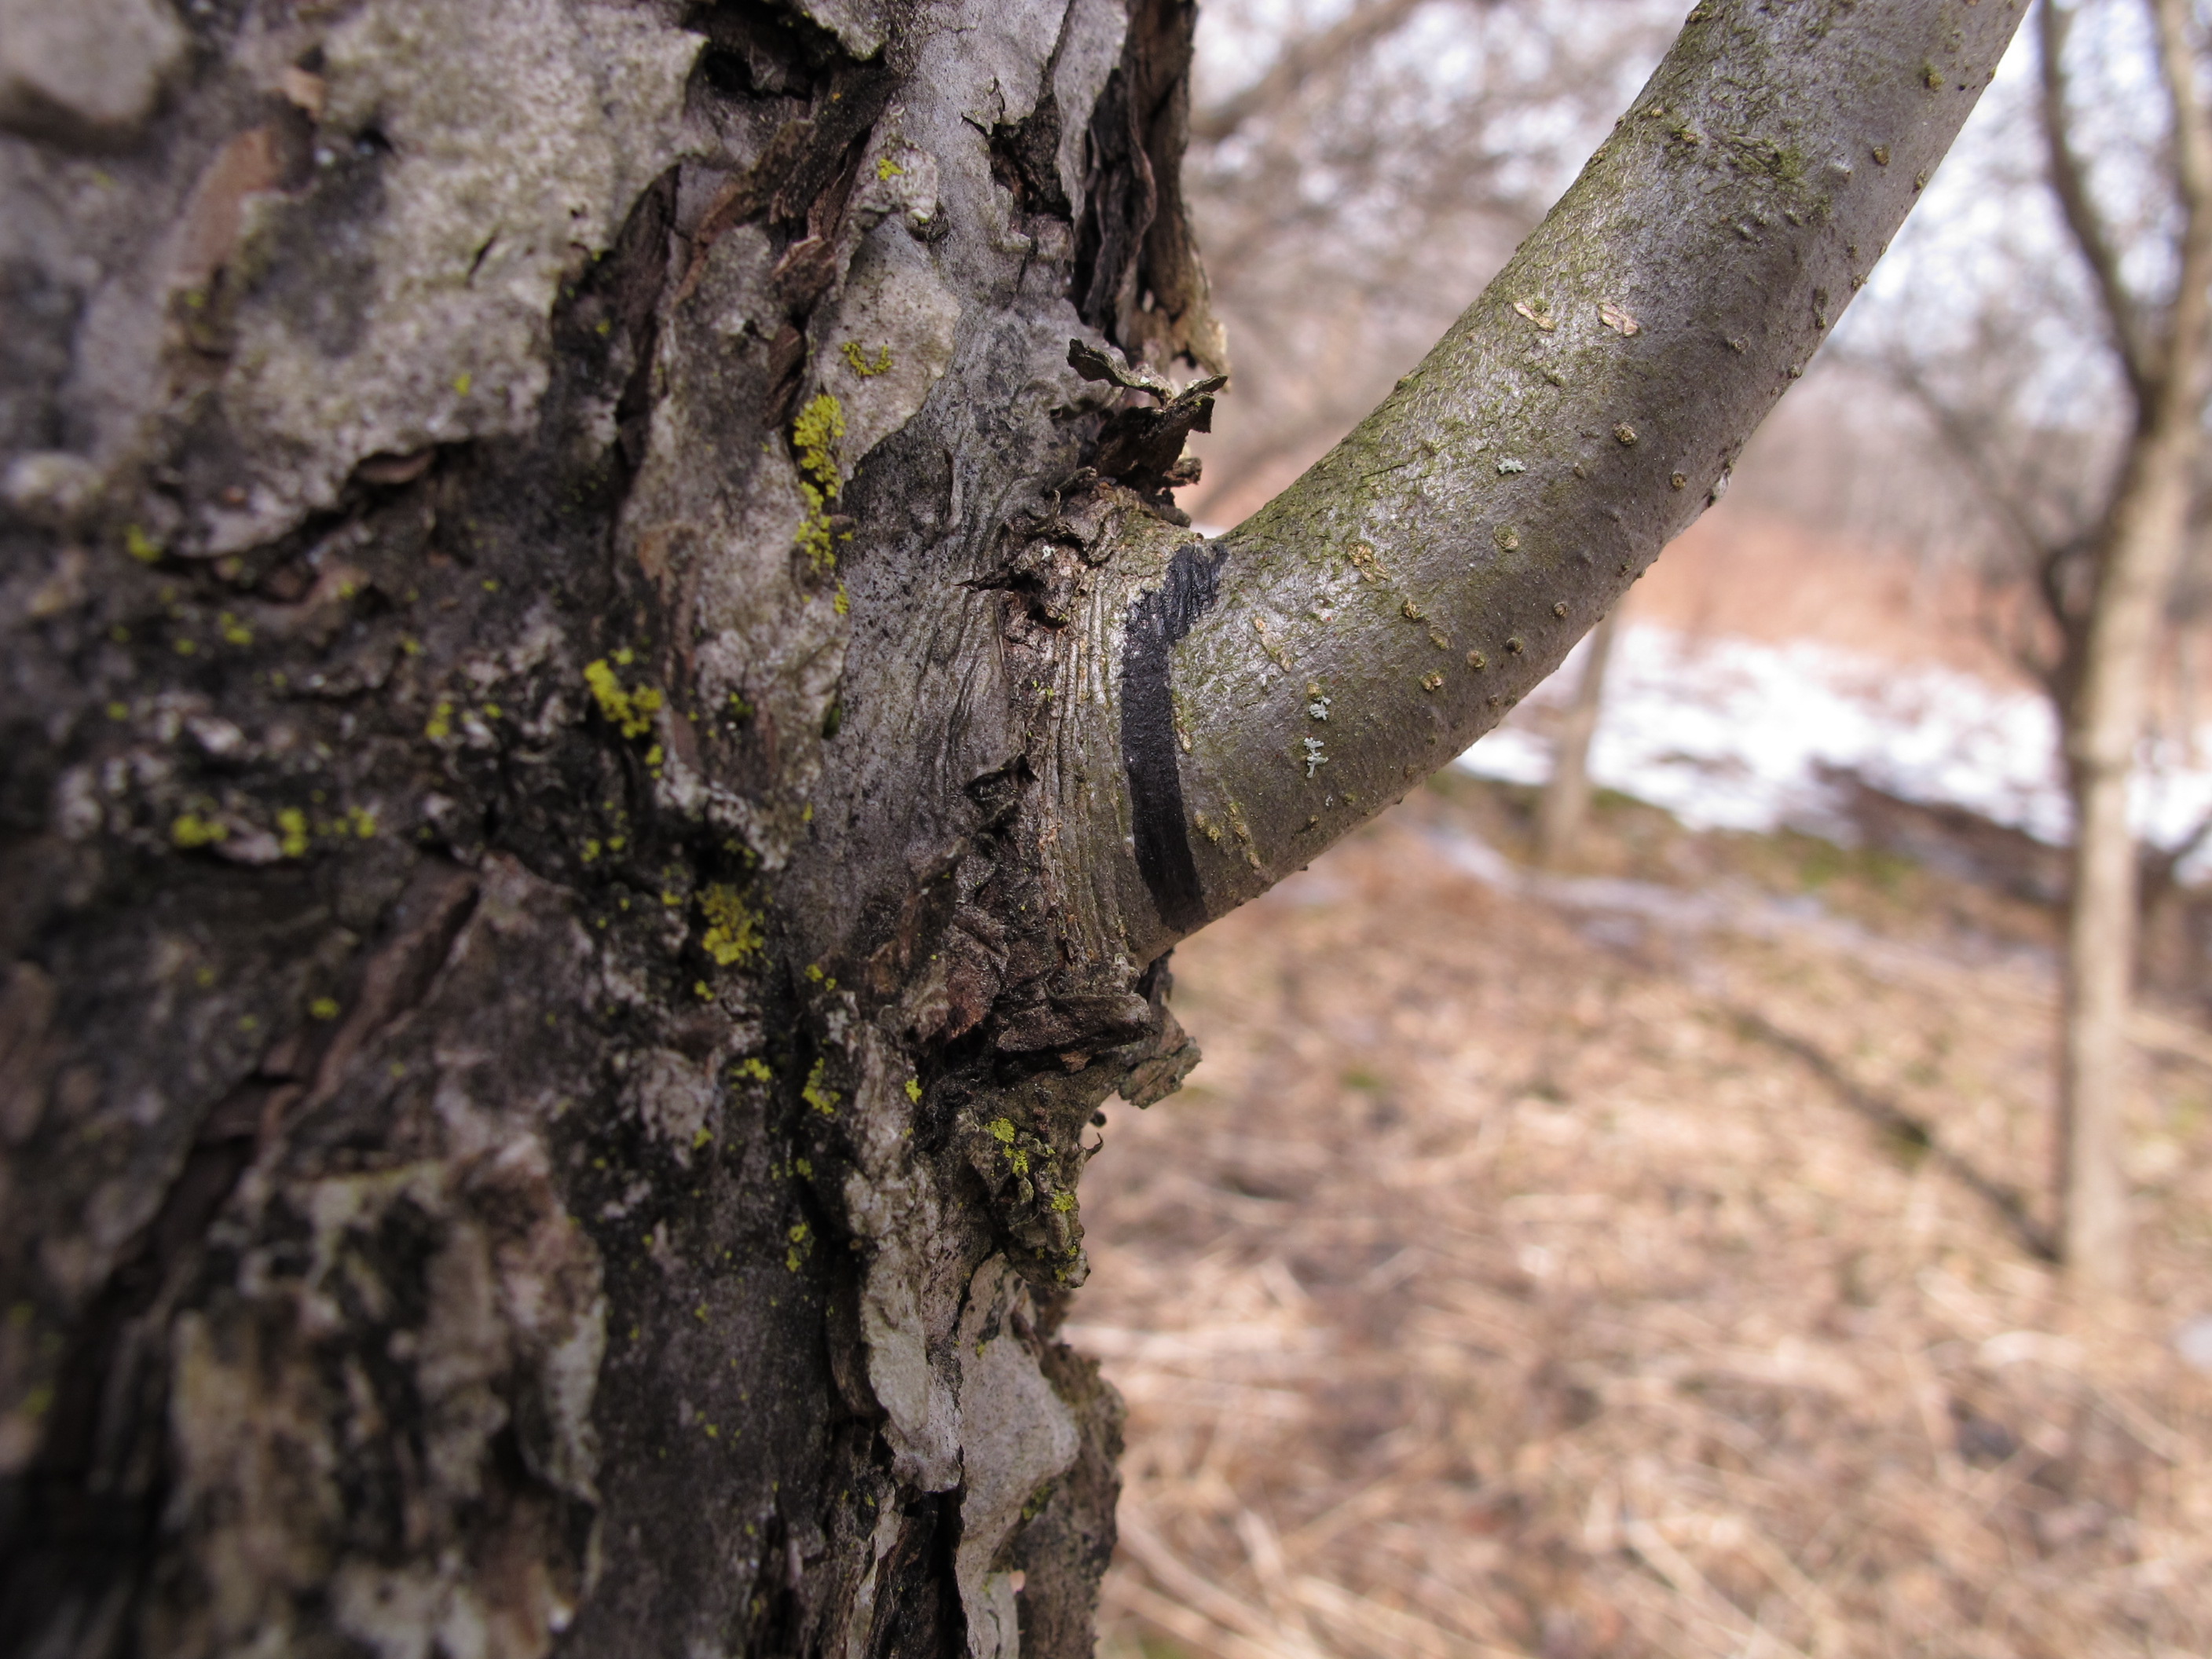
Next, if 2 branches are rubbing or in danger of fusing together (because they are growing so close together), I remove one of them. On this tree, a four-inch diameter branch was rubbing against and fusing with another, so I removed it in a 2-part procedure. First I reduced the weight of the branch by lopping off most of it. This made the finish cut easier. A heavy branch is likely to snap off and tear the bark before the cut is completed.
Prune Past Black Line
It was an awkward cut because the branches were so close together. I used a magic marker to draw lines to show me where to cut. This guided me as I angled the saw up to the exact spot I was aiming for as I completed the cut. I used a 21-inch scimitar-shaped pruning saw for the job. It has big teeth that make the job easier than a smaller saw, and unlike a bow saw, it can get in relatively tight places. It is a Corona brand saw, a model RS 7160that I bought from OESCO, a tool supplier in Conway, MA (www.oescoinc.com).
Branches that are at roughly a 45 degree angle from the leader generally produce the most fruit. Vertical shoots, on the other hand, are not very productive and should be removed. They start out as “water sprouts”, little pencil-sized shoots but will grow to be large if not removed. You should snip them off with hand pruners even though they will reappear next summer. However, if you do a good job of opening up the tree to sunlight, you may get fewer of them.
Blossoms and fruit appear on little fruit spurs, generally 3-4 inch twigs with a few larger buds. Fruit grows on spurs that are at least 3 years old. Each bud will produce more than one blossom and a few leaves. If you take a few branches with fruit spurs and place them in a vase, they will eventually bloom inside the house – a real treat for me. Other buds will just produce leaves, but even those are nice at this time of year.
I removed several large branches in the interior of the tree. It’s always a good plan to make a few cuts of larger branches than lots of little cuts. Don’t think of pruning as “cutting off an arm”. Pruning helps the tree to be healthy and to produce more fruit and flowers in future years.
So have at it. Go outside on a sunny day and start pruning. Take your time. Do the easy stuff first. You’ll gain confidence as you go, and, with time, your tree will turn into a piece of art.
Henry Homeyer’s web sites are www.henryhomeyer.com and www.Gardening-Guy.com.
Controlling Invasive Woody Plants
Posted on Wednesday, March 13, 2013 · Leave a Comment
We’ve had a few days of spring-like weather and I’m champing at the bit, ready to start gardening as soon as the snow disappears. There’s not too much we can do as yet. One thing I’ve been doing recently is trying to get rid of invasive trees, specifically the common buckthorn. That’s a long process, so it’s a good thing to work on now, before planting season.
Common Buckthorn
Common buckthorn and glossy buckthorn are two species of small trees that arrived here from Europe or Asia, where they are native, and that have found the new world (more than) suitable for their needs. They are understory plants that will grow in sun or shade, wet or dry, good soil or bad. And they are very hard to get rid of. Like many invasives, if you cut down one, many new shoots will sprout up.
I don’t use herbicides, but there is a way to kill buckthorns without using herbicides. Several years ago I was told about “double girdling” them as way to slowly kill them – without generating root sprouts. Now, while they are dormant, is a good time to begin.
Take a pruning saw and cut through the outer bark and the green cambium layer, but do not cut into the hard core of the trunk. Go all the way around the tree, so that you have girdled the tree. Be sure to connect the beginning and end of your cut (which requires that you keep your saw blade level as you cut). Then do it again 12 inches above the initial cut.
Girdling Buckthorn
If you girdle the tree this year, it will leaf out and act as if nothing bad had occurred. Next year, it will leaf out, but may start to show signs of decline. In the third year, the tree will die. And best of all, no root sprouts will pop up. (Or they didn’t for me, anyhow, when I tried it a few years ago).
One problem: common buckthorn’s growth habit is to start off as a single trunk, and then immediately split off into 6-12 smaller trunks. Since I couldn’t double girdle the tree down low, I had to do so on each of the many upward-growing shoots. And another thing: buckthorns commonly have depressions or dimples in their stems. So when cutting through the bark, it is easy to miss a section because your saw can go over a dimple and leave the job incomplete.
Norway maples (Acer platanoides) are on the list of invasive species in most New England states, and also need to be weeded out. They are on the list because they can out-compete our native maples (and other trees) for water, sunlight and nutrients, and because they seed into the woods whenever present. I have not tried the double girdling technique on them because I have none on my property. But if you have some, I suggest you try it – and then please email me in 3 years if the technique works.
‘Crimson King’ is a cultivar of Norway maple that is very attractive, with nice dark purple leaves. It was sold in huge numbers up until recently. It is a hybrid, and the numerous seedlings it produces are mostly green-leaved – which means that most gardeners just assume that the maple seedlings they see in their woods are native maples. There is a way to test a maple to see if it is a Norway. Once summer comes, snap off a leaf and look at the base of the petiole (leaf stem). If it oozes white sap, it’s a Norway maple.
Other trees and shrubs that can be invasive include bush honeysuckle, tree of heaven, barberry , Russian olive, autumn olive, burning bush, border privet, princess tree (Powlownia tomentosa), and multiflora rose. Most share these characteristics: they are tough trees, produce lots of seeds, and will out-compete native species – they have been introduced from abroad.
I recently spoke to Blaine Moore of Maverick Farm in Sharon, VT about a technique he has used on invasives. He cuts them off close to ground level, and then covers the cut stem with a tin can so that no light gets to the stem – light can stimulate cut stems to grow or to send up root sprouts. He told me he has used this technique successfully for a number of years on a variety of types of invasives and he swears by it. I have not tried this yet, but I have lots of honeysuckle, and I will try it this spring – it’s much less work than digging them out. He sometimes uses tuna cans and nails the can onto a stump to keep it in place.
I have written in the past about a nifty tool for pulling young woody invasives, the weed wrench (www.weedwrench.com). This is a very sturdy hand tool that allows you to grab onto a tree or shrub with a self-tightening jaw, and pull them out with the leverage of a steel arm. They come in four sizes and are a good investment for garden clubs. Of course you will have to wait until the soil thaws to start pulling out culprits. Meanwhile, go try some double-girdling.
Henry Homeyer can be reached by email at henry.homeyer@comcast.net. His Web site is www.Gardening-Guy.com.
Getting Ready for Spring and Worrying About Tomatoes
Posted on Wednesday, March 6, 2013 · Leave a Comment
I know that most of you have probably already ordered your seeds, but I just did so on the day I wrote this column in the last week of February. I spent a recent Sunday afternoon going through my seeds and throwing out any seeds that were older than those packaged for the 2010 growing season. Almost any seed is viable for 3 years, and some are good even longer. Of course storing seeds in a cool dark place helps prolong viability, too. It hurts me to throw out seeds, but I don’t want to plant and then find that I my seeds didn’t germinate well – or at all.
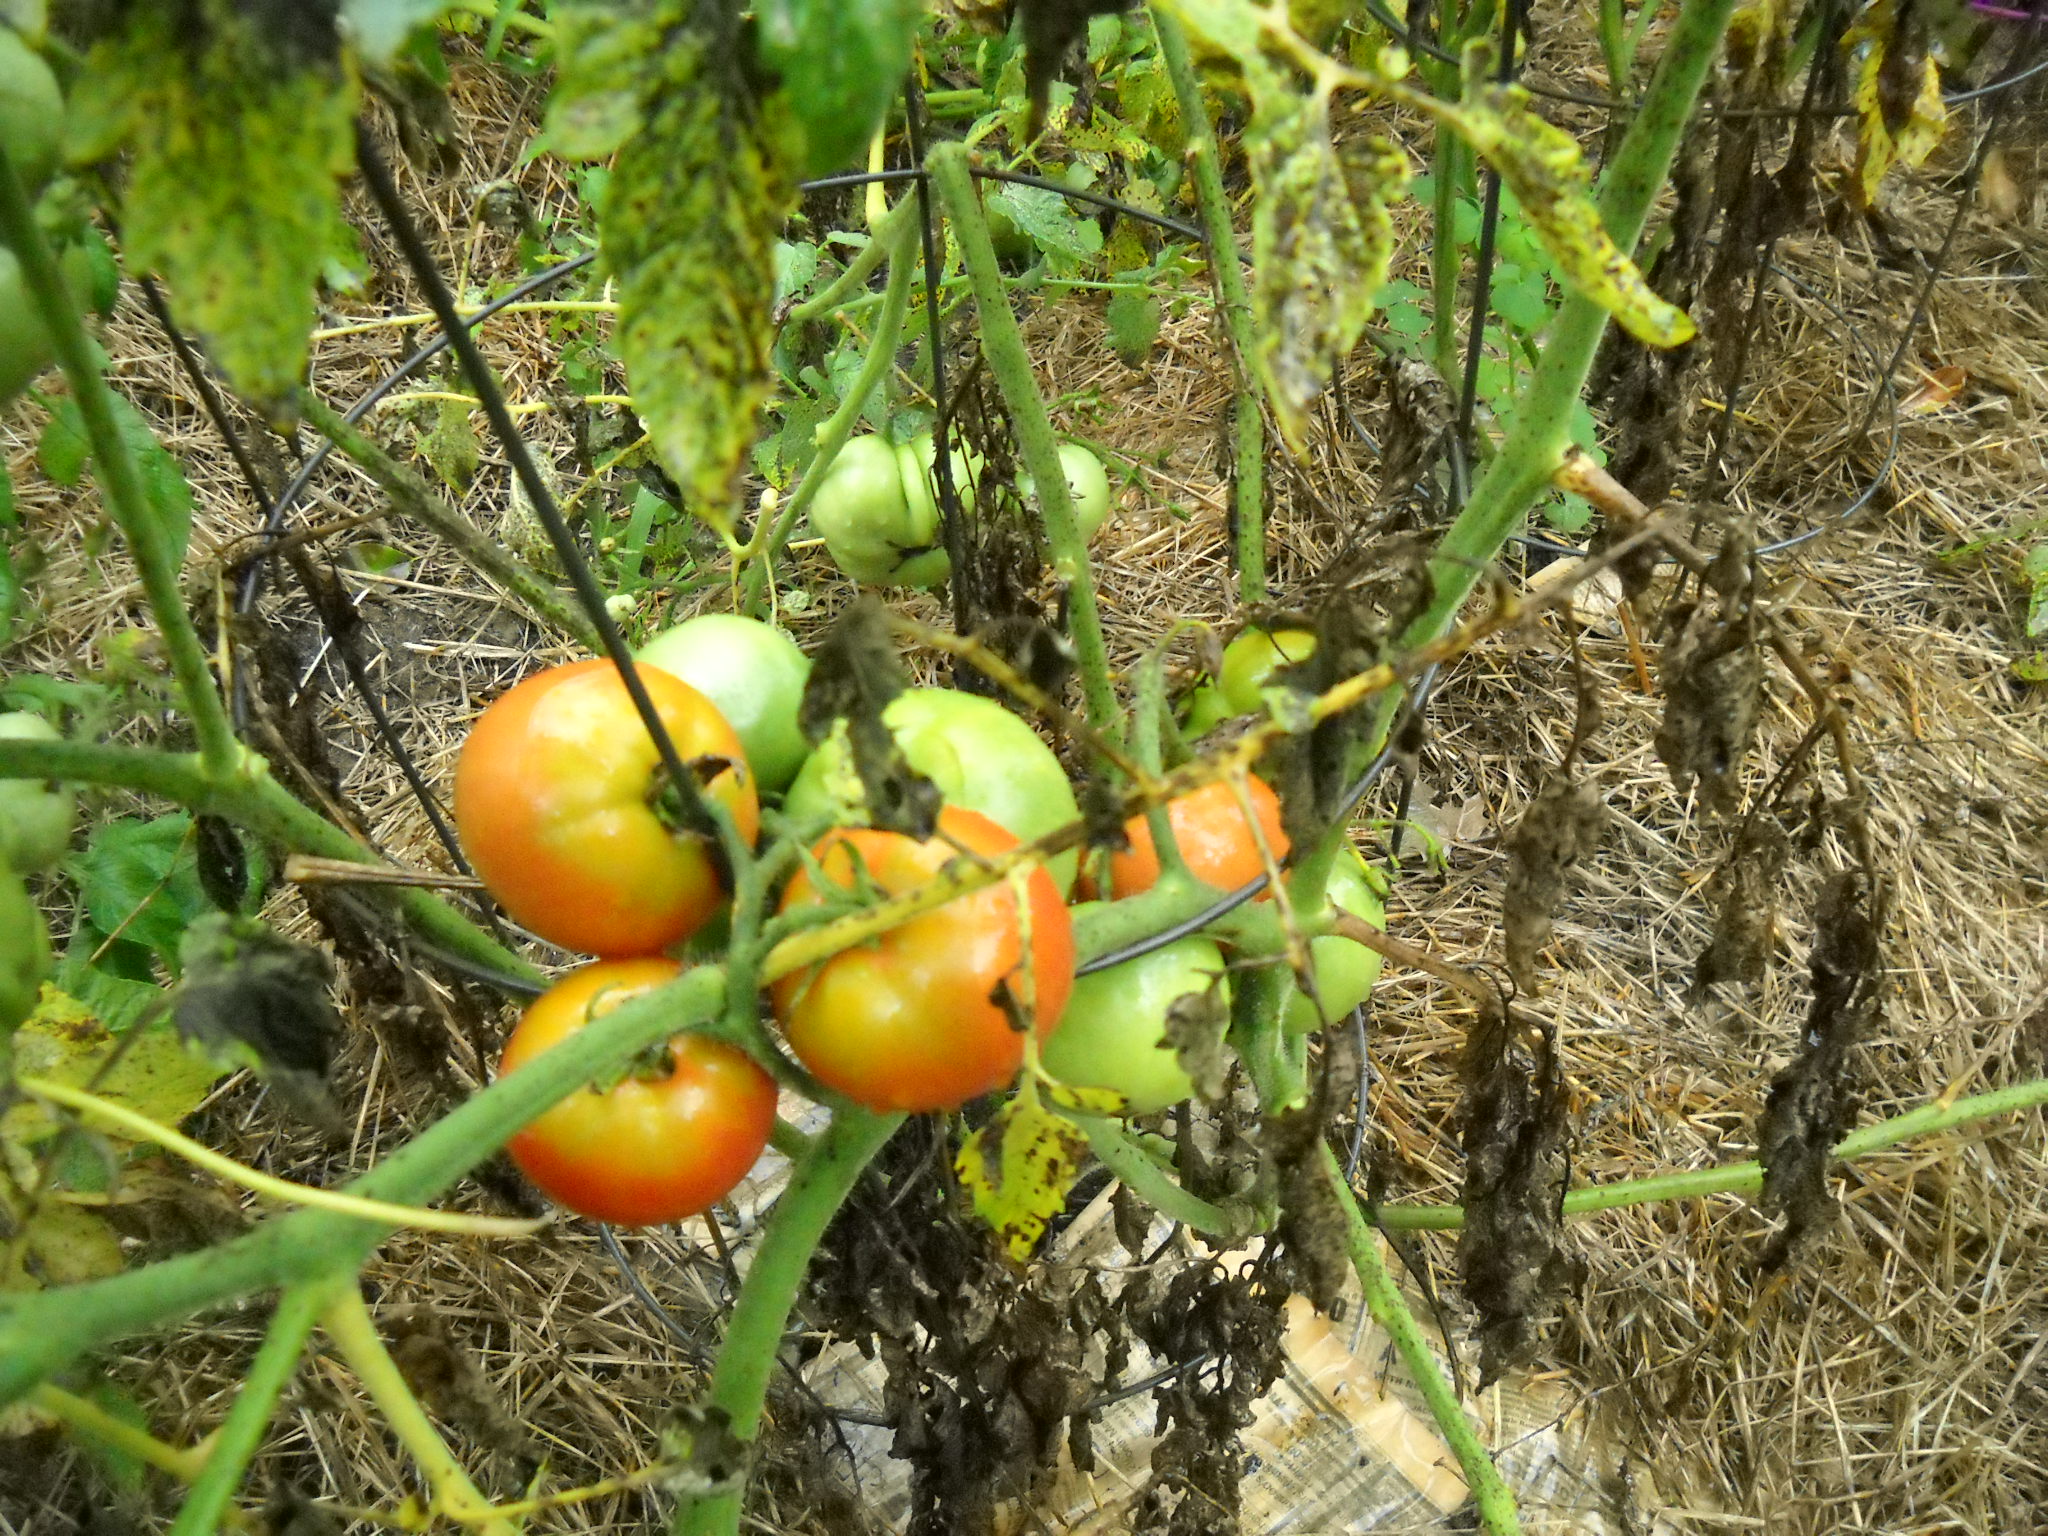
Many people have e-mailed me with questions about the various blights that have plagued our tomatoes in recent years. What can we do? Well, I hedge my bets. I buy both heirloom seeds (which generally have little resistance to blights and diseases but taste great) and modern hybrids that have been bred to resist diseases. Of the first generation hybrids (called F-1 hybrids in the catalogs) I have had good results with Sungold cherry tomatoes, Defiant, and Mountain Magic. The latter two are available from Johnny’s Selected Seeds. Sungold is available everywhere. All are tasty, but nothing beats the flavor of an heirloom Brandywine.
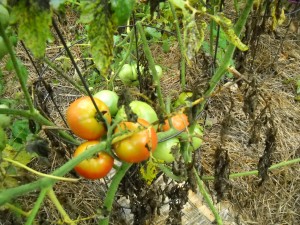
Tomatoe Plant With Early Blight
I also order some seeds for tomatoes that are early to produce. A 60-day tomato is much more likely to survive long enough to produce a good batch of fruit than one that takes 78 days or longer. Those days on the seed packages, by the way, refer to how many days under ideal conditions it should take to get fruit after transplanting seedlings into the ground. If we have a cold, rainy summer a 60-day tomato can take a week longer – or even more.
In responding to a reader who asked about blights, I came up with a plan I shall try myself: creating a simple plastic-covered hoop house for some of my tomatoes. Some diseases have spores that live in the soil, and get on the lower stems and branches by splash-up. If I keep the plants protected from the rain and I water carefully, I should have few of those diseases. Mulching helps, too.
Other diseases are air-borne. Late blight, one of the most virulent diseases, is air-borne. Depending on the prevailing winds and the presence of diseased plants in your neighborhood, you might get it – or you might not. A greenhouse would be a big help keeping out those spores, but greenhouses are expensive. A simple open-ended hoop house should help some, and not cost much. It will be most protective if the open ends are not facing the prevailing winds. So that is what I shall do.
I’ve built hoop greenhouses with windows and doors, and it’s quite a bit of work. So this year I shall try something easier. I will make a 10 ft by 10 ft hoop house big enough to walk through, but without all the carpentry of a door and a window. It should hold 10-12 tomato plants, maybe more.
Here is what is needed: Twelve 10-foot pieces of ¾ inch PVC electrical conduit and some PVC glue. A piece of greenhouse plastic roughly 20 feet by 12 feet. Enough row cover or “Reemay” to drape over the ends, maybe 12 feet by 8 ft (I’m hoping this breathable fabric will keep out spores but allow breezes to pass through). Some carpenter’s spring clamps to hold the plastic and Reemay in place. And two 10-foot pieces of wood strapping that I will screw into the ribs of the hoop house to keep the hoops from moving.
I will pull a string tight between 2 sticks to define one side, and then measure over 10 feet and do it again. My soil is soft, so after I have glued 2 pieces of conduit together, I shall just push the ends in the ground, creating a hoop (the conduit is flexible but sturdy). Measure over 2 feet, repeat. And so on. I will try to buy my greenhouse plastic from a local greenhouse, or see if I can get a used piece they have taken down. Worst case scenario? I’ll buy 4-mil plastic that is not UV protected –but it will only work one year before it decays in the sun.
Once the cover is on, you could use a screw gun to screw right though some strips of wood strapping into the ribs with sheet rock screws to stabilize the structure and help hold the plastic in place. I’ll do it 3 feet off the ground on each side of the hoop house. Carpenter’s spring clamps can be bought for $2 each, and could be used to clamp the Reemay over the ends.
I reckon I can build that hoop house in an afternoon. If you want to have something even smaller, use just 10 feet or 15 feet of conduit per hoop over a 3 or 4 foot wide bed. You won’t be able to walk in it, but it will be even cheaper and easier to build. You’ll have to remove the plastic each time you want to weed, pick or water, of course.
Gardening is a constant challenge. If the blight doesn’t attack, maybe the hornworms will. But I’ll try not to worry too much, and try to figure out what I can do cheaply and efficiently to get the best production possible. Wish me luck!
Henry Homeyer’s Web sites are www.Gardening-Guy.com and www.henryhomeyer.com
Visiting Longwood Gardens in Winter
Posted on Wednesday, February 27, 2013 · Leave a Comment
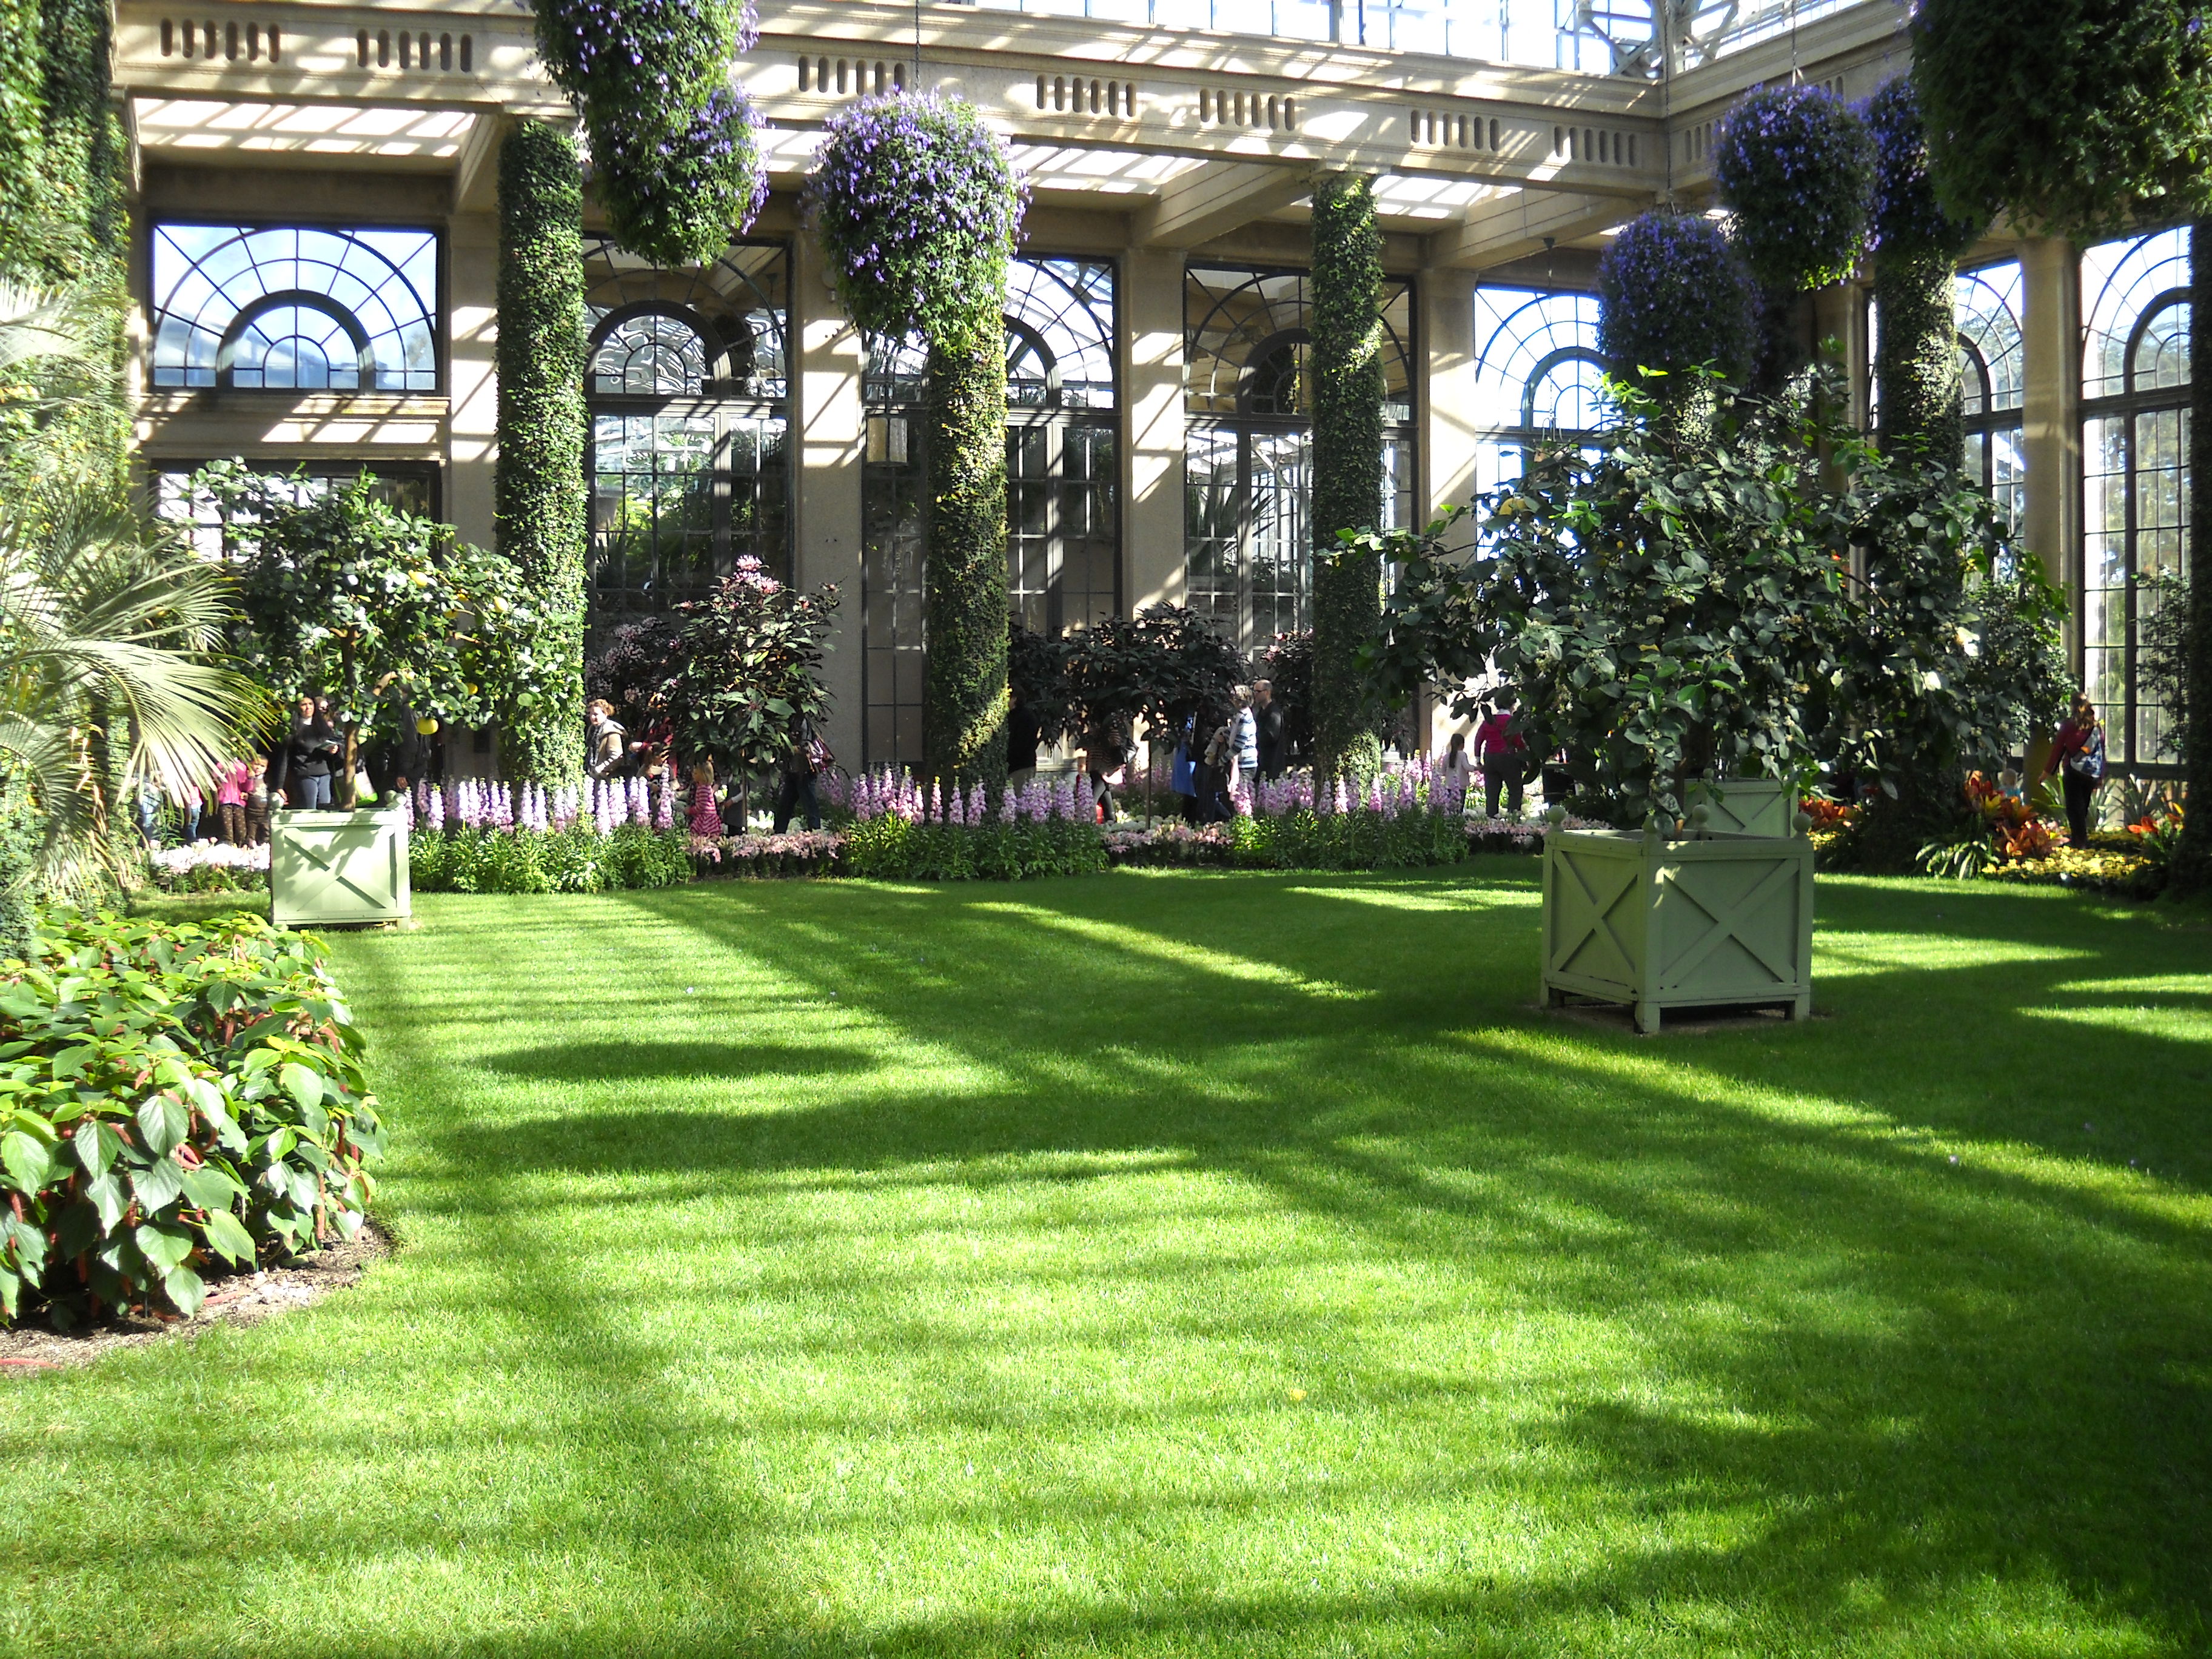
I recently traveled to Pennsylvania to visit family, and while there I visited Longwood Gardens in Kennett Square, PA (about 30 miles west of Philadelphia). It was a fabulous break from winter and a good chance to see flowers in bloom before the flower show season gets into full swing. From now through March 24 their 4 acres of glass conservatory are displaying more than 5,000 orchids – and much more.

Longwood Gardens
I’ve been to many greenhouses over the past few decades, both here in the States and in Europe. Often I find them too hot and too humid, particularly if dressed in winter clothing. The Longwood Garden conservatory seems to have figured out how to do it right. The greenhouses were built in the 1920’s for Pierre du Pont (1870-1954), who, it would appear, had more money than he knew what to do with. So these greenhouses have very high ceilings, about 50 feet in places. That means that hot sticky air can accumulate near the ceiling, leaving us mortals on the ground with warm, pleasant air.
Walking into the main halls of the conservatory one is greeted with a massive arrangement of potted orchids made to look like cut orchids in a huge vase. It was an arrangement of whites and yellows, two different kinds, standing in a shallow pool of water. Light poured in everywhere through the ceiling and walls. To your left, a lawn! That’s right, a perfectly manicured lawn big enough to host a generous game of croquet! In this season, it was a refreshing sight.
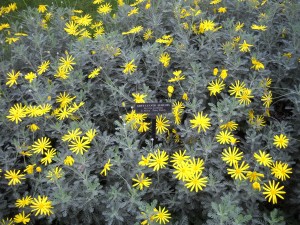
Grey Leafed Euryops
I like the fact that all the plants are labeled (which is mostly true, outside the conservatory, too). I carry a notebook so that I can research plants I like – not all are suitable for New England. I loved a yellow daisy-like plant with blue gray foliage, called Grey-leafed Euryops (Euryops pectinatus). Unfortunately, it is a South African shrub suited for California, or indoors, but not my garden.
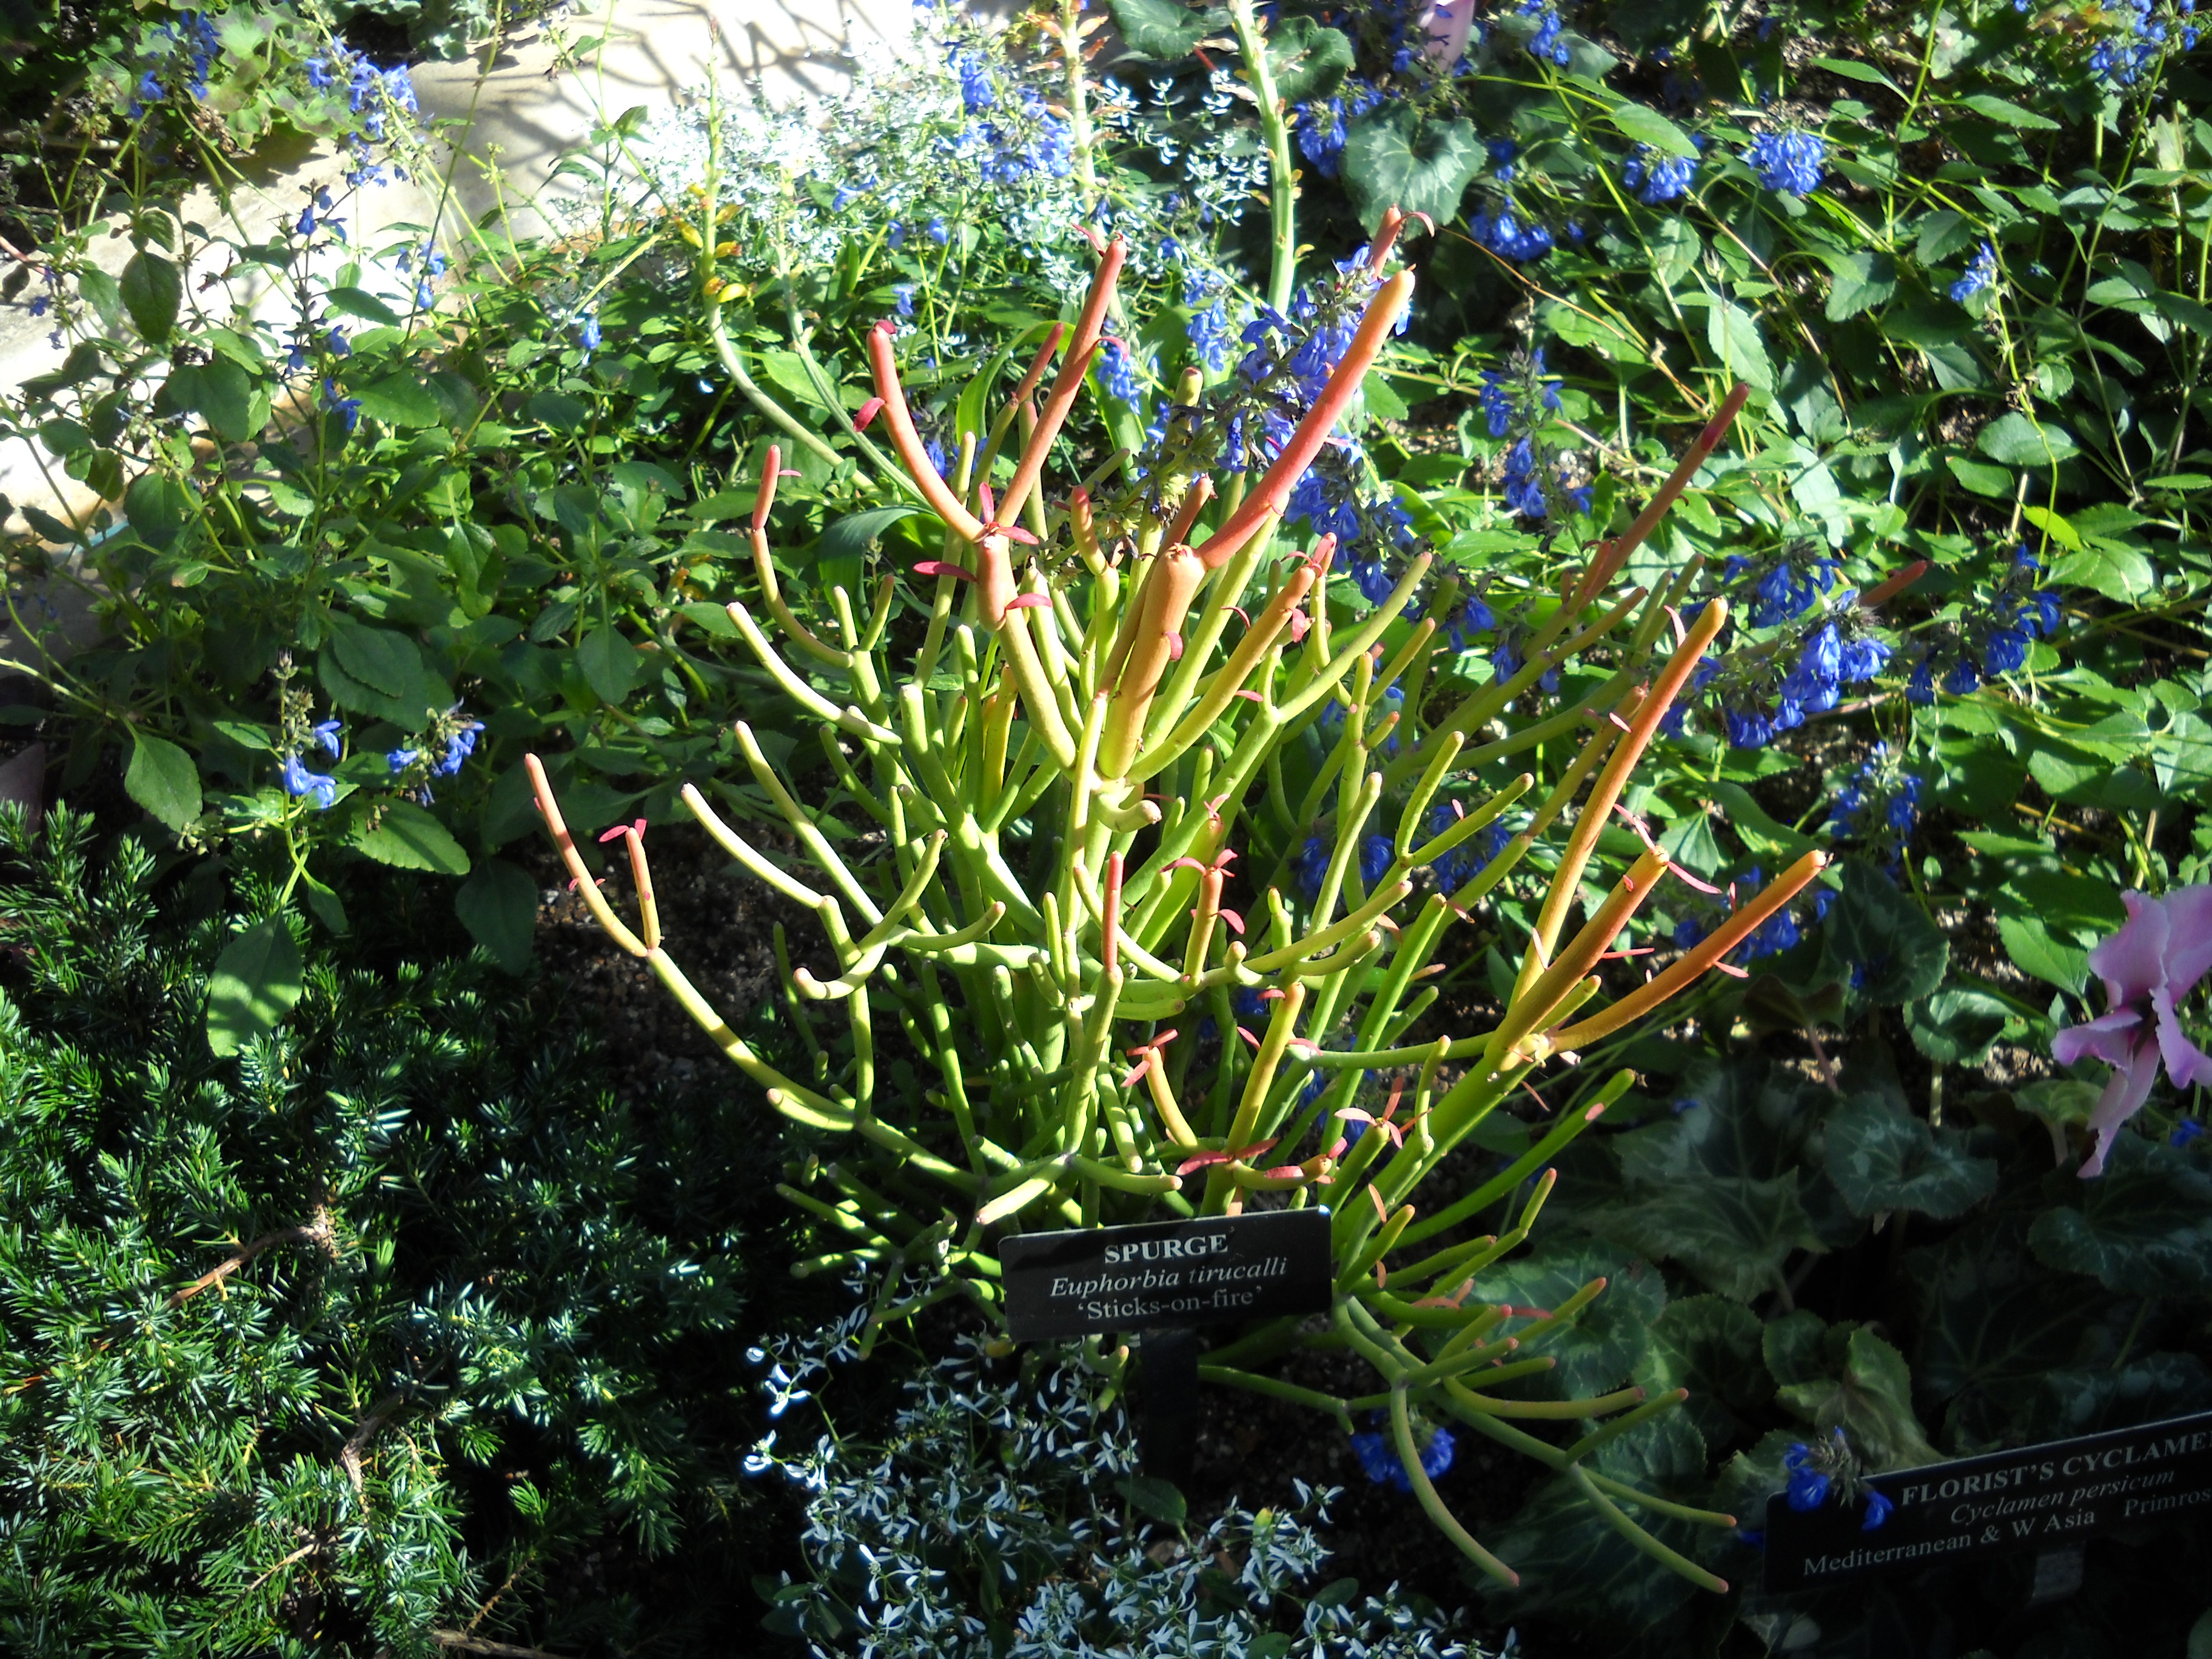
I observed a euphorbia (Euphorbia tirucalli) ‘Sticks on Fire’ that I simply must find, and accept that it must stay in a pot that will allow me to bring it in during the winter. It has miniscule leaves, but the stems are yellow, progressing to red toward the tips of the plant. It is very dramatic, and would be a nice houseplant. My nine-year old grandson, George, collects succulents, and this would be a great addition to his collection.
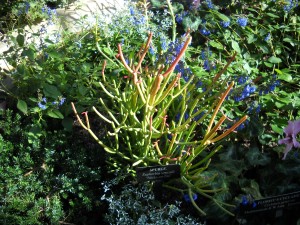
Euphorbia ‘Sticks on Fire’
Speaking of kids, Longwood Gardens is definitely child-friendly. In one section docents were handing out plastic-coated cards with plant pictures for a scavenger hunt for kids, and there is a nice water feature that will allow kids to get a little wet, but not soaked. And the moving squirts of water are definitely exciting. Docents are everywhere, and very helpful. One was showing children vanilla pods that were picked from a very long viney vanilla orchid (Vanilla plainifolia), and allowing them to sniff the vanilla scent. The plant fascinated me – nearly 25 feet tall with fleshy green leaves, it had been in the conservatory only since 2010.
In that same room with the vanilla plant were examples of orchids of every hue, from bright red to purple to orange and yellow to white. I was amazed to see each in perfect condition, no spent blossoms or droopy leaves. Then I learned from the docent in the room that these potted orchids are changed out 2 to 3 times a week. Only perfection is on display!

Rose Supports
I like to learn from each garden I visit. One new growing trick that I liked involved using standard sheep fence to hold up flowers. But instead of running the fencing vertically, as is standard, three layers of fencing were stretched between cross bars horizontally. The first bar was about 2 feet off the ground, the next at 3 feet, and a top layer at 4 feet. Those supports were about 15 feet apart. This support system allowed floppy roses to grow through the 6-inch openings of the fencing, and to lean on the wires as needed – without being tied up. This would work well for any type of tall flower outdoors that might get beaten down by the rain.
Also of interest to me was a rose variety called ‘Pink Cherokee’ that was planted in the conservatory in the 1920’s when it was first built. The rose is a simple single rose that has climbed more than 20 feet up and blooms (in the greenhouse) in spring, summer and winter.

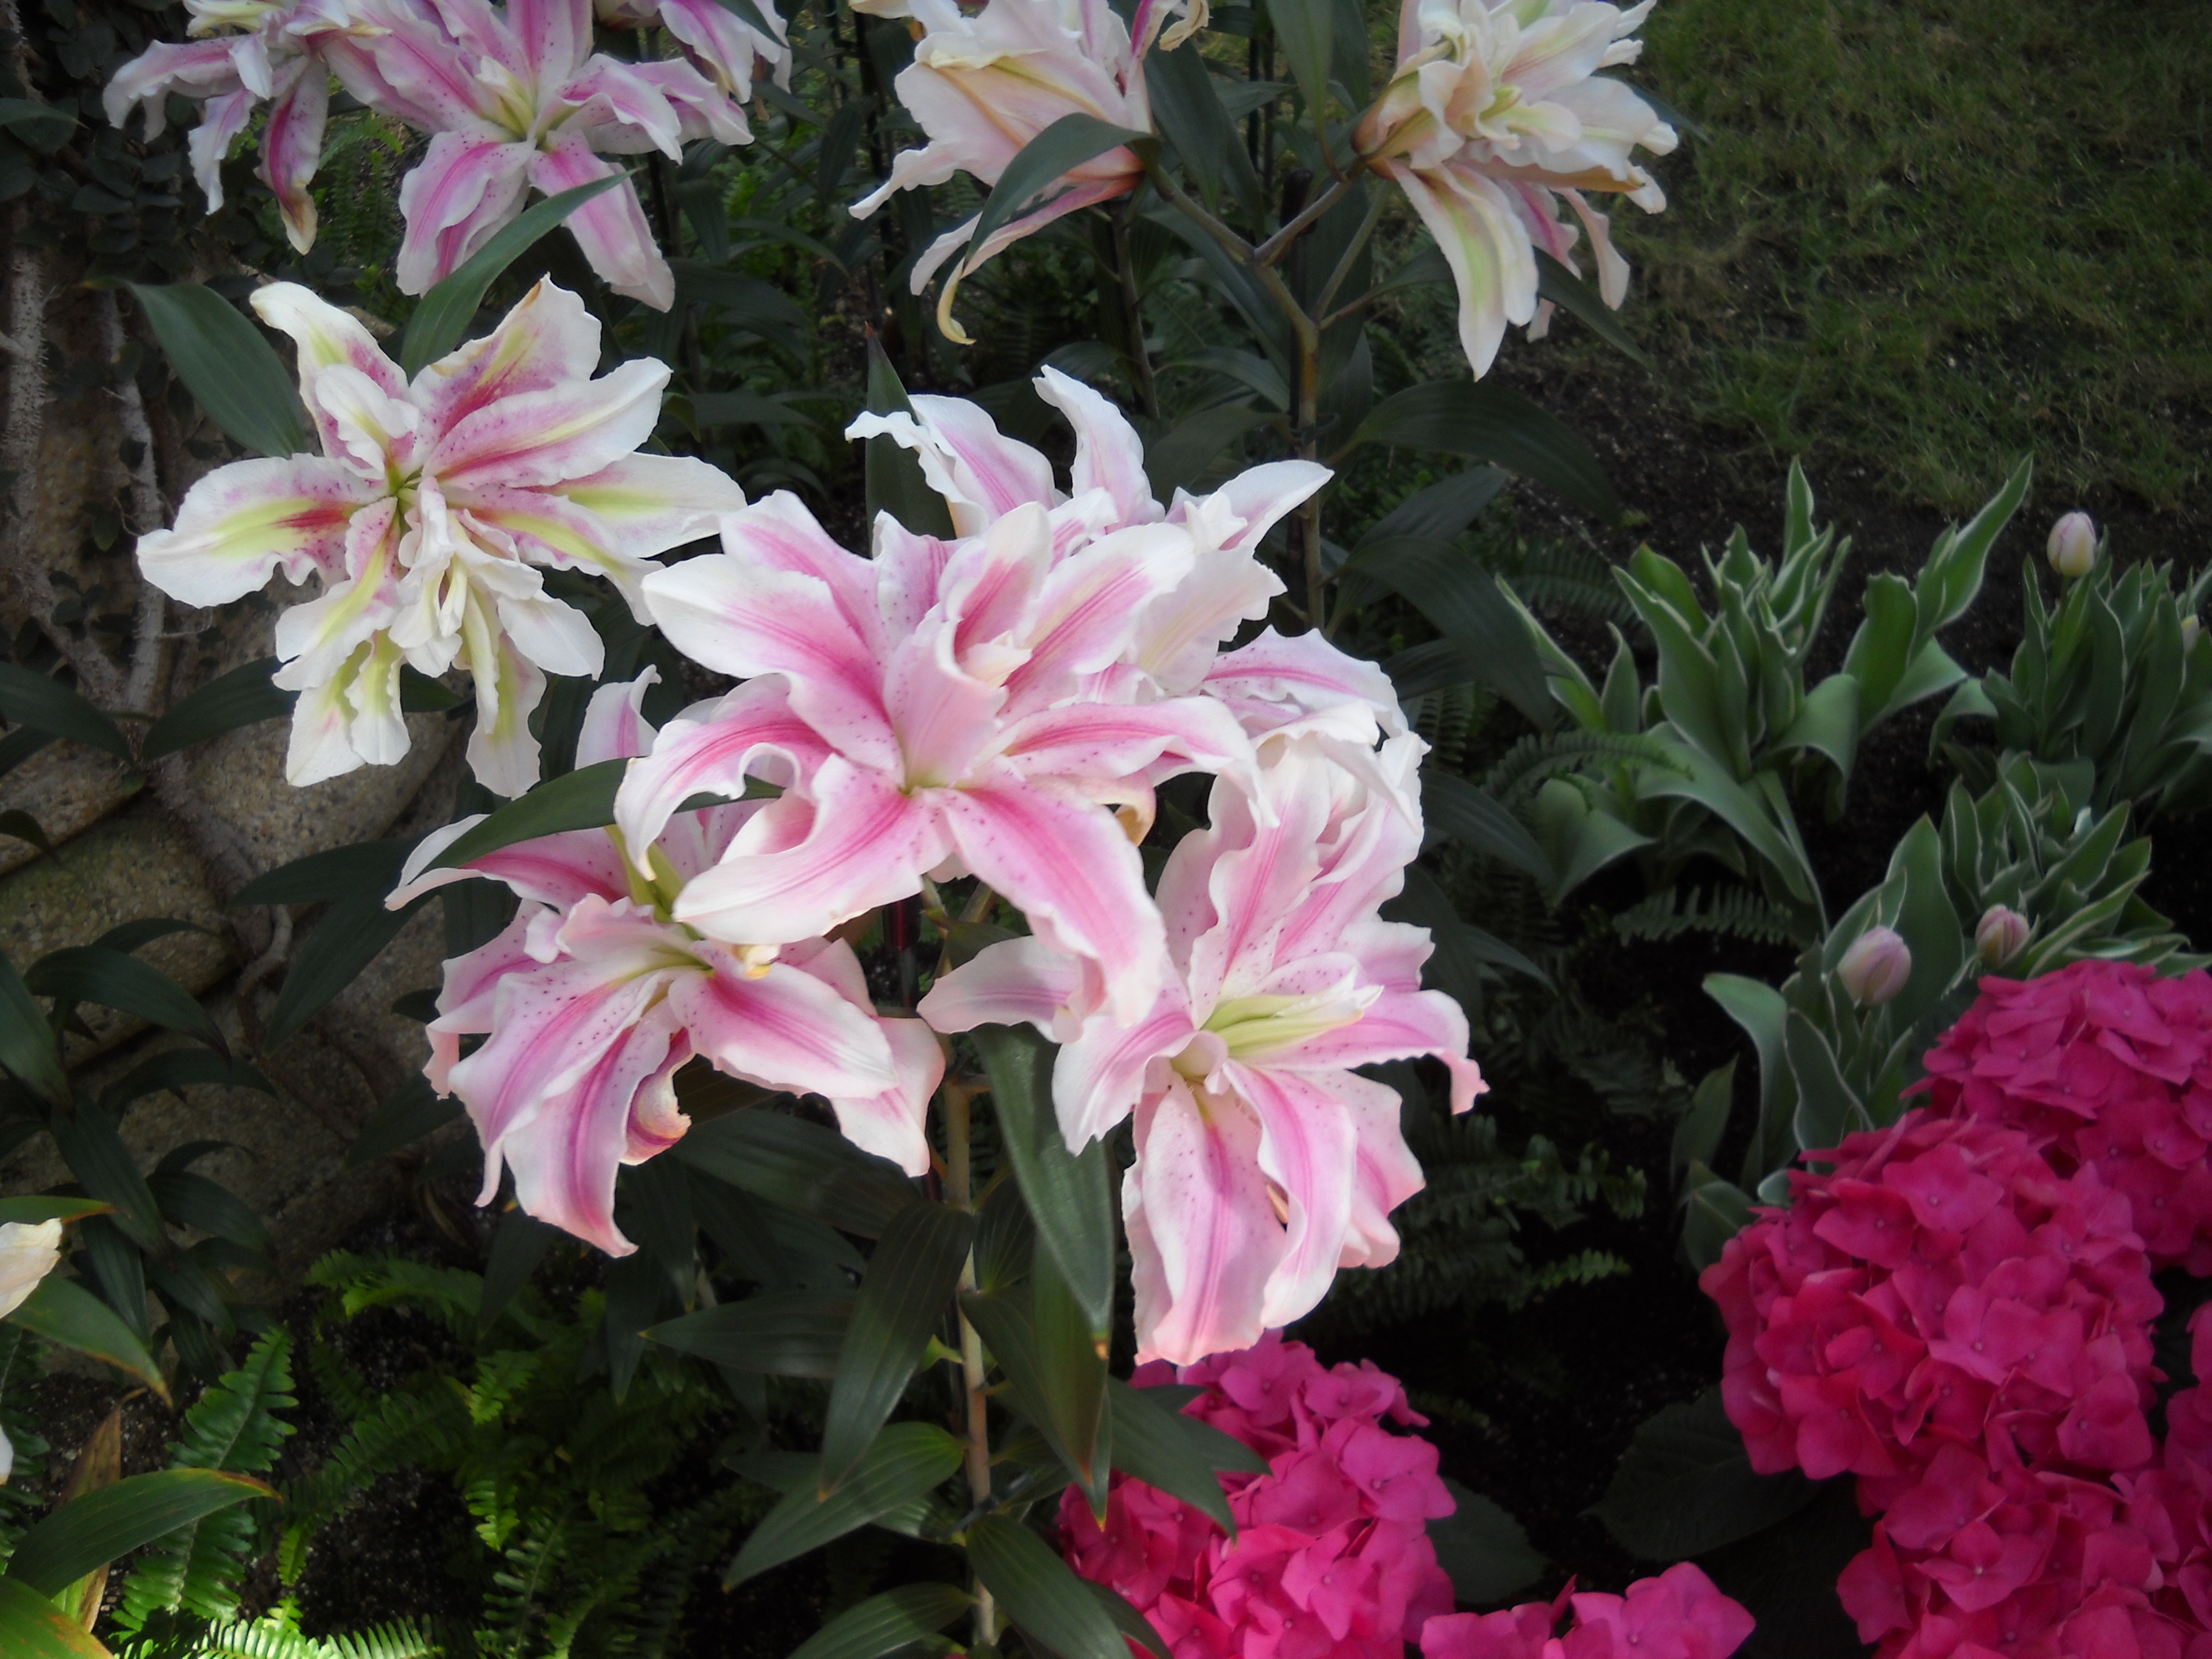
Double Star Lily
The greenhouses included many standard flowers besides the orchids: daffodils, tulips, freesias, oriental lilies (including a double one, ‘Double Star’, with twice the number of petals). I loved seeing some rare yellow clivia – I grow the standard orange one, a real work horse of a house plant with glossy long strap-like leaves. The yellow one I had heard of, but never seen.
For more information on the Longwood Gardens, go to their web site, www.longwoodgardens.org. Admission is $18for adults, $15 for seniors (62+), and $8 for students 5-18. If you are in Pennsylvania, the gardens are worthy of a visit in any season – the outdoor gardens in summer are fantastic!
Henry Homeyer can be reached at henry.homeyer@comcast.net or PO Box 364, Cornish Flat, NH 03746. Visit his web site at www.Gardening-guy.com.
Native Pollinators
Posted on Wednesday, February 20, 2013 · Leave a Comment
Most gardeners know that our native bumblebees are good pollinators: reliable workhorses that pollinate even when honeybees stay in the hive and complain that it’s too chilly, or that they don’t like the rain. But you may not know that there are many other native pollinators, some very specialized, and that they can help us get good harvests. There are things we can do to support our unsung helpers including some that we can do now, in the dead of winter.
I called my friend Jim Kennedy who is a Landscape Architect/Wetland Scientist living in Etna, NH. He manages his large tract of land with a priority for nurturing wildlife of all sorts – from planting buckwheat along the edge of the forest to feed the deer, to creating meadows for woodcocks. He is a beekeeper, but also takes steps to provide food for native pollinators.
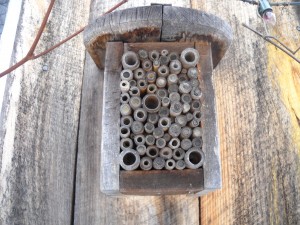
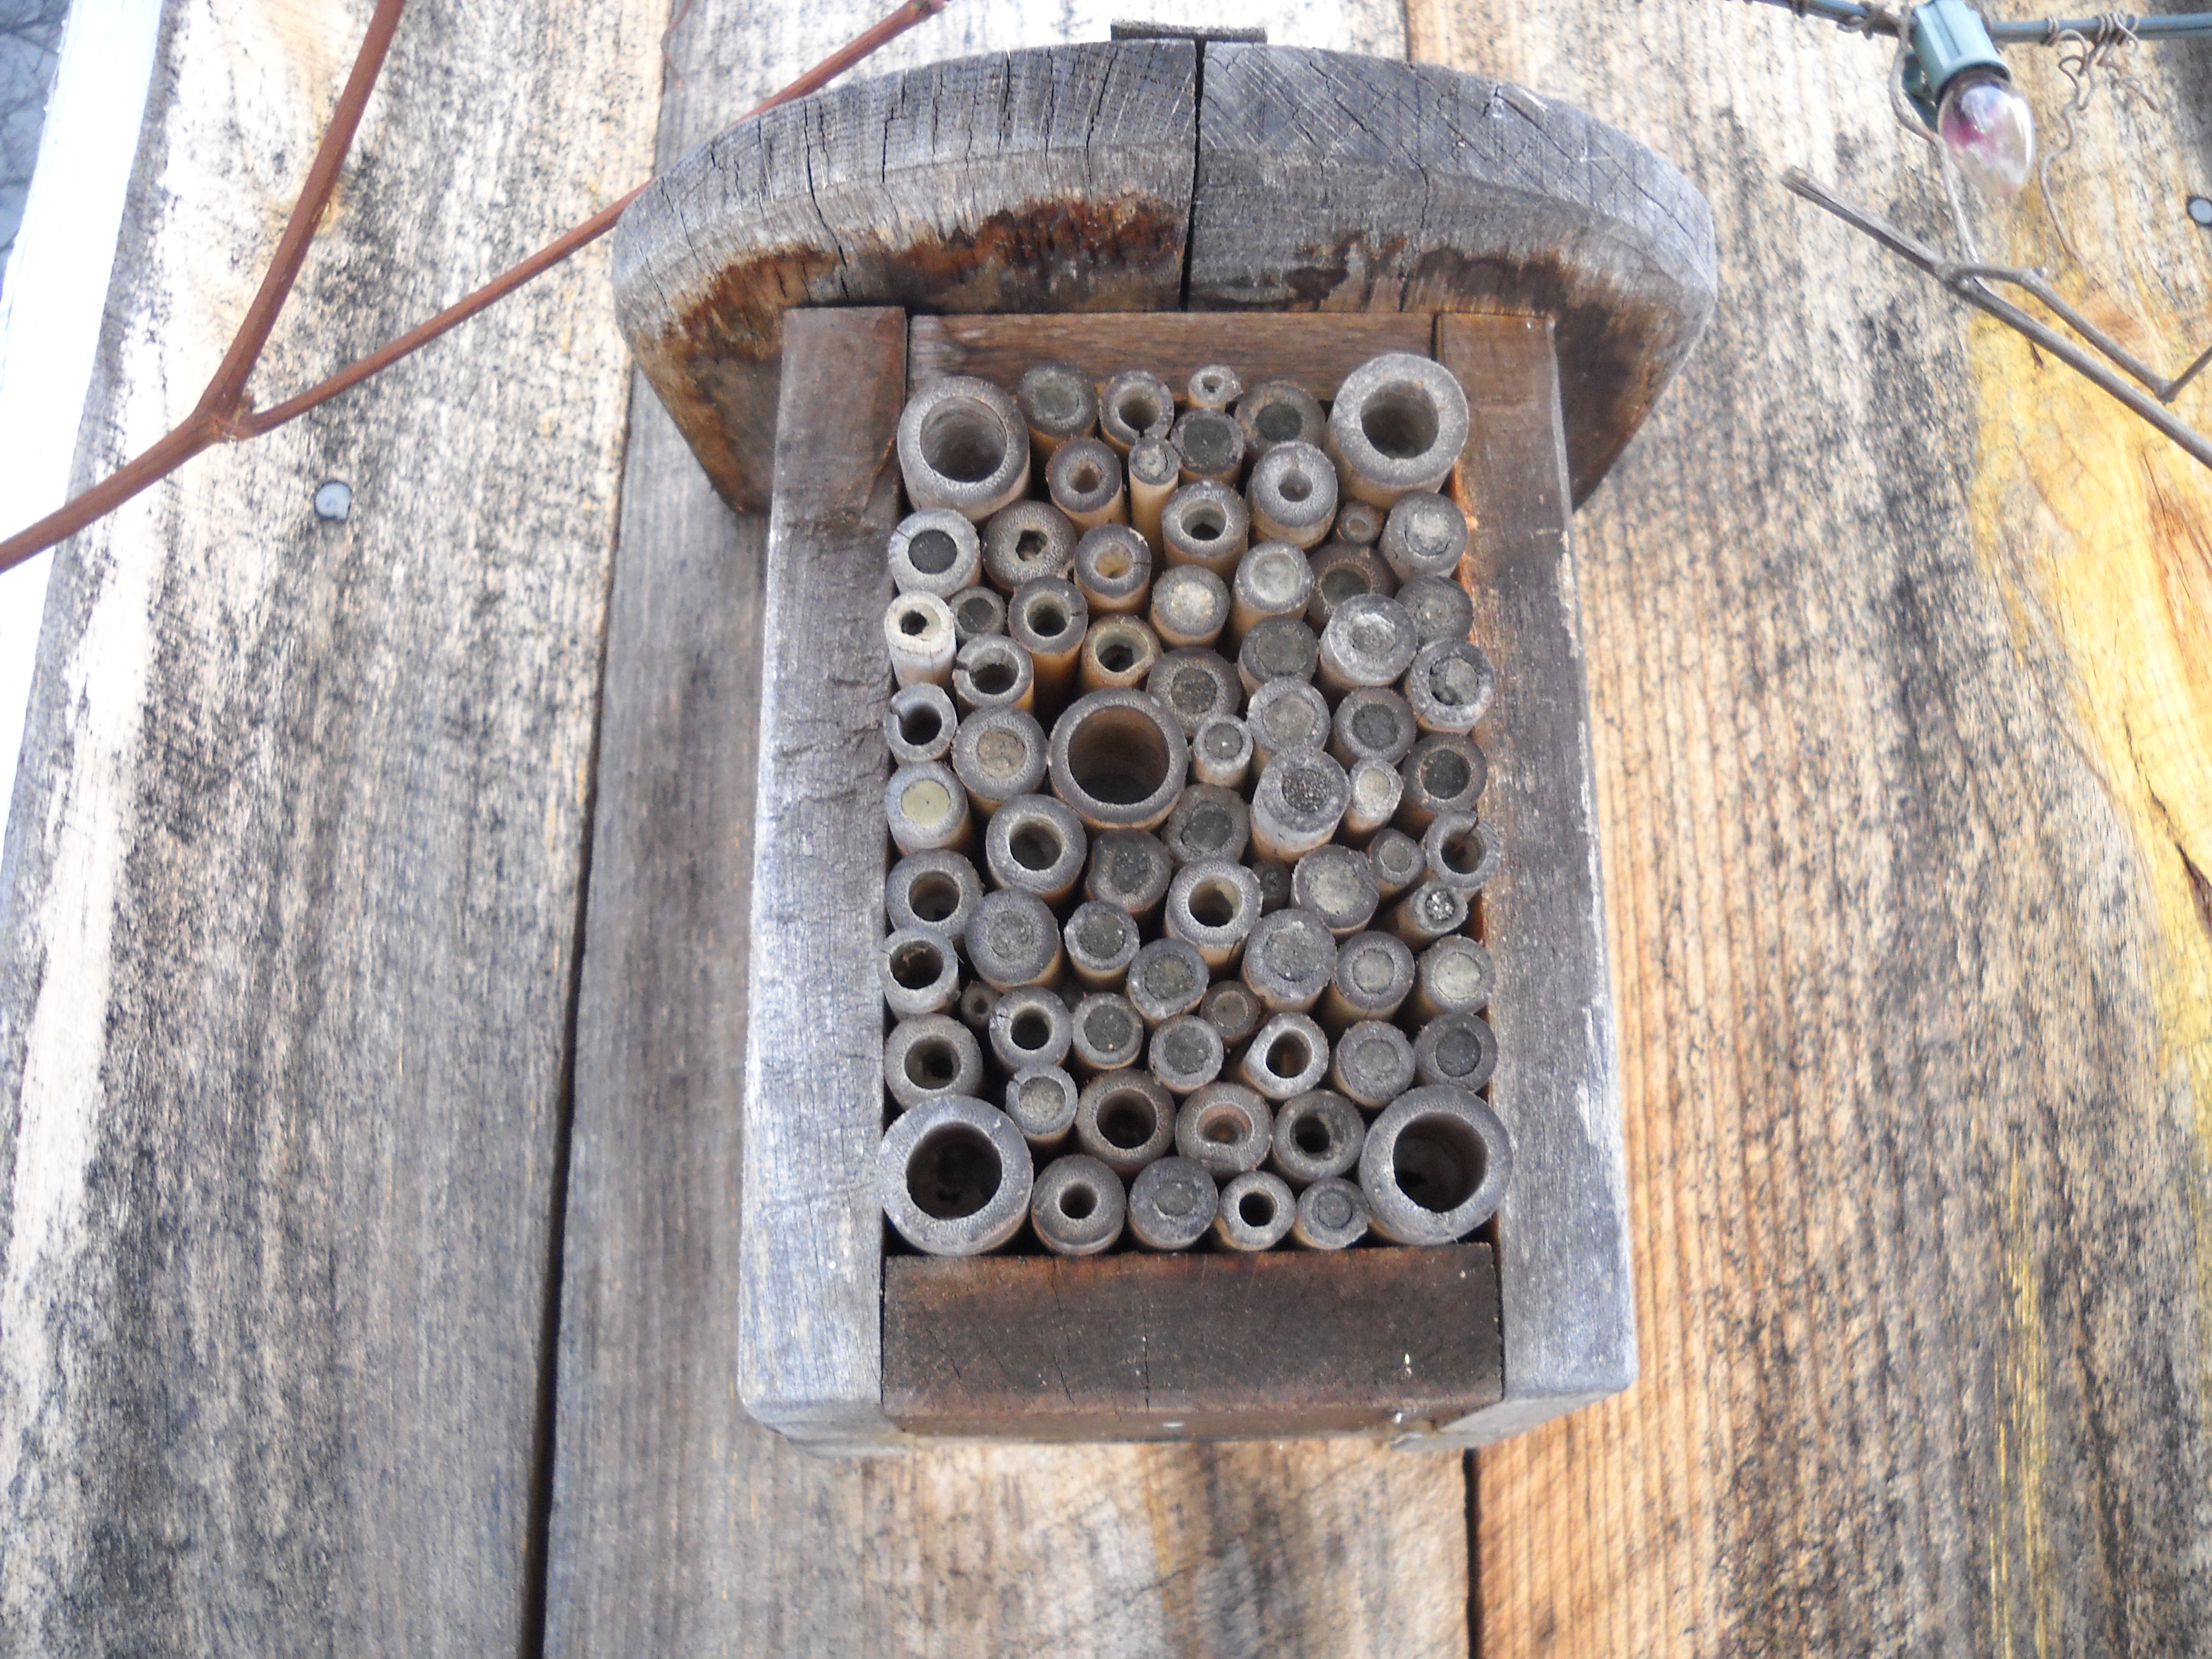
Solitary Bee Nesting Box
Native pollinators include about 4,000 species of bees and wasps. Unlike honeybees, most native pollinators are solitary – they do not live in a hive with other bees and wasps. Jim directed me to the Xerces Society (www. xerces.org) which is a group for“Invertebrate Conservation” in North America.
Native pollinators need three things to be successful: adequate food, generally in the form of native flowers; a suitable place to lay eggs and shelter their brood; and lastly, protection from pesticides.
Jim Kennedy does what I do: he avoids cutting down stands of milkweed that grow on his property. Monarch butterflies like them, but they also provide nectar for other pollinators. He encourages dandelions because they are one of the first food sources for bees in the spring. (Tell that to the lawn dudes that want to ‘nuke’ your dandelions. And he waits until late in the fall to cut down goldenrod in his meadows. Yes, a field may look a little messy if you leave stands of goldenrod or milkweed, but who cares what the neighbors think?
Garden flowers can provide food for bees, too. But flowers that are from Europe or the Far East may not attract our native bees the way native flowers do, or feed them as well. Flowers that are good for native pollinators include asters, black-eyed Susans, elderberries, Joe Pye weed, purple coneflowers, salvias, sedums and willows.
This is a time of year when you could build some nesting sites for native solitary bees. I have a simple nesting box on the side of my barn, and I occasionally see little bees or wasps coming and going in summer. It looks like a bird house, but the front side is open and it is filled with 6-inch lengths of bamboo of different diameters stacked up from wall to wall and top to bottom. Each piece of bamboo is open on the end facing out, and closed off at the other end. Here is how to make one:
What you are trying to create is an open-faced box with a slanted roof. I recommend using“five quarter” cedar because it is a full inch thick, and less likely to split when you nail or screw the box together. You should probably pre-drill your holes before screwing the pieces together. The opening of the box should be 4 inches by 6 inches, and the side pieces need to be cut on a slant (from back to front) to create a sloping roof when you put the top on (water will drip off the front, so create an overhang). The bamboo (or even dry stems of Japanese knotweed) should be stacked into the little building you have created, filling it up completely. Opening diameters should range from 1/8” to 3/8”.
Another way to create a nesting site for native pollinators is to use a 6-inch diameter block of wood that is 12-18 inches long and drill it full of holes ranging in diameter from 1/8 inch to 3/8 inch. Space the holes about ¾ inches apart in rows. For holes up to ¼ of an inch, the holes can be 3-4 inches deep; for those ¼ inch or larger, 5-6 deep inches is recommended. Hang this – or your bee box – on your barn or in a tree with the drilled holes facing east to get morning sun.
The majority of native bees actually nest in the ground. Jim Kennedy leaves bare soil around his pond to make it easy for the bees to find good nesting sites. And most bees, yellow jackets excepted, have no interest in stinging you. Yellow jackets can be aggressive, but the nests do not survive the winter, so when I get one near my garden, I just avoid it and the next year it is gone.
I do not use pesticides, but be informed that if you do, you can be killing bees along with the pests. The neonicotinoids are a class of chemicals that are called “systemic poisons”. That means that they are absorbed by the plants, and the chemical is present throughout the plant, including the pollen and nectar, so it will kill bees that feed on them. So your Oriental lilies, if sprayed to keep the lily leaf beetles at bay, can do a lot of damage. Some trade names of systemic pesticides include Rose Defense, Marathon, Merit and Bayer Advanced – and lots more. Any pesticide can kill beneficial insects by drift or overspray.
It will be awhile before we see bees, but it is good to think about them while it is still cold and snowy.
Henry Homeyer has a new book, a fantasy-adventure chapter book for kids. It is Wobar and the Quest for the Magic Calumet and is about a boy and a cougar. His website is www.henryhomeyer.com.


 Click Here to buy from Cobrahead