-

Now available for $24.95 including shipping. -

Now available for $21.00 including postage. Vendors I Like
 Click Here to buy from Cobrahead
Now is the Time to Plant Garlic!
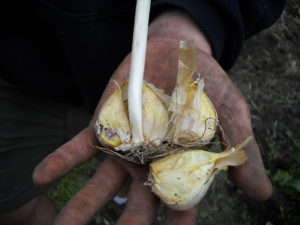
Hardneck Garlic ready for planting
Here in New England we should plant hard neck garlic, which has a stiff “scape” or stem that starts in the middle of the bulb, and grows up as the stalk and produces a flower in July. The fresh scapes can be cut and used in sauces or omelets.
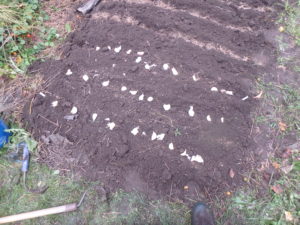
Place your garlic cloves on the soil to establish space before planting
When I plant the second row I stagger the cloves so that they are not lined up with the first row. In the third row I match the cloves with those in the first row. Staggering the bulbs insures a little extra space between bulbs. When all are in the soil I push soil over the cloves and pat the soil down with my hands. If your soil is sandy or a heavy clay, adding some compost before planting is good.
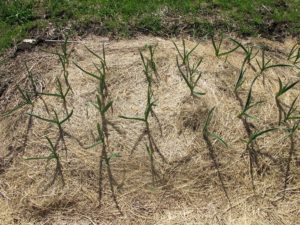
Garlic grows through th mulch, shown here in May
Sometimes garlic will send up a green shoot in the fall. When this happens, gardeners write me, asking if their garlic will suffer if it grows in the fall. Nope. The frost will kill the greenery, but not harm its potential, come spring.
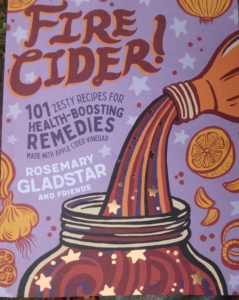
Fire Cider book cover
Rosemary Gladstar and a group of her colleagues and students have put together a lovely book called, “Fire Cider! 101 Zesty Recipes for Health-Boosting Remedies Made with Apple Cider Vinegar” published by Storey Publishing in 2019. Nearly every one of the recipes includes garlic. The book also tells the tale of how a company tried to trademark the name Fire Cider, though recently, I have learned, the upstarts lost in court.
The One-Day Cold
I don’t often catch colds. Part of that may be that I eat well, and get plenty of sleep and exercise daily. Or maybe it is just that I don’t have school-age kids and work out of my house, so I don’t come in contact with all the germs that are floating about. But over the holidays I went to parties, saw the grandkids, shopped and had plenty of chances to catch a cold. And I did catch one.
Elderberry elixir
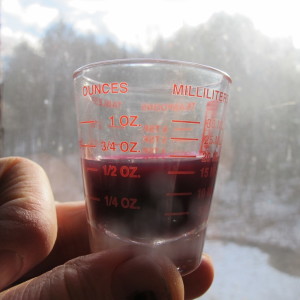
One morning shortly after the holidays I woke up with a sniffle, a scratchy throat, and a general feeling of malaise. So I got out the big guns: Fire Cider and elderberry elixir. I took about half an ounce of each of these herbal cures after breakfast, again at mid-morning, and then after lunch. As if by miracle, my symptoms started to go away. I continued the cure, and by bedtime I felt fine. Coincidence? Perhaps.
Several years ago I learned how to make Fire Cider from Vermont herbalist Rosemary Gladstar. She explained that the ingredients in this potion stimulate the immune system and help the body heal itself. That makes sense to me as the recipe (see below) contains garlic, horseradish and hot pepper – and more! Any one of these is likely to make my body wake up and pay attention!
Here’s the basic recipe as given by Rosemary Gladstar: In a glass jar combine the following ingredients:
- 1/2 cup grated horseradish
- 1/8 cup minced garlic
- ½ cup finely chopped onion
- ½ cup grated fresh ginger
- ½ to 1 teaspoon powdered cayenne (or other hot pepper)
- About a quart of organic vinegar, preferably locally made and containing the web of live bacteria that constitute the “mother” of the vinegar.
- ½ cup honey (or to taste), heated till well liquid.
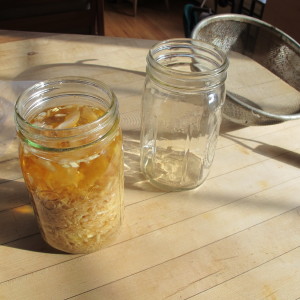
Fire Cider before decanting
All ingredients are best if fresh, local and organic; I grew most of mine. Let this steep, preferably for 3 to 4 weeks, then pour through a sieve and it is ready to use. You can use it sooner than 3 weeks, of course. Seal with a plastic lid, or put a plastic bag over the jar and seal with a canning lid. The fumes are strong enough to eat through a normal canning lid over time. Keep cool or in the fridge.
For Christmas my sister-in-law, Lisa Goodale Brinton, gave me some Fire Cider she had made which was an enhanced version of the one I learned from Rosemary Gladstar. She made it by the gallon, adding rosehips, sun-dried shiitake mushrooms, rosehips, orange and lemon juice and zest, fresh thyme and rosemary and fresh turmeric root that she had fermented using kambucha. It tasted very good, and was the potion I used to help kick my cold.
After I made my Fire Cider I added some fresh rosemary and lemon juice: a sprig of the rosemary and the juice of a lemon. I added it after I first tasted it, and it only improved the flavor. I read that one can add powdered turmeric instead of macerated fresh fermented turmeric, so I added a teaspoon of dry turmeric powder. Spices don’t last forever, so it is always good to buy fresh spices regularly. My turmeric was several years old, so I got some fresher stuff to use.
While reading to see if anyone could explain why Fire Cider might help kick a cold I came across some amazing news: a corporation called Shire City Herbals has trademarked the term Fire Cider and has filed lawsuits to prevent others from using the term. Yikes, I could be in trouble now! But apparently lots of protest has been made; see www.freefirecider.com for more information. Rosemary has been sharing her recipe since the 1970’s and the recipe was included in her wonderful book,Rosemary Gladstar’s Herbal Recipes for Vibrant Health – which came out before Shire City Herbals even started their business.
I also recently made some elderberry elixir. I went to my freezer and got some of my frozen berries. In a saucepan I heated 6 cups of elderberries, 2 cups of water, a quarter cup of honey, a couple of tablespoons of lemon juice and half a teaspoon of cinnamon. I brought it to a boil and simmered it until the berries were mushy.
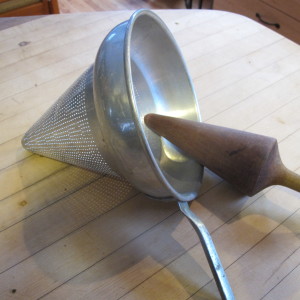
Jelly cone
I used a jelly cone to separate the elderberry pulp and the juices. This is an aluminum cone with lots of small holes. It comes with a pointed wooden masher that I use to crush the berries and extract the juice. The 6 cups of berries produced a little less than a quart of the elixir. I will keep it in the fridge as otherwise if would ferment and spoil.
I can’t promise you that Fire Cider or my elderberry elixir will prevent or cure the common cold. But at worst, they are great placebos: tasty and full of zing.
Henry can be reached at P.O. Box 364, Cornish Flat, NH 03746 or by e-mail athenry.homeyer@comcast.net.