Kissing Balls
Posted on Wednesday, December 10, 2014 · Leave a Comment
At this time of year I need all the help I can get. Cloudy gray days do not make me cheerful. Days that end at 4pm do not please me. I counteract the dark with lights, flowers on the table, greenery (and maybe a little chocolate). This year I decided to make a kissing ball to hang from my chandelier in the living/dining area.

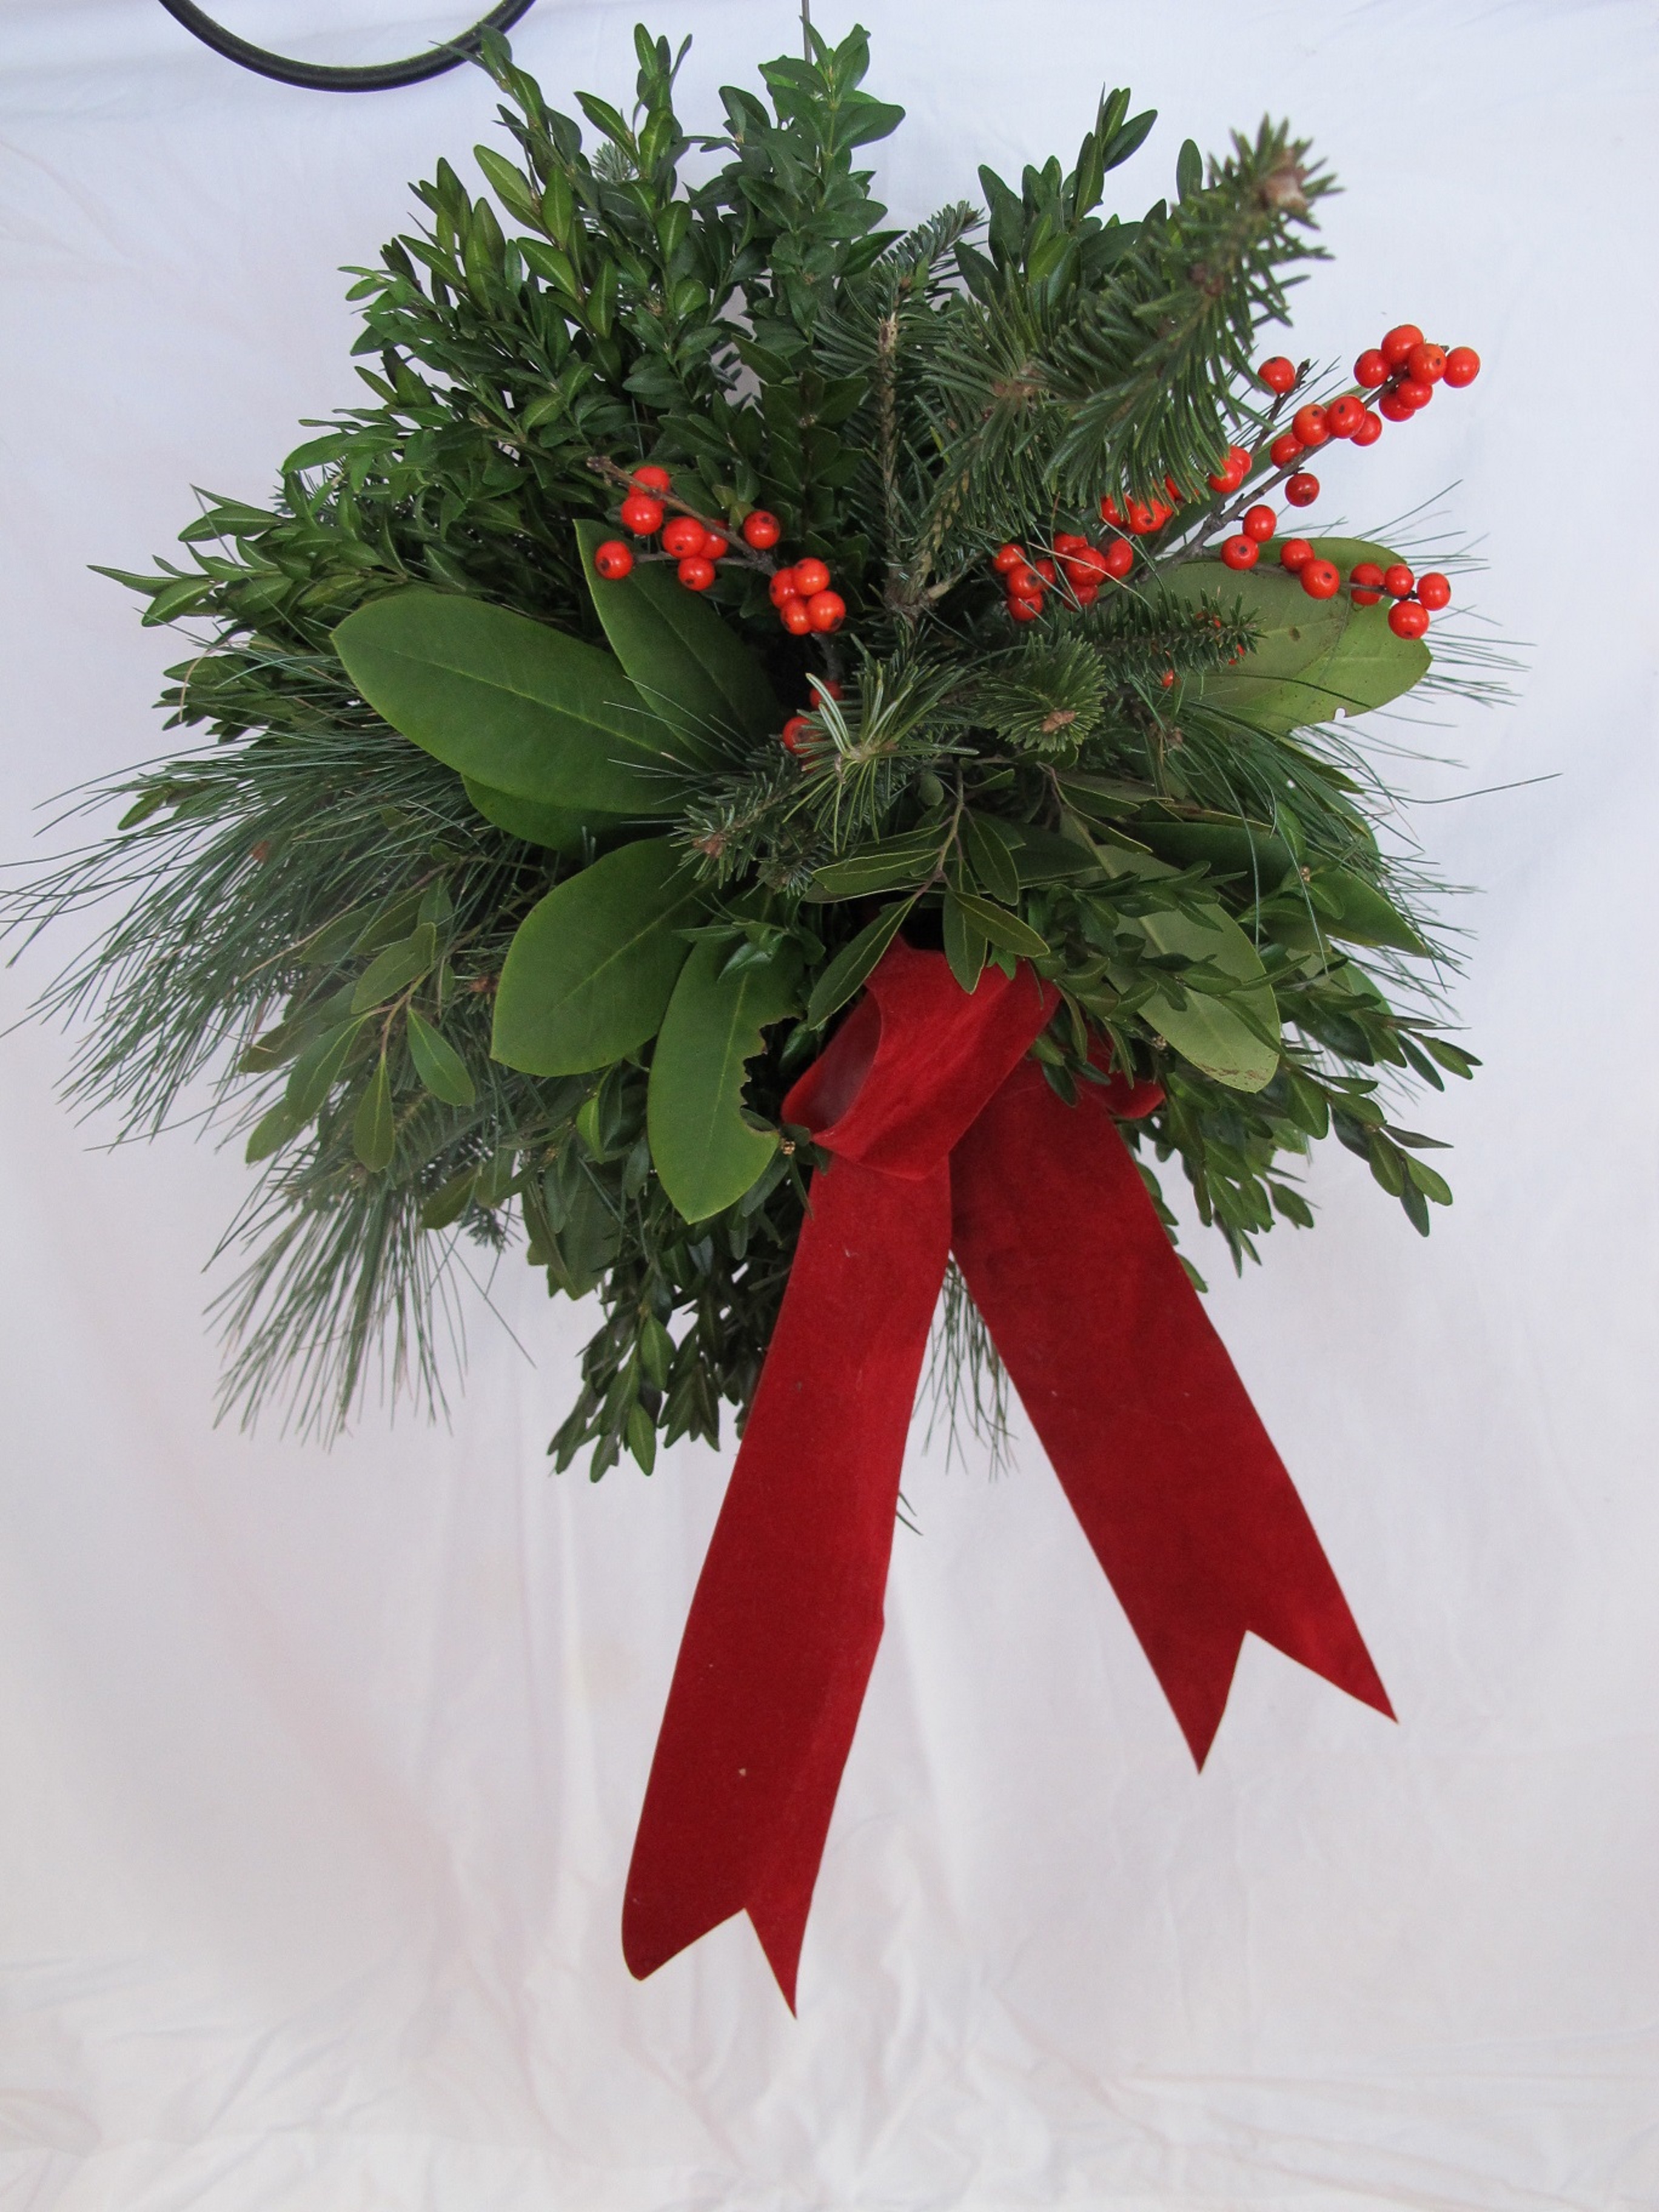
Kissing Ball
Kissing balls have a long history. During the Middle Ages villagers would hang balls of evergreens with a clay figure representing the Baby Jesus inside. Later, during the Victorian era, people would poke greens, particularly sweet-smelling greens, into apples or a potatoes and them and hang them in the house.
But they fell into disfavor, and mistletoe remained as the primary green hung in the house during much of the 1900’s. Mistletoe, of course allowed high-spirited youth to steal a kiss if a maiden was “accidentally” standing under the mistletoe. In this day of lawyers, no one wants to sell mistletoe because the berries are quite poisonous. But now decorated evergreen balls are back, being sold as kissing balls. I recently made one.
When I made my plans I didn’t think of an apple or a potato as the center of the ball. I bought a grapefruit and a large orange. But ultimately I decided I needed something longer lasting, and went to my local garden center to see if I could buy a ball of “Oasis”. Florists use Oasis to hold flowers and greens in place in arrangements while allowing them to absorb water. No one had balls of Oasis for sale, so I bought a 3 by 9-inch block.
I started the project by getting a variety of greens. I bought a small bundle of boxwood and cut branches of balsam fir, white pine, evergreen azalea and rhododendron.
Boxwood is loved by many gardeners: it is well behaved, slow-growing and has very small evergreen leaves that are a shiny green all year. They make great miniature hedges. I have avoided it because in the old days it was marginally hardy here. Now we have varieties that sneer at temperatures of 25 below and colder. Korean boxwood varieties such as Green Gem, Green Velvet and Green Mountain shouldn’t suffer winter burn or winter kill.

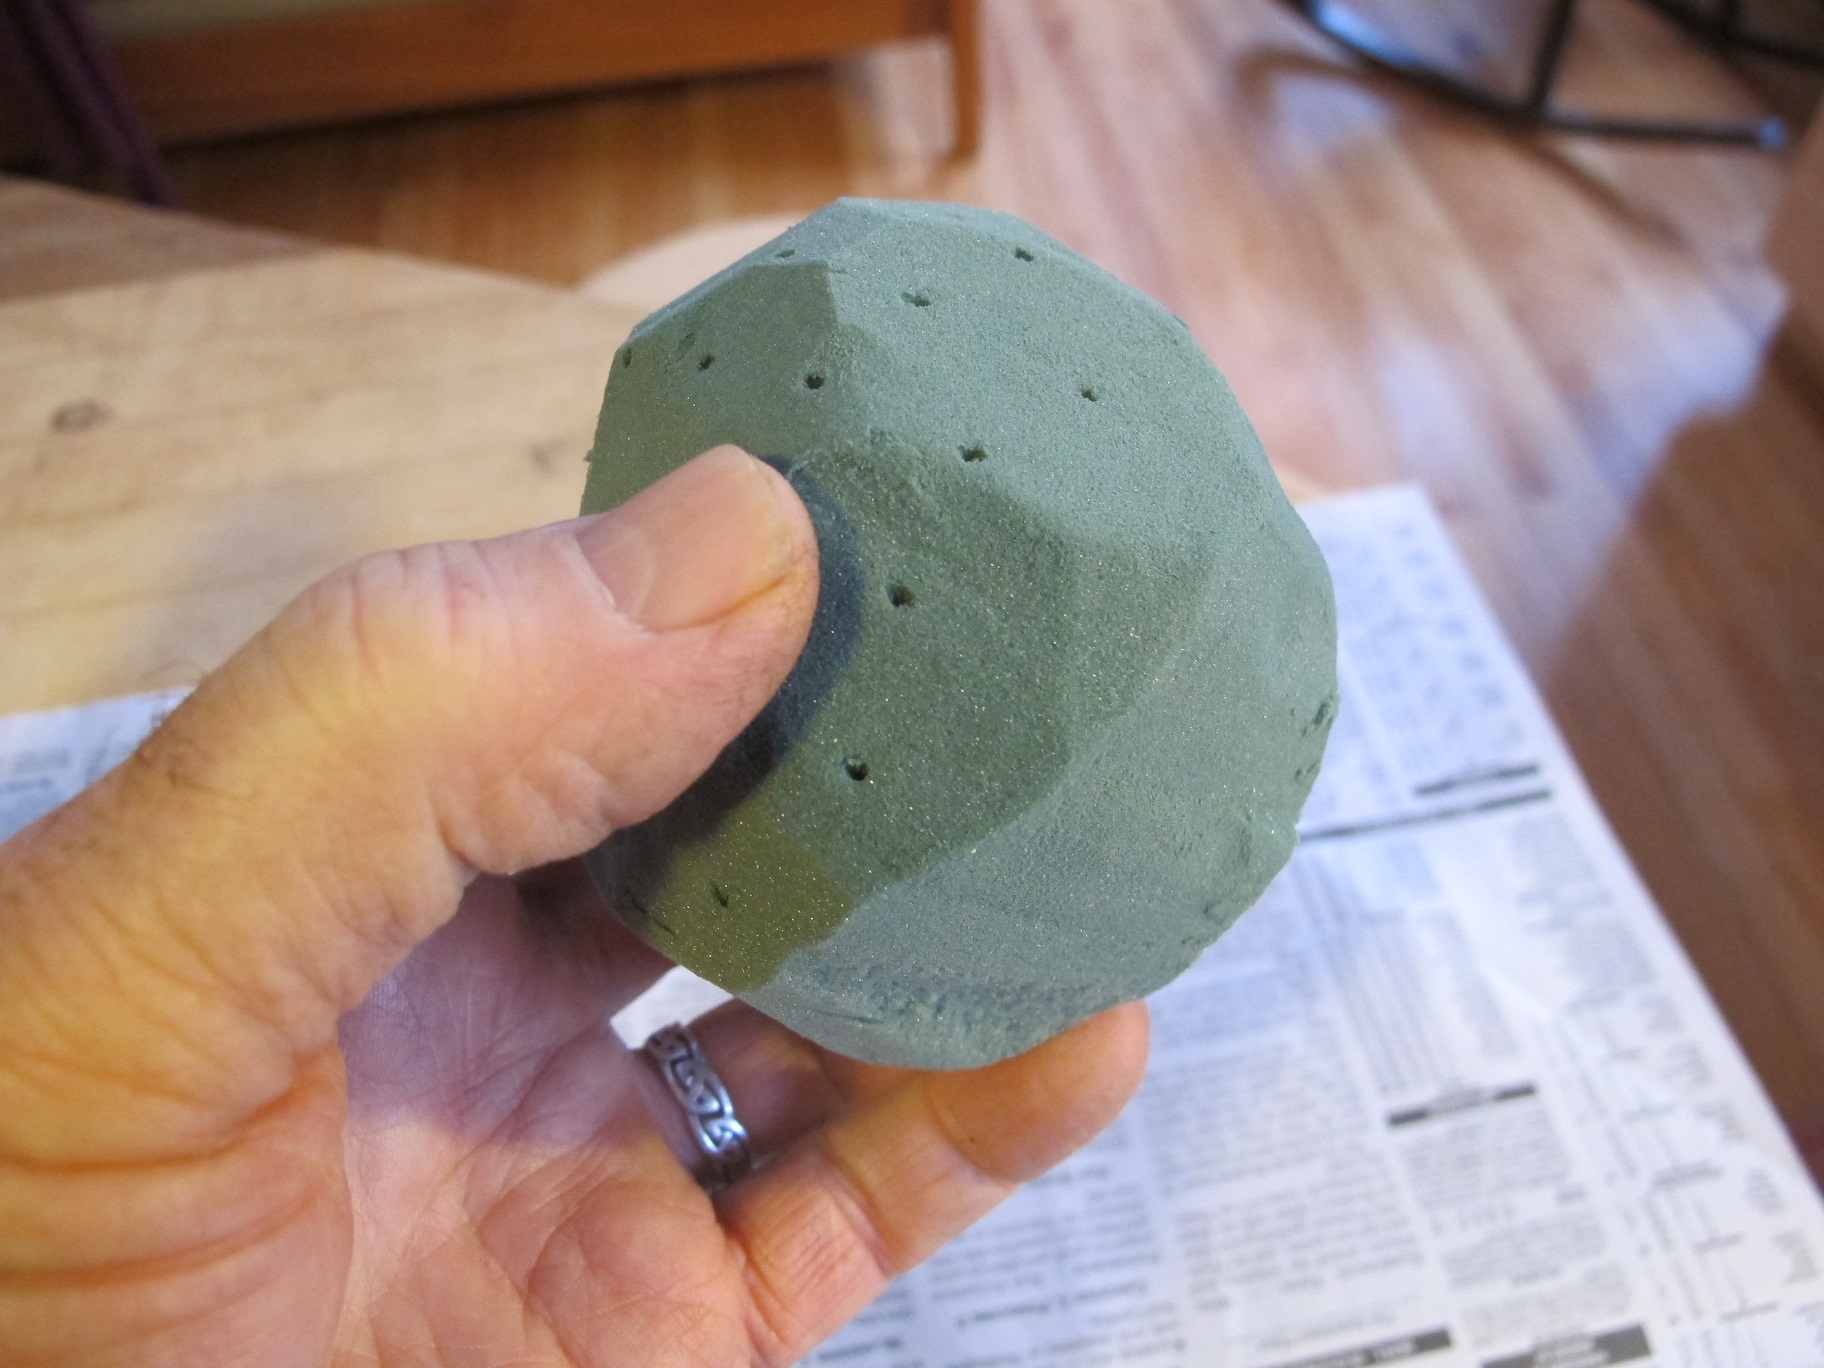
Oasis ball doesn’t have to be perfect
Oasis is very easy to cut. I used a long serrated bread knife, but you could use any knife. I soaked the sphere in water for 15 minutes or so, rotating it a few times and holding it under water so the entire thing would be well soaked. Then I took an old fashioned wire coat hanger and cut out a section. I kept the top hook portion, one angled side and the bottom wire. I straightened it out with a pair of needle nose pliers, and pushed it through the globe. I then twisted the bottom inch of wire to a right angle, and slipped a big fender washer on it to help support the sphere once I hung it, and to keep the delicate Oasis from being damaged by the wire.
I hung the ball from my chandelier and began the easy part: decorating it. I cut pieces of greenery into roughly 6-inch pieces, and gently poked them into the Oasis. I started at the top, creating concentric circles of white pine, then boxwood, balsam fir, another layer of boxwood, then azalea and rhododendron, and finally finishing up with more boxwood. Once I passed the “equator” I turned the leaves so that the shiny side would be facing down.
I used my pocket knife to shave off needles of the fir (which did not pull off easily), and to remove any lumps in the stems. On thicker branches, I shaved of a little wood to make a thinner branch to poke into the Oasis.
At the very bottom I attached a bow made of red ribbon, wiring it onto the hook at bottom after removing the washer. That insured that the wire would not pull though the Oasis, which is very delicate.
It was gorgeous. A globe of green with a nice variety of textures and colors of green. All it needed was some red berries. So my dog Daphne and I jumped in the car and drove to the nearest swamp. I had put on my tall boots, just in case some wading was required. Little did I know.
Our native holly, which loses its leaves, is called winterberry (Ilex verticillata). In the wild it lives in swamps, but is also a good landscape plant with loads of bright red berries. It is dioecious, meaning it has male and female plants; if you want berries, buy a male to go with your females (one male can service several females).
I cut some branches for my kissing ball and was leaving the swamp when, with a crack, I fell through the ice and water filled my boots. If I’d been captured on camera I might have started a new trend –icy water in boots instead of a bucket of ice water on the head. I laughed. Later, I poked stems of red berries into the kissing ball. It certainly brightens up the room, and I grin when I remember getting those red berries.
Henry Homeyer lives in Cornish Flat, NH. His books are available from his web site, www.Gardening-Guy.com. Contact him at henry.homeyer@comcast.net or P.O. Box 364, Cornish Flat, NH 03746.
Living Christmas Trees: Good Idea or Bad?
Posted on Thursday, December 4, 2014 · Leave a Comment
I know people who say we shouldn’t be cutting down trees just to brighten our houses for the holidays. Trees are, after all, sequestering carbon and making our environment cleaner, greener, and all that. I say “Bah Humbug!” and will cut a fresh tree from my neighborhood tree farmer. But if you want to be a Greenie, here is what you need to know about using a live tree with the idea of then planting it outside after the holidays.
First know that chances of survival are only 50-50 or thereabouts. Planting a tree in New England in January is not easy. For starters, the ground may be frozen. And keeping a tree hydrated and happy in the house is a challenge, even for an attentive tree steward. But let’s see how you can improve your odds. I’ve never had a live tree in the house, so I spoke with Norm Longacre, of Longacre’s Nursery in Lebanon, NH for some helpful hints.
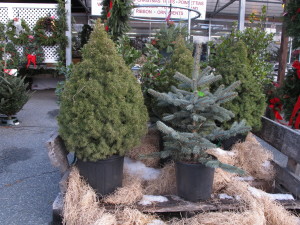
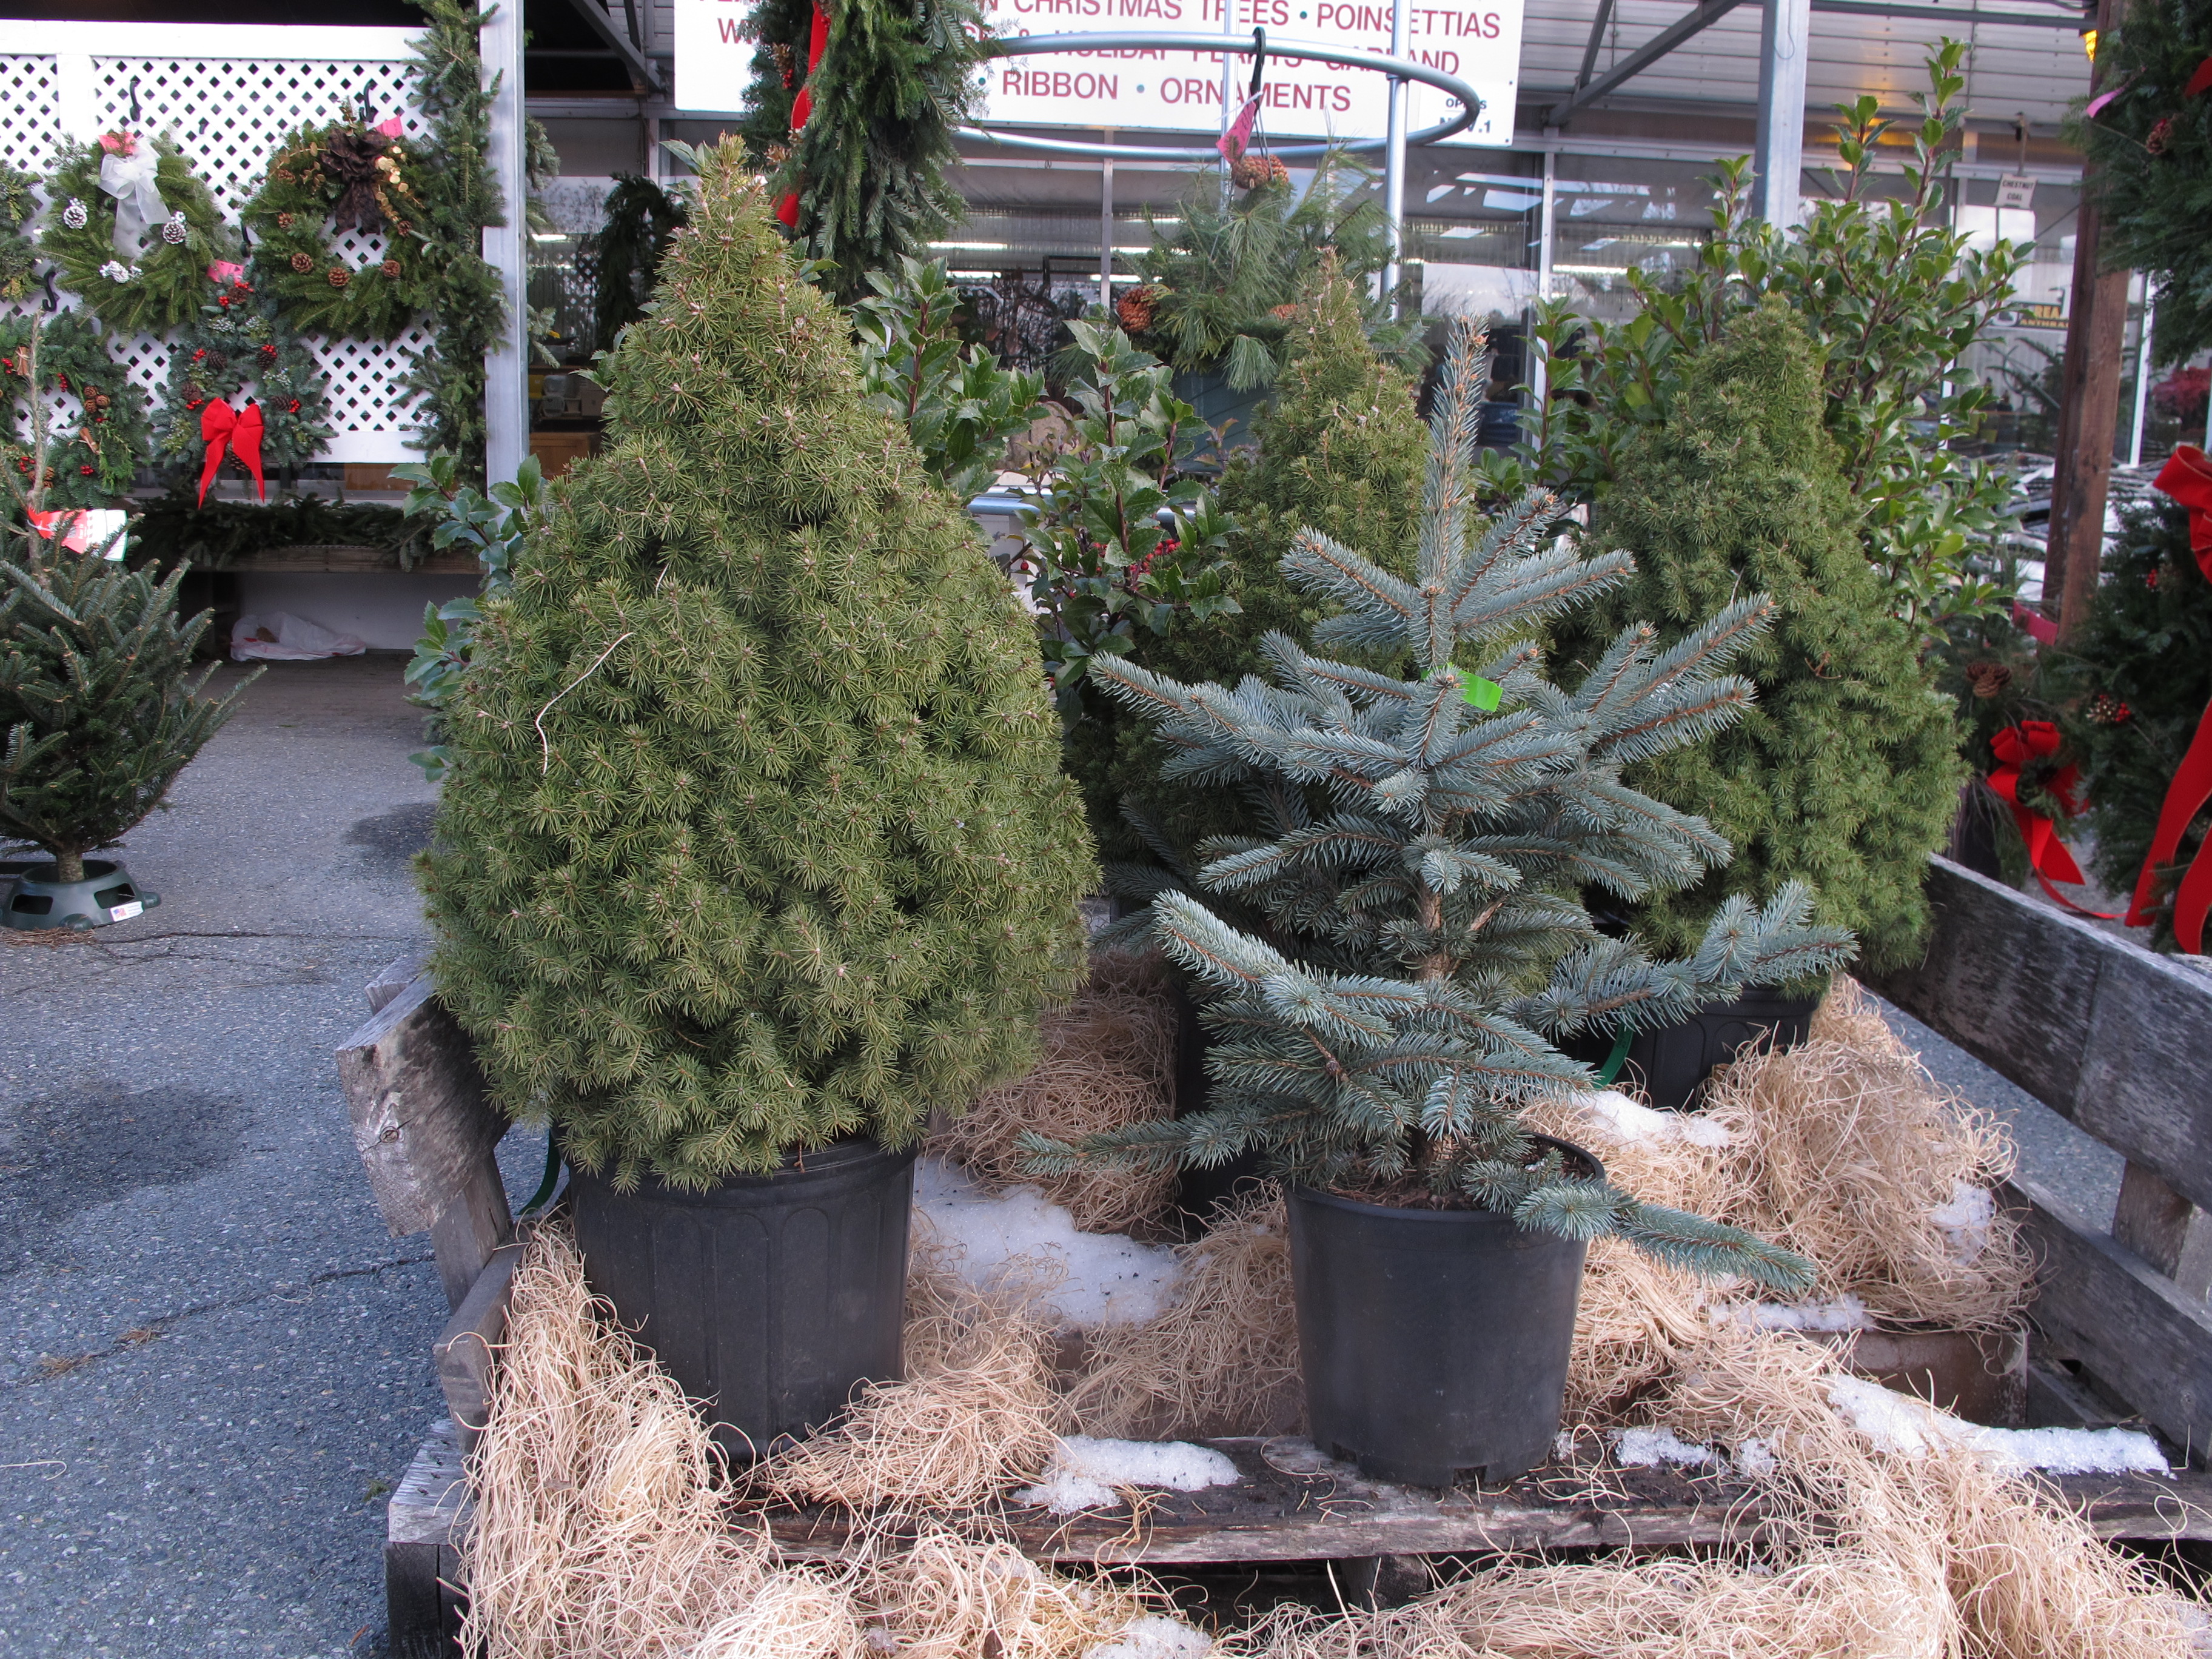
Potted Christmas trees looking for a new home
Norm said that you should think small. A six-foot tree will have a big, heavy rootball, and will be harder to move and harder to plant. Think three to four feet tall, maximum, and even smaller if you can. The best? A tabletop tree.
He said to buy a fir or spruce that has been grown in a plastic container, not one that is recently dug up or wrapped in burlap. Place the tree in the coolest part of the house – and never near a radiator or woodstove.
I suggest that you think where the tree will be planted after the holidays before you buy one. Too many times I’ve seen a huge blue spruce towering over a nice little ranch house, blocking out the sun from the big picture window. Why? Because the tree was small and cute when the owner of the house bought it, and he never thought about its ultimate size.
Balsam fir (Abies balsamea) is one of the classic Christmas trees. In the wild it will grow to be 45 to 75 feet tall with a spread of 20 to 25 feet. This is not the tree to place close to the house. There are a few cultivars that are supposed to stay small, but mostly such trees just grow slower than the standard varieties. In 40 years, a dwarf may no longer be a dwarf.
Blue spruce (Picea pungens) is another good-sized tree in the wild, 30 to 60 feet tall with a spread of 20 to 30 feet. There are spruce that stay small, I have read. ‘Blue Kiss’ is one that, after 40 years growing in Ohio, is reported to be only 8 feet tall and 10 feet wide. But that’s still enough to block most windows. So choose the location well.
I would buy a bale of hay or straw now and spread a thick layer of it over the soil at the site where you will plant your tree to serve as insulation. Between now and January it is likely we will have some very cold days. And unless we have a thick layer of snow, the top few inches of soil can be frozen solid by the time you want to plant your tree outdoors. Yes, you can break up frozen soil with a pick ax, but do you want to?
I would also buy a few bags of topsoil now and store them in a warm basement. Then if the soil is frozen when it’s time to plant, and you hack it out, you can backfill the hole with soil that is not in frozen chunks. You will want some bark mulch or wood chips to spread over the soil once the tree is planted, too.
Instead of keeping a live tree in the house for a month, the way many of us do with cut trees, think about having it indoors for just a week or 10 days. That will reduce the stress on the tree considerably. Keep the soil lightly moist, but not soggy.
When the time comes to plant your tree, be sure that you dig the hole the appropriate depth. Never plant a tree in a hole that is deeper than necessary. Look for the trunk flare, that part of the tree that would be above ground if growing in the wild. Keep that flare above ground and do not cover it with bark mulch. To do so is to consign your tree to an early death. The bark will rot if covered with soil or mulch, and the tree will decline in 6 to 10 years. Many trees come in the pot with the trunk flare covered with soil, so you may have to expose it when you plant. And don’t forget to water your tree after you plant it!
And what about all those cut trees we see for sale on empty lots, selling to people like me? They are a crop, like corn or beans. They provide a livelihood for tree farmers and are great for boon to our environment. I buy one every year and feel not an iota of guilt.
One nice thing about buying a cut tree that reaches the 10-foot ceiling in my house is this: after the holidays I will cut off all the branches and use them to provide some protection for less hardy plants that might be harmed by cold winter winds. I will layer them over perennials that are “iffy” in my climate, or use them to protect roses or other shrubs that might be damaged by the cold.
So go ahead and buy a live tree for the house if you wish, but please remember the words of Norm Longacre. “Don’t hold your nurseryman responsible if your tree doesn’t survive.”
Henry Homeyer is a UNH Master Gardener and the author of 4 gardening books. His Web site is www.Gardening-Guy.com.
Holiday Gifts for the Gardener
Posted on Saturday, November 29, 2014 · Leave a Comment
It’s that time of year again: time to find the perfect present for Aunt Edna, Uncle Bob and everyone else we love. Gardeners on my list are pretty easy to buy for because there are so many wonderful gifts to choose from, including selections under $10 (Atlas nitrile gardening gloves, packets of my favorite seeds) to expensive coffee table books and wheelbarrows that cost $300 or more. Let me offer a few suggestions.
Let’s start at the high end. One of my coaching clients this summer wanted some raised beds that were actually tall enough so that she wouldn’t have to bend over. She ordered some ‘VegTrugs’ from Gardener’s Supply (www.gardeners.com or 802-660-3500). These are wood growing containers made of fir that are about 6 feet long, 30 inches wide and 32 inches tall – about the same height as your kitchen table.
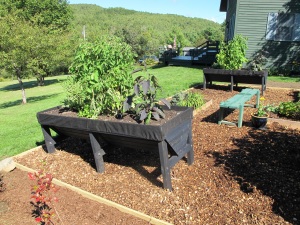
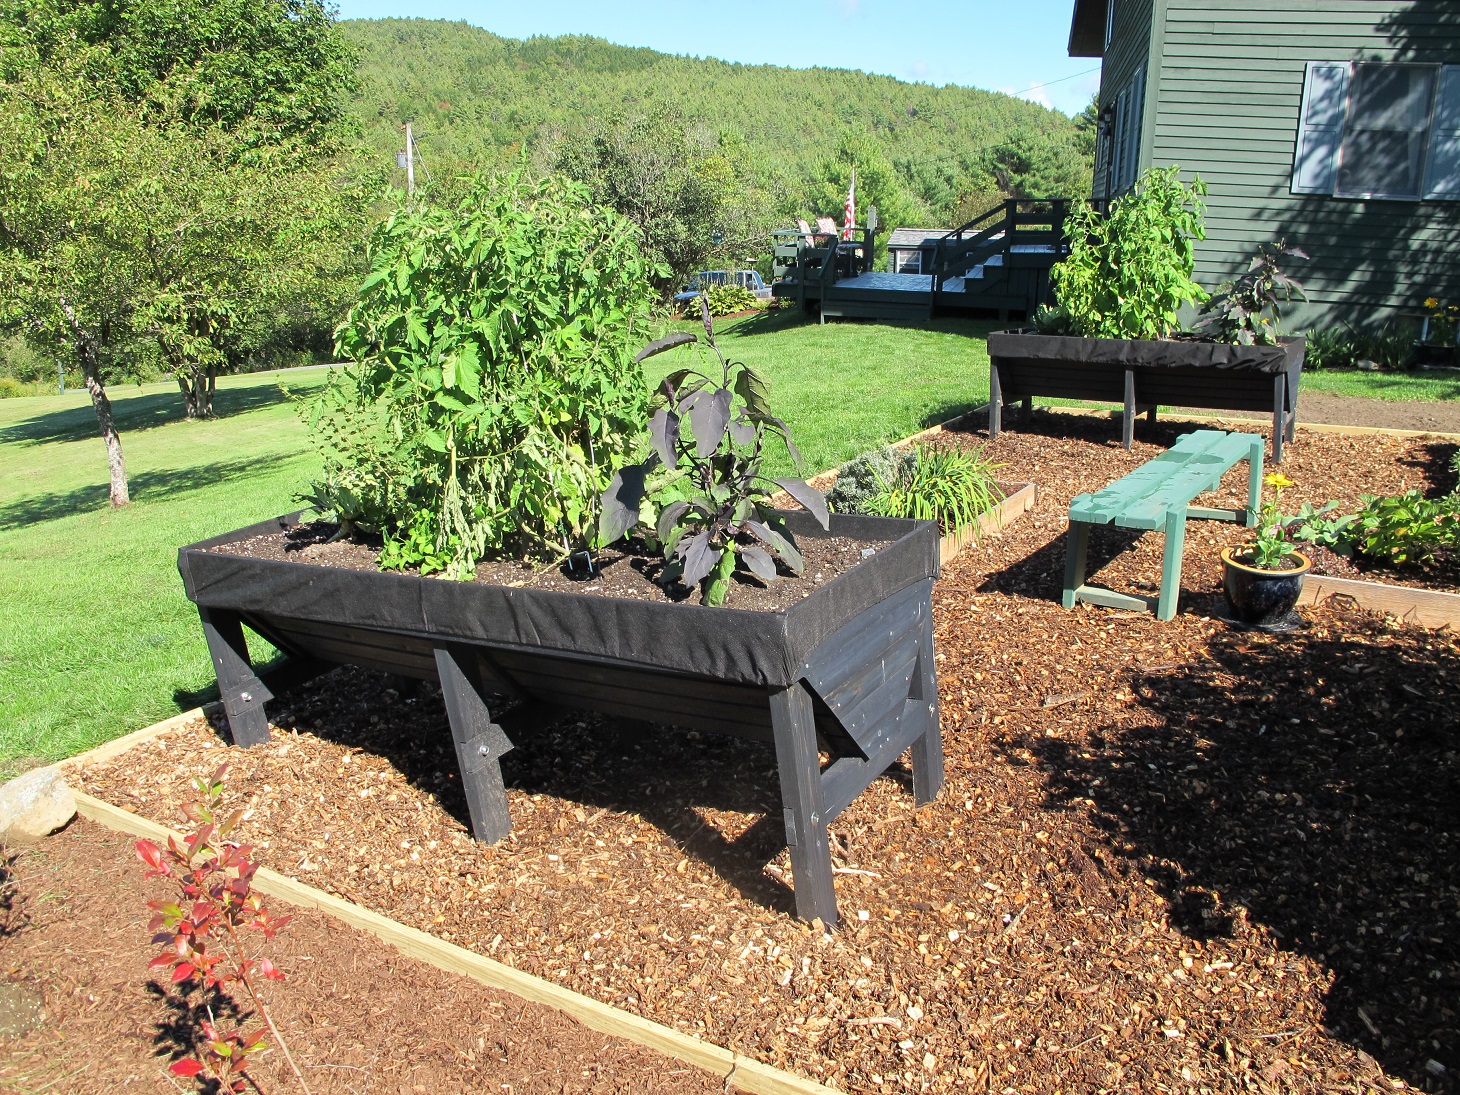
VegTrug
The VegTrug is V-shaped in cross-section and lined with a fabric that keeps soil from washing through between the slats. This container is deep and hold 380 quarts of soil mix – about 10 bags. We filled it with a 50-50 mix of compost and topsoil bought in bulk, and added some perlite and peat moss to keep the soil fluffy. It performed very well, growing tomatoes and eggplants in the middle, and shallow rooted things like lettuce and basil along the edges. At $249, it’s an investment, but well designed and it should last for years. Gardener’s Supply has a number of other kinds of raised beds. My client assembled her VegTrug in about an hour, and some of the others are even simpler.
Weeding is the least fun part of gardening for many, and anything that helps to reduce weed numbers is a good gift. A few years ago I got some rolls of weed mat that came with pre-punched holes spaced appropriately for growing tomatoes, or lettuce – or you name it. This is a woven polypropylene mat that the maker claims will last 10 years.
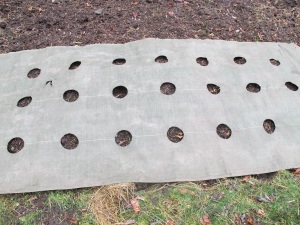
Garden weed mat
The mats come in 4-foot wide strips with evenly spaced holes in 8 different sizes and spacings. They block out light, keeping weeds from growing, while also moderating temperature and water loss. From 10.99 for a 6-foot piece to $30.99 for an 18-foot length. Made in Vermont, available from www.GardenMats.com or by calling 802-498-3314.
Each year I remind readers that in my opinion the best weeding tool made is the CobraHead weeder (www.CobraHead.com or 866-962-6272). This is a single steel finger, curved and sharp, that will get under weeds and lift them out, tease out grass roots or prepare the soil for planting. It is $24.95, including shipping. Made in America, too.
Watering well is important in dry times. Plants need gentle streams of water that can best be delivered by a watering wand. These devices have long metal handles with a rose (water sprayer) on the end. The best wands are made by Dramm, but many knock-offs are sold, too. Go for the best. Why? They have figured out how to aerate the water so that lots of water can come out, fast, but gently. My wand allows me to walk along and get water where I want it: on the ground, near the plants, but not on the foliage. Available at good garden centers everywhere. About $20.
Books are loved by gardeners. Designing flower gardens? An excellent book is by Julie Moir Messervy, Landscaping Ideas that Work (Taunton Press, $21.95). This is a good overview and introduction to the basics of landscape design, starting with a checklist of the atmosphere, activities and features you would like. It is simple and straightforward with lots of color pictures. Granted, the pictures are mostly of expensive houses and projects, but she gives readers an idea of relative cost of various options (brick walkways, or stone, or packed earth) by using 1 to 4 dollar signs next to each.
The New Vegetable Growers Handbook: A users manual for the organic vegetable garden by Frank Tozer (distributed by Chelsea Green Publishing, $27.95) is an excellent reference text for anyone who grows veggies. It has detailed growing information on nearly 100 different veggies and has great tips on practical matters such as how to avoid getting bitter-tasting cucumbers or how day length affects the size of your onions, and why you should plant them early in spring. Want to try new greens? Tozer tells you how to grow Komatsuna and Mizuna and Mibuna and more. By the way, Chelsea Green Publishing (www.chelseagreen.com) has lots of other good gardening and permaculture books worth looking at.
Record keeping is important if you want to improve your gardening skills and to learn from past years. The Moleskine Company (www.moleskine.com) makes many journals, including a gardening journal that offers 240 pages, including space to record your efforts and useful information such as hardiness zones. It has design grids for planning and adhesive labels for personalizing sections. It’s $19.95 and found at many bookstores.
Santa Claus, if you’re listening, what I really want this year is another load of manure. Just have your reindeer drop a load of black garden gold anywhere near my vegetable garden. A pick-up truck load would be great or, if you think I’ve been a very good boy a dump-truck load!
Henry Homeyer has his own gardening books, signed, available from his web site, www.Gardening-Guy.com.
Forcing Bulbs
Posted on Wednesday, November 19, 2014 · Leave a Comment
I love to ski and snowshoe. I don’t mind shoveling snow and lugging in firewood for the woodstove the chugs along day and night now. But there are limits to my patience, and by March I’ll ready for green growing things and some fresh flowers. So I start lots of veggies and flowers by seed, starting in March and April. But I also force bulbs to bloom indoors in March. Now is the time to do so.
Most bulbs are described on their packages as early, mid-season or late. Go to your local garden center and ask for bulbs that are early bloomers because they are the best for forcing. Buy daffodils, some tulips and maybe some small bulbs like crocus or snowdrops. You can plant these bulbs in large pots or even in your window box that is, by now, cleaned out and stored in the garage or barn.
You will also need some potting soil and compost. I make a mix that is half compost, half potting soil for forcing bulbs. I don’t use garden soil because it can be heavy and often stays wet. Bulbs can rot if they are left in wet soil for too long.

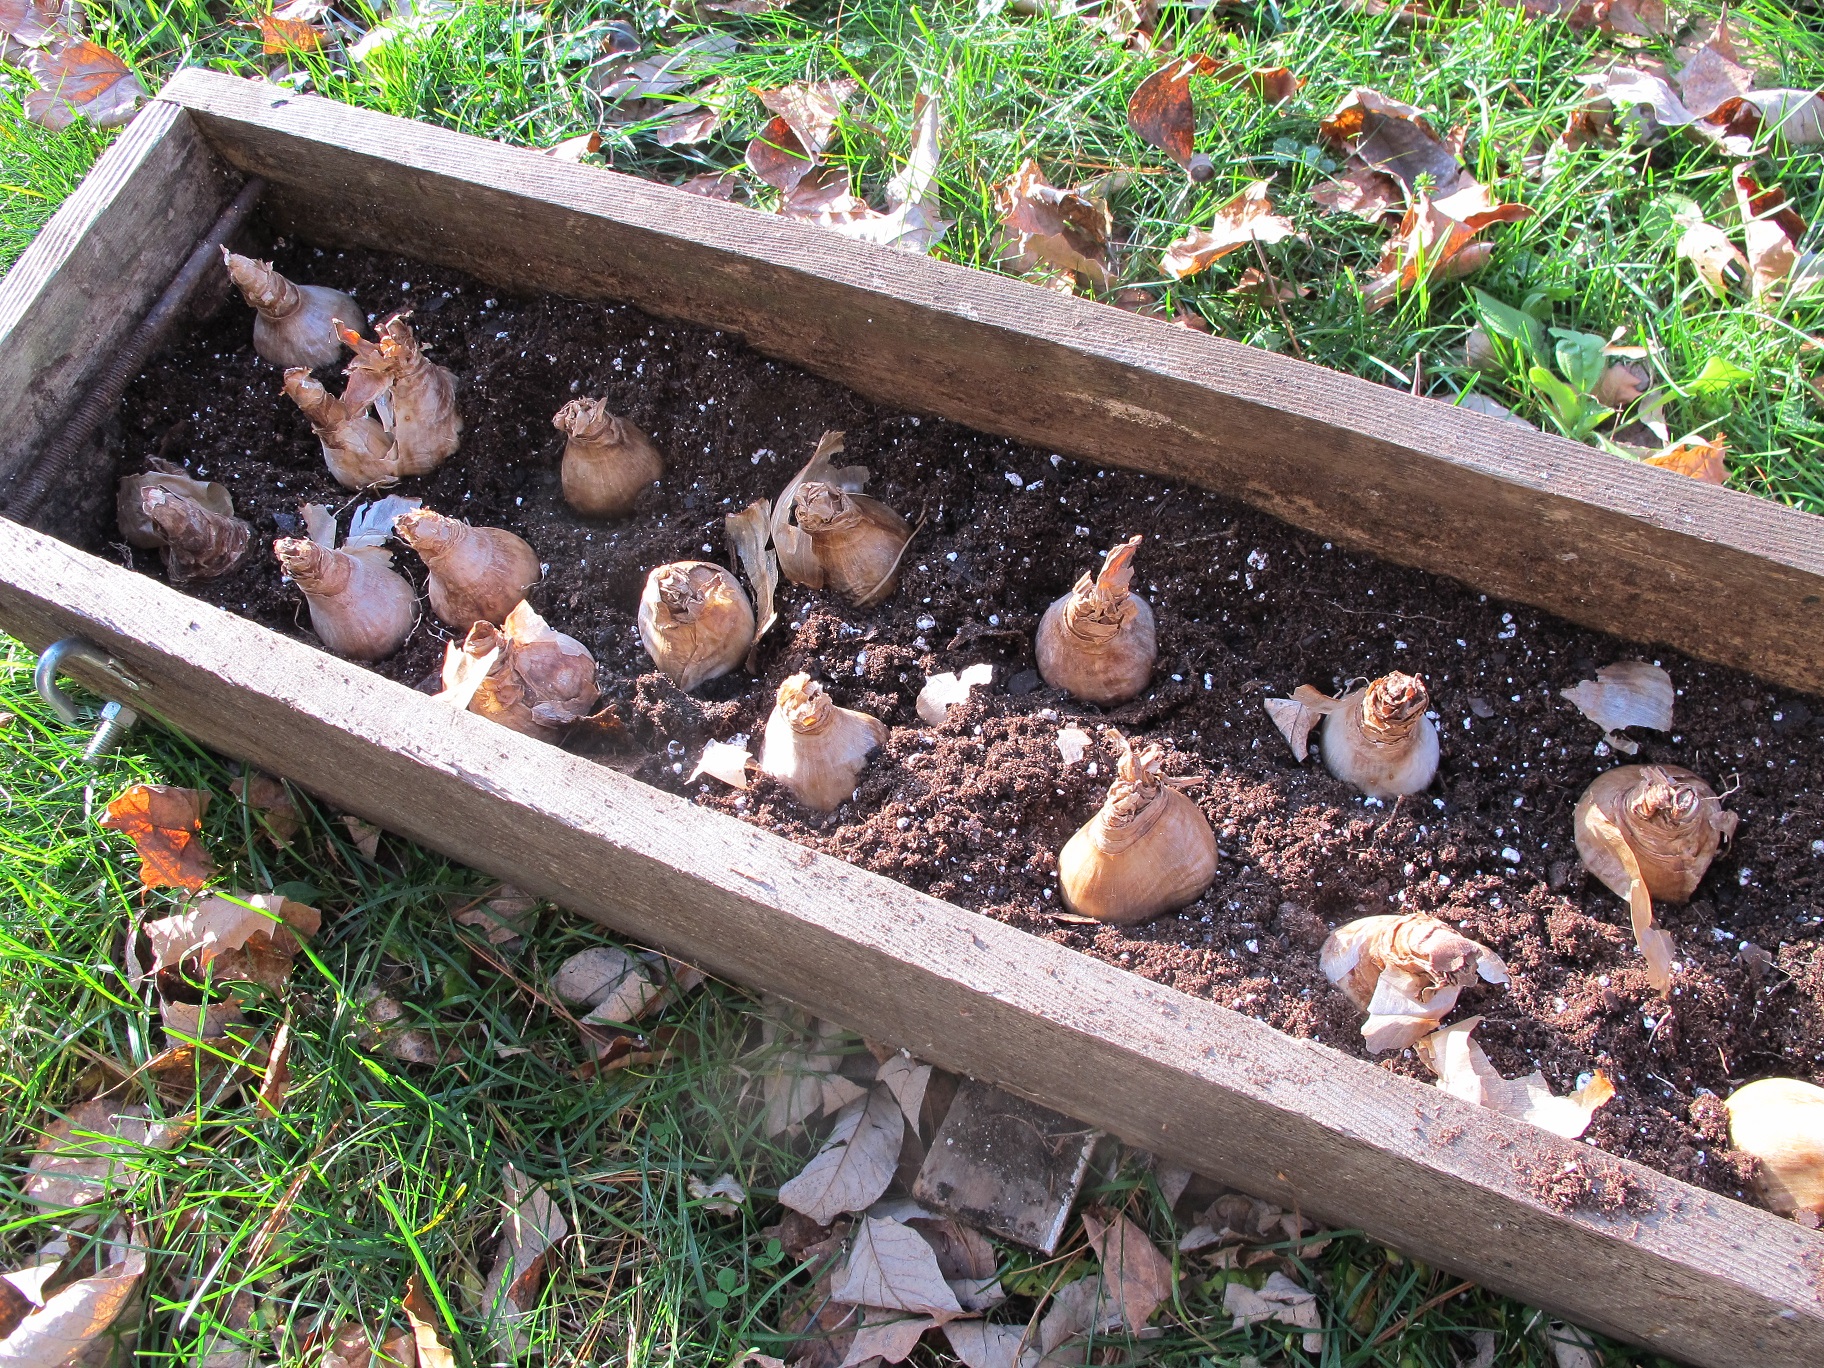
daffodils being planted for forcing
I recently planted 25 daffodils in a window box that is about 30 inches long, 6 inches wide and deep. It was a mix of different kinds of daffodils. I prefer to get all of one kind so that they all bloom at once, but the mixed bag was what was available (and on sale).
I filled the window box a little more than half full with my mixture of compost and potting soil and placed the bulbs, pointy end up, in the soil. Once I had them all in place I pushed them down more and filled up the box with more potting soil-compost mixture. Bulbs for forcing can be planted shoulder to shoulder, or nearly so.
In order to prepare bulbs for early blooming indoors, you will need a place to store them that is cold, but not as cold as the outdoors. Despite global warming, I still see minus 20 every winter, even if for only a few days. Bulbs planted in the ground have some protection against the cold, but if you were to plant bulbs in pots and leave them outside, the extreme temperatures would kill most. Bulbs left in a cool basement or garage will do just fine. Inside the bulkhead to your cellar might be the right temperature, too.
Ideally temperatures for bulbs used for forcing will be between 25 and 50 degrees, though colder temperatures should not be a problem (my basement often goes below freezing). Left in a warm location, the bulbs will grow green tops – but not blossoms.
You need to be aware that rodents like eating bulbs (indoors or out) – especially tulips. My basement has, most years, harbored mice and even sometimes red squirrels. In fact, I have learned the hard way that indoor rodents can – and will – dig up and eat tulips. So now I keep my pots of tulips covered with hardware cloth (a fine-mesh metal screening available at hardware stores). But wear gloves if you cut hardware cloth to size – the edges are as sharp as razor wire. Daffodils, on the other hand are not of interest to rodents as they are mildly poisonous.
You can double your production of blooms by planting two layers of bulbs in a container. Plant big bulbs deep in the pots, add soil, and then plant a layer of crocus or other small bulbs above them. To avoid planting the little guys right over the big boys, you can mark the location of the deeper bulbs with straw from a broom. That way they won’t get pushed over as the daffodils come up. Or you can just take your chances.
Don’t wait until mid-December to start your bulbs, get on this project now. Daffodils take about 12 weeks of dormancy before they should be brought into the warmth of the house, and tulips do better with 4 full months. Planted now, they would be ready in mid-March. Little things like crocus can be forced in 8 to 10 weeks.

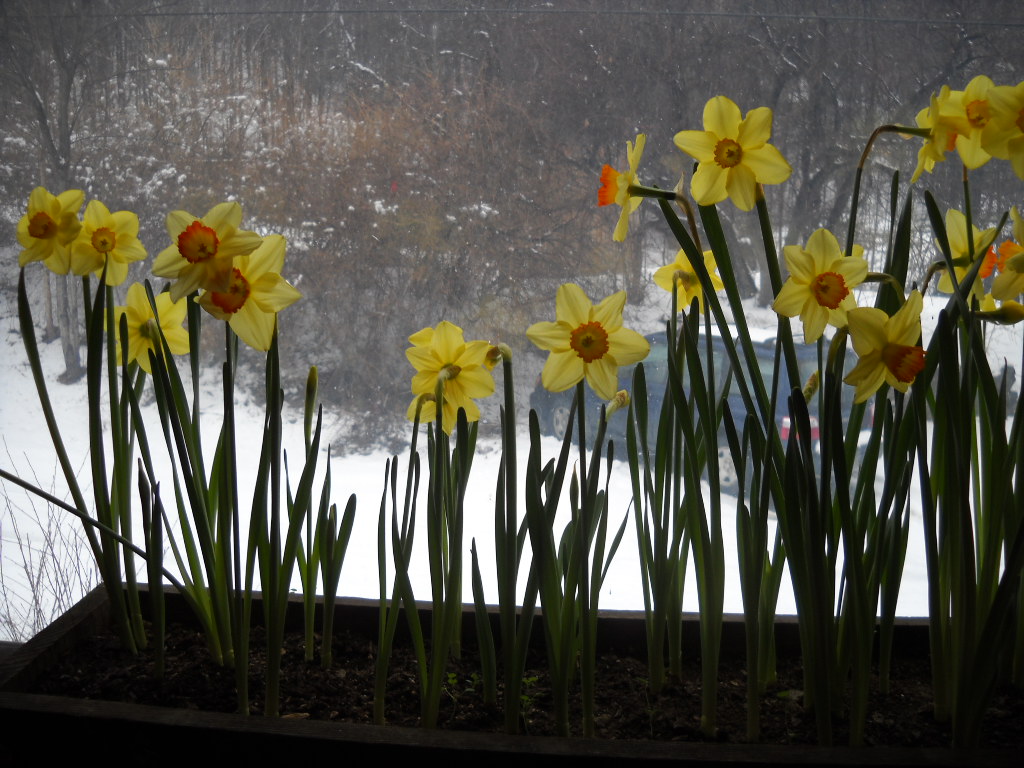
Forced flowers
It is important to check on the bulbs you are forcing at least once a month, particularly if you have put wire rodent-proofing over the containers. I’ve had shoots get damaged by trying to grow through the hardware cloth. If the bulbs are sending up shoots, remove the wire mesh. I also don’t want the soil mix to get bone dry, so I check it and water a little if it is too dry. The bulbs will grow roots when first planted, and then go dormant if kept in a dark, cold location.
When it is time to bring up your potted bulbs into a warm place, let them wake up gently. My mudroom is good for starting them: there is some sunshine but it is cool. Then, once the shoots are up and green, I place the containers on my sunniest window sills – either east or west facing.
I was a Peace Corps volunteer in Cameroon, West Africa many years ago. There I could have flowers blooming outside every day of the year. It spoiled me, perhaps, because I still want flowers every day. Forcing bulbs is one way to have lots of blossoms when there is still snow on the ground.
Henry Homeyer is the author of 4 gardening books. His Web site is www.Gardening-Guy.com. You may also reach him by e-mail at henry.homeyer@comcast.net.
The Under Appreciated Yellows and Browns of Fall
Posted on Wednesday, October 29, 2014 · Leave a Comment
I took a walk this week along a country road and was delighted by the colors of the fall leaves. The reds –maples, largely – have fallen, but the yellows and browns are still on some trees and lovely. And once you develop an appetite for the less flashy leaves, you may want to plant a tree that will do”the late show” in years to come.
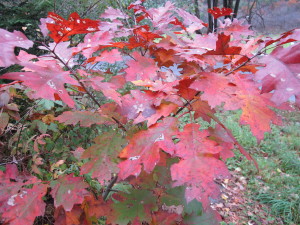
Red oak
The oaks and beeches are particularly nice right now. Oaks hold onto to their leaves much later than the maples, developing a more subtle coloration: browns mixed with russet or carmine or maroon. Perhaps burnt umber. Worldwide there are some 500 species of oaks, but here in the wild forest, just a few. Seven are listed by Cooperative Extension as native to New Hampshire, but only two are common: northern red oak (Quercus rubra) and white oak (Q. alba). Additionally there are many pin oaks (Q. palustris) that have been introduced and used as good tough street trees. In fact, I’ve read that pin oak is the most commonly planted tree in America.
Oaks generally fall into two categories. Red oaks have leaves with pointed tips on their lobes; those with rounded leaf edges without any sharp points are considered white oaks. Red oaks produce acorns that only germinate after a cold period of 30 to 60 days in a process called stratification, while white oaks can germinate right away. The Washington oak, a white oak in Princeton, NJ, is over 275 years old.
Oaks, and nut trees in general, have tap roots that go down deep in the soil. White oaks really are best started by planting acorns, or getting a small tree at a nursery. By the time a white oak has a trunk that is two and a half inches in diameter, it’s too big to move. Pin oaks, one of the red oaks, have fibrous roots that are near the soil surface and can be planted or moved more easily.
Acorns have always fascinated little children (and me). They are shiny, smooth and shapely. They feel good when in your pocket. They have a little hat that stays on while on the tree, but falls off once ready to be planted. Acorns that are fertile always lose their caps, so don’t plant one wearing a cap.

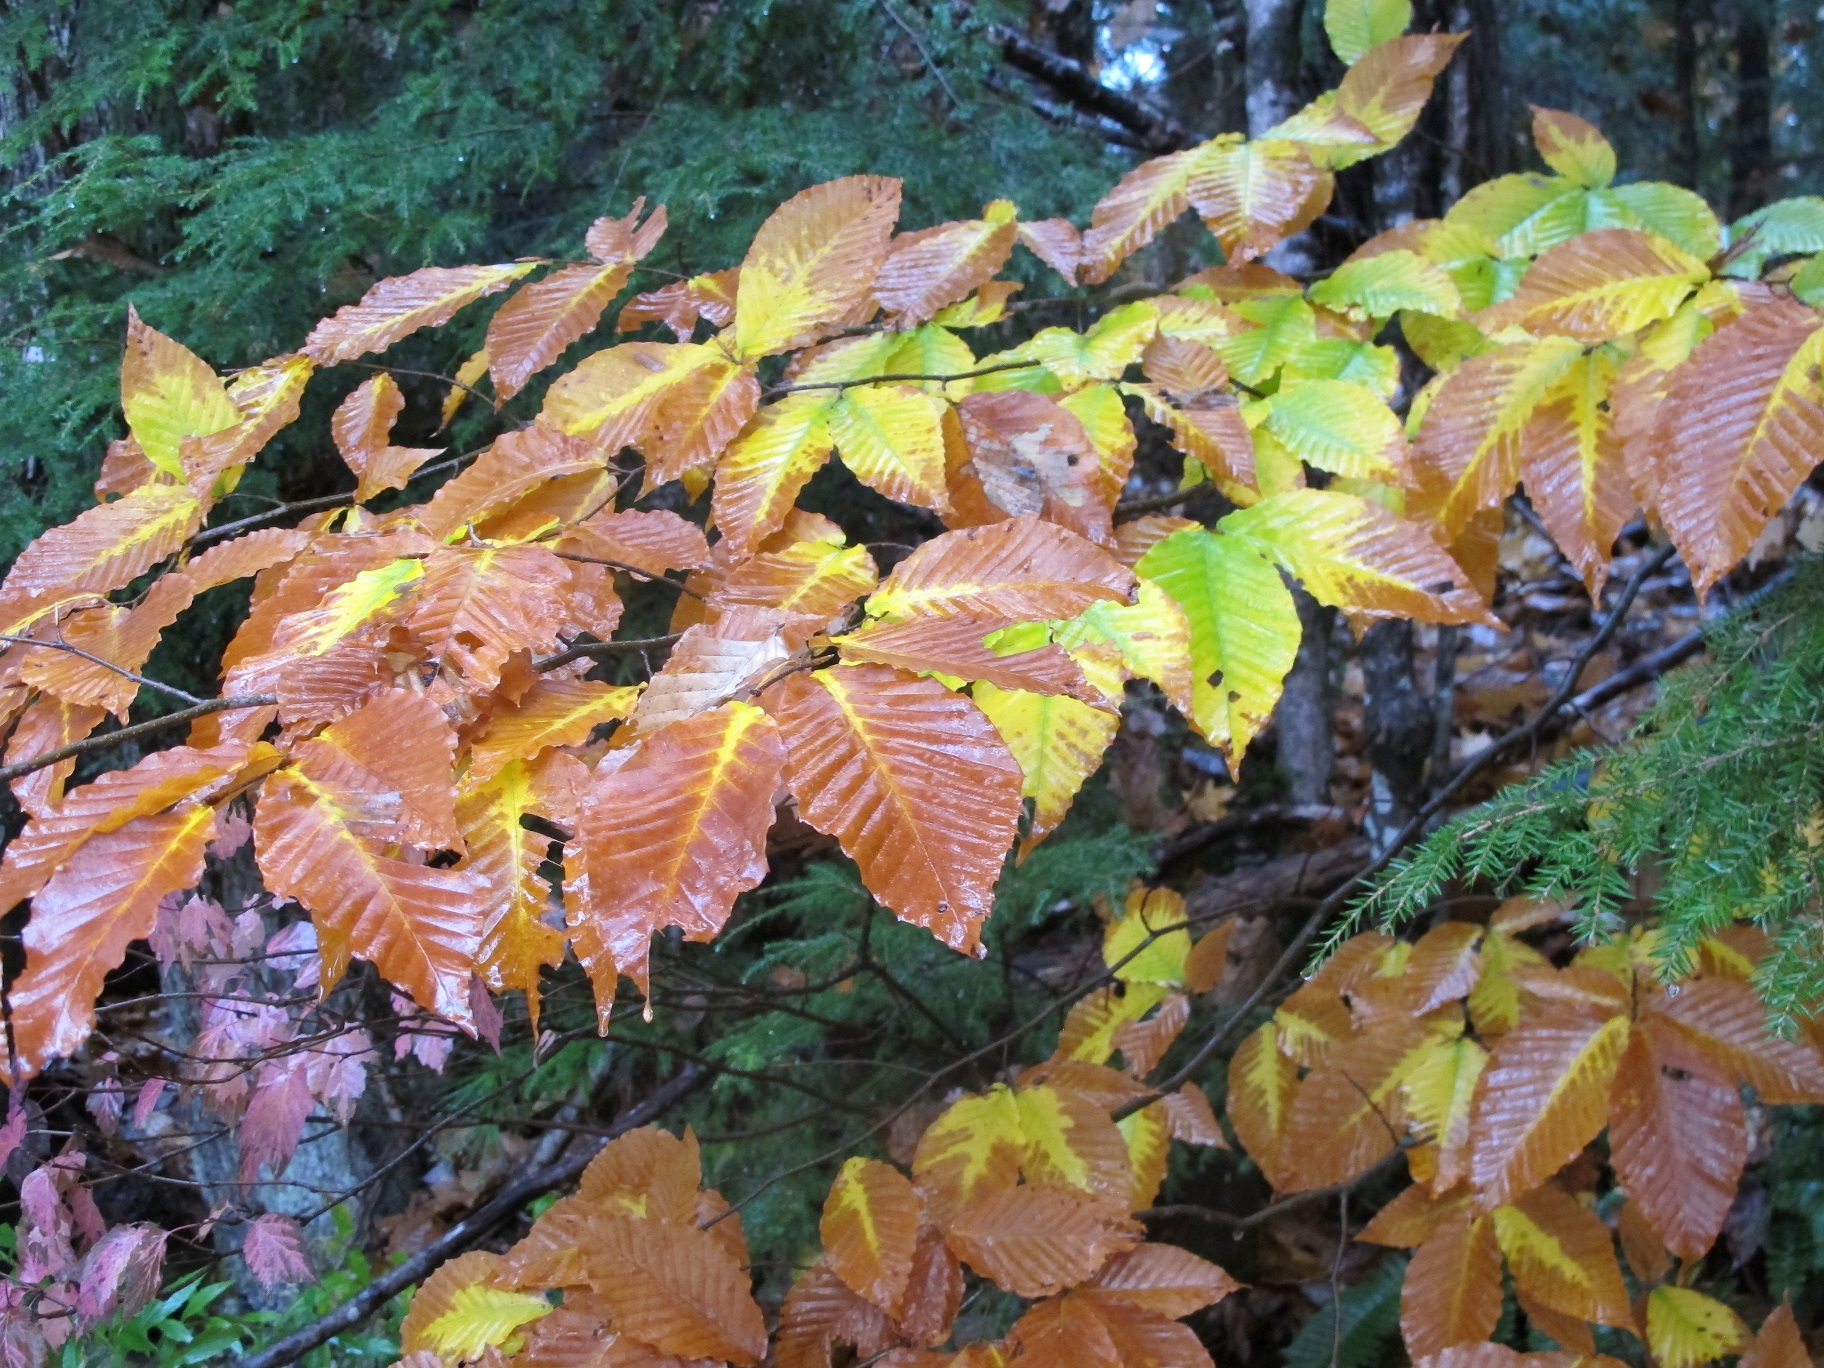
Beech leaves
Beeches (Fagus grandifolia) are also wonderful at this time of year. Like the oaks, beeches hang on to their leaves – some of the young trees keep their leaves until May, when new leaves push them off the branches. And although the fall color is yellow, never red, some will display stripes of green in leaves while the yellows develop. Eventually, they all turn brown and produce a nice sound as the dry leaves are teased by winter breezes.
Beeches have smooth gray bark that is splendid in winter. But many beeches suffer from a fungal disease which mars the bark and kills off older specimens. The trees are attacked by a scale insect that damages the bark, allowing a fungal disease called Nectria to infect the trees. According to a US Forest Service pamphlet, the scale insect arrived from Europe in the 1890’s and, like many foreign pests, had few enemies here in North America (it first appeared in Nova Scotia). These is no easy remedy if your beech trees are infected.
Another great tree for yellow leaves in the fall is the bottle brush buckeye (Aeseculus parviflora), a member of the horsechestnut family. I just planted one this fall because it has great spring flowers, will blossom nicely in the shade or part shade, and tolerates moist soil. I had just the right spot. The brilliant yellow fall leaves were a bonus.
My hybrid ‘Merrill’ magnolia has great yellow fall color, too. And if you get up close to the tree, you can see that it is loaded with small, bright red berries nestled in their pods. The buds for next year’s flowers are on the tree, too, and will become more noticeable once the leaves and seeds have dropped. The buds look like pussywillow buds on steroids.
At this time of year the weather tends to be a bit gloomy. Rainy cold weather is not much fun, and the sun sets by supper time. So what can a gardener do? Plant some acorns. My friend Joe Monninger of Plymouth, NH went out one fall about 10 years ago and planted a bunch of acorns. I called him this week to see how they did.
Ten years later- despite squirrels, lawn mowers and weed whackers – four of Joe’s acorns have grown to stand waist high. Not bad. He hadn’t done anything to improve the soil, he hadn’t fenced them to keep away deer. He just poked some holes in the ground and planted acorns. Even if he planted 25, he has four nice trees – and that’s not a bad return on his labor, if you ask me. If you plant some acorns, put one of those little white plant labels near each one so you will be careful to avoid stepping on them when young – or mowing them down. And in 300 years they might still be alive and producing acorns.
I believe in enjoying what I have. Take time, I say, to slow down and really look at the subtleties of nature and the garden. Red is not the only good fall color.
Henry is the author of 5 books. His web site is www.Gardening-Guy.com. You may send questions to him at henry.homeyer@comcast.net.
Cold Weather Crops
Posted on Wednesday, October 22, 2014 · Leave a Comment
At this time of year I eat one of the “three B’s” from my garden every day: broccoli, Brussels sprouts or kale. All right, don’t get on my case. I know kale doesn’t start with a “B”. But it’s a brassica, the family that contains those other two, plus cabbage, rutabagas, cauliflower, kohlrabi and more. All are good cold weather crops.
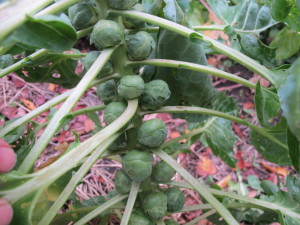
Brussels sprouts
In addition to surviving frosts, all the brassicas are healthy foods with lots of Vitamin C, soluble fiber and compounds thought to prevent cancer (though that is a little controversial). What you may not know is that boiling brassicas removes most of those cancer-fighting compounds, but steaming them or cooking them in a microwave dos not. Three to four minutes of steaming will cook your brassica nicely, but not steal many nutrients. But the best way to eat them is raw.
There are many varieties of broccoli, almost all are excellent. Arcadia is one that has done well for me, and is very cold hardy. I talked to my friend Chaz Meyers of Cornish Flat, N.H., who I think of as Mr. Broccoli. He and his wife, Jill Johnson, grow about 50 plants every year, freezing it and eating it all year. He told me that ‘Packman’ is favorite, in part because it produces lots of side shoots. He also likes ‘Waltham’ and ‘Gotham’ varieties.
Chaz recommends cutting the primary head of broccoli on an angle so that the stem, which is often a bit hollow, does not hold water (which might promote rot). He also suggests, if the summer is dry, watering your broccoli well after cutting the big head. That keeps the plant healthy and promotes the development of side shoots.
I once planted a little vegetable garden for a woman who didn’t know much about gardening. I planted two broccoli plants that produced magnificent heads in July. She ate them, with glee, and then pulled out the plants. Yikes! I regretfully explained that the most productive part of the plant are all those little “side shoots” that come after the main head. That, like the Energizer Bunny, broccoli keeps on producing for months. I’m still eating side shoots from plants I put in back in June.
Although broccoli are known for having little green caterpillars on them, mine have not had any this year – or none that I’ve seen. Maybe I’ve eaten a few. The best solution to the green caterpillar problem is just to soak the broccoli in cold water with a little salt in it before cooking. They will float up.
I dare say that my Brussels sprouts are perfect right now. Each is the diameter of a quarter- or a half dollar – and unbothered by any pests or diseases. I eat some every night for dinner: a dozen is just the right sized serving for me, so my six plant will keep me eating them for weeks. Brassicas are very hold hardy, and Brussels sprouts and kale will survive temperatures down to 20 degrees – or even colder. Frost helps to sweeten up their flavors.
Deer don’t bother my garden until it gets cold. Then they look for my Brussels sprouts and kale and broccoli. Once they waited until the night of December 24 to eat my Brussels sprouts, though that might have been the reindeer, waiting while Santa was inside the house. I recently took some preventive measures. I covered my kale with a scrap of chicken wire that I just draped over my plants, and then I surrounded the Brussels sprouts with some four-foot chicken wire. The broccoli will have to fend for itself – I’ve run out of fencing.
Kale is the perfect vegetable to freeze. Unlike spinach, it doesn’t get soggy when frozen. It keeps its character. I blanch it for a minute in boiling water. That kills the aging enzymes that would make it turn old and woody after just a few months in the freezer. When I take it out, I drop it into a sink full of cold water, spin it dry in my salad spinner, pat it dry with a tea towel, and put it in freezer bags. I suck out the air in the bags with a drinking straw. The straw goes into a zipper bag that is 99% closed, and I suck out the air. I snap the bag shut as I pull out the straw, and it’s ready to go in the freezer.
I know people that are gaga about kale chips, dried kale that is salty and crispy, the health-nut food to substitute for potato chips. I recently tried making my own but I’m neutral about them. Here’s what I did: I stripped the leaves off the central stem, and tore the leaves into pieces and put them in a big bowl. I coated them with a garlic and olive oil solution (I used 3 cloves garlic and a few tablespoons of oil). I sprinkled pepper flakes or nutritional yeast on the leaves and tossed some more. I added salt, but not a lot.
Then I put some kale chips in the oven at 150 degrees for 2 hours with the convection fan blowing, others in a food dehydrator at 135 degrees for 2.5 hrs. Maybe I needed to use more salt or oil, but I was aiming for a health food. And this tasted like something a little too healthy. Oh well. They’re crispy, but they’re definitely not as good as potato chips. Darn!
Eating the brassicas from my garden at this time of year is a wonderful way to transition to winter. I have food in the freezer from the summer, and root crops stored in the cellar. But it feels great to walk to the garden with a knife and cut something fresh for dinner.
Henry Homeyer is a gardening educator, speaker and writer. Reach him at henry.homeyer@comcast.net.
Planting Garlic
Posted on Wednesday, October 15, 2014 · Leave a Comment
Garlic is one of those magical flavors that give foods depth of flavor and the richness of another world. Italian food, French food, Indian food – these all include liberal use of garlic. Why the English decided on fish and chips and boiled dinners as their staples is a mystery to me. Maybe they can’t grow garlic. But I’ve been growing garlic for my kitchen for decades. It’s easy to grow and now is the time to plant it for next year.
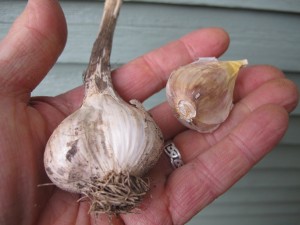
Hard neck garlic
Your first task is to find some garlic suitable for planting. You can’t just go the grocery store and buy some. Most commercial (non-organic) garlic has been treated with chemicals to keep it from sprouting. Instead, go to your garden center to buy some – or get a few heads of garlic from a farm stand or a friend who grows it.
Here in New England the recommended type of garlic is called ‘hard neck garlic’ and it survives our cold weather nicely. Soft neck garlic, commonly grown in California, is less cold tolerant. It is the type that can be braided and hung in the kitchen. Hard neck garlic sends up a stiff stalk, called a scape, which grows out of the middle of the bulb – a stiff neck, if you will.
Hard neck garlic generally has a stronger, richer flavor with more bite. It also comes in a wide range of flavors – just as different varieties of tomatoes and sweet corn have distinct flavors. Hardneck garlic is often classified as either rocambole, porcelain or purple stripe. Rocambole garlic has a tan outer covering and usually produces up to a dozen cloves per bulb. Porcelain garlic has a satiny white wrapper and tend to produce larger cloves with as few as four per bulb. Purple stripe garlic is one of my favorites – it is productive, tasty and generally a nice, plump size.
I like to say that everyone would be a gardener if growing all vegetables were as easy as growing garlic. There are just three steps to growing garlic: planting it, mulching it, and harvesting it. That’s right, if you mulch well it will grow well and you will never – or rarely – need to weed.
I grow garlic (and all my vegetables) in wide, mounded beds. Each bed is 30 to 36 inches wide, and mounded up 4 to 6 inches above the walkways. A short-tined garden rake or hoe is useful for shaping the beds, and to gather up loose soil from the walkways.
The first step when planting garlic is to remove any weeds from the soil. Then I enrich the soil by adding 3 or 4 inches of compost on top of the bed I am planting it in. I use a garden fork or my CobraHead hand weeder to loosen the soil and stir the compost into the top few inches of soil. Rototilling would mix the compost in deeper – good for drainage in a clay soil if you have it, but away from the roots of my garlic.
Rows of garlic need to be spaced 6 to 8 inches apart. Most years I plant short rows across my wide beds, but sometimes I will plant rows down the length of the beds – it really doesn’t matter which way you do it. I create furrows with a hand tool in the fluffy soil of my bed and sprinkle on some bagged organic fertilizer, then mix that in.
It is important to plant your garlic right side up. If you look at a bulb of garlic, you should be able to see roots, or where the roots have been cut off. The top of each clove has a slightly pointy tip, and the bottom has a small, flat scar. And of course, when looking at a bulb of hard neck garlic you can see where the scape grew. If you plant the cloves upside down, they use up a lot of energy trying to get started and grow toward the sun.
To plant, just push each clove into the prepared soil about 4 inches away from its nearest neighbor. The top of the clove should be 2 to 3 inches beneath the soil after you cover it up. Pat the soil with your hands to firm it up.
The last step is to mulch. I use mulch hay because it is inexpensive, but straw is fine, and should have fewer seeds. I put a thick, fluffy layer of hay over the entire bed – and about a foot deep. Fall rains and winter snows will compact the mulch to a 3 to 4 inch thick layer of mulch that should keep out all weeds – while allowing the garlic scapes to push through in the spring.
Garlic is ready to pick in July or August. The scapes will curl and dance as they grow, and are wonderful in a vase with flowers. The scapes are also tasty – you can chop them and add to stir fries or omelets. Store your garlic crop in a cool dark place for best storage. And don’t eat it all! Save some for planting your next crop.
I’ve been told that garlic has cancer-fighting compounds, and that it’s best to chop or press you garlic 10 minutes before cooking it to preserve the best effects. And it’s supposed to be good for keeping away vampires, not just cancer. Me? I find it necessary for a good spaghetti sauce!
Henry Homeyer is a garden designer, coach and the author of 4 gardening books. His web site is www.Gardening-Guy.com.
Planting Trees
Posted on Wednesday, September 17, 2014 · Leave a Comment
Fall is hard upon us, or at least here, in Cornish Flat. I know I should “toughen up” and ignore the cold, but I admit it here: I had my first fire in the wood stove recently. It felt great on a raw, rainy night. “Real” New Englanders never admit to turning on the heat or starting a fire until Halloween or later. Not me. And I’m looking at fall chores outside, too. Chief among them is planting trees and shrubs.
There is disagreement among experts as to the best time to plant trees. Some like spring, saying roots have a longer time to get established before winter. Other say no, if you skip a week or two of watering in the heat of August, you can damage roots or even kill a tree. Fall is safer, they say, because the weather is cooler and often rainy. Experts explain that roots grow and extend in fall, even after leaf drop – right up to the time the ground freezes. That last argument makes sense to me, so I’m in the “plant trees in fall” camp.
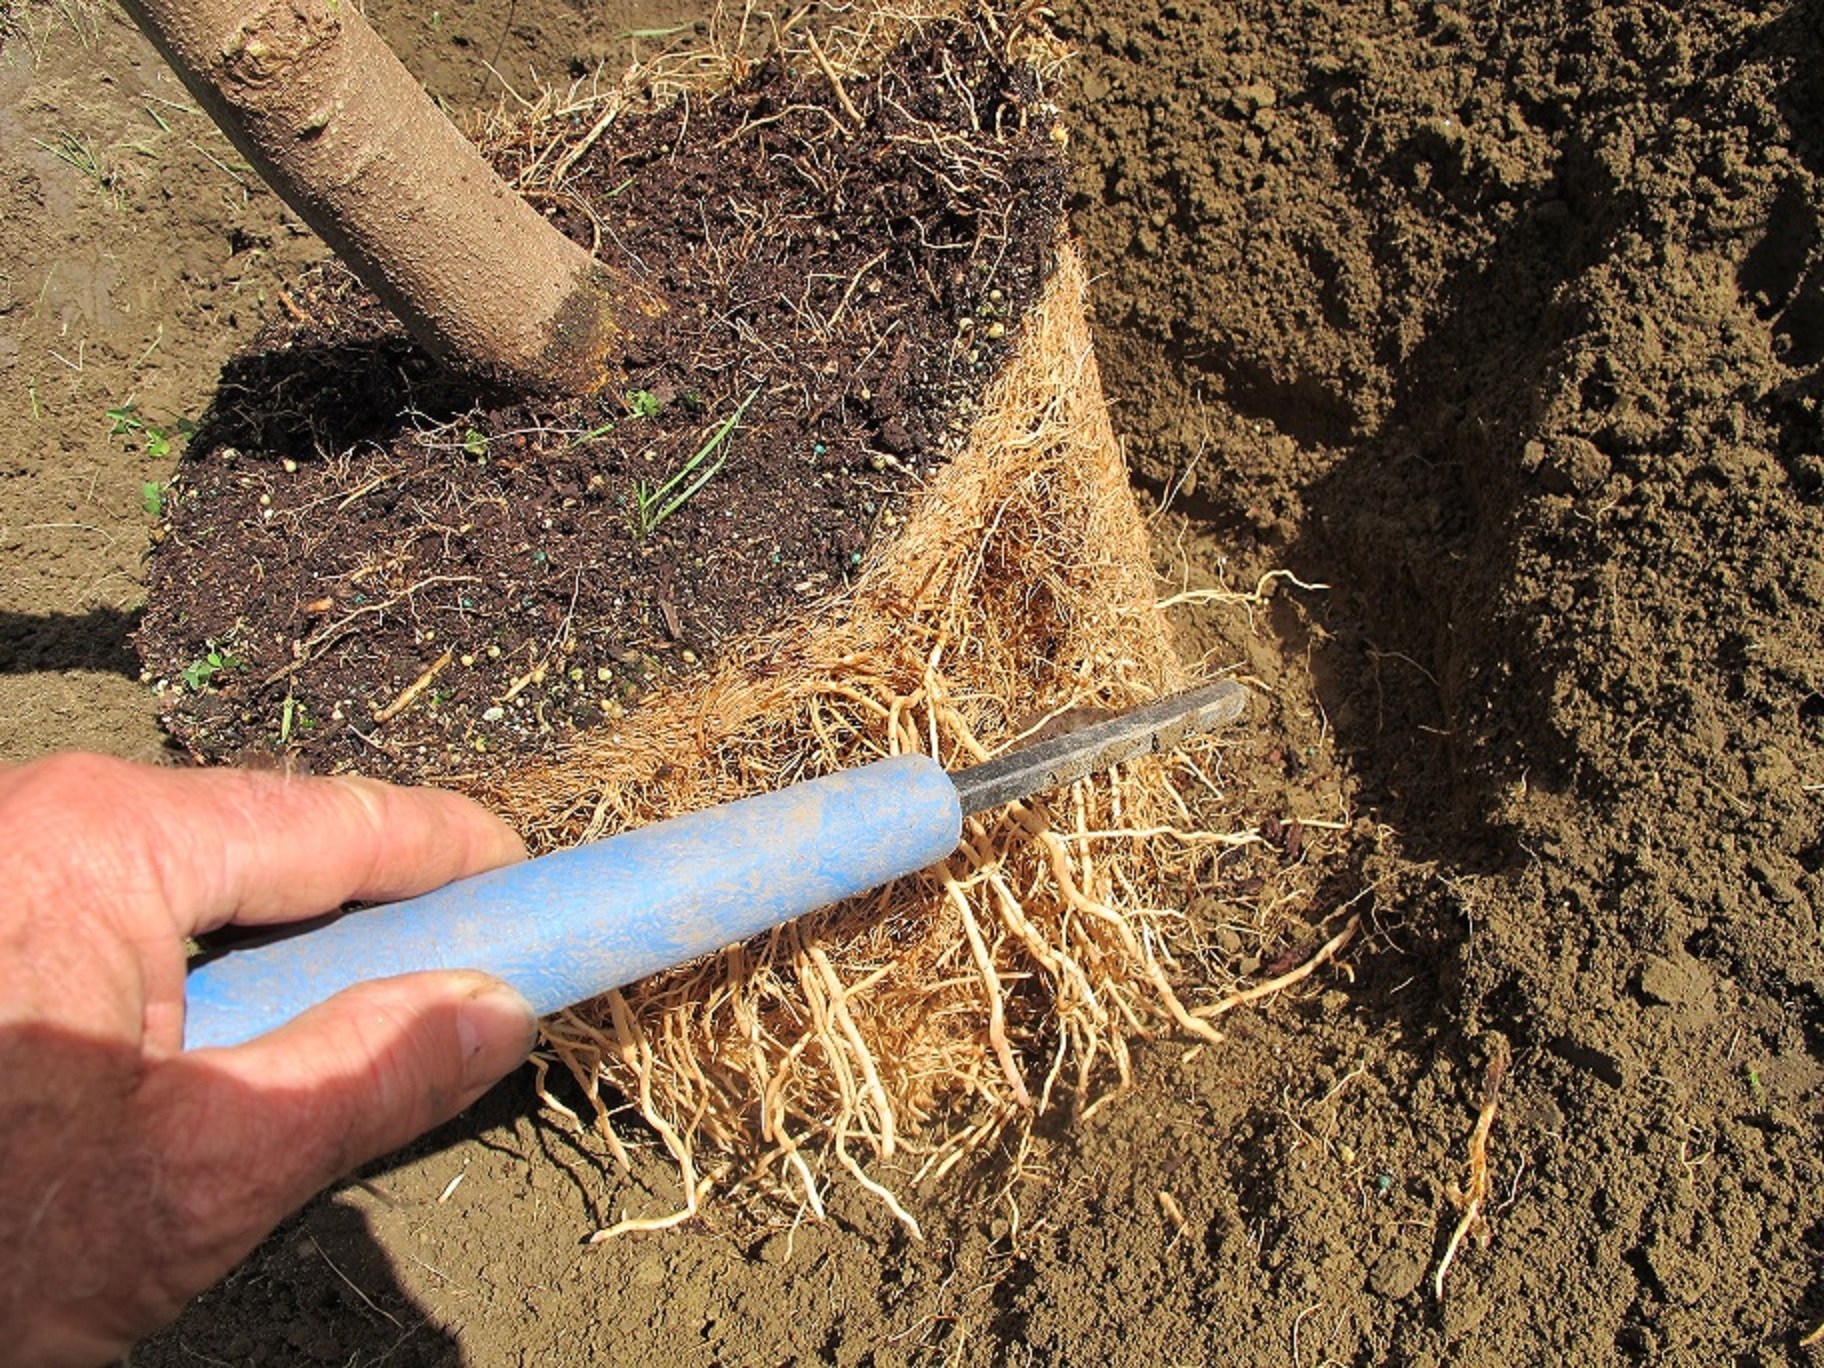
Trees sold in nurseries are often grown in fields like corn – row after row of maples, birches and oaks. Then they are lifted out of the soil and plunked into plastic pots. Those pots are then filled up with a potting mix but little or no regard is paid to the placement of the seedling in the pot. Workers don’t seem to know or care that it’s important that the “trunk flare” is on the surface of the potting mix – not buried 3 to 6 inches below the surface. This often causes trouble later on.
I recently planted a 10-foot tall Merrill magnolia for a client. It came in a plastic pot that was about a foot deep and wide. One of the first tasks I did was to dig around in the planting mix to find the trunk flare. Trees in nature – or well planted in the landscape – don’t look like telephone poles at the ground’s surface. Instead, the trunk flares out, displaying above ground “roots” that stabilize the tree in high winds. But even a large tree in a pot may not show much flare.
Here’s the problem: If the flare is covered up, the bark will be covered by soil and will eventually rot. The growing layer beneath it (the cambium) will be ruined – and the tree will decline and die. But it’s a slow process, taking 6 to 10 years. Sometimes more. Look for tip die back – trees that lose their leaves at their tops long before the rest of the leaves. Those are trees that are not doing well, and may have trunk flares covered by soil or mulch. Remove the soil until you can see the trunk flare, and you can save the tree.
At planting time you need to figure out what was above ground while the tree was growing in the ground, and clear soil off it before planting. You might be misled by little roots growing out of the trunk flare if the tree has been in the pot for a year or more. Trees in nurseries are watered from above, so trees in pots grow roots at the surface of the pot. But you can disregard those roots, or cut them off. Use your fingers to loosen soil around the base of the trunk and expose the trunk where it flares out. Then you are ready to plant.

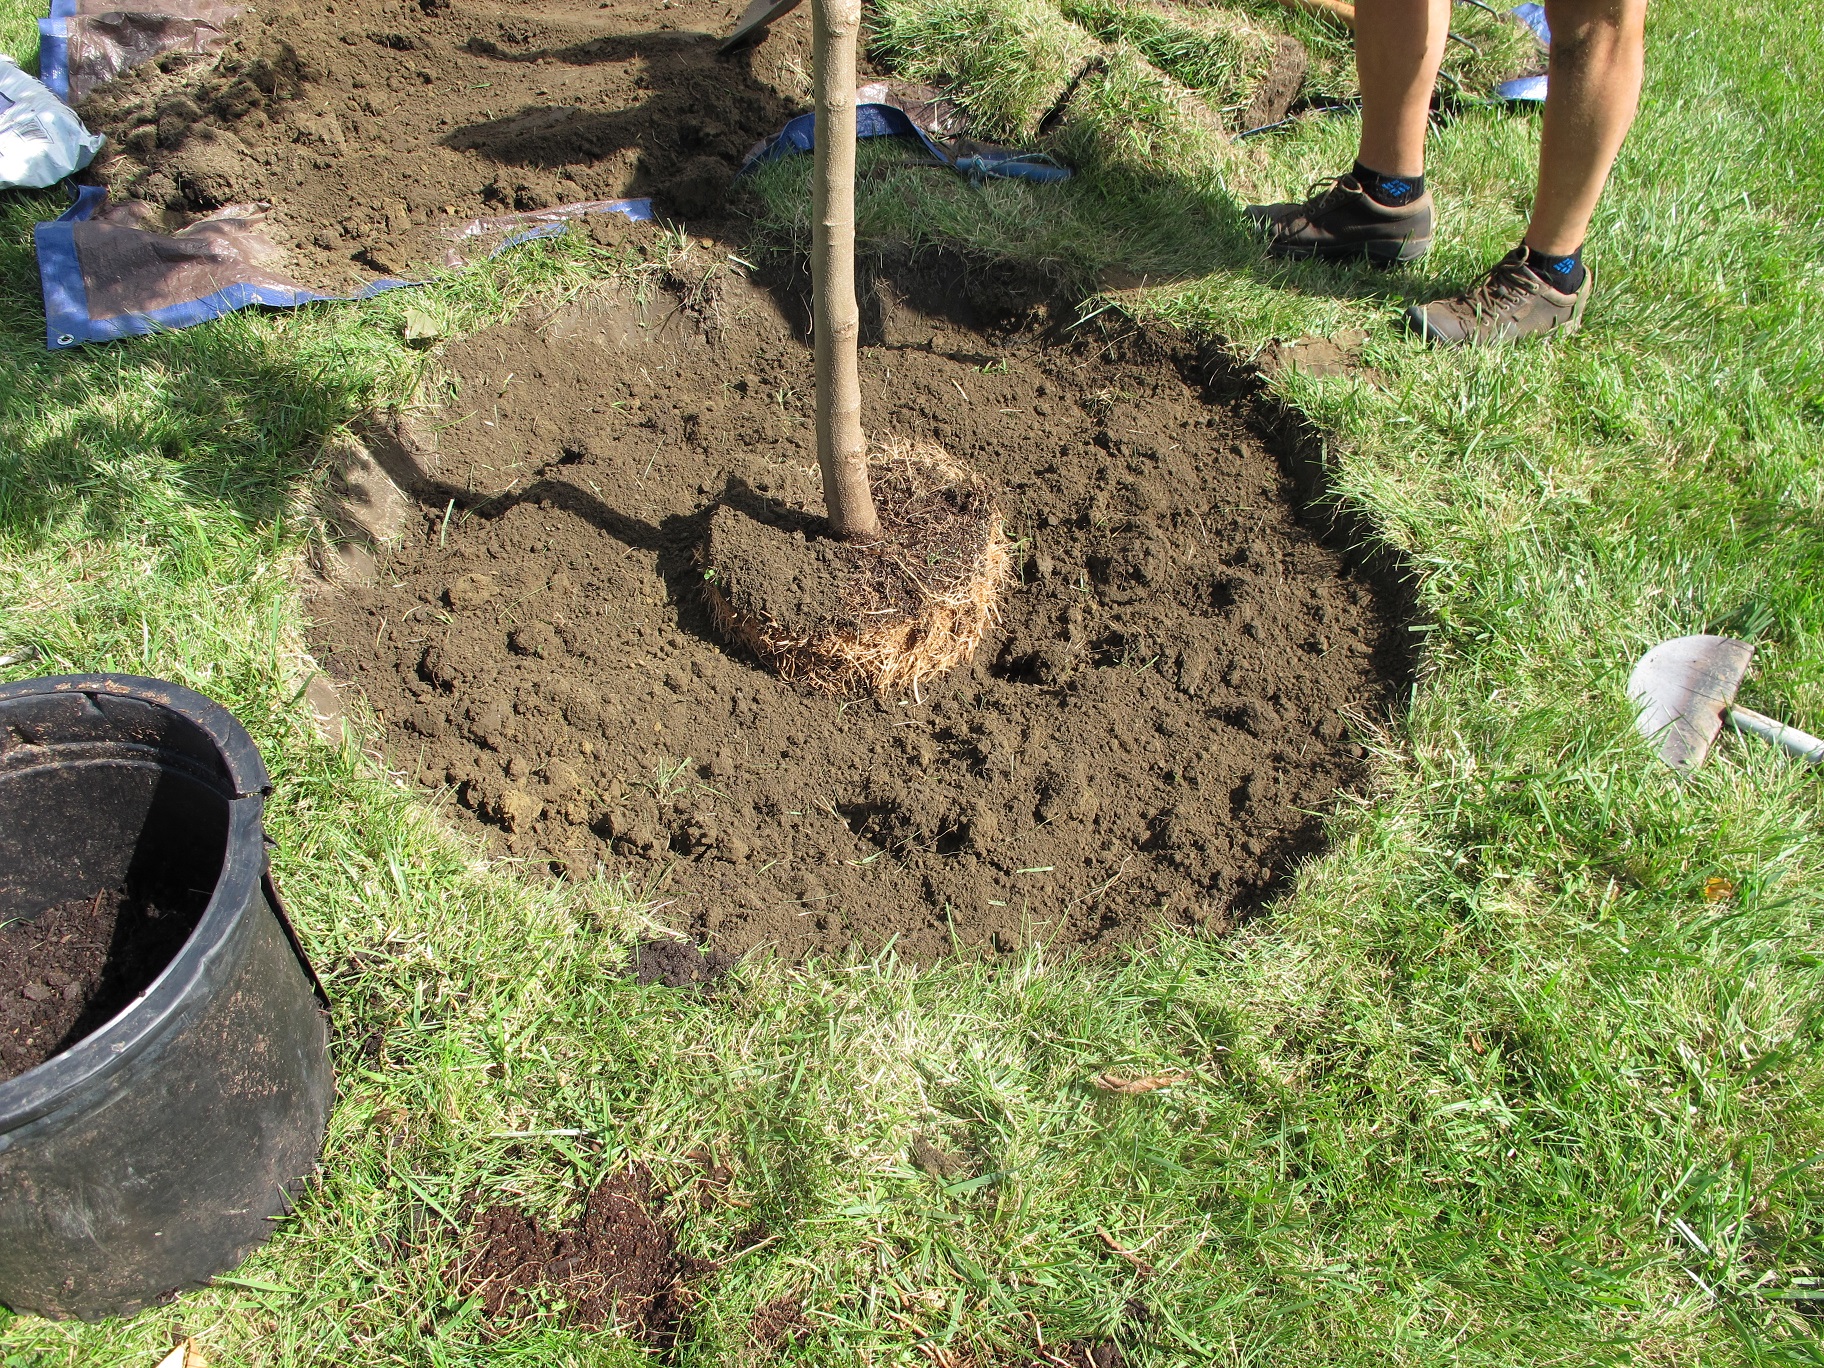
Filling the hole that is wide, not deep
Many experts advise digging a hole that is three times as wide as the pot it came in. I like 4 or 5 times the width of the root ball. The idea is create a zone around the planted tree that has nice loose, fluffy soil that will allow fine roots to penetrate it. But the depth should just be the depth of the root ball, not more. You want the root ball to sit on unexcavated soil so that it doesn’t sink down deeper after a few rains or waterings.
What do you do if planting on a hillside? You must create a level terrace for the tree by cutting into the bank and/or filling up the lower side with fill. Generally it is better to cut into a hillside and re-grade the soil.
Once the hole is dug, remove the tree from the pot and place it in the hole. If you place a tool handle over the hole you can easily see if the hole is the right depth. Be sure the bottom is flat and the tree is vertical, not leaning. Look at it from 2 sides to see if it is straight, and if the best side is showing forward.
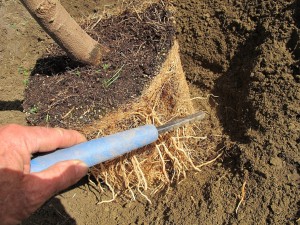
Teasing out the roots
I tease out the roots on the sides and bottom of the root ball to loosen them up before filling the hole. Then I refill the hole, using the same soil I dug out – minus the rocks. It’s okay, according to me, to add a little compost or rich topsoil to the fill if planting in poor soil. But don’t fill the hole just with topsoil and compost. If you do, the roots may never extend past the hole you have dug – like a tree growing in a bathtub.
Mother Nature doesn’t use fertilizer, and I don’t either. I don’t want to push a tree to grow fast in its first year, which fertilizer would promote. I want it to get established, and to send out roots looking for water and minerals.
Planting a tree is not rocket science. Just expose the trunk flare before you put it in the ground, dig a nice wide hole, and keep it watered for the first year of its life. Planted right, your tree should out last you!
Henry Homeyer is a UNH Master Gardener, and the author of 4 gardening books. His e-mail address is henry.homeyer@comcast.net. His Web site is www.Gardening-Guy.com.
Fall Chores
Posted on Wednesday, September 10, 2014 · Leave a Comment
The fall equinox arrives on September 23 this year. On that date, days and nights are of equal length, but with each subsequent day the nights get a little bit longer and we begin our descent into winter. For many gardeners, the shortening days are not welcomed. I try to look at the positive side: we all need a break from weeding and working on our gardens. It’s not time to hang up our tools and put them away, but we can start to slow down.
My vegetable garden did well this year. We had plenty of rain – but lots of sun, too. Often the rain was torrential – which is not ideal – but it most often fell at night, followed by sunny days which were great for growing. I worked a piece of borrowed land this summer, one that had been fallow for a couple of years, and I was not bothered by tomato blights there, so the leaves are still green and the plants producing well.
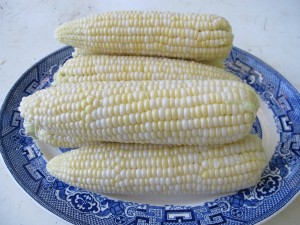
Organic Corn from my Garden
I grew corn for the first time in more than 20 years and was delighted that the corn did not all get ripe at once; it ripened over a 3 week period. I had plenty to share, which is nice, too. People often say that you can’t grow corn organically – that you need insecticides to kill the corn ear worms and chemical fertilizers to feed the nitrogen-hungry plants. I used neither, and got fat, juicy ears that produced not a single worm. I fertilized with Pro-Gro organic fertilizer at planting time. Period. Too much nitrogen from chemical fertilizers has been shown to attract insects.
I used a lot of hay as mulch this year, and that really helped to keep weeding to a manageable level. Three or four inches of mulch hay around the tomatoes applied early on kept down weeds and provided a nice clean place for fruit, some of which inevitably lands on the ground (despite the cages).
It’s important to clean up and remove diseased plants once they have stopped producing. I like to mix plant carcasses with brush in a pile in the garden where I can burn it all after the snow flies. Insects (and their larvae and eggs) and fungal spores can be effectively destroyed that way. Weeds harboring seeds can go on the pile, too. Weeds with big clusters of seeds should not go in a compost pile that you intend to use anytime soon. Weed seeds can last for years, and composting often does not kill them.
Some of my flower beds are less weedy this year than in the recent past. I’ve realized that I have more flower beds than I can keep up with by myself, so I hired a fellow to help me weed this summer – and he actually knows the difference between a flower and a weed! It was quite liberating. But I need to go over some of the beds he worked on and get out little weeds that have appeared since he cleaned them up. Weed seeds – or scraps of root – are a fact of life, and re-weeding is always necessary. If I get these little weeds now, it will help me have cleaner beds in the spring. It will help, too, if I put down a layer of bark mulch after this weeding.
Each summer I grow colorful plants on my deck, and I dread the onset of cold weather as many of these plants will never be happy inside the house. They just can’t survive the lower light levels indoors. Each fall night that portends frost I scurry back and forth from the deck to the indoors, lugging my favorite plants. I keep them living as long as I can but realize that some will have to be left to succumb to the arriving cold.
A fall chore I do each year without fail is to wash the leaves, top and bottom, of any plant that I bring in from the outside. I do this to wash off aphids and their eggs and larvae. Aphids are well controlled outdoors – there are lots of predator insects that consider them the Ben and Jerry’s of the insect world, consuming them with glee. But indoors? Even a few eggs will soon produce adults that will reproduce and make a mess of my houseplants. So I wash them with a sharp stream of water from the hose, let them dry in the sun, and then bring them indoors for the winter.
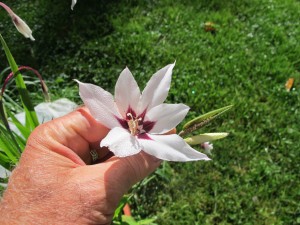
Sword lily
A fall chore I often forget to do in time is to dig up and store tender bulbs like gladiolas, dahlias and peacock orchids or sword lilies (Acidanthera spp.). These will not survive our winters and deserve to come indoors to live in a paper bag in a cool spot. This year I resolve to do better. I planted sword lilies in pots and they are blooming beautifully right now, and are delightfully fragrant.
This week I will plant some grass seed. Fall is a good time to fill in dead spots on the lawn. The soil is warmer now than in the spring, and fall rains will make watering less needed. There is still plenty of time for the new grass plants to get established before cold weather. I’ll just scuff up the soil with a short-tined garden rake, spread some seed, and then cover it with a thin layer of mulch. Finally I’ll smooth over the mulch with the back side of a lawn rake to mix in the seed and compress the soil a bit by putting down a board or small square of plywood and stepping on it lightly.
There will still be plenty of summer-like days ahead, but it’s good, I think, to start planning for fall and winter. Before we know it, we’ll be raking up the leaves – and shoveling snow.
Henry Homeyer is a garden designer and consultant, and the author of 5 books. His web site is www.Gardening-Guy.com.
Plants for the Front Porch
Posted on Wednesday, September 3, 2014 · Leave a Comment
We New Englanders have a long tradition of doing something to brighten the approach to our front door. In winter it’s a nice green wreath; my grandmother liked red geraniums in a pot by the door all summer; in fall, pumpkins and chrysanthemums are traditional decorations. Three common decorative plants are available for purchase at farm stands now – and worth a look.
Chrysanthemums are very popular, and are readily available in a wide range of colors. I treat them as annuals even though some are touted as perennials. I once estimated the number of buds and blossoms on a potted “mum”. By counting and multiplying I arrived at an estimate of 300 blossoms on a plant that was perhaps 18-inches across. Phenomenal. But if I had planted it in the ground and it came back the next spring, I would have gotten just a small fraction of the number of blossoms the following year. Why? The growers pinch back the stems at least twice to make the plant branch again and again. I don’t have the patience to do so.
A few tips about keeping mums happy. First, they have a large number of blossoms and leaves for the size of their pots. On a crisp fall day a mum loses a lot of water, especially on a sunny doorstep. You probably should water daily, or every other day. If yours comes in a peat pot, which many do, the soil or potting mix will dry out even faster than if it’s growing in a plastic pot. I find that submerging the pots in a big container of water and holding them down until they stop bubbling is the best way to get the roots full hydrated. Or transplant them to self-water containers that have water reservoirs to prevent roots from drying out.
Secondly, if you want to plant your mums in the ground, be careful at planting time: the branches are often very brittle. It’s always disappointing to me when I break off a big section of a mum before it can even strut its stuff for a moment. Usually I just leave my mums in their pots and arrange them by the front door.
If I do plant my mums, I endeavor to plant them deep enough so that I can cover the root ball with an inch of real soil (they are planted in a peat-based growing mix that dries out very quickly). And although you can plant the peat pots directly in the ground, tear off the top 2 inches of pot so that it won’t be sticking up and wicking water away. Remember, a dry mum is an unhappy mum. Frost seems a long way away now, but remember to cover mums when hard frost comes, or bring the pots indoors. They survive light frost nicely.
Another great fall doorstep plant is decorative cabbage or kale. I just bought a big fat one at a farmers market recently, and it will look great all fall, assuming I don’t let it dry out. Last year I started a couple of dozen decorative kales from seed, but was disappointed that they stayed smaller than those generally sold, and bolted in the heat of summer. Huh. The professionals seem to have tricks I do not. I had mine in the ground, not pots, and had planned on transplanting them into nice containers after Labor Day, but ultimately I didn’t think them worthy of moving to the front of the house.
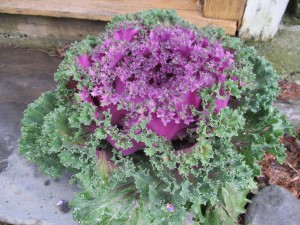
Decorative Kale
Decorative kale generally has dark green or purplish leaves on the outside, and pink, white or light purple inside. I’ve read that they are, indeed, edible, but are tough and leathery; why bother when edible kale is so easy to grow and tasty? Another great feature of decorative kale is its ability to survive frost. It will not even blink when temperatures drop down into the teens, assuming that your plant has seen temperatures in the twenties and has had time to get used to cold weather. I’ve read that they will survive temperatures as low as 5 degrees without harm.
The last of the fall porch plants are the short asters commonly available in blues and purples, and occasionally in white. Like the mums, these have been pinched back to stimulate the production of more blossoms – and to keep them short. Most are winter hardy, and I have planted them in the ground and let them come back for a second show the next year. But instead of being under a foot tall, they were at least 18 inches tall and only had a few blossoms. I never got around to pinching them back. Nice in the second year, but not dramatic. I usually prefer to buy new plants and let someone else do all the hard work.
Even if you have some new mums on the porch, don’t forget about your window boxes and planters full of annuals. Yes, they may look bedraggled now, but with a little care you can give them new life. Deadhead blossoms, cutting back stems several inches below those tired seed heads. This is tedious, but worthwhile. And give those annuals a burst of energy with some liquid fertilizer. I use a liquid fish mix, but there are plenty of choices, and almost anything will help.
When I see a nice pot of flowers on a neighbor’s porch I always think, “How nice. She is blessing us all with a glimpse of beauty as we go by.” I try to do my part in doing the same, and hope you will, too.
Henry Homeyer is a gardening coach, garden designer and the author of 4 gardening books. His Web site is www.Gardening-guy.com.


 Click Here to buy from Cobrahead