Daylilies
Posted on Wednesday, August 20, 2014 · Leave a Comment
What one kind of flower would you bring with you if you were being sentenced to life on a deserted island? Would you pick peonies for their big, bold blossoms and tantalizing smell? Or perhaps primroses for their bountiful blossoms and willingness to spread? A better choice might actually be daylilies. They’ll grow just about anywhere, are generally untroubled by pests and diseases – and you can eat them! This is daylily season, and a good time to buy some more for your garden.
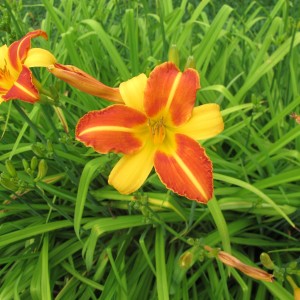
Frans Hals
Let’s start with the common orange daylily (Hemerocallis fulva). Most gardens have some. You’ll also see them by the side of the road as if gardeners – having too many, but unwilling to compost them – have heaved them out the windows of their cars. These sturdy perennials will grow anywhere, and will even bloom in the shade. They were introduced from Asia in the late 1800’s and were admired as exotic at the time, I’m sure. But now they are too common for most gardeners’ taste. And they do spread by root, which can be bothersome.
In the Chinese market in Montreal daylily tubers are for sale for cooking. I’ve tried cleaning and cooking the roots of my own orange daylilies, but have decided that it’s too much work to get them clean enough to eat. They were tasty enough, but fry up almost anything with garlic and onions, and it will be yummy.
The flowers are edible and surprisingly delicious. Make a big green salad and add daylily petals for color. Don’t use the stamens and pistils (the little stuff inside the blossoms) as they’re not tasty. Chop or tear the petals. And toss in a few buds, which taste a bit like asparagus or green beans.
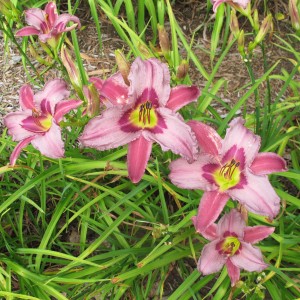
Blueberry Breakfast
For a nice vegetable dish, sauté chopped onions, shallots or garlic in olive oil or butter. Add a little chopped tarragon and black pepper. When the onions are almost cooked, drop in buds from those common orange daylilies you have been meaning to manage, but haven’t. Select buds an inch to an inch and a half long. They will start to open when they are cooked – in just a minute or two.
For dessert you can take a wine glass and place in it a fully open, brightly-colored daylily blossom. Put in a scoop of sherbet in the blossom and garnish with a few fresh berries and a mint leaf if you have one. Yum!
Daylilies are great cut flowers. Because each blossom only lasts a day – hence the name – most people don’t use them in flower arrangements. But I cut scapes (leafless stems) that are just starting to bloom and have numerous fat, unopened buds. The buds will open one at a time for up to a week, depending on number of buds. This works most reliably if the arrangement gets some sunshine each day.
I recently visited Cider Hill Gardens in Windsor, VT to admire their collection of daylilies. They have daylilies in a wide range of colors, from nearly white (‘Ice Carnival’) to deep reds that border on black. They have daylilies that are pink, creamy yellow or light orange, lilac, lavender, bluish and red. Some come in one color, but most are bi-colored, with a throat or eye of a second color. Each flower has both petals and sepals, and in some, like ‘Frans Hals’, the petals and sepals can be different colors – a look I like.
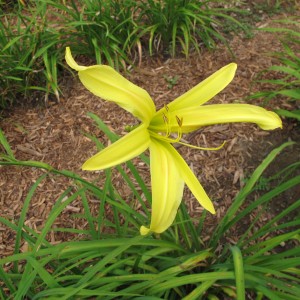
Kindly Light a spider dayllily
Flower shape varies as much as the colors. There is the standard trumpet. Then there are those with ruffled edges (‘Here She Comes’ is a good one). And the so-called ‘spiders’, whose petals are narrow and spaced apart a little – like the legs of a spider. ‘Kindly Light’ is a nice yellow one. ‘Doubles, such as ‘Jean Swann’ have their centers filled in with lots of extra petals. And some are worth buying for their great names like ‘Blueberry Breakfast’ or ‘Bodacious’.
Then there are the re-blooming daylilies, like Stella de Oro, a gold-colored daylily that is very popular because it blooms off and on all summer. I’ve seen pictures of a re-bloomer called Purple de Oro that I simply must have. So many kinds, so little garden space!
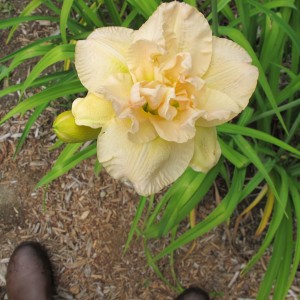
Jean Swann
What do daylilies want in life? Sunshine, dark rich soil, and adequate moisture. But they will settle for less – even a lot less- and bloom almost anywhere. Yes, slugs will sometimes nibble on the leaves, but they are not a magnet for bugs the way some roses are.
Over time clumps of daylilies get bigger, and you can divide them to start new clumps. Simply slice through a big clump with a spade to make two or four new plants, pry them apart and re-plant. I’ve been known to take out a chunk shaped like a piece of pie with a serrated knife – and the mother plant never even seemed to notice I’d done so. So run to your neighborhood plant center and have a look – you’ll likely come home with something wonderful.
Henry Homeyer is the author of 4 gardening books, and a children’s fantasy-adventure, Wobar and the Quest for the Magic Calumet. Contact Henry through his Web site, www.Gardening-Guy.com.
Good Bugs, Bad Bugs
Posted on Wednesday, July 16, 2014 · Leave a Comment
Many gardeners seem to think that any UFI (Unidentified Flying Insect) is a potential threat to their tomatoes or the spinach. When in doubt, they swat it, squish it or submerge it. But most bugs are not bad – and many are helpful.
We all know that lady bugs are good. They eat aphids and in fact, some enterprising businesses are selling lady bugs by the thousand. My advice? Don’t bother buying them. If you’re not spraying your flowers and vegetables with insecticides, you will naturally have some ladybugs and other aphid eaters. Of course insecticides will throw off the balance of nature, and the pests may dominate. But a good healthy garden should attract beneficials like ladybugs in the quantities that you need. Bring in a thousand? They might fly away the same day.
According to the lovely little guide book, Good Bug Bad Bug: Who’s Who, What They Do, and How to Manage Them Organically by Jessica Walliser, a ladybug can eat up to 5,000 aphids in its lifetime. But there are plenty of other good bugs. This book, by the way, is simple, well illustrated and sturdy enough to take to the garden. I recommend it.
The assassin bug is just that: a voracious predator that will eat cabbage worms, potato beetles, cucumber beetles, cutworms, earwigs, Japanese beetles, Bean beetles, tomato hornworms, and more. They are generally black, and about half an inch long with a broad body and bristly front legs. They have a sharp curved beak they use to penetrate other insects, allowing them to inject a poison to kill them and turn their insides into a “smoothie” they can drink. They can sometimes pierce human flesh if handled roughly.
Lacewings are beautiful green flying insects with diaphanous wings. You’ve probably seen them on your window screens, attracted to the lights – they’re about an inch long. But it is their larvae that do they work in the garden – they eat about 100 aphids a day! The larvae are brown and white with big mandibles for grasping prey. They are half an inch long, and fast moving. The adults eat nectar and pollen of flowers and weeds including dandelions, Queen Anne’s lace and goldenrod so a few weeds are good to have – alonmg with plenty of flowers.
Parasitic wasps are generally small – from 1/32 of an inch to half an inch – but do great work. There are some 200 different kinds, according to Good Bug Bad Bug. Many have noticeable ovipositors for laying eggs, but don’t be confused and think they are stingers – these beneficial insects do not sting. They generally lay their eggs in the bodies, larvae or eggs of other insects. Once their eggs hatch, the young parasitic wasps feed on their prey.
One type of parasitic wasp feeds on the tomato hornworm. If you see small white “grains of rice” on the back of a hornworm, these are actually larvae of a wasp. Don’t kill the hornworm! Just move it off, away from your tomatoes, and let the wasp larvae do their thing. Like the lacewings, the adults feed on nectar and pollen, so a diverse garden with continuous blooms is a good attractant.
One of the things I like about the book Good Bug Bad Bug is that it offers many solutions to an insect problem. Row cover, a breathable spun fabric, is offered as a solution to striped cucumber beetles, and it reminds the reader that cukes are insect pollinated so you can’t keep it on once your vines start to produce blossoms. The book also suggests interplanting with marigolds, catnip or tansy or putting out yellow sticky cards to catch the culprits. Mulch, the book says, will help keep females from contact with the soil where they lay their eggs, too. I didn’t know that.
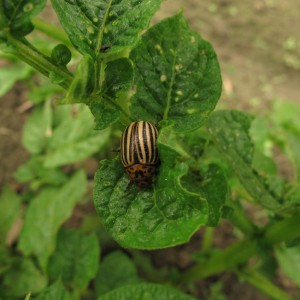
Potato beetle
Potato bugs are my current nemesis. I plant my potatoes much later than my neighbors (in late June) which often means the bugs are already busy by the time my spuds come along. This year they have found me anyway. Every day I go down the row of potatoes, flipping the foliage over to look for adults and orange egg masses underneath the leaves. If I spot eggs, I remove that part of the leaf and put it in soapy water. This sounds tedious, but is actually just a 5 minute job for my 65 plants – and it makes a huge difference.
Diligence counts: I skipped a couple of days of patrol, and found potato bug larvae eating my plants. And picking 50 larvae is a lot more work than removing one leaf. So I shall keep up my vigilance. And if the larvae seem to be winning, I can always spray a biological control called Bt. This is a bacterium that will control them, but damage nothing else. But not all Bt is the same: ask for one that controls potato beetles (San Diego or tenebrionis).
Try to get over your aversion to bugs in the garden, if you have one. Just because a bug is unknown to you is no reason to squish it. It may be an assassin bug, ready to help you!
Henry Homeyer is the author of 4 gardening books. His Web site is www.Gardening-Guy.com. He is also a garden designer, gardening coach and public speaker.
Trees and Shrubs for the Shade
Posted on Wednesday, July 9, 2014 · Leave a Comment
I grew up in a small town in rural Connecticut. Behind the house there was a brook and a hardwood forest with a high canopy of old maples that created a cool space for spending hot summer days. My favorite understory tree was a small, bushy tree that had very fragrant leaves and stems, which I decided must be witch hazel, as the barber splashed witch hazel on my neck after each haircut, and it was vaguely the same. I frequently chewed on the leaves and green twigs in lieu of the chewing gum that was forbidden to me.
This summer I discovered the name of that plant: spicebush (Lindera benzoin). One of my gardening clients had requested one for her garden, and as soon as I crushed a leaf, I was transported back 60 years. I knew it immediately. Most winters my part of New Hampshire drop to minus 25 degrees Fahrenheit, so any plant that will survive here must be rated for Zone 4 (Minus 20 to minus 30). I checked my favorite tree book (Michael Dirr’s Manual of Woody Landscape Plants), and sure enough, spicebush is rated for Zone 4. I will get my own as soon as I find the right place on my property to plant it.
From Dirr’s book I learned that spicebush can get to be up to 12 feet tall and wide, and is in the laurel family. There are 80 species of Lindera, both deciduous and evergreen (L. benzoin is deciduous). Apparently it blooms in early spring but the yellow blossoms are only one fifth of an inch across, so not overwhelming (I have no memory of it blooming). Fall leaf color is yellow. Dirr’s book says it does well in moist, well drained soils in full sun or half shade, though in my experience it will do well in dry shade in open woodlands. Dirr says spicebush is not often found in nurseries, but E.C. Brown’s Nursery in Thetford, VT has several nice ones.
Another woodland plant that I would like to try is leatherwood (Dirca palustris). Like spicebush, this is a native shrub that will grow in shady areas but this one prefers moist to wet soil – and I have plenty of that. Apparently it only gets to be 3 to 6 feet tall and wide, and is more open and spreading in shade than in sun. It is has small yellow flowers that bloom very early in the spring, well before the leaves emerge. Native Americans used the bark to make bow strings, fish lines and in the manufacture of baskets. Tough stuff.
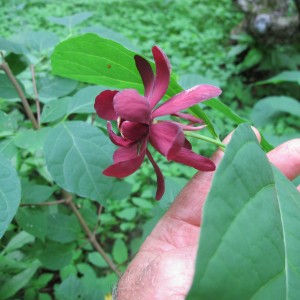
Calycanthus-or-sweetshrub
Three years ago I planted a sweetshrub or Carolina allspice (Calycanthus florida). The first 2 years I grew it in full sun with deep, rich moist soil. Both years the leaves yellowed – as if the sun were too strong and bleached them out. So last fall I moved it into a grove of old wild apples that provide full shade, and it seems to be doing much better. It is blooming now, and has put on considerable new growth.
Sweetshrub grows to be 6 to 9 feet tall with a 6 to 12 foot spread. Some varieties have very fragrant flowers, but mine is not. Dirr’s book suggests buying the shrub is in bloom in early summer, as the fragrance varies from plant to plant. It is adaptable to acid or alkaline soils, and is hardy to Zone 4.
Mountain laurel (Kalmia latifolia) is another fabulous shrub that will grow in deep shade (or even full sun), and I have grown it these past 20 years or so, even though I am on the northern edge of where it is successful. Mine produces delicate three-quarter inch diameter flowers, cups of white with pink veins. After cold winters I don’t always get flowers. There are cultivars with flowers in white to rose, and everything in between. Definitely buy when blooming. It does best in acidic soil that is cool and lightly moist. I have seen it growing abundantly in the wild at Sleeping Giant State Park in Hamden Connecticut, where there is a high, dry, open hardwood forest.
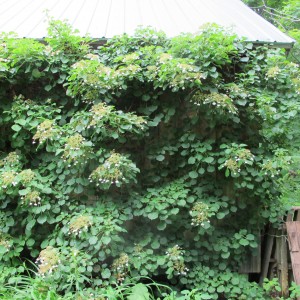
Climbing hydrangea on barn wall
Of all the shade-growing woody plants, the most dramatic on my property is the climbing hydrangea (Hydrangea anomala subsp. petiolaris). I have vines that completely cover the north side of my barn – and that only get a few hours of sun each day. It is in bloom now, with flower corymbs (flat topped inflorescences) that have both fertile and sterile (showy) blossoms and are 6 to 10 inches across.
Climbing hydrangea is slow to get established – mine took 6 years – but once it begins to grow, it quickly covers a surface. It will attach itself to stone or brick, but needs to be strapped onto wood surfaces, at least at first. Mine has grown through the cracks on the barn and is now self-supporting. Its vines can grow 60 feet or more, and has support arms for its flowers that reach straight out from the barn that are up to 3 feet long. It is truly dramatic.
So don’t despair if your property is mostly in the shade. There are these plants, and lots more, that will amaze and delight you.
Henry Homeyer is the author of 4 gardening books. His Web site is www.Gardening-Guy.com.
Gardening with a Chain Saw
Posted on Wednesday, June 18, 2014 · Leave a Comment
Bill Waste of Lyme, NH likes to say he gardens with a chain saw. Bill is a good humored fellow, and likes to joke. But I’ve seen him use the chain saw to get a growing bed ready to plant, so his claim is, at least partially, legitimate. What Bill was doing in the vegetable garden with his chain saw was preparing straw bales for planting.
Bill lives on a hill high above the Connecticut River in Lyme, NH with a great view, but limited space for gardening. He is surrounded by trees and the property has rocky soil that would daunt even a hard-working pilgrim. This was sheep farming country for good reason – growing vegetables is hard work in rocky soil. But each year Bill grows tomatoes, basil, pumpkins and squash. This year and last he planted his squash and pumpkins in hay bales.
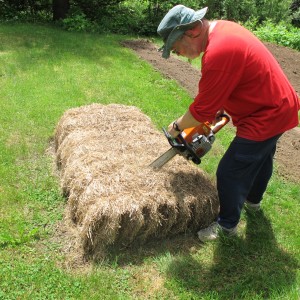
Bill Waste with chain saw
If you lack good soil, or have invasive weeds that terrorize your garden plot, you might want to think about growing some vegetables in hay bales, too. It’s easy, and you don’t really have to have a chain saw. Bill explained to me that he places three hay bales side-by-side to let them season – 5 weeks is a minimum, he said. He sprinkles about a cup of organic blood meal on the top of each bale to provide nitrogen to the hay, and waters it in well – encouraging the blood meal to penetrate the hay. The hay then begins to ferment, and the blood meal provides nitrogen for the microbes that are beginning to break down the hay.
This first step of seasoning the hay is important, Bill told me, because it gives off considerable heat. Enough heat so that seeds or plants might be killed after planting. As any farmer can tell you, moist hay can occasionally generate enough heat to start a fire by spontaneous combustion. In tests I conducted some years ago, a compost pile can attain temperatures of 130 to 165 degrees Fahrenheit, and grass seed will not germinate after a few days at those temperatures.
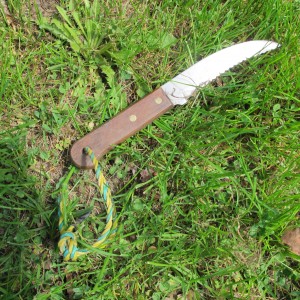
Root knife
But back to the chain saw. After 5 weeks or more outdoors, the hay bales are ready to plant. Bill uses the chain saw to carve out a planting cavity that he fills with soil. The cavity is roughly 6 by 12 inches, and 6 inches deep. I asked if I could prepare one planting hole with a knife, and he let me. I used a 6-inch long serrated knife that I got from Lee Valley tools called a root knife. It was a little slower than Bill’s chain saw, but it did the job. You could do it with a steak knife, I suppose.
After carving out the cavity, Bill fills it with potting soil and a little organic fertilizer. He plants 5 pumpkin or squash seeds in the potting soil, waters well, and steps back, ready for Mother Nature to take over. There are no weed seeds in the potting mix, and the only work that Bill needs to do is make sure the bale does not dry out. If all 5 seeds germinate, he thins out 2 plants.
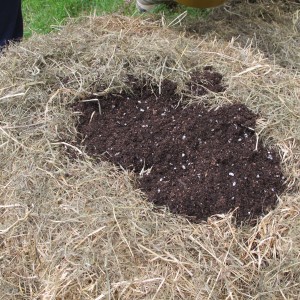
Bed ready for planting
Although one could grow almost anything in a hay bale, Bill recommends vines, since they can spill over the sides and stretch out across the garden. The only down side I can see is that you must be willing to let the vines grow over the lawn- which cannot easily be cut while the plants are growing. One could, I suppose, put down black plastic or mulch to keep down grass and weeds as the vines grow.
Bill is always looking for ways to save energy – his, that is. He has come up with a method of growing tomatoes that allows him to go away for a week if he wants, without letting his tomatoes suffer from lack of water. It requires access to lots of plastic buckets, which he has. Some fast food places give them away, and some building contractors have excess buckets that sheet rock “mud” comes in.
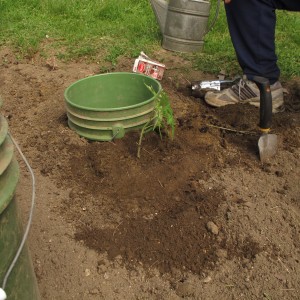
Bucket watering system
What Bill does is bury 5-gallon pails in his garden, leaving just a couple of inches above ground. These are his water reservoirs, and his tools for getting moisture down deep in the ground. Instead of surface watering every day in August when his garden is dry and thirsty, he just waters once a week by filling the buckets. The trick? He has drilled a series of eighth-inch holes in the buckets so that water leaks out to the soil after he fills them.
Around each bucket Bill plants 3 tomato plants, each just as close to the bucket as he can. The buckets have three sets of 6 or 7 small holes, each in an inverted “Y” pattern. The water leaks out in an hour or so, but it gets water where he wants it: down deep.
Each of us has a different approach to weeding, watering, planting. We figure out what works best. I doubt I will ever bury buckets for watering my garden, but if you have dry, sandy soil, you might want to. And hay bales? I’ll probably try it.
Henry’s Web site is www.Gardening-Guy.com. He can be reached at henry.homyer@comcast.net. He is the author of 5 books.
Transplanting Tomato Starts
Posted on Wednesday, April 30, 2014 · Leave a Comment
This year I started my tomatoes indoors much earlier than I usually do. Normally I start them on April 10 at 10:14. Only kidding. I start them, most years, during the second week of April. That way they are well established by the time they are planted outdoors 8 weeks later – but not crowding the root space provided by a standard flat.
But this year I started most on March 24, 3 weeks earlier. Why? Because the winter was so long and harsh I was ready to see little green things growing under lights – and was willing to take on the responsibilities of nurturing them. But this year I will have to transplant my seedlings into 3-inch pots in May to avoid root crowding.
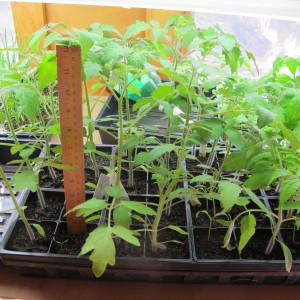
Tomato seedlings ready for bigger pots
I will pick a date for transplanting according to the Stella Natura calendar (www.stellanatura.com). This is a biodynamic planting calendar that is “supported by lunar and planetary rhythms”. For each day of the year, and every hour, the calendar designates one of 5 categories: good for working with or planting flowers, fruit, roots, leafs, or none of those – a “black-out day”. I will pick a fruit day for my transplanting .
I’ve done just a little testing of the recommendations of the Stella Natura calendar, but enough so that I feel obliged to follow it. Probably you have had times when you planted seeds and got a bad germination rate. I have. I blamed the seeds – or my planting technique. But a few years ago I tried planting a 6-pack of lettuce on a leaf day, and then again the following day, which my biodynamic calendar indicated was a blackout day. The first lettuce germinated at close to 100%, while the second at considerably less than 50% and many of the plants that grew were stunted or died. Same soil mix, same temperatures, same watering. So now I follow the calendar – at least as far as avoiding the black out days.
According to the calendar, “scientific studies showing that plant metabolism, growth rate and water absorption tend to peak around full moon. …The full moon enhances germination. Sow seeds 2 or 3 days before the full moon to receive its optimal drawing power”.
It’s important, when transplanting seedlings to bigger containers, to use a planting mix that is warmed indoors for a day or so. Potting mix coming right from the barn might be chilly enough to shock tender little roots. I use a 2 quart juice pitcher and measure out 10 quarts of commercial seed-starting or potting mix and 10 quarts of compost in a plastic recycling bin.
I stir in a cup of Pro-Gro or other organic fertilizer and a cup of Azomite or other rock powder, then moisten the mixture enough so that the dryness of the commercial potting mix, which contains peat moss or coir, is overcome. Then I let it sit for a day or more to warm up indoors.
Azomite is a rock powder mined in Utah that contains 70 naturally occurring minerals and trace elements harvested from a layer of volcanic ash that was later inundated with sea water. Although I do not have scientific proof of its ability to improve growth and vigor of plants, I have done some informal experiments with rock powders, and believe that they help.
If you use the same plot every year for decades, as I have, trace minerals of the soil may well get used up, so adding a wide variety of minerals makes sense to me. I add Azomite or finely ground granite powder to increase mineral diversity in my planting mix and also in my soil.
I re-use plastic pots each year, and believe it is a good practice to clean them before re-using. I wash them in the sink with soapy water, or sometimes fill the top shelf of the dishwasher to clean them. This helps to eliminate any bacterial residues that might not be good for my seedlings.
Also key to success with indoor seedlings is a good light source. I use ordinary fluorescent lights that I hang over my seedlings. I keep them about 6 inches above the seedlings, Light intensity diminishes exponentially with distance. My lights hang on chains, and I raise the lights as the seedlings grow. I have the lights on a timer so they are on just 14 hours a day. Little plants need rest, too.
Don’t keep your seedlings too warm. Sixty-five degrees is good for the day time, but leave a window ajar at night to let temperatures drop to 55 degrees – though I admit that don’t do that most nights.
Growing seedlings from seed requires some work, but I do it every year because I love tending my seedlings. I save money doing it, and can grow plants I would never find for sale at a garden center, too.
Henry Homeyer can be reached at P.O. Box 364, Cornish Flat, NH 03746. Please include a self-addressed, stamped envelope if you want a question answered by mail. Henry’s e-mail address is henry.homeyer@comcast.net. His website is www.Gardening-Guy.com.
The Spring Bulb Flowers
Posted on Wednesday, April 16, 2014 · Leave a Comment
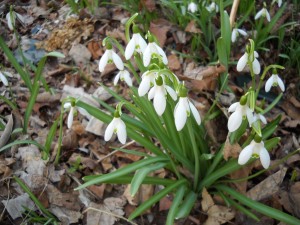
Snow drops in April
I’ve been paying attention to snowdrops and crocus since I was 9 years old – I recently found entries in my diary that tell me so. My entry for March 7, 1956, in its entirety was this: “Spring is getting here at last the snow drops are in bud + will bloom in a few days.” Then on April 5 I wrote,” Today our first crocus was in bloom it is very pretty.” I still pay attention to them, and generally note when they come into bloom. Now is the time to decide where you should plant bulbs next fall.
Here’s what I do. I wander around my property each year in the spring to see what spots are bare of bulb flowers. I bring along those white plastic markers used for labeling, and write “add crocus here”, for example. Then in the fall, when it’s time to plant more bulbs I don’t have to rely on my memory.
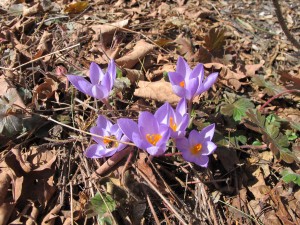
Early crocus
When planting bulbs, I label what I‘ve planted. That way I’ll see what has performed well, and be able to buy more of the same. For example, I’m always eager to get color in the garden at the same time that the snowdrops bloom. Glory –of-the-snow is one plant that overlaps with snowdrops, but is a bit later, as is scilla. This spring I saw that a crocus I planted last fall, ‘Blue Pearl, is blooming with my snowdrops – and before those other two. So I’ll buy 100 of those for fall planting. I bought them at Brent and Becky’s Bulbs– I know because they include tags with each bag of bulbs.
Writing this in early April, I haven’t seen any of my winter aconite appear, though I would have thought they would be up by now. It is a very early bright yellow flower that has one-inch wide, six-petaled flowers. I’ve grown it before but lost it to cold or rodents or poor drainage. I’m still optimistic that it will show up.
I tend to blame bulb failure on drainage problems even though I mix in lots of compost at planting time and favor hillsides. South facing hillsides are great for early bulbs as the snow melts off weeks earlier than north-facing plots. But rodents might be the culprits, too.
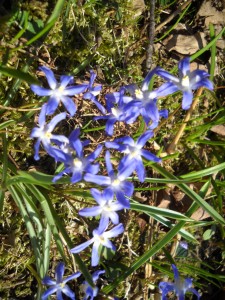
Glory of the Snow early April 005
A bulb plant that I’ve considered fussy is a low-growing iris, Iris reticulata. It is a lovely iris that blooms near the ground level and has medium-sized blue, purple or (sometimes) yellow flowers. Doing some research I found out why I thought they are fussy: after they bloom, the bulbs divide, producing several little bulblets. These won’t bloom for a few years. So I need to plant some every year until I have a mature colony of them. I also read that they like soil that dries out well in summer, such as in a rock garden or sandy hillside.
My lawn is full of snowdrops that have planted themselves. I assume that they produce seeds that wash into the lawn with early summer rains. The bulk of my snowdrops are planted on a hillside above the lawn. But you can plant early spring bulbs in the lawn, too. Just don’t plant daffodils or anything with large leaves because you won’t be able to mow the lawn where they are growing until the leaves yellow and dry off – around July 4th. Bulb plants need to re-charge their batteries, if you will, by getting sunshine and storing energy.
Little bulbs like snowdrops, crocus and grape hyacinths have short leaves that disappear early and won’t disrupt your early mowing. You can always set the lawn mower blades high to protect the leaves if they are still green when you need to cut the lawn.
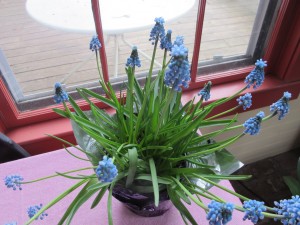
Grape hyacinths
Grape hyacinths (Muscari spp.) are great little flowers that come in many different shades of blue and purple. I’ve planted many dozens in my day, but find they tend to lose vigor and disappear with time. So I plant them again. This spring I bought a pot of them at a garden center and have been enjoying them immensely in the house. Later, when the soil is thawed, I’ll plant them outside. I keep the pot in a cool space indoors, as if they get too warm, they flop over.
Tulips I treat like annuals. I plant 100 most years in a bed that I reserve for them – and later zinnias. If I had depended on bulbs planted in 2012 for this year, the number of blooms might be just 50, and maybe 25 the following spring. So I don’t bother to coddle them. In fact, I often pull the flower stem instead of cutting it, as I can get an extra 2-3 inches of stem for my vase, and I love tall tulips. I compost the spent bulbs. I find that adding a few pennies to the water in the vase helps the tulips to last longer before losing their petals, or opening if picked in bud.
Daffodils are slightly poisonous to deer and rodents, so they aren’t eaten – and can bloom for years. You can plant them in open woodlands and they will do fine. I grew up with daffodils planted along paths in our woods, and I still delight in the memory of them. By the way, if you forced paperwhites this winter, don’t bother planting them outdoors – they’re not hardy here.
Bulbs are a great investment. Most come back year after year, bringing me pleasure each year before the garden gets going.
Henry Homeyer is a gardening coach living in Cornish Flat, NH. His Web site is www.Gardening-Guy.com.
Spring Pruning
Posted on Wednesday, April 2, 2014 · Leave a Comment
Conventional wisdom has it that fruit trees should be pruned in March, but don’t worry if you haven’t even started yet. I haven’t. There’s no harm in pruning in April, or anytime, really. After the buds on fruit trees open, they are more prone to being knocked off while we work on the trees. But you probably don’t care if you get a few less apples or pears. The snow has been so deep this year that it has been difficult to move ladders around, keeping most of us from starting early.
Pruning is best done with clean, sharp equipment. You’ll need a pair of by-pass hand pruners and a sharp tri-cut pruning saw. Bow saws, once popular, are tough to get in tight places, so the folding saw has taken over. A nice pair of loppers will save time sawing medium-sized branches.
Before beginning, check your pruners to see if they are sharp. I do that with the backside of a fingernail, which I drag lightly across the cutting blade. It should shave off a little of the nail. (If yours are not sharp, read my description of how to sharpen pruners in my book, Organic Gardening (not just) in the Northeast: A Hands-On, Week-by Week Guide. Your library should have it).
Next I clean off any gunk on the blades. I use a special solution called Sap-X with an old green scrubby, but you could use a little sewing machine oil or even kerosene. The blades should open and close easily.
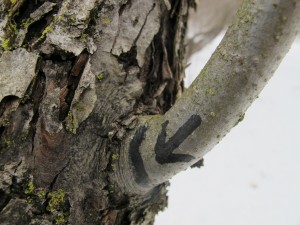
Branch collar and line to show where to cut
Start working on a tree by studying it for a few minutes. Apples do best with a single leader in the middle and the longest branches near the base, getting shorter going up the trunk. If you have two competing leaders, it would be good to remove one, though in an old tree that might not be practical due to the size.
As you look at the tree, ask yourself which larger branches should be removed. Are there any dead branches? They must be removed, so start by taking them out. Are there branches that are rubbing others, or crossing through the middle of the tree? They can go next. Lastly, remove any watersprouts – those smaller branches shooting straight up.
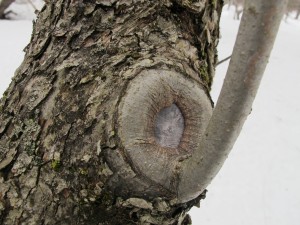
Healed cut and new water sprout
Some fruit trees produce dozens – or even hundreds – of water sprouts each year. Although some varieties seem more prone to producing them than others, you can minimize their presence by pruning to create a well-balanced tree that allows sunshine to get to each leaf of the tree. Watersprouts are the tree’s effort to produce more leaves to create more food.
Even though it might seem scary, it is better to remove large branches than to nip away at a tree, taking tiny branches. It is more efficient, and makes for a better looking, healthier tree. In any given year you can remove up to a quarter of the tree. That means a quarter of the branches that produce leaves – and hence food for the tree. Taking out a big dead branch doesn’t count at all. A healthy tree allows each leaf to get sunshine. If there are too many branches, they will shade each other out.
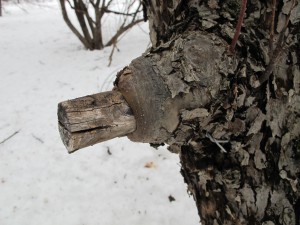
Stub healing back to branch collar
Where you make your cuts is important, too. Don’t cut off branches flush with the trunk, nor leave long stubs. Branches should be pruned just outside (away from) the wrinkly flare that starts at the trunk or a larger branch. That area you should leave is called the trunk collar. It is the site where healing takes places fastest. Years ago arborists recommended painting tar over a cut, but that is no longer thought to be a good practice.
If you have an empty place in your tree and wish you had a branch there, sometimes you can bend down a branch and keep it in place until it will stay put – generally around July 4th. But don’t do that until after the leaves appear. You can attach a weight to a small branch. A plastic soda bottle is good: you can add water until it is just the right weight. Or you can tie a bigger branch down to a stake in the ground.
Apples generally are produced on short spurs that occur on scaffold branches that are at a 45 degree angle from the main trunk (or even more horizontal). Branches going straight up are less likely to produce fruit. But don’t be impatient with young trees: they won’t produce fruit until they are good and ready.
Pruning on a warm spring day is great fun, and a good excuse to be outside. And remember, trees are not like people: they benefit by having their limbs removed.
Henry Homeyer lives in Cornish Flat, NH. His Web site is www.Gardening-Guy.com.
Vegetables as Art
Posted on Wednesday, March 19, 2014 · Leave a Comment
I would hazard a guess that if you toured an art museum, the artwork depicting flowers would outnumber the art showing vegetables by ten to one. Or maybe a hundred to one. Flowers? Georgia O’Keefe and her poppies spring to my mind, Monet had his famous paintings of Giverny with its water lilies. Van Gogh had his sunflowers. And so on. But few painters have focused on kohlrabi or lettuce. And why is that? Vegetables are as beautiful as flowers if properly grown and displayed.

Bill Chisholm art
I was recently at the Rhode Island Flower Show and was struck by the artwork of Bill Chisholm of Somerville, Massachusetts (www.billchisholm.com). He had big, bold paintings for sale of vegetables and fruits. I bought a big tomato, a smaller artichoke and a delightful clove of garlic. I hung them in my kitchen, next to the stove. He paints in oil, and then has reproductions printed on canvas using a technique called giclée. The canvas is stretched on wood frames, just like an original, but at a small fraction of the price.
Much of my life is devoted to my vegetable gardens in the spring, summer and fall. I start seeds now, indoors. I baby the infants outdoors in May and June. I harvest and process the food much of the summer and all of the fall. So now, in winter, it’s nice to see veggies on the wall – in addition to those in the freezer. My new art got me thinking about the veggies we will plant this summer.
As you plan your garden this year, think about planting veggies in artistic ways. Choose cultivars for color and leaf texture, and plant them as you would if you were planting a flower garden – or creating a painting. Here are some of my favorites;
I love lettuces. They come in so many colors and leaf textures. I start lettuce in the house in April and May in 6-packs, each week starting a couple of different varieties. I plant green leaf lettuce, red lettuce, lettuce of multiple hues. In the garden I like to space lettuce six inches apart so that each head reaches full size, and is not crowded. But I like to interplant reds with greens, frilly lettuces with shiny leafed-lettuce. Arugula with Romaine or Oakleaf – and so forth.
I get seeds from numerous sources. Renee’s Seeds (www.reneesgarden.com) packages lettuces in pairs or trios of colors. This allows you to create a colorful array of leaf colors with just a package or two. Johnny’s Selected Seeds has an amazing array of lettuce seeds aimed not only at the homeowner, but also the CSA manager and farmer. In their catalog are a few pages showing the diversity of leafs you can work with.
Of the purple-leafed veggies, one of my favorites is orach. This is not a lettuce at all, but a relative of the amaranths, and is sometimes called “summer spinach”. It doesn’t bolt the way spinach does, and can get to be 3-4 feet tall. It will self sow if you let it – I allow a few plants to get big and make seeds, and it comes back each year in my garden. I use if in salads, but I’ve read that it is also good as a cooked green. Available from Johnny’s Seeds.
Other gorgeous vegetables include purple kohlrabi, eggplants, artichokes, and cauliflower. Visitors to my garden look at kohlrabi and seem to ask the same question: “What is that? A space alien?” The plant is fat globe that sits on the soil surface and sends up “arms” from the bulb, with leaves on top the arms.
For sheer production value, you can’t beat a variety of kohlrabi called ‘Kossak’ from Johnny’s Seeds, which produces globes bigger than softballs. But the purple-skinned ones, while smaller, are my favorites for their beauty. Renee’s Seeds sells a package of mixed purple and green varieties. I chop up kohlrabi and use it is salads and stir fries. It’s crisp and mild flavored, with a bit of a cabbage taste. They are fast-growing and should be started by seed in the garden.
Cauliflowers can be gorgeous, too. I have grown a purple cauliflower variety but have to admit that, like most cauliflowers, it is awfully fussy. If the soil is too wet or too dry, the plants get big but don’t produce anything but little buttons – not the big heads you see in the grocery store – or want to eat. And the purple color fades away on cooking.
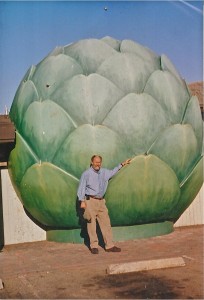
Artichoke Sculpture
Artichokes are beautiful plants, but take a long time to grow. In California they are perennials, but not here. This year I started a few seeds in January, but little plants are sometimes sold at good garden centers if you haven’t started any yet. I grow a couple of plants each year mainly for their looks and get a few artichokes to eat, but they are quite small. Some years ago I visited the Giant Artichoke Restaurant in Castroville, CA. It had a sculpture of an artichoke that towered over me that I remember fondly – too bad I can’t have one like it in my garden.
So as we move towards spring, think about the art value of your veggies and create your own living artwork. Tasty can be tasteful and pretty, too.
In addition to writing, Henry Homeyer teaches pruning to homeowners. He can be reached at henry.homeyer@comcast.net. He lives in Cornish Flat, NH.
Growing Your Own Fruit
Posted on Wednesday, March 5, 2014 · Leave a Comment
Most mornings in winter I start my day with a bowl of oatmeal. That can get pretty dull, so I liven it up with a variety of fruits, most of which I grew myself and preserved either dried or frozen. Add some cinnamon or cardamom and a few nuts, and bland becomes bodacious. In my freezer I have blueberries, elderberries, blackberries, plums, apples, raspberries and a few peaches that I got by trading some apples with a friend. So if you’re bored with breakfast, do some studying now about the various fruits you might grow, and plant them this summer.
Much of what I know about gardening comes from practical experience: ask a good gardener, for example, what kind of peach tree she grows, plant one, and see how it does. Try again if the first one dies. But I also depend on reading good books on gardening, and now, while there is still snow on the ground, I spend considerable time reading.
I have two books on fruit growing that I like a lot. The first, written in 1992 by Lewis Hill of Greensboro, Vermont, is a classic: Fruits and Berries for the Home Garden. Lewis was a friend of mine (he passed away in 2008) and a Vermonter to the core: quick –witted, hardworking, and curious. He grew up on a dairy farm and only had a high school education, but with his wife Nancy, he wrote 16 excellent gardening books. His book on fruits and berries is full of good information but also entertaining. It has recently been updated, I just learned, by University of Vermont professor Len Perry as The Fruit Grower’s Bible.
The other fruit book I like is Lee Reich’s Grow Fruit Naturally: A Hands-On Guide to Luscious, Homegrown Fruit, which came out in 2012 and is full of color illustrations and good drawings. Like Hill, Lee Reich is opinionated, thorough, and has many years of experience. Lee has a PhD in horticulture and lives in upstate New York.
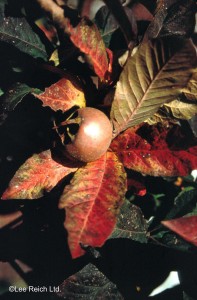
Medlar
Reich’s book introduced me to two fruits hardy for Zone 5 (possibly even Zone 4) that I have never grown or tasted: the medlar and the shipova. The medlar is a small tree that is self-fruitful, meaning that one tree is all that is needed for pollination. According to Reich’s book, the medlar blossoms open late enough to almost never be bothered by spring frosts. The fruit keeps well and is very tasty. So why have I never heard of one? Reich writes, “The flesh, when ready for eating, is brown and mushy and lacking visual appeal.” It also needs “bletting” or ripening on a shelf in a cool room, the cooler the better.
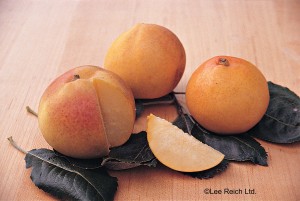
Shipova
The Shipova is actually a hybrid made from two different species, a type of mountain ash (Sorbus aria) and the European pear. Reich lists it as a Zone 4 plant, so it is hardier than the medlar and should survive my New Hampshire winters easily. It produces pear-like fruit on a tree that can grow to 20 feet, or if grafted on a suitable rootstock, only 8 feet tall. He says that are ready for harvest in mid-summer. Unlike the medlar, the fruit does not keep well – but it is attractive to the eye and tasty, too. I called Lee, and he said the fruit tastes similar to a pear.
Reich made it clear that fruits like the medlar and shipova are not often sold at our local nurseries, so I went on-line to see where they are available. Raintree Nursery in Morton, Washington (http://www.raintreenursery.com) had both for sale. In the back of Reich’s book there is a list of nurseries that sell fruit trees, including St Lawrence Nurseries in Potsdam, NY which has lots of cold hardy trees that can be ordered bare root until April 10.
Lee Reich’s book is just chockfull of tidbits that are useful. He explains, for example, labels on pesticides: ‘caution’ means the material is slightly toxic or relatively nontoxic. ‘Warning’ means moderate toxicity, and material marked ‘danger’ might kill you – even in small quantities. Lee is a proponent of organic techniques, but points out that even pesticides approved for organic growers can have severe side effects. He notes that nicotine sulfate is an extract of tobacco that is “organic” but has a danger label. It’s important to pay attention to warning labels whether you are using organic pesticides or not.
I also like the fact that Reich’s Grow Fruit Naturally has specific cultivars named for the fruits it describes, and offers useful tips such as whether a variety is self-fruitful or not. There is a nice section on pruning and another on proper planting techniques.
Call me a skeptic, but I like to buy trees from local nurseries as it means that the owners probably have grown what they are selling. Still … I love to experiment with new plants, and usually try something new every year. This just might be the year for a shipova or a medlar. I wonder how they are on breakfast cereal?
Henry Homeyer can be reached at henry.homeyer@comcast.net or by writing him at P.O. Box 364, Cornish Flat, NH 03746.
Enjoying the Winter Landscape
Posted on Wednesday, February 19, 2014 · Leave a Comment
I like winter. I like the special quality of winter light in the late afternoon, those purples and blues that were perfectly captured by artist Maxfield Parish. But most of all, I like passing through the woods on skis when the sun is bright. The snow sparkles the way diamonds might, if scattered on a Mediterranean beach.
I visit the woods in winter for the same reason that I go to museums: for the sheer beauty on display. There is something uplifting about great works of art – or great works of nature. I don’t need to go to the Grand Canyon to feel awe; I can enjoy the woods near home just as much. Part of the joy for me is going slowly enough to see what’s there, and taking time to appreciate the details.
As I approach my favorite woods, stolid maples wait patiently along the lane, old and venerable. They will share their sweet nectar in another month or two but for now they stand silently, motionless, waiting.
In the forest, young hemlocks bend under the weight of snow, their long arms reaching to the ground for stability, green fingers disappearing into the snow. Going through glades of mature hemlocks or pines, their branches reaching out high above me, is almost like visiting a great cathedral. I like the wisps of snow that blow off their branches – snow smoke I call it – even if some goes down my neck.
Teenage beeches are the glamour stars of the woods, their bark smooth, gray and unblemished. Young beeches often hold their dry brown leaves until May, and they rustle when I jostle them. But the old beeches seem somber, even sad, and somehow remind me of elephants. They are stolid, unmoving, their grey legs showing wrinkles and scars.
I don’t always have time or the energy to go for a long cross-country skiing adventure. Sometimes I just strap on my snowshoes and go to my garden to look at the silhouettes of trees and shrubs.
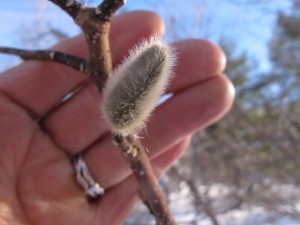
Magnolia Flower Bud
One of my favorites is my Merrill magnolia. I planted it some 15 or 20 years ago as a specimen tree in the middle of a mowed lawn. Now it is near maturity: 25 or 30 feet tall with a “wing span” of 20 feet. It has multiple stems, as many magnolia do, and smooth gray bark. The branches are loaded with large, fuzzy flower buds. These buds are bigger and better than pussy willow blossoms, and they bring joy not only for their looks now, but also for the image of what the blossoms will look like: 3-inch double white flowers that are lightly fragrant. The tree almost always blooms for me on April 23, my birthday.
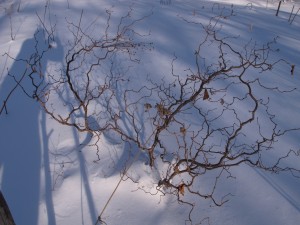
Twisted Hazelnut
I love the curlicue form of purple-leafed, twisted hazelnut (also called Harry Lauder’s walking stick). It is a very interesting silhouette against the snow, and come spring it will produce lovely, glossy purplish leaves. Later in the summer the leaves will lose some of their purple hue and appear more green.
My apple trees can be a joy to look at, too. Proper pruning of apple trees can turn them into works of art. The key is to get rid of the clutter that apple trees seem determined to grow. Annual pruning to get rid of those vertical twigs called “water sprouts” makes a big difference. I tell people that a bird should be able to fly through an apple tree and not get hurt. I once found the skeleton of a bird in an unpruned apple tree, but don’t know for sure how it met its demise. I’ll start pruning in March, once the snow has melted enough to move around the trees easily.
A native tree that has a great profile is the pagoda dogwood (Cornus alternifolia). It grows branches well separated, so they remind me of person doing Tai chi, holding arms in frozen poses. I have one that grew out of the face of a retaining wall as a ‘volunteer’. Although I snipped it off when young, the roots sent a new shoot, and I let it grow. Now it is a favorite of mine in winter.
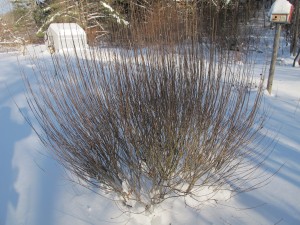
Arctic Blue Willow
My arctic blue willow looks great now, too. It is a ‘nana’ or small variety, and has hundreds of thin twigs growing vertically and very close together. Earlier in the winter it was severely bent over by an ice storm, but I shook the branches free of ice and snow, and now it is back in fine form. The 16 inches of fine snow we got recently sifted through the branches this time, giving it a great silhouette.
So go outside and really look at the “bones” of your garden on a snowy day. And if you don’t find much to look at, make plans to buy and plant some nice trees and shrubs, come spring.
Correction: A kindly soils professor e-mailed me about a recent article in which I said wood ashes could be used to substitute for limestone. He noted that trees can pick up lead and cadmium, particularly near roads, so wood ashes are not good to use in the garden. He also said they act so quickly that your soil may become too alkaline and inhospitable to soil microorganisms.
Henry Homeyer teaches pruning and general gardening. His web site is www.Gardening-Guy.com. He is the author of 4 gardening books.


