Picking for Vases
Posted on Wednesday, November 4, 2015 · Leave a Comment
This is a hard time for those of us who love to go to the garden to pick flowers to grace the table. We’ve had a few weeks of cold weather, and even the hardiest of flowers seem to have faded away. So what can a gardener do?
Think outside the box. We can pick stems of shrubs with colorful or interesting bark. We can snip off branches of evergreen trees. And there are decorative grasses and even some dry weeds that have interesting form.
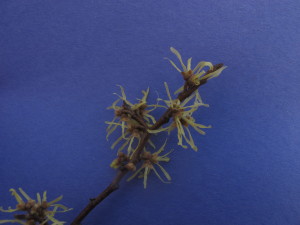
Witchhazel blossoms
Actually, I do have one thing still blooming: my witchhazel (Hamamelis virginiana) shrubs are in their glory now that their leaves have dropped. They are remarkable yellow blossoms that consist of curly yellow straps. Their fall foliage is yellow and the blossoms appear while the leaves are still on the branches – and are easily missed. Now the leaves are gone and the blossoms are prominent.
Witchhazel comes in several species. There is a spring blooming variety, H. vernalis, that blooms as early as March. Some varieties of this species also have spectacular fall leaf color. The variety ‘Autumn Embers’, a spring bloomer, has great fall color. I have yet to try this species, but it’s on my wish list.
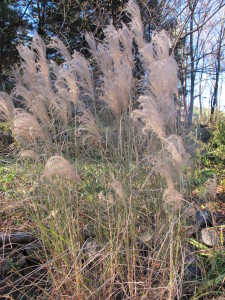
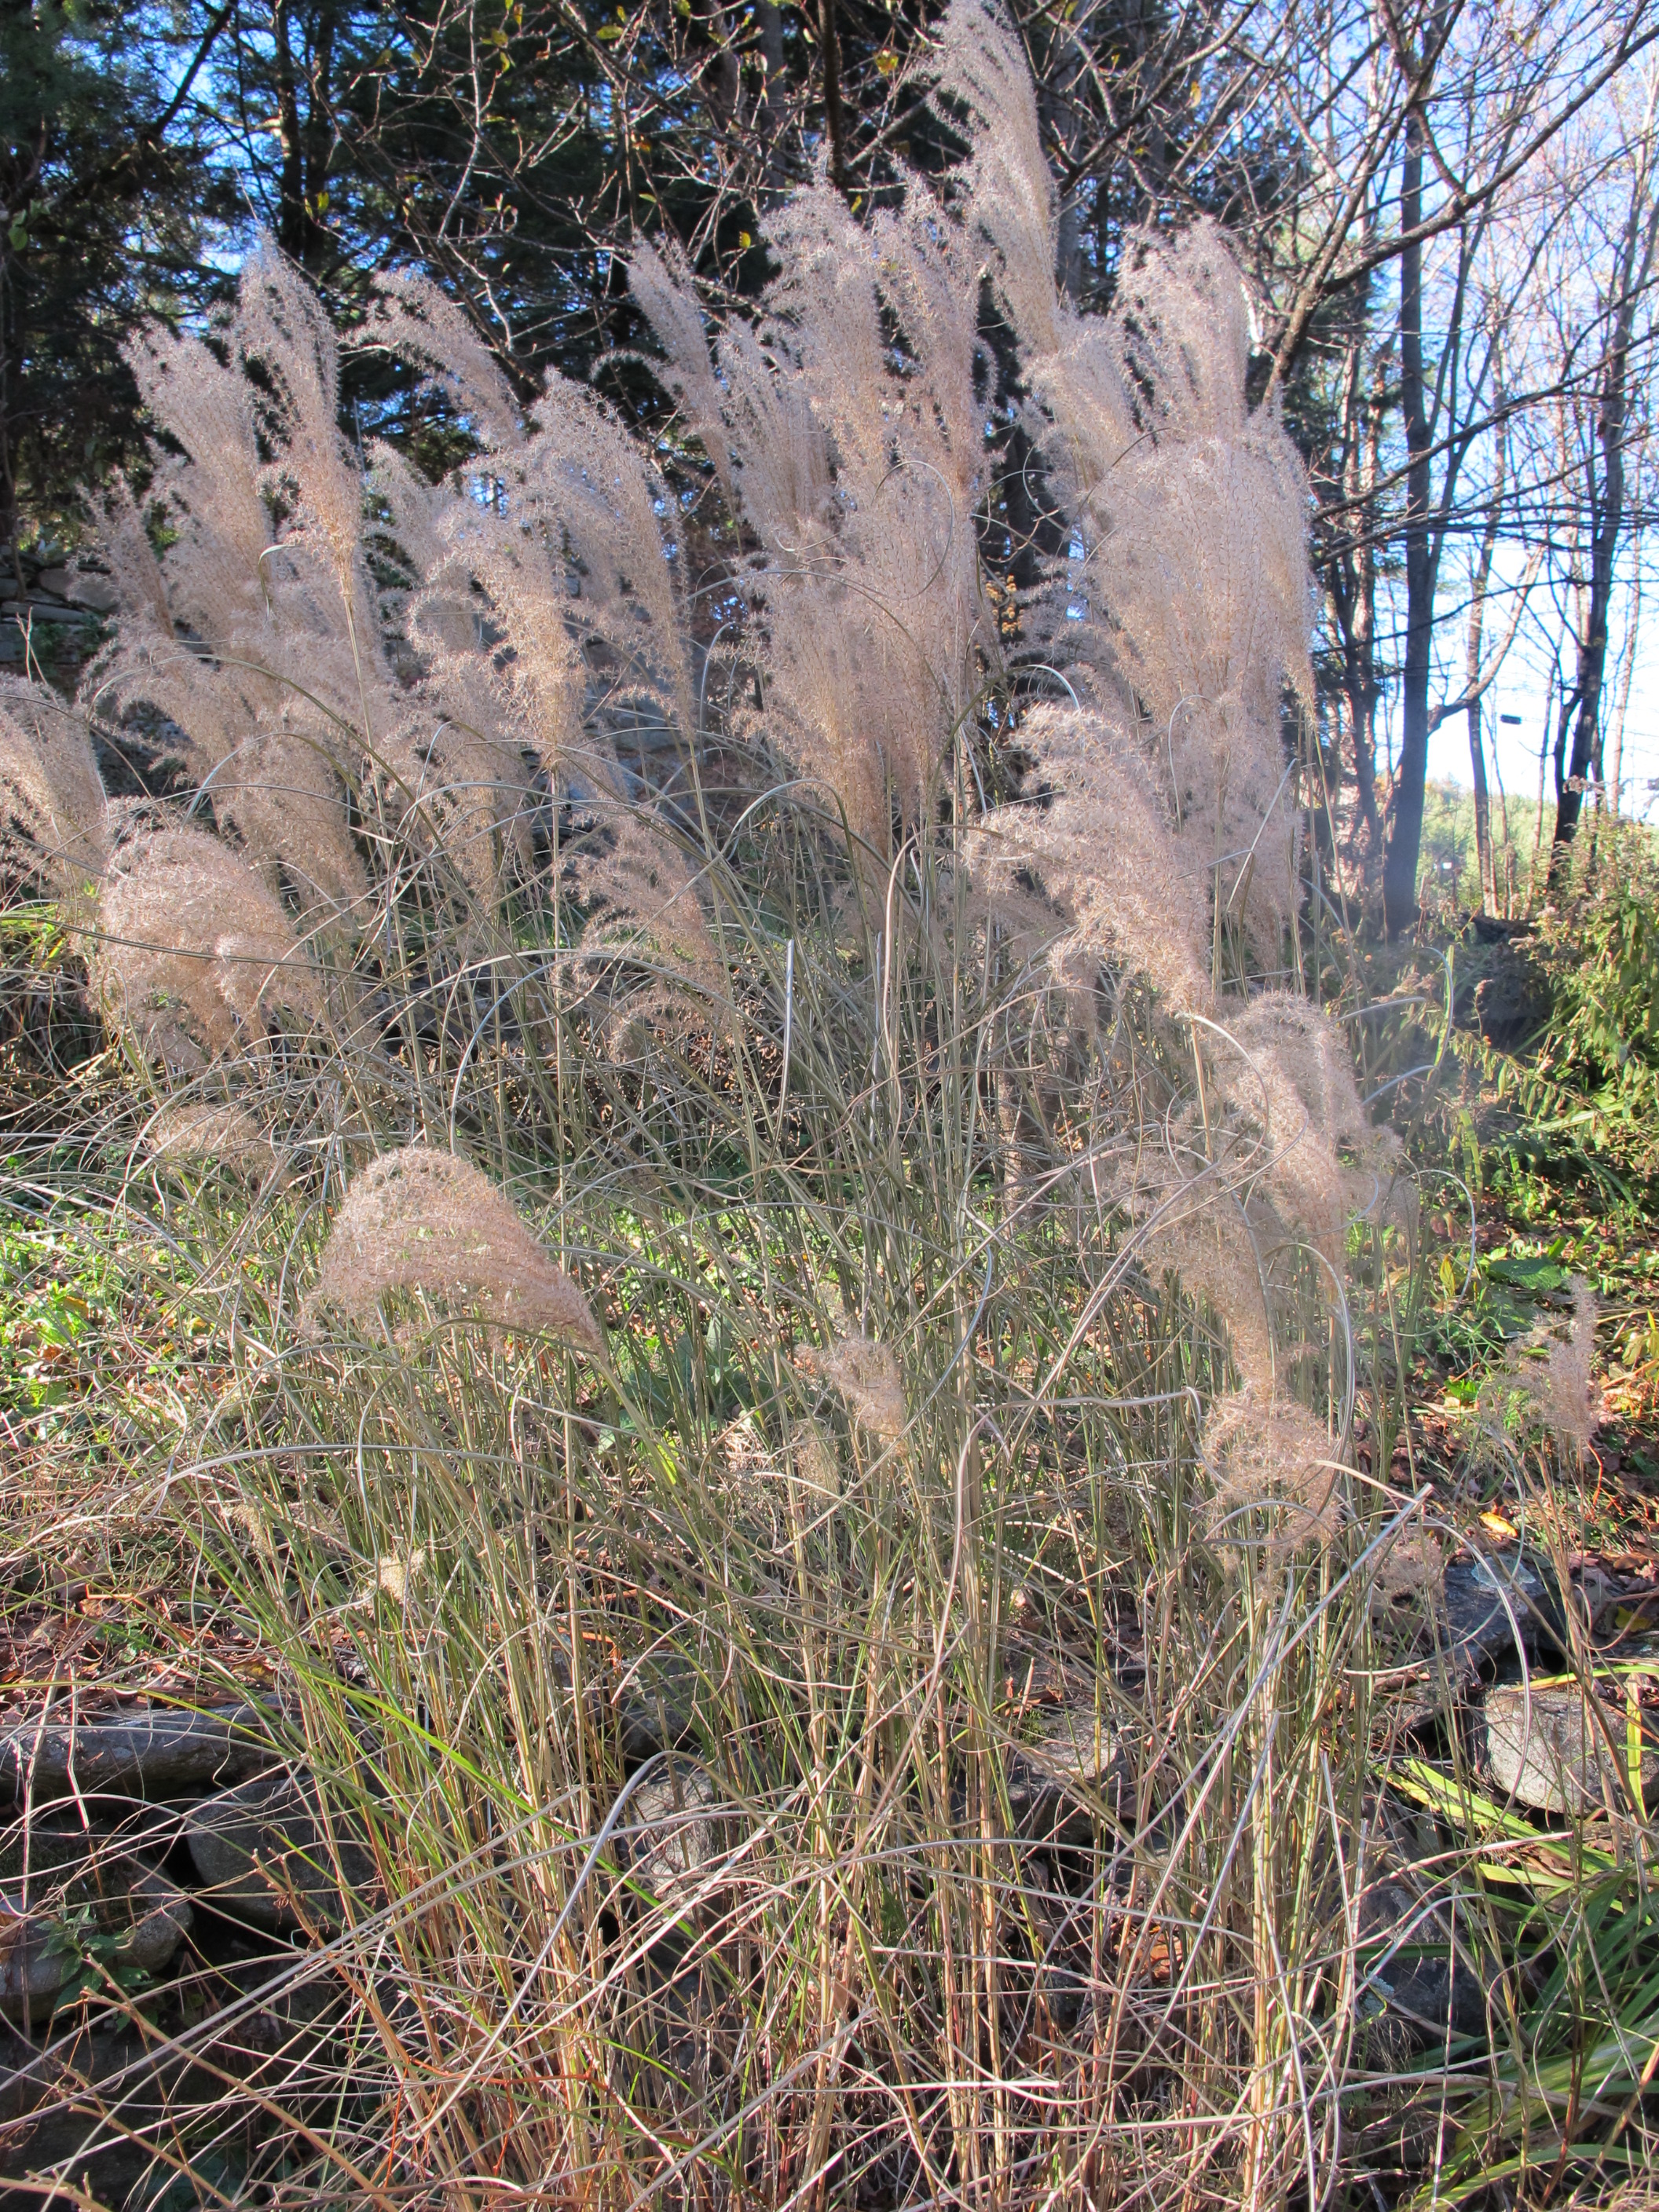
Miscanthus sinensis
Most grasses and branches lend themselves to making big arrangements. I decided to try working with some to make something shorter as tall arrangements on the dining room table block my vision of a diner across from me. I cut stems of fountain grass (Miscanthus sinensis) which is well over 6 feet tall in my garden, but I just used the top 18 to 24 inches of each stem. They are in blossom right now, meaning that they display fluffy plumes above the foliage.
I also cut the bare red stems of red-twigged dogwood, which is also known as red osier dogwood (Cornus sericea). This is a plant that I cut to the ground each spring. New growth has bright red bark that seems to get brighter in the winter. In the wild it lives in wet places, and I grow it in moist soils, but it will grow in ordinary garden soil. I cut it back to keep the size in check, but mostly to get bright red color. Other varieties of the species produce yellow stems.
So I had bright red in the vase, and tawny beige grasses. I needed some greenery. I have lots of Canadian hemlock, but have found that the needles do not hold on well. White pine would work, but I wanted a different look. I cut a few stems of a hellebore, a perennial flower with evergreen leaves. The stems rise up a foot or so, then send out horizontal clusters of shiny green leaves, which seemed perfect. The leaves did well for a couple of days, then got droopy.
Other plants that often have good looking leaves at this time of year include European wild ginger (Asarum europaeum), dead nettle (Lamium spp.), myrtle or periwinkle (Vinca minor) and pachysandra (Pachysandra spp.). And although a vase full of just leaves may not be interesting in summer, a little greenery in a low bowl with a few stones is not bad now.
Of the leaves mentioned above, pachysandra is the best: it will last all winter in a vase, rooting and looking perky. Pick some now for use all winter.
In my vegetable garden I still have a number of plants that might also look good in a vase. Kale comes in a variety of colors and leaf types. All do well in a vase, and purple kale can be very striking. Mint also holds up for several days in a vase – and you can nibble on the leaves.
If you grew last winter’s amaryllis outdoors in a pot all summer, (hoping it might re-bloom for you this year), now is the time to give some tough love. You need to stop watering it, and let the leaves yellow and die. Cut off the leaves and keep it in a cool dark place for six weeks. It needs that dormant time if it is to re-bloom.
I usually take my amaryllis out of its pot, shake off any soil, and put it in a brown paper bag. Then I store it in my basement, which is between 45 and 55 degrees at this time of year, which is perfect. After 6 weeks I re-pot it and bring it up into the warmth of the house, but keep it out of direct sunshine for a while. Date the bag so you will know when to bring it into the light.
If you want to be sure of having a blooming amaryllis for the holiday season, go buy one now. They generally come with all you need: pot, potting soil, instructions. Don’t overwater it as the bulbs can rot. And this advice: bigger, more expensive bulbs are worth the money. The cheap ones you can get in a Big Box store will bloom, but you will probably just get one bloom stem, not two, and the blossoms will generally not be nearly as dramatic, nor be as numerous. I’ve learned the hard way.
Winter is breathing down our necks. I’m using the woodstove almost every day. And although I get a few things from my garden to put in a vase, I like to visit my local florist and buy some real flowers, too. If you’re on a limited budget, ask your florist for flowers that will last well in a vase. We gardeners all need flowers- even winter!
Henry is a garden consultant, coach, and a UNH Master Gardener. His web site is www.Gardening-guy.com.
What I Learned Last Summer
Posted on Wednesday, October 28, 2015 · Leave a Comment
As I calculate it, I’ve been gardening for 66 years – or at least hanging out in gardens. I have memories of being in the garden with my grandfather, John Lenat, when I was three. Technically I was “helping” Grampy, though my role was probably limited to things like tossing weeds into his wheelbarrow if the weeds missed the wheelbarrow when he threw them. Still, I’ve spent a lot of time in the garden since then. And each year I still learn plenty in the garden. Let’s look at what I learned this year.
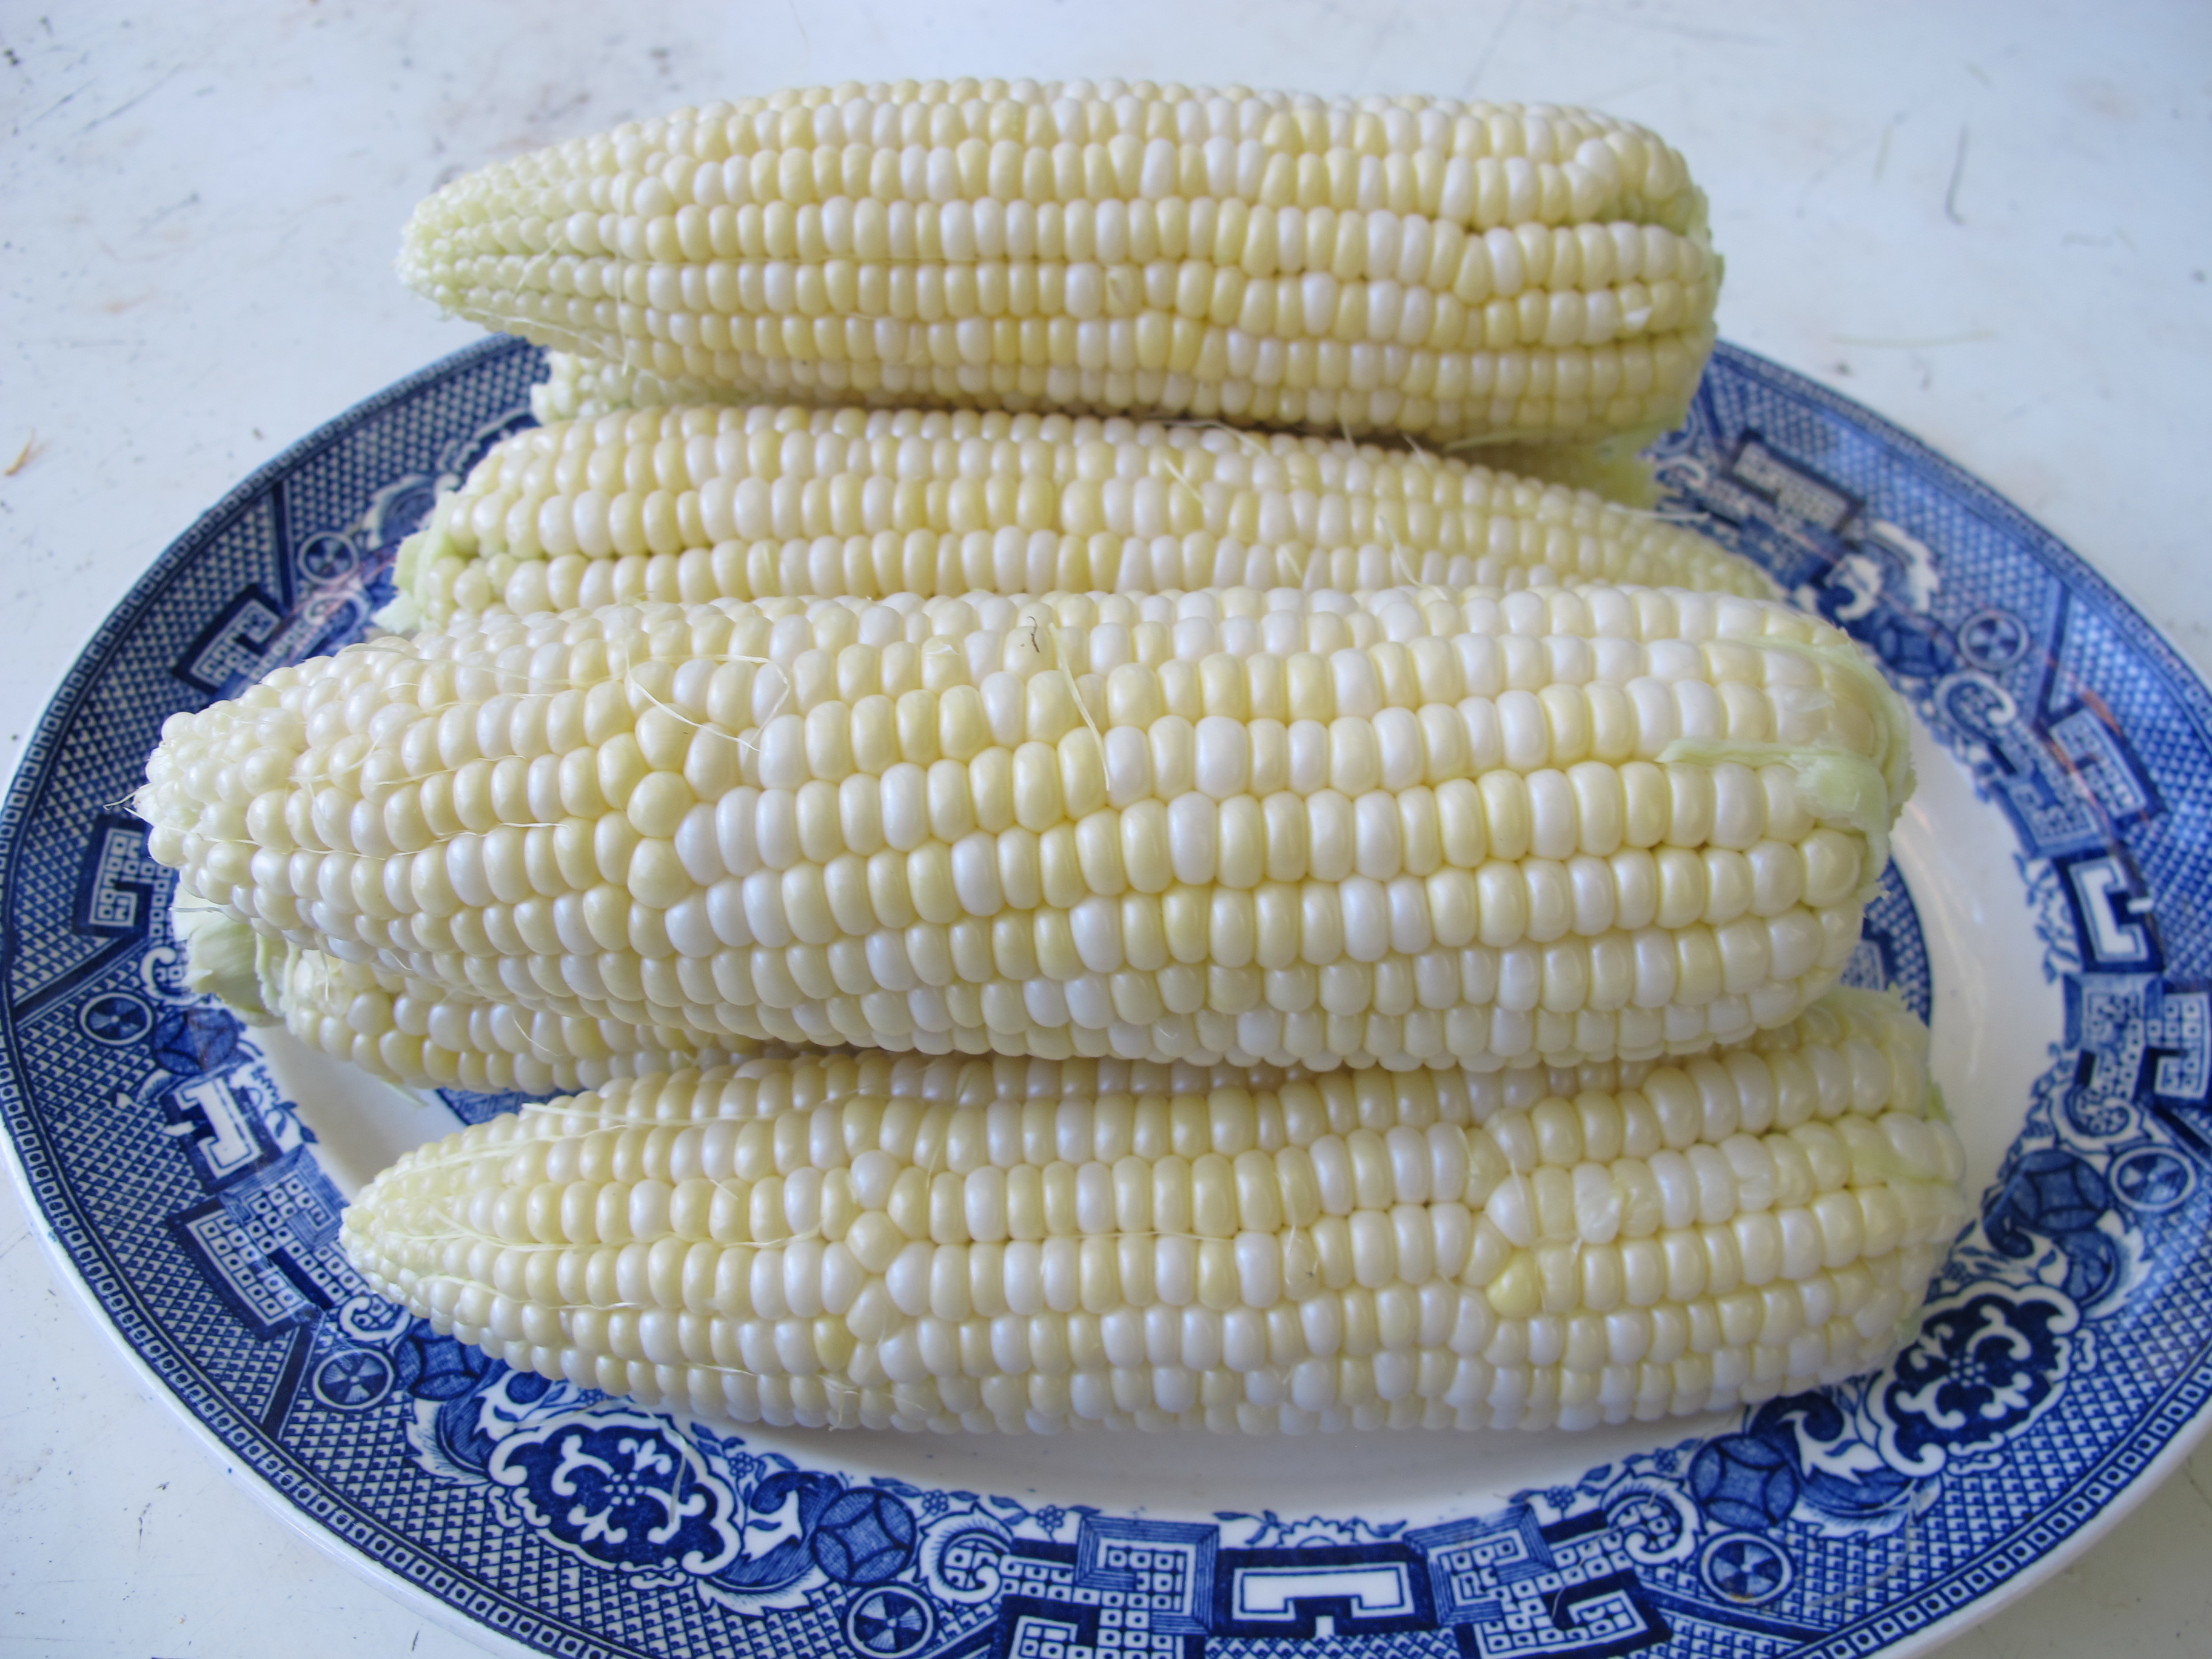
I haven’t grown sweet corn often, but these last two years I’ve had the use of a farmer’s field to grow corn, potatoes, watermelons, pumpkins and more. It’s been great fun to have pretty much unlimited space for growing anything I want – and enough space to grow food to give away. So I grew sweet corn.

Organic Corn from my Garden
Farmers say corn is a “heavy feeder” and they give it plenty of nitrogen, one of the three nutrients found in chemical fertilizers. Nitrogen drives green growth and makes plants get big, fast. Inadvertently I did an experiment with my corn: half got supplemental nitrogen, half did not. It wasn’t a planned experiment: I had some bagged organic fertilizer, one called Pro-Gro, and gave it half my corn. Then I ran out of fertilizer and said to myself, “This is good rich soil, I’m not going to go back home (6 miles from the field) to get more fertilizer. It’ll be fine.”
The difference was dramatic: the corn that got fertilizer was big and produced nice corn. The other? Scrawny with small ears barely worth picking. Even those dang raccoons ignored it, mostly.

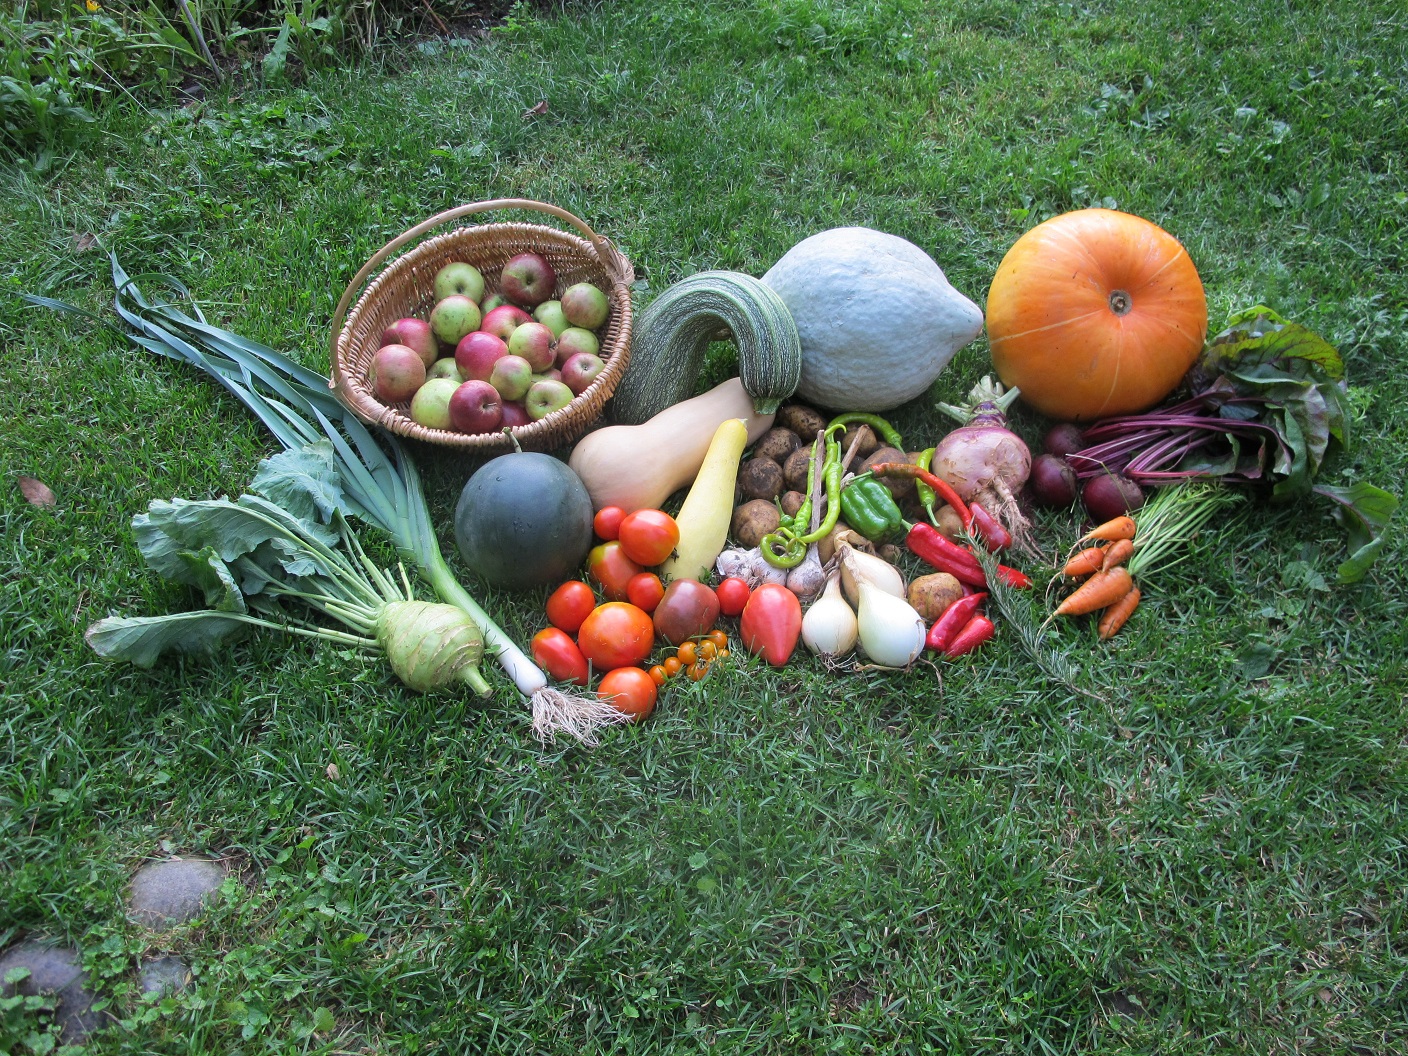
This year’s harvest, including watermelon
I had not grown watermelon in 30 years, as I had decided that I live too north to make it worthwhile. But our local farmstand grows nice small watermelons, and since I had the space, I decided to give some a try. I bought a 4-pack of plants in May, planted them in early June, and got a couple of watermelons from each plant.
Here’s what I learned: watermelons don’t take up so much space, or at least not the mini-melons. My melon sent out two vines each, and I directed them in opposite directions, running down the row. They grew up to 20 feet, but the leaves were relatively small, and they just went by other plants in the row without troubling them. That meant that I found melons in with the summer squash, but I didn’t mind.
Deciding when to pick the watermelons was, at first, challenging. The variety I grew (probably one called ‘Sugar Baby’) produced nice 6- to and 8-inch watermelons. I was told by a local farmer that ripe watermelons should sound hollow when tapped. The first one I picked was pink inside, not red, and clearly needed more time on the vine. We ate it anyway. But I learned to be patient. Watermelons don’t go mushy if you don’t pick them, or get tough and bitter. They just get sweeter, and wait patiently for you. The rest were all wonderful, and I shall grow them again.
A friend visited Monticello last year, and bought me some seeds, including sesame seeds. I planted some indoors last spring, and planted them in the ground in early June. I remember from my Peace Corps days in West Africa that sesame was a big plant, so I left plenty of space for these. I didn’t need to. Mine got no taller than 2 feet tall, and each plant produced perhaps 50 small seed pods. If you want a supply of sesame seeds, you need lots of plants. I won’t bother to do it again.
This past winter I read that tomatoes produce better if you grow them without added fertilizer. In the past I’ve always added both compost and bagged organic fertilizer in each planting hole. This year I did not add fertilizer and, as predicted, did not get those 6-foot tall plants I am used to. I got smaller plants, but they produced smaller loads of tomatoes, too. Next year I will use fertilizer again – but maybe less than the handful I usually toss in the planting hole.

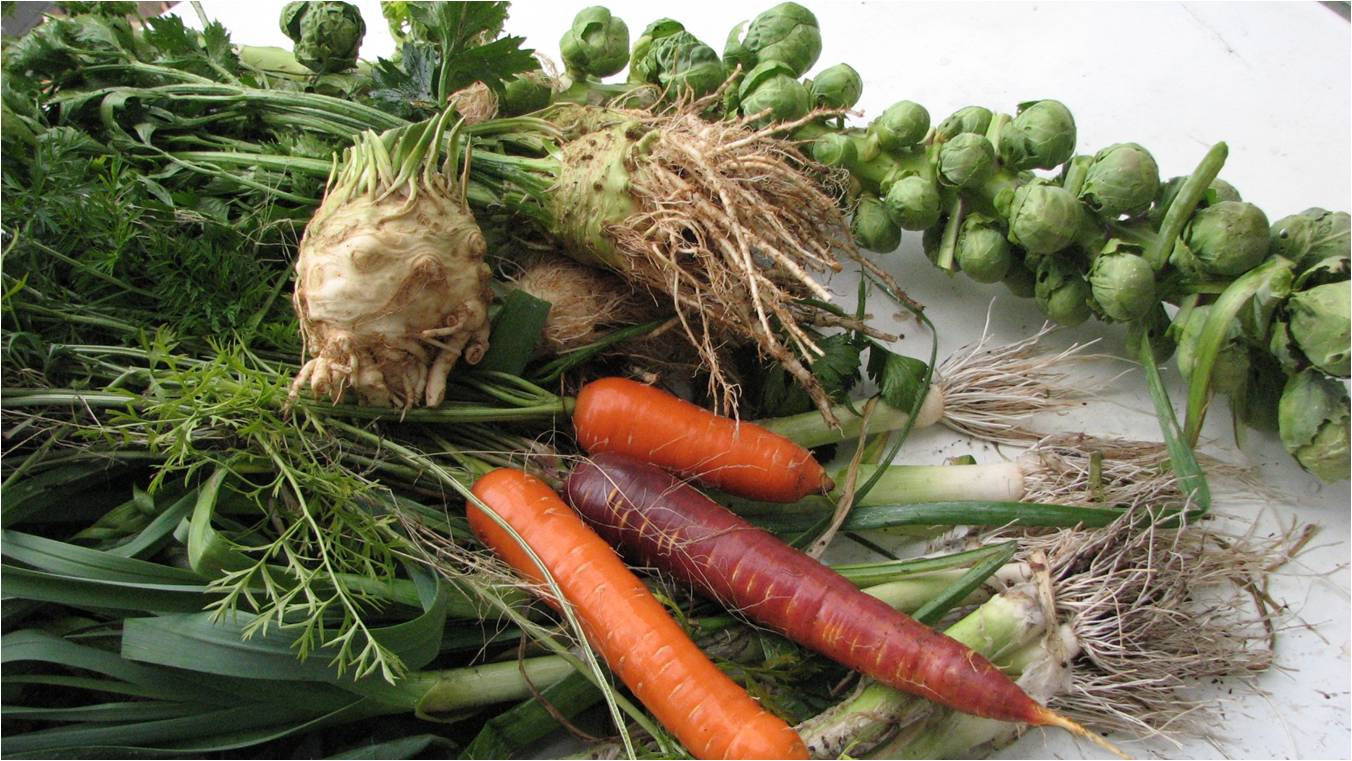
Celeriac with carrots and Brussels sprouts
I don’t normally grow celery. It tends to be tough, stringy, and attract slugs. Instead I grow celery root which is also called celeriac. Celeriac is a related plant that produces a big bulb-like root that tastes like celery when grated into soups and stews. I start it by seed in March, and grow it in full sun in soil that does not dry out.
This year I forgot to plant any seeds, so bought two 6-packs of started plants. But one of the 6-packs was celery, not celeriac. I didn’t notice the difference until mid-summer, as the leaves are similar. The celery was better than I had remembered: not the big stalks one finds at the grocery store, but reasonably sized and not too stringy. And the slugs? They ate some, but were not awful. What did I learn from this? Always start your own seeds if you want to be sure to get what you want.
Every year is different, and every year I learn from my mistakes and experiments. Maybe if I reach 100 years old I’ll know it all. I hope not!
Henry is a UNH Master Gardener living in Cornish Flat, NH. Reach him at henry.homeyer@comcast.net. His website is www.Gardening-Guy.com.
On Traveling and Gardening
Posted on Monday, October 19, 2015 · Leave a Comment
Being a gardener enhances my enjoyment of almost anything I do – including traveling. I recently went to France to hike a section of the Chemin de Saint Jacques de Compostelle. This is an ancient pilgrim’s trail through France and Spain (where it is called the Camino); it’s a thousand miles long and people have been walking it for over a thousand years.

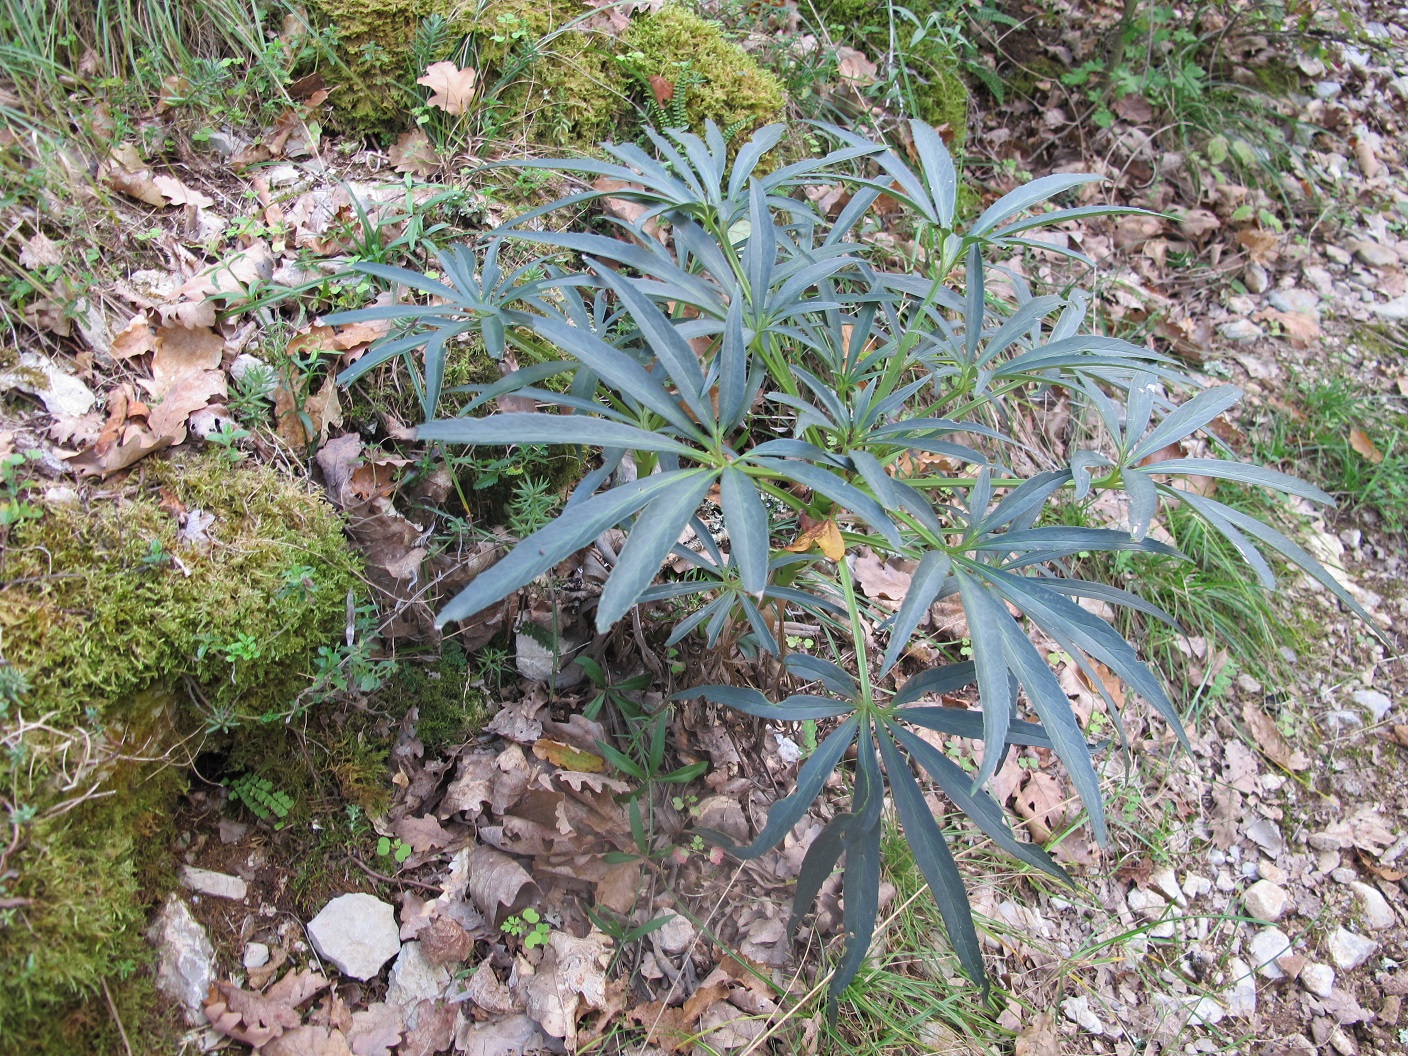
Stinking Hellebore
Part of my joy in this trip was seeing what was growing as we walked along, particularly plants we grow as perennials here in New England but grow there as weeds or wildflowers. I also enjoyed seeing species of plants that are in the same genus (a scientific grouping of closely related plants) that are different species, but similar to ours. And seeing how things grow there informs me about what specific plants need.
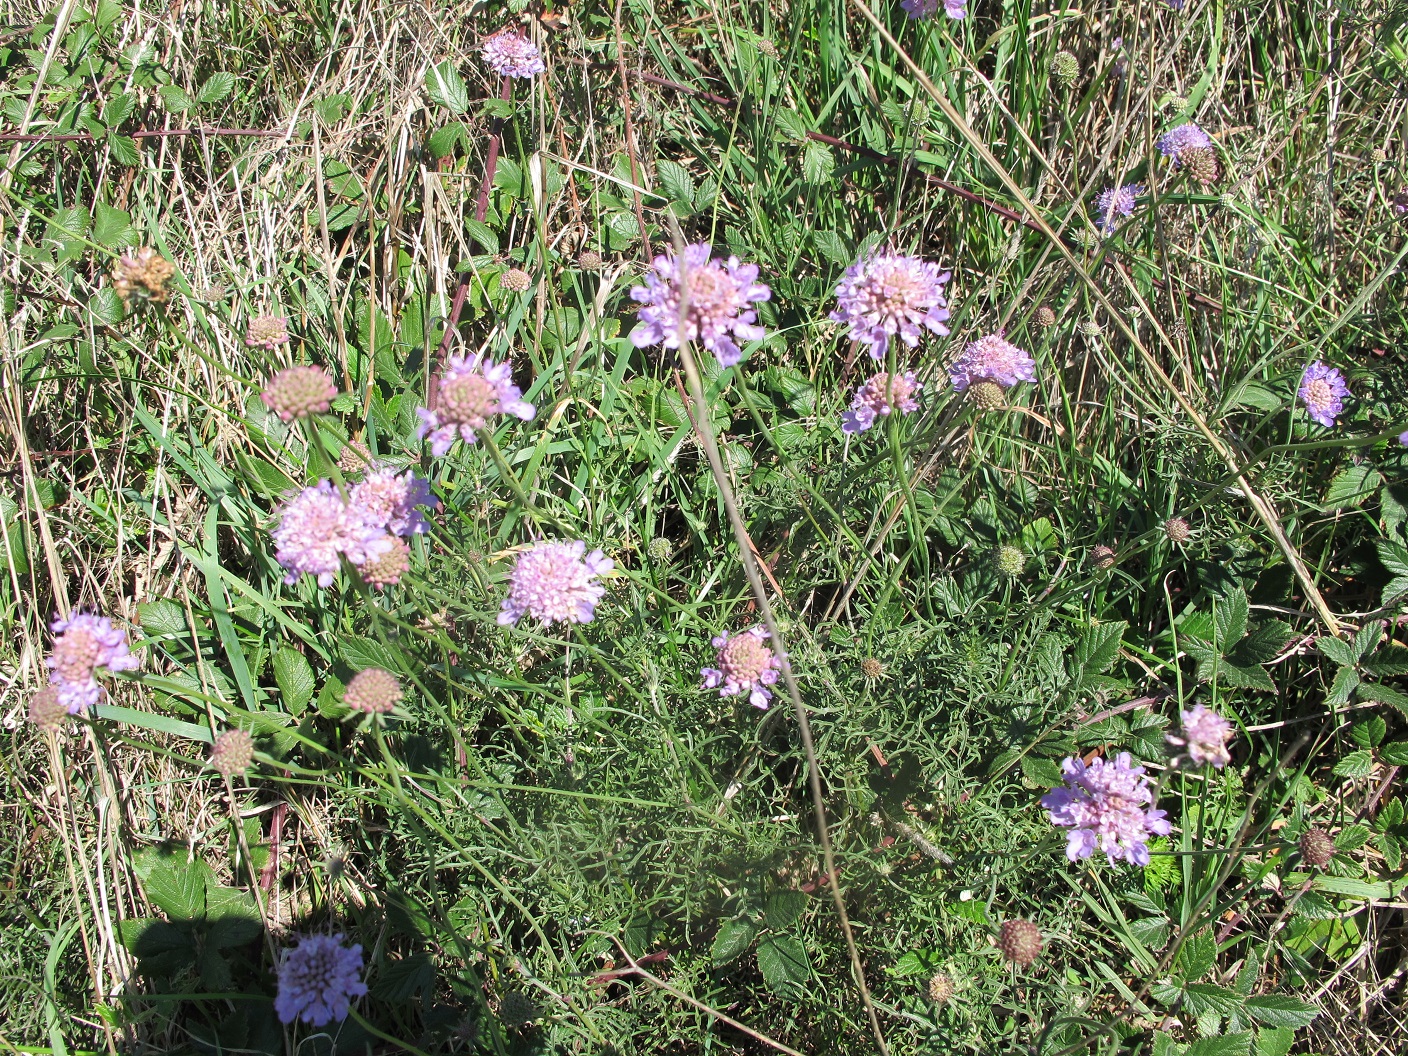
Everywhere we walked we saw the light purple or heather-blue flowers of pincushion flower (Scabiosa spp.). It grew in fields, competing with grasses, and along roadsides. The soil in the part of France where we hiked was full of limestone rock, so it must be somewhat alkaline. I’ve grown this perennial, but it has never thrived for me, dying out after a year or two. I think if I plant it again, I will add some limestone to the soil. A cup of limestone worked into the soil around a trio of plants should help.
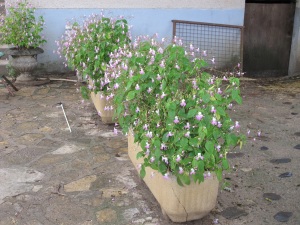
Pink jewelweed
Jewelweed or touch-me-not (Impatiens capensis) is a tall weed that thrives in shade and produces seed pods that, when ripe, can propel seeds several feet when touched. Along my hike I saw a relative, probably Impatiens glandulifera, that not only appeared along the trail but also in gardens. This one is shorter than ours, two feet tall or less, and has nice pinkish flowers. Weed or garden plant? I saw it in planters, so I guess it is considered a garden plant there.
Speaking of weeds, I saw a little purple loosestrife in France, but never in the huge swaths have I seen it wetlands here. I saw a few plants alongside a disturbed area by a man-made lake. Everything I have read about this invasive here has told me that in Europe, where purple loosestrife came from, there are many natural insect predators to keep it under control; here are there are no natural predators. The plants I did see were much smaller than what I have seen here.
I saw large swaths of a bright yellow crocus, a large one that seemed to naturalize and spread nicely. I asked a local about it, he could only tell me that it was a type of crocus, but no species or cultivar name. I’ve grown fall crocus here, a beautiful purple-blue one that is the species that produces saffron (Crocus sativus). Unfortunately, it takes 7,000 blossoms to produce 3 ounces of saffron and mine, instead of naturalizing, have tended to disappear. Not sure if the squirrels are into saffron, or if the conditions where I planted them are not quite right.
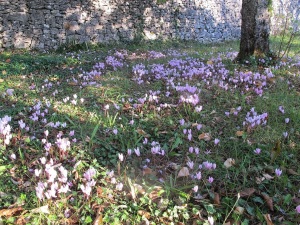
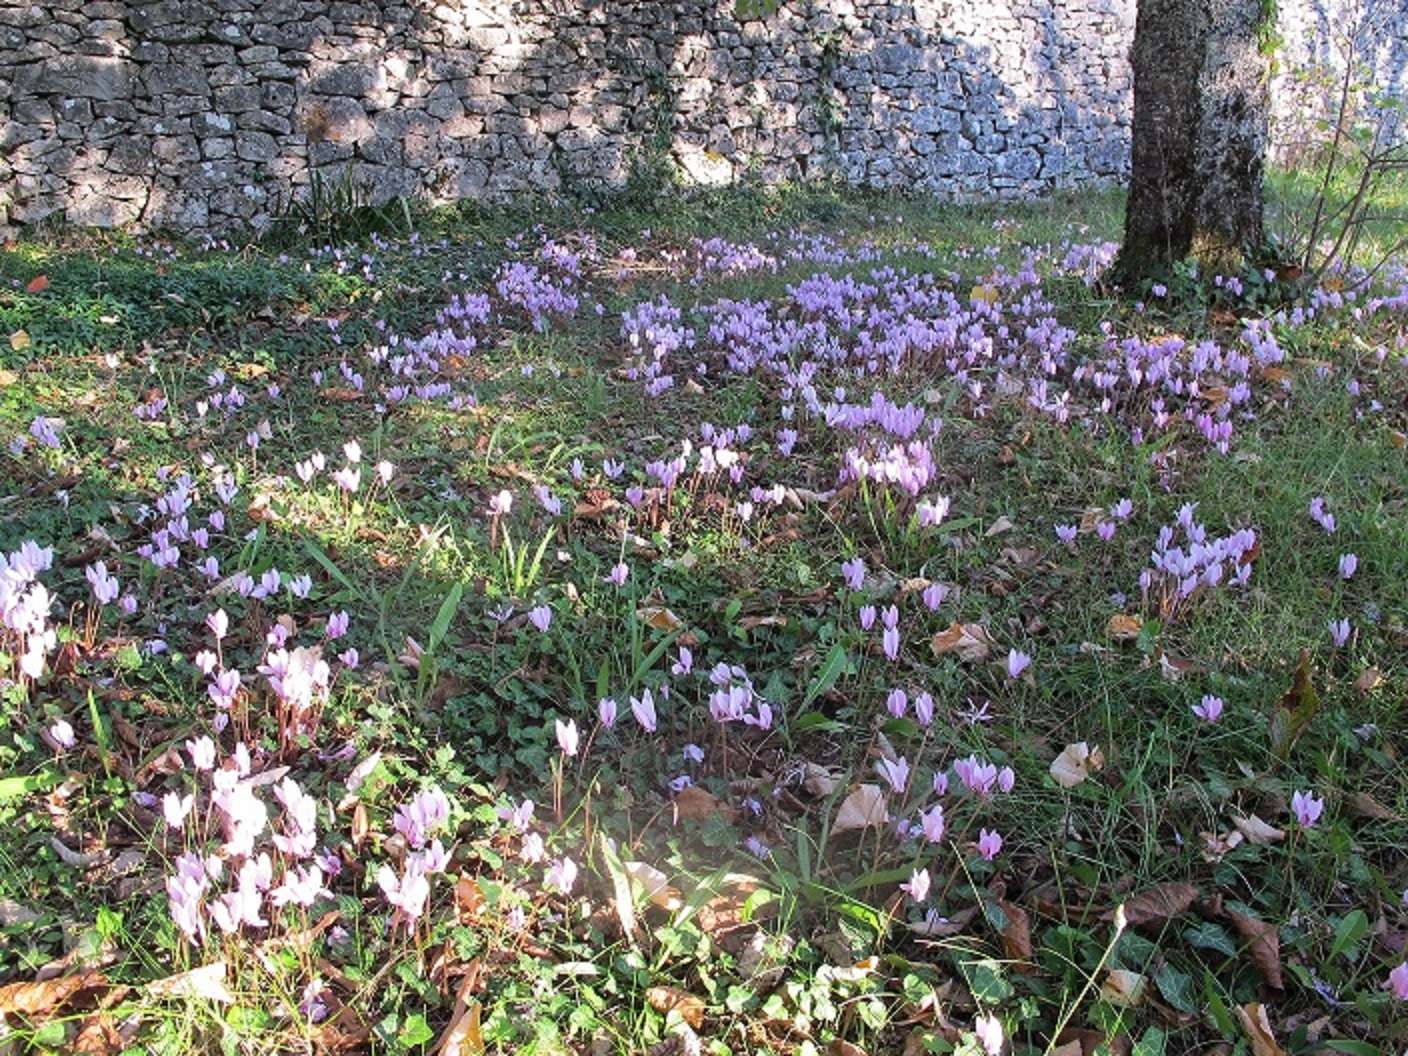
Cyclamen
Cyclamen is often sold as a very satisfactory houseplant here, but can also be grown as a fall-blooming outdoor plant. In France I saw huge patches of it blooming, mainly in shady places near homes, which made me think it was planted but I did see some growing in the wild, too. The variety I have grown is a species called Cyclamen neapolitanum. It has survived over the years, but rarely blooms for me, or if it does, it may escape my notice – it blooms just when my maples drop their leaves.
A plant that delighted and surprised me along the trail was stinking hellebore” (Helleborus foetidus). Hellebores are among my favorite flowers in early spring, though of a different species than the French one I saw – I grow lots of the kind called Lenten rose (Helleborus orientalis). The Lenten rose is hardy to zone 4 and has been hybridized in recent years to produce blossoms ranging from deep purple to peach and pink. It grows in shade or partial shade and has glossy evergreen leaves. The stinking hellebore has greenish flowers that are malodorous, hence the name. It is hardy here to zone 6, though I have grown it successfully – though I rarely get any flowers.

Pincushion flower
Hawthorns (Crataegus spp.) are very common France, both in hedgerows and in the wild. I have a green hawthorn (Crataegus viridis), a species commonly used as a street tree for its toughness, medium size, and red berries in winter. Mine is a variety called ‘Winter King’ which is commonly sold. There I saw numerous English Hawthorn (Crataegus laevigata). Interestingly, most had no berries, even though it was the right season for them. Birds don’t seem to like the berries of ‘Winter King”, but I suppose the English hawthorn berries might be appealing to French birds. Or was it revenge on the English for the 100 Years War?
There were so many other interesting plants growing in France I can’t describe them all. I saw purple kale grown decoratively, and sage grown in quantity for the color of its leaves. Fall anemones were common in gardens, and of course the French love their roses. And being on vacation, I always took time to smell the roses. So when you go on vacation, I hope you’ll take note of the plants and e-mail me if you see something wonderful.
Henry can be reached by e-mail at henry.homeyer@comcast.net or at P.O. Box 364, Cornish Flat, NH 03746. Please include a self-addressed stamped envelope if asking a question by regular mail.
Pruning Trees and Shrubs
Posted on Monday, October 12, 2015 · Leave a Comment
By now you may have your garden put to bed, raked the leaves and planted spring bulbs. I haven’t, but don’t gloat if you have – there is still work to do. This is the time to prune hardwood trees and shrubs (though not evergreens, which should have been pruned back in July). Take a walk around your property and look for scruffy shrubs or trees with deadwood or crossing branches. Trees are healthier and better looking if pruned regularly, meaning at least once a year.
To me, pruning is a joy. I can’t draw a picture, but I can sculpt a tree, making a messy, un-made bed of a tree into something beautiful. If you haven’t dared to prune, give it a try. Even if you make an “oops!” cut, the tree will recover. Start slowly, never taking off more than 25% of the foliage of a tree or shrub in any given year.
Let’s start with how to prune a shrub. Walk around it 3 times, observing its growth. Is it too tall? Too wide? Is the interior of the shrub cluttered with dozens of small branches? Are there dead branches?
It is easiest to prune once the leaves have fallen so one can see the structure of the plant. My late sister, Ruth Anne, loved to start by sitting down or sprawling out underneath a shrub and looking up through it to see where clutter should be removed. Sometimes I do that too, depending on the species.
Begin by removing any dead branches. You can do that any time of the year. If the leaves have dropped and you are not certain if the branch is dead, rub it with your fingernail. If you see green when you scratch the surface, it is alive. Soon you will also notice that the bark on dead branches is a different color, and the bark is often flakey.
Next, look for branches that are rubbing against others, or branches that shoot through the middle of the shrub. Branches should go up or out, not toward the middle. Remove any that do not follow this rule.
Branch collar to right of magic marker stripe
It is important to cut branches so that you do not leave any stubs. Cut back a branch to where it originates, either on a bigger branch or to the trunk. Look for the branch “collar”. This is at the point of origin of a branch and is usually swollen and often wrinkled. Leave the branch collar as that is where the tree will heal itself. If you leave a stub past the branch collar, the stub will have to rot off – a long process – before it can heal. That could allow insects or diseases to damage the tree.
Unlike most trees, many shrubs send up multiple stems from the ground. Forsythia, mock orange and many lilacs do this, for example. If you never cut out some stems, the plant will get broader and denser in habit – and lose its graceful appearance. In general, cutting out old stems and encouraging younger growth will invigorate a shrub.
In my opinion, most trees and shrubs look best if their “legs” are exposed. That means the lower part of the stems shouldn’t have side branches and there shouldn’t be uninvited stems to shoot up from the base. Some apple trees are notorious for sending up unwanted shoots from the roots. Cut them off at the ground for a better looking tree.
Speaking of apple trees, most people think they should be pruned in March. In fact, you can prune them now, too. March is a time when farmers and orchardists had time on their hands. But you do no harm by pruning now. Many apples have lots of water sprouts, those pencil-thick stems that shoot straight up. Every year apple tree produce more, and every year I cut them off.
Deer are bad pruners. They go around trees and shrubs nibbling at twigs. Good pruners take larger branches, opening up a tree or shrub to sunlight and better air circulation with a single cut instead of 50 small ones. Taking a big cut is a bit nerve wracking at first, I suppose, but with practice it gets easier. Many trees and shrubs respond to a cut by branching and growing two or more new branches. Make 50 small cuts and you can have 100 new branches. Make a few big cuts and you get just a few new branches.
To prune well and efficiently you need good tools. Don’t go to a big box store and buy the cheapest pruners you can. Go to your garden center and buy a good pair of by-pass pruners. Felco is the most common brand of the good pruners, though I prefer pruner’s made by Bahco. Mine, the PX type, comes in 3 sizes, and left and right handed versions. I got mine from OESCO Inc. (www.oescoinc.com or 800-634-5557) in Conway, MA. I use them daily, and they seem to last forever – with only an occasional sharpening.
You’ll need a saw and some loppers, too. Don’t get a bow saw, get a nice folding saw with a tri-cut blade. And get geared loppers if you can. Fiskars makes nice ones.
So get to work. Most of us have plenty of pruning to do, and a good fall day is the perfect time to do it.
Henry’s website is www.Gardening-Guy.com. He is on vacation this week and not taking questions.
Planting Bulbs
Posted on Monday, October 5, 2015 · Leave a Comment
After a long winter like this past one, I am always grateful for my spring bulbs. Many of them pop up and bloom on schedule, no matter how cold and snowy the winter was. I’ve been planting bulbs around my property since the early 1970’s, and some of them are still flowering each spring. Others run out of energy and disappear with time. If you haven’t done so yet, now is the time to get some and plant them.
First, let’s look at the basics: what makes a bulb plant survive and flourish? Decent soil. It must be well drained. Soggy soil rots bulbs. If you have a heavy clay soil, it will stay wet and is not a good place for bulbs unless you add compost to the planting hole to help it drain better. Planting on a hillside helps, too, as water will drain off a hillside.
Bulb flowers take shade better than sun-loving perennials. Growing up we had hundreds of daffodils that bloomed along a woodland path behind the house. The leaves got sunshine and re-charged the bulbs before the trees were fully leafed out. Of course if you have plenty of sunshine, all the better.
Some people have had great luck planting daffodils in a grassy field or lawn. I’ve done that, but find that the bulb foliage is still green and producing food for the bulb when the lawn needs to be cut. If you cut the foliage too early, your bulbs won’t perform as well. I like to plant daffodils in flower beds between big clumps of hostas. They can bloom early, and then their dying foliage is hidden by the hosta leaves.

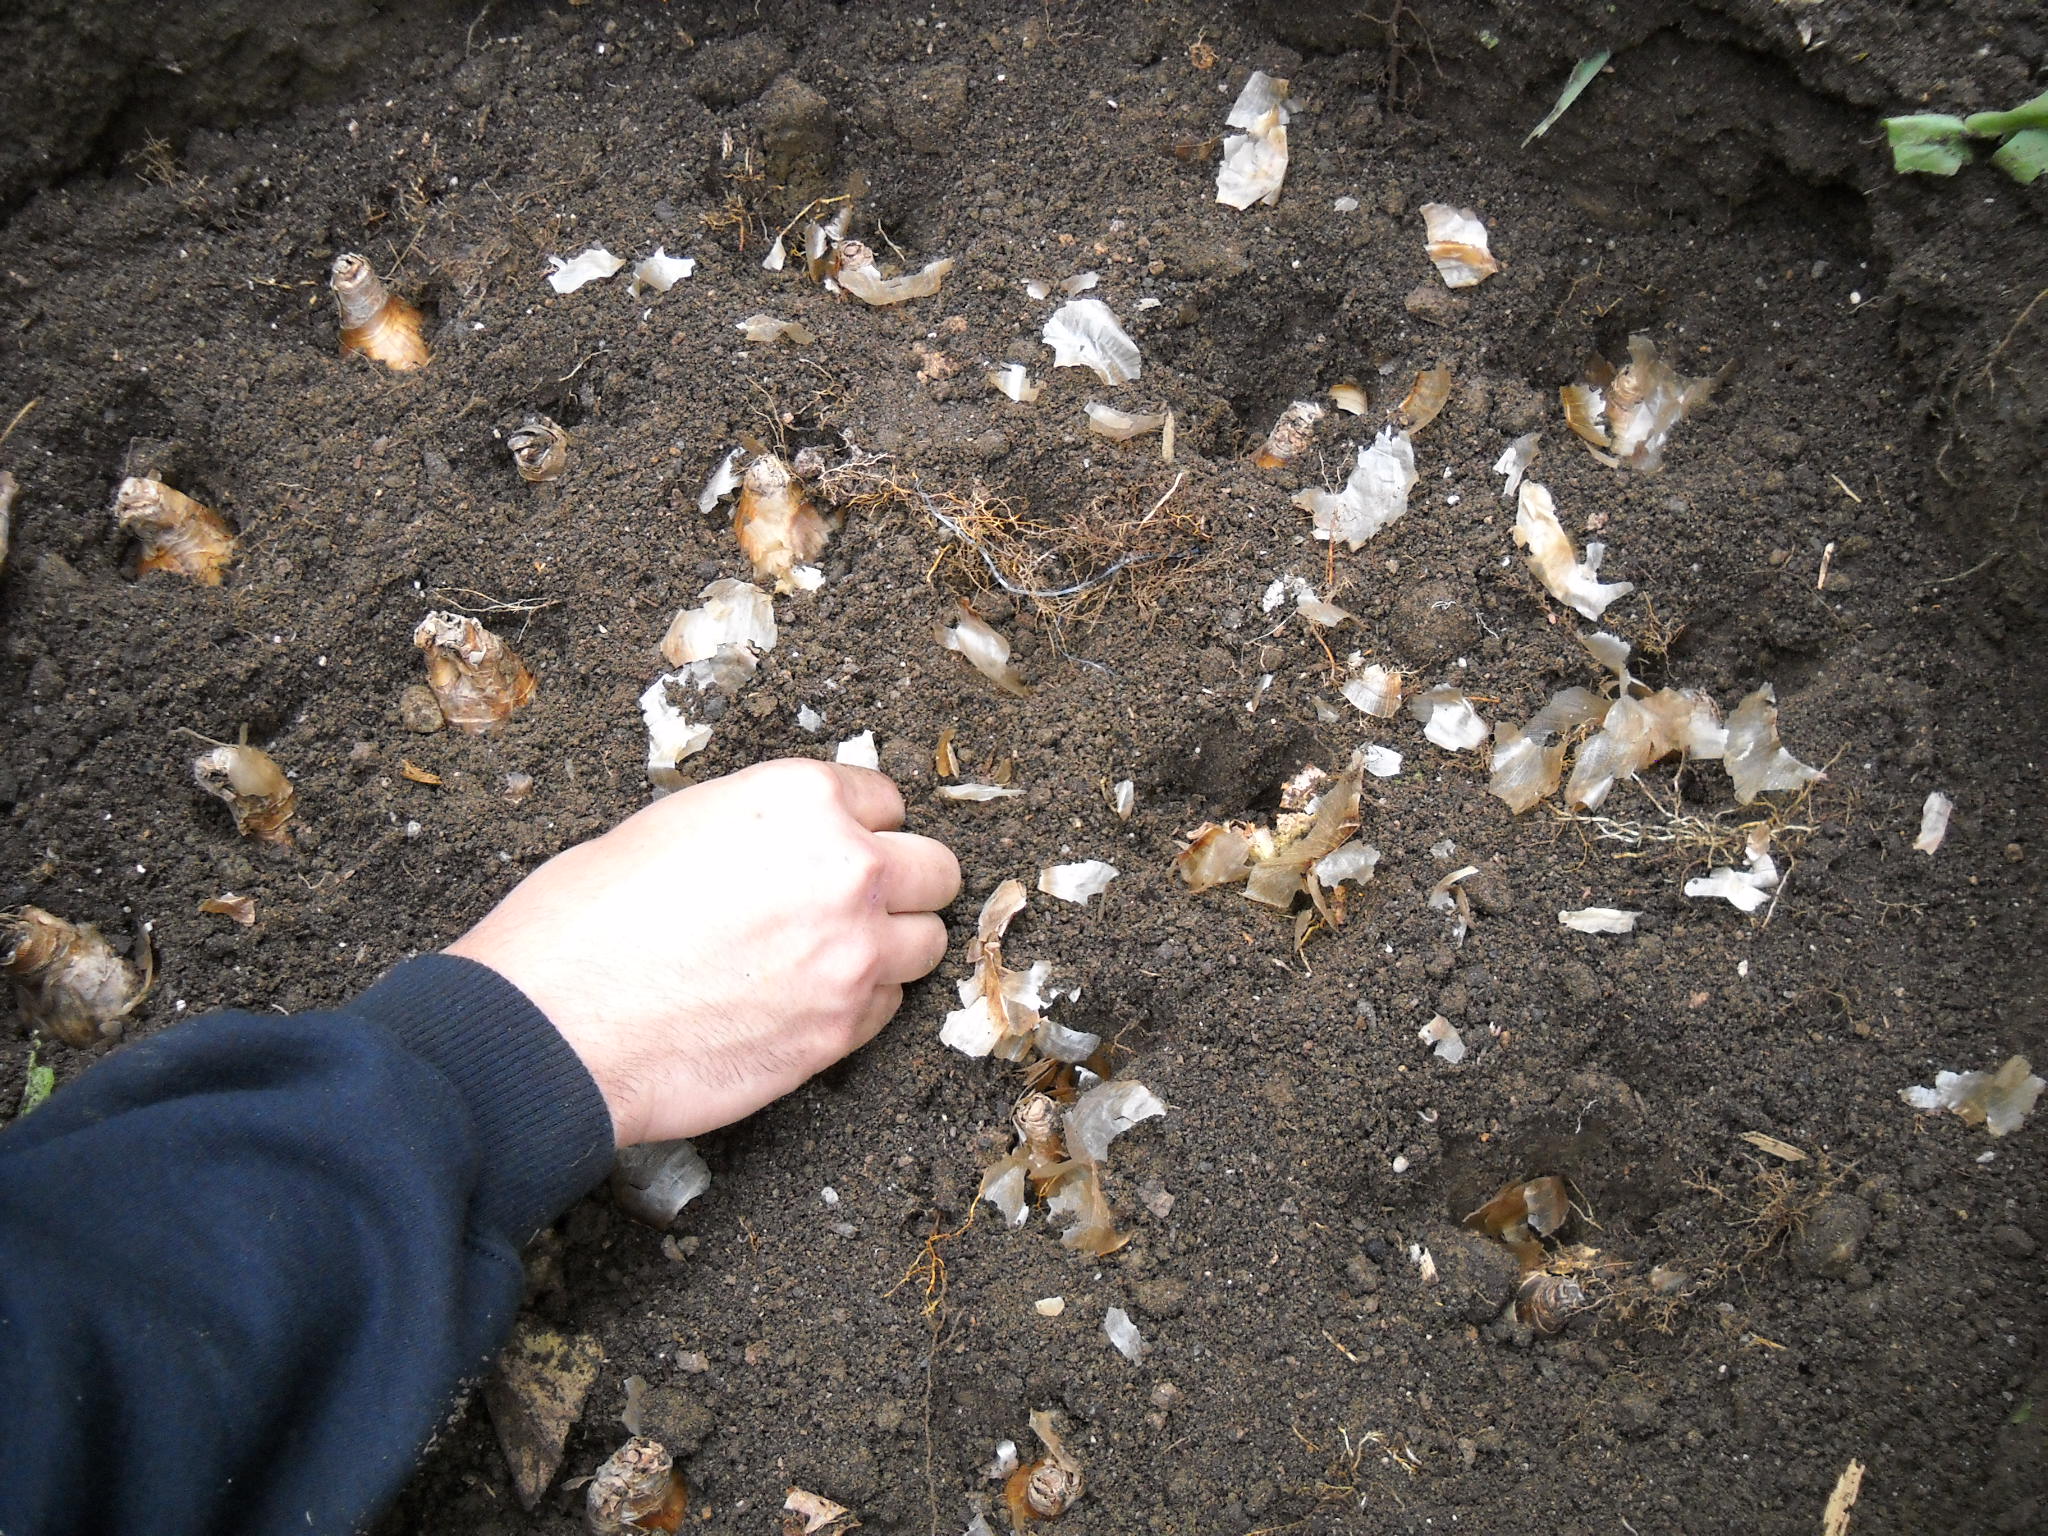
Planting bulbs
Some gardeners dig a little hole for each bulb, but that seems like too much work for me, even if you have one of those tools that are made for digging small round holes. I’d rather use my shovel to dig one oversized hole, one big enough for the 25 bulbs or more. For large bulbs like daffodils or tulips a hole 24 to 36 inches long and 18 to 24 inches wide is fine for 25 bulbs.
For the big bulbs I dig a hole 6 to 8 inches deep. Then I add compost and some organic fertilizer or “bulb booster” fertilizer and stir it into the bottom of the hole. I place the bulbs on the improved soil, pointy end up, and cover with more improved soil.
What about those hungry, bulb-stealing squirrels? They don’t eat daffodils as they are vaguely poisonous. They may dig a few up to see what you planted, but they won’t eat them. “Yech,” they say, if they inadvertently take a bite.
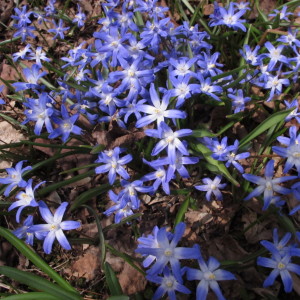
Glory of the snow
When I interviewed the White House gardener in 1999 he said they planted thousands of tulips each year, despite the rampant squirrels. He said they planted the tulips and covered them with soil, then put down a layer of chicken wire, then more soil. Oh, and he said they fed the squirrels all winter with cracked corn. Squirrels that are not hungry are less likely to try to steal your bulbs. Squirrel welfare.
Some people have great luck with tulips coming back, but I consider them annuals. In general, I find that the second year only half the tulips come back to bloom, the third year only half of those come back and so on. But I often plant 100 tulips, all one color for a blast of color in spring. I particularly like the tall ones that bloom a bit later.
‘Maureen’ is one of my favorite tulips. She is a 28 inch tall tulip, a creamy white that blooms in May. ‘Menton’ blooms at the same time and is rose-pink with apricot-pink petal edges and is 26 inches tall. Wow. They make a nice mix. I have already ordered 100 of each! That way I’ll have too many flowers, and can give away big bunches of them when they bloom.
If you consider your tulips annuals, you can plant them in your vegetable garden and pull them after blooming. Then you can plant tomatoes or something else there. And if you have a deer problem, you can easily fence a small plot for 100 tulips with 4 poles and some bird netting. If you want to mix them into your flower gardens, plant them where you’ll plant annual flowers. When the tulips are done blooming, it will be time to plant annuals.
The little bulbs are great early harbingers of spring, particularly snowdrops. Snowdrops are small white globes on 4 inch stems. Mine fight through frozen soil in early March. Some years (when we have deep snow) I shovel snow off the hillside where they appear so they can bloom on schedule. Each year I have more, so now, after decades, I have a thousand or more.
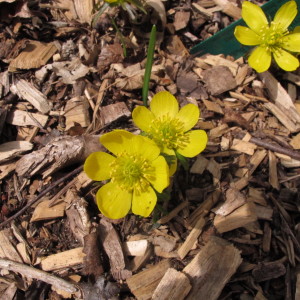
Winter aconite
Other early bloomers include winter aconite (Eranthis hyemalis), a small up-ward looking 6-petaled brilliant yellow flower. Another favorite of mine is glory-of-the-snow (Chionodoxa luciliae). This is a nice blue, with a yellow eye. It blooms shortly after the snowdrops in April.
I can’t praise the spring bulbs enough. I consider them essential for my wellbeing. So order some, or go to your garden center and buy some. You’ll be glad in a few months.
Henry is on vacation this week and will not be answering questions. His website is www.Gardening-Guy.com
Fall Chores
Posted on Monday, September 28, 2015 · Leave a Comment
I love writing this weekly column. I do it 52 weeks of the year, and have been writing it since the fall of 1998 when I wrote my first column about putting the garden to bed. And the nature of gardening is such that I can write a column a little ahead of time so that I can, for example, go hike the Chemin de St Jacque de Compostelle in southwest France, which I am. Lucky me.
Here are some of the tasks I’d be doing at home this week, if I were there. First, I’d be weeding. Yes, weeds like to set their seeds in the ground in the fall for a new start in the spring. They seem to know that we are tired of pulling weeds now. But don’t let them get away from you. Pulling weeds now will save you lots of work next year – both in the vegetable garden and in the flower garden. A single weed might only produce a few hundred weeds – or up to a million for a mature purple loosestrife.
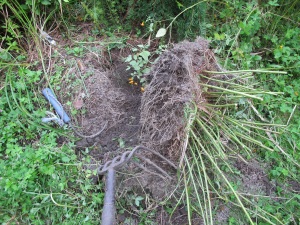
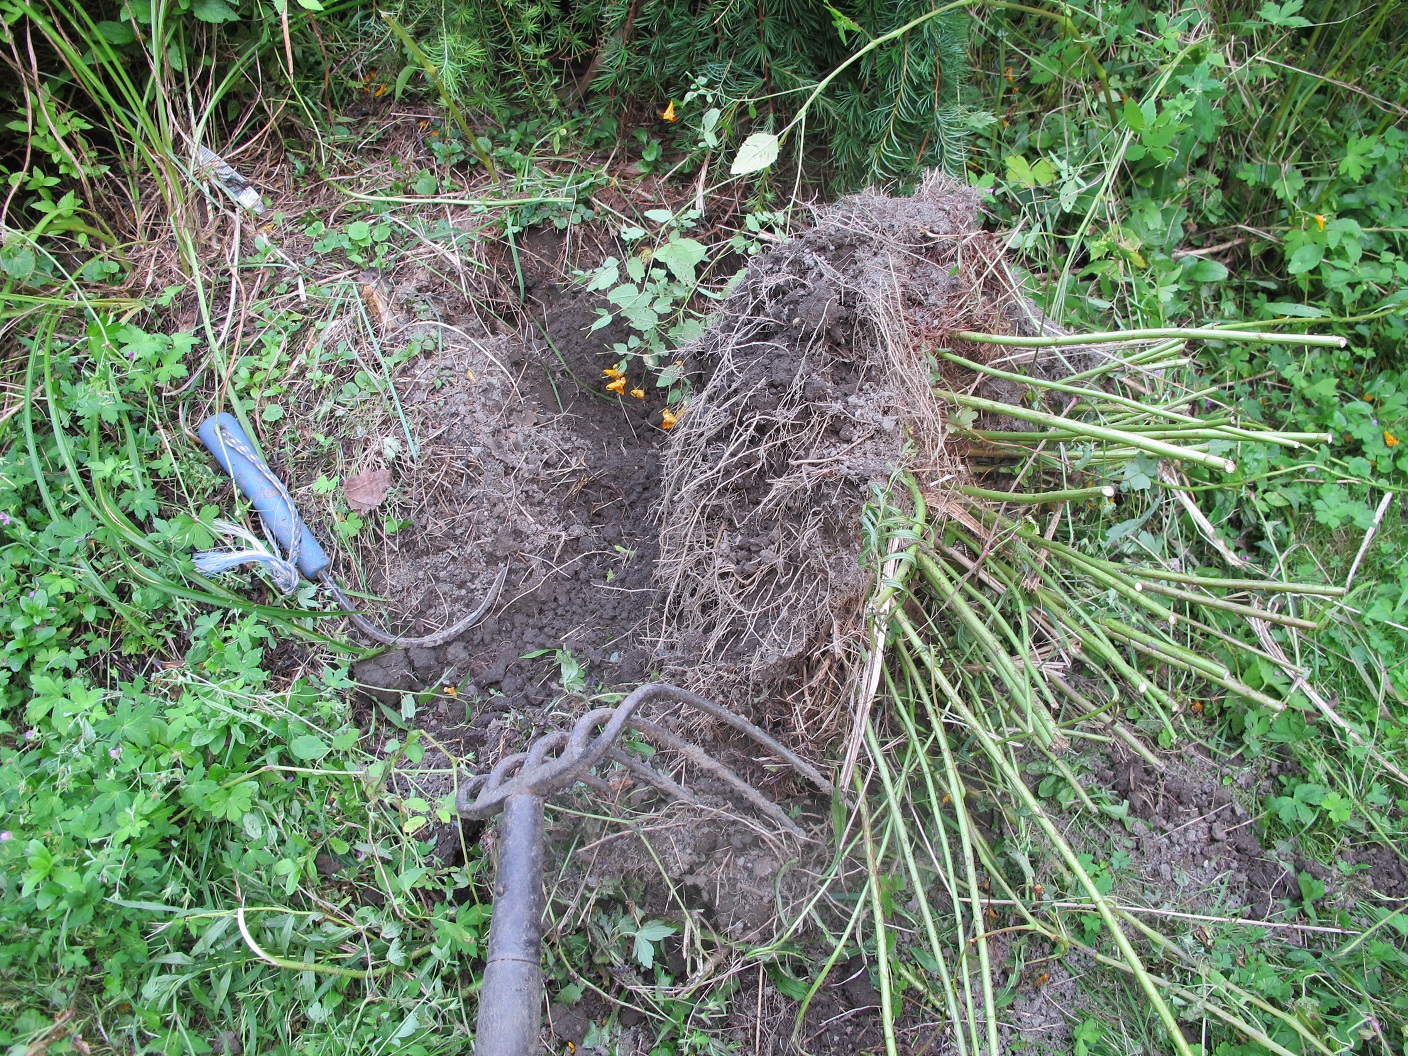
Removing goldenrod
Before I left I did extra weeding. I love goldenrods, and actually planted some short ones last year, and some shade-loving ones. But the big boys, those goldenrods that get to be 6 feet tall, are too big to co-exist with most garden plants, so they had to come out. I had been leaving them in the ground as bees and other pollinators love the pollen. But before I left they had finished blooming and I dug some out before the seeds got distributed.
A big clump of goldenrod is not something that you can easily just pull out – unless you have a backhoe. First I take my pruners and cut back the stems so I am not fighting them or getting poked in the eye. Then I go around the perimeter of the clump with a shovel or drain spade and try to get under the clump. I push the shovel in on angle, then push down on the handle to see it I can get it to lift a little. When I have gone all the way around, I push down hard, and (hopefully) the clump tips over and I can drag it aside. For purple loosestrife, which has a massive root system, it is better to cut off the tops and burn them (or put in the household trash) than to let the seeds be distributed.

Jewel weed takes over August
Before I left I also pulled out a lot of jewel weed (a.k.a. touch-me-not). Jewell weed has seed pods that explode when they are ripe, or if you touch them when they are almost ripe. Spring loaded. It is in the genus Impatiens, the same genus as our beloved shade annual. But this one will grow in the sun or shade. I let mine go to seed in recent years so my grandchildren could have the fun of touching them and seeing them explode. But now the population has exploded, so this year I worked hard to get them before seeds were set. They are an annual weed that is easy to pull.
Each fall I like to weed and prepare the beds in the vegetable garden for planting in the spring. I grow my veggies in wide, mounded beds. I like to loosen the soil in the walkways and then rake the soil into my beds. Then I add a layer of compost on top and stir it in. Finally, and I won’t do this until I return, I cover the beds with leaves and grass clippings collected by the lawnmower.

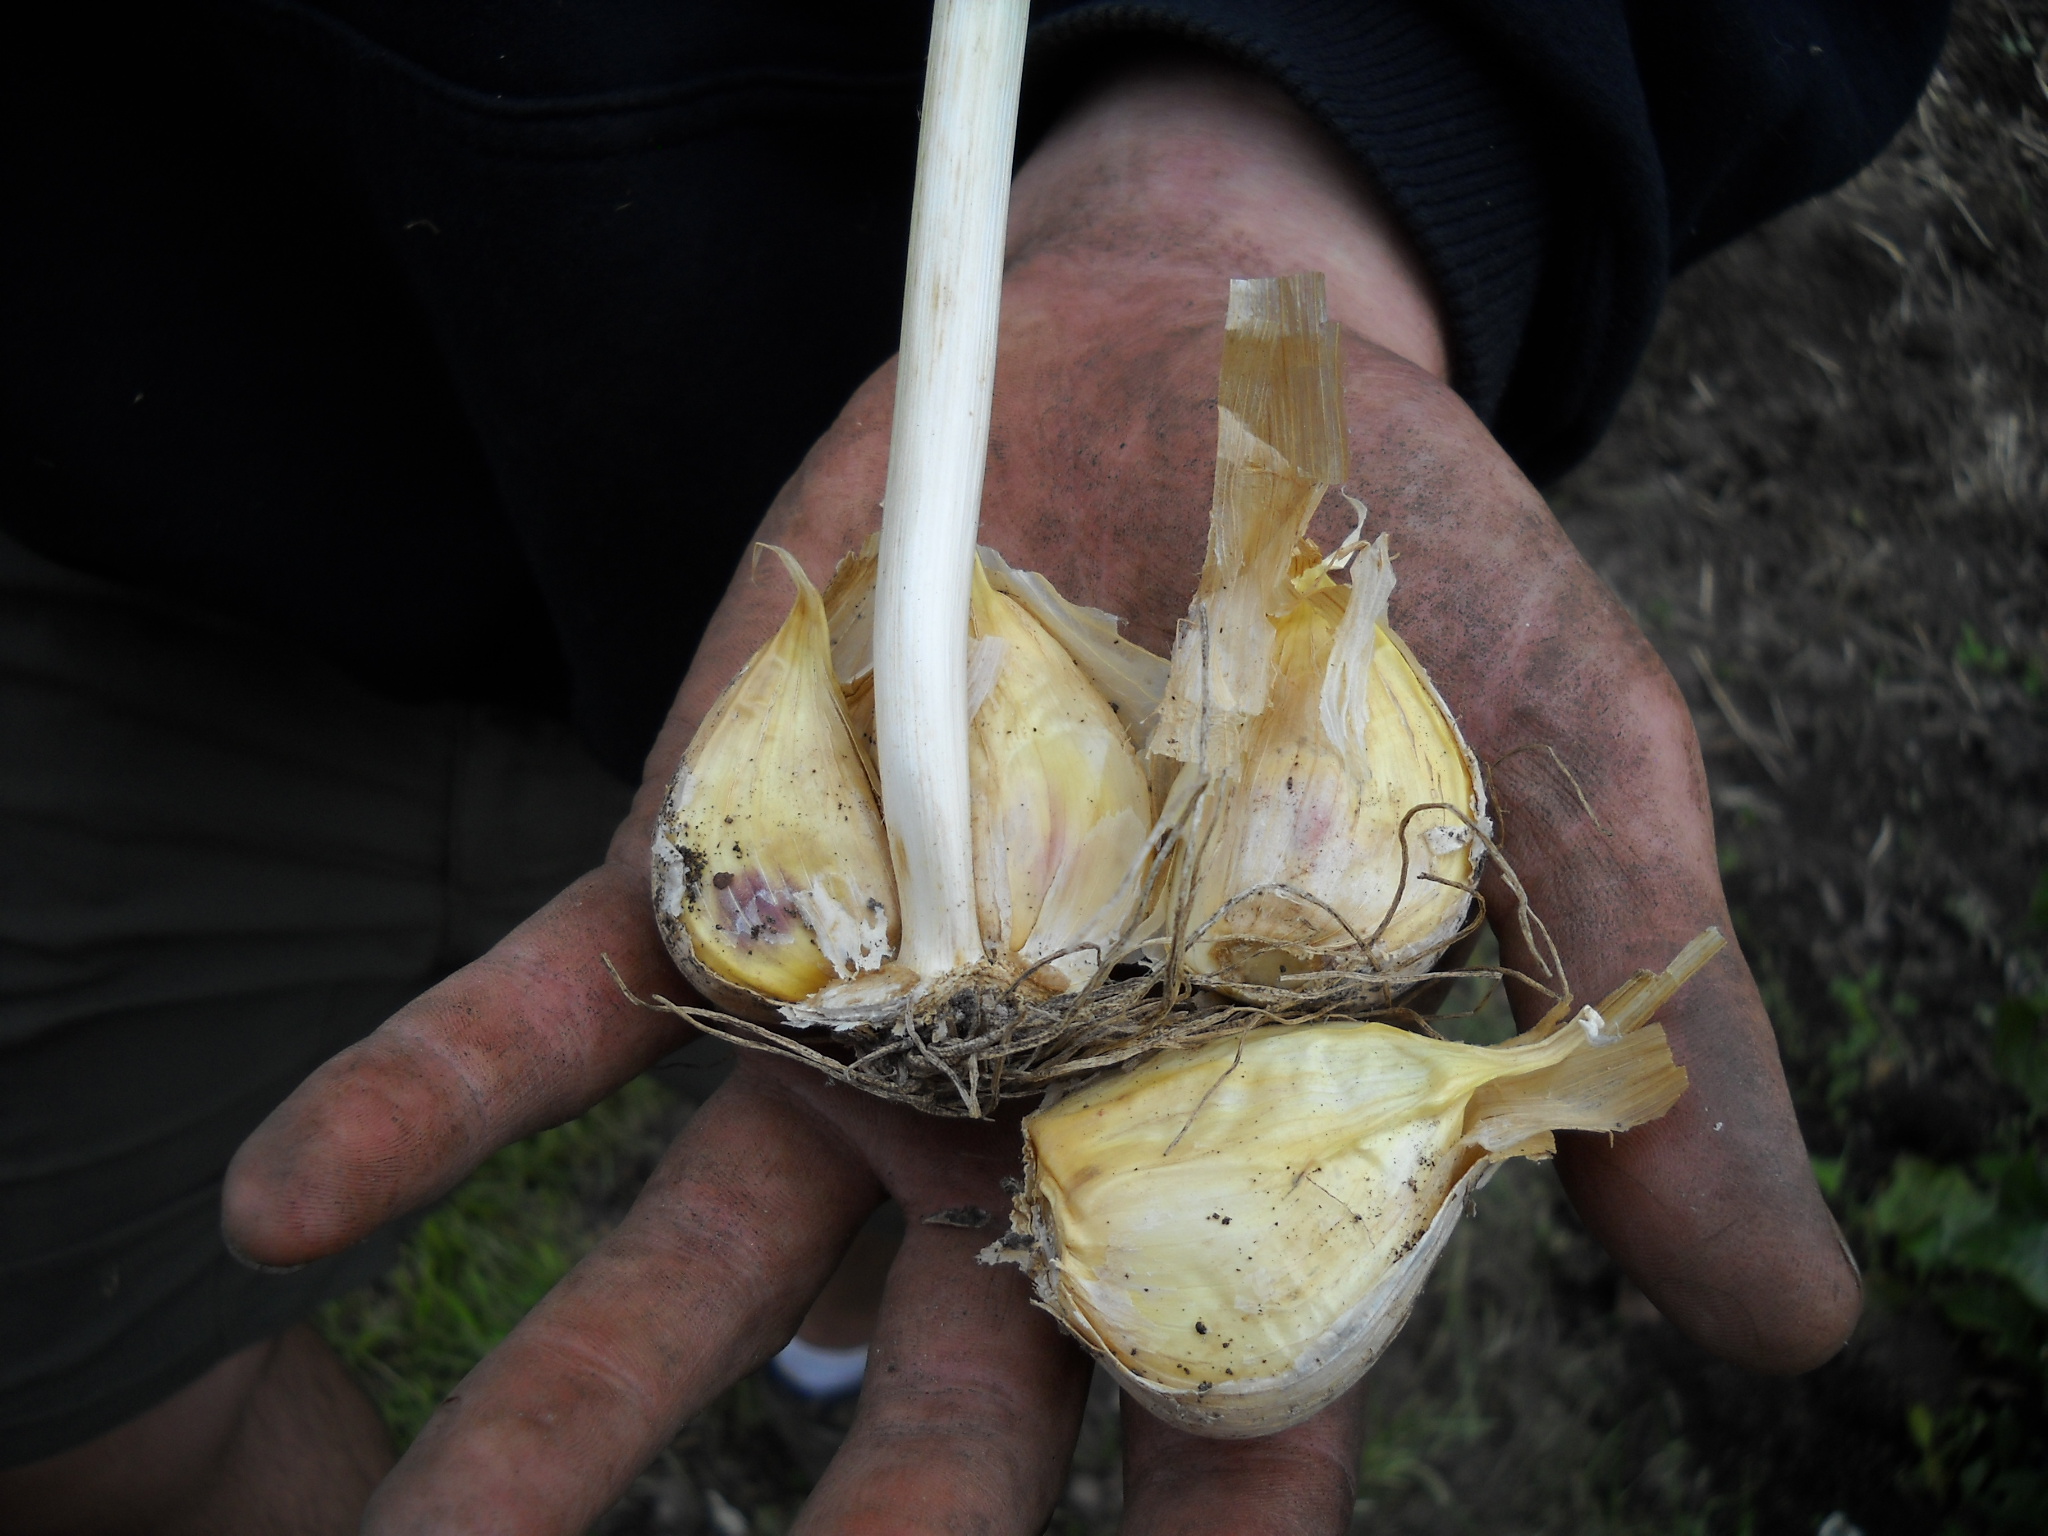
Hardneck Garlic ready for planting
Every October I plant garlic for the next year, and you should, too. Buy seed garlic from your local farmer or get some at the local garden center. Grocery store garlic probably has been chemically treated to keep it from sprouting, so is not good. It is probably not the type we can grow here, which is called hard-neck garlic. Buy it as soon as you can, as many farms run out. I don’t need to buy garlic as I save my biggest and best bulbs of garlic to use as seed garlic.
If you’ve never planted garlic, here is what you do: Prepare a bed and enrich it with plenty of compost. I use my CobraHead weeder, which has a single tine, to make a furrow and then sprinkle in some organic bagged fertilizer, and stir that in. I take a bulb of garlic and separate the cloves – usually 5 to 7 per bulb. The roots are at the fat end, and the pointy end goes up. I plant the cloves about 3 to 4 inches apart and a couple of inches deep. Rows should be about 6 inches apart.
The final, most important thing to do –in terms of saving labor – is to heavily mulch the garlic bed. You can use mulch hay or straw, a layer of the fluffy stuff a foot thick will pack down to 4 inches by the end of winter. Garlic will pop right though that layer, but most weeds will not. And don’t worry if some garlic sprouts before snow flies, it will still re-sprout in the spring.
Last winter I managed to avoid killing my rosemary plant that I had brought in last fall and potted up. So this spring I planted it in the garden, where it has thrived. Now I need to pot it up again. Pot it up in potting soil mixed with compost.
Here’s the trick about bringing in rosemary: Do it now, and let it stay outside in the pot just where it has been all summer. That way you are changing only one variable at a time. If you dig it up and bring it in right away, it not only must get used to life in a pot, but life indoors. In a week or so, bring it inside. . Rosemary should survive temperatures down to 24 or 25 degrees.
And speaking of life indoors, on the next warm day wash all your houseplants with the hose to get off aphids and their eggs. Then let them dry in the sun and bring them in. You’ll have fewer aphids that way.
Henry is on vacation this week and will not be answering questions. His website is www.Gardening-Guy.com
Fermenting Foods
Posted on Monday, September 21, 2015 · Leave a Comment
Many people believe that fermented foods – sauerkraut, yogurt, sourdough bread, for example – are better for you than other foods. For thousands of years people have fermented foods as way to preserve them, and scientists today note that fermenting foods can increase their content of vitamin C, thiamine and niacin, among other nutrients. Fermented vegetables help to promote a healthy gut and introduce beneficial bacteria into our bodies. And fermenting food is another way of preserving it for winter use.
We live in a society that minimizes contact with bacteria. Hand sanitizer is big business. Now probiotics (microorganisms introduced into the body for their beneficial qualities) are being sold and promoted in “live” yogurt and other probiotic preparations. But you can use your garden produce to make easy, tasty fermented foods that do much the same.
I recently met with a passionate food “fermentista”, Leslie Silver of Middletown Springs, Vermont and spent an afternoon making sauerkraut and other fermented foods. It’s easy. Leslie also told me about the 3rd Annual Vermont Fermentation Festival on October 3 at Green Mountain College in Poultney, Vermont. It is sponsored by RAFFL (www.rutlandfarmandfood.org) and organized by her. For $10 you can have a full day of learning!
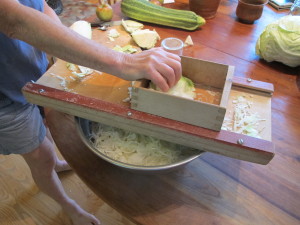
Grating cabbage on a kraut board
Leslie explained that raw cabbage has naturally occurring bacteria that will ferment the sugars in the leaves without any introduction of bacteria on our part (most fresh fruits and vegetables has good bacteria, too). All we have to do is chop or finely slice the cabbage and add a teaspoon of salt for each pound of cabbage. The salt draws out the water and creates a brine. If you knead the salted cabbage like bread dough, soon there will be lots of liquid.
We packed chopped cabbage and other vegetables into wide-mouth quart jars and pressed out the air, allowing brine to cover the mix. Left open at room temperature the cabbage ferments and creates lactic acid and carbon dioxide that bubbles along, showing me that my sauerkraut is “working”. This kind of fermenting is called lacto-fermentation. (The lacto refers to lactic acid, not anything to do with milk).
Eventually the lactic acid brings the pH down to about 4.0, which stops the fermenting – and prevents other, harmful bacteria from affecting the food. Those same bacteria that cure the sauerkraut are beneficial to our gut.
If you want to learn how to make sauerkraut and other fermented veggies, I recommend working with an expert to really get first-hand knowledge of how to do it. We made 4 different recipes in 4 hours including 3 kinds of sauerkraut and a corn relish. All are delicious.
As an author (and a person of a certain age) I like to have a book in hand when learning a new skill. Leslie recommended Fermented Vegetables: Creative Recipes for Fermenting 64 Kinds of Vegetables in Krauts, Kimchis, Brined Pickles, Chutneys, Relishes & Pastes by Kirsten and Christopher Shockey, published by Storey Publishing. I got it, and like it. It has lots of good color photos and nice recipes. It explains the process well, without being overly technical.
The other book I got was a New York Times bestseller by Sandor Katz called The Art of Fermentation: An In-Depth Exploration of Essential Concepts and Processes from Around the World, published by Chelsea Green Publishing. This is also a great resource with information not only about fermenting vegetables, but also fruits, grains, milk, beans, meat and more. It has a glowing introduction from food writer Michael Pollan, who I trust. It’s excellent. The book is nearly 500 pages long, and seems to cover all aspects of fermenting, including lots of technical stuff.
Materials for fermenting veggies are minimal: You need a large bowl, containers and large sharp knife. Leslie also had a kraut board with 3 sharp blades. Run a cabbage across it and the shredded cabbage falls into the bowl.
We made small batches and put our krauts in wide-mouth glass jars. But, having fallen in love with specialty sauerkrauts, I have ordered from Gardeners Supply Company (www.gardeners.com or 888-833-1412) a 1.3 gallon Fermentation Crock kit, complete with lid and weights to keep the veggies in the brine (they tend to rise). I have old crocks, but this one has a water seal that allows the carbon dioxide to get out while keeping extraneous bacteria and yeasts out. For about $80, it seems like a good investment.
My krauts are tastier than any I’d ever had. In one I added fresh ginger, another has fennel seeds. It’s a good way to use kohlrabi, carrots, celeriac, too. I’ll be making more later this fall – once I get my new crock.
Henry is the author of 4 gardening books. He is not answering questions this week. His website is www.Gardening-Guy.com.
Tree-Related Fall Chores
Posted on Monday, September 14, 2015 · Leave a Comment
It’s that time again. Time to think about getting ready for winter. Some trees are showing signs of changing leaf color. Vegetable gardens are winding down. Summer flowers are finished with their blooms, and even fall flowers are beginning to decline. Sigh. Summer is just about over.
Last winter we had record-setting snows in many places. One of the consequences of that was that meadow voles and other rodents had good protection from owls and hawks. Voles feasted on the bark of apple trees, stripping the bark with immunity – and fatally damaging many trees. A tree will slowly starve to death if it loses bark all around the trunk, although that may take a year or more. The leaves continue to produce the sugars all summer, but the damage prevents the sugars from getting to the roots – and they starve.
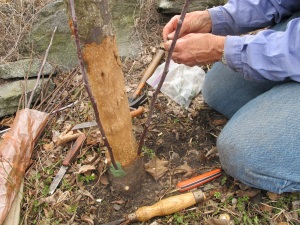
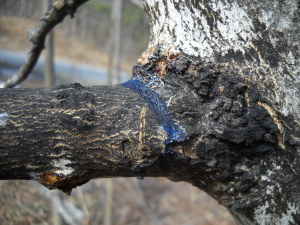
Bridge grafting
When my partner, Cindy Heath, retired after 26 years as director of Recreation and Parks in Lebanon, NH a nice crabapple tree was planted in her honor near the community garden. But last winter it was girdled by voles. So I hired a grafting specialist, Jenny Wright of Unity, NH, who met me last spring to do some repairs. She did what is called bridge grafting, grafting 4 twigs to span the damage. Two of the four grafts “took” and the tree has been saved. Even one successful graft probably would have worked. It’s probably not a job you can take on without help, but there are people who can help you.
Of course, the damage could have been prevented, and I would like to recommend that you take steps to protect any young fruit trees from similar damage if we have another snowy winter. Buy some “hardware cloth” and wrap it around the bottom 24 inches of the tree. Hardware cloth is a wire mesh that comes in a variety of sizes. Quarter inch mesh is best. You should be able to buy a small roll 24 inches wide. You will need tin snips to cut it and some wire to tie the ends together. For a 2-inch diameter tree, make a 4-inch diameter cylinder around it. Be sure to remove the wire mesh before the tree grows into it. Older trees are rarely eaten by rodents.
Another job for the fall is to clean up all those fallen apples that litter the ground. You may think they are harmless, but if you had any apple scab on your apples it is important to pick them up. If you don’t, come spring the fungal disease that causes scab will release spores and infect next year’s crop.

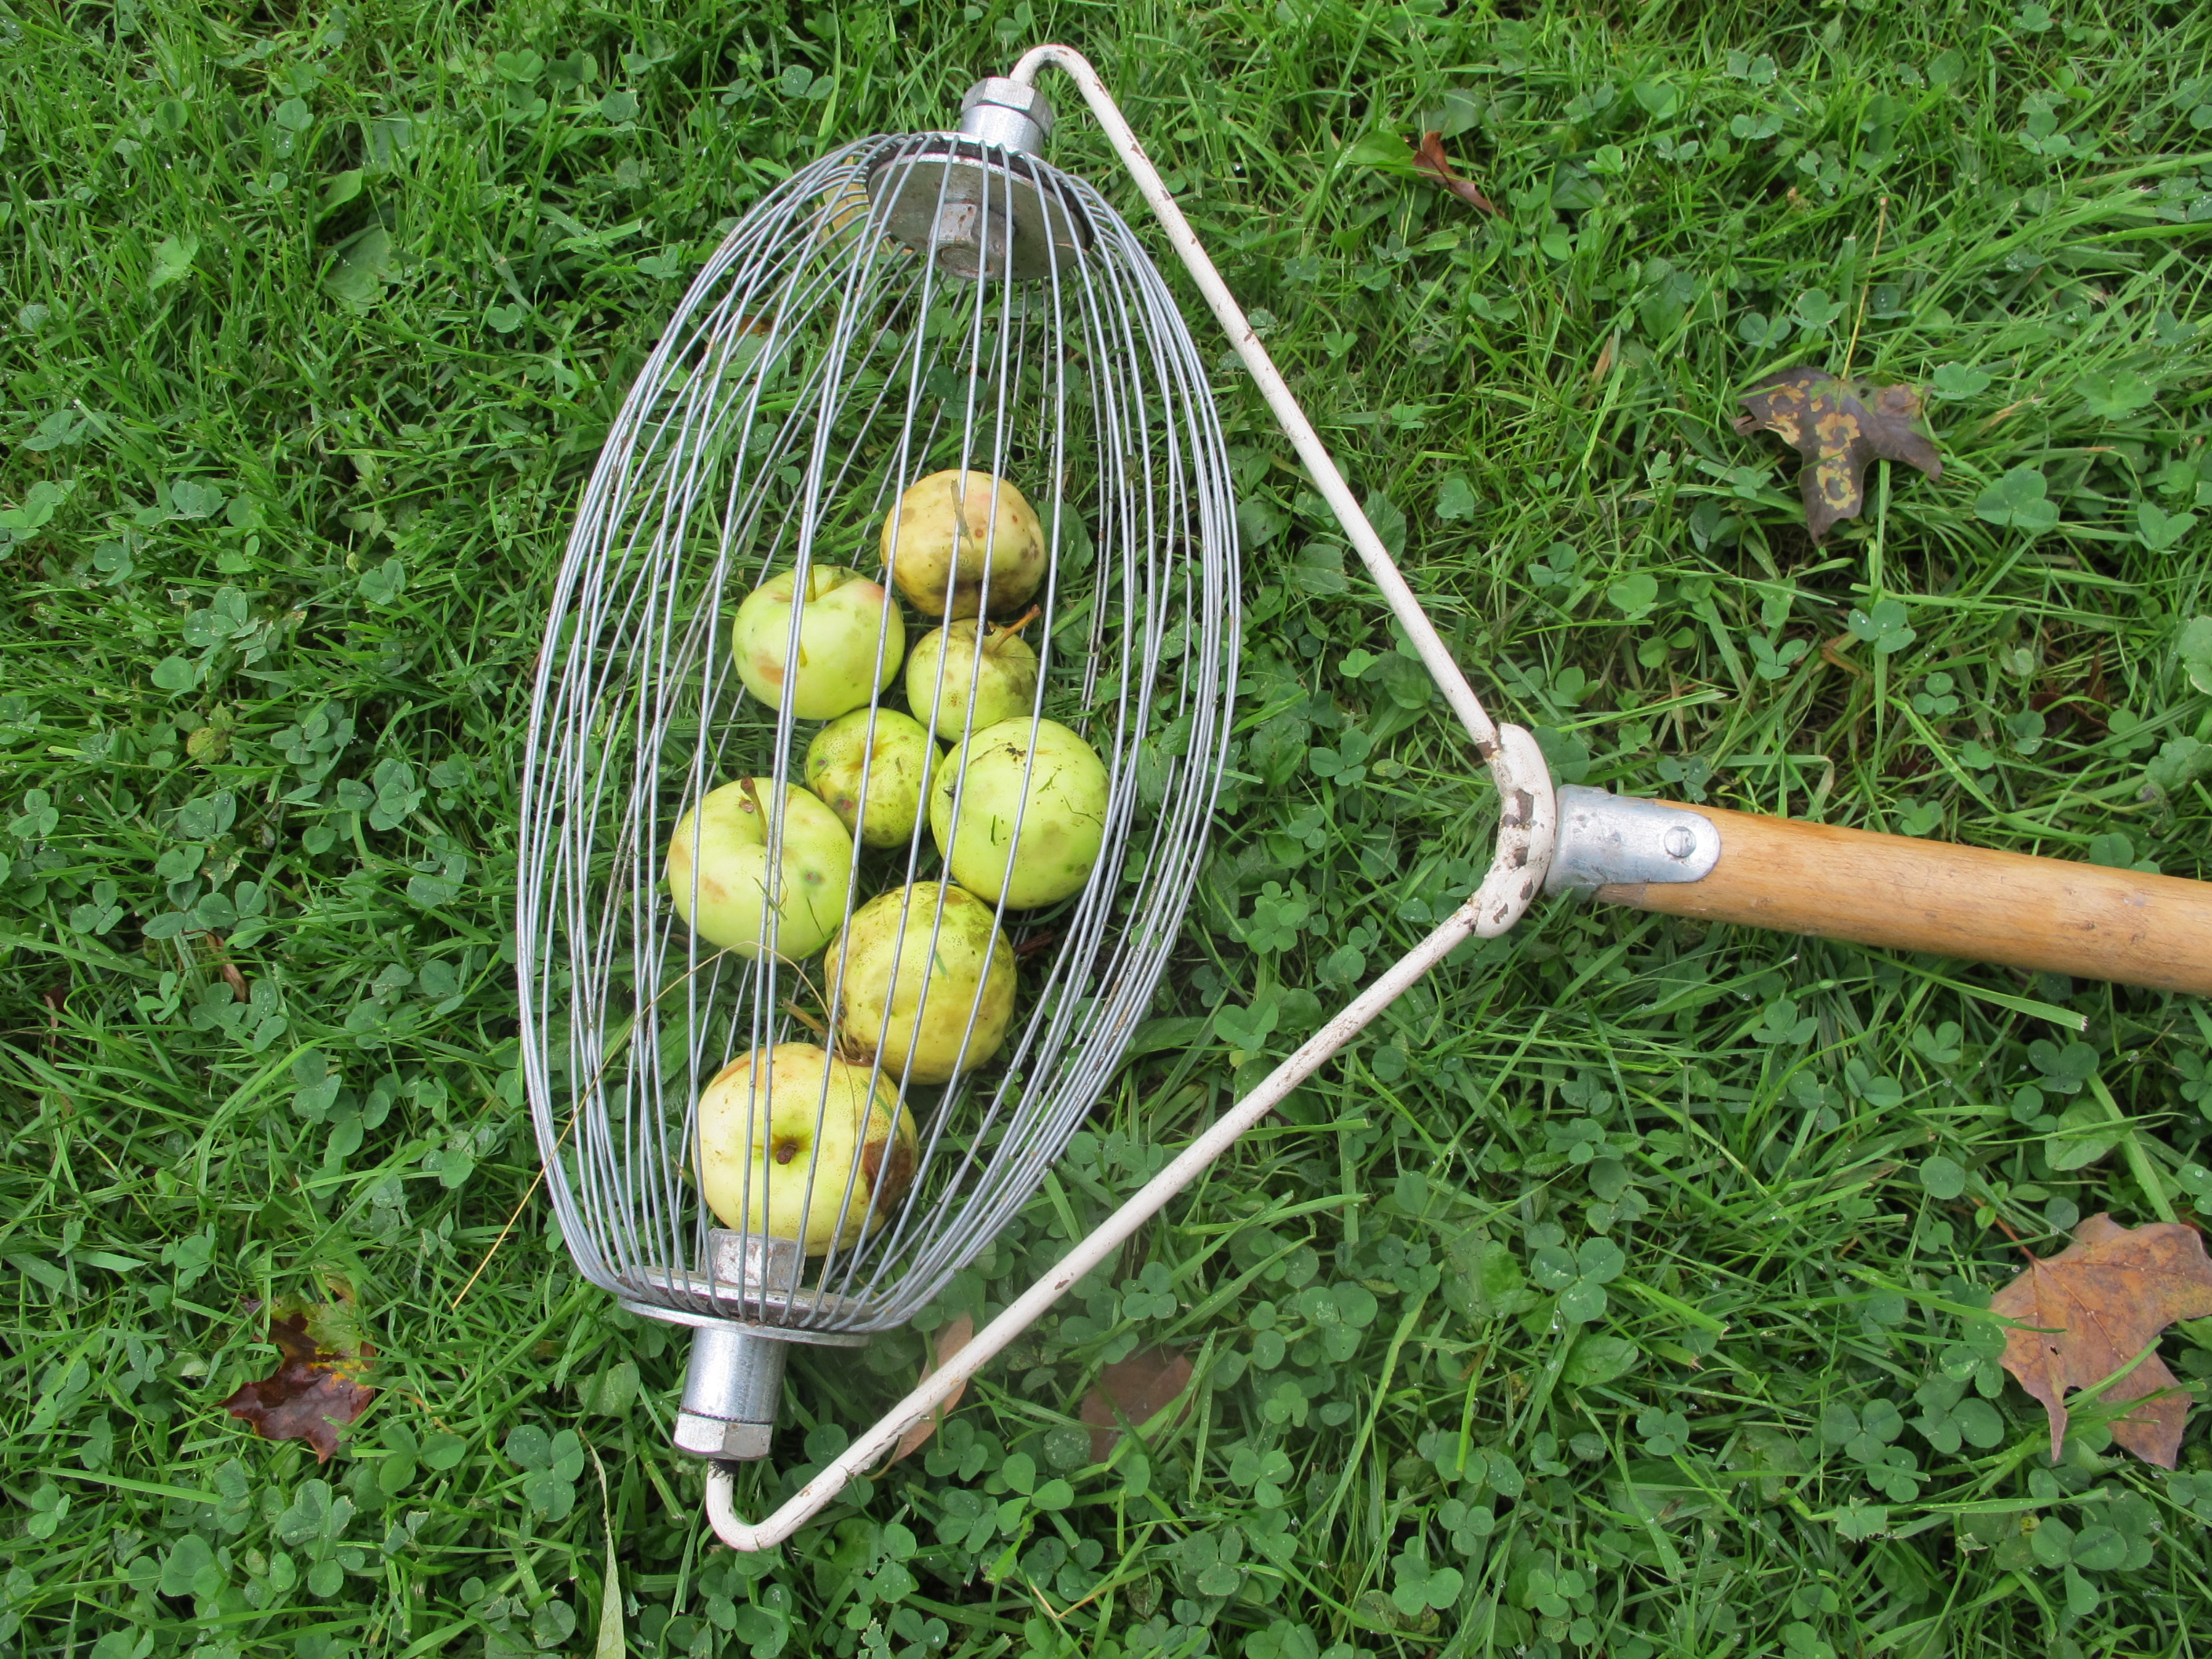
Nut Wizard with apples
Raking up apples is tedious and often leads to damage to the lawn around a tree. But I have a “Nut Wizard”. It consists of a football-shaped wire device that turns on its axis when pushed across the ground by a long handle. The wires separate a little when going over an apple, which then enters the interior of the tool. When I have about 25 apples captured, I empty them into a wheelbarrow by separating the wires enough for the apples to fall out.
I got my Nut Wizard for about $50 from Elmore Roots Nursery (www.elmoreroots.com or (802) 888-3305). The greatest thing about it? My grandchildren love using it. Tom Sawyer would be proud of me!
If you have blackberries or raspberries, this is the time to cut down this year’s canes. Canes only produce for one year, and will only be in the way next year so cut them off near the ground. I use a pole pruner to cut the canes. I have a tool that works very well – it is lightweight and has a squeeze grip (like hand pruners). After snipping off a cane I can grab it with the blades (by squeezing very gently) and pull it out of the patch.
The tool I use is made by ARS, model LA 180 L1.8, which I got from OESCO tool company (www.oescoinc.com or 800-634-5557). It sells for about $100, but is well worth it if you have lots of berries and don’t like getting blood transfusions.
If you planted new trees or shrubs this year, it is important that they go into the winter well hydrated. Water them weekly as we go into the cold season if we don’t have a lot of rain.
Be sure newly planted trees are mulched with ground bark or wood chips. That will help keep the roots warm as winter approaches. Roots continue to grow even after leaf drop – until the ground gets too cold. A 3 to 4 layer of bark chips will allow them to grow longer into the autumn. But don’t let the mulch touch the tree – leave a donut hole around the trunk to avoid rotting of the tree bark.
Trees are my friends for lots of reasons, including the gift they bestow on me each fall. I don’t look on raking up leaves as a pain in the you-know-where. I look at leaves as a great source of organic matter and mulch for my gardens. I run them over with the lawn mower, and then rake them up. Once chopped and mixed in the some grass clippings, they don’t blow away. So keep that in mind when raking leaves instead of watching football!
Henry is the author of 4 gardening books. His website is www.Gardening-Guy.com.
Fall Lawn Care
Posted on Monday, September 7, 2015 · Leave a Comment
This is a good time to do some improvements on your lawn. If you have crabgrass, lawn ivy (Creeping Charlie) or bare spots where the kids played badminton, now is the time to get to work. I recently called Paul Sachs, owner of North Country Organics and the author of three books on lawn care. He gave me some good suggestions.
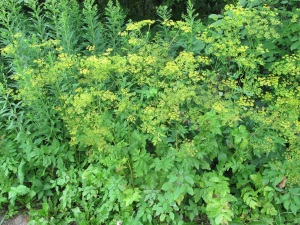
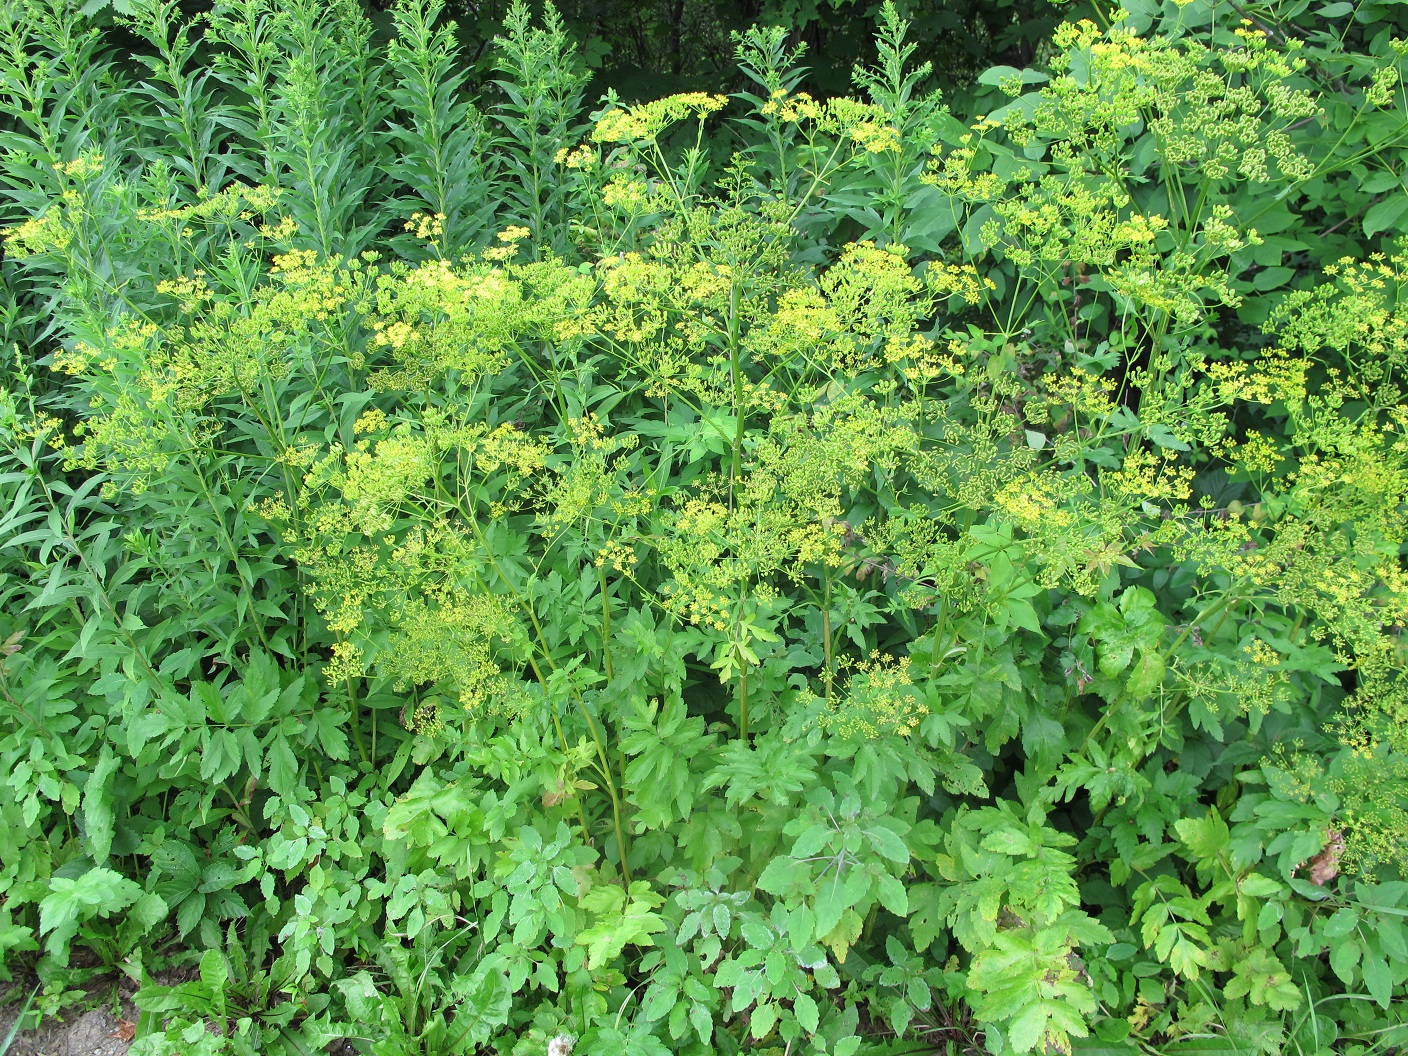
Wild parsnip
Testing pH is a good first step, Sachs said. If your soil is too acidic or too alkaline, minerals can be bound up and unavailable to your turf plants even if they are present. You can get a simple test kit at a garden center, or take a sample and mail it to your state Extension Service soil testing lab for a more extensive report.
He warned that the first time someone adds limestone to their lawn – and fall is a good time for that – they may see a remarkable improvement the following spring. But, he warned, don’t keep on adding limestone without testing the pH. If you keep adding limestone every year your pH can get quite alkaline, which is just as bad as being too acidic.
According to Sachs, fall is a good time to overseed your lawn if you have thin or worn places, or if you have crabgrass. The soil is warm now, so new grass seeds will germinate more quickly than in the spring. Crabgrass, an annual, is declining in vigor so you can crowd it out by adding seed. Crabgrass seeds are not going to germinate until the spring, but if you can establish a nice thick turf now, crabgrass will have a hard time competing with it next spring.
It is best to sow a mixture of kinds of seed – a conservation mix that contains something like this: 35 percent creeping red fescue, 25 percent turf type tall fescue, 10 percent Kentucky bluegrass, 12 percent turf type perennial ryegrass, 15 percent annual ryegrass and 3 percent white clover. That mixture is good for a variety of soils and will thrive in full sun or even moderate shade.
Sachs told me that before you overseed an area, you should lower the height of the blades on your mower and give it a good haircut. That will allow newly started grass seeds to get more sunshine, which is important when it is getting established. So when filling in thin spots, you want to cut the grass close and allow new plants to develop.
Fall is also a good time to thicken the lawn by providing some fertilizer. An organic fertilizer like Pro-Gro will help roots to bulk up and winter-over better. Paul Sachs told me that when adding fertilizer it is good to keep the blades of mower up high, allowing each grass plant to have more surface area for photosynthesis. That will help to pump up its roots.
Knowing how much fertilizer to add and then figuring out how to spread it at the proper rate is a job for Einstein, I always thought. Paul Sachs helped me with the calculation. In general, he said you should add 20 to 30 pounds of fertilizer per 1,000 square feet of lawn if using Pro-Gro or other organic fertilizer with a 5-3-4 nutrient analysis (5-3-4 means 5 lbs of nitrogen, 4 of phosphate, 3 of potash per hundred weight).
A 20 by 50 foot section of lawn is 1,000 square feet. Figure out the total square footage of your lawn, calculate the amount of fertilizer you need for the job, and then buy the appropriate number of bags. Start applying it in a push-type spreader. If you set your spreader for a low rate of distribution, you can go over the lawn more than once until you have used all the fertilizer. Done. If part of the lawn got a little more than another part, no big deal – so long as every part of the lawn got some fertilizer.
Compaction makes it difficult to for grasses to thrive – except crabgrass, of course. That’s why crabgrass invades areas where you frequently walk. Years ago Sachs told me a simple way to test for compaction: you should be able to push a screwdriver with a 6-inch shaft into the lawn with moderate force. If you can’t, the lawn needs help.
You could hire a landscaper to come with a core-aerator or you could try to do something yourself. On-line I found an aerator at Sears for about $100 that can be pulled behind a riding lawn mower. It has 10 sharp steel stars that rotate and poke small 2-inch deep holes.
And then were the aerator sandals that strap onto your shoes with spikes that poke holes in the soil – only $16 but it would seem like a lot of work to aerate the lawn that way. Sachs said, “If you stomp your feet into really compacted soil, the only way to escape is to undo the straps and pry them out with your hands. I learned what it must feel like when a fly lands on fly paper.”
What about that pesky lawn ivy, commonly called Creeping Charlie? It is in the mint family and will grow almost anywhere. Sachs suggested raking it out with a short-tined garden and then fertilizing and overseeding. I tried raking it out, but found I pulled out my lawn grass, too. So maybe we just have to live with it. After all, if it’s green and you can mow it, I say it’s a lawn.
Henry is a gardening consultant and the author of 5 books. His website is www.Gardening-Guy.com. He lives and gardens in Cornish Flat, NH.
Putting Food By
Posted on Wednesday, August 26, 2015 · Leave a Comment
It’s a rare gardener who doesn’t grow at least a few tomatoes. We all love them. I eat them at least twice a day in season, and sometimes I even have one with breakfast. But the season is short, so many of us try to put up tomatoes to have their flavor in winter soups and stews. Our grannies slaved over a hot stove in August and September, canning tomatoes. But have I found freezing them is much easier.
Here’s what I do: I freeze whole tomatoes in zipper bags. I don’t blanch them or remove the skins. All I do is place clean fresh tomatoes in a gallon freezer bag and suck out the air with a straw, sliding out the straw and pinching the bag shut as I do so.
When I want to cook with a tomato, I hold a frozen one under the tap, run hot water over it while rubbing it, and the skin comes right off. I set it aside for a few minutes, then chop it and put in the stew pot. I know it is chemical-free and harvested at peak ripeness. I sometimes freeze cherry tomatoes, and those I toss into the pan with skins on.
In winter I long for tomatoes for my noon sandwich. I’ve found that roasting tomatoes first, then freezing, is a good way to have a substitute for fresh tomato in a sandwich. I thickly slice tomatoes and roast them at 350 degrees until they have given off most of their moisture and caramelized nicely. Then I carefully place them in gallon freezer bags in a single layer. When I need a few slices, I break off the frozen slices and put them in my toaster oven on aluminum foil. I heat them at 350 until thawed. They are not the same as fresh, but they’re the best substitute I’ve found.
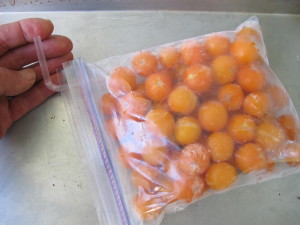
A straw used to remove air from a bag of cherry tomatoes
Cherry tomatoes are highly prolific, and I generally have 10 plants or more. Although I eat plenty like candy, right in the garden, I obviously have more than I can eat in August and September. So I cut each in half, and put them in my food dehydrator. I set the thermostat at 125 or 130 degrees, and dry them for 18 to 24 hours, depending on water content and the ambient air’s humidity.
Food dehydrators are great for drying tomatoes, apples, pears, hot peppers and more. My favorite is the Excalibur. It has 9 trays, each 15 inches square, and a fan and heater. It uses 660 watts of electricity per hour, which is less than the 1000 watts used by my previous favorite, the NESCO American Harvester. The Excalibur blows sideways across the trays so everything gets dry at the same rate; the NESCO dehydrator blows from the top or the bottom, and one must rotate the trays to get even drying. The trays near the heater dry quickly, those farther away more slowly.
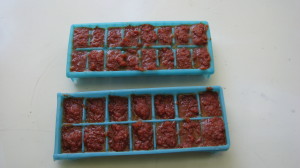
Tomato paste
I also make a lot of tomato paste. To do this I core full-sized tomatoes over the sink and squeeze out seeds and excess juice. Then I cut them in half and toss them in the food processor, which I use to puree them into a thin gruel. I cook the pureed tomatoes in a big enameled cast iron pot at low heat until the contents are thick enough so that I can stand up a spoon in the pot. It takes 2 to 3 hours of cooking to make paste.
I let the paste cool all night with the pot lid off, so more moisture evaporate by morning. Then I spoon the paste into ice cube trays and freeze them. When hard, I take the cubes out and put in freezer bags. One cube is a very nice quantity to add to a soup or stew. By freezing the paste in small units, there is no can of tomato paste left in the fridge to go moldy and blue. No odd flavors picked up in the fridge, either.
I also make spaghetti sauce. Not much, but I like to have some ready for a quick meal in March. I sauté onions, garlic and fresh green peppers to start with. I add fresh basal, marjoram and parsley from the garden. And of course tomatoes, black pepper and a touch of salt. I can one batch in quart jars each summer – 7 jars – and freeze more in quart yogurt containers. Canning must be done properly, cooking the sealed jars for a long time.
But if you don’t grow enough tomatoes to put up all of them you want for winter, don’t despair. Most farm stands take orders for tomatoes by the bushel at a very reasonable rate, much less than the per pound rate. So when the late blight nailed my tomatoes some years ago, I bought a bushel from a farmer and put them up.
I don’t generally grow a lot of peppers, so I often buy a half bushel of green, yellow and red peppers. I clean and slice them, and freeze in zipper bags. I find they freeze so well that I can even add them to a salad, and having 3 colors of peppers makes a very attractive winter salad. Put them in the salad right out of the freezer and eat soon after.
Gardening is fun, even the weeding. But eating the garden produce is even better. Fresh is best, but come winter, anything is good!
Henry is a gardening consultant and garden designer. He is the author of 4 gardening books and a children’s chapter book. His website it www.Gardening-Guy.com


 Click Here to buy from Cobrahead